- Как установить ноутбук Jupyter на Android-устройство?
- редактировать
- Running Jupyter and the Scipy stack on Android
- Some background
- Show, don’t tell
- Setting up your terminal
- Installing the Scipy stack
- Getting comfortable
- Things that are still missing
- Jupyter notebook: Python IDE for android
- How To Run Jupyter Notebook on Android (Termux CLI)
- How To Run Jupyter Notebook on Android
- This Article Has Been Shared 861 Times!
- About Abhishek Ghosh
- Here’s what we’ve got for you which might like :
- Articles Related to How To Run Jupyter Notebook on Android (Termux CLI)
- Take The Conversation Further .
- Subscribe To Our Free Newsletter
- How to Install Python and Jupyter Notebook onto an Android Device
- Increase your productivity when you’re waiting in a queue or are on the go.
- 1. Getting Python 3
- 2. Run Pydroid 3
- 3. Run Jupyter Notebook
- 4. Save notebooks on a shared drive
- Summary
Как установить ноутбук Jupyter на Android-устройство?
Есть ли способ установить функциональный экземпляр ноутбука Jupyter на устройстве Android? В частности, я хочу использовать Jupyter для запуска ноутбука Python.
Скачать приложение pydroid3. Откройте приложение, сверху есть кнопка с 3 строками. Нажмите на нее, есть опция PIP, нажмите на нее. В PIP нажмите на кнопку установки и введите jupyter . Как только он будет загружен, над терминалом есть опция терминала, нажмите на терминал и введите jupyter notebook . Ваша работа выполнена.
редактировать
Я нашел некоторую информацию в Интернете (как в этом сообщении в блоге), пока придумывал ответ на этот вопрос, но все это было по крайней мере несколько неверно и/или устарело. Вот полный набор рабочих инструкций:
Откройте Termux, затем введите/запустите в командной строке следующие команды:
При желании вы можете установить некоторые другие полезные пакеты, которые хорошо сочетаются с Jupyter:
Наконец, проверьте ноутбук, запустив:
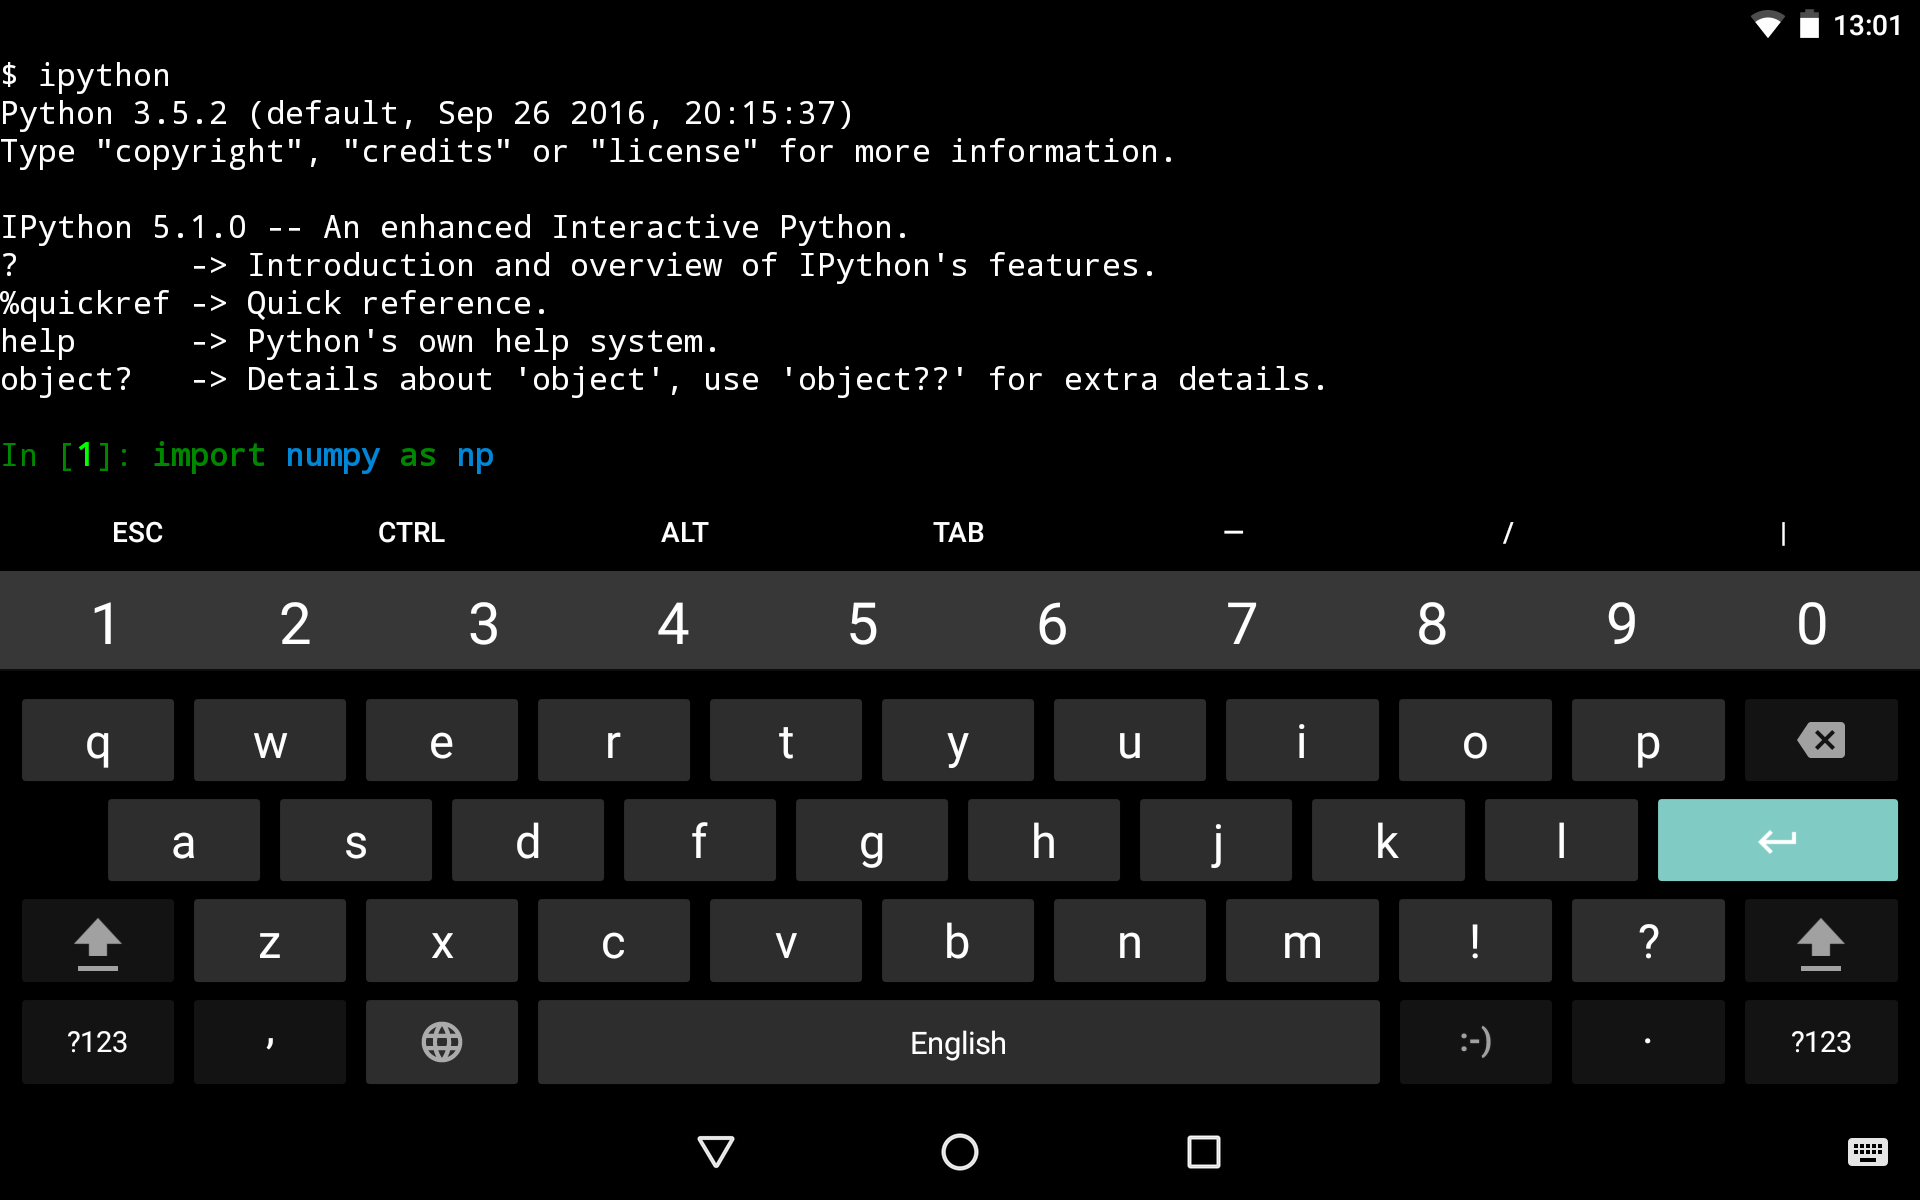
Когда вы запускаете jupyter notebook , запускается jupyter notebook некоторую информацию в стандартный вывод. Когда вы видите строку:
скопируйте следующий URL, вставьте его в браузер на своем устройстве и нажмите «Перейти». Вы должны получить что-то похожее на это:

Я проверил эти инструкции на Nexus 7 2013 (wifi) под управлением Android 6.0.1 (Marshmallow).
Источник
Running Jupyter and the Scipy stack on Android
Install Termux from Google Play, open it and run:
Copy the URL printed to the screen (it will look something like http://localhost:8888/?token=longstringofcharacters ) and paste it into Chrome/Firefox. Enjoy!
Read on for more tips and a few tweaks.
Update (25-01-2017): There were a few dependencies that I had left out of the instructions for installing numpy et al. I edited the post to make things more complete and clear.
Some background
I bought my first tablet last October, an NVIDIA Shield K1. I had been putting off getting one because I never could think of a good use for them. I have my phone for messaging and Internet, my kindle for reading, and my Linux laptop for working. It seemed to me that the tablet would be a nice toy but not something I could use and justify the purchase.
The dream would be to be able to ditch my laptop and do actual work on the tablet. Mark O’Connor wrote about doing just that on Yield Thought but he cheats a bit by running everything on a Linode server. And how does anyone do scientific programming these days without a Jupyter notebook?
I finally gave in, thinking that I would use the tablet mainly for reading papers and taking notes. Maybe even play a few games. Then I discovered Termux.
Show, don’t tell
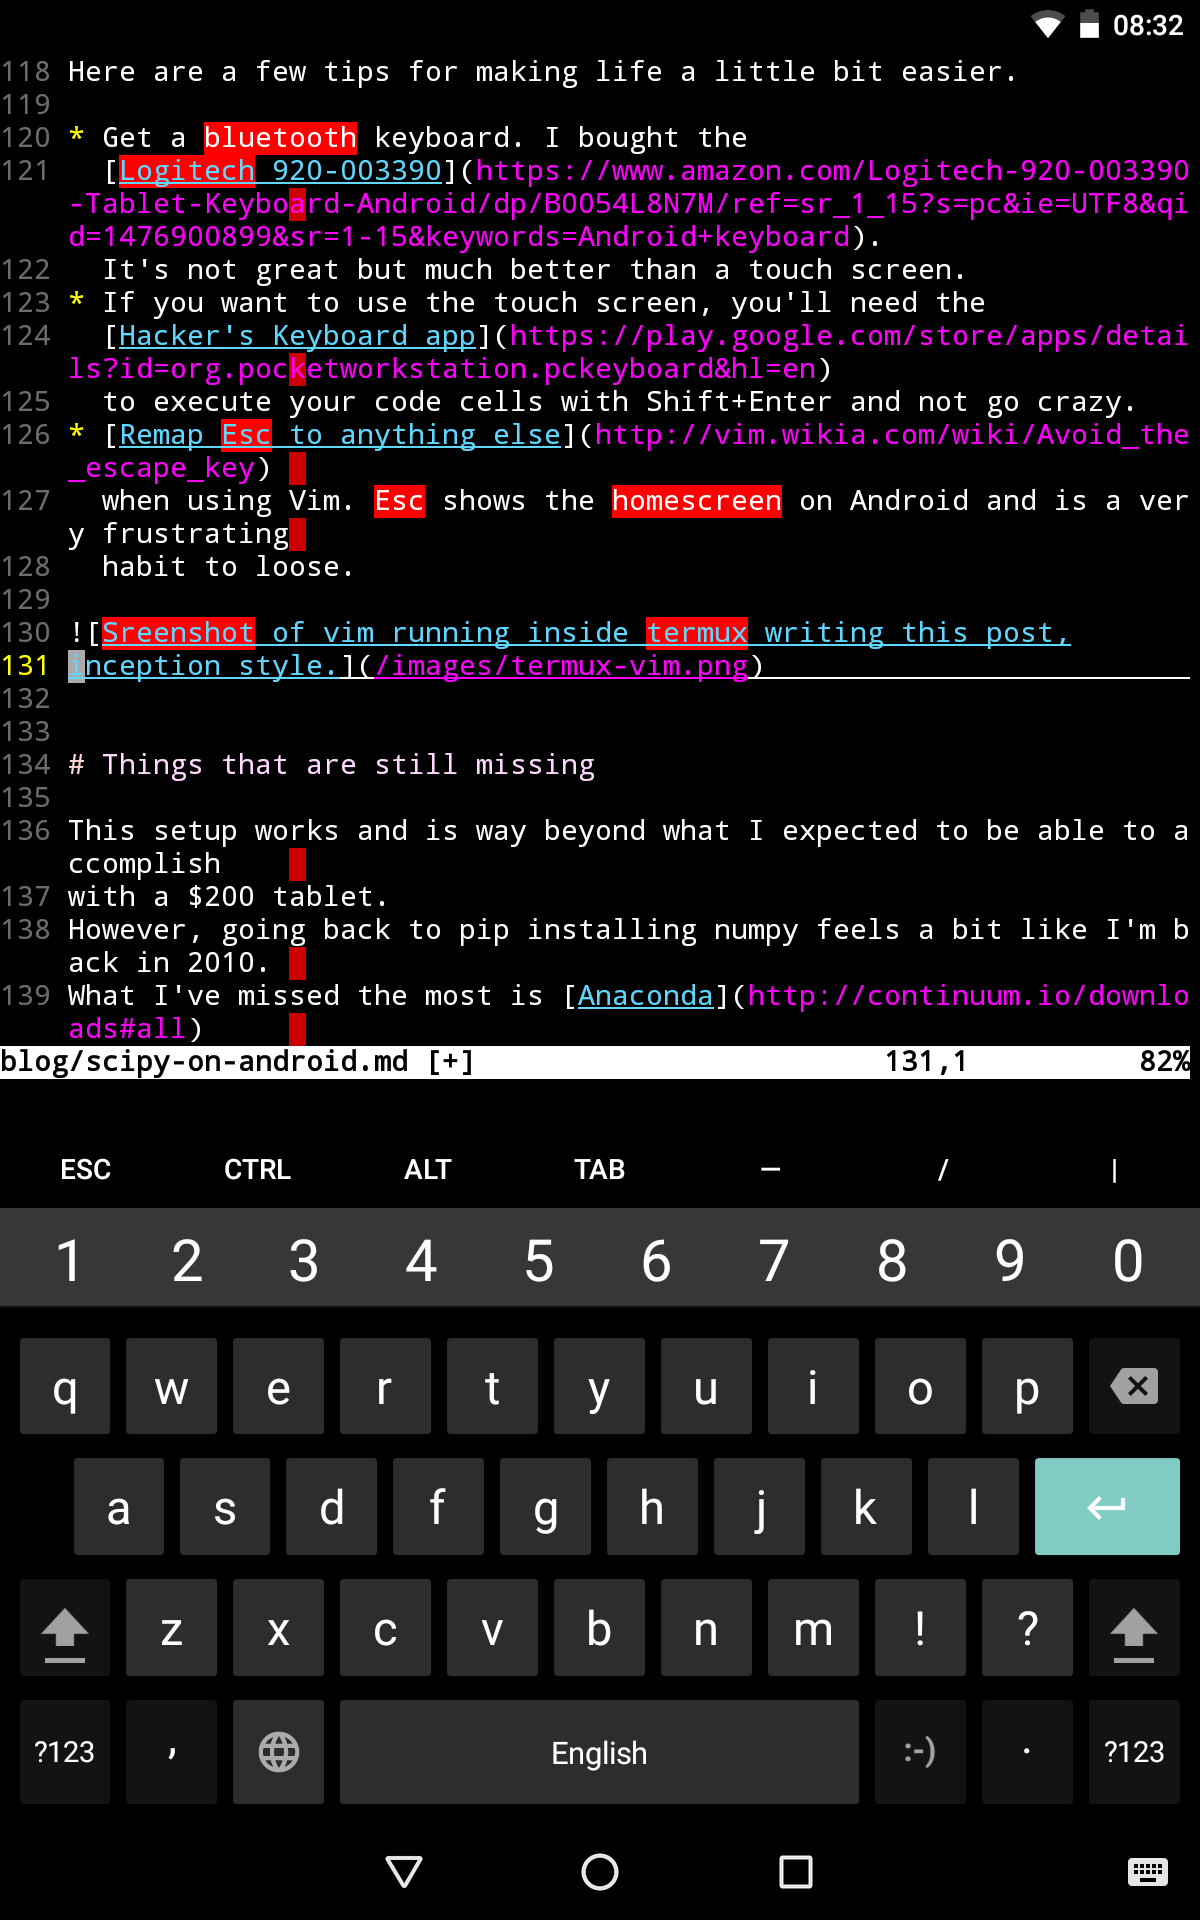
Here is a screencast of me running a Jupyter notebook server on my tablet. Notice that the URL is localhost:8888/ so this is not a remote server.

Setting up your terminal
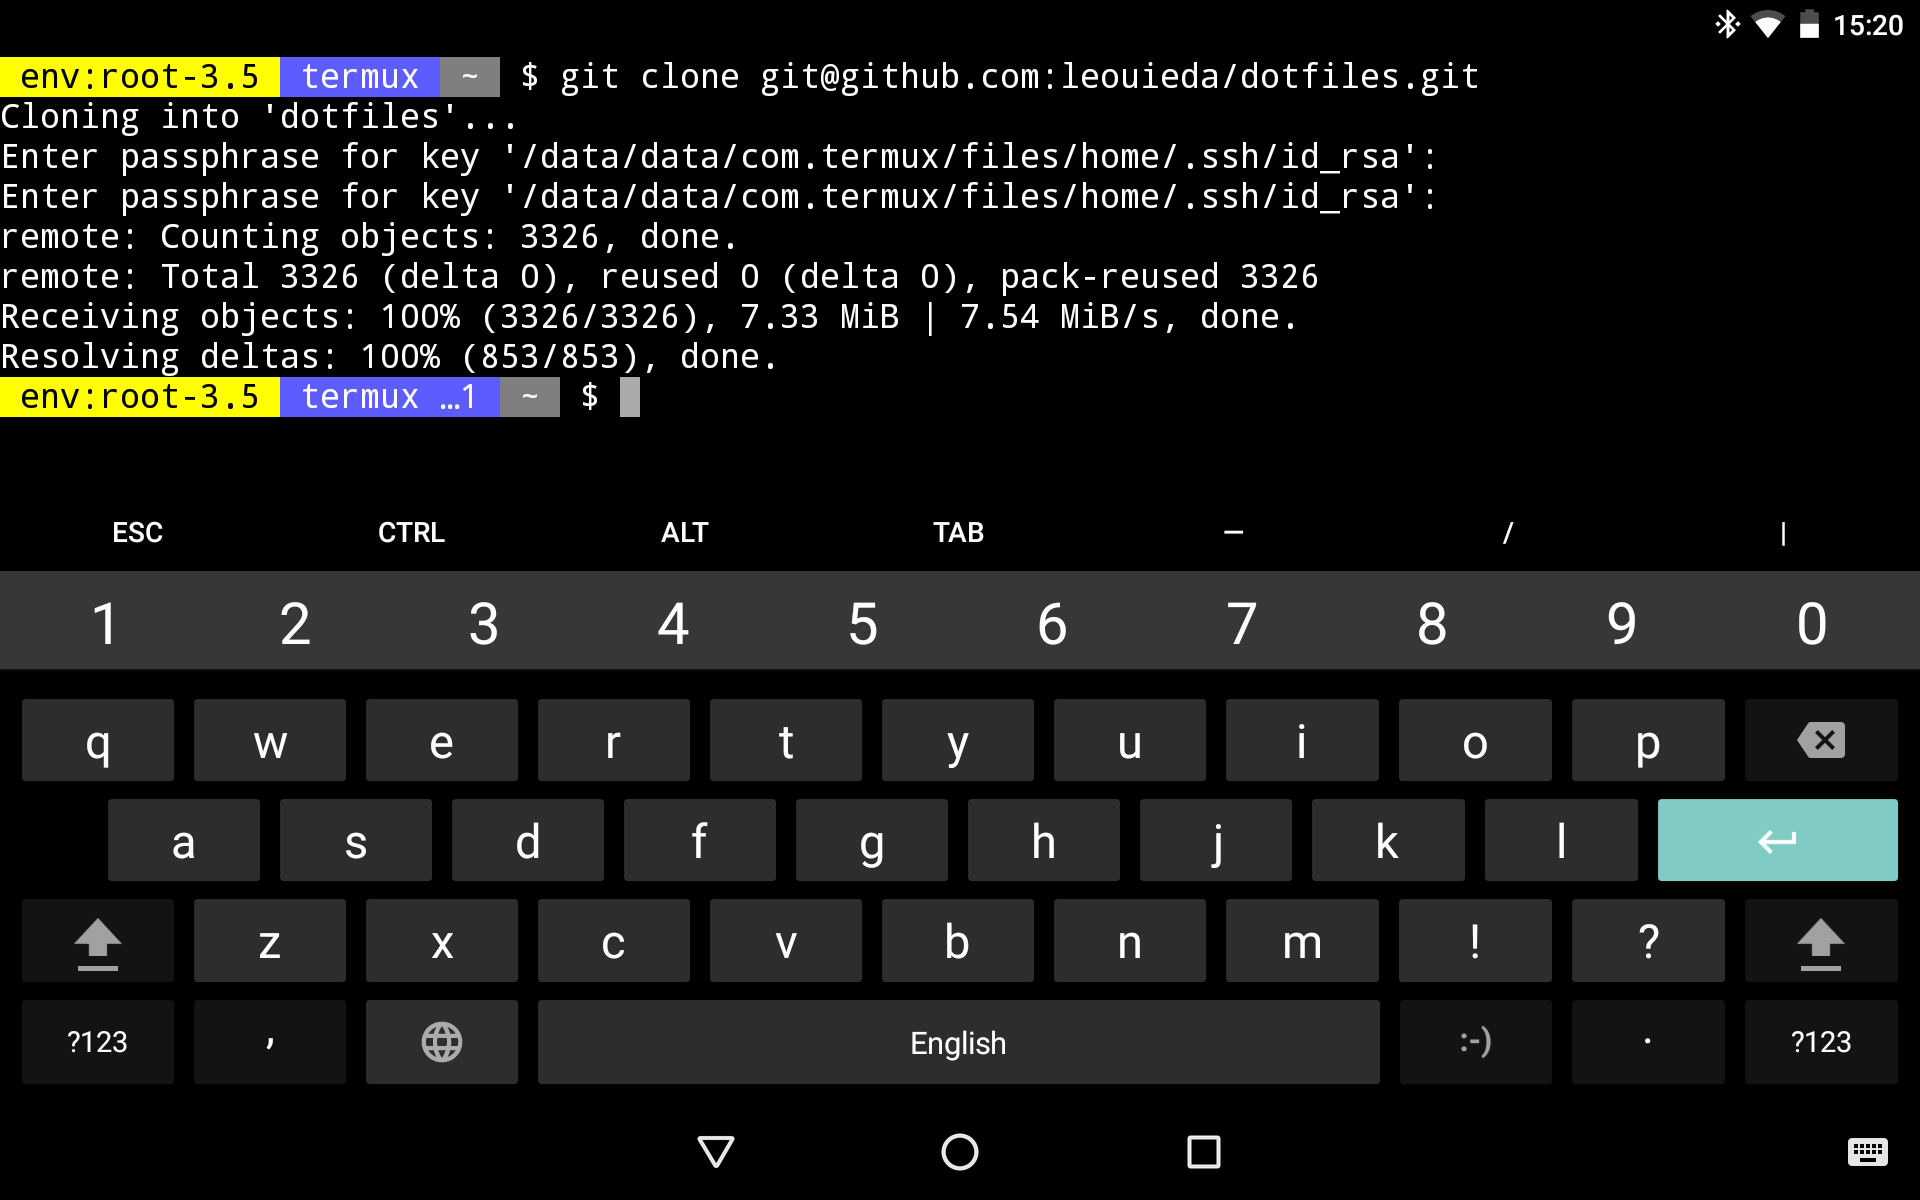
Install Termux from Google Play and open it. You’ll be dropped into a bash terminal, like the one below.
![]()
Termux uses the apt package manager so you can install packages pretty much like you would on Debian/Ubuntu.
The first thing I do on any new computer is install git so that I can fetch my configuration files from GitHub:
Before cloning the repository, I need to generate a new SSH key (only required if you use the SSH protocol with git):
Then I can clone my dotfiles repository:
Now my Termux terminal looks just like my Linux terminal on my laptops.
Installing the Scipy stack
If you’re from the pre-Anaconda era, you’ll probably remember the frustration of trying to pip install numpy scipy matplotlib . Sadly, there is no Anaconda for Termux so we’re stuck with using the system python and pip to install packages.
But don’t despair! Things work more smoothly these days (if you follow the magic incantations). Sadly, the scipy library itself so far can’t be installed without significant effort. Even then you might not be able to do it because of all the Fortran requirements (BLAS, LAPACK, and gfortran). So for now, we have to make do with numpy only.
First, we must install python it self (version 3.6), the headers files, a C compiler, and the FFTW package from Termux:
Now we can install numpy using pip:
For matplotlib, we’ll need to install a few more dependencies:
And for Jupyter we need to install the zmq library as well:
Finally, we can get pandas:
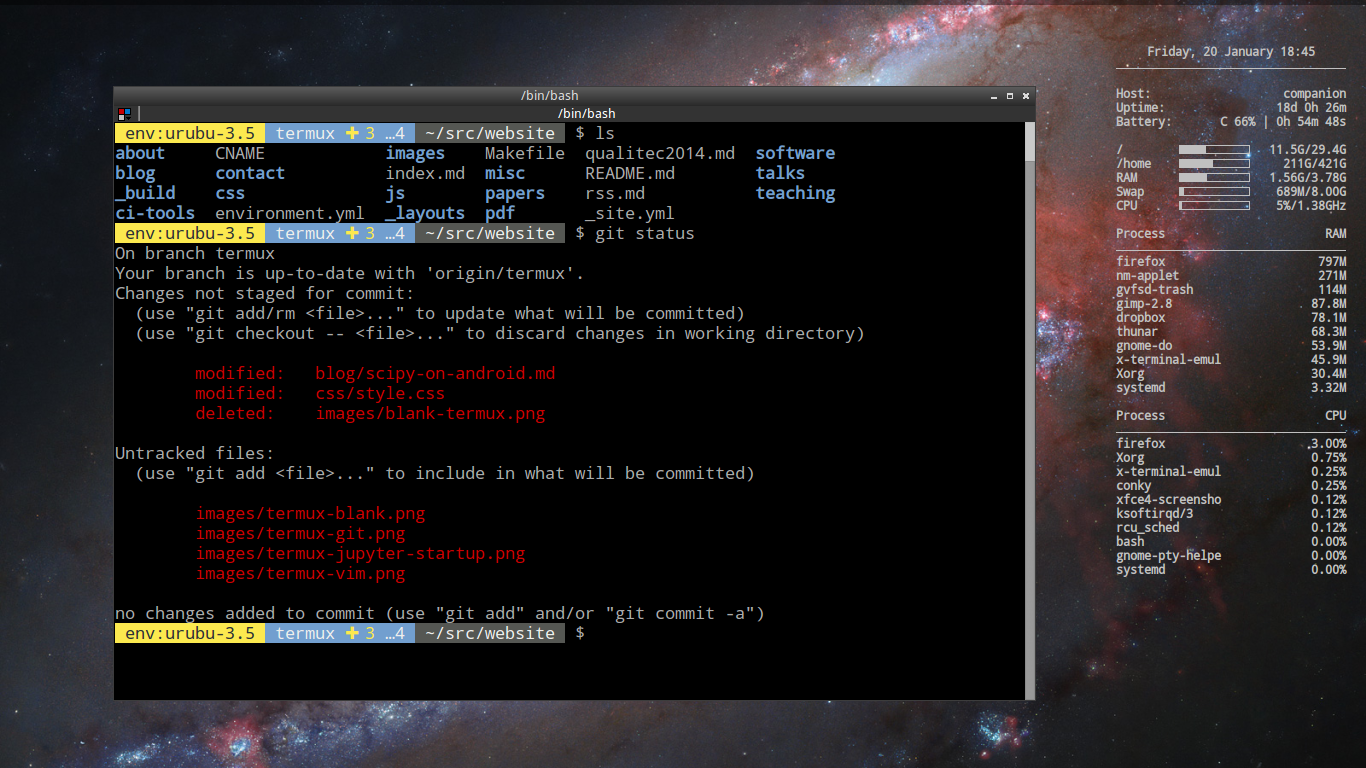
Now you have access to things like ipython on the command-line:
One thing that won’t work are matplotlib plots because there is no backend for Android. You can, however, use %matplotlib inline or %matplotlib notebook inside Jupyter notebooks to get the plots working. Using plt.savefig without using plt.show() should also work.
To get a Jupyter notebook server running, so the same thing you would on any other computer:
The server won’t automatically open a browser but you can copy the URL from the output and paste it into Chrome or Firefox.
Getting comfortable
While it is possible to do some work using this setup (I wrote part of this post on the tablet using Vim and pushing to the website’s GitHub repo), it may not be the most productive environment. Here are a few tips for making life a little bit easier.
- Enable extra keys (esc, ctrl, tab) to complement your touch keyboard by pressing «Volume Up» + Q. Can you imagine using a terminal without tab completion?
- Get a bluetooth keyboard. I bought the Logitech 920-003390. It’s not great but much better than a touch screen.
- If you want to use the touch screen, you’ll need the Hacker’s Keyboard app to execute your code cells with Shift+Enter and not go crazy.
- Remap Esc to anything else when using Vim. Esc shows the homescreen on Android and is a very frustrating habit to loose.
Things that are still missing
This setup works and is way beyond what I expected to be able to accomplish with a $200 tablet. However, going back to pip installing numpy feels a bit like I’m back in 2010. What I’ve missed the most is Anaconda and the conda package manager. Having a prebuilt bundle certainly makes life a lot easier. But I miss the conda environments the most. I use them extensively for my projects and papers.
The scipy package. So yeah, that is still missing as well. A lot of things can be done using numpy replacements ( numpy.fft instead of scipy.fftpack etc) though they are usually slower.
Another recent arrival that has made a huge impact on my daily work is conda-forge. This project greatly democratizes conda packages. Now anyone can build their own packages for Linux, Windows, and Mac. It would be awesome to have some for Android as well. Assuming that you can get conda installed, the major difficulty might be finding a continuous integration service that runs Android and setting up the infrastructure.
Let me know if you try this out! Is there another setup that you use? What else is missing? Do you think we’ll be able to fully work like this one day?
Back to the blog Comments? Let me know on Twitter
Source code used to build this site: leouieda/website
Last updated 2021/12/02 from commit 2563465
Built with Nēnē v0.3.2
This website does not use cookies or track you in any way
Except where noted, all content is licensed CC-BY
Источник
Jupyter notebook: Python IDE for android
Termux
Termux is the best linux terminal environment app. It provides a terminal environment with mutiple sessions provision and comes handy to apply almost very linux deployment.
Interactive python Environment :
Jupyter notebook is one of the famous interactive python environment. It runs in your web browser in your localhost address.
Requirements:
1. Install termux app (can be installed from android playstore or Fdroid )
2. Any web browser (if already present like chrome, firefox then not needed )
Process to install:
Goto termux and open it, if its your first time installing termux the it may take few seconds to install its dependencies.
Now type in the termux terminal:
These commands updates all necessary dependencies of the termux with latest updates.
Now we need to install python, for this type in terminal :
This installs python 3 package to your termux. The python package comes with all basic modules and pip too. For checking if the python is installed correctly type in terminal :
_You will see >> appearing , which confirms our install. Now, press ctrl+d which exit you from python. _
Upgrading pip:
let’s upgrade our pip to latest version , for this type:
Installing Dependencies from pip:
Finally we can now proceed to install jupyter notebook by pip but first we need to download clang (converts our program into object, for machine execution) , fftw and others. Now, type in terminal:
Installing Jupyter notebook:
_Type this in the terminal to download jupyter notebook. _
After, jupyter is installed, type in terminal:
_It shows something like this _

The output in terminal clearly shows to access the notebook we can open by coping any of those 3 lines , you can go copy http://localhost one and paste it in your browser and something like this will be seen :

Now, to work on notebook, you can create a notebook and work on.
Back in terminal press ctrl+c to quit the notebook.
You can further install your required packages such as numpy, matplotlib and pandas too.
For this type in terminal:
There you go, with jupyter notebook. If you want other packages you can easily install with pip.
Источник
How To Run Jupyter Notebook on Android (Termux CLI)
We discussed about custom repo setup on Termux. We will actually see that application here. In this Guide, We Will Discuss How To Run Jupyter Notebook on Android Using Termux CLI. It is no way closest to real stable way, you may need to modify, develop, contribute to make it smooth. The total method is time taking, may throw error demanding searching fix. It is recommended to use an USB mouse or keyboard with Android to work. It is practically from official guide after testing.

How To Run Jupyter Notebook on Android
Open Termux, run update, upgrade :
In case you have no cURL installed, install it :
You can see the above thing here :
Next install the needed things, one by one :
It is super disgusting to install cython :
It is very easy to get errors in red font.
Then you can run Jupyter notebook in Termux like you do on full computer. You will get informative screen and link after running command. It feels like 7 years back.
This Article Has Been Shared 861 Times!
About Abhishek Ghosh
Abhishek Ghosh is a Businessman, Surgeon, Author and Blogger. You can keep touch with him on Twitter — @AbhishekCTRL.
Here’s what we’ve got for you which might like :
Articles Related to How To Run Jupyter Notebook on Android (Termux CLI)
Here Are The Steps On How To Install Apache Kafka on Ubuntu 16.04 Running One Single Cloud Server Instance. Apache Kafka
Zeppelin Can Be Pre-Built Package Or Can Be Build From Source. Here Is How To Install Apache Zeppelin On Ubuntu 16.04 Building From Source.
This article Theoretical Foundations of Big Data aims to provide an overview of theoretical models of the data analysis and administration.
From the basic idea of communication between cars, the concept of Hovering Data Cloud system is developed. It is related to telecom & IoT.
RabbitMQ is a Message Broker for the Messaging Protocols. Here Are the Steps on How To Install RabbitMQ on Ubuntu 16.04 LTS Server Over SSH.
Take The Conversation Further .
We’d love to know your thoughts on this article.
Meet the Author over on Twitter to join the conversation right now!
If you want to Advertise on our Article or want a Sponsored Article, you are invited to Contact us.
Subscribe To Our Free Newsletter
Please Confirm the Subscription When Approval Email Will Arrive in Your Email Inbox as Second Step.
Источник
How to Install Python and Jupyter Notebook onto an Android Device
Increase your productivity when you’re waiting in a queue or are on the go.

Angelica Lo Duca
Jun 8 · 4 min read

Thanks to the spread of mobile technologies, we are online for almost all the part of the day: while travelling by car or by train, preparing the dinner and even when we go out for a walk.
For who, like me, is always active and multitasking, it may happen that, while sitting at computer, she must leave what she was doing to do something else. This means that the previous task at PC is delayed.
I have found a partial solution to this problem: why not continuing the task on the phone (or tablet), while doing other?
Since my main job deals w i th coding in Python through Jupyter Notebooks, in this post I explain how to install these two components on Android. This task is very simple, since Android is a unix-based operating system.
1. Getting Python 3
First of all, Python must be installed on the phone/tablet. Many Apps are available on Google Play. I suggest to install Pydroid 3 — IDE for Python 3.

The installation process is very simple: it is sufficient to access Google Play, search for the App and click on the Install button.
2. Run Pydroid 3
Now that the App is installed, we can run it. The first time the App is launched, Python is downloaded and installed. After, that, we can select the upper left button to open a menu and select Pip, as shown in the following figure:

Once, clicked on the Pip button, a search box opens. We can type jupyter and check the setting: use prebuilt library repository. We click on Install and the following alert appears:

We can click Get Plugin. The Google Play App opens and asks for the installation of the Pydroid repository plugin.

We click on Install and we wait for the completion. Now we come back to the Pydroid App and Pip installation for jupyter.
Once the installation is complete, we can run the jupyter notebook.
3. Run Jupyter Notebook
We come back to the Pydroid home page and we select the Terminal from the main menu.

A Terminal opens and we can write the command jupyter notebook . Eventually the notebook starts and the App asks whether we want to open it in the browser or in the Pydroid app.
4. Save notebooks on a shared drive
The final step involves storage. In order to keep synchronised our notebooks among different devices, we should install a shared drive among them. One possible solution could be the usage of Dropbox or Google Drive. In this article we describe how to configure Dropbox, which offers 2 GB of space in the free version. Firstly, I download the Dropbox App for desktop from this link and we install it on the computer. Then we download the same App on the smartphone from Google Play.
Once installed on both the devices, we can synchronise them. For example we can access the dropbox folder on our computer from Terminal and then run the Jupyter notebook. We can create the following hello world notebook and name it Test.ipynb.
Then we must access Test.ipynb from the smartphone. We run Dropbox from the smartphone and wait for synchronisation. Then we hold on Test.ipynb and we access the top right menu and we click Save. We choose the location on the file system.
Now we can run the Jupyter notebook from smartphone through Pydroid and access the folder containing Test.ipynb from the Jupyter file manager. Et voila! We can continue our notebook from the smartphone! Note that our edits will not be synchronised automatically on dropbox. Thus, once completed the code, we need to access the the previous folder from the smartphone file system and share it with dropbox.
Summary
In this article, I have illustrated how to install and configure Python and Jupyter onto an Android-based phone. Then, I have illustrated how to synchronise the computer and the smartphone in order to work on the same piece of code.
An alternative solution to the proposed mechanism could be the execution of Python completely online. This can be achieved, for example, through Google Colab. But this is reserved as a future post 🙂
If you wanted to be updated on my research and other activities, you can follow me on Twitter, Youtube and and Github.
Источник


