- Layout
- Что такое Layout
- Виды разметок
- Комбинирование
- Программный способ создания разметки
- Android (Home screen) Widgets — Tutorial
- 1. Prerequisites
- 2. Android Widgets
- 2.1. Overview about AppWidgets
- 2.2. Home screen widgets
- 2.3. Steps to create a Widget
- 2.4. Widget size
- 3. Creating the Broadcast receiver for the widget
- 3.1. Create and configure widget
- 3.2. Available views and layouts
- 3.3. AppWidgetProvider
- 3.4. Receiver and asynchronous processing
- 4. Widget updates
- 5. Exercise: widget with fixed update interval
- 5.1. Target
- 5.2. Create project and widget implementation
- 5.3. Validate
- 6. Collection View Widgets
- 7. Enabling a app widget for the lock Screen
- 8. Exercise: Update widget via a service
Layout
Что такое Layout
При разработке первых приложений мы уже встречали элемент LinearLayout, который позволяет группировать дочерние элементы в одну линию в автоматическом режиме. Существуют и другие типы контейнеров, позволяющие располагать элементы разными способами. Пришло время познакомиться с ними поближе.
Компоновка (также используются термины разметка или макет) хранится в виде XML-файла в папке /res/layout. Это сделано для того, чтобы отделить код от дизайна, как это принято во многих технологиях (HTML и CSS). Кроме основной компоновки для всего экрана, существуют дочерние элементы компоновки для группы элементов. По сути, компоновка – это некий визуальный шаблон для пользовательского интерфейса вашего приложения, который позволяет управлять элементами управления, их свойствами и расположением. В своей практике вам придется познакомиться со всеми способами размещения. Поэтому здесь мы рассмотрим только базовую часть теории, чтобы вы поняли саму сущность разметки. Кроме того, разметку можно создавать программным способом, который будет описан в конце статьи. Если вы будет обращаться к элементам управления через Java-код, то необходимо присваивать элементам уникальный идентификатор через атрибут android:id. Сам идентификатор назначается через выражение @+id/your_value. После этого вы можете обращаться к элементу через код при помощи метода findViewById(R.id.your_value).
Android Studio включает в себя специальный редактор для создания разметки двумя способами. Редактор имеет две вкладки: одна позволяет увидеть, как будут отображаться элементы управления, а вторая – создавать XML-разметку вручную.
Создавая пользовательский интерфейс в XML-файле, вы можете отделить представление приложения от программного кода. Вы можете изменять пользовательский интерфейс в файле разметки без необходимости изменения вашего программного кода. Например, вы можете создавать XML-разметки для различных ориентаций экрана мобильного устройства (portrait, landscape), размеров экрана и языков интерфейса.
Каждый файл разметки должен содержать только один корневой элемент компоновки, который должен быть объектом View или ViewGroup. Внутри корневого элемента вы можете добавлять дополнительные объекты разметки или виджеты как дочерние элементы, чтобы постепенно формировать иерархию элементов, которую определяет создаваемая разметка.
Виды разметок
Существует несколько стандартных типов разметок:
Все описываемые разметки являются подклассами ViewGroup и наследуют свойства, определённые в классе View.
Комбинирование
Компоновка ведёт себя как элемент управления и их можно группировать. Расположение элементов управления может быть вложенным. Например, вы можете использовать RelativeLayout в LinearLayout и так далее. Но будьте осторожны: слишком большая вложенность элементов управления вызывает проблемы с производительностью.
Можно внедрить готовый файл компоновки в существующую разметку при помощи тега :
Подробнее в отдельной статье Include Other Layout
Программный способ создания разметки
Для подключения созданной разметки используется код в методе onCreate():
Естественно, вы можете придумать и свое имя для файла, а также в приложениях с несколькими экранами у вас будет несколько файлов разметки: game.xml, activity_settings.xml, fragment_about.xml и т.д.
В большинстве случаев вы будете использовать XML-способ задания разметки и подключать его способом, указанным выше. Но, иногда бывают ситуации, когда вам понадобится программный способ (или придётся разбираться с чужим кодом). Вам доступны для работы классы android.widget.LinearLayout, LinearLayout.LayoutParams, а также Android.view.ViewGroup.LayoutParams, ViewGroup.MarginLayoutParams. Вместо стандартного подключения ресурса разметки через метод setContentView(), вы строите содержимое разметки в Java, а затем уже в самом конце передаёте методу setContentView() родительский объект макета:
Число макетов постоянно меняется. Например, недавно появились новые виды CoordinatorLayout и ConstraintLayout. Кроме стандартных элементов разметки существуют и сторонние разработки.
Источник
Android (Home screen) Widgets — Tutorial
Developing Android Widgets. This article describes how to create home screen widgets in Android.
1. Prerequisites
The following description assume that you already have experience in building standard Android application. Please see https://www.vogella.com/tutorials/Android/article.html — Android Tutorial. It also partly uses Android services. You find an introduction into Android Services in https://www.vogella.com/tutorials/AndroidServices/article.html — Android Service Tutorial.
2. Android Widgets
2.1. Overview about AppWidgets
2.2. Home screen widgets
Home screen widgets are broadcast receivers which provide interactive components. They are primarily used on the Android home screen. They typically display some kind of data and allow the user to perform actions with them. For example, a widget can display a short summary of new emails and if the user selects an email, it could start the email application with the selected email.
To avoid confusion with views (which are also called widgets), this text uses the term home screen widgets, if it speaks about widgets.
A widget runs as part of the process of its host. This requires that the widget preserves the permissions of their application.
Widget use RemoteViews to create their user interface. A RemoteView can be executed by another process with the same permissions as the original application. This way the widget runs with the permissions of its defining application.
The user interface for a Widget is defined by a broadcast receiver. This receiver inflates its layout into an object of type RemoteViews . This object is delivered to Android, which hands it over the home screen application.
2.3. Steps to create a Widget
To create a widget, you:
Define a layout file
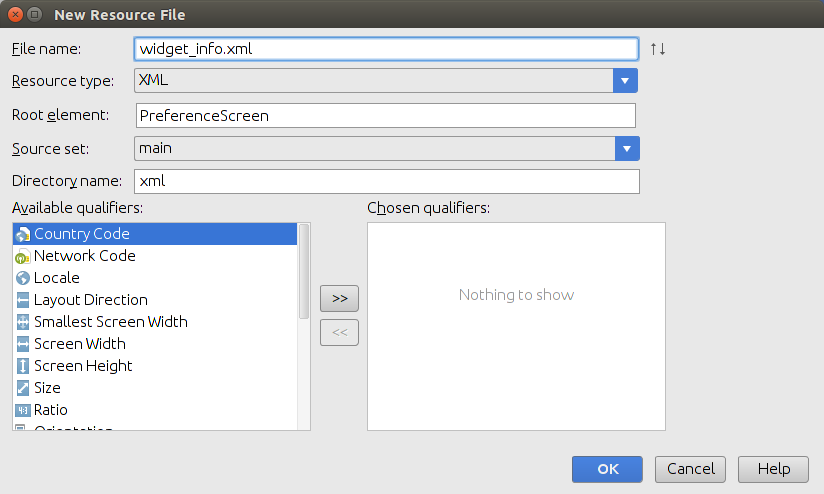
Create an XML file ( AppWidgetProviderInfo ) which describes the properties of the widget, e.g. size or the fixed update frequency.
Create a BroadcastReceiver which is used to build the user interface of the widget.
Enter the Widget configuration in the AndroidManifest.xml file.
Optional you can specify a configuration activity which is called once a new instance of the widget is added to the widget host.
2.4. Widget size
Before Android 3.1 a widget always took a fixed amount of cells on the home screen. A cell is usually used to display the icon of one application. As a calculation rule you should define the size of the widget with the formula: ((Number of columns / rows) * 74) — 2 . These are device independent pixels and the -2 is used to avoid rounding errors.
As of Android 3.1 a widget can be flexible in size, e.g., the user can make it larger or smaller. To enable this for widget, you can use the android:resizeMode=»horizontal|vertical» attribute in the XML configuration file for the widget.
3. Creating the Broadcast receiver for the widget
3.1. Create and configure widget
To register a widget, you create a broadcast receiver with an intent filter for the android.appwidget.action.APPWIDGET_UPDATE action.
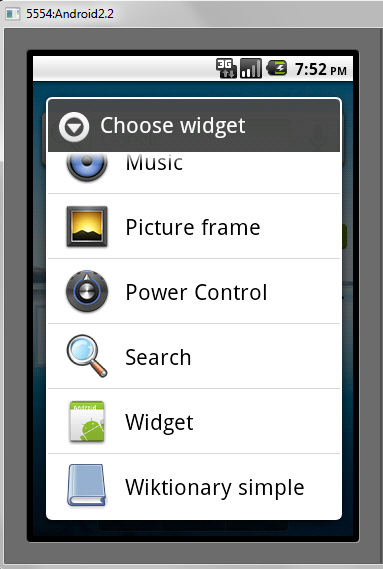
The receiver can get a label and icon assigned. These are used in the list of available widgets in the Android launcher.
You also specify the meta-data for the widget via the android:name=»android.appwidget.provider attribute. The configuration file referred by this metadata contains the configuration settings for the widget. It contains, for example, the update interface, the size and the initial layout of the widget.
3.2. Available views and layouts
A widget is restricted in the View classes it can use. As layouts you can use the FrameLayout , LinearLayout and RelativeLayout classes. As views you can use AnalogClock , Button , Chromometer , ImageButton , ImageView , ProgressBar and TextView .
As of Android 3.0 more views are available: GridView , ListView , StackView , ViewFlipper and AdapterViewFlipper . These adapter views require that you define a collection view widget which is described later in this tutorial.
The only interaction that is possible with the views of a widget is via an OnClickListener event. This OnClickListener can be registered on a widget and is triggered by the user.
3.3. AppWidgetProvider
Your BroadcastReceiver implementation typically extends the AppWidgetProvider class.
The AppWidgetProvider class implements the onReceive() method, extracts the required information and calls the following widget life cycle methods.
As you can add several instances of a widget to the home screen, you have life cycle methods which are called only for the first instance added / removed to the home screen and others which are called for every instance of your widget.
| Method | Description |
|---|---|


