- Текст на английском языке с переводом № 2.2
- A delicious apple pie!
- Вкусный яблочный пирог!
- Подсказки:
- Рабочая тетрадь Spotlight 6. Workbook. Страница 55
- Let’s Bake an Apple Pie
- First Things First, Let’s Make Our Own Pie Crust
- For a perfect crust every time:
- Let’s Bake a Naturally Sweetened Apple Pie
- Subscribe For Free!
Текст на английском языке с переводом № 2.2
A delicious apple pie!
An apple pie is a simple but very tasty meal 1 . It is very easy to make. It’s made of two parts: a crust and a filling. An apple pie can be single-crusted (with only one piece of crust on top or bottom), or double-crusted (with crust on top and on bottom).
The top of an apple pie can be solid, or the stripes 2 of crust can form a lattice 3 top. If you have a pie with a lattice top, you can see the filling even before you cut the pie!
The filling is made with apples. Some people prefer finely 4 chopped apples, some add large slices 5 instead. With large slices you will get a hearty 6 pie, while the fine chop will make your pie very delicate.
An apple pie is a signature dish 7 of many nations. The first written recipe is found in the 14th century book The Forme of Cury ( The Method of Cooking in Middle English). That recipe also called for some pears, raisins and saffron.
An apple pie is also a signature American dish. Some people even call it an unofficial symbol of the United States.
The most basic (but still tasty!) apple pie needs 2 or 3 cups of flour, 2 eggs (1 beaten 8 egg), a stick of butter, some salt and a cup of water for a crust. For a filling you can take 1 kg of apples, a cup of sugar, 2 tablespoons 9 of flour. Make a simple pastry dough 10 and let it rest in your fridge. Combine everything you need for a filling and refrigerate it as well. Place your dough into a pie dish, add filling and the top layer of crust. Make sure to pinch 11 your crust so it’s sealed all around the pie. Brush 12 your pie with the beaten egg and bake in a preheated oven at 200 °C for about an hour until the crust is golden brown. The pie can be served with an ice cream or a cheese topping. Bon appétit!
Вкусный яблочный пирог!
Яблочный пирог – простое, но очень вкусное блюдо. Его очень легко приготовить. Оно состоит из двух частей: теста и начинки. Яблочный пирог может быть открытым (слой теста только сверху или только внизу) или закрытым (с тестом и сверху, и снизу).
Верх яблочного пирога может быть целым, либо же кусочки теста могут быть выложены в форме решётки. У пирога с решётчатым верхом начинку можно видеть ещё до разрезания!
Начинка делается из яблок. Некоторые люди предпочитают мелко нарезанные яблоки, некоторые вместо этого добавляют большие дольки. С большими дольками пирог получается очень сытным, а с мелкой нарезкой пирог будет очень нежным.
Яблочный пирог – национальное блюдо многих кухонь мира. Первый письменный рецепт был найден в книге XIV века «The Forme of Cury» («Методы приготовления еды» на среднеанглийском). Этот рецепт, кроме всего прочего, требует также груши, изюм и шафран.
Яблочный пирог, кроме того, является фирменным американским блюдом. Некоторые люди даже называют его неофициальным символом Соединённых Штатов.
Для самого простого (но по-прежнему вкусного!) яблочного пирога понадобится 2 или 3 стакана муки, 2 яйца (одно взбитое яйцо), пачка сливочного масла, немного соли и стакан воды – на тесто. Для начинки можно взять 1 кг яблок, стакан сахара, 2 столовые ложки муки. Сделайте простое тесто для выпечки и поставьте отдыхать в холодильник. Соедините всё, что вам нужно для начинки, и также поставьте охлаждаться. Поместите ваше тесто в форму для пирога, добавьте начинку и верхний слой теста. Убедитесь, что защипнули тесто по всему периметру пирога. Смажьте ваш пирог взбитым яйцом и выпекайте в разогретой до 200 °C духовке около часа или пока корочка не станет золотисто-коричневой. На готовый пирог при подаче можно положить мороженое или сыр. Приятного аппетита!
Подсказки:
- 1 meal – обед, кушанье, блюдо (как таковые);
- 2 stripes – полоски;
- 3 lattice – решётка;
- 4 finely (контекст.) – мелко (нарезанное, обработанное и т.п.);
- 5 slices – ломтики, дольки;
- 6 hearty (контекст.) – сытный, плотный;
- 7 dish (контекст.) – блюдо (в т.ч. рецепт);
- 8 beaten (контекст.) – взбитый;
- 9 tablespoons – столовые ложки.
- 10 pastry dough – тесто для выпечки;
- 11 to pinch – щипать, защипывать;
- 12 to brush – обработать при помощи щётки.
Finely в контексте данного текста – мелко, деликатно, а вовсе не хорошо.
Кулинарные традиции часто ссорят автора и переводчика. Так, в данном тексте очень сложно подобрать адекватный перевод слову crust: под «корочкой» здесь подразумевается весь наружный слой пирога, исключая начинку – в том числе и, возможно, не самые сухие его части. Аналогично, интуитивно абсолютно понятный кулинарный термин topping не имеет точного аналога в русском языке и со временем для удобства был полностью позаимствован (топпинг для пиццы, топпинг для мороженого).
Источник
Рабочая тетрадь Spotlight 6. Workbook. Страница 55
9с. Let’s cook! — Давайте готовить
1. Tick (√) the appropriate boxes. — Отметьте галочкой соответствующие колонки

- boil: eggs, pasta, potatoes, carrots, fish, meat — варить: яйца, вермишель, картофель, морковь, рыба, мясо
- fry: eggs, potatoes, fish, meat, onions — жарить: яйца, картофель, рыба, мясо, лук
- dice: potatoes, carrots, meat, onions — нарезать: картофель, морковь, мясо, лук
- bake: potatoes, fish — запекать: картофель, рыба
- peel: potatoes, carrots, onions — очищать: картофель, морковь, лук
2. Choose the correct item. — Выберите правильный ответ

- Slowly stir the eggs, the flour and milk mixture. — Медленно перемешать яйца, муку и молочную смесь
A) bake
В) fry
С) stir — перемешать - When the chicken boils, add the vegetables. — Когда курица сварится, добавьте овощи
A) peel
В) add— добавить
С) buy - Put the cake in the oven and bake it for 30-45 min. — Положите торт в духовку и пеките его в течение 30-45 минут
A) bake— печь
В) melt
С) dice - How many people does the recipe serve? — На скольких человек рассчитан рецепт?
A) prepare
В) serve— подавать, обслуживать
С) need - Look at the ingredients you need before you go to the market. — Посмотрите на ингредиенты, которые вам нужны перед тем как идти на рынок
A) cooking time
В) portions
С) ingredients — ингредиенты - You have to be careful not to cut yourself when you dice vegetables. — Вам нужно быть осторожным, чтобы не порезаться, когда режете овощи.
A) boil
В) mix
С) dice — нарезать
3. Complete the exchanges. — Дополните предложения

• I’d like a cola please • Yes, I’d love that • May I take your order, sir • Would you like some dessert • I’m on a diet • Would you like a starter
- A: Would you like some dessert? — Хотите десерт?
B: I’d like the apple pie. Thank you. — Я хотел бы яблочный пирог. Спасибо. - A: May I take your order, sir? — Могу я принять ваш заказ, сэр?
B: I’d like the chicken curry, please. — Я хотел бы курицу с карри, пожалуйста. - A: Anything to drink? — Что-нибудь будете пить?
B: I’d like a Cola, please. — Мне колу, пожалуйста - A: What about a sirloin steak? — Как насчет антрекота?
B: Yes, I’d love that. — Да, мне нравится. - A: Would you like something light? — Хотите что-нибудь легкого?
B: Yes, thank you. I’m on a diet. — Да, спасибо. Я на диете. - A: Would you like a starter? — Что хотели бы на закуску?
B: Yes, please. I’ll have the chef’s salad. — Да, я возьму салат от шеф-повара.
4. Listen and complete — Послушайте и дополните

Hello, everybody! Welcome to the programme! Today I’m going to tell you an easy way to prepare a delicious western omelette. Now, it takes about 10 minutes to prepare all the ingredients and about another 10 minutes to actually cook the omelette. This recipe, by the way, serves 2 people. So, here are the ingredients you’ll need: 1 teaspoon of butter, 1 tablespoon of diced green peppers, 1 tablespoon of diced red peppers, 1 tablespoon of diced spring onions, 4 eggs, and 4 tablespoons of diced cheese. Remember, it’s very important that you have all the ingredients ready before you start cooking. So, let’s get started! First, melt the butter in a large frying pan. Then, fry the red and green diced peppers together with the diced spring onions. Beat the eggs in a bowl and pour them over the vegetables. When the omelette is almost cooked, sprinkle the cheese over it. Now, fold the omelette in half and continue cooking until ready. Serve immediately and … enjoy it!
Всем привет! Добро пожаловать на нашу программу! Сегодня я хочу рассказать вам простой способ приготовить вкусный западный омлет. Это занимает около 10 минут, чтобы подготовить все ингредиенты и около 10 минут приготовления самого омлета. Кстати, этот рецепт рассчитан на 2 человек. Так, вот все ингредиенты, которые нам понадобятся: 1 чайная ложка масла, 1 столовая ложка нарезанного зеленого перца, 1 столовая ложка нарезанного красного перца, 1 столовая ложка зеленого лука, 4 яйца и 4 столовой ложки тертого сыра. Запомните, это очень важно, чтобы все ингредиенты были готовы перед началом приготовления омлета. Итак, давайте начнем! Сперва расплавьте масло на большой сковороде. Затем обжарьте красный и зеленый нарезанный перец вместе с нарезанным луком. Взбейте яйца в миске и вылейте их поверх овощей. Когда омлет почти готов, посыпьте его сыром. Теперь сложите омлет пополам и продолжайте готовить до готовности. Подавайте немедленно и … наслаждайтесь!
Western omlette — Западный омлет
Preparation time: 10 min. — Время подготовки 10 минут
Cooking time: 1) 10 min. — Время приготовления 10 минут
Ingredients: — Ингредиенты
- 1 tsp butter — 1 чайная ложка масла
- 1 tbsp diced green peppers — 1 столовая ложка зеленого перца
- 1 tbsp diced 2) red peppers — 1 столовая ложка нарезанного красного перца
- 1 tbsp diced spring onions — 1 столовая ложка зеленого лука
- 4 3) eggs. — 4 яйца
- 4 tbsps diced cheese — 4 столовой ложки нарезанного сыра
Portions: 2 — Две порции
Melt the butter in a pan, 4) fry the diced green and red peppers with the spring onions. Beat the eggs in a bowl and pour them over the vegetables. When the omelette is almost cooked, 5) sprinkle the cheese over it. Fold the omelette in half immediately and continue cooking until ready. Serve immediately.
Растопите масло на сковороде, обжарьте нарезанный зеленый и красный перец с зеленым луком. Разбейте яйца в чашку и вылейте их на овощи. Когда омлет будет почти готов, посыпьте его сыром. Немедленно сложите омлет пополам и продолжайте жарить его до готовности. Подавайте сразу.
Источник
Let’s Bake an Apple Pie
T he temperatures are dropping and school has officially started. This is my first time as a parent with a child at school and I have to admit, the first couple of weeks I was heartbroken. I missed my little guy during the days and what made it worse, he was having a rough time being away as well.
Now that he’s adjusted and quite happy to be in kindergarten, I’ve been on the upswing. I have found myself with more time on my hands and, in this season, there is nothing more relaxing than baking an apple pie.

All photos by Diana Bauman
With my 3 year old at home, we’ve been able to turn up the music, dance and bake. There’s so much freedom and peace in listening to good music and playing in the kitchen.
What’s even more rewarding is that the older boys are happy to see what you’ve created after a long day of school and work. I’m starting to enjoy these school days and the season in which I have found myself.
So, with fresh local apples at every farmers’ market (or your neighbor’s tree) let’s have some fun. Let’s bake an apple pie!
First Things First, Let’s Make Our Own Pie Crust
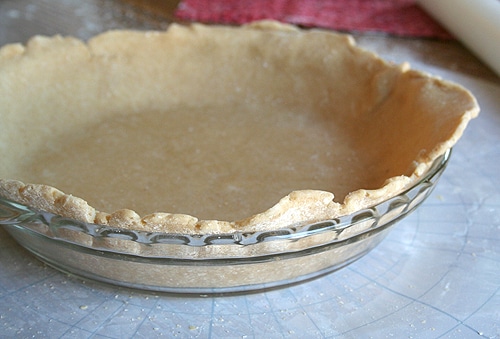
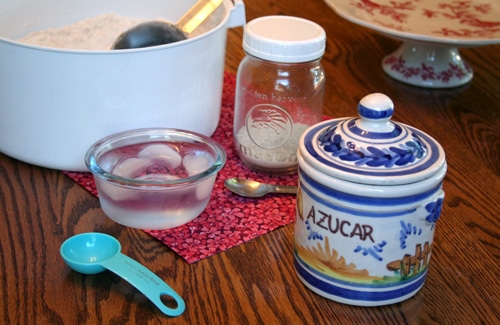
With only a few simple ingredients and a food processor, making a pie crust can be simple and quick to make.
This is my go-to recipe for a buttery, rich, flaky crust. A traditional French Pâte Brisée.
For a perfect crust every time:
- Keep all ingredients cold
- Do not over process the dough
- Use ice-water
- Allow your finished dough to rest in the refrigerator for at least 1 hour
For my pie crust, I grind my own whole wheat grain using soft white wheat berries. This is what you would find at the store called Whole Wheat Pastry Flour. In my opinion, store bought whole wheat flour does not compare to milling your own grain at home. It’s much heavier and in my opinion, gritty. If you do not grind your own grain, I would suggest using an unbleached all purpose white flour.
**For a video tutorial for this pie crust, head over to A Little Bit of Spain in Iowa and join me in my kitchen as I mix it up!**
Ingredients for a two crust pie:
- 2 1/2 cups flour
- 1 tsp salt
- 1 tsp sugar
- 2 sticks unsalted butter
- 6-10 tablespoons cold water (This is quite a gap in measurements, however, since I use freshly milled grains, it’s much lighter and I only need around 6tbls of water. If you’re using store bought flour, you will most likely need anywhere from 8-10tablespoons)
Method:
1. In a food processor combine the flour, salt and sugar. Blend to incorporate.
2. Cut the butter in small pieces, making sure to not handle it too much. Your hands will give off quite a bit of heat and it’s important to keep your butter as cold as possible.
3. Add the butter to the flour mixture and pulse 6-8 times or until the mixture resembles a coarse grain. Do not over process.
4. Add 1 tablespoon at a time of water and pulse. Continue to do this until the dough just begins to hold together without being wet or sticky. Again, do not over process.
5. The dough should not stick together in a ball-shaped form. It should just begin to hold. Once you’re at this stage, empty the dough “pieces” onto the counter and shape quickly into a rounded ball. Divide into two balls.
6. Quickly shape each piece into a disc and wrap in plastic. Do not overwork.
7. Place the dough in the refrigerator for at least 1 hour before using.
The dough will keep in the refrigerator for 2 weeks or frozen for up to a month.
Let’s Bake a Naturally Sweetened Apple Pie

Now that our pie crust has been made, putting together a filling for apple pie is a breeze. What’s great about this version is that it uses real maple syrup as the sweetener. Its sweet maple flavor lends itself beautifully to the apples and cinnamon; no one would ever guess that a granulated sugar wasn’t used.
Ingredients:
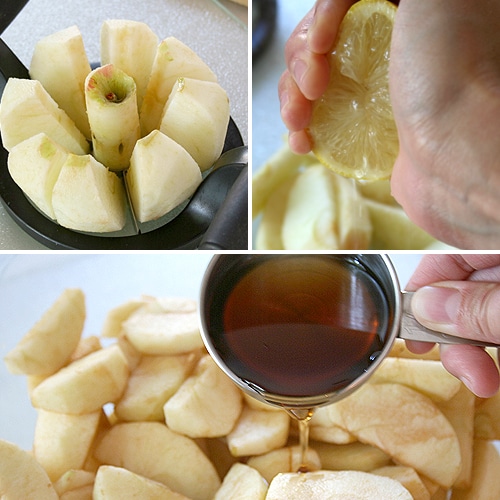
- 7 large local apples, (Some prefer tart, others don’t. It’s up to you which variety to use), peeled and sliced thinly
- 1/2 lemon
- 2 tbsps melted butter
- 1/2 cup real maple syrup
- 1 tsp cinnamon
- 1 tsp nutmeg
- 3 tbsps flour
1. While peeling and slicing your apples, place in a large bowl and add the juice of 1/2 a lemon. Make sure to toss the apples in the lemon juice as you keep adding them to the bowl to prevent from discoloring. Once all the apples have been peeled and sliced, add the butter and maple syrup to the bowl. Mix well.
2. In a smaller bowl, combine the cinnamon, nutmeg and flour. Add to the apples and toss to incorporate.

3. Roll out one pie crust and line into a pie dish. Add the apple mixture into the pie crust, making sure to drizzle any remaining liquid on top.

4. Roll out the top pie crust, cutting out any decorations into the crust.
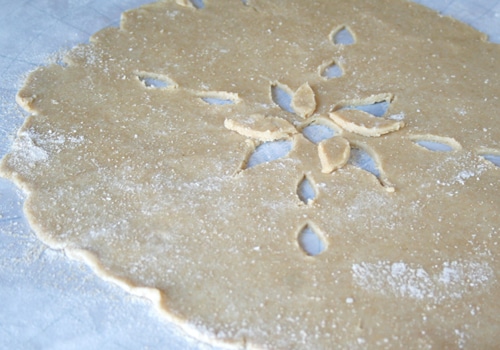
5. Carefully, lift the top pie crust and cover the pie. Pinch the sides of the pie closed and sprinkle with organic sugar.
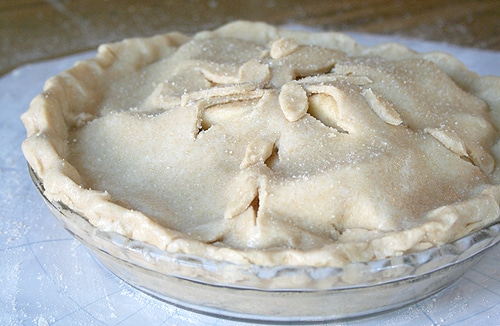
6. Bake at 450°F for 10 minutes. Lower the heat to 350°F and continue to bake for an additional 40-45 minutes.
Allow to rest for at least 1 hour before you cut through. The liquids will thicken as it cools.
What’s your favorite dish to make or treat to bake while jamming to your favorite tunes in the kitchen?
As a first generation American, Diana shares her family’s traditional Spanish and Mexican recipes at her blog, A Little Bit of Spain in Iowa. As a mami and urban homesteader she also writes about her faith, family, organic gardening, raising backyard chickens and preserving the harvest.
Subscribe For Free!
Like reading this post?
Get more delivered to your email inbox.
Источник


