- See and remove your devices that are associated with Apple ID purchases
- Use a Mac or PC to see or remove your associated devices
- Remove your associated iPhone, iPad, or iPod touch
- More about associated devices
- Manage the apps that you use with Sign in with Apple
- View the apps using your Apple ID
- On your iPhone, iPad, or iPod touch
- On your Mac
- On the web
- Manage your apps
- Turn off email forwarding
- Change your forwarding address
- Stop using your Apple ID with an app
- What is Sign in with Apple?
- About Sign in with Apple
- Privacy and security
- Use Sign in with Apple
- Learn more
- Sign in with your Apple ID
- Sign in on your iPhone, iPad, or iPod touch
- Sign in on your Mac
- Sign in on Apple TV
- Sign in on apps and other devices
- Sign in to use Apple Music, the Apple TV app, and more on your other devices
- Sign in to use iCloud on your other devices
- Use Sign in with Apple on third-party apps and websites
- Learn more
- How to Fix ‘This iPhone is Currently Linked to An Apple ID’ Problem
- Solution 1: Remove Apple ID from iPhone without Password Easily and Quickly
- Solution 2: Ask the Previous Owner to Remove Apple ID
- Solution 3: Change/Reset Apple Password to Remove Apple ID from iPhone
- Conclusion
See and remove your devices that are associated with Apple ID purchases
Manage the list of devices that can download and play items that you bought with your Apple ID.
When you subscribe to Apple services or buy content from Apple, the device that you’re using becomes associated with your Apple ID. You might want to remove an associated device in these situations:
- If you reach your limit of associations and want to add a new one.
- If you can’t redownload purchases from the App Store, Apple TV app, the iTunes Store, and other Apple services.
- If you want to sell or give away an associated device.
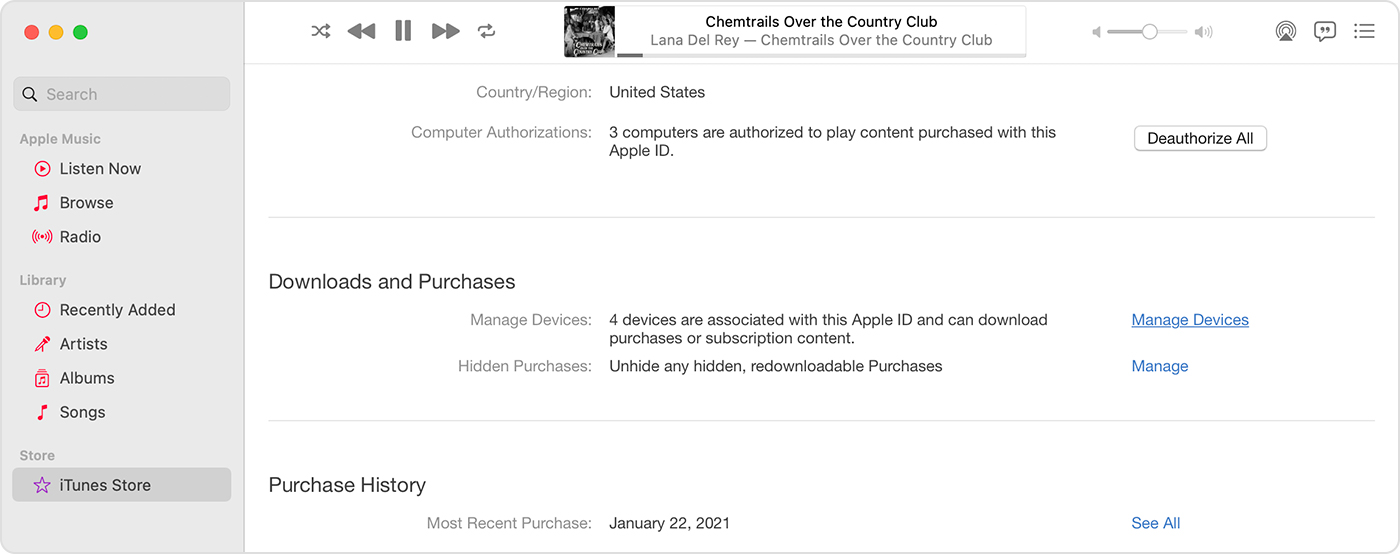
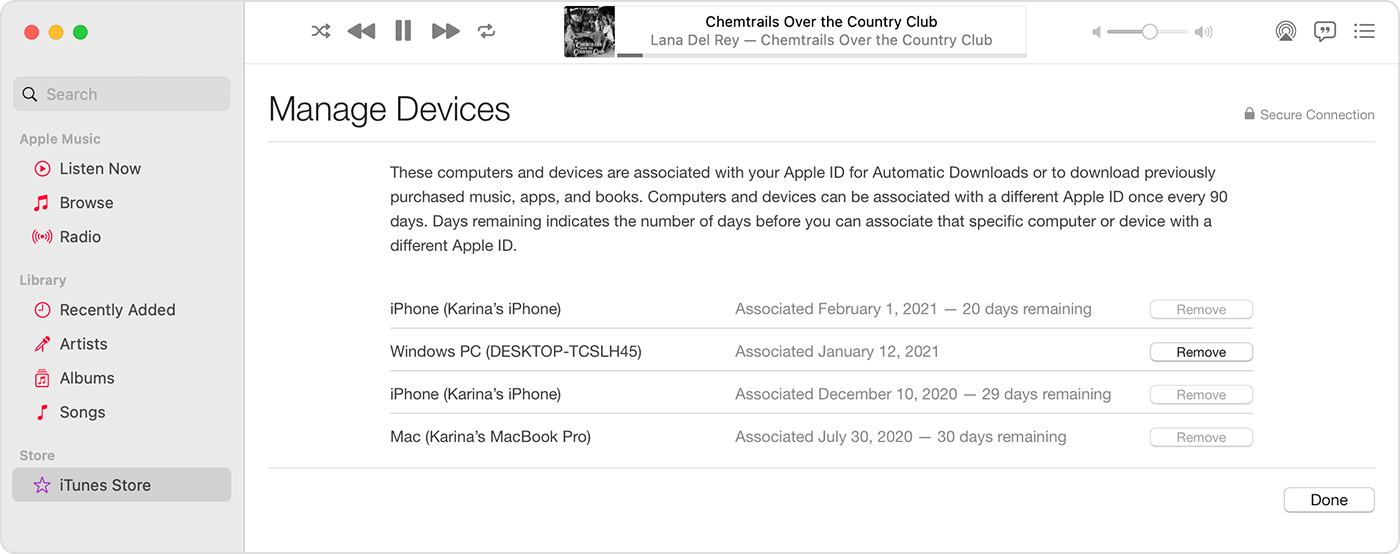
Use a Mac or PC to see or remove your associated devices
- On your Mac, open the Apple Music app. Or on your PC, open iTunes for Windows.
- From the menu bar, choose Account > View My Account. You might need to sign in with your Apple ID.
- Click Manage Devices. If no devices are associated with your Apple ID, you won’t see this section.

- If you want to remove a device, click Remove. If you can’t remove a device, sign out of your Apple ID on that device and try again. If you still can’t remove it, you might need to wait up to 90 days to associate the device with a different Apple ID.
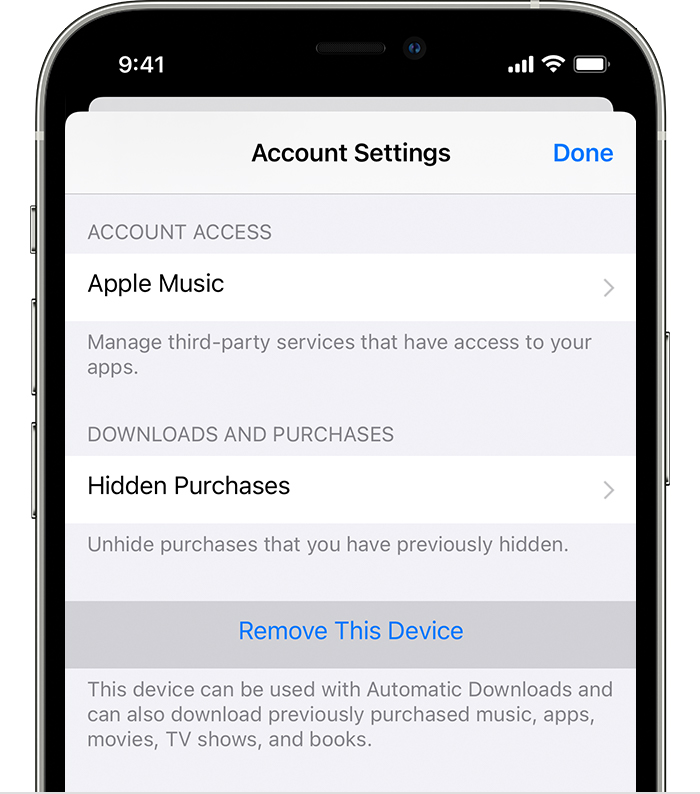
Remove your associated iPhone, iPad, or iPod touch
- Tap Settings, tap your name, then tap Media & Purchases.
- Tap View Account.
- Scroll down, then tap Remove This Device.
More about associated devices
You can have ten devices (no more than five computers) associated with your Apple ID for purchases at one time.
When you try to associate a device that was previously associated, you might see a message that says, «This device is associated with another Apple ID. You cannot associate this device with another Apple ID for [number] days.» You might need to wait up to 90 days to associate the device with a different Apple ID.
This list of associated devices is not the same as the list of devices that you’re currently signed in to with your Apple ID. You can see where you’re signed in on your Apple ID account page.
Information about products not manufactured by Apple, or independent websites not controlled or tested by Apple, is provided without recommendation or endorsement. Apple assumes no responsibility with regard to the selection, performance, or use of third-party websites or products. Apple makes no representations regarding third-party website accuracy or reliability. Contact the vendor for additional information.
Источник
Manage the apps that you use with Sign in with Apple
When you use Sign in with Apple, you can sign in to participating third-party apps and websites with your Apple ID. Learn how to view and manage the apps that you use with Sign in with Apple.
View the apps using your Apple ID
To see a list of the apps that you’re currently using with Sign in with Apple and manage your preferences for each one, go to Apple ID settings on your device or sign in to your Apple ID account page. Learn more about Sign in with Apple.
On your iPhone, iPad, or iPod touch
- Open the Settings app, then tap your name.
- Tap Password & Security.
- Tap Apps Using Your Apple ID.
On your Mac
- Choose Apple menu, then click System Preferences.
- Click Apple ID, then choose Password & Security.
- Click Edit.
On the web
- Sign in to appleid.apple.com.
- Go to the Security section. Under Sign in with Apple, select «Manage apps & websites.»
- Select Manage.

Manage your apps
In your Apple ID account settings, you see a list of apps that you use with Sign in with Apple. To view the information you originally shared with an app, select any app in the list. You can also view a link to the app’s Privacy Policy or Terms & Conditions.
If you chose to hide your email address from an app and use our private email relay service, you can turn off email forwarding to your personal email address. You can also choose to stop using your Apple ID with an app or website.
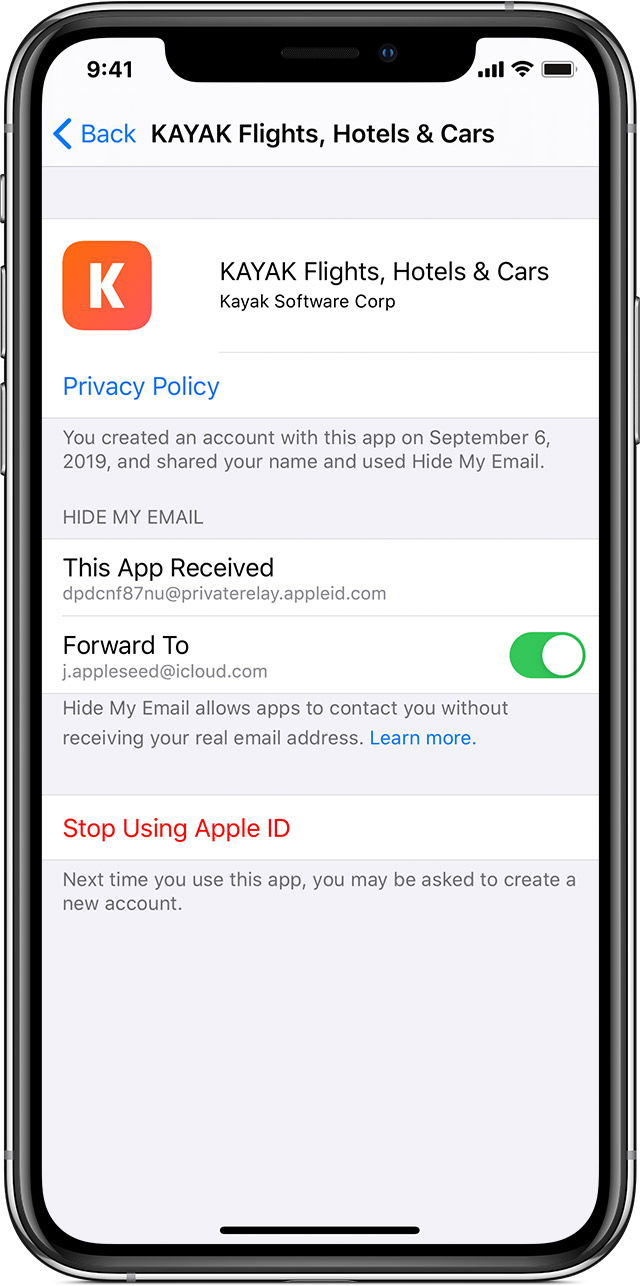
Turn off email forwarding
To stop emails sent by a particular developer from reaching your personal inbox, turn off Forward To, then select Stop. Emails aren’t forwarded to your personal inbox unless you turn email forwarding back on.
Change your forwarding address
If you use Hide My Email with a developer, you can change the email address that receives forwarded messages from that developer. You can select any email address you have on file in your Apple ID account:
- On your iPhone, go to Settings, then tap [your name].
- Tap Name, Phone Numbers, Email, then tap Forward to under Hide My Email.
- Choose the address you want emails to be forwarded to.
When you choose the email address, this applies to email from all apps and developers using Hide My Email.
Stop using your Apple ID with an app
To stop using your Apple ID with an app, select Stop Using Apple ID, then choose Stop Using.
When you stop using your Apple ID with an app, you’re signed out of the app on your device. The next time you visit the app or its associated website, you can either select Sign in with Apple to sign in again, or create a new account.
If you choose to use Sign in with Apple again, you’re signed in to the same account you previously used. Some apps might let you create a new password for your existing account so you can sign in again without using your Apple ID.
Some developers might use Sign in with Apple to give you an account for more than one app. If that’s the case and you turn off email forwarding or stop using your Apple ID for one app, it applies to all apps from that developer.
Источник
What is Sign in with Apple?
Sign in with Apple is the fast, easy, and more private way to sign in to third-party apps and websites using the Apple ID that you already have.
About Sign in with Apple
When you see a Sign in with Apple button on a participating app or website, it means you can set up an account using your Apple ID. No need to use a social media account, fill out forms, or choose another new password.
Sign in with Apple is built from the ground up to respect your privacy and keep you in control of your personal information. It works natively on iOS, macOS, tvOS, and watchOS, and in any browser.
Privacy and security
- At your first sign in, apps and websites can ask only for your name and email address to set up an account for you.
- You can use Hide My Email—Apple’s private email relay service—to create and share a unique, random email address that forwards to your personal email. This lets you receive useful messages from the app without sharing your personal email address. Learn more about how Hide My Email works.
- Sign in with Apple won’t track or profile you as you use your favorite apps and websites. Apple retains only the information that’s needed to make sure you can sign in and manage your account.
- Security is built in to Sign in with Apple with two-factor authentication. If you use an Apple device, you can sign in and re-authenticate with Face ID or Touch ID anytime.
![]()
Use Sign in with Apple
To use Sign in with Apple, tap the Sign in with Apple button on a participating app or website, review your information, and sign in quickly and securely with Face ID, Touch ID, or your device passcode.
Learn how to use Sign in with Apple on your iPhone, iPad, iPod touch, or web browser.
You need to be signed in with your Apple ID in System Preferences > Apple ID on your Mac or Settings > [your name] on your iPhone, iPad, or iPod touch. You also need two-factor authentication turned on. Learn more.
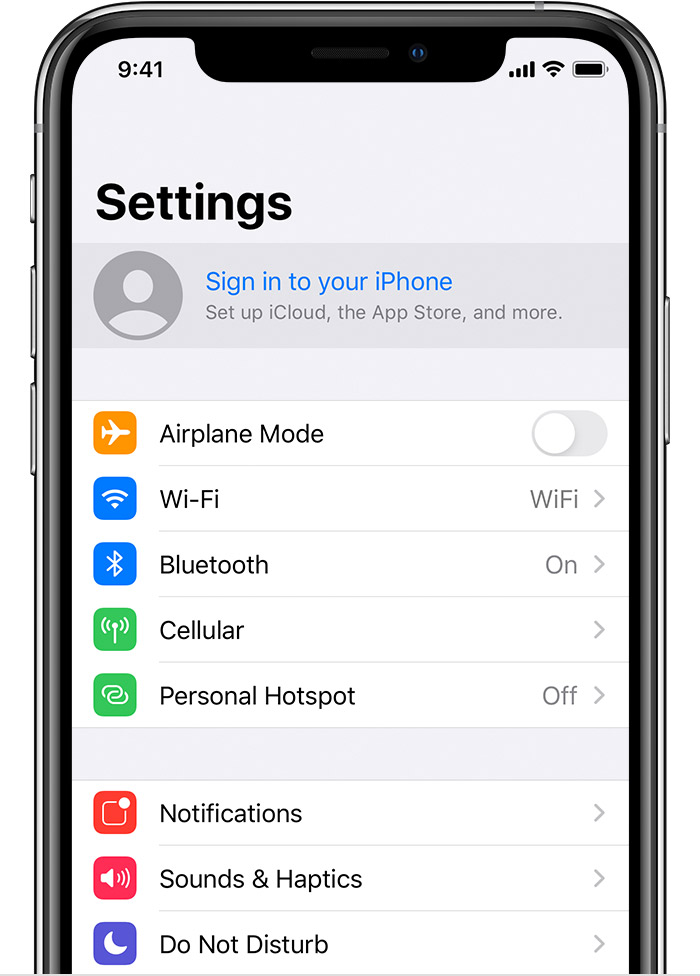
![]()
Learn more
- If you don’t see a Sign in With Apple button, that app or website doesn’t support Sign in With Apple yet.
- Sign in with Apple is not available for children under 13 years old. This age may vary by country or region.
- Learn how to review the apps you use with Sign in with Apple.
- If you need help signing into or updating your Apple ID, or changing your account information, learn what to do.
Information about products not manufactured by Apple, or independent websites not controlled or tested by Apple, is provided without recommendation or endorsement. Apple assumes no responsibility with regard to the selection, performance, or use of third-party websites or products. Apple makes no representations regarding third-party website accuracy or reliability. Contact the vendor for additional information.
Источник
Sign in with your Apple ID
Your Apple ID is the account that you use to access all Apple services and make all of your devices work together seamlessly. After you log in, you can use the App Store, iCloud, iMessage, Apple Music, Apple TV+, and more.
Want to use Sign in with Apple on third-party apps or websites? Learn how to use Sign in with Apple.
Sign in on your iPhone, iPad, or iPod touch
Sign in on your Mac
Sign in on your Apple TV
Sign in on apps and other devices
Sign in on your iPhone, iPad, or iPod touch
- Open the Settings app.
- Tap Sign in to your [device].
- Enter your Apple ID and password.
- If prompted, enter the six-digit verification code sent to your trusted device or phone number and complete sign in.
If you’re already signed in to iCloud on the iPhone paired with your Apple Watch, you will automatically be signed in to that Apple ID. Learn more about how to set up and sign in to your Apple Watch.
Sign in on your Mac
- Choose Apple menu > System Preferences.
- Click Sign In.
- Enter your Apple ID and password.
- If prompted, enter the six-digit verification code sent to your trusted device or phone number and complete sign in.
Sign in on Apple TV
- From the Home screen, choose Settings.
- Then choose Users and Accounts and select Add New User…
- Select Enter New…, then follow the on screen instructions.
If you use two-factor authentication on an Apple TV (2nd or 3rd generation), you might need to enter a verification code with your password. Learn how to get a verification code on your trusted device or sent to your trusted phone number.
Sign in on apps and other devices
You can use your Apple ID on some third-party devices to sign in to Apple services like Apple Music, the Apple TV app, and more.
Depending on your device, you might need to use an app-specific password.
Sign in to use Apple Music, the Apple TV app, and more on your other devices
You can sign in to Apple Music on Android, or sign in to the Apple TV app on your smart TV or streaming device.
On your Windows PC, you can sign in to iTunes for Windows to buy movies and TV shows, or listen to songs on Apple Music.
Sign in to use iCloud on your other devices
On your Windows PC, you can set up and sign in to iCloud for Windows to access photos, documents, and more.
You can also sign in to iCloud.com from your browser. Learn which iCloud.com features are available on your device.
Use Sign in with Apple on third-party apps and websites
If you see a Sign in with Apple button on a participating third-party app or website, you can use your existing Apple ID to quickly set up an account and sign in. Learn how to use Sign in with Apple.
When you sign in to the App Store and other media services for the first time, you might need to add a credit card or other payment information. You can’t sign in to the App Store and other media services with more than one Apple ID at the same time, or update the content you buy with a different Apple ID. Depending on how you created your Apple ID, you might be prompted to upgrade to two-factor authentication on an eligible device.
Learn more
- To view and manage your Apple ID account details on the web, sign in to appleid.apple.com.
- Learn more about where you can use your Apple ID.
- Learn how to manage your subscriptions to services like Apple Music or Apple TV+.
- If you have multiple Apple IDs, you can’t merge them.
Information about products not manufactured by Apple, or independent websites not controlled or tested by Apple, is provided without recommendation or endorsement. Apple assumes no responsibility with regard to the selection, performance, or use of third-party websites or products. Apple makes no representations regarding third-party website accuracy or reliability. Contact the vendor for additional information.
Источник
How to Fix ‘This iPhone is Currently Linked to An Apple ID’ Problem
by Anna Sherry Updated on 2019-07-25 / Update for Apple ID
iPhones are very attractive and very expensive devices so; you can guess that not all its followers are able to get a new phone from the store. They, often buy a used iPhone, at a cheaper price. But after getting the iPhone, most of them complain that this iPhone is linked to an Apple ID. So, basically the users get stuck with an already linked Apple ID on their iPhone. This is a very old issue which can be fixed very easily. Unfortunately, most of the users don’t have any idea how to remove an iPhone linked to Apple ID previously. Thankfully, we know how to do it and provided a detailed description in the article below.

Solution 1: Remove Apple ID from iPhone without Password Easily and Quickly
While most people eagerly looks for their lost Apple ID there are still some users who voluntarily removes the Apple ID linked to their iOS devices. Basically, users go through this procedure because they are going to hand over the device to someone else. So, it completely makes sense to erase the Apple ID along with all the contents associated with it.
You are thinking that simply erasing the data and restarting the phone will do the trick but if you have failed to erase the Apple ID, then that ID will be still connected and registered in your name. It is even possible for someone else to take advantage of such situation.
So, if you are sure that this iPhone is linked to an Apple ID then, you need to remove it immediately before handing over the device, preferably using a quick and easy method. This is where Tenorshare 4uKey comes in. Various programs with similar capabilities are available over the internet but we recommend Tenorshare 4uKey as it provides a simplistic approach to fix the said situation. The guide is as follows;
Step 1 Start by download and installing the program on your computer and then launch it. Click on «Unlock Apple ID» from the main interface of the program.


Step 2 Now, get your iPhone and connect it to the computer via the USB cable. The program will detect the device immediately, then you will be prompted to unlock it.
Step 3 Now, click «Start» to remove the Apple ID.
Step 4 If the «Find My iPhone» feature is active on your iPhone then you have to reset all settings, first. After that iPhone will be restarted and then 4uKey will start to remove the Apple ID. But if that feature is turned off on your iPhone then the program will directly start removal of the Apple ID.
This is the easiest way to remove the Apple ID without the password quickly. But you need to be careful with the device for the future, as you won’t be able to use the original Apple ID registered with this particular iPhone again. If the version of iOS you are using is below 10.2 then all your files will be lost after the completion of the procedure. So, if you were having trouble with this iPhone is linked to an Apple ID, you can use Tenorshare 4uKey to get the ID removed immediately.
Solution 2: Ask the Previous Owner to Remove Apple ID
Apple introduced the iCloud activation lock during the launch of iOS 7. It was a security measure to protect the device against unauthorized use of the device. Basically it was designed for cases like theft of device or loss of the device.
Basically, Apple introduced the Apple ID and linked the devices with it so that no one other than the owner of the device will be able to use its privileges. If you bought a second hand iPad/iPhone and you think that this iPad is linked to an Apple ID, it is much of a trouble for you. Fortunately, the Apple ID can be bypassed very easily if you can just contact the previous owner and ask them to unlock the device remotely using the following steps;
Step 1 Log into the iCloud account with their Apple ID.
Step 2 Click on «Find iPhone» and choose the device.
Step 3 Afterward, click on «Remove from Account».
That’s it, now access to your iPad will be flawless without any interruption. Now a note of warning, if you are getting a used device then you must check if the activation lock is activated. If it is activated, ask the owner of the device to erase the device. Also the details of the previous owner with the Apple ID will be asked, tell them to provide it and make the device disconnect from that Apple ID. Now, you have a brand new phone in your hands.
Solution 3: Change/Reset Apple Password to Remove Apple ID from iPhone
Well, if you want to reset the Apple Password in order to remove the Apple ID then it can be done very easily by changing the password from your iPhone.
Step 1 So, open your Apple ID account page and click on the link called «Forgot Apple ID or Password».
Step 2 Type your account ID.
Step 3 Then select the mode you want to use to reset your password. It can be done via email, or using the security questions if you are asked for a Recovery key then use the Two-factor algorithm method.
Step 4 After selecting a mode, click «Continue» to proceed.
The password will be reset immediately and you have to use a new password to login.
Conclusion
So, if you have bought a used iPhone or any iOS device at a cheap price but you are just finding out the grim reality that the device is still linked to its old Apple ID, don’t panic. The article above has already provided all the necessary information on the problem «This iPhone is linked to an Apple ID bypass»; you just have to use it effectively. Although, we prefer using Tenorshare 4uKey for this procedure as it is effective, easier to operate and highly recommended!
Updated on 2019-07-25 / Update for Apple ID
Источник


