- Linux connect to iphone
- Contents
- Installation
- Connecting to a device
- Usbmux daemon
- Pairing
- Application integration
- Manual mounting
- Mounting the media directory
- Mounting application documents
- Changing iPod mountpoint
- Importing videos and pictures
- HTML5 videos
- Importing pictures and deleting them
- Converting video for devices
- Handbrake
- Avidemux
- Mencoder
- FFmpeg
- Device specific
- iPhone/iPod Touch
- The iFuse Way
- Generating HashInfo file
- Unobfuscating the Database
- iPod Classic/Nano (3rd generation)
- iPod Nano 5th generation
- iPod Nano 6th generation
- iPod Shuffle 1st and 2nd generation
- iPod Shuffle 4th generation
- iPod Video (5th and 5.5th generation)
- iPod management apps
- Как подключить iPhone к Linux
- Проблема синхронизации iPhone с Linux
- Почему нельзя запустить iTunes с Wine
- OwnCloud и XAMPP для передачи файлов между Linux и iPhone
- Установка XAMPP на Ubuntu 16.10
- Создание папки для размещения файлов OwnCloud для XAMPP
- Установка OwnCloud в Ubuntu 16.10
- Запуск OwnCloud на XAMPP в Ubuntu 16.10
- Подключение к OwnCloud с iPhone
- Редактирование файла конфигурации OwnCloud
- Подключение iPhone к OwnCloud
- Google Play Music для передачи музыки между Linux и iPhone
Linux connect to iphone
![]() This article or section needs language, wiki syntax or style improvements. See Help:Style for reference.
This article or section needs language, wiki syntax or style improvements. See Help:Style for reference.![]()
The purpose of this article is to demonstrate the use of iOS devices with Arch Linux.
Contents
Installation
Install the libimobiledevice libraries and optionally ifuse AUR the mounting utility
Connecting to a device
Usbmux daemon
usbmuxd is required to make connections to iOS devices all. systemd comes with udev rule to automatically start and stop this daemon so no user interaction is required.
Insert the iOS device and verify that usbmuxd.service automatically started.
Pairing
In order to be able to connect to the iOS device, it must be connected via USB to the computer.
If you have multiple iOS devices connected —udid ios_udid parameter can be passed to target specific device.
Application integration
Applications which use GVFS, such as some file managers (GNOME Files, Thunar) or media players (Rhythmbox) can interact with iOS devices after installing the gvfs-afc and gvfs-gphoto2 packages. Restarting the file manager or application might be needed.
Manual mounting
Mounting the media directory
The simplest way to mount your iPhone’s filesystem to your mount folder, is using the following:
If you do not use the allow_other option, you will not be able to access the mountpoint folder, even if you attempt to sudo into it.
Application documents are not included in the iPhone’s media directory and are mounted separately.
Mounting application documents
To list all available applications (and their APPIDs), run the following:
For example, if VLC is installed on device, you can mount VLC’s files:
org.videolan.vlc-ios is the APPID listed in the output of the previous command.
The mountpoint field is where you want to have it mounted.
Changing iPod mountpoint
Traditional iPods are accessed just like a normal USB storage device containing a vfat file system (in rare cases hfsplus), and can be accessed as such. See the USB storage devices article for detailed instructions.
If udisks2 is installed, it will mount an attached iPod to /run/media/$USER/iPod_name .
If the volume label of the iPod is long, or contains a mixture of spaces, and/or lower-case and capital letters, it may present an inconvenience. You may easily change the volume label for more expedient access using dosfslabel from the dosfstools package:
- Get and confirm the current volume label:
- Set the new volume label:
- Unmount the device:
- Mount it again:
where /dev/sdxx is the current device node of your iPod.
Importing videos and pictures
Both videos and photos can be found in typically in /DCIM/100APPLE .
HTML5 videos
Typically you want to convert MOV files to a HTML5 video format like OGV using ffmpeg2theora . Note that the creation date metadata is not in the converted video, so you need to use a script like:
And use cp -a or rsync -t in order to preserve the file’s date & time.
Importing pictures and deleting them
You can move photos and videos out of /DCIM/100APPLE , however you need to trigger a rebuild of the «Camera Roll» database by deleting the old databases.
Converting video for devices
Handbrake
Handbrake is a nifty tool with presets for a variety of iPod versions. CLI and GTK versions are available with the handbrake-cli and handbrake packages respectively.
If you do decide to take the CLI way, a good guide is available at https://handbrake.fr/docs/en/latest/cli/command-line-reference.html.
Avidemux
This can convert to mp4 files. If you enforce a hard max of bit rate @ 700ish and keep the video size to 720×480 or 320×240 than it works fine for video file exporting.
Mencoder
Has extremely comprehensive configuration support, which will be able to spit out iPod-compatible video files. Check out mencoder(1) ; a lot of MPlayer opts will also affect encoding.
A basic guide is also available at MEncoder.
An example command to encode iPhone/iPod Touch-compatible video:
FFmpeg
Another encoder with comprehensive configuration support. Example command to encode for 5G iPod:
or iPod Touch/iPhone compatible video output:
Device specific
iPhone/iPod Touch
By default, neither the iPhone nor the iPod Touch present mass storage capability over USB, though there is a solution for accessing your files.
The proposed solution is to use a FUSE file system called ifuse AUR , which allows you to mount your device through USB, as you normally would. After installing ifuse, for instance, you should see your iPhone appear in the left navigation of Gnome Files and other supporting file managers.
Refer to this page:[1]
The iFuse Way
Now make sure that you have the fuse module loaded by doing modprobe fuse , assuming that you do not have it in /etc/modules-load.d/ already.
You can now mount your device. Make sure it is unlocked before you plug it in, or it will not be recognized.
The mountpoint field is where you want to have it mounted.
And you are done! You should be able to point your syncing software of choice to the mount point and be able to transfer files.
To unmount your device:
Members of group fuse can mount devices as regular user:
Generating HashInfo file
If you have never synced your device using iTunes, you will get error messages telling you that the HashInfo file is missing. This can be fixed by syncing once with iTunes in order to create it. Alternatively one can create this file using the site http://ihash.marcansoft.com/. Enter the serial number of the iPod on the website. It will generate a file named HashInfo which you will place under the /mnt/ipod/iPod_Control/Device/ directory. Unplug the iPod device and plug it back.
Unobfuscating the Database
Since firmware version 2.0, Apple has obfuscated the music database. If you are using recent firmware, the file /System/Library/Lockdown/Checkpoint.xml can be modified to enable use of the older, non-obfuscated database. If that file does not exist then try to copy from /System/Library/CoreServices/Checkpoint.xml to /System/Library/Lockdown/Checkpoint.xml then replace:
Then reboot your device.
If syncing fails with «ERROR: Unsupported checksum type ‘0’ in cbk file generation!», you may need to leave this at 4. libgpod seems to expect a hashed database.
iPod Classic/Nano (3rd generation)
You need to set up the iPod to make libgpod able to find its Firewire ID. For this, you will need to get your FireWire ID manually
1) Mount the iPod as a rw mount point. In the following example, use /mnt/ipod .
2 ) Find the serial number by typing
this should print a 16 character long string like 00A1234567891231 (it will have no colons or hyphens)
3) Once you have that number, create or edit /mnt/ipod/iPod_Control/Device/SysInfo . Add to that file the line below:
(replace ffffffffffffffff with the 16 digit string you obtained at the previous step and do not forget the leading 0x before the string)
Your iPod can now be managed with Amarok or gtkpod.
iPod Nano 5th generation
Follow the instructions above #Generating HashInfo file in order to set up the hash file, it is needed to write into the device music library. To be able to use the iPod Nano with libgpod , a SysInfoExtended file is also needed to be placed in the directory /mnt/ipod/iPod_Control/Device/ . It can be generated using:
iPod Nano 6th generation
By default libgpod does not seem to be able to syncronize on a iPod Nano 6th generation. It copies data, but as soon as USB is disconnected, everything is as before. The package libhashab-git AUR fix this.
iPod Shuffle 1st and 2nd generation
Due to the simple structure of the Shuffle (compared to the «big» iPods), it is possible to use the player almost like any other USB flash MP3 player. What is necessary is rebuild_db.py file stored in the iPod’s root directory. Simply copy MP3 files onto the iPod Shuffle (sub-folders are allowed too) and run:
iPod Shuffle 4th generation
In order to use this version of the iPod Shuffle under linux, you can use the python based command line tool ipod-shuffle-4g AUR . It also provides advanced voiceover and (auto)playlist generation support.
iPod Video (5th and 5.5th generation)
iPods in the mainline series up to and including this model do not support the AAC PNS feature, and will display audible artifacts when encountering it. Disable the feature in ffmpeg when encoding AAC files for these devices.
The -movflags +faststart options place the moov atom at the start of the file, which helps the iPod parse the file faster.
iPod management apps
These tools use the libgpod library:
- Strawberry — Fork of Clementine aimed at audio enthusiasts and music collectors.
https://www.strawberrymusicplayer.org/ || strawberry
- Rhythmbox — GTK clone of iTunes, used by default in GNOME.
https://wiki.gnome.org/Apps/Rhythmbox || rhythmbox
- Banshee — iTunes clone, built with GTK and Mono, feature-rich.
http://banshee.fm/ || bansheeAUR
- gtkpod — GUI for Apple’s iPod using GTK. It allows you to import your existing iTunes database, add songs, podcasts, videos and cover art, and to edit ID3 tags.
https://sourceforge.net/projects/gtkpod/ || gtkpodAUR
- Amarok — Mature Qt-based player known for its plethora of features.
https://amarok.kde.org/ || amarokAUR
- Yamipod — Lightweight application for managing ONLY music on your iPod (not on your computer)
http://www.yamipod.com ||
These tools use their own implementation to communicate with the iPod:
Источник
Как подключить iPhone к Linux
iPhone по определению ограничен в синхронизации с iTunes. Apple по какой-то причине не выпустила клиент iTunes для дистрибутивов Linux. Это может быть большой головной болью для пользователей iPhone, которые хотят использовать рабочий стол Linux, потому что невозможно синхронизировать iPhone с такими дистрибутивами, как Ubuntu. Итак, если вам интересно, как вы можете использовать iPhone с Linux, вот полное руководство, которое может вам помочь.
Проблема синхронизации iPhone с Linux
Основная проблема с использованием iPhone с системой Linux заключается в том, что вы просто не можете синхронизировать его. iTunes — единственное программное обеспечение, с которым синхронизируется iPhone без джейлбрейка, и оно пока недоступно для любых платформ Linux. Существует ряд библиотек, таких как «libimobiledevice», которые пытались позволить пользователям синхронизировать iPhone с Linux, не только из-за проблем с запуском, но и для iOS 10. Это не работает, поэтому если у вас есть iPhone, и вы используете систему Linux в качестве ежедневного драйвера, вам отчасти не повезло.
Почему нельзя запустить iTunes с Wine
Wine — это приложение уровня совместимости, которое позволяет пользователю запускать приложения Windows в системе Linux. Поэтому моей первой попыткой использовать iPhone с Linux было запустить iTunes с Wine. Я использовал PlayOnLinux в качестве внешнего интерфейса для программного обеспечения. Но затем я обнаружил, что Wine не будет разрешать передачу через USB, поэтому iPhone не сможет синхронизироваться с ним. Вы можете по-прежнему использовать iTunes для всего остального, включая управление своей музыкальной библиотекой iCloud. Но если она не синхронизируется с iPhone, то на самом деле это бесполезно. Что приводит нас к своего рода обходному пути.
OwnCloud и XAMPP для передачи файлов между Linux и iPhone
Первая проблема, которую мы будем решать, это передача файлов и документов между iPhone и Linux. Для этого вы можете использовать OwnCloud вместе с XAMPP.
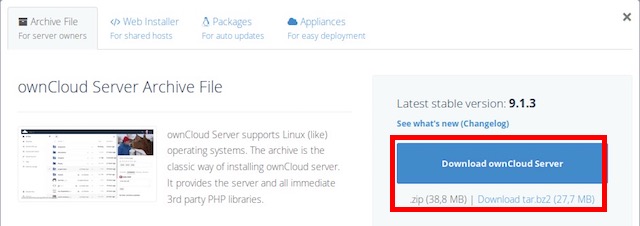
- OwnCloud — это автономный облачный сервер, к которому вы можете получить доступ с iPhone. Он поставляется с бесплатным планом и является практически лучшим способом передачи документов между вашим iPhone и рабочим столом Linux. Тем не менее, OwnCloud требует, чтобы сервер работал. Здесь и вступает XAMPP.
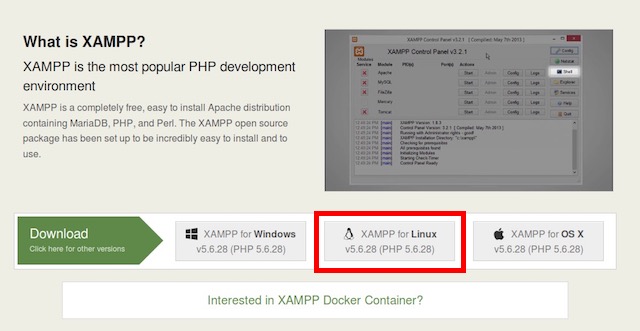
- XAMPP — это простой способ запустить сервер LAMP в вашей системе Linux, Mac или Windows. Но вам нужно установить версию XAMPP, работающую по крайней мере на PHP 5.4, потому что OwnCloud не будет работать на более ранней версии.
Теперь, когда мы все это выяснили, давайте начнем с установки OwnCloud и XAMPP в нашей системе. Для этого я использую устройство под управлением Ubuntu 16.10 Yakkety Yak.
Установка XAMPP на Ubuntu 16.10
Сначала мы установим XAMPP и создадим папку, в которой можно хранить файлы OwnCloud. Для этого просто следуйте данным инструкциям:
1. Загрузите установщик XAMPP с официального сайта. Это будет в форме файла .run.
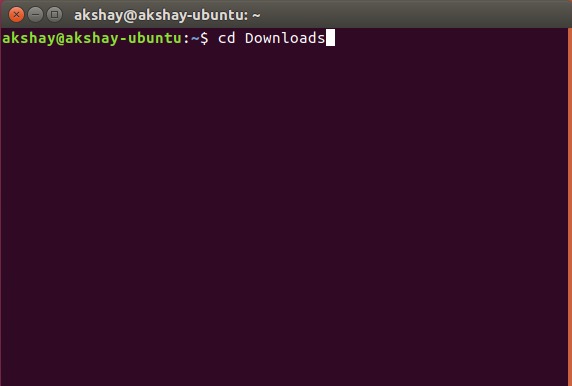
2. Как только вы загрузите его, запустите терминал и перейдите в каталог Downloads с помощью команды «cd Downloads». Если вы загрузили установщик в другой каталог, просто используйте его имя вместо «Загрузки». Также убедитесь, что вы используете правильную прописную букву, иначе команда не будет выполнена.
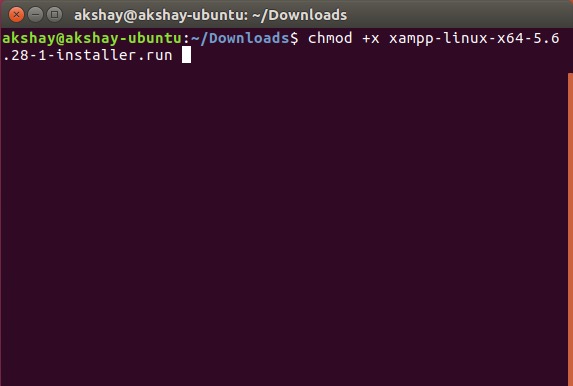
3. Дайте установщику разрешение на выполнение. В Терминале выполните команду «chmod + x xampp-linux-x64-5.6.28-1-installer.run». Название программы установки может отличаться. Просто используйте точное имя установщика. Вы можете набрать «chmod + x xampp» и нажать клавишу «Tab» для автозаполнения имени.
4. Теперь мы запустим установщик с правами root с помощью команды «sudo ./xampp-linux-x64-5.6.28-1-installer.run» Вам будет предложено ввести пароль. Введите его (оно не будет отображаться даже в виде звездочек) и нажмите Enter.
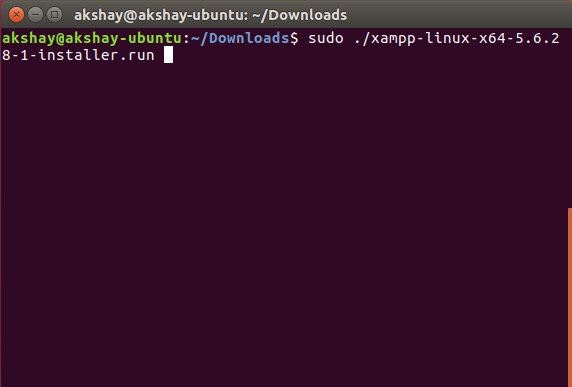
5. Теперь запустится установщик, и вам просто нужно следовать его инструкциям, чтобы установить XAMPP в вашей системе. Он установлен в каталоге «/ opt /» .
Создание папки для размещения файлов OwnCloud для XAMPP
Теперь, когда XAMPP установлен, нам нужна папка, в которую можно поместить файлы OwnCloud, чтобы XAMPP мог ее запустить. Есть папка под названием htdocs, где вы можете разместить сайты, которые хотите, чтобы XAMPP запускал. Она находится в «/ opt / lampp / htdocs», но мы не будем помещать файлы OwnCloud в каталог «opt». Просто следуйте инструкциям ниже:
1. В терминале перейдите в домашнюю папку с помощью «cd

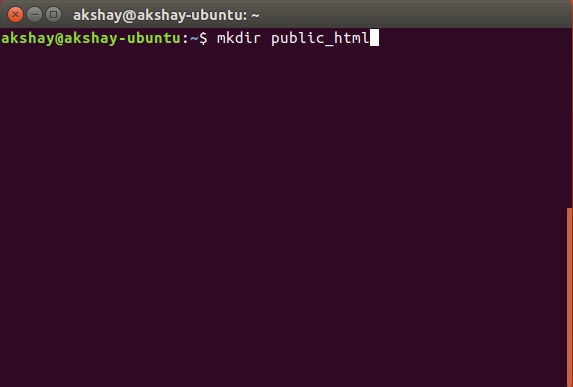
2. Теперь создайте здесь папку «public_html » с помощью команды « mkdir public_html».
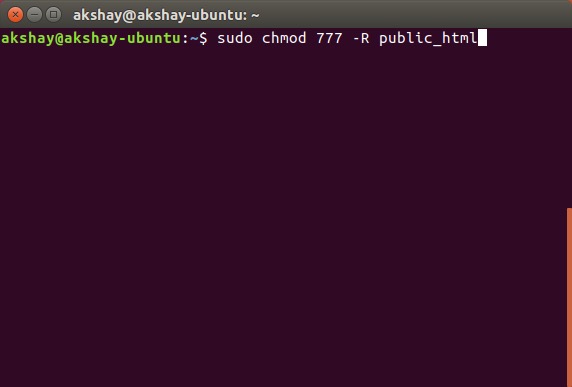
3. Далее мы предоставим всем пользователям доступ на чтение/запись для папки «public_html» с помощью команды «sudo chmod 777 -R public_html»
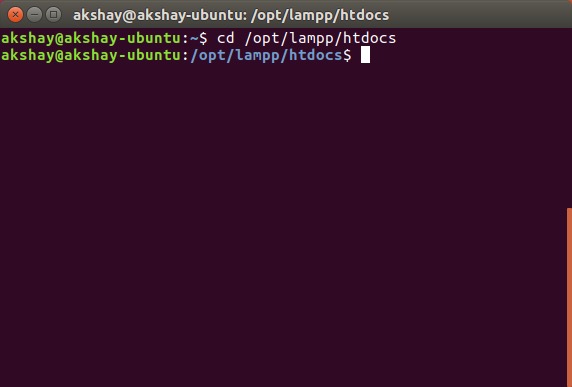
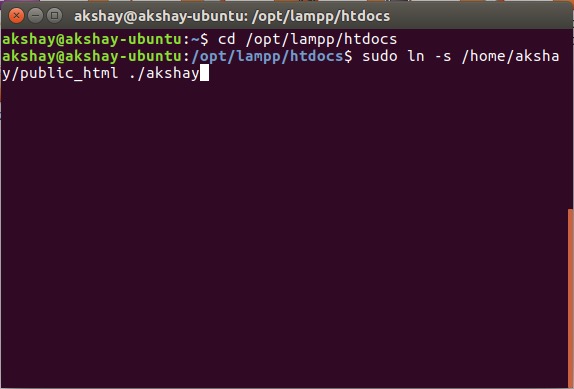
4. Теперь используйте команду «cd / opt / lampp / htdocs», чтобы перейти в папку htdocs.
5. Теперь просто запустите команду «sudo ln -s / home / username / public_html ./username». Замените «имя пользователя» на имя пользователя в Linux. В моем случае имя пользователя «akshay», поэтому я использую команду «sudo ln -s / home / akshay / public_html ./akshay».
Ваша папка public_html теперь готова для размещения файлов, чтобы запустить XAMPP. Давайте теперь установим OwnCloud.
Установка OwnCloud в Ubuntu 16.10
1. Загрузите ZIP-файл для OwnCloud с официального сайта.
2. Распакуйте его в папку «public_html», которую вы создали при настройке XAMPP.
Запуск OwnCloud на XAMPP в Ubuntu 16.10
Теперь вы можете запустить OwnCloud в вашей системе Ubuntu 16.10 с XAMPP. Просто следуйте этим инструкциям:
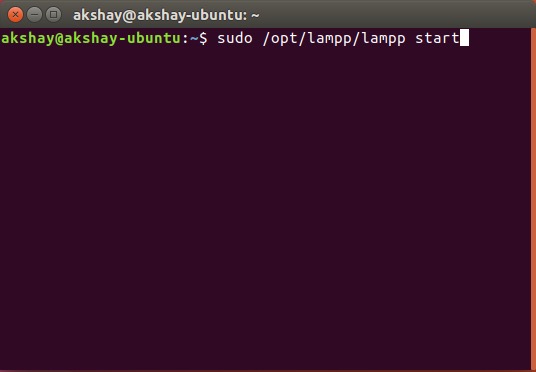
1. В Терминале выполните команду «sudo / opt / lampp / lampp start». Это запустит сервер XAMPP в вашей системе.
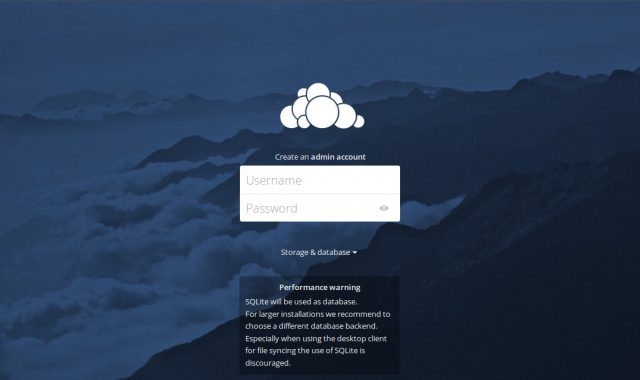
2. Теперь в вашем браузере перейдите по ссылке «http:// localhost / username / owncloud». Замените «имя пользователя» на ваше имя. В моем случае адрес «http://localhost/akshay/owncloud».
3. Перед вами появится экран, на котором вам нужно будет создать имя пользователя и пароль администратора.
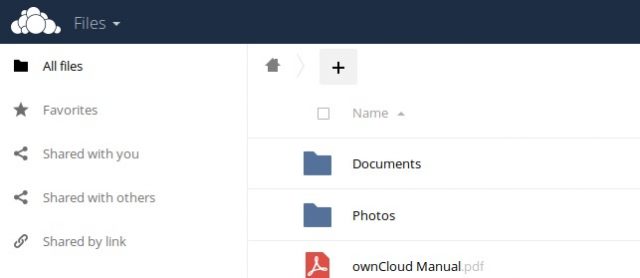
4. Войдя, вы попадете в основной интерфейс OwnCloud. Здесь вы можете загружать и удалять все свои файлы.
Подключение к OwnCloud с iPhone
Итак, вы загрузили все файлы, которые хотите иметь на своем iPhone, на сервер OwnCloud. Пока существует проблема фактического подключения вашего iPhone к OwnCloud, передачи файлов между устройствами. Для этого вам нужно разрешить доступ с использованием IP-адреса вашего компьютера.
Редактирование файла конфигурации OwnCloud
Редактировать конфигурацию OwnCloud легко, просто следуйте инструкциям ниже:
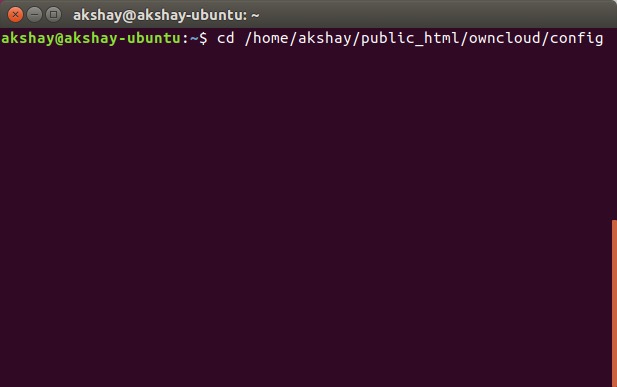
1. В терминале перейдите в папку конфигурации OwnCloud, используя «cd / home / username / public_html / owncloud / config».
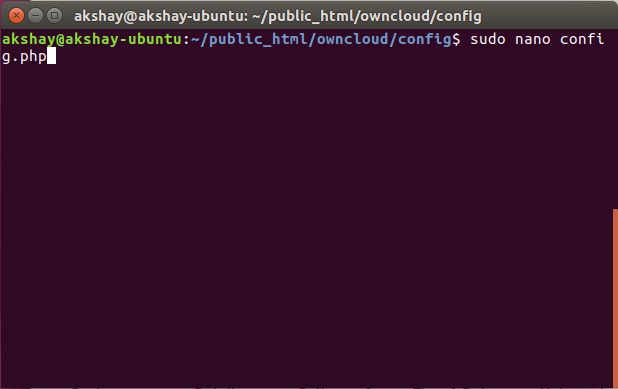
2. Здесь выполните команду «sudo nano config.php». Это откроет файл конфигурации внутри терминала, готовый к редактированию.
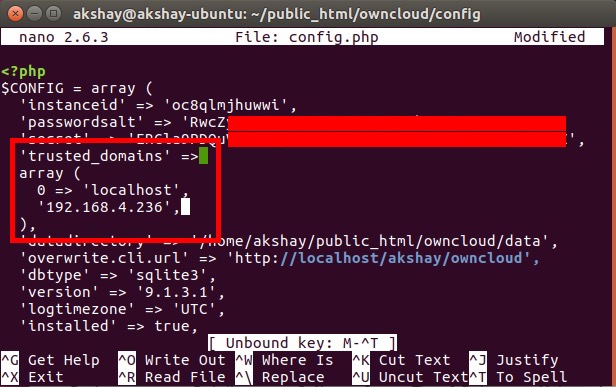
3. Просто найдите строку «trusted_domains». Вы увидите, что там уже добавлен «localhost». Создайте новую строку после «localhost» и введите IP-адрес вашего компьютера в одинарных кавычках. Отредактированный раздел «trusted_domains» должен выглядеть примерно так:
[php] ‘trusted_domains’ = & amp; amp; gt;
массив (
‘localhost’,
‘192.168.2.236’,
), [/ php]
Подключение iPhone к OwnCloud
Вы можете легко подключить ваш iPhone к серверу OwnCloud двумя способами. Мы обсудим их оба, и вы можете использовать тот, который подходит вам лучше.
Подключение с iPhone к OwnCloud через Safari
Чтобы подключить iPhone к серверу OwnCloud, выполните следующие действия:
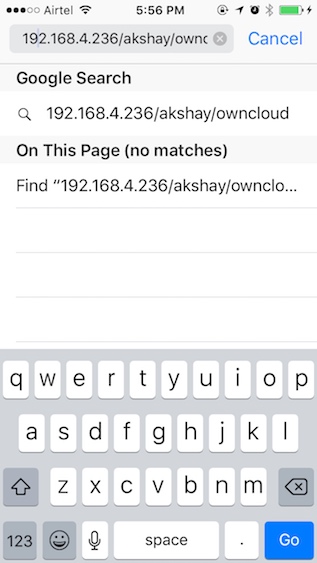
1. Запустите Safari на своем iPhone и перейдите по адресу «http : // ipaddress / username / owncloud /». Замените «ipaddress» на IP-адрес вашего компьютера, а «username» на ваше имя пользователя.
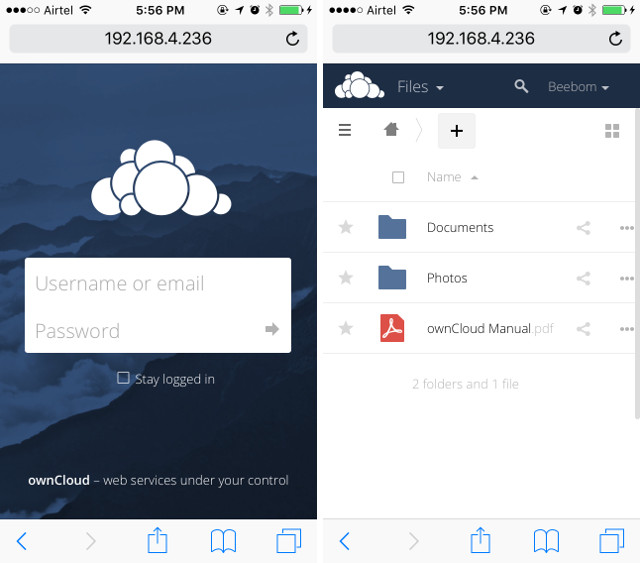
2. Перед вами появится экран входа в систему. Используйте учетные данные, которые вы создали при настройке OwnCloud для входа в систему. Как только вы это сделаете, вам откроются все файлы и папки, имеющиеся на сервере OwnCloud. Вы можете просматривать файлы и загружать любые из них.
Подключение с iPhone к OwnCloud с помощью клиента WebDAV
OwnCloud поддерживает WebDAV для передачи файлов, и если у вас есть приложение (например, Documents 5 от Readdle), которое может подключаться к серверам WebDAV, вы можете легко получить к нему доступ к серверу OwnCloud. Существует множество файловых менеджеров iPhone, которые поддерживают WebDAV, и вы можете использовать любой из них для подключения к OwnCloud. Я использую Documents 5.
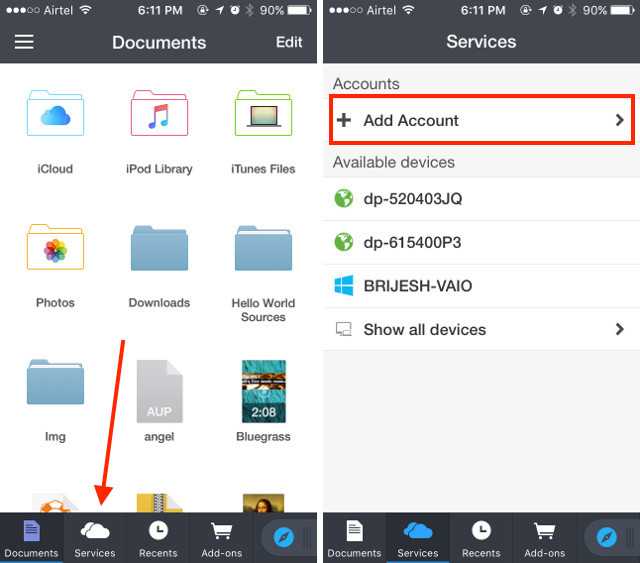
1. Запустите Documents 5 на вашем iPhone и нажмите на иконку с надписью «Услуги». Кликните на опцию «Добавить аккаунт».
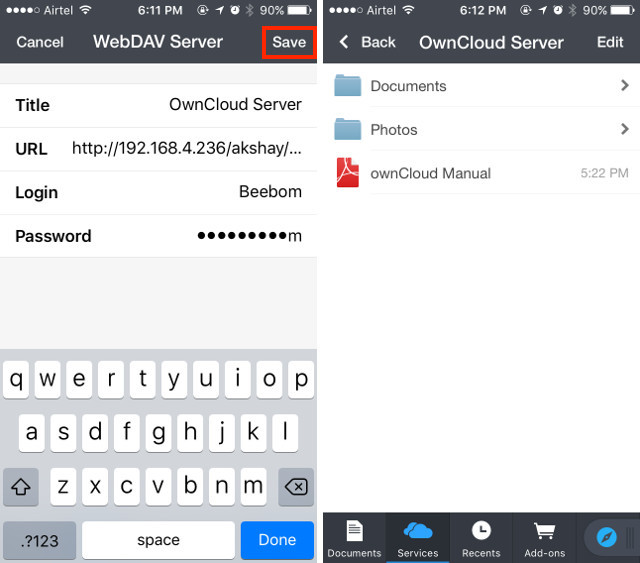
2. Выберите «WebDAV Server» из списка и введите имя для сервера вместе с URL-адресом «http : // ipaddress / username / owncloud / remote» . php / webdav /». Введите ваше имя пользователя и пароль OwnCloud.

3. Закончив, просто нажмите «Сохранить», и документы будут подключены к вашему серверу OwnCloud. После этого вы сможете просматривать (и загружать) все файлы, доступные на вашем сервере OwnCloud.
Если вы используете DHCP, скорее всего, IP-адрес вашего компьютера будет постоянно меняться, и вам придется каждый раз вручную редактировать файл конфигурации. Лучше, если вы установите статический IP-адрес, чтобы регулярно не редактировать файл конфигурации.
Google Play Music для передачи музыки между Linux и iPhone
Поскольку iTunes на Linux не работает, нам придется обратиться к другим вариантам, одним из которых является Google Play Music. Музыкальный сервис позволит вам загружать музыку в облако, и вы сможете получить доступ к нему на своем iPhone с помощью официального приложения Google Play Music.
Чтобы получить доступ к музыке на iPhone, нужно загрузить музыкальную библиотеку на веб-сайт Google Play Music. Для этого нужно установить Google Music Manager.
1. Загрузите клиент Google Music Manager с официального сайта. Он загружается в виде пакета .deb в Ubuntu и открывается непосредственно в Центре программного обеспечения, и вы можете установить его.
2. В панели запуска приложений найдите Google Music Manager и запустите его.
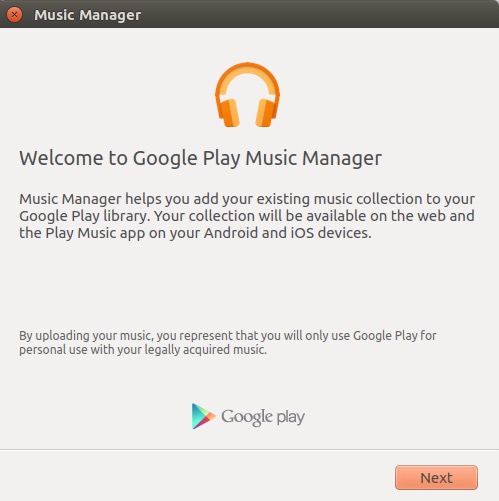
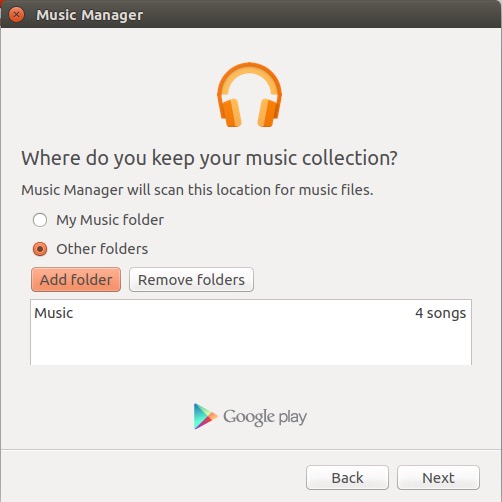
3. Следуйте инструкциям, чтобы настроить и запустить Music Manager. После этого ваша музыкальная библиотека будет автоматически загружена в вашу музыкальную библиотеку Google Play.
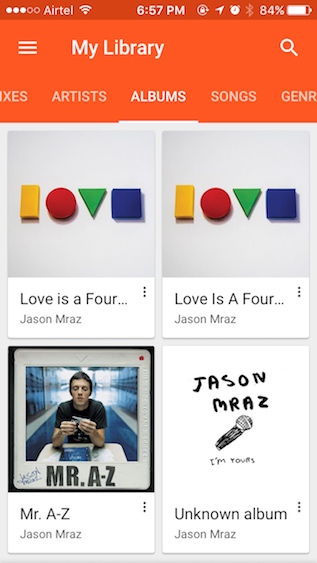
4. После загрузки ваших песен (это может занять некоторое время, в зависимости от размера вашей библиотеки), вы можете запустить приложение Google Play Music на своем iPhone и войти в систему с помощью своей учетной записи Google.
5. В дальнейшем вам просто нужно загружать новые музыкальные файлы в папку «Музыка» в Linux, и Google Music Manager автоматически переместит их в библиотеку «Google Play Музыка», чтобы вы могли получить к ней доступ на своем iPhone и любом другом устройстве.
Вы можете управлять всем на своем iPhone или даже iPad с Linux, используя сервисы, которые я упомянул. Кроме того, все эти сервисы имеют бесплатный уровень, который вы можете использовать. Google Play Music предлагает бесплатный план, который позволит вам загружать до 50000 песен в облаке, а OwnCloud допускает размещение собственного сервера.
Источник


