- Анимации в Android по полочкам (Часть 1. Базовые анимации)
- Часть 1. Базовые анимации
- 1. Кадр за кадром
- 2. Анимация свойств объекта (aka Property Animator)
- 3. Анимация View (aka View animation)
- 4. Анимация векторных ресурсов (aka AnimatedVectorDrawable)
- Smooth loading animations in Android
- The UX problem
- Two false starts
- A promising solution
- Default to Open
- Loading animation in android
- Android Loading View – Add Spinner And Dot Loading Animation
- Adding Android loading spinner view
- Adding Android loading view with book like animation
- Adding Android loading view with dots like animation
Анимации в Android по полочкам (Часть 1. Базовые анимации)
Сегодня я хочу немного рассказать про анимацию в Android. Думаю для всех достаточно очевидный факт, что анимации могут украсить наше приложение. Но я считаю, что они могут намного больше. Первое это — хорошие анимации даже при скромной графике могут вывести наше приложение на абсолютно новый уровень. Второе — это дополнительный инструмент для общения с пользователем, позволяющий фокусировать внимание, подсказывать механики приложения, и многое другое… но это отдельная большая тема.
Сегодня мы поговорим об инструментах для создания анимации. К сожалению, так получилось, что в Android достаточно много способов что либо анимировать, и по началу в них очень легко запутаться. Я постараюсь привести максимально общую классификацию и оставлю ссылки исключительно на документацию, т.к. туториалов можно найти предостаточно. Надеюсь эта статья поможет уложить в голове всё по полочками и, при необходимости создать анимацию, выбрать наиболее подходящий способ.
Часть 1. Базовые анимации
Часть 2. Комплексные анимации
Часть 3. «Низкоуровневые» анимации
Часть 1. Базовые анимации
1. Кадр за кадром

Предполагаю, что первая анимация в мире создавалась именно так, и в Android до сих пор доступна эта возможность.
Всё что нужно сделать это создать xml со ссылками на каждый кадр:
И запустить анимацию (Здесь и далее все примеры будут приведены на Kotlin):
Сложные по графике анимации, небольших размеров и подготовленные во внешнем редакторе.
Возможность достичь любой сложности эффектов
Большое потребление ресурсов и, как следствие, довольно затратный импорт в приложение с возможностью получить OutOfMemory. Если по каким-то причинам вам нужно показывать большое количество кадров, то придётся писать свою реализацию с постепенной подгрузкой изображений в память. Но если так пришлось делать, возможно проще прибегнуть к видео?
2. Анимация свойств объекта (aka Property Animator)
Если нам нужно всего-лишь передвинуть что-нибудь на несколько пикселей в сторону или изменить прозрачность, чтобы не плодить миллион очень похожих друг на друга кадров на помощь приходит Animator. Фактически с помощью него можно анимировать любое свойство любых объектов.
Базовый абстрактный класс называется Animator, у него есть несколько наследников, нам важны:
ValueAnimator — позволяет анимировать любое свойство
ObjectAnimator — наследуется от ValueAnimator и имеет упрощённый интерфейс для анимации свойств View.
ViewPropertyAnimator — Предоставляет ещё один удобный интерфейс для анимации View. Не унаследован от Animator и используется в методе View::animate()
Анимацию выше можно описать как в коде:
так и в XML ( animator/open_animator.xml ):
Так-же есть возможность описать нашу анимацию переходов между стейтами View, что соответсвенно, с лёгкостью позволит создать анимированные переходы между стейтами у любых View. Описанная в XML анимация будет автоматически запущена при смене состояния View.
animator/state_animator.xml
Анимация View объектов и любых их параметров
Анимация любых других параметров
В некоторой степени требовательны к ресурсам
3. Анимация View (aka View animation)
До появления Animator в Android были только Animations. Основной недостаток которых был в том что они анимировали только представление вида и никак на самом деле не изменяли его свойства. Поэтому если хочется анимировать перемещение какого-либо элемента, то дополнительно по окончанию анимации нужно изменить ещё его свойства. Такой подход так или иначе не очень удобен, если вам нужна чуть более сложная анимация или нужно отлавливать нажатия в момент анимации.
Анимацию можно запустить как в коде:
так и в XML (обратите внимание, что синтаксис отличается от xml для Animator):
anim/open_animation.xml
Там, где API не позволяет использовать Animator.
Устаревший API, меняет только представление вида.
4. Анимация векторных ресурсов (aka AnimatedVectorDrawable)
На мой взгляд самая интересная часть в Android анимациях. Можно относительно малыми силами добиваться сложных и интересных эффектов. Трансформации иконок в Android сделаны именно так.
VectorDrawable состоит из Path и Group элементов. Создание анимации сводится к тому, чтобы прописать движение к этим элементам. Андроид на картинке выше, в коде будет выглядеть так:
Чтобы не писать XML вручную можно воспользоваться онлайн инструментом.
Начиная с API 25 векторные анимации отрисовываются в RenderThread, поэтому, даже если мы загрузим чем-то наш UI Thread (но мы же никогда так не делаем, да?), анимации всё равно будут проигрываться плавно.
Иконки
Анимационные эффекты
Нет возможности вручную управлять точкой анимации во времени (т.е. фактически отсутствует какой-либо метод, вроде setCurrentTime)
Источник
Smooth loading animations in Android

RxJava can seem removed from the world of user experience. It’s easy to think of it as a tool for back-end only. Today we’ll look at a real front-end problem, how to apply marble diagrams to solve it, and how to use Kotlin to clean up the solution. We’ll also look at the difference between throttling and debouncing, and some lesser-know overloads of debounce and delay .
The UX problem
We’re often trying to avoid flicker and flashes on Android apps. One common scenario where this can occur is loading from an API call. We want to show a loading animation if the API call takes too long. But if the API call is almost instantaneous, we don’t want to flicker between a quick loading animation and the content of the page.
There are some existing tools for getting around this, for example the ContentLoadingProgressBar in the Android SDK. Of course, top-tier apps have placeholder views instead of progress bars:
These types of views are best composed in a RecyclerView. The RecyclerView will manage the scheduling of UI updates to avoid the jarring effect when a View is suddenly inserted into a ViewGroup. But this is often not enough to prevent a flicker, flash, or jarring animation:
Since we’re just putting a data into a RecyclerView.Adapter , how do we avoid the flicker of a loading animation for a quick load?
The current feature is a suburb picker to specify pickup location for users selling items on Trade Me.

In the implementation, the Fragments are humble views that simply subscribe to streams of content when they come into focus. The Activity publishes the content for the display, with the Fragment simply subscribing to updates in content. Note the publisher here could also be a ViewModel or a controller Fragment.
Since the published content is received as a reactive streams, we should easily be able to find a combinator on Observable to remove the flicker.
Two false starts

Observable#throttleLast seems like a good candidate. Looking at the above marble diagram, imagine that:
- the red marble represents our “still loading” state
- the orange marble represents our loaded state
- the other colored marbles represent UI updates from user interactions
Intervals of the delay parameter are represented by the clocks on the diagram.
The marbles at the top represent a stream of events as input into the box, with time flowing from left to right. The box is a function on Observable and the marbles at the bottom represent the resultant stream of events after the function has been applied.

Since the red marble (loading) was emitted before the tick of the clock, it is ignored and only the orange marble (loaded) is emitted.This is similar to the result we want: if the loading state is too quick we want it to be dropped and invisible to the user.
However, throttleLast is not quite right for the subsequent events. Imagine that the yellow and green marbles are events triggered by a user interaction e.g., clicking one of the items in the RecyclerView .

The yellow marble is ignored, which may be desirable since it occurred quite quickly before the green one. But the emission of the green marble is delayed until another tick of the clock. This is not what we want — we would prefer the green marble to be emitted immediately so that there is no delay between the user interaction (the click) and the result on screen (the change in the UI).
Since we’ve ruled out Observable#throttleLast , why not look at Observable#debounce ? This certainly sounds more like what we want to achieve. The first overload has a signature that looks like this:
The marble diagram looks like this:

Just from the diagram, we can see that the marbles are only being emitted after the tick of the clock. This is the same mismatch of use case we found for throttleLast .
What we really want is something that can debounce only in the case of loading, and leaves the other marbles to fall immediately.
A promising solution
Turns out there is an overload of debounce that achieves just this:

The combinator in the box shows three arrows of lengths 1, 2, and 3 for f(1) , f(2) , and f(3) . These represent three different debounce intervals. This shows we can achieve debouncing determined by a function, closer to what we want.
A concrete example is found in this Stack Overflow answer by Lawrence Kesteloot:
This clearly explains the parameter debounceSelector : it’s a function that takes as input T and outputs an Observable representing a debounce interval.
Now we can do this:
We can use the Extract Method refactor and type aliases to make this a little bit cleaner:
If it’s something we might use in more than a few places in the app, we could easily write an extension method to take the abstraction further:
Then we can use it like this:
We can write unit tests against the extension function using the TestScheduler since it allows fast-forwarding of time to see which elements have been emitted. We can also use an overload of Observable#delay to prepare the test data. It’s very similar to the overload of Observable#debounce we were using earlier:
The complete set of unit tests is below. Note how we can model our use cases exactly:
The final feature without flicker:
David Rawson is an Android Developer at Trade Me. You can find him on Stack Overflow here.
Default to Open
Life lives here. Stories about how we’re building Trade Me.
Источник
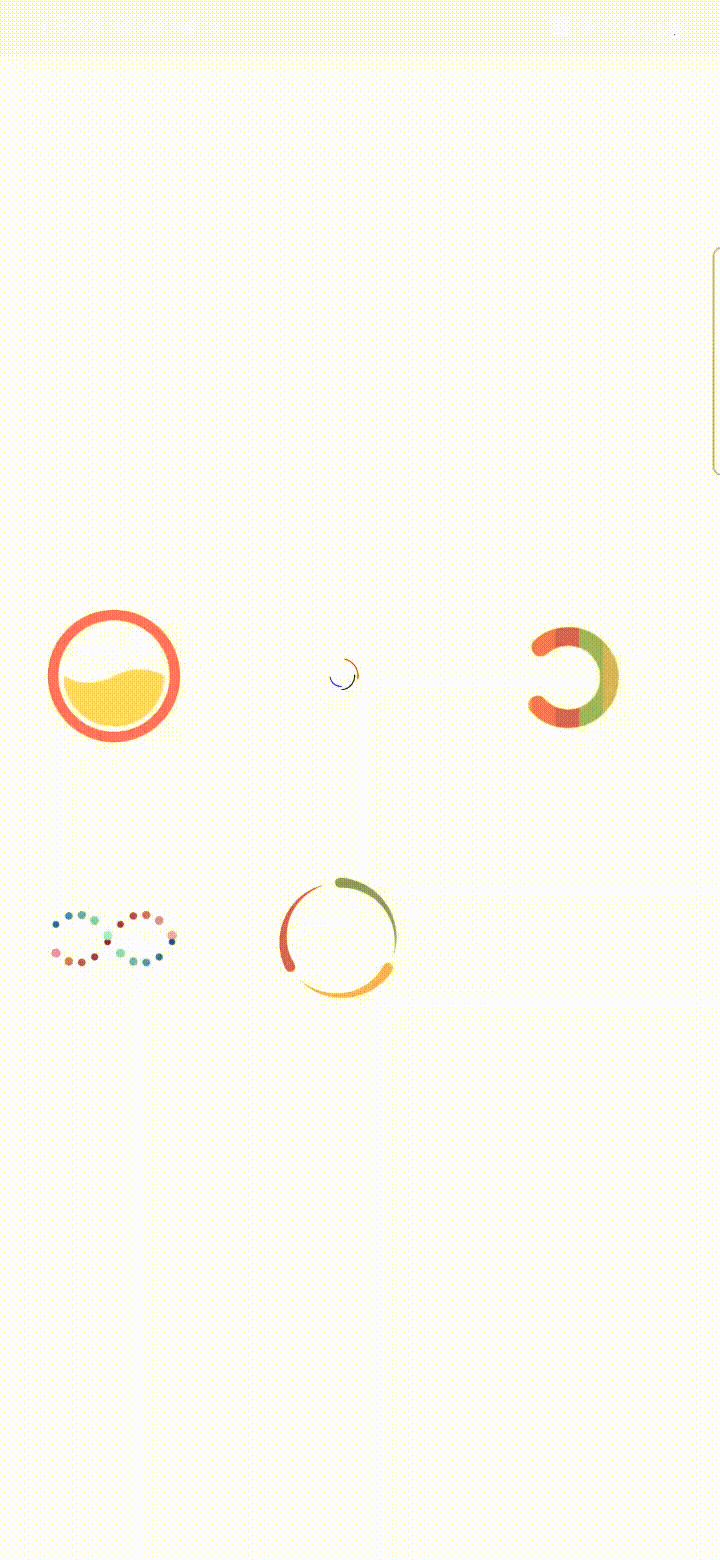
Loading animation in android
Android Loading Animation
Create Cool Android Loading Animation in a simple way.
![]()
![]()
![]()
![]()


This Library will help developer to implement Cool Android Loading Animation in easiest way.
| First Screen | Second Screen | Third Screen |
|---|---|---|
 |  |  |
Add it in your root build.gradle at the end of repositories:
Add the dependency
You may use the following properties in your XML to change your Loading Animation.
/*Loading Animation xml */
- app:barType -> To get animation gif file
- app:text -> To add text below animation
- app:textColor -> To set color of Text
- app:textSize -> To set text Size
- app:enlarge -> To increse size of animation(1 to 10)
- app:boldText -> To make textView Bold
- app:isVisible -> To set text visible(ByDefult invisible)
Источник
Android Loading View – Add Spinner And Dot Loading Animation
Hello and welcome to another tutorial from Codingdemos, today you will learn how you can use custom Android loading view instead of the usual Android ProgressDialog as an indicator to your user(s) that you are trying to load something.
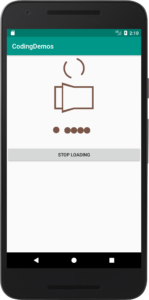
By the end of this tutorial, you will have an app that looks like this. (Large preview)
In this tutorial you will be using a 3rd party library called Loading to create those cool Android loading view animations.
In this tutorial we will be using the following:
- – Android studio version 3.0.1
– Android emulator Nexus 5X with API 26
– Minimum SDK API 16
1- Open up Android Studio and open any project that you have in your computer.
Create new Android Studio project or open existing project. (Large preview)
2- Open up build.gradle (module:app) and add the library in the dependencies.
3- Now sync your project by clicking on Sync Now.

4- Open up colors.xml file to change the colors of the main app.
5- Build and run the app to see the new colors.
Changed the colors of the app. (Large preview)
Adding Android loading spinner view
6- Open up activity_main.xml file and add the following code.
Here you have added RotateLoading which looks like Android loading spinner, you have set the width and height to 80dp and you set it’s position to be in the center.
You have added Android Button with a label Start loading, this button will be used to start and stop the loading animation.
7- Open up MainActivity.java file, inside this file you will initialize and reference rotateloading and btnLoading like this.
8- Now you want to start/stop loading spinner every time you tap on loading button, so you need to call SetOnClickListener like this.
Here you would check the status of Android loading spinner whether it’s started or not and act upon it.
9- Now build and run the app to see the result.
Showing Android loading spinner. (Large preview)
10- There is an issue with the loading spinner which is we can’t actually see it 😀 Let’s fix that by giving it a color like this. Open up activity_main.xml file to modify RotateLoading by adding the following code.
Here you’ve set the color of Android loading spinner to the app accent color.
11- Now build and run the app to see the output.
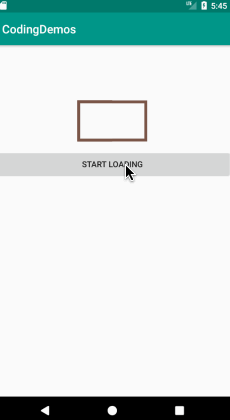
Changed the color of Android loading spinner. (Large preview)
12- If you’ve noticed there is another issue with the Button, when tapping on it to start/stop loading spinner the Button label doesn’t change which is not user friendly.
13- Open up MainActivity.java file and modify Button OnClickListener to include the following code.
14- Now build and run the app.
Button showing correct label after taps. (Large preview)
Adding Android loading view with book like animation
15- Let’s modify activity_main.xml file to include book loading animation.
Here you’ve set the width and height to 150dp & 100dp and put it in the center of the screen.
16- Open up MainActivity.java file, here you need to initialize and reference book loading animation.
17- Now you need to modify Button OnClickListener to include the code for starting/stopping loading book animation like this.
18- Build and run the app to see the result.

Showing Android book loading indicator. (Large preview)
19- You can change the color of the book loading animation to any colors that you like by adding the colors name & codes inside colors.xml file like this.
20- Now build and run the app to see the changes.
Showing Android book loading animation. (Large preview)
Adding Android loading view with dots like animation
21- Open up activity_main.xml file and add the following code.
Here you’ve set it’s height to 100dp and you set the position to be in the center.
22- Now open up MainActivity.java to initialize and reference the view as well as to start the loading animation.
23- Modify the code for Button’s OnClickListener to include the start/stop dots loading animation like this.
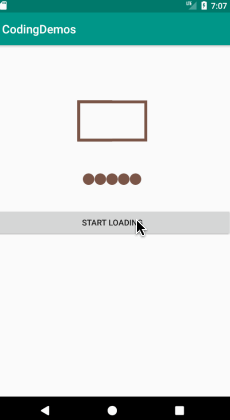
24- Build and run the app to see the result.
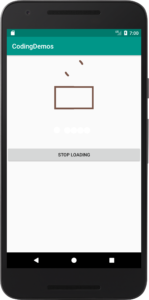
Showing Android dots loading indicator. (Large preview)
25- The dots are visible on the screen but it’s difficult to see them because of the color, you can change the color by opening MainActivity.java file and add the following code.
26- Now build and run the app to see it.
Changed the colors of dots loading indicator. (Large preview)
27- Here is the full code for activity_main.xml file.
28- Here is the full code for MainActivity.java file.
29- I hope you find this tutorial helpful and if you have any question please post them in the comment below.
Источник


