- Making loading data lifecycle aware
- What’s so special about Loaders?
- I don’t believe you
- Not good enough — what if my data changes?
- Working with the rest of your app: the LoaderManager
- LoaderCallbacks
- Cool, but I don’t need a background thread
- Loaders: for data only
- Android Loading View – Add Spinner And Dot Loading Animation
- Adding Android loading spinner view
- Adding Android loading view with book like animation
- Adding Android loading view with dots like animation
Making loading data lifecycle aware

Note: if you’re looking for a modern, flexible solution to this problem that doesn’t rely on Loaders (the chosen solution here), check out the Lifecycle Aware Data Loading with Architecture Components blog post.
Building a dynamic Android app requires dynamic data. But I hope we’ve all moved beyond loading data on the UI thread (#perfmatters or something like that). That discussion can go on for seasons and seasons, but let’s focus in on one case: loading data specifically for display in your Activity or Fragment with Loaders.
Much of the talk on Loaders is around CursorLoader, but Loaders are much more versatile than only working with Cursors.
While Loaders exist as part of the framework on API 11 and higher, they’re also part of the Support v4 Library and bring the latest features (and bugfixes!) to every API 4 and higher devices.
What’s so special about Loaders?
By default, device configuration changes such as rotating your screen involve restarting your whole Activity (one of the many reasons it is so critical not to keep a reference to your Activity or any Views). The best part about Loaders is that Loaders survive configuration changes. That expensive data you just retrieved? Still there for immediate retrieval when the activity comes back up. Data is queued up for delivery so you aren’t going to lose data during device configurations either.
But even better: Loaders don’t stay around forever. They’ll be automatically cleaned up when the requesting Activity or Fragment is permanently destroyed. That means no lingering, unnecessary loads.
These two facts together mean that they perfectly match the lifecycle you actually care about: when you have data to show.
I don’t believe you
Perhaps an example will be enlightening. Let’s say you are converting a regular AsyncTask to the loader equivalent, aptly named AsyncTaskLoader:
Looks pretty similar to an AsyncTask, but we can now hold onto results in a member variable and immediately return them back after configuration changes by immediately calling deliverResult() in our onStartLoading() method. Note how we don’t call forceLoad() if we have cached data — this is how we save ourselves from constantly reloading the data!
You might have noticed the static keyword when declaring the JsonAsyncTaskLoader. It is incredibly important that your Loader does not contain any reference to any containing Activity or Fragment and that includes the implicit reference created by non-static inner classes. Obviously, if you’re not declaring your Loader as an inner class, you won’t need the static keyword.
Not good enough — what if my data changes?
What the simple example fails to get at is that you aren’t limited to just loading a single time — your Loader is also the perfect place to put in broadcast receivers, a ContentObserver (something CursorLoader does for you), a FileObserver, or a OnSharedPreferenceChangeListener. All of a sudden your Loader can react to changes elsewhere and reload its data. Let’s augment our previous Loader with a FileObserver:
So by hooking into the onStartLoading() callback to start our processing and the final onReset(), we can stay perfectly in sync with the underlying data. We could have used onStopLoading() as the ending callback, but onReset() ensures that we have continuous coverage (even mid-configuration change).
You’ll note the usage of takeContentChanged() in onStartLoading() — this is how your Loader knows that something has changed (i.e.,someone called onContentChanged()) while the Loader was stopped so even if there were cached results, a data load still needs to be done.
Note: we still deliver the old, cached data before loading the new — make sure that’s the right behavior for your app and change onStartLoading() as necessary. For example, you might check for takeContentChanged() and immediately throw away cached results, rather than redeliver them.
Working with the rest of your app: the LoaderManager
Of course, even the best Loader would be nothing if it wasn’t connected to something. That connection point for activities and fragments comes in the form of LoaderManager. You’ll call FragmentActivity’s getSupportLoaderManager() or a Fragment’s getLoaderManager() to get your instance.
In almost every case, there’s only one method you’ll need to call: )» target=»_blank» rel=»noopener ugc nofollow»> initLoader() . This is generally called in onCreate() or onActivityCreated() — basically as soon as you know you’ll need to load some data. You’ll pass in a unique id (only within that Activity/ Fragment though — not globally unique), pass an optional Bundle, and an instance of LoaderCallbacks.
Note: make sure to upgrade to version 24.0.0 or higher of the Android Support Library if you want to call initLoader() within a Fragment’s onCreate() — there were issues in previous versions of the Support Library (and all framework fragments this Lint request and this related Google+ post.
You might notice there’s a )» target=»_blank» rel=»noopener ugc nofollow»> restartLoader() method in LoaderManager which gives you the ability to force a reload. In most cases, this shouldn’t be necessary if the Loader is managing its own listeners, but it is useful in cases where you want to pass in a different Bundle — you’ll find your existing Loader is destroyed and a new call to onCreateLoader() is done.
We mentioned using onReset() instead of onStopLoading() for our FileObserver example above — here we can see where this interacts with the normal lifecycle. Just by calling initLoader(), we’ve hooked into the Activity/ Fragment lifecycle and onStopLoading() will be called when the corresponding onStop() is called. However, onReset() is only called when you specifically call destroyLoader() or automatically when the Activity/ Fragment is completely destroyed.
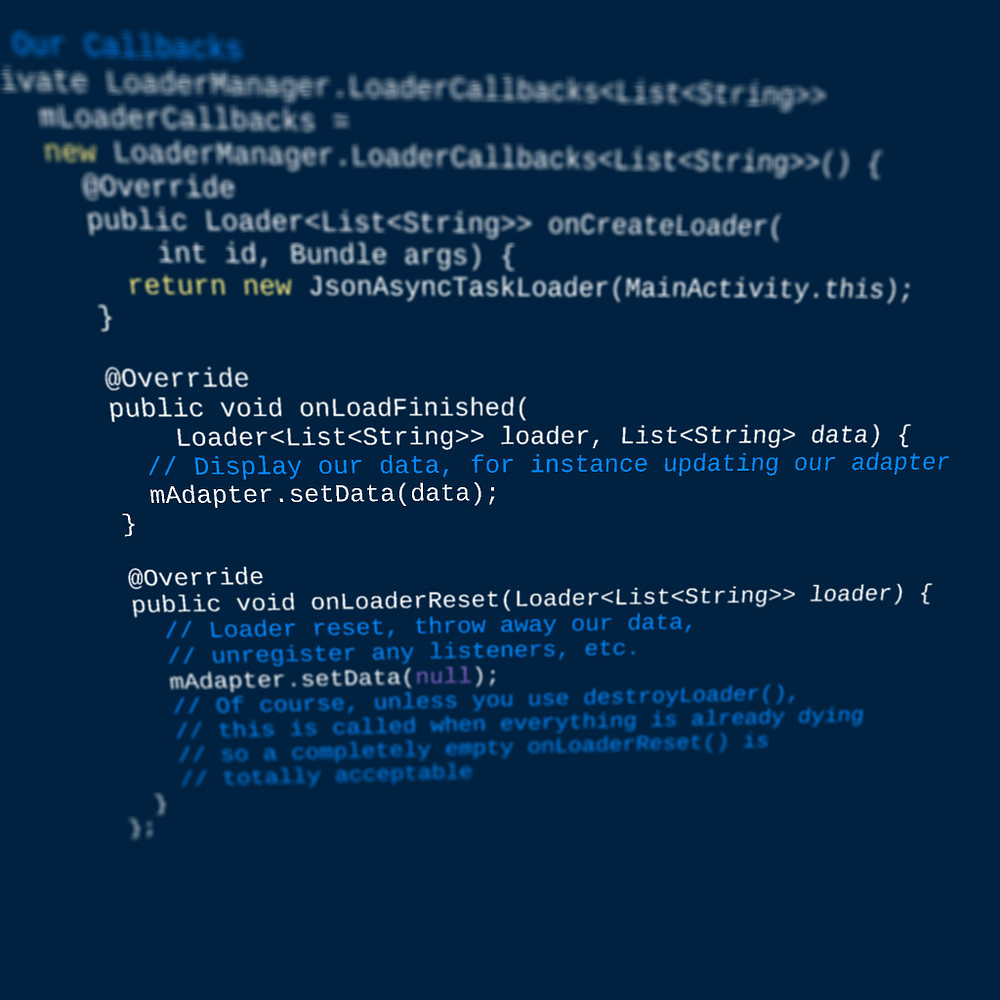
LoaderCallbacks
LoaderCallbacks is where everything actually happens. And by ‘everything’, we mean three callbacks:
So our previous example might look like:
Of course, there’s no hard requirement to use LoaderManager, although you’ll find life much easier if you do. Feel free to look at the FragmentActivity source and the LoaderManager source for a detailed look into everything it is giving you.
Cool, but I don’t need a background thread
AsyncTaskLoader tries to make it easy to get off the background thread, but if you’ve already done your own background threading or rely on event bus / subscription models, AsyncTaskLoader is overkill. Let’s take an example of loading location changes without throwing all that code into your Activity/ Fragment:
So here we can see the three main components:
- onStartLoading() kicks off the subscription process (in this case, by connecting to Google Play services)
- onStopLoading() is when we’re put into the background (either temporarily on rotation or when the Home button is pressed and the loader is put into the background) so we reduce battery/processor usage
- As we get results we call deliverResult()
- Finally, we disconnect and clean up in onReset()
Here the Loader framework knew nothing about Google Play services, but we can still encapsulate that logic in one place and rely on a single onLoadFinished() with an updated location. This type of encapsulation also helps with switching out location providers — the rest of your code does not care how or where the Location objects come from.
Note: in this case, failures are reported by sending a null Location. This signals the listening Activity/ Fragment to call getConnectionResult() and handle the failure. Remember that the onLoadFinished() includes a reference to the Loader so any status you have can be retrieved at that point.
Loaders: for data only
So a Loader has one goal in life: give you up-to-date information. It does that by surviving device configuration changes and containing its own data observers. This means that the rest of your Activity/ Fragment doesn’t need to know those details. (Nor should your Loader know anything about how the data is being used!)
If you’ve been using retained Fragments (those that call setRetainInstance(true)) to store data across configuration changes, strongly consider switching from a retained Fragment to a Loader. Retained fragments, while aware of the overall Activity lifecycle, should be viewed as completely independent entities, while Loaders are tied directly into an Activity or Fragment lifecycle (even child fragments!) and therefore much more appropriate for retrieving exactly the data needed for display. Take for example a case where you are dynamically adding or removing a fragment — Loaders allow you to tie the loading process to that lifecycle and still avoid configuration changes destroying the loaded data.
That single focus also means that you can test the loading separately from the UI. The examples here just passed in a Context, but you can certainly pass in any required classes (or mocks thereof!) to ease testing. Being entirely event driven, it is also possible to determine exactly what state the Loader is in at any time as well as expose additional state solely for testing.
Note: while there’s a LoaderTestCase designed for framework classes, you’ll need to make a Support Library equivalent from the LoaderTestCase source code if you want to do something similar with the Support v4 Loader (something Nicholas Pike already has done!). This also gives you a good idea of how to interact with a Loader without a LoaderManager.
Now, it is important to mention that Loaders are reactive, recipients of data. They’re not responsible for changing the underlying data. But for what they do, they do fill a needed gap of lifecycle aware components that survive configuration changes and get your data to your UI.
Join the discussion on the Google+ post and follow the Android Development Patterns Collection for more!
Источник
Android Loading View – Add Spinner And Dot Loading Animation
Hello and welcome to another tutorial from Codingdemos, today you will learn how you can use custom Android loading view instead of the usual Android ProgressDialog as an indicator to your user(s) that you are trying to load something.
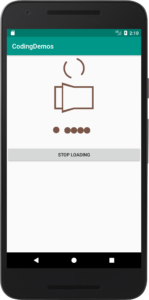
By the end of this tutorial, you will have an app that looks like this. (Large preview)
In this tutorial you will be using a 3rd party library called Loading to create those cool Android loading view animations.
In this tutorial we will be using the following:
- – Android studio version 3.0.1
– Android emulator Nexus 5X with API 26
– Minimum SDK API 16
1- Open up Android Studio and open any project that you have in your computer.
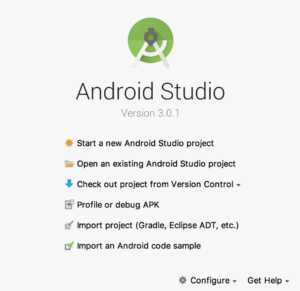
Create new Android Studio project or open existing project. (Large preview)
2- Open up build.gradle (module:app) and add the library in the dependencies.
3- Now sync your project by clicking on Sync Now.

4- Open up colors.xml file to change the colors of the main app.
5- Build and run the app to see the new colors.
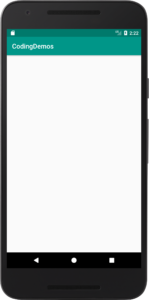
Changed the colors of the app. (Large preview)
Adding Android loading spinner view
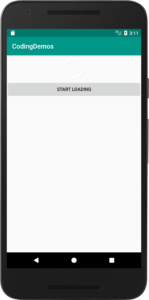
6- Open up activity_main.xml file and add the following code.
Here you have added RotateLoading which looks like Android loading spinner, you have set the width and height to 80dp and you set it’s position to be in the center.
You have added Android Button with a label Start loading, this button will be used to start and stop the loading animation.
7- Open up MainActivity.java file, inside this file you will initialize and reference rotateloading and btnLoading like this.
8- Now you want to start/stop loading spinner every time you tap on loading button, so you need to call SetOnClickListener like this.
Here you would check the status of Android loading spinner whether it’s started or not and act upon it.
9- Now build and run the app to see the result.
Showing Android loading spinner. (Large preview)
10- There is an issue with the loading spinner which is we can’t actually see it 😀 Let’s fix that by giving it a color like this. Open up activity_main.xml file to modify RotateLoading by adding the following code.
Here you’ve set the color of Android loading spinner to the app accent color.
11- Now build and run the app to see the output.
Changed the color of Android loading spinner. (Large preview)
12- If you’ve noticed there is another issue with the Button, when tapping on it to start/stop loading spinner the Button label doesn’t change which is not user friendly.
13- Open up MainActivity.java file and modify Button OnClickListener to include the following code.
14- Now build and run the app.
Button showing correct label after taps. (Large preview)
Adding Android loading view with book like animation
15- Let’s modify activity_main.xml file to include book loading animation.
Here you’ve set the width and height to 150dp & 100dp and put it in the center of the screen.
16- Open up MainActivity.java file, here you need to initialize and reference book loading animation.
17- Now you need to modify Button OnClickListener to include the code for starting/stopping loading book animation like this.
18- Build and run the app to see the result.
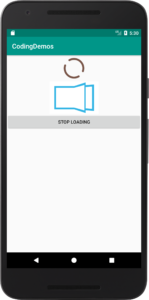
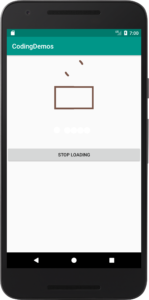
Showing Android book loading indicator. (Large preview)
19- You can change the color of the book loading animation to any colors that you like by adding the colors name & codes inside colors.xml file like this.
20- Now build and run the app to see the changes.
Showing Android book loading animation. (Large preview)
Adding Android loading view with dots like animation
21- Open up activity_main.xml file and add the following code.
Here you’ve set it’s height to 100dp and you set the position to be in the center.
22- Now open up MainActivity.java to initialize and reference the view as well as to start the loading animation.
23- Modify the code for Button’s OnClickListener to include the start/stop dots loading animation like this.
24- Build and run the app to see the result.
Showing Android dots loading indicator. (Large preview)
25- The dots are visible on the screen but it’s difficult to see them because of the color, you can change the color by opening MainActivity.java file and add the following code.
26- Now build and run the app to see it.
Changed the colors of dots loading indicator. (Large preview)
27- Here is the full code for activity_main.xml file.
28- Here is the full code for MainActivity.java file.
29- I hope you find this tutorial helpful and if you have any question please post them in the comment below.
Источник


