- Логирование в Android приложениях
- Пытаемся навести порядок
- 2 Ways to Log Out of Your Google Account From Android Phone
- Ways to Log Out Google Account From Phone
- 1. From the Smartphone Settings
- 2. From the Google Dashboard: Remotely
- Wrapping up
- Google Login and Logout in Android With Firebase (Kotlin Implementation)
- Логирование в Android приложениях
- Пытаемся навести порядок
Логирование в Android приложениях
Уверен, что всем разработчикам приложений на платформе Android знаком класс Log, позволяющий логировать различные события. По различным причинам, формат записи логов для каждого проекта может отличаться достаточно сильно — начиная от «AAA», «111111» и «I was here» до более-менее внятных — «Opening HTTP connection to habrahabr.ru». Под катом вы найдете пример функции, которая поможет навести порядок в логах.
Данный топик не претендует на оригинальность и универсальность. И поэтому, если в вашем проекте уже существует некий стандарт логирования событий, то смело проходите мимо — топик скорее ориентирован на начинающих разработчиков.
Как правило, ценность логов начинаешь понимать только когда заказчик матерясь отсылает лог на почту и просит засабмитить фикс через 5 минут. И если лог состоит из сообщений невнятного характера, то как минимум, разбр данного лога займет куда больше времени, чем хотелось бы.
Пытаемся навести порядок
Логи существуют для того, чтобы разработчик мог понять что, где и когда произошло. Найти ответ на вопрос «когда произошло» достаточно просто — в логах Андройд записывает время события. Нахождение ответа на вопрос «что произошло» так же не вызывает больших трудностей, если сообщение в лог было написано со смыслом, например: «Opening file. ». Вопрос «где произошло» оказывается наиболее сложным. Если проект большой, то придеться потратить время на нахождение нужного места кода, даже, если лог был написан со смыслом.
Если событие логируется с указанием Throwable (чаще Exception), например, метод public static int d (String tag, String msg, Throwable tr) , то в консоле сообщений будет выведен стек, который поможет быстро идентифицировать место логирования. Но использование данного метода без особой необходимости до безобразия перегрузит лог ненужной информацией.
Если же логируется просто текст, то при логировании можно явно указывать место вызова. Например:
Однако, писать такое каждый раз — дело утомительное и неблагодарное.
Ниже приведен пример класса Log , который делает это автоматически.
Использование класса очень простое:
Результатом логирования данным способом будут примерно следующие строки:
Примечание:
По понятным причинам, данный способ мало пригоден для приложений «пропущенных» через обфускатор.
В общем-то все.
Прошу прощения, если эта статья показалась слишком тривиальной для хабра.
Источник
2 Ways to Log Out of Your Google Account From Android Phone
There can be many reasons why you should log out of your google account from your Android phone. For example, if you changing your Android smartphone or you lost it, unfortunately, you must want to log out of your Google Account from that smartphone. Here we have a simple step-by-step guide to do that from your phone as well as remotely in case you don’t have the phone. Read on to know the ways to log out of your Google account from your Android phone.
Ways to Log Out Google Account From Phone
Table of Contents
As mentioned, there are two ways to do that- via smartphone settings and via Google dashboard on the browser. Let’s check out the steps for both ways.
1. From the Smartphone Settings
Logging out of your Google Account from your smartphone is pretty simple and quick. You can do that from the settings menu, just follow the steps listed below.
- Open the Settings app from the app drawer.
- Go to Accounts and select our Google Account which you want to logout.
2. From the Google Dashboard: Remotely
If you lost your phone and want to log out of your Google account remotely, you can do that using the Google dashboard. For this, you need a laptop with an internet connection and your Google account credentials.
- Open a browser and go to myaccount.google.com.
- Now put in your credentials for the Google account and login.
- Go to the Security tab and look for Your devices section click on Manage devices.
- Click on the three dots menu on the desired device and select Signout.
- Confirm the selection and the account will be logout of that particular device.
Wrapping up
This is how you can sign out of your Google Account without access to your devices. You can also do that using another smartphone just open the Gogel dashboard in the desktop mode of that phone.
Источник
Google Login and Logout in Android With Firebase (Kotlin Implementation)

A detailed explanation of how to implement Google Login and Logout in your Android App
Google Sign-In is a secure way to authenticate users in your apps. It reduces the hassle of dealing and handling those extra passwords by the user to get authenticated to the app. One can use the same Google login option to authenticate to multiple apps. This saves us from clicking that “Forgot Password?” button every time someone forgets the login password.
These days most of the apps we use have an option of Google Login for user authentication thereby the user experience easy and effective.
In this article, I am going to demonstrate the implementation of Google Login-and Logout using Firebase in Kotlin using Android Studio. Let’s get started:)
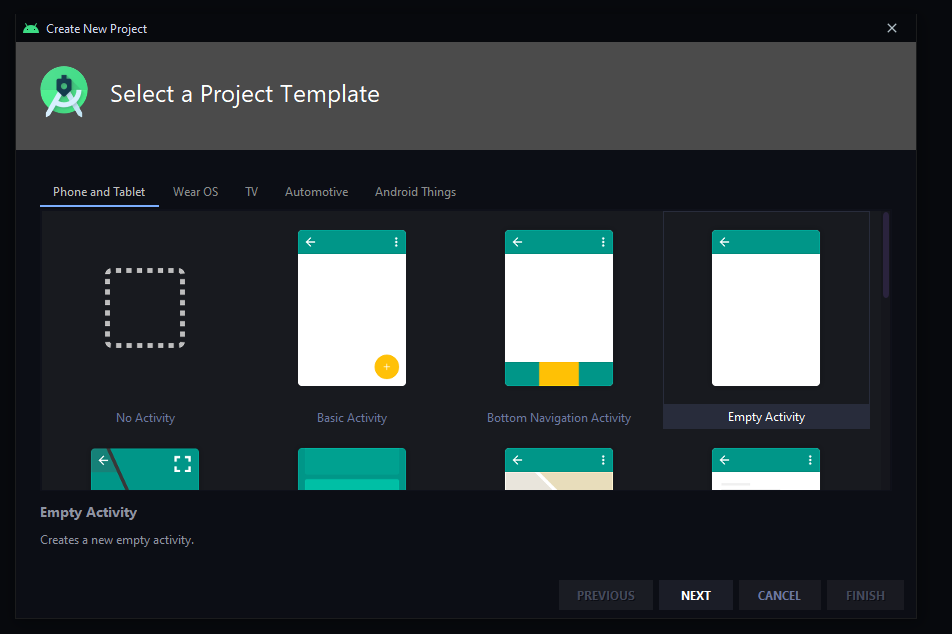
Step 1: Create an Android Studio project by selecting an empty activity. You can name your project in any way you want, I have named it GoogleLoginLogOut. Do not forget to select the language as Kotlin. Select the minimum SDK version 21 ie. Android 5.0 Lolipop.

Step 2: Add Firebase to your Android Studio Project as shown below.
- Click on tools, then click on Firebase.

2. Click on Authentication in the Firebase Assistant and then select Email and Password Authentication. After this, you will see the option for Connecting to Firebase, you need to click on that option.

3. Now you’ll be directed to the firebase console page on your browser where you have to create a project by clicking on “Add Project”. Then click on continue. Kindly disable Google Analytics for this project. We don’t need it for now.

4. Click on “Create Project” and click on “Connect”. Now you will see that Firebase is connected to your Android Studio Project.

Click on “Add Firebase Authentication to your app” to set up the dependencies correctly.


Step 3: To enable the authentication provider, we need to include some dependencies in the App Level Gradle file which are given as follows.
Add the following dependency to Project Level Gradle
Click on “Sync Now” after adding these dependencies.

You can see that the build is successful and dependencies are set up correctly. To authenticate your client, add your SHA-1 to your firebase project in the firebase console. To obtain your SHA-1 fingerprint, run the signing report in Android Studio.
Now, go to the firebase console and open your project there. Click on project settings and then click on “Add a fingerprint” and paste your SHA-1 fingerprint there and save it.
Step 4: Now we need to select the Sign-In Method. For this, go to Authentication in Firebase Console on your browser, click on the “Sign-In Method”. You’ll see the option for Google Sign-In. Enable it, add your email id and save it.

Step5: Now we can start implementing Google Sign-In in our Android Studio project by adding some code.
Before integrating google sign-in, let’s work a little bit on the UI of the app. We need to create an empty activity named LoginScreen.kt that takes us to the MainActivity of our app.

Set the LoginScreen.kt as the launcher activity while creating it.
Now for the UI of the login screen, we need to add the following code in activity_login_screen.xml.
This is how our login screen looks after adding the above XML code. By clicking on the button we will be directed to MainActivity.kt where we will implement Google Logout.

Step 6: Now we will be integrating Google Login in our app. Add the following code to LoginScreen.kt
- First, we get the shared instance of the FirebaseAuth object, Req Code and GoogleSigninClient in LoginScreen.kt
2. We have to configure the GoogleSignInOptions object, call requestIdToken in LoginScreen.kt
You must pass the server’s client ID to the requestIdToken method. This is done in the following way:
Click on this page to get the server’s client ID. Then click on “Configure Project”. Then select your project in the drop-down list. In my case it is GoogleLoginLogout.

Copy your package name and SHA-1 fingerprint and paste in the following dialog box where you have to configure the Auth Client.

Copy the client ID after clicking on “Create” and pass it inside the requestIdToken method as a String resource.
Step 7: After this, we have to create signInGoogle() function, onActivityResult() and handleResult() function LoginScreen.kt.
Step 8: Make a Kotlin object named SavedPreference in order to access the user credentials anywhere in the app and add the following code there:
Step9: Now we have to call the signInGoogle() method on click of the button in the login screen that we made earlier. This is done in on create method of LoginScreen.kt.
Step10: To ensure that we directly reach MainActivity when the account is Logged in, we add the following code in LoginScreen.kt as well:
This completes Google Login Implementation in Android Studio using Firebase. When I log in to my app using my Gmail ID, it takes me to the MainActivity and my user credentials automatically update in the Firebase Authentication user list as follows.

Step11: Since GoogleLogin is implemented, we will now proceed with the implementation of Google Logout.
Inside activity_main.xml create a button which when clicked, logs out the user from the app. Add the following code to activity_main.xml for the same.
Step12: Now we will implement the Logout on click of the “LOGOUT” button. This directs us to the login screen again. The following code is written in MainActivity.kt to make the Logout feature functional.
We have to configure the GoogleSignInOptions object, call requestIdToken in Mainactivity.kt as follows:
After this, we will implement logout on click of the LOGOUT button
Clicking this logs us out of our app and so that we can log in again with some other Gmail ID or the same ID if we want.
So this was the entire implementation of Google login and Google logout using Firebase. You can integrate this feature in your android apps to ease out user authentication.
Kindly try implementing this feature and tell me how did you like the tutorial.
Leave your suggestions in the comments below about what tutorials should I make further.
If you liked the implementation please do not forget to click the 👏 button. Thank you:)
Kindly check the project on my Github account for more reference
Источник
Логирование в Android приложениях
Уверен, что всем разработчикам приложений на платформе Android знаком класс Log, позволяющий логировать различные события. По различным причинам, формат записи логов для каждого проекта может отличаться достаточно сильно — начиная от «AAA», «111111» и «I was here» до более-менее внятных — «Opening HTTP connection to habrahabr.ru». Под катом вы найдете пример функции, которая поможет навести порядок в логах.
Данный топик не претендует на оригинальность и универсальность. И поэтому, если в вашем проекте уже существует некий стандарт логирования событий, то смело проходите мимо — топик скорее ориентирован на начинающих разработчиков.
Как правило, ценность логов начинаешь понимать только когда заказчик матерясь отсылает лог на почту и просит засабмитить фикс через 5 минут. И если лог состоит из сообщений невнятного характера, то как минимум, разбр данного лога займет куда больше времени, чем хотелось бы.
Пытаемся навести порядок
Логи существуют для того, чтобы разработчик мог понять что, где и когда произошло. Найти ответ на вопрос «когда произошло» достаточно просто — в логах Андройд записывает время события. Нахождение ответа на вопрос «что произошло» так же не вызывает больших трудностей, если сообщение в лог было написано со смыслом, например: «Opening file. ». Вопрос «где произошло» оказывается наиболее сложным. Если проект большой, то придеться потратить время на нахождение нужного места кода, даже, если лог был написан со смыслом.
Если событие логируется с указанием Throwable (чаще Exception), например, метод public static int d (String tag, String msg, Throwable tr) , то в консоле сообщений будет выведен стек, который поможет быстро идентифицировать место логирования. Но использование данного метода без особой необходимости до безобразия перегрузит лог ненужной информацией.
Если же логируется просто текст, то при логировании можно явно указывать место вызова. Например:
Однако, писать такое каждый раз — дело утомительное и неблагодарное.
Ниже приведен пример класса Log , который делает это автоматически.
Использование класса очень простое:
Результатом логирования данным способом будут примерно следующие строки:
Примечание:
По понятным причинам, данный способ мало пригоден для приложений «пропущенных» через обфускатор.
В общем-то все.
Прошу прощения, если эта статья показалась слишком тривиальной для хабра.
Источник


