- Check your Apple ID device list to see where you’re signed in
- See where you’re signed in
- Use your iPhone, iPad, iPod touch, or Apple Watch to see where you’re signed in
- Use your Mac to see where you’re signed in
- Use your PC to see where you’re signed in
- Use the web to see where you’re signed in
- Add a device to the list
- Remove a device from the list
- Use your iPhone, iPad, or iPod touch to remove a device
- Use your Mac to remove a device
- Use your PC to remove a device
- Use the web to remove a device
- Permanently remove a device from your account page
- How to View Logs from iPhone and iPad on a Mac
- How to View iOS Device Logs from a Mac
- Pushover Notifications 4+
- Simple Push Notifications
- Pushover, LLC
- Designed for iPad
- Screenshots
- Description
- What’s New
- Ratings and Reviews
- Awesome app, reliable service, outstanding developer
- A+ exactly what you are looking for!
- Apple Watch notifications are unreliable
- App Privacy
- Data Linked to You
Check your Apple ID device list to see where you’re signed in
Learn which devices appear in your Apple ID device list, how to see your device’s details, and how to remove a device, if necessary.
See where you’re signed in
Use the steps below to see the devices that you’re currently signed in to with your Apple ID.
Use your iPhone, iPad, iPod touch, or Apple Watch to see where you’re signed in
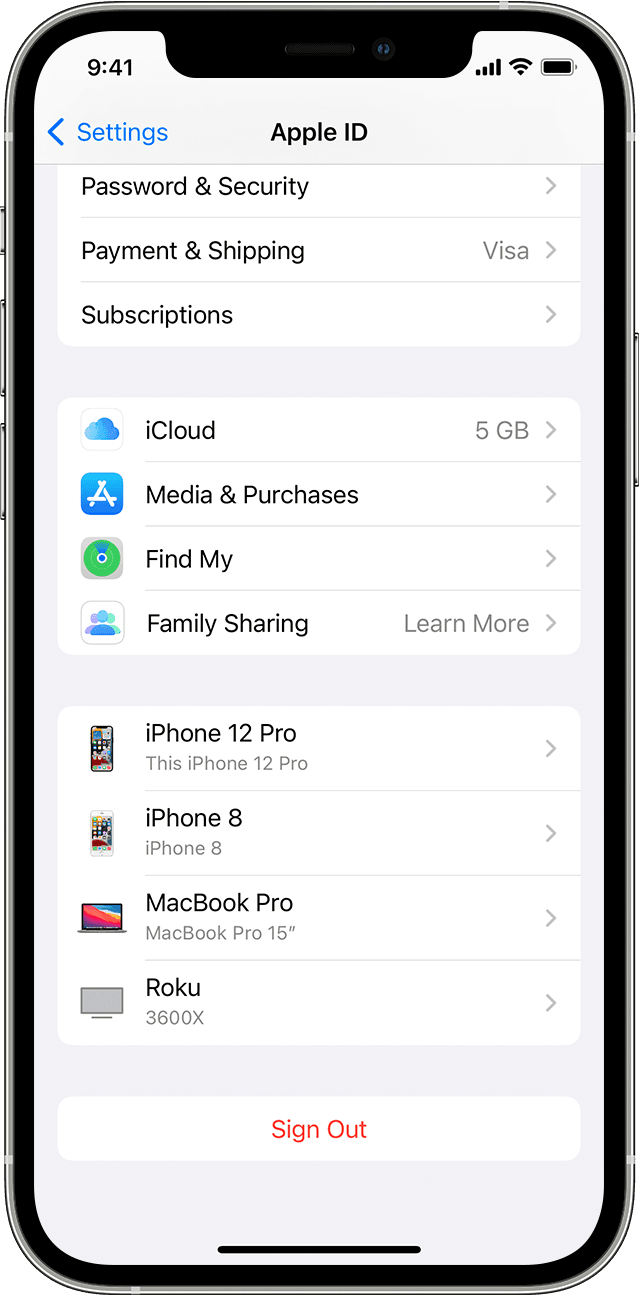
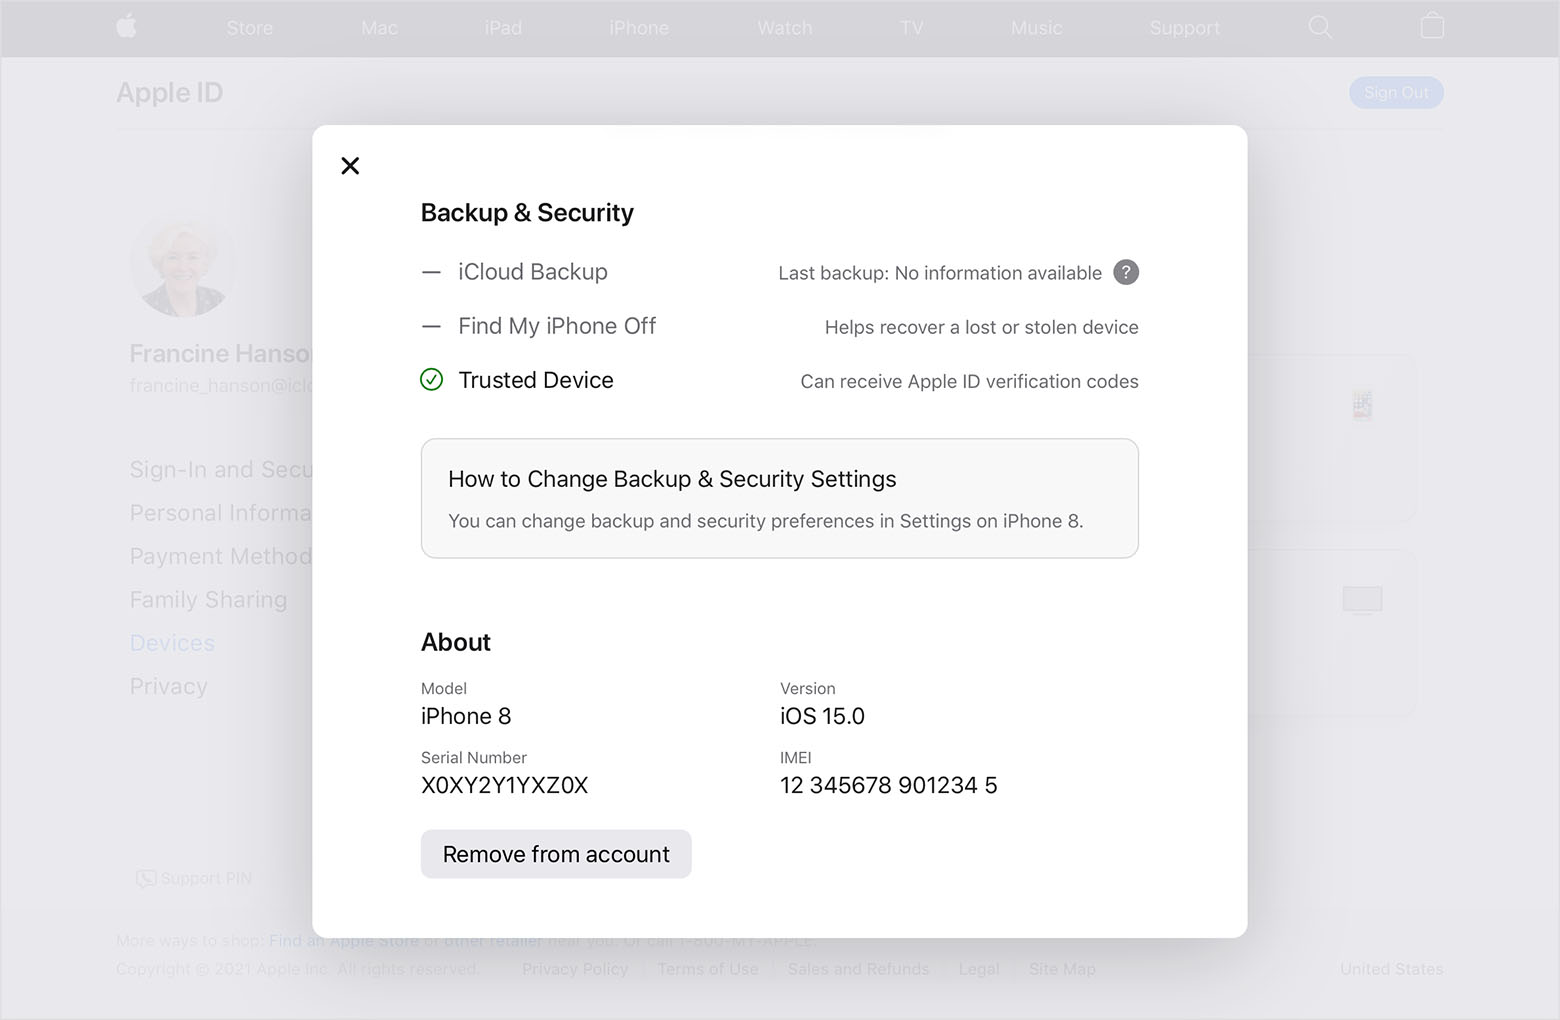
- Tap Settings > [your name], then scroll down.
- Tap any device name to view that device’s information, such as the device model, serial number, OS version, and whether the device is trusted and can be used to receive Apple ID verification codes. The information might vary depending on the device type. You might need to answer your security questions to see device details.
![]()
Use your Mac to see where you’re signed in
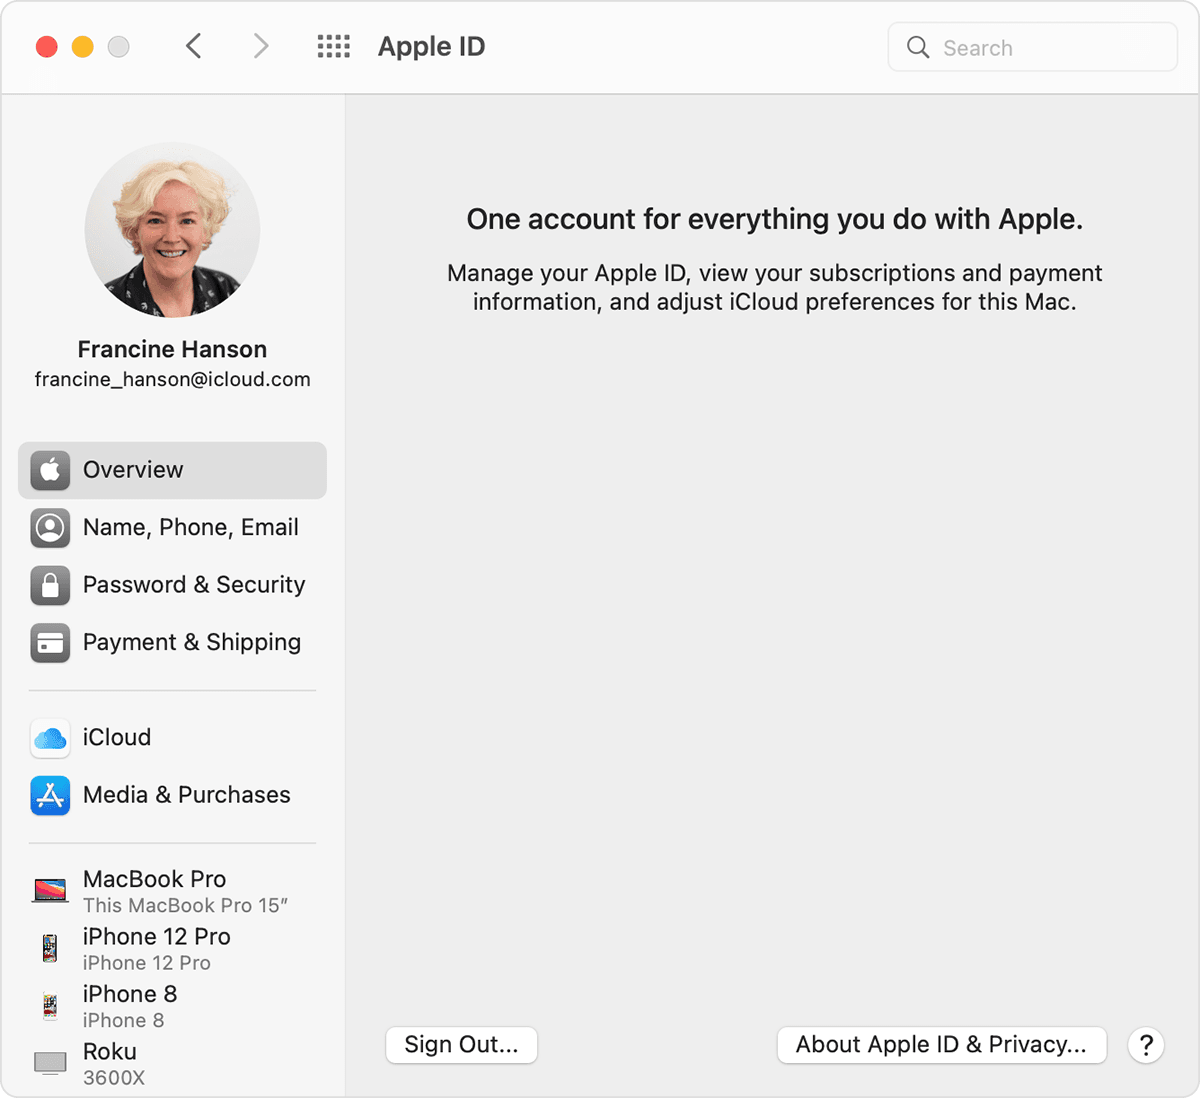
- Choose Apple menu > System Preferences.
- Click Apple ID.

- Click any device name to view that device’s information, such as the device model, serial number, and OS version. The information might vary depending on the device type. You might need to answer your security questions to see device details.
Use your PC to see where you’re signed in
- Open iCloud for Windows.
- Click Account Details, then click Manage Apple ID.
- Click any device name to view that device’s information, such as the device model, serial number, and OS version. The information might vary depending on the device type.
Use the web to see where you’re signed in
From the Devices section of your Apple ID account page, you can see all of the devices that you’re currently signed in to with your Apple ID, including Android devices, consoles, and smart TVs:
- Sign in to appleid.apple.com,* then select Devices.
- If you don’t see your devices right away, click View Details and answer your security questions.
- Click any device name to view that device’s information, such as the device model, serial number, and OS version. The information might vary depending on the device type.

* Depending on how you created your Apple ID, you might be required to provide additional information.
Add a device to the list
To add a device to the list, you need to sign in with your Apple ID. After you sign in on a device with your Apple ID, that device appears in the list. Here’s where you need to sign in:
- For iOS or iPadOS, sign in to iCloud, iMessage, FaceTime, iTunes & App Stores, or Game Center on the device. You can also see your paired Apple Watch.
- For macOS or Windows 10 and later, sign in to iCloud on the device.
- For Apple TV HD and later, sign in to the iTunes and App Store on the device.
- For Apple TV (3rd generation) and earlier, sign in to the iTunes Store on the device.
Your AirPods will appear in the Find My app, but they won’t appear in your Apple ID device list. You can remove your AirPods from your account using Find My. Devices running iOS 7 or earlier or OS X Mavericks or earlier won’t appear in your device list.
Remove a device from the list
If your device is missing, you can use Find My to find your device and take additional actions that can help you recover it and keep your data safe. If you aren’t using your device anymore, or if you don’t recognize it, you might want to remove it from the list.
If you set up two-factor authentication for your Apple ID, removing a device will ensure that it can no longer display verification codes. It also won’t have access to iCloud and other Apple services, including Find My, until you sign in again with two-factor authentication. The device won’t reappear in the list unless you sign in again.
Use your iPhone, iPad, or iPod touch to remove a device
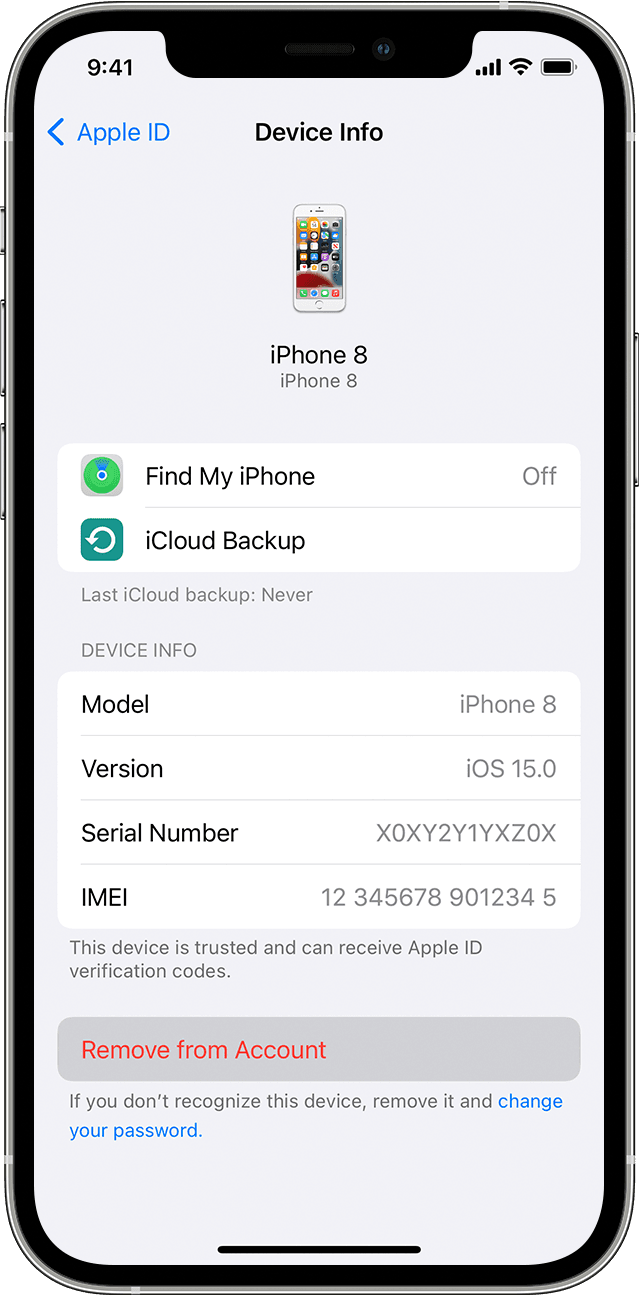
- Tap the device to see its details, then tap Remove from Account.
- Review the message that appears, then tap again to confirm that you want to remove the device.
- Want to permanently remove the device from your account page?
![]()
Use your Mac to remove a device
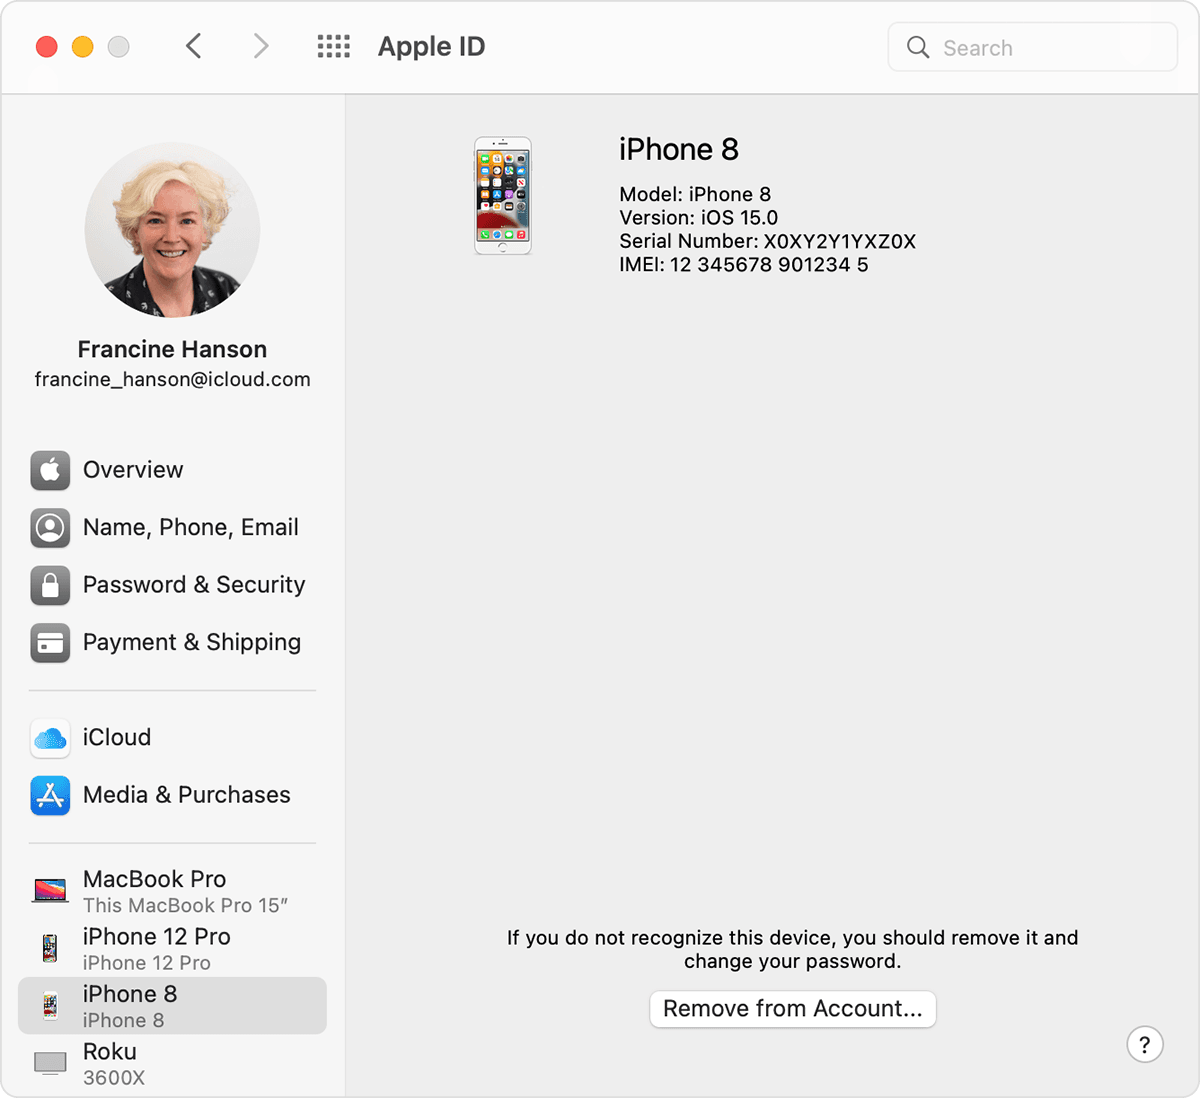
- Choose Apple menu > System Preferences.
- Click Apple ID.
- Click the device to see its details, then click Remove from Account.
- Review the message that appears, then click again to confirm that you want to remove the device.
- Want to permanently remove the device from your account page?
Use your PC to remove a device
- Open iCloud for Windows.
- Click Account Details, then click Manage Apple ID.
- Click the device to see its details, then click Remove from Account.
- Review the message that appears, then click again to confirm that you want to remove the device.
- Want to permanently remove the device from your account page?
Use the web to remove a device
- Sign in to appleid.apple.com, then select Devices.
- Click the device to see its details, then click «Remove from account.»
- Review the message that appears.
- Click again to confirm that you want to remove the device.
- Want to permanently remove the device from your account page?
Permanently remove a device from your account page
If you’re still signed in with your Apple ID on the device, it might reappear on your account page the next time your device connects to the Internet. To permanently remove the device from your account page, sign out of iCloud, iTunes & App Stores, iMessage, FaceTime, and Game Center on that device, or erase that device.
Источник
How to View Logs from iPhone and iPad on a Mac

The iPhone and iPad generate logs of some system activity, including app crashes and other potentially interesting or helpful data. By connecting an iOS device to a Mac, you can review those logs.
Browsing through log data is generally only useful for developers and advanced users, either for troubleshooting or diagnostic purposes, but it may have broader applications for some other environments too. And it’s possible that even more casual yet curious tinkerer-types may find it interesting to browse through, even if the data is largely irrelevant to them and their device usage.
You will need an iPhone or iPad, a Mac, and a USB cable to get started. Be sure the iOS device is powered on as well.
How to View iOS Device Logs from a Mac
- Connect the iPhone or iPad you want to view logs for to a Mac by using a USB connection, be sure to unlock the iOS device as well
- Open the “Console” app on Mac OS, found in the /Applications/Utilities/ directory
- From the Console app sidebar, look under the ‘Devices’ section and select the iPhone or iPad that is connected to the Mac
The Console Log data updates rapidly as events are occurring on the iOS device, for example if you’re connecting to or disconnecting from a wi-fi router, or disabling cellular connectivity, or opening or closing apps, or initiating a process that you know will trigger an app crash, data relevant to those events will all immediately appear on screen. To the casual user this will all likely appear as utter gibberish, but it’s useful for developers in particular.
If you connect multiple iOS devices to the Mac, say an iPhone and iPad, you would be able to browse through logs for each device independently. You can also view Apple Watch logs through the Console app on a Mac the same way, if you have an Apple Watch synced to the connected iPhone.
Note that if you select the iPhone or iPad from Console app and there is no data, and you see a little triangle “!” symbol next to its name in the Devices list, that indicates the iOS device either must be unlocked first, and/or the computer connected to must be trusted.
If you have previously untrusted a computer, or reset the trusted computers list in iOS, you would need to trust the computer again before the data becomes visible. Likewise if you ignored the “Trust This Computer?” dialog on the iOS device, you can usually trigger it again by simply connecting and disconnecting it again, if it has never been trusted before.
The Console app for Mac is frequently used for troubleshooting and diagnostic purposes by more advanced users, as well as developers and tinkerers, but why limit the fun to the Mac? Just connect an iOS device to the computer and you can browse through those device logs too.
Note this requires a somewhat modern version of iOS, a semi-modern iPhone or iPad, and a modern version of Mac OS. Much earlier versions could once use the iPhone Configuration Utility to look at the same log data, or access crash data from backups however.
Источник
Pushover Notifications 4+
Simple Push Notifications
Pushover, LLC
Designed for iPad
-
- 4.8 • 957 Ratings
-
- Free
- Offers In-App Purchases
Screenshots
![]()
![]()
Description
Pushover is a simple push notification service that integrates easily into web apps like IFTTT, network monitoring systems, security cameras, shell scripts, IoT devices, and anything else that needs to send alerts to your iPhone, iPad, Desktop, and other robot-like mobile devices. App has a free 30-day trial and unlimited usage beyond the trial requires a one-time in-app purchase.
Pushover includes an Apple Watch app and complications so you can push custom data straight to your watch face with our Glances API.
Visit https://pushover.net/ to find apps, plugins, and services that support Pushover, or get an API key for your own app.
What’s New
3.7.5:
— Support Time-Sensitive notifications
— Add an optional black app icon
— Show account creation date in settings
— Fix a bug with logging out, prompt to delete all messages
— Apple Watch complication fixes
3.7:
— Add support for custom notification sounds on iOS 14+
— Show additional timestamp of when a message was received when it differs from the message’s specified timestamp
— Add a setting to disable the Pushover logo on Watch complications for more room
Ratings and Reviews
Awesome app, reliable service, outstanding developer
I have been using Pushover for more than a year to receive critical alerts for work. I go on call once every three weeks and this app has never let me down. The feature that I like the most from the paid service is that I can create an application with its own email address and set up my alerts to go to that email address. Any of my devices running pushover can then receive that alert. The service itself is far more configurable than that but for the sake of brevity I will keep it short. Also one of my other favorite things is the API. We are going to be doing some very interesting things with alerts that require acknowledgment. My biggest request is that Superblock LLC would add a third type of alert (level 3?) that has an approve/deny response instead of a simple repeat alert until acknowledged. I would like to be able to push approve/deny workflow items to my phone and be able to capture those responses on the backend or with a postback like I can with level 2. It would also be great if the repeat frequency of the level 2 and 3 alerts could be configured.
A+ exactly what you are looking for!
as a network engineer (and somewhat coder), I
frequently get very important alerts I have to be able to depend on arriving. Well some of the software I use has companion apps that allow me to be a notification to get notifications via push messages, I was looking for a bit more flexibility and customization.
This app/service is perfect! I was able to quickly migrate some of my alerts by using the custom email address they give you. overtime I’ll upgrade (on my end) some of these alerts from using email to using a more reliable HTTPS API method (with email as a fallback).
I can’t believe the service is five dollars for life as I’m sure that rate will go up at some point but either way it’s a great service (I paid up as soon as I got my first test alert).
Apple Watch notifications are unreliable
This app works great for notifications to my iPhone but my associated Apple Watch notifications are often delayed and/or unreliable. I have my home automation system pushing these notifications and my phone gets every one of them and almost instantly. The Watch only gets some of them and often delayed. I use many other apps with watch notifications without issue so it is not a communication or settings problem. I can have my automation hub send the exact same notifications to pushover and it’s own app and my iPhone will get both notifications at the same second. My watch gets the automation app notifications also at the same second, the pushover notification comes sometimes at the same time, sometimes a few seconds later and sometimes never. This app is literally the only one that I have the problem with. I have reinstalled both the phone and watch app and tried all combinations of Bluetooth, WiFi and Cellular connections with the watch and the phone . nothing fixes this issue.
App Privacy
The developer, Pushover, LLC , indicated that the app’s privacy practices may include handling of data as described below. For more information, see the developer’s privacy policy.
Data Linked to You
The following data may be collected and linked to your identity:
Privacy practices may vary, for example, based on the features you use or your age. Learn More
Источник


