- How to Detect Long Press in Android?
- Where can we use this feature?
- Long Press On a Button
- Debugging in Android Studio
- Tips and tricks for squashing bugs faster on Android
- Log filtering and folding
- Attaching the debugger
- Moving breakpoints
- Conditional breakpoints
- Dependent breakpoints
- Методы лечения различных ошибок в Android Studio при разработке проекта
- Create a Notification
- Add the support library
- Groovy
- Kotlin
- Create a basic notification
- Set the notification content
- Kotlin
- Kotlin
- Create a channel and set the importance
- Kotlin
- Set the notification’s tap action
- Kotlin
- Show the notification
- Kotlin
- Add action buttons
- Kotlin
- Add a direct reply action
- Add the reply button
- Kotlin
- Kotlin
- Kotlin
- Kotlin
- Retrieve user input from the reply
- Kotlin
- Kotlin
- Add a progress bar
- Kotlin
- Set a system-wide category
- Kotlin
- Show an urgent message
- Kotlin
- Set lock screen visibility
- Update a notification
- Remove a notification
- Best practices for messaging apps
- Use MessagingStyle
- Kotlin
- Use direct reply
- Enable smart reply
- Add notification metadata
How to Detect Long Press in Android?
A Long Press refers to pressing a physical button or tap a virtual button on a touchscreen and holding it down for a second or two. Employed on touchscreens, smartphones, tablets, and smartwatches, the long press or long tap increases the user interface’s flexibility. The typical “short press” or “short tap” performs one operation, while pressing/tapping and holding that same button for a short time activates another. Long pressing lets you get some information, download photos from the web, edit pictures, and more.
Where can we use this feature?
As mentioned, a long press can be used for plenty of applications, some are listed below:
- Get information
- Download photos
- Edit pictures
- Copy, Cut, Paste operations on Text View
Through this article, we want to extend our knowledge regarding the long press on a Button as well as a view such as a TextView in Android. We have implemented a method that would detect a long press for a certain duration, and if the criteria are fulfilled, a Toast would be generated. Note that we are going to implement this project using the Kotlin language.
Long Press On a Button
To detect a long press on a button in Android, follow the following steps:
Step 1: Create a New Project
To create a new project in Android Studio please refer to How to Create/Start a New Project in Android Studio. Note that select Kotlin as the programming language.
Источник
Debugging in Android Studio
Tips and tricks for squashing bugs faster on Android

As developers, we all know that there are days we spend more time in the debugger than in the code editor. With this in mind, I recently took the opportunity to see what tricks and tips members of our Android Studio team had for speeding up debugging. I’ve gathered together some of the best that I think will save you time and be easy to incorporate into your debugging flow.
While your app is likely much different than the hypothetical sample game app we’re using here, these debugging tips will apply to any app.
If you’d rather watch a live demo, you can find a video version of this article on YouTube.
Log filtering and folding
Let me start with a tip for that debugging classic: printf statements. Take a game that logs its frames-per-second rate every second and the user’s final score at the end of each game. In the Logcat window this gives:
There’s quite a lot of information in the output that you might not care about, such as the date and thread IDs. You can easily configure what is displayed. From the logcat toolbar, click the Settings icon and, in the Configure Logcat Header dialog, deselect information you no longer want to see.
You now get much cleaner, more relevant log output, like this:
However, this still leaves a lot of clutter obscuring the high score messages. To focus on these messages use the logcat search. Enter part of the debug message into Search to filter the logcat window.
If this is a search you use regularly, you can save it by adding a custom filter from Edit Filter Configuration.
Then, add the details of your filter.
Another way to reduce logging clutter is to use the fold lines feature, which groups and collapses lines that are similar. Select some text from a log Item, right-click, and select Fold Lines Like This.
When the Console dialog opens, click OK and similar messages containing the selected text are collapsed.
If you need to look at this information later, you can click on the lines to expand them. There are also gutter handles that enable you to expand and collapse folded lines.
Attaching the debugger
You usually start a debugging session using the Debug button or menu option. However, if you started an app by running it, you can attach a debugger to the running app without needing to restart it. To do this, click Attach Debugger to Android Process.
In the Choose Process dialog, highlight the process you want to attach the debugger to and click OK. Now, you’ll start hitting your breakpoints as you normally would in a debug session.
Moving breakpoints
If you find that you have set a breakpoint at an inappropriate place, rather than clearing and resetting the breakpoint, you can drag it to the line that you care about. This is useful because it preserves the settings on the breakpoint, including the things I’m going to mention next.
Conditional breakpoints
You may need to chase down a bug that relates to a particular type of event in your app or game. For example, in a game you are developing, you may want to stop when a player collides with the object that uses up their last bit of health. You set a breakpoint on collisions but now the code stops on every collision. To avoid this you can set a conditional breakpoint.
To set a conditional breakpoint, right-click on a breakpoint and add a condition. The condition can be any code expression that equates to a Boolean. When the code hits the line, if the expression evaluates to true the breakpoint activates.
Here, in logic when the player is just about to collide with an object, setting a condition of player.health == 1 enables you to catch the last time the player collides with the object before their health drops to 0.
Dependent breakpoints
It’s not unusual for an app to have code that can be triggered from many different paths. If you have a bug that only happens along one particular path, setting a breakpoint in the code can result in a lot of unnecessary breaks. To get around this, you can use dependent breakpoints, which trigger only after another specified breakpoint was hit. For example, you can create a breakpoint that is triggered only in the path you care about and then use it as a dependency, so your other breakpoint only triggers in the path of interest.
To set a dependent breakpoint, right-click on the second breakpoint and open the More menu. In Disable until breakpoint is hit, choose the breakpoint you want to depend on.
Источник
Методы лечения различных ошибок в Android Studio при разработке проекта
Сегодня хотел бы поделиться своим анализом и способами лечением разных ошибок при разработке своего продукта в Android Studio. Лично я, не раз сталкивался с различными проблемами и ошибками при компиляции и/или тестировании мобильного приложения. Данный процесс, всегда однообразный и в 99% случаев и всегда нужно тратить n-колличество времени на его устранение. Даже, когда ты уже сталкивался с данной проблемой, ты все равно идешь в поисковик и вспоминаешь, как же решить ту или иную ситуацию.
Я для себя завел файлик, в котором отметил самые частые ошибки — потратив на это несколько часов и перечислил самые популярные ошибки (в дальнейшем планирую просто их запомнить), чтоб сократить свое время в дальнейшем.
Итак, начну по порядку с самой распространенной проблемы и дальше буду перечислять их по мере появления:
1) Если подчеркивает красным код, где используются ресурсы: R. — попробовать (но вероятно не поможет): Build -> Clean Project.
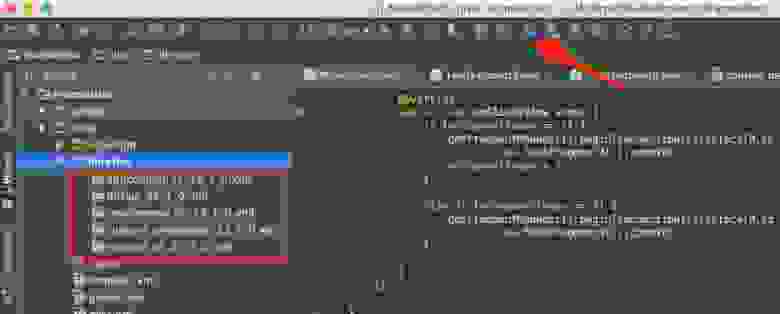
В принципе на Build -> Clean Project можно не терять времени, а лучше всего — слева переключиться на Project, открыть каталог .idea, затем каталог libraries и из него удалить все содержимое. Затем нажать кнопку Sync Project. А затем (если все еще красное, но скорее всего уже будет все ок ) Build -> Clean Project.
2) После внезапного выключения компьютера, после перезапуска может быть во всех проектах весь код красным. Перед этим может быть ошибка: Unable to create Debug Bridge: Unable to start adb server: Unable to obtain result of ‘adb version’. Есть три решения — первое помогло, второе нет (но может быть для другого случая), а третье — не пробовал:
а) File — Invalidate Caches/Restart — Invalidate and Restart
б) Закрыть студию. В корне папки проекта удалить файл(ы) .iml и папку .idea. Вновь запустить студию и импортировать проект.
в) Нажать Ctrl-Alt-O и запустить оптимизацию импорта.
Кстати, adb сервер можно проверить на версию (и работоспособность) и затем перезапустить:
3) Если Android Studio выдает приблизительно такую ошибку: Error:Execution failed for task ‘:app:dexDebug’.
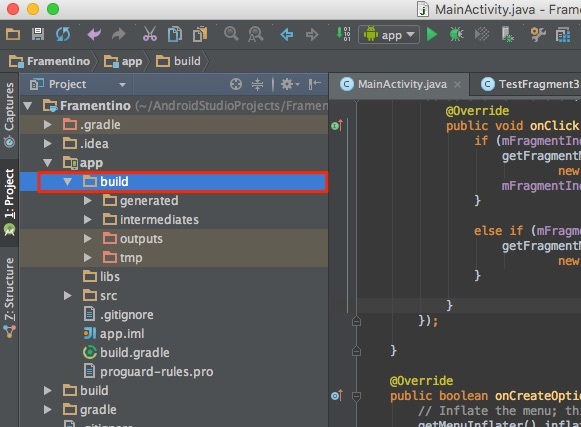
Надо слева переключиться на опцию Project, найти и удалить папку build которая лежит в папке app, т.е. по пути app/build. Затем перестроить весь проект заново: Build -> Rebuild Project.
Такое же решение если ошибка типа: «не могу удалить (создать) папку или файл» и указан путь, который в ведет в app/build. Тоже удаляем папку build и ребилдим проект.
4) В сообщении об ошибке упоминается heap — виртуальная память. А ошибка обычно вызвана ее нехваткой, т.е. невозможностью получить запрашиваемый объем. Поэтому этот запрашиваемый объем надо уменьшить, т.е. переписать дефолтное значение (обычно 2048 MB которое можно изменить в настройках), на меньшее 1024 MB.
В файле проекта gradle.properties пишем:

5) Android Studio пришет примерно такую ошибку: Plugin is too old, please update to a more recent version, or set ANDROID_DAILY_OVERRIDE environment variable to «83648b99316049d63656d7276cb19cc7e95d70a5»
Возможные причины (кроме необходимости регулярного обновления SDK):
а) Загруженный проект был скомпилирован с помощью уже несовместимого старого gradle плагина. В этом случае надо найти и подключить в своем build.gradle проекта этот более старый плагин. т.е. попробовать более старые версии, например: 1.1.3 (часто именно 1.1.x и подходит).
Найти все версии можно здесь.
б) Если в build.gradle проекта используется beta-версия плагина — это означает, что срок ее истек. Посмотреть последние релизы (продакшн и бета) можно также здесь:
6) Иногда при подключении сторонних библиотек могут дублироваться некоторые файлы (обычно связанные с лицензированием). В сообщении будет что-то содержащее слова: duplicate files. Решение — надо посмотреть в сообщении об ошибке или в документации подключенной сторонней библиотеки — какие именно файлы стали избыточными, и перечислить их в build.gradle модуля для исключения (exclude) из билда.
Это делается в директиве packagingOptions (которая, в свою очередь, находится в директиве android).
Источник
Create a Notification
Notifications provide short, timely information about events in your app while it’s not in use. This page teaches you how to create a notification with various features for Android 4.0 (API level 14) and higher. For an introduction to how notifications appear on Android, see the Notifications Overview. For sample code that uses notifications, see the Android Notifications Sample.
Notice that the code on this page uses the NotificationCompat APIs from the Android support library. These APIs allow you to add features available only on newer versions of Android while still providing compatibility back to Android 4.0 (API level 14). However, some new features such as the inline reply action result in a no-op on older versions.
Add the support library
Although most projects created with Android Studio include the necessary dependencies to use NotificationCompat , you should verify that your module-level build.gradle file includes the following dependency:
Groovy
Kotlin
Create a basic notification
A notification in its most basic and compact form (also known as collapsed form) displays an icon, a title, and a small amount of content text. In this section, you’ll learn how to create a notification that the user can click on to launch an activity in your app.

Figure 1. A notification with a title and text
For more details about each part of a notification, read about the notification anatomy.
Set the notification content
To get started, you need to set the notification’s content and channel using a NotificationCompat.Builder object. The following example shows how to create a notification with the following:
- A small icon, set by setSmallIcon() . This is the only user-visible content that’s required.
- A title, set by setContentTitle() .
- The body text, set by setContentText() .
- The notification priority, set by setPriority() . The priority determines how intrusive the notification should be on Android 7.1 and lower. (For Android 8.0 and higher, you must instead set the channel importance—shown in the next section.)
Kotlin
Notice that the NotificationCompat.Builder constructor requires that you provide a channel ID. This is required for compatibility with Android 8.0 (API level 26) and higher, but is ignored by older versions.
By default, the notification’s text content is truncated to fit one line. If you want your notification to be longer, you can enable an expandable notification by adding a style template with setStyle() . For example, the following code creates a larger text area:
Kotlin
For more information about other large notification styles, including how to add an image and media playback controls, see Create a Notification with Expandable Detail.
Create a channel and set the importance
Before you can deliver the notification on Android 8.0 and higher, you must register your app’s notification channel with the system by passing an instance of NotificationChannel to createNotificationChannel() . So the following code is blocked by a condition on the SDK_INT version:
Kotlin
Because you must create the notification channel before posting any notifications on Android 8.0 and higher, you should execute this code as soon as your app starts. It’s safe to call this repeatedly because creating an existing notification channel performs no operation.
Notice that the NotificationChannel constructor requires an importance , using one of the constants from the NotificationManager class. This parameter determines how to interrupt the user for any notification that belongs to this channel—though you must also set the priority with setPriority() to support Android 7.1 and lower (as shown above).
Although you must set the notification importance/priority as shown here, the system does not guarantee the alert behavior you’ll get. In some cases the system might change the importance level based other factors, and the user can always redefine what the importance level is for a given channel.
For more information about what the different levels mean, read about notification importance levels.
Set the notification’s tap action
Every notification should respond to a tap, usually to open an activity in your app that corresponds to the notification. To do so, you must specify a content intent defined with a PendingIntent object and pass it to setContentIntent() .
The following snippet shows how to create a basic intent to open an activity when the user taps the notification:
Kotlin
Notice this code calls setAutoCancel() , which automatically removes the notification when the user taps it.
The setFlags() method shown above helps preserve the user’s expected navigation experience after they open your app via the notification. But whether you want to use that depends on what type of activity you’re starting, which may be one of the following:
- An activity that exists exclusively for responses to the notification. There’s no reason the user would navigate to this activity during normal app use, so the activity starts a new task instead of being added to your app’s existing task and back stack. This is the type of intent created in the sample above.
- An activity that exists in your app’s regular app flow. In this case, starting the activity should create a back stack so that the user’s expectations for the Back and Up buttons is preserved.
For more about the different ways to configure your notification’s intent, read Start an Activity from a Notification.
Show the notification
To make the notification appear, call NotificationManagerCompat.notify() , passing it a unique ID for the notification and the result of NotificationCompat.Builder.build() . For example:
Kotlin
Remember to save the notification ID that you pass to NotificationManagerCompat.notify() because you’ll need it later if you want to update or remove the notification.
Add action buttons
A notification can offer up to three action buttons that allow the user to respond quickly, such as snooze a reminder or even reply to a text message. But these action buttons should not duplicate the action performed when the user taps the notification.

Figure 2. A notification with one action button
To add an action button, pass a PendingIntent to the addAction() method. This is just like setting up the notification’s default tap action, except instead of launching an activity, you can do a variety of other things such as start a BroadcastReceiver that performs a job in the background so the action does not interrupt the app that’s already open.
For example, the following code shows how to send a broadcast to a specific receiver:
Kotlin
For more information about building a BroadcastReceiver to run background work, see the Broadcasts guide.
If you’re instead trying to build a notification with media playback buttons (such as to pause and skip tracks), see how to create a notification with media controls.
Add a direct reply action
The direct reply action, introduced in Android 7.0 (API level 24), allows users to enter text directly into the notification, which is delivered to your app without opening an activity. For example, you can use a direct reply action to let users reply to text messages or update task lists from within the notification.
Figure 3. Tapping the «Reply» button opens the text input
The direct reply action appears as an additional button in the notification that opens a text input. When the user finishes typing, the system attaches the text response to the intent you had specified for the notification action and sends the intent to your app.
Add the reply button
To create a notification action that supports direct reply:
- Create an instance of RemoteInput.Builder that you can add to your notification action. This class’s constructor accepts a string that the system uses as the key for the text input. Later, your handheld app uses that key to retrieve the text of the input.
Kotlin
Kotlin
Caution: If you re-use a PendingIntent , a user may reply to a different conversation than the one they thought they did. You must either provide a request code that is different for each conversation or provide an intent that doesn’t return true when you call equals() on the reply intent of any other conversation. The conversation ID is frequently passed as part of the intent’s extras bundle, but is ignored when you call equals() .
Attach the RemoteInput object to an action using addRemoteInput() .
Kotlin
Kotlin
The system prompts the user to input a response when they trigger the notification action, as shown in figure 3.
Retrieve user input from the reply
To receive user input from the notification’s reply UI, call RemoteInput.getResultsFromIntent() , passing it the Intent received by your BroadcastReceiver :
Kotlin
After you’ve processed the text, you must update the notification by calling NotificationManagerCompat.notify() with the same ID and tag (if used). This is necessary to hide direct reply UI and confirm to the user that their reply was received and processed correctly.
Kotlin
When working with this new notification, use the context that’s passed to the receiver’s onReceive() method.
You should also append the reply to the bottom of the notification by calling setRemoteInputHistory() . However, if you’re building a messaging app, you should create a messaging-style notification and append the new message to the conversation.
For more advice for notifications from a messaging apps, see best practices for messaging apps.
Add a progress bar
Notifications can include an animated progress indicator that shows users the status of an ongoing operation.

Figure 4. The progress bar during and after the operation.
If you can estimate how much of the operation is complete at any time, use the «determinate» form of the indicator (as shown in figure 4) by calling setProgress(max, progress, false) . The first parameter is what the «complete» value is (such as 100); the second is how much is currently complete, and the last indicates this is a determinate progress bar.
As your operation proceeds, continuously call setProgress(max, progress, false) with an updated value for progress and re-issue the notification.
Kotlin
At the end of the operation, progress should equal max . You can either leave the progress bar showing when the operation is done, or remove it. In either case, remember to update the notification text to show that the operation is complete. To remove the progress bar, call setProgress(0, 0, false) .
To display an indeterminate progress bar (a bar that does not indicate percentage complete), call setProgress(0, 0, true) . The result is an indicator that has the same style as the progress bar above, except the progress bar is a continuous animation that does not indicate completion. The progress animation runs until you call setProgress(0, 0, false) and then update the notification to remove the activity indicator.
Remember to change the notification text to indicate that the operation is complete.
Set a system-wide category
Android uses some pre-defined system-wide categories to determine whether to disturb the user with a given notification when the user has enabled Do Not Disturb mode.
If your notification falls into one of the pre-defined notification categories defined in NotificationCompat —such as CATEGORY_ALARM , CATEGORY_REMINDER , CATEGORY_EVENT , or CATEGORY_CALL —you should declare it as such by passing the appropriate category to setCategory() .
Kotlin
This information about your notification category is used by the system to make decisions about displaying your notification when the device is in Do Not Disturb mode.
However, you are not required to set a system-wide category and should only do so if your notifications match one of the categories defined by in NotificationCompat .
Show an urgent message
Your app might need to display an urgent, time-sensitive message, such as an incoming phone call or a ringing alarm. In these situations, you can associate a full-screen intent with your notification. When the notification is invoked, users see one of the following, depending on the device’s lock status:
- If the user’s device is locked, a full-screen activity appears, covering the lockscreen.
- If the user’s device is unlocked, the notification appears in an expanded form that includes options for handling or dismissing the notification.
Caution: Notifications containing full-screen intents are substantially intrusive, so it’s important to use this type of notification only for the most urgent, time-sensitive messages. Note: If your app targets Android 10 (API level 29) or higher, you must request the USE_FULL_SCREEN_INTENT permission in your app’s manifest file in order for the system to launch the full-screen activity associated with the time-sensitive notification.
The following code snippet demonstrates how to associate your notification with a full-screen intent:
Kotlin
Set lock screen visibility
To control the level of detail visible in the notification from the lock screen, call setVisibility() and specify one of the following values:
- VISIBILITY_PUBLIC shows the notification’s full content.
- VISIBILITY_SECRET doesn’t show any part of this notification on the lock screen.
- VISIBILITY_PRIVATE shows basic information, such as the notification’s icon and the content title, but hides the notification’s full content.
When VISIBILITY_PRIVATE is set, you can also provide an alternate version of the notification content which hides certain details. For example, an SMS app might display a notification that shows You have 3 new text messages, but hides the message contents and senders. To provide this alternative notification, first create the alternative notification with NotificationCompat.Builder as usual. Then attach the alternative notification to the normal notification with setPublicVersion() .
However, the user always has final control over whether their notifications are visible on the lock screen and can even control that based on your app’s notification channels.
Update a notification
To update this notification after you’ve issued it, call NotificationManagerCompat.notify() again, passing it a notification with the same ID you used previously. If the previous notification has been dismissed, a new notification is created instead.
You can optionally call setOnlyAlertOnce() so your notification interupts the user (with sound, vibration, or visual clues) only the first time the notification appears and not for later updates.
Remove a notification
Notifications remain visible until one of the following happens:
- The user dismisses the notification.
- The user clicks the notification, and you called setAutoCancel() when you created the notification.
- You call cancel() for a specific notification ID. This method also deletes ongoing notifications.
- You call cancelAll() , which removes all of the notifications you previously issued.
- If you set a timeout when creating a notification using setTimeoutAfter() , the system cancels the notification after the specified duration elapses. If required, you can cancel a notification before the specified timeout duration elapses.
Best practices for messaging apps
Use the best practices listed here as a quick reference of what to keep in mind when creating notifications for your messaging and chat apps.
Use MessagingStyle
Starting in Android 7.0 (API level 24), Android provides a notification style template specifically for messaging content. Using the NotificationCompat.MessagingStyle class, you can change several of the labels displayed on the notification, including the conversation title, additional messages, and the content view for the notification.
The following code snippet demonstrates how to customize a notification’s style using the MessagingStyle class.
Kotlin
Starting in Android 8.0 (API level 26), notifications that use the NotificationCompat.MessagingStyle class display more content in their collapsed form. You can also use the addHistoricMessage() method to provide context to a conversation by adding historic messages to messaging-related notifications.
- Call MessagingStyle.setConversationTitle() to set a title for group chats with more than two people. A good conversation title might be the name of the group chat or, if it doesn’t have a specific name, a list of the participants in the conversation. Without this, the message may be mistaken as belonging to a one-to-one conversation with the sender of the most recent message in the conversation.
- Use the MessagingStyle.setData() method to include media messages such as images. MIME types, of the pattern image/* are currently supported.
Use direct reply
Direct Reply allows a user to reply inline to a message.
- After a user replies with the inline reply action, use MessagingStyle.addMessage() to update the MessagingStyle notification and do not retract or cancel the notification. Not cancelling the notification allows a user to send multiple replies from the notification.
- To make the inline reply action compatible with Wear OS, call Action.WearableExtender.setHintDisplayInlineAction(true) .
- Use the addHistoricMessage() method to provide context to a direct reply conversation by adding historic messages to the notification.
Enable smart reply
- To enable Smart Reply, call setAllowGeneratedResponses(true) on the reply action. This causes Smart Reply responses to be available to users when the notification is bridged to a Wear OS device. Smart Reply responses are generated by an entirely on-watch machine learning model using the context provided by the NotificationCompat.MessagingStyle notification, and no data is uploaded to the Internet to generate the responses.
Add notification metadata
- Assign notification metadata to tell the system how to handle your app notifications when the device is in Do Not Disturb mode. For example, use the addPerson() or setCategory(Notification.CATEGORY_MESSAGE) method to override the Do Not Disturb mode.
Content and code samples on this page are subject to the licenses described in the Content License. Java is a registered trademark of Oracle and/or its affiliates.
Источник


