- Как отменить подписку Apple
- Отмена подписки Apple
- Как отменить подписку на iPhone, iPad или iPod touch
- Отмена подписки на компьютере Mac
- Отмена подписки на компьютере с Windows
- Отмена подписки на Apple Watch
- Отмена подписки на Apple TV
- Если у вас нет устройства Apple или компьютера с Windows
- Об отмене подписок Apple
- Subscribe to iTunes Match
- About iTunes Match
- Subscribe to iTunes Match
- If you don’t see the iTunes Store on your Mac
- Cancel your iTunes Match subscription
- Use iTunes Match
- Learn more
- Change your subscription from Apple
- How to change your subscription plan on your iPhone, iPad, or iPod touch
- Change your subscription plan on your Mac
- Change your subscription plan on your Apple TV
- Change your subscription plan on your Apple Watch
- What subscription plans are available
- Learn more
- Get an Apple Music student subscription
- How to get a student subscription to Apple Music
- How to get Apple TV+
- How to reverify your student status
- In the Apple Music app or iTunes for Windows
- In Settings on your iPhone, iPad, or iPod touch
- If you’re no longer a student
Как отменить подписку Apple
Узнайте, как отменить подписки, приобретенные в приложениях из App Store. Вы также можете отменить подписки Apple TV+, Apple News+, Apple Fitness+ и другие.
Отмена подписки Apple
Отменить подписку можно в приложении «Настройки» на iPhone или iPad либо в App Store на компьютере Mac.
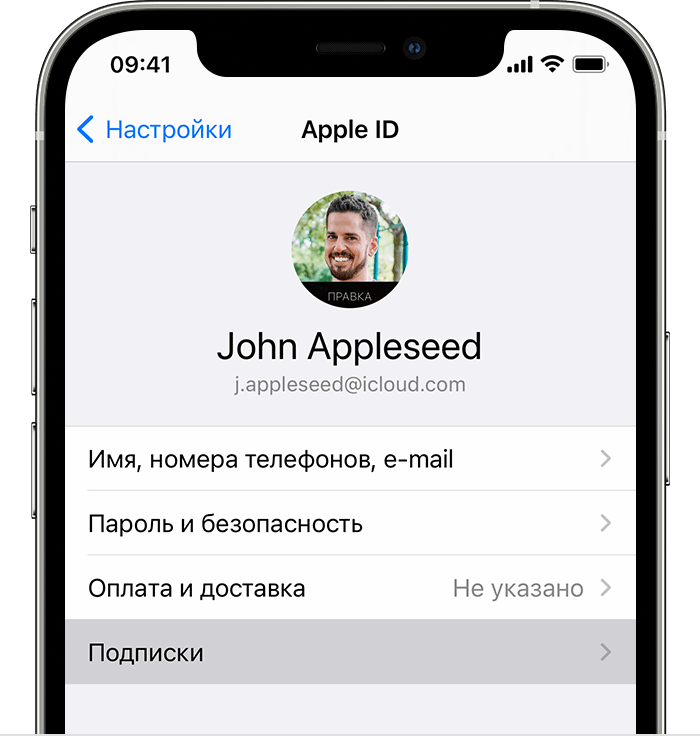
Как отменить подписку на iPhone, iPad или iPod touch
- Откройте приложение «Настройки».
- Нажмите свое имя.
- Нажмите «Подписки».

- Выберите подписку для управления. Не видите нужную подписку?
- Нажмите «Отменить подписку». (Или, если вы хотите отменить подписку Apple One, но сохранить подписки на некоторые сервисы, нажмите «Выбрать отдельные сервисы».) Если варианта отмены нет, значит, подписка уже отменена и не будет продлеваться.
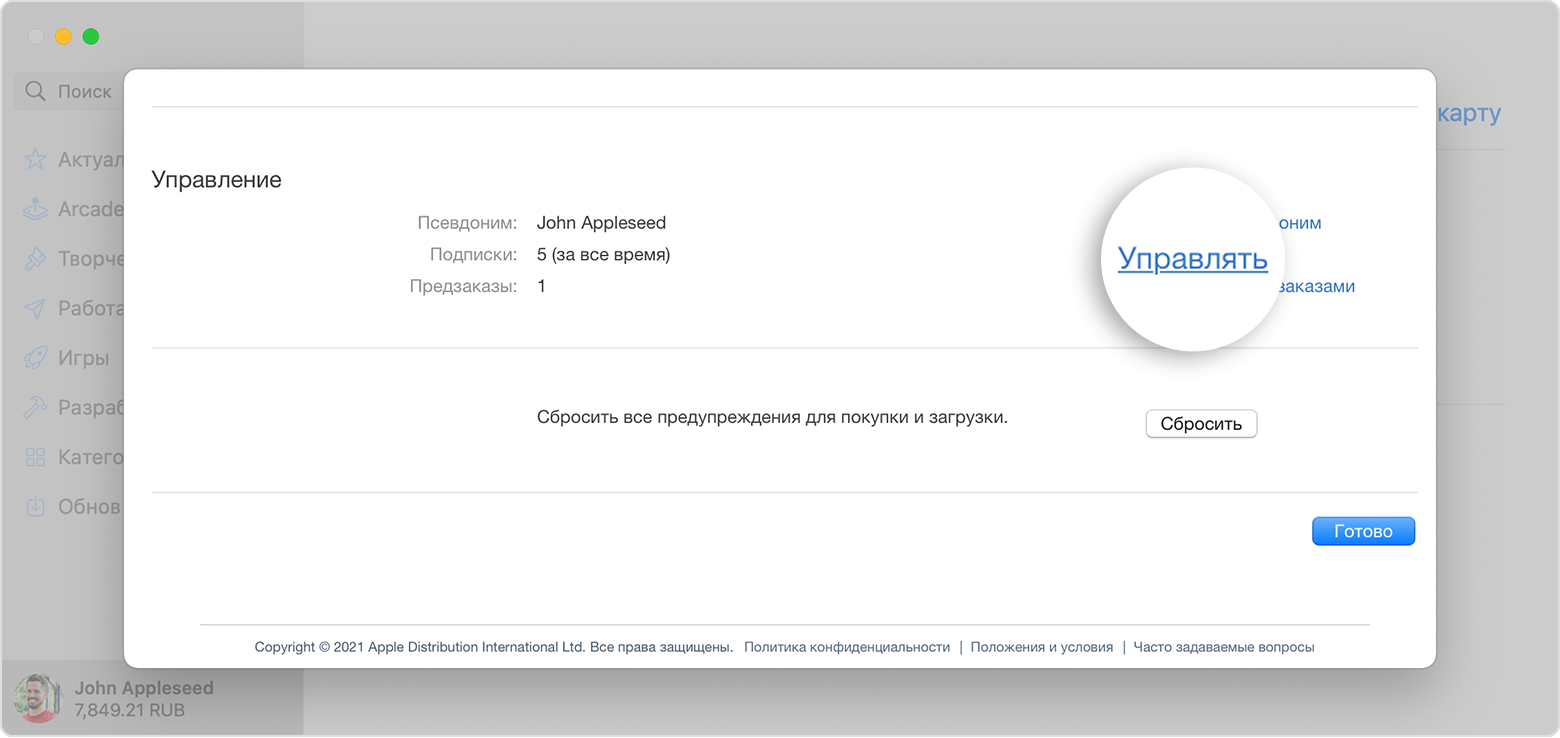
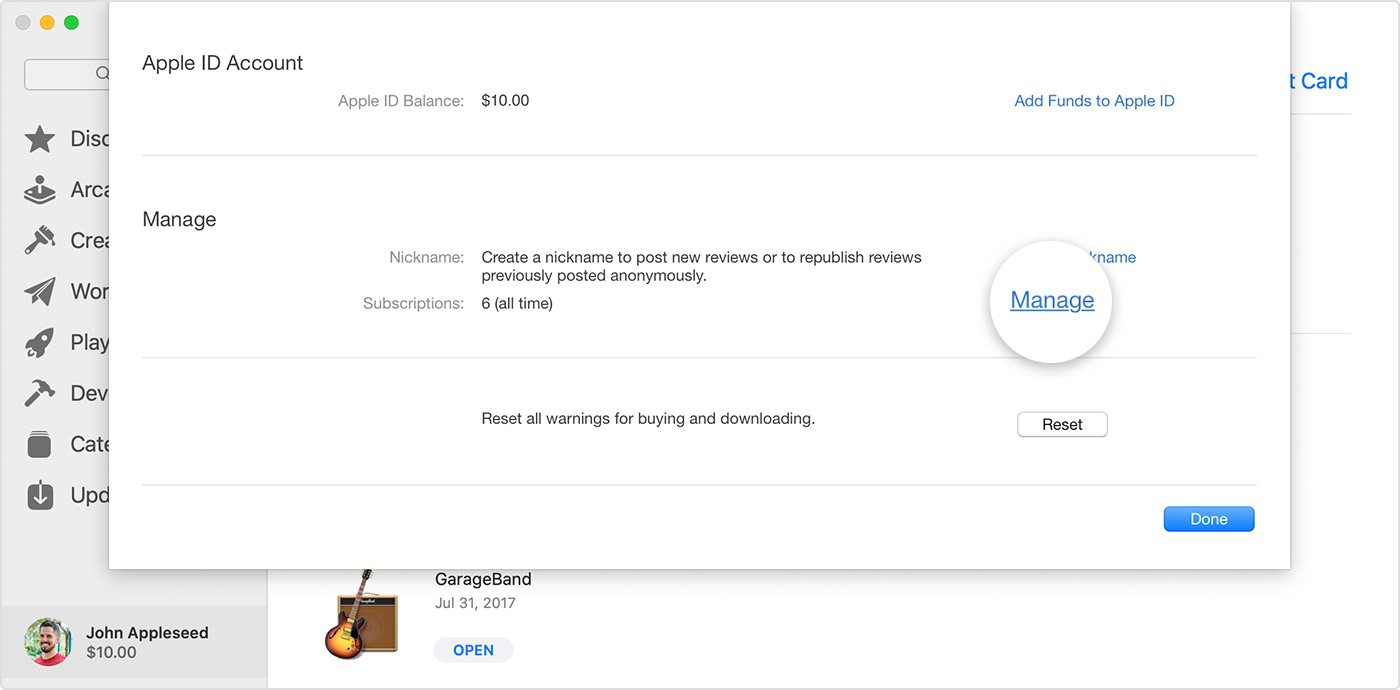
Отмена подписки на компьютере Mac
- Откройте приложение App Store.
- Нажмите кнопку входа или свое имя в нижней части боковой панели.
- Нажмите «См. информацию» в верхней части окна. Может потребоваться выполнить вход.
- Прокрутите вниз открывшуюся страницу до пункта «Подписки», после чего нажмите «Управлять».
- Нажмите «Изменить» рядом с нужной подпиской. Не видите нужную подписку?
- Нажмите «Отменить подписку». Если варианта «Отменить подписку» нет, значит, она уже отменена и не будет продлеваться.
Отмена подписки на компьютере с Windows
Отмена подписки на Apple Watch
- Откройте App Store на часах Apple Watch.
- Прокрутите экран до пункта «Аккаунт» и нажмите его.
- Нажмите «Подписки».
- Нажмите нужную подписку. Не видите нужную подписку?
- Нажмите «Отменить подписку». Если варианта «Отменить подписку» нет, значит, она уже отменена и не будет продлеваться.
Отмена подписки на Apple TV
На Apple TV можно редактировать подписки только для приложений tvOS, установленных на этом Apple TV. Если у вас Apple TV (3-го поколения или более ранней модели), для управления подписками необходимо использовать устройство iOS или iPadOS либо компьютер.
- Откройте приложение «Настройки».
- Выберите пункт «Пользователи и учетные записи», затем — свою учетную запись.
- Выберите «Подписки».
- Выберите нужную подписку, затем выберите «Отменить подписку». Если варианта «Отменить подписку» нет, значит, она уже отменена и не будет продлеваться.
Если у вас нет устройства Apple или компьютера с Windows
- Вы можете отменить подписку Apple Music на веб-сайте.
- Вы можете отменить подписку Apple TV+ на веб-сайте.
- Если вы хотите отменить другую подписку Apple, обратитесь в службу поддержки Apple.
Об отмене подписок Apple
- Большинство подписок автоматически возобновляется, если их не отменить.
- После отмены платной подписки ее можно продолжать использовать до даты выставления следующего счета.
- Если отменить подписку во время пробного бесплатного периода, доступ к содержимому может быть прекращен сразу же.
Если вы оформили пробную бесплатную подписку или подписку со скидкой и не хотите продлевать ее, отмените ее по крайней мере за 24 часа до окончания ознакомительного периода.
В Израиле, ЮАР и Турции отмена подписок выполняется несколько иначе. Узнайте об особых обстоятельствах для этих стран и регионов.
Информация о продуктах, произведенных не компанией Apple, или о независимых веб-сайтах, неподконтрольных и не тестируемых компанией Apple, не носит рекомендательного или одобрительного характера. Компания Apple не несет никакой ответственности за выбор, функциональность и использование веб-сайтов или продукции сторонних производителей. Компания Apple также не несет ответственности за точность или достоверность данных, размещенных на веб-сайтах сторонних производителей. Обратитесь к поставщику за дополнительной информацией.
Источник
Subscribe to iTunes Match
iTunes Match gives you access to all of your music on all of your devices, even songs that you’ve imported from other sources such as CDs.
About iTunes Match
iTunes Match uploads your music library from the Apple Music app on your Mac or iTunes for Windows on your PC. Then you can access your music library on all of your devices that have Sync Library turned on.
To subscribe to iTunes Match, update your Mac to the latest version of macOS. On your PC, make sure that you have the latest version of iTunes for Windows.
iTunes Match isn’t a back up service, so make sure to always have a back up of your music collection before you make any changes.
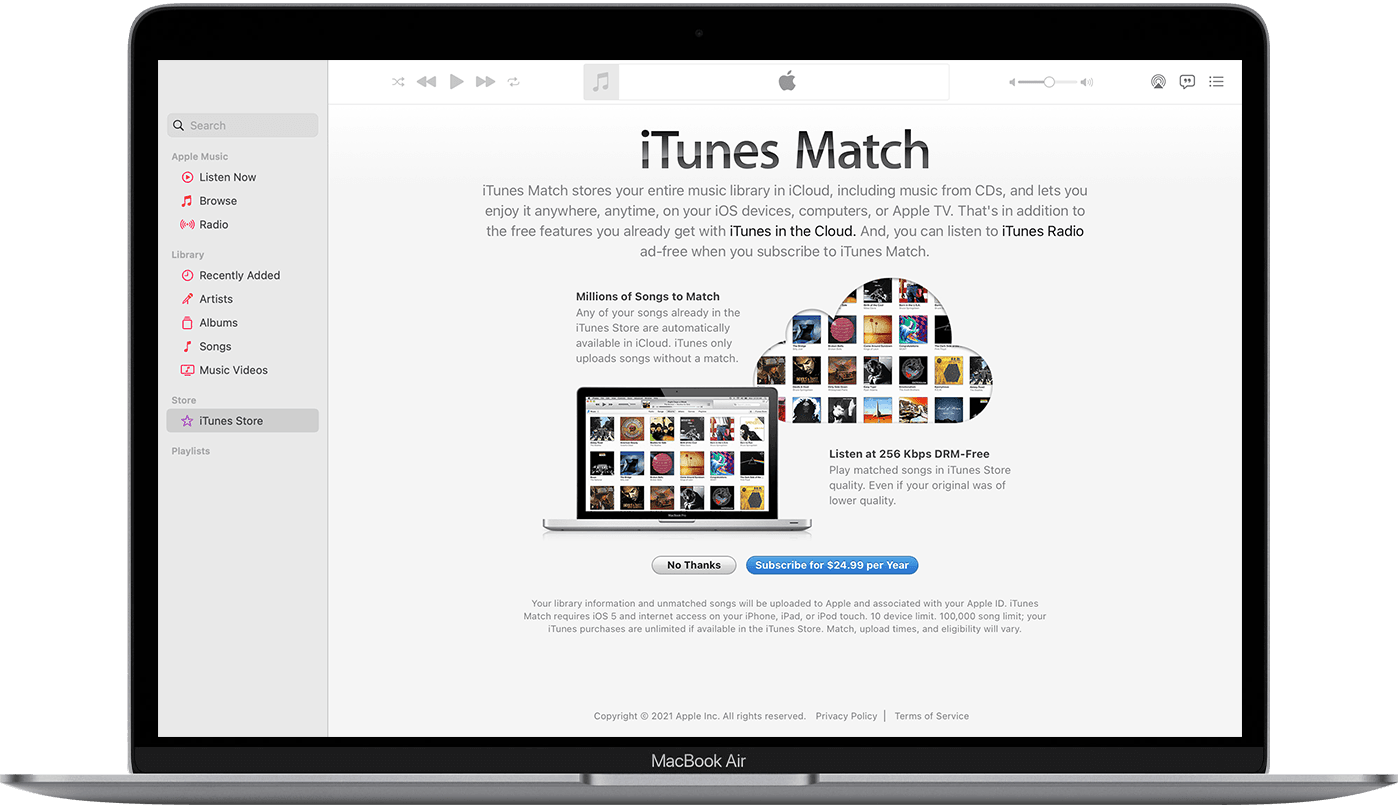
Subscribe to iTunes Match
- On your Mac, open the Apple Music app. On your PC, open iTunes for Windows.
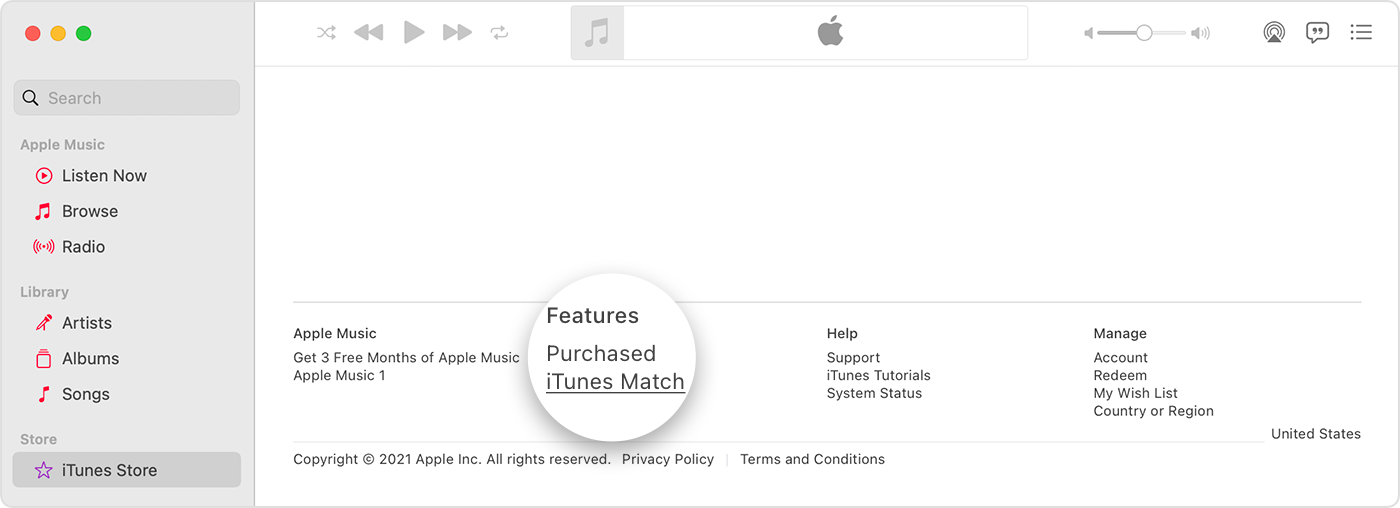
- On your Mac, go to the sidebar and click iTunes Store. Don’t see the iTunes Store on your Mac? On your PC, click Store at the top of the iTunes window.
- Scroll to the bottom of the Store window. Under Features, click iTunes Match.
- Click the Subscribe button.
- Sign in with the Apple ID and password.
- Confirm your billing information. You might need to add a valid payment method. Then click Subscribe.
After you subscribe, iTunes Match automatically scans your music library for matches. A status indicator lets you track the scan’s progress. You can manually pause and resume the scan at any time by clicking the Stop or Start button.
It might take some time for iTunes Match to upload your music from your Mac or PC. If your Mac or PC disconnects from the Internet during the upload process, iTunes Match will automatically resume where it left off the next time you open the Apple Music app or iTunes for Windows.
Once your music library is uploaded, you’ll see the Download button next to songs that are available in iCloud. If you don’t see the Download button, then the song is already in your local music library.
If you don’t see the iTunes Store on your Mac
In the latest version of macOS, the iTunes Store might be hidden. Here’s how to find it:
- In the Apple Music app, go to the menu bar and choose Music > Preferences.
- Go to the General tab and select iTunes Store.
- Click OK.
Cancel your iTunes Match subscription
By default, your iTunes Match subscription automatically renews at the end of your one-year subscription. Learn how to cancel your subscription.
Use iTunes Match
To access your songs and playlists on other devices, turn on Sync Library on all of your devices.
When you sign in with the Apple ID that you use with iTunes Match on your iPhone, iPad, iPod touch, Mac, or PC, you associate that device with your account and get access to your music library.
iTunes Match isn’t available for Android devices.
Learn more
- Learn how to turn on Sync Library on all of your devices.
- If songs are missing from your music library after you turn on Sync Library, learn what to do.
- Learn how to delete music from your devices.
- Learn about the cloud status icons you’ll see when you have an iTunes Match subscription.
iTunes Match availability varies by country and region.
Information about products not manufactured by Apple, or independent websites not controlled or tested by Apple, is provided without recommendation or endorsement. Apple assumes no responsibility with regard to the selection, performance, or use of third-party websites or products. Apple makes no representations regarding third-party website accuracy or reliability. Contact the vendor for additional information.
Источник
Change your subscription from Apple
Switch your subscription to a different type, such as a monthly plan, annual plan, or student plan. And see a list of subscription plans that are available on your devices.
How to change your subscription plan on your iPhone, iPad, or iPod touch
- Open the Settings app.
- Tap your name, then tap Subscriptions.
- Tap the name of the subscription that you want to change.
- If different types of subscriptions are available, a list appears. Tap the option that you want.
- Tap Purchase.
- If you chose a subscription that you can share with family, scroll down and turn on Share with Family. (Don’t see Share with Family? Set up Family Sharing or join a family, then return to this page and turn on Share with Family.) If you don’t want to share the subscription with your family, turn off Share with Family.
Change your subscription plan on your Mac
- Open the App Store app.
- Click the sign-in button or your name at the bottom of the sidebar.
- Click View Information at the top of the window. You might be asked to sign in.
- On the page that appears, scroll to Subscriptions, then click Manage.
- Click Edit next to the subscription that you want to change.
- Choose a different subscription option.
- If you chose a subscription that you can share with family, scroll down and turn on Share with Family. (Don’t see Share with Family? Set up Family Sharing or join a family, then return to this page and turn on Share with Family.) If you don’t want to share the subscription with your family, turn off Share with Family.
Change your subscription plan on your Apple TV
- Open Settings.
- Select Users & Accounts, then select your account.
- Select Subscriptions.
- Choose the subscription that you want to change.
- Choose a different subscription option.
- If you choose a subscription that you can share with family members, make sure that you have set up Family Sharing or joined an existing family group.
Change your subscription plan on your Apple Watch
- On your Apple Watch, open the App Store.
- Scroll to Account and tap it.
- Tap Subscriptions.
- Tap the subscription that you want to change.
- If you choose a subscription that you can share with family members, make sure that you have set up Family Sharing or joined an existing family group.
What subscription plans are available
![]()
- Combine subscriptions from Apple, including Apple Music, Apple Arcade, iCloud storage, and more, for one low price. Choose an Individual, Family, or Premier plan.
- Monthly (includes up to 6 family members)
- Annual (includes up to 6 family members)
- Monthly (includes up to 6 family members)
- Annual (includes up to 6 family members)
- Monthly individual
- Annual individual
- Family (includes up to 6 family members)
- Student
- Monthly only (includes up to 6 family members)
- Monthly (includes up to 6 family members)
- Annual (includes up to 6 family members)
Apple TV channels
- Monthly only (includes up to 6 family members)
Apple Podcasts Subscriptions
- Monthly (includes up to 6 family members)
- Annual (includes up to 6 family members)
Apps that aren’t made by Apple
- Follow the steps in this article to see what subscription plans are available. Some subscriptions can be shared with family members.
![]() Some subscriptions are not available in all countries and regions. Find out what services are available in your country or region.
Some subscriptions are not available in all countries and regions. Find out what services are available in your country or region.
Learn more
- Change your payment method.
- Verify that you are eligible for a student subscription.
- When you join an existing family subscription, your individual or student subscription is canceled at the end of the next billing cycle.
Information about products not manufactured by Apple, or independent websites not controlled or tested by Apple, is provided without recommendation or endorsement. Apple assumes no responsibility with regard to the selection, performance, or use of third-party websites or products. Apple makes no representations regarding third-party website accuracy or reliability. Contact the vendor for additional information.
Источник
Get an Apple Music student subscription
Students enrolled in degree-granting universities and colleges can join Apple Music at a discounted monthly rate for up to 48 months. And if you have an Apple Music student subscription, you also get Apple TV+ for a limited time.
To qualify for an Apple Music student subscription, you must be a student studying a bachelor degree, post-graduate degree, or equivalent Higher Education course at a University, College (U.S. only) or Post-Secondary School (Canada only). Junior, technical colleges, and special courses are also eligible in Japan.
The Apple Music student subscription is only available in certain countries and regions. Learn more about Apple Music availability and pricing.
How to get a student subscription to Apple Music
- Open the Apple Music app or iTunes.
- Go to Listen Now or For You.
- Tap or click the trial offer (one trial per person or family).
- Choose Student, then tap or click Verify Eligibility.
- You’ll be taken to the UNiDAYS website where you’ll need to follow the onscreen prompts to verify your enrollment. After UNiDAYS verifies that you’re a student, you’ll be redirected back to the Apple Music app or iTunes.
- Sign in with the Apple ID and password that you use to make purchases. If you don’t have an Apple ID, choose Create New Apple ID, then follow the steps. If you’re not sure if you have an Apple ID, we can help you find out.
- Confirm your billing information and add a valid payment method.
- Tap or click Join.
![]()
How to get Apple TV+
If you have an Apple Music student subscription, you can enjoy free access to Apple TV+ for a limited time. Just open the Apple TV app and start watching Apple Originals. You can’t share your free Apple TV+ access with Family Sharing.
Apple TV+ isn’t available in all countries and regions. You might be able to use Apple Music but not Apple TV+ in your country or region. Learn what’s available in your country or region.
![]()
How to reverify your student status
Near the end of each year that you have an Apple Music student subscription, you’ll see a message that asks you to verify your student status in the Apple Music app or iTunes. You can also verify your student status at any time in the Settings app on your iPhone, iPad, or iPod touch.
In the Apple Music app or iTunes for Windows
If you see a message that asks you to verify your student status:
- Tap or click Verify Eligibility.
- Tap or click Go to Website.
- Sign in to your institution’s portal.
- After you sign in to your institution’s portal, you’ll be directed back to Apple Music and see a confirmation screen.
In Settings on your iPhone, iPad, or iPod touch
- Go to Settings > [your name], then tap Subscriptions.
- Tap Apple Music Membership.
- Tap «Verify your student status.» You’ll be redirected to the UNiDAYS website.
- Follow the prompts to verify your eligibility. If the verification is successful, you’ll automatically return to Apple Music and continue your Apple Music student subscription.
If you’re no longer a student
If you’re no longer a student or if you complete 48 months of a student subscription, your subscription automatically becomes an Apple Music individual subscription and you lose free access to Apple TV+.
If you’re prompted to verify your student status after launching Apple Music, but you’re no longer a student or have completed 48 months of a subscription, tap or click «I’m No Longer A Student.» You won’t be asked to verify again.
If you don’t confirm during the verification period, and you still have time left in your 48 months, you’ll have to re-enroll as a student.
Источник


