- Maps SDK for Android
- Requirements
- Java compatibility
- Use with other Mapbox tools
- Static maps
- Mapbox Studio
- Conditions
- Attribution
- Добавьте элегантные карты в ваше приложение для Android с помощью MapBox
- Установка Mapbox
- Макет карты
- Добавление маркера на карту
- Получить местоположение устройства.
- Почти готово!
- Создайте две точки маршрута и добавьте маркер в пункте назначения.
- Создайте сетевой запрос MapboxDirections и выполните его асинхронно.
- Нарисуйте ломаную линию на основе координат на карте.
- Пройдя лишнюю милю
- Camera position
- Set camera position
- Set camera on map initialization
- Mapbox cameraposition android studio
- About
Maps SDK for Android
Current version: v 10.1.0 View changelog
The Mapbox Maps SDK for Android is a library for embedding highly customized maps within Android applications.
Use custom map styles. Start with one of our Mapbox-designed styles that are optimized for various use cases or design your own custom style in Mapbox Studio. Enhance the experience with 3D terrain. You can even alter your map’s style at runtime.
Add your own custom data to the map. Whether you’re adding markers to a map to include a store locator right in your app or creating compelling data visualizations, the Maps SDK gives you control over how you display data on your map. You can style map features at runtime based on data properties, user interaction, or device settings.
Your browser doesn’t support HTML5 video. Open link to the video.
Requirements
The Mapbox Maps SDK for Android is compatible with applications that:
- Are built using the Android SDK 21 or higher.
- Use Java 8 for sourceCompatibility and targetCompatibility , as shown in the installation guide.
Java compatibility
The Mapbox Maps SDK for Android is built with Kotlin, the official language recommended by Google for Android development. Kotlin is 100% interoperable with Java.
Applications with a Java codebase can interact properly with the public APIs exposed by Mapbox SDKs for Android. If you experience any issues using the Mapbox Maps SDK for Android with Java, contact us.
Use with other Mapbox tools
Use the Mapbox Maps SDK for Android with other Mapbox products. Mix and match other tools and plugins to create a location-savvy application to your exact specifications.
Static maps
The Mapbox Maps SDK for Android includes methods to generate a static snapshot of an existing map within your application. Use the MapSnapshotter class to create a static raster image of a map, without having to make a request to another API.
The Java SDK is also available for applications that need direct access to the Mapbox Static Images API.
Mapbox Studio
The Mapbox Maps SDK is compatible with Mapbox Studio. Design a map that seamlessly matches your brand and application design, then infuse it with your own custom data all within the Mapbox Studio web interface.
Conditions
Attribution
You must include the Mapbox wordmark on any map that uses the Mapbox Maps SDK for Android. You must display attribution on maps unless the map’s data comes entirely from non-Mapbox sources.
You may adjust the position of the Mapbox wordmark and attribution notice, but they must stay visible on the map. You may also change the background and text color of the attribution notice to match your design aesthetics, but all information must be legible.
You may not otherwise alter the Mapbox wordmark or text attribution notice.
Источник
Добавьте элегантные карты в ваше приложение для Android с помощью MapBox
Mapbox — это SDK с открытым исходным кодом для идеальных по пикселям векторных карт, который обещает скорость рендеринга и плавность видеоигры. Если вы заинтересованы в интеграции функциональности карты в свои приложения, тогда стоит рассмотреть Mapbox.
Обзор и примеры Mapbox Android SDK являются хорошей отправной точкой. В этом уроке я создам что-то более сложное, приложение, которое рисует лучший маршрут от пункта отправления до пункта назначения на карте.

Вы можете найти код для окончательного проекта на GitHub .
Для использования Mapbox в вашем приложении вам понадобится токен доступа API. Чтобы получить его, создайте учетную запись Mapbox и найдите свою здесь .

Добавьте токен в strings.xml в вашем проекте Android:
В AndroidManifest.xml добавьте следующие разрешения для доступа в Интернет и определения местоположения.
Примечание . В Android Marshmallow (API 23) и выше необходимо запрашивать разрешения во время выполнения .
Установка Mapbox
Откройте build.gradle (Module: app) и добавьте MapBox в качестве зависимости.
Первая зависимость представляет собой Mapbox, а вторая — это библиотека маршрутов, позволяющая добавлять в приложение маршруты вождения, прогулок и езды на велосипеде и рисовать их на карте.
Макет карты
В файле макета content_main.xml замените содержимое следующим:
Инициализируйте переменные, которые вам понадобятся в классе MainActivity :
В onCreate() файла MainActivity.java удалите панель инструментов и код кнопки плавающего действия и инициализируйте карту, добавив:
Карты Mapbox должны реализовывать методы жизненного цикла Activity чтобы избежать ошибок времени выполнения, поэтому добавьте необходимые функции переопределения.
Теперь, когда Mapbox настроен, пришло время начать сборку приложения.
Добавление маркера на карту
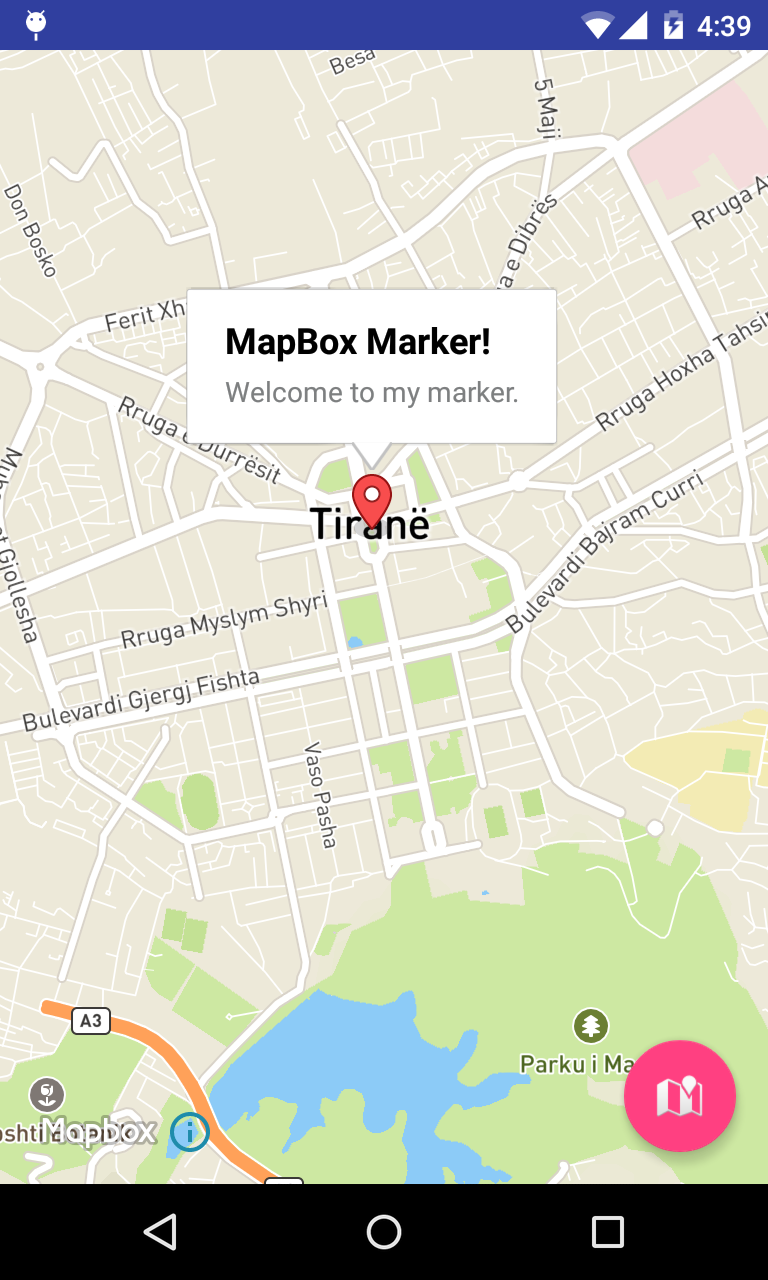
Добавьте следующее в onCreate в MainActivity :
CameraPosition — это полезный класс Mapbox, используемый для установки положения, угла, масштабирования и наклона точки обзора пользователя.
Вот как выглядит маркер на карте:
Получить местоположение устройства.
Чтобы Mapbox мог получить доступ к местоположению устройства, службы определения местоположения должны быть включены, и приложение должно иметь разрешение на их использование. Как упоминалось ранее, в Android Marshmallow (API 23) и более поздних версиях необходимо запрашивать разрешения во время выполнения .
Добавьте код, чтобы получить текущее местоположение для новой функции:
И вызвать эту функцию после кода инициализации карты:
В этом случае для отслеживания установлено значение TRACKING_FOLLOW , что означает, что местоположение пользователя будет постоянно отслеживаться, и карта будет обновляться по мере изменения.
Почти готово!
Теперь у вас есть маркер и местоположение, затем рисует маршрут на карте.
При этом используется вторая библиотека, импортированная в зависимостях, «Библиотека направлений», также созданная командой Mapbox.
Вот как это работает:
- Создайте две Waypoint , источник и пункт назначения.
- Создайте MapboxDirections построителя MapboxDirections , который представляет собой сетевой запрос к API-интерфейсу Mapbox, содержащий исходную и конечную Waypoint и профиль маршрута (вождение, ходьба или езда на велосипеде).
- Выполнить запрос направления асинхронно. Класс MapboxDirections имеет встроенный асинхронный запрос с использованием Retrofit API, используя enqueue() для выполнения запроса.
- Метод onResponse() возвращает ответ Retrofit, который является стандартным ответом JSON API.
- Тело ответа содержит пары координат местоположения, координаты, которые будут нарисованы на карте.
- С помощью Mapbox Polyline координаты нарисованы на карте. Полилиния — это геометрический объект с незамкнутым списком координат, нарисованным в виде линии.
Чтобы использовать библиотеку «Направление», получите местоположение устройства в качестве начальной точки и местоположение, указанное пользователем, для чего нажмите и удерживайте нажатой карту на карте в качестве конечной точки.
Создайте две точки маршрута и добавьте маркер в пункте назначения.
Добавьте следующее в onCreate функции onCreate :
Создайте сетевой запрос MapboxDirections и выполните его асинхронно.
Добавьте следующий метод, чтобы получить лучший маршрут:
Нарисуйте ломаную линию на основе координат на карте.
Добавьте этот метод, чтобы нарисовать маршрут:
Запустите проект, выберите две точки, и вы должны увидеть что-то вроде ниже.

Пройдя лишнюю милю
В этом уроке я рассмотрел основы, чтобы вы начали работать с MapBox SDK и библиотекой Direction. MapBox имеет более интересные функции для использования в вашем приложении, такие как различные стили карт или для чего-то другого, собственные векторные карты.
Другая библиотека, которую я рекомендую, — это библиотека геокодирования для преобразования координат в адреса или наоборот. Чтобы узнать больше о MapBox, проверьте его мобильные карты , где вы можете найти информацию о библиотеках, упомянутых в этом руководстве.
Источник
Camera position
The Mapbox Maps SDK for Android gives you complete control over the position of the map camera. The camera’s location and behavior is defined by its properties:
- center : The longitude and latitude at which the camera is pointed.
- bearing : The visual rotation of the map. The bearing value is the compass direction the camera points to show the user which way is «up». For example, a bearing of 90В° orients the map so that east is up.
- pitch : The visual tilt of the map. A pitch of 0В° is perpendicular to the surface, looking straight down at the map, while a greater value like 60В° looks ahead towards the horizon.
- zoom : The zoom level specifies how close the camera is to the features being viewed. At zoom level 0, the viewport shows continents and oceans. A middle value of 11 shows city-level details, and at a higher zoom level the map begins to show buildings and points of interest.
- padding : Insets from each edge of the map. The padding value impacts the location at which the center point is rendered.
- anchor : The point in the map’s coordinate system around which zoom and bearing are applied. Mutually exclusive with center .
Set camera position
The Maps SDK allows you to set the camera’s position on map initialization, or after the map has already been initialized. You can also set the camera’s position based on the user’s location or fit the camera to a specific shape.
Set camera on map initialization
You can configure many of your map’s characteristics, including the starting camera position or the location of the compass on the screen, in your activity’s layout file.
When you add a map to your application programmatically instead of using XML, specify the camera position when you initialize the map by defining CameraOptions , passing those options to MapInitOptions , and using those options when initializing the MapView . This approach is best if you know what part of the world you want to show a user first. Since the SDK will load the tiles around the specified location first, the map may appear to load faster.
CameraOptions parameters are optional. For any parameters that aren’t specified, the SDK will use the default value.
Источник
Mapbox cameraposition android studio
Example Android project for a workshop that teaches Android app development.
Android: operating system for smartphones or tablets.
iOS: operating system for iPhones or iPads.
App: application, computer program that runs on the platform, i.e. Android or iOS.
Activity: A screen in Android
UI: User Interface
UI elements: graphical elements for the user interface, e.g. text, input fields, pictures or buttons.
SDK: Software Development Kit: set of libraries for developing apps
Framework: software where we just need to write our logic or customization
IDE: Integrated Development Environment: code editor with helpful tools
Android Studio: IDE for making Android apps
Xcode: IDE for making iOS apps
adb: Android Debug Bridge: tool for putting an app from the IDE on the phone and debug it
Bug: error/mistake in a computer program
debugging: process of going through the program step by step to find the error
API: Application Programming Interface
REST: Representational State Transfer: an API for HTTP
HTTP: Hypertext Transfer Protocol: a protocol for sending information over the internet
Communicating with a Server
Apps and websites often use REST APIs for communicating with a server over the internet.
And you will get data back that looks like this:
This format is called JSON, and its advantage is that it can be understood all different apps: Android, iOS and web applications.
There are frameworks that support developing an app for multiple platforms, usually both Android and iOS.
Usually they create apps that use HTML5, CSS and JavaScript: web apps.
Examples for these franeworks are:
- Apache Cordova (formerly PhoneGap)
- Sencha Touch
- Crosswalk Project
- Enyo
- iUI
There are also frameworks that let you build the app once, and then create native apps for all platforms.
- React Native (using JavaScript)
- Xamarin (using .NET)
- Unity (using C#)
There are also Progressive Web Apps. These are apps that run in the browser of your phone. They are advanced websites that display content for mobile devices.
Go ahead and try them out!
The Development Cycle
The typical lifecycle for a bug-fix goes like this:
- There is a new app version released.
- A bug is reported.
- The developer fixes that bug.
- A fellow developer does a code review.
- The system builds a snapshot.
- QA tests it.
- A new app version is released.
There are several services that you can use to distribute an app to a selected circle of testers. For this example we chose HockeyApp.
- Crashlytics Beta
- TestFlight (iOS)
- DryDock (iOS)
- Google Play Store: Beta Testing (Android)
In bigger companies, you would usually have a team that consists of:
- PO: Product Owner
- Designer
- QA: Quality Assurance
- Backend developers
- Android developers
- iOS developers
- (DevOps and/or IT)
Usually, a software development team has a board that helps them doing their agile process (Scrum, Kanban). This usually contains:
- a backlog where all open tickets are collected and sorted by priority
- a sprint board or scrum board whith columns like OPEN, IN PROGRESS, IN REVIEW, and DONE
- a burndown chart, where the progress of a sprint is visualized
A sprint is a time span of usually 2 weeks, where developers focus on solving a certain amount of issues from the backlog.
After a developer implemented a new feature or fixed a bug, another developer will have a look at the code and double-check that everything is fine: the code review.
Usually, developers use a software for version control, so they can keep track of the changes or revert changes.
One of the most common version control tools is git.
If a developer made changes to the code, they can add these changes, and then commit them with a commit message.
GitHub is an online platform where developers can push their commits to. An example is this project here.
Have a look at the commit history.
If a developer starts working on a project, they usually check out a new branch. This way, multiple developers can work on the same project in parallel.
When a developer finished a feature or bugfix, they need to merge their branch back into the master branch. On GitHub this is done with a pull request.
When a pull request is open, the other developers can easily check the changes for errors or weaknesses.
A continuous integration (CI) system can automatically:
- run unit tests
- run code quality tools, e.g. lint
- upload a new snapshot version
- upload a new release version
Examples for these systems are:
What do you need to get started?
- Your laptop
- An internet connection
- Android Studio
- An Android phone (optional)
Setting up Android Studio
Install Android Studio. If it asks you to install Java, install it, too.
Open Android Studio. Follow the instructions and install at least one SDK.
Create your first App
Open Android Studio and select «Start a new Android Studio project».
Give it a name (e.g. «MapBox Example»).
As company domain, use the following pattern:
So if your name would be Lisa Simpson, this would be:
Press next, choose «Phone and Tablet», press next.
Select «Empty Activity», press next and finish.
Click «AVD Manager» and «Create virtual device. «.
Select “Phone” and choose one (e.g. Pixel). Click next.
For the system image, choose the first one, click «Download», and once it’s downloaded, press Finish. Your device will now be listed in the list of emulators.
Click the «run» button and wait until it started.
In Android Studio, press the green «play» icon. It starts up your app in the emulator.
Alternatively, you can connect your Android phone with a USB cable and choose that.
For this, you have to enable USB debugging in your phone’s settings.
Add MapBox to Your App
Add the MapBox Access Token
MapBox doesn’t show a map if we don’t use a key: the MapBox access token. For using their SDK, they want you to register an account.
I did that already, and prepared an access token for you on the USB drive that you got.
Open the key.txt file on your USB drive and copy the key.
In your project, go to res/values . Right click the values folder and choose New. — Values resource file .
At file name type keys.xml and press OK .
Open the file, and between the tags, in a new line, type:
Then, in between the > and the , paste your key.
Adding MapBox to the project
For downloading external dependencies (like the MapBox SDK), in Android we use Gradle,
In build.gradle (Project: . ) in line 22, below jcenter() , add:
In app/build.gradle (Module: app) below line 24 add:
Build the project.
This will download the MapBox SDK library that contains everything we need.
Displaying a map
In activity_main.xml replace existing code with the following content:
At AndroidManifest.xml add the following content at line 4:
In MainActivity.java in line 7 after the first < put this:
Replace the code that says setContentView(R.layout.activity_main); with this:
After line 20, before the last >, paste the following methods:
Add a Marker and an Info Window
In the method protected void onCreate(Bundle savedInstanceState) after the last statement but before the closing >, paste this code:
Run your app and see what happens when you tap the marker.
Change the Camera Position
As you have noticed, when the app starts, MapBox will always show Chicago first.
We can change that with the following steps:
First, we need to find latitude and longitude of the location that we want to show first.
For finding out longitude and latitude of places, go to http://www.latlong.net/.
Find the latitude and longitude of, for example, Stuttgart.
Go to the file activity_main.xml . In line 14 and 15 you see that there are some latitude and longitude values given:
Replace the numbers with the latitude and longitude of your city.
Change the Location of the Marker
Go to MainActivity.java and find the line .position(new LatLng(41.885,-87.679)) in the code that you just pasted.
There, replace the numbers with the latitude and longitude of your city.
Run the app and see if your marker is at your new location now.
Can you also change the text of the snippet?
Change the Marker Icon
In your Android Studio project, navigate to the res folder.
Create all the drawable-. folders there that you see at https://github.com/hamburgcodingschool/android-mapbox-example/tree/master/app/src/main/res.
From each of these folders, download the ic_directions_car.png file and put them at the same folder in your project.
At line 27, just before mapView.getMapAsync(new OnMapReadyCallback() < , paste the following line:
Then, one line below .snippet(«Baden-Württemberg») , add:
Run your app and see how it looks.
If you want to create your own icons, you can use the Android Asset Studio: https://romannurik.github.io/AndroidAssetStudio/index.html
Share your Location
For listening to clicks on the info window (the text shown when a marker is clicked), we need to create a listener like this:
This needs to be added in a new line just below
but before the closing > of public void onMapReady(MapboxMap mapboxMap) < .
Next, we need to fill in some logic, so that it looks like this:
Run your app and share the location of your marker with someone!
Note: this may not work if no email or similar account is set up in your emulator.
We explain all you need to know in this workshop.
Show the Phone’s Location
At the end of the method onMapReady() , switch on the maps blue icon for the location:
This won’t work yet, because of Android’s location permissions. This permission needs to be granted by the user first.
Add the following code for checking the location permission:
The variable MY_PERMISSIONS_REQUEST_LOCATION is marked red, because it’s not there yet. We need to add it to the beginning of the class:
This is showing a dialog to the user that asks whether or not the app is allowed to use the phone’s location.
We also need to react to the decision of the user: it’s called a «Callback».
Directly at the beginning of the class, after AppCompatActivity , make a space and add this:
implements ActivityCompat.OnRequestPermissionsResultCallback .
Add a new line directly after private MapView mapView; and add:
Then, at the beginning of the onMapReady() method, on the first line after <, add:
At the end of the class, just before the last > , put the following code:
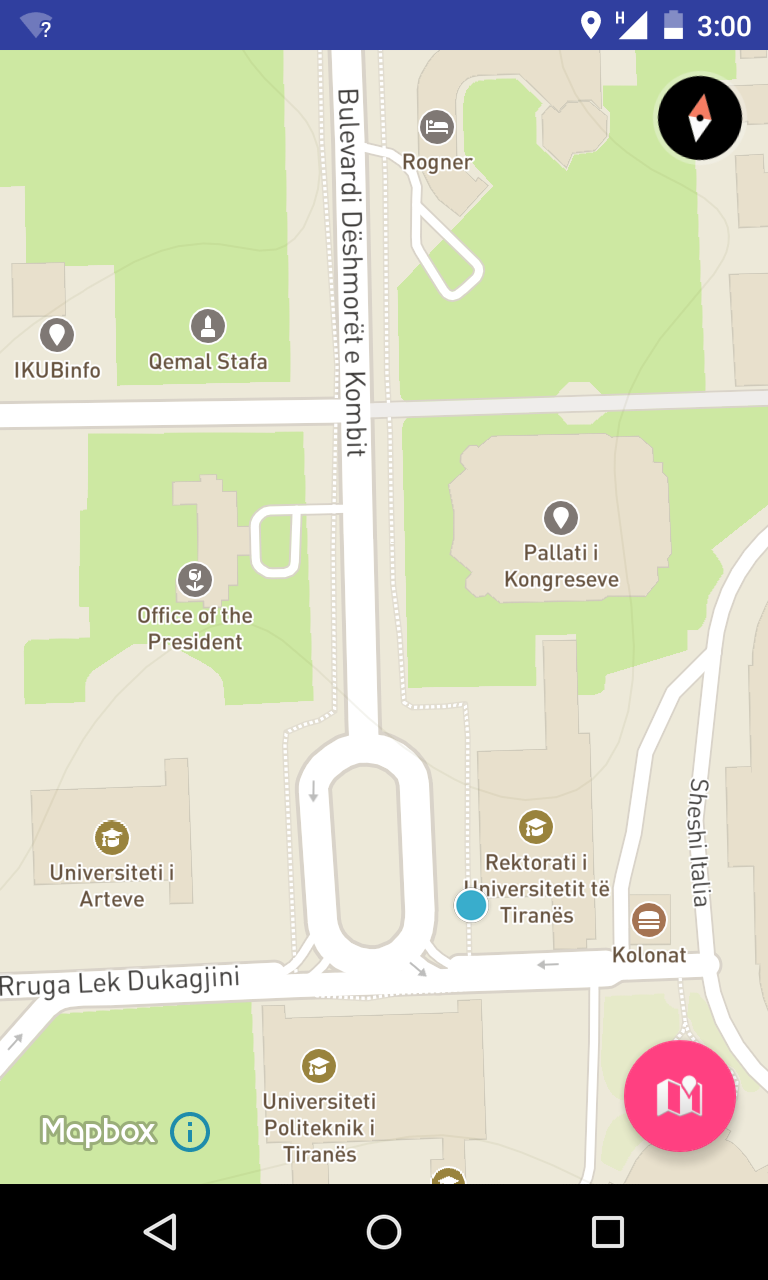
Now, if you start your app, you get a dialog asking you to grant permission to use the location.
You should now see a little blue dot at your location.
Create a Button
Open the file activity_main.xml . We need to change the layout so that it shows a button.
Inside the
e.g. in line 7 add:
android:orientation=»vertical»
In the replace line
android:layout_height=»match_parent» with
Almost at the bottom, create a new line above and add a button:
Try changing the label text to Share My Location .
Run your app and see how the layout changed.
The button is not doing anything yet when it’s clicked.
Get the device’s location
In the file app/build.gradle at line 28 add the following line:
In MainActivity at line 33, add the following line:
At the end of method onCreate() , just one line before the > , add:
Now we prepare the function that is showing the location on button click. Add this to the end of the class, just before the last > :
Show Location on Button Click
Now we want to show what the current location is when we click the button.
For that, we need an OnClickListener that is listening to Button clicks.
Find method onMapReady() and put this just before the end:
Now run your app on the emulator and try the new button.
Share Your Location
Now, instead of showing the current location in a toast, we want to share them.
Find the line that says Toast.makeText(MainActivity.this, «Location: » + location, Toast.LENGTH_LONG).show(); .
Delete this line, and at the exact same place put this:
Run your app and try it out!
Fake Your Location
Ever wondered if you can fake your location? You can trick your phone into believing that it is someplace else. Follow these steps to do this:
In your phone, open the Play Store. Search for Fake GPS Location . Install the app that looks like this:

In the phone, go to Settings. Go to System > Developer options . It should be switched on. In there, look for the option Select mock location app . The installed Fake GPS app will be listed there. Click it.
Now open the Fake GPS app. Put the marker somewhere you like, and click play.
The app will go to the background. If you open your own Maps app, it will show your location at that place.
Try sharing your fake location with your friends.
To stop the fake location, open the notification from the top and click it. Press the pause button. This stops the fake location and you will have your original location back.
About
Example Android project for a workshop about MapBox.
Источник


