- MikroTik Winbox для macOS
- Установка Winbox для macOS
- Комментариев: 6
- MikroTik Winbox для macOS
- Установка Winbox для macOS
- v3.31.0
- Winbox-mac:
- Winbox:
- Assets
- v3.30.0
- Winbox-mac:
- Winbox:
- WinBox for Mac
- Winbox
- Starting Winbox
- Simple mode
- Buttons/check-boxes and Other Fields
- Menu Items
- Advanced mode
- Buttons/check-boxes and Other Fields
- Command Line
- IPv6 connectivity
- Run Winbox on macOS
- Run Winbox on Linux
- Interface Overview
- Work Area and Child Windows
- Child window menu bar
- Sorting out displayed items
- Customizing list of displayed columns
- Detail mode
- Category view
- Drag & Drop
- Traffic monitoring
- Item copy
- Transferring Settings
- Troubleshooting
- Winbox cannot connect to the router’s IP address
- I get an error ‘(port 20561) timed out’ when connecting to routers mac address
- I can’t find my device in WinBox IPv4 Neighbors list or MAC connection fails with «ERROR could not connect to XX-XX-XX-XX-XX-XX»
MikroTik Winbox для macOS
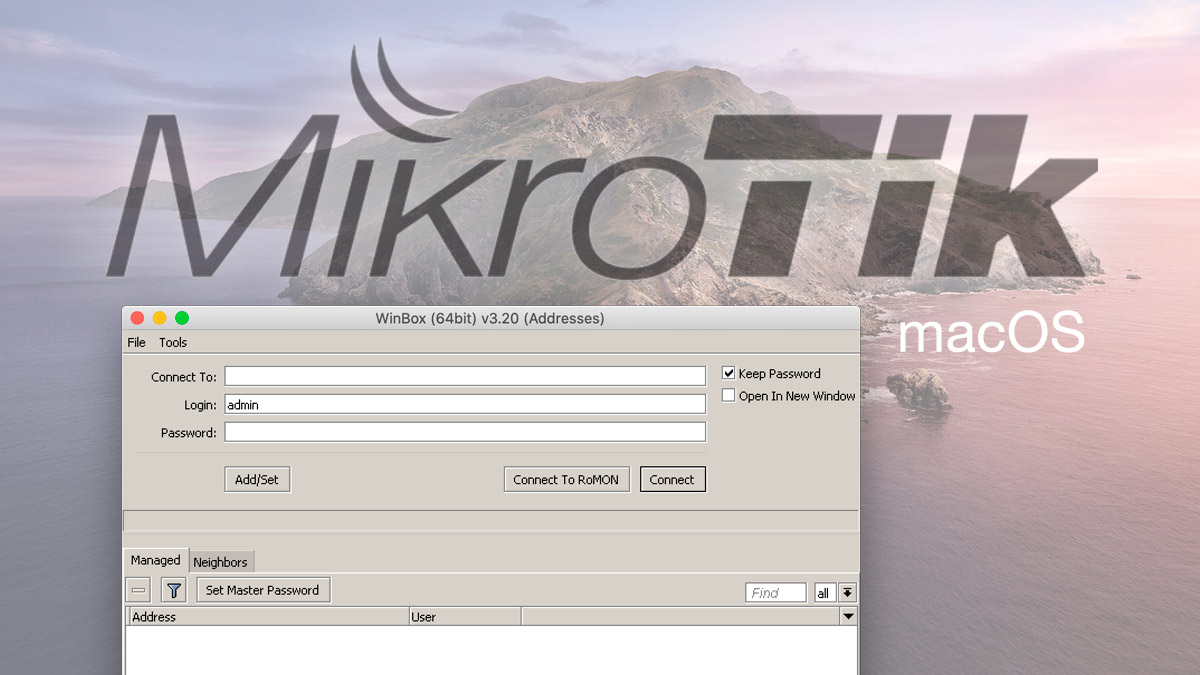
Я давно и основательно перешёл на Мак, но некоторые специфические программы, требующиеся мне в работе есть только под Windows. К таким относится и утилита Winbox, необходимая для настройки роутеров и точек доступа Mikrotik. Конечно, можно держать для этих целей виртуальную машину с Windows, но это скорее напоминает стрельбу из пушки по воробьям.
В идеале, хотелось иметь нативное приложение Winbox непосредственно под macOS, но разработчикам Mikrotik видимо не сказали о существовании других операционных систем кроме Windows. К сожалению, портированной программы для мака так и нет, но на гитхабе нашлось более простое решение Winbox-mac.
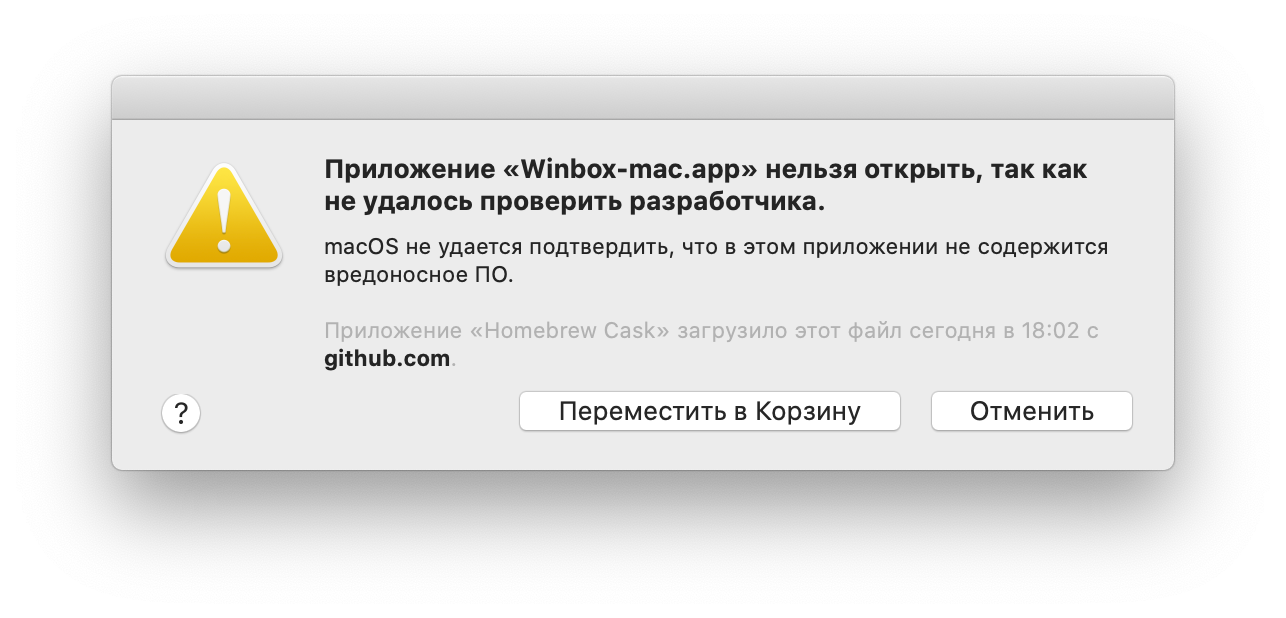
На самом деле это не приложение для macOS в чистом виде, под капотом у него обычный Winbox в комплекте с Wine, в котором оставлены только нужные файлы для запуска. Отсюда и немалый вес приложения в 330 MB против 2,1 MB обычной Windows версии. После установки Winbox-mac появляется в списке программ на Маке, но при первом запуске требуется добавить его в исключения безопасности.
Установка Winbox для macOS
Установка довольно простая, но с затеями (в лучших традициях старых дистрибутивов Linux) и подробно описана на странице Winbox-mac. Для начала поставим Brew. Как написано на страничке проекта, Homebrew это недостающий менеджер пакетов для macOS.
Для его установки выполним в терминале следующую команду:
/usr/bin/ruby -e «$(curl -fsSL https://raw.githubusercontent.com/Homebrew/install/master/install)»
Теперь можно установить сам Winbox и радоваться результату:
brew cask install nrlquaker-winbox
Если считаете статью полезной,
не ленитесь ставить лайки и делиться с друзьями.
Комментариев: 6
А ещё лучше включить для своей подсети доступ по 80 порту в IP Services и пользоваться браузером вместо винбокса
С винбокс удобней. По началу тоже думал -Зачем мне винбокс, когда есть веб морда. Но практика показывает что с винбокс удобней узать микротик.
Была проблема с установкой. Команда в инструкции не срабатывала. Помогло использовать такую команду:
Спасибо тебе добрый человек!
Сработала эта команда — brew install —cask nrlquaker-winbox
Забыли добавить, что при первом запуске необходимо нажать shift что бы появилось дополнительное окно с разрешением добавить в исключения безопасности.
echo ‘export PATH=»/opt/homebrew/bin:$PATH»‘ >> $HOME/.zshrc
Источник
MikroTik Winbox для macOS
Я давно и основательно перешёл на Мак, но некоторые специфические программы, требующиеся мне в работе есть только под Windows. К таким относится и утилита Winbox, необходимая для настройки роутеров и точек доступа Mikrotik . Конечно, можно держать для этих целей виртуальную машину с Windows, но это скорее напоминает стрельбу из пушки по воробьям.
В идеале, хотелось иметь нативное приложение Winbox непосредственно под macOS, но разработчикам Mikrotik видимо не сказали о существовании других операционных систем кроме Windows. К сожалению, портированной программы для мака так и нет, но на гитхабе нашлось более простое решение Winbox-mac .
На самом деле это не приложение для macOS в чистом виде, под капотом у него обычный Winbox в комплекте с Wine , в котором оставлены только нужные файлы для запуска. Отсюда и немалый вес приложения в 330 MB против 2,1 MB обычной Windows версии. После установки Winbox-mac появляется в списке программ на Маке, но при первом запуске требуется добавить его в исключения безопасности.
Установка Winbox для macOS
Установка довольно простая, но с затеями (в лучших традициях старых дистрибутивов Linux) и подробно описана на странице Winbox-mac. Для начала поставим Brew. Как написано на страничке проекта, Homebrew это недостающий менеджер пакетов для macOS.
Для его установки выполним в терминале следующую команду:
/usr/bin/ruby -e «$(curl -fsSL https://raw.githubusercontent.com/Homebrew/install/master/install)»
Теперь можно установить сам Winbox и радоваться результату:
Источник
v3.31.0
Winbox-mac:
Winbox:
- ask to close all WinBox instances before WinBox upgrade, otherwise upgrade will fail;
- fixed table to properly show and hide columns and remember its widths;
- made MAC-telnet work if SSH or telnet was used before;
- update file path after changing its location with drag&drop.
Maintainer wanted. If you want to improve and update Winbox-mac to the latest version please contact me.
Assets
v3.30.0
Winbox-mac:
Winbox:
- added support for mouse wheel scroll in field & table show columns windows;
- double click on word in «Terminal» now automatically selects and copies it to clipboard;
- fixed WinBox disconnect when selecting entries in QuickSet’s «WiFi Clients» table;
- fixed crash when all inner windows were closed;
- fixed crash when opening some of interfaces;
- fixed glitches while resizing column widths or reordering table entries;
- fixed visual glitch when showing table filters and categories;
- fixed visual glitches when scrolling «Terminal» window and Zoom In or Zoom Out is used;
- made Ctrl++ & Ctrl+- still work if focus is on checkbox;
- made Ctrl+C and Enter right after text selection in «Terminal» window work as copy to clipboard;
- made Ctrl+D pass-through to «Terminal», so it is possible to terminate inner telnet or SSH sessions;
- made Ctrl+V work as paste from clipboard;
- made double click in «Torch» window work again;
- properly show «I» flag for invalid entries;
- use router’s time when filling default time in «Scheduler» items;
- added «Windows» menu for list of all currently opened windows;
- added separate «Show Columns» window for list of visible columns;
- allow changing column order by using drag and drop;
- made «Terminal» window titles unique.
Maintainer wanted. If you want to improve and update Winbox-mac to the latest version please contact me.
Источник
WinBox for Mac
Winbox 3.21 LATEST
macOS 10.12 Sierra or later
WinBox for Mac 2021 full offline installer setup for Mac
Winbox for Mac is a small utility that allows administration of MikroTik RouterOS using a fast and simple GUI. It is a native Win32 binary, but can be run on Linux and MacOS (OSX) using Wine. All interface functions are as close as possible mirroring the console functions, that is why there are no sections in the manual. Some of advanced and system critical configurations are not possible from WinBox for Mac, like MAC address change on an interface changelog.
It supports IPv6 connectivity. To connect to the routers IPv6 address, it must be placed in square braces the same as in web browsers when connecting to IPv6 server. Winbox for macOS neighbor discovery is now capable of discovering IPv6 enabled routers. As you can see from the image below, there are two entries for each IPv6 enabled router, one entry is with IPv4 address and another one with IPv6 link-local address.
It has MDI interface meaning that all menu configuration (child) widows are attached to main (parent) Winbox window and are showed in work area. By default the app shows most commonly used parameters. However sometimes it is needed to see another parameters, for example «BGP AS Path» or other BGP attributes to monitor if routes are selected properly. It is possible to upload and download files to/from router using win box drag & drop functionality. You can also download file by pressing right mouse button on it and selecting «Download».
It can be used as a tool to monitor traffic of every interface, queue or firewall rule in real-time. Screenshot below shows ethernet traffic monitoring graphs.
Features and Highlights
- Winbox.exe is signed with an Extended Validation certificate, issued by SIA Mikrotīkls (MikroTik).
- WinBox uses ECSRP for key exchange and authentication (requires new winbox version).
- Both sides verify that other side knows password (no man in the middle attack is possible).
- Winbox in RoMON mode requires that agent is the latest version to be able to connect to latest version routers.
- Winbox uses AES128-CBC-SHA as encryption algorithm (requires winbox version 3.14 or above).
Winbox cannot connect to the router’s IP address?
Make sure that Mac firewall is set to allow connections or disable windows firewall.
I get an error ‘(port 20561) timed out’ when connecting to routers mac address
Windows (7/8) does not allow mac connection if file and print sharing is disabled.
Note: Requires MikroTik router.
Источник
Winbox
Winbox is a small utility that allows the administration of MikroTik RouterOS using a fast and simple GUI. It is a native Win32 binary but can be run on Linux and macOS (OSX) using Wine. All Winbox interface functions are as close as possible mirroring the console functions, that is why there are no Winbox sections in the manual. Some advanced and system critical configurations are not possible from the Winbox, like MAC address change on an interface Winbox changelog
From Winbox v3.14, the following security features are used:
- Winbox.exe is signed with an Extended Validation certificate, issued by SIA Mikrotīkls (MikroTik).
- WinBox uses ECSRP for key exchange and authentication (requires a new Winbox version).
- Both sides verify that the other side knows the password (no man in the middle attack is possible).
- Winbox in RoMON mode requires that the agent is the latest version to be able to connect to the latest version routers.
- Winbox uses AES128-CBC-SHA as an encryption algorithm (requires Winbox version 3.14 or above).
Starting Winbox
Winbox loader can be downloaded from the MikroTik download page. When winbox.exe is downloaded, double click on it, and the Winbox loader window will pop up. There are two Winbox loader modes: simple which is enabled by default and advanced.
Simple mode
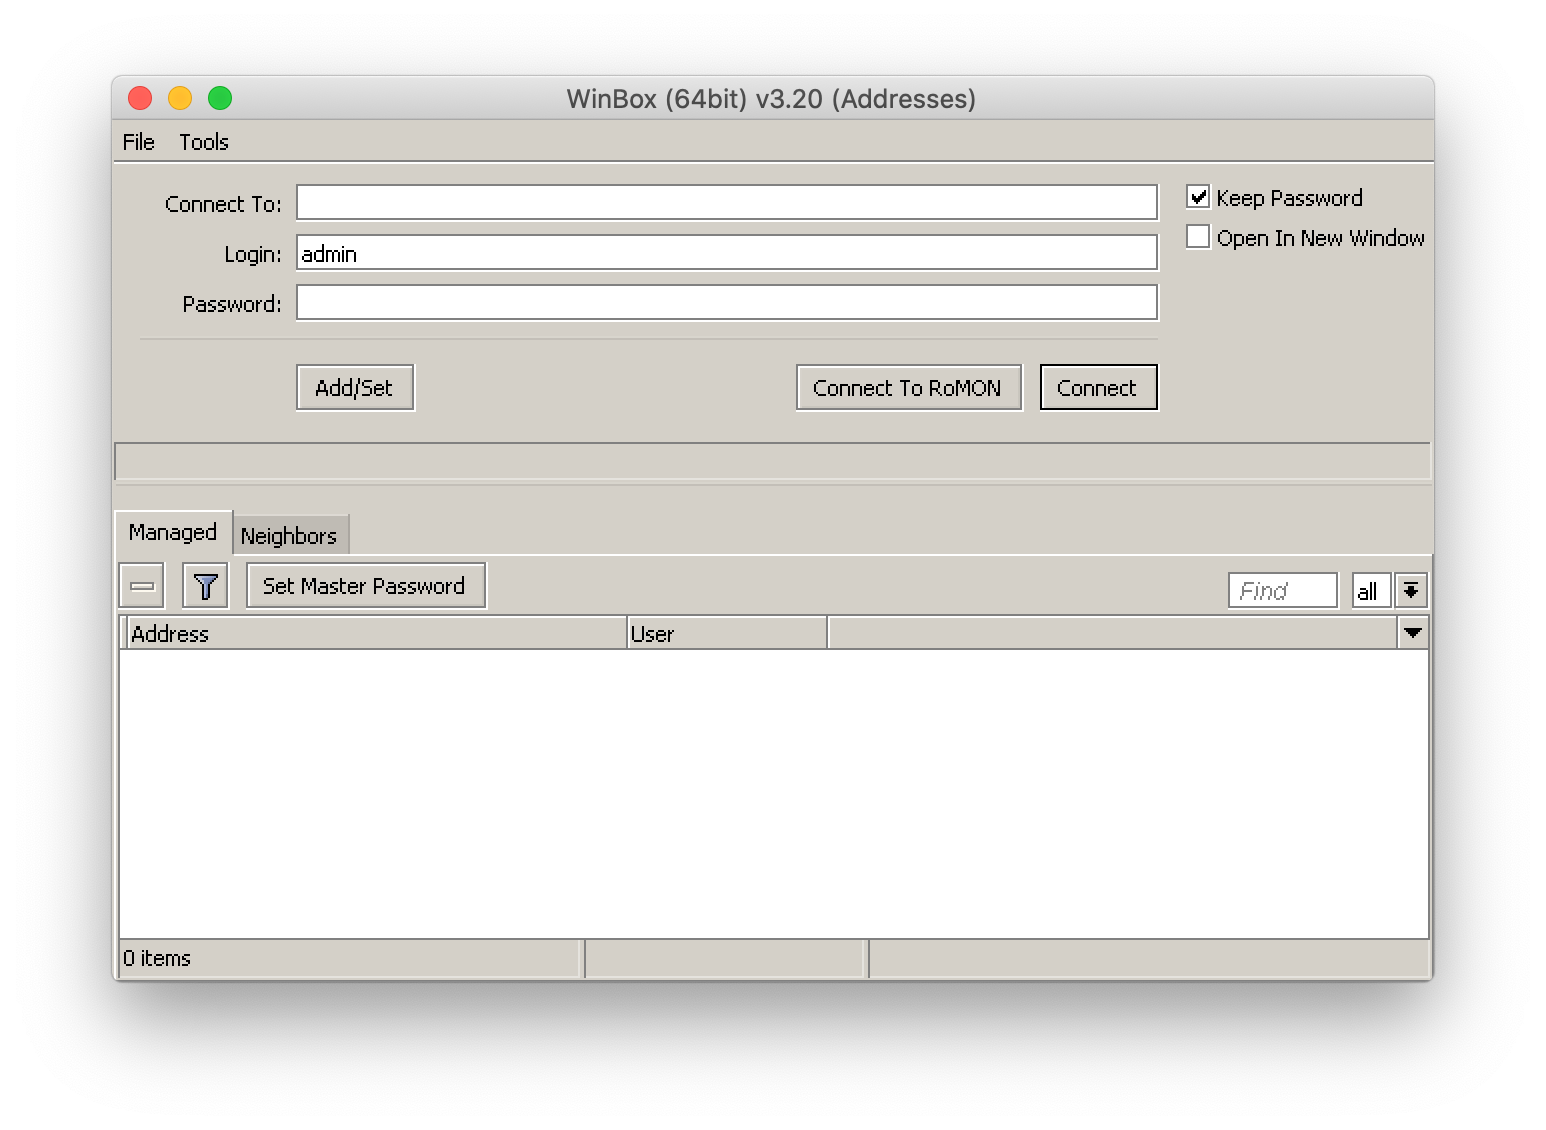
When you open Winbox loader for the first time simple mode layout will be used:

To connect to the router enter the IP or MAC address of the router, specify username and password (if any) and click on the Connect button. You can also enter the port number after the IP address, separating them with a colon, like this 192.168.88.1:9999. The port can be changed in the RouterOS services menu.
It is recommended to use an IP address whenever possible. MAC session uses network broadcasts and is not 100% reliable.
You can also use neighbor discovery, to list available routers use the Neighbors tab:

From the list of discovered routers, you can click on the IP or MAC address column to connect to that router. If you click on IP address then IP will be used to connect, but if you click on MAC Address then the MAC address will be used to connect to the router.
Buttons/check-boxes and Other Fields
- Connect — Connect to the router
- Connect To RoMON — Connect to RoMON Agent
- Add/set — Save/Edit any of the saved router entries in the Managed tab.
- Open In New Window — Leaves loader open in the background and opens new windows for each device to which connection is made.
- Connect To: — destination IP or MAC address of the router
- Login — username used for authentication
- Password — password used for authentication
- Keep Password — if unchecked, the password is not saved to the list
Menu Items
- File
- New — Create a new managed router list in a specified location
- Open — Open managed router list file
- Save As — Save current managed router list to file
- Exit — Exit Winbox loader
- Tools
- Advanced Mode — Enables/Disables advanced mode view
- Import — Imports saved session file
- Export — Exports saved session file
- Move Session Folder — Change path where session files are stored
- Clear cache — Clear Winbox cache
- Check For Updates — Check for updates for Winbox loader
Advanced mode
Additional Winbox loader parameters are revealed when an advanced mode is enabled with Tools → Advanced Mode:

Buttons/check-boxes and Other Fields
- Browse — Browse file directory for some specific session
- Keep Password — if unchecked, the password is not saved to the list
- Secure mode — if checked, Winbox will use DH-1984 for key exchange and modified and hardened RC4-drop3072 encryption to secure the session.
- Autosave session — Saves sessions automatically for devices to which connections are made.
- Session — Saved router session.
- Note — Note that is assigned to save router entry.
- Group — Group to which saved router entry is assigned.
- RoMON Agent — Select RoMON Agent from the available device list
Managed routers list is encrypted, but it can still be loaded in other Winbox without problems IF the master password is not set for it!
Command Line
It is possible to use the command line to pass connect to, user and password parameters automatically:
For example (with no password):
Will connect to router 10.5.101.1 with user «admin» without a password.
It is possible to use the command line to pass connect to, user, and password parameters automatically to connect to the router through RoMON. In this case, RoMON Agent must be saved on the Managed routers list so Winbox would know the user and password for this device:
For example (with no password):
Will connect to router D4:CA:6D:E1:B5:7D through 10.5.101.1 RoMON Agent with user «admin» without a password.
IPv6 connectivity
Winbox supports IPv6 connectivity. To connect to the router’s IPv6 address, it must be placed in square braces the same as in web browsers when connecting to the IPv6 server. Example:
when connecting to the link-local address interface index must be entered after the %:
Port number is set after the square brace when it is necessary to connect Winbox to other port than the default:
Winbox neighbor discovery is capable of discovering IPv6 enabled routers. There are two entries for each IPv6 enabled router, one entry is with IPv4 address and another one with IPv6 link-local address. You can easily choose which one you want to connect to.
Run Winbox on macOS
Starting with macOS 10.15 Catalina, Apple has removed support for 32bit applications, meaning it is no longer possible to use regular Wine and regular Winbox in this OS. Wine has made available a 64bit version for macOS, and MikroTik has released a special Winbox64.exe version as well.
If you have used Wine previously, we recommend you first delete the previous Wine application and the Wine settings directory in your home folder:
To run Winbox64 the following steps are required.
- Install Wine Staging from WineHQ’s official download page and make sure you have downloaded the winbox64.exe executable from the MikroTik download page.
- During installation, you must mark «64-bit support» (by default it is not checked).
- In macOS terminal, make sure your set to use ZSH as the new shell, like this (and restart Terminal after this command):
- Edit your zprofile file to add environment variables, pointing the wine64 command to the correct installation path of Wine Staging:
The file should look like this (make sure your paths are correct here):
If you are running macOS Big Sur, instead of «nano
/.zprofile», you have to edit «nano
Since there is currently no ARM version of Wine for macOS, it will not be possible to use the above instructions for M1 processor-based Apple devices. You can try using Crossover software, which will run Winbox in Rosetta2 emulation mode.
Run Winbox on Linux
It is possible to run Winbox on Linux by using Wine emulation software. Make sure that the Microsoft font pack is installed, otherwise, you may see distortions.
Interface Overview
Winbox interface has been designed to be intuitive for most of the users. The interface consists of:
- The main toolbar at the top where users can add various info fields, like CPU and memory usage.
- The menu bar on the left — list of all available menus and sub-menus. This list changes depending on what packages are installed. For example, if the IPv6 package is disabled, then the IPv6 menu and all its sub-menus will not be displayed.
- Work area — an area where all menu windows are opened.

The title bar shows information to identify with which router Winbox session is opened. Information is displayed in the following format:
From screenshot above we can see that user krisjanis is logged into router with IPv4/IPv6 address [fe80::4e5e:cff:fef6:c0ab%3]. Router’s ID is 3C18-Krisjanis_GW, currently installed RouterOS version is v6.36rc6, RouterBoard is CCR1036-12G-4S and platform is tile.
On the Main toolbar’s left side is located:
- undo
- redo
- Safe Mode
- Currently loaded session
More about Safe mode and undoing performed actions read in this article.
On the right side is located:
- an indicator that shows whether the Winbox session uses encryption
- Winbox traffic indicator displayed as a green bar,
- Custom info fields that can be added by the user by right-clicking on the toolbar and picking available info fields from the list
Work Area and Child Windows
Winbox has an MDI interface meaning that all menu configuration (child) widows are attached to the main (parent) Winbox window and is showed in the work area.
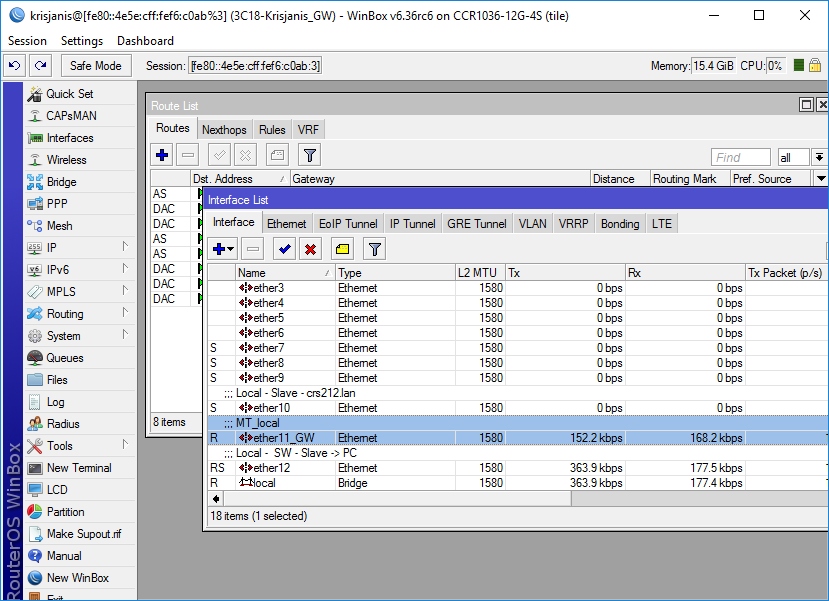
Child windows can not be dragged out of the working area. Notice in the screenshot above that the Interface window is dragged out of the visible working area and a horizontal scroll bar appeared at the bottom. If any window is outside visible work area boundaries the vertical or/and horizontal scrollbars will appear.
Child window menu bar
Each child window has its own toolbar. Most of the windows have the same set of toolbar buttons:
 Add — add a new item to the list
- Remove — remove the selected item from the list
- Enable — enable selected item (the same as enable command from console)
- Disable — disable selected item (the same as disable command from console)
- Comment — add or edit a comment
- Sort — allows to sort out items depending on various parameters. Read more >>
 Add — add a new item to the list
 Remove — remove the selected item from the list
 Enable — enable selected item (the same as enable command from console)
 Disable — disable selected item (the same as disable command from console)
 Comment — add or edit a comment
 Sort — allows to sort out items depending on various parameters. Read more >>
Almost all windows have a quick search input field on the right side of the toolbar. Any text entered in this field is searched through all the items and highlighted as illustrated in the screenshot below

Notice that on the right side next to the quick find input filed there is a drop-down box. For the currently opened (IP Route) window, this drop-down box allows to quickly sort out items by routing tables. For example, if the main is selected, then only routes from the main routing table will be listed.
A similar drop-down box is also in all firewall windows to quickly sort out rules by chains.
Sorting out displayed items
Almost every window has a Sort button. When clicking on this button several options appear as illustrated in the screenshot below

The example shows how to quickly filter out routes that are in the 10.0.0.0/8 range
- Press Sort button
- Chose Dst.Address from the first drop-down box.
- Chose in form the second drop-down box. «in» means that filter will check if DST address value is in range of the specified network.
- Enter the network against which values will be compared (in our example enter «10.0.0.0/8»)
- These buttons are to add or remove another filter to the stack.
- Press the Filter button to apply our filter.
As you can see from the screenshot Winbox sorted out only routes that are within the 10.0.0.0/8 range.
Comparison operators (Number 3 in the screenshot) may be different for each window. For example «Ip Route» window has only two is and in. Other windows may have operators such as «is not», «contains», «contains not».
Winbox allows building a stack of filters. For example, if there is a need to filter by destination address and gateway, then
- set the first filter as described in the example above,
- press [+] button to add another filter bar in the stack.
- set up a second filter to filter by the gateway
- press the Filter button to apply filters.
You can also remove unnecessary filters from the stack by pressing the [-] button.
Customizing list of displayed columns
By default, Winbox shows the most commonly used parameters. However sometimes it is needed to see other parameters, for example, «BGP AS Path» or other BGP attributes to monitor if routes are selected properly.
Winbox allows to customize displayed columns for each individual window. For example to add BGP AS path column:
- Click on the little arrow button (1) on the right side of the column titles or right mouse click on the route list.
- From popped up menu move to Show Columns (2) and from the sub-menu pick the desired column, in our case click on BGP AS Path (3)

Changes made to window layout are saved and next time when Winbox is opened the same column order and size are applied.
Detail mode
It is also possible to enable Detail mode. In this mode all parameters are displayed in columns, the first column is the parameter name, the second column is the parameter’s value.
To enable detail mode right mouse click on the item list and from the popup menu pick Detail mode

Category view
It is possible to list items by categories. In this mode, all items will be grouped alphabetically or by another category. For example, items may be categorized alphabetically if sorted by name, items can also be categorized by type like in the screenshot below.
To enable Category view, right mouse click on the item list and from the popup menu pick Show Categories

Drag & Drop
It is possible to upload and download files to/from the router using Winbox drag & drop functionality. You can also download the file by pressing the right mouse button on it and selecting «Download».
Traffic monitoring
Winbox can be used as a tool to monitor the traffic of every interface, queue, or firewall rule in real-time. The screenshot below shows Ethernet traffic monitoring graphs.

Item copy
This shows how easy it is to copy an item in Winbox. In this example, we will use the COPY button to make a Dynamic PPPoE server interface into a Static interface.
This image shows us the initial state, as you see DR indicates «D» which means Dynamic:

Double-Click on the interface and click on COPY:

A new interface window will appear, a new name will be created automatically (in this case pppoe-in1)

After this Down/Up event this interface will be Static:

Transferring Settings
- Managed router transfer — In the File menu, use Save As and Open functions to save the managed router list to file and open it up again on a new workstation.
- Router sessions transfer — In the Tools menu, use Export and Import functions to save existing sessions to file and import them again on a new workstation.
Troubleshooting
Winbox cannot connect to the router’s IP address
Make sure that the Windows firewall is set to allow Winbox connections or disable the windows firewall.
I get an error ‘(port 20561) timed out’ when connecting to routers mac address
Windows (7/8) does not allow mac connection if file and print sharing is disabled.
I can’t find my device in WinBox IPv4 Neighbors list or MAC connection fails with «ERROR could not connect to XX-XX-XX-XX-XX-XX»
Most of the network drivers will not enable IP stack unless your host device has an IP configuration. Set IPv4 configuration on your host device.
Sometimes the device will be discovered due to caching, but MAC connection will still fail with «ERROR: could not connect to XX:XX:XX:XX:XX:XX
Источник


