- Mini Apple Pies
- Mini Apple Pies
- Mini Apple Pies
- About The Recipe
- Equipment Needed
- Ingredients
- Instructions
- How To Lattice
- Finishing The Pies
- Making Pie Crust in Mixer vs Food Processor
- Which Variety of Apple To Use For This Recipe and How To Pick Them
- Can I Make This Into One Large Pie?
- Should I Use Store-Bought Filling or Homemade
- 3 Tips For The Perfect Pie Crust
- What To Serve with Apple Pie
- Expert Tips
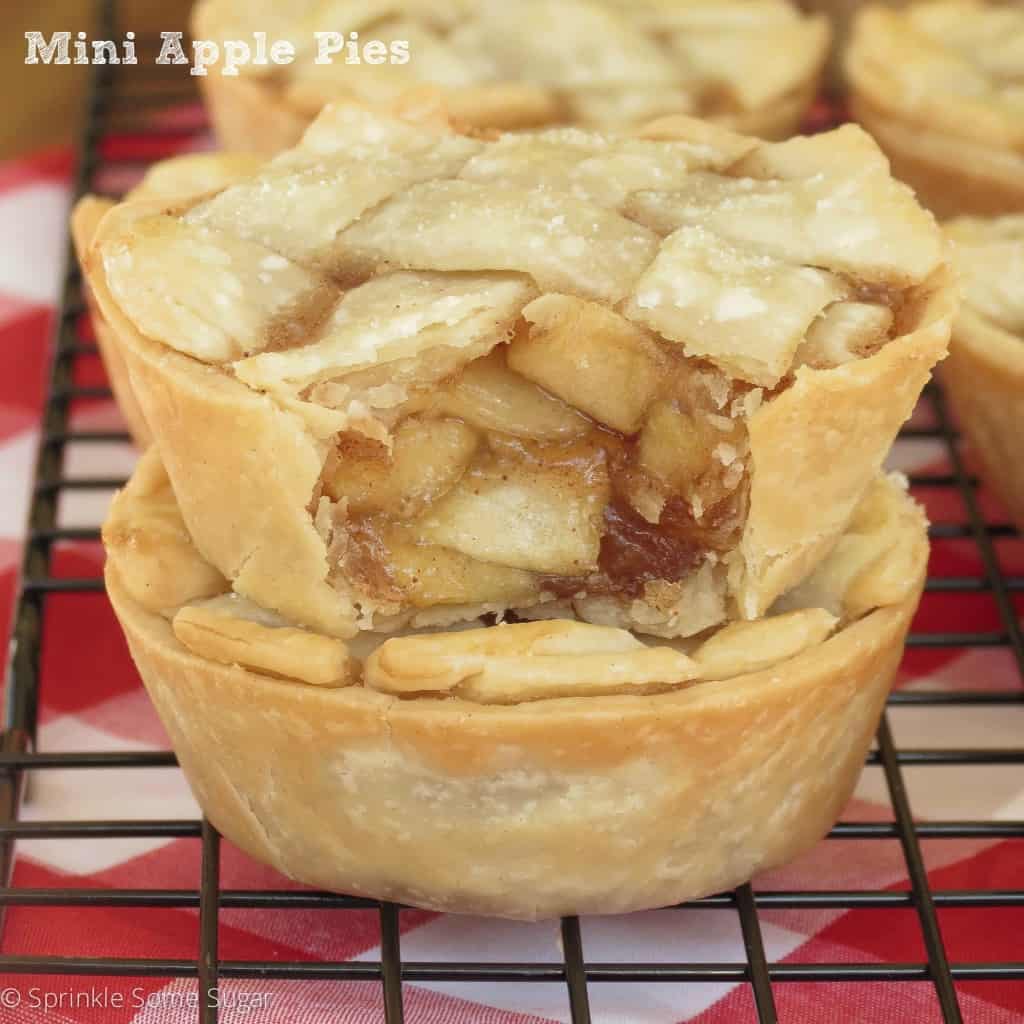
Mini Apple Pies
These adorable little pies are super easy to make and the filling is so delicious.
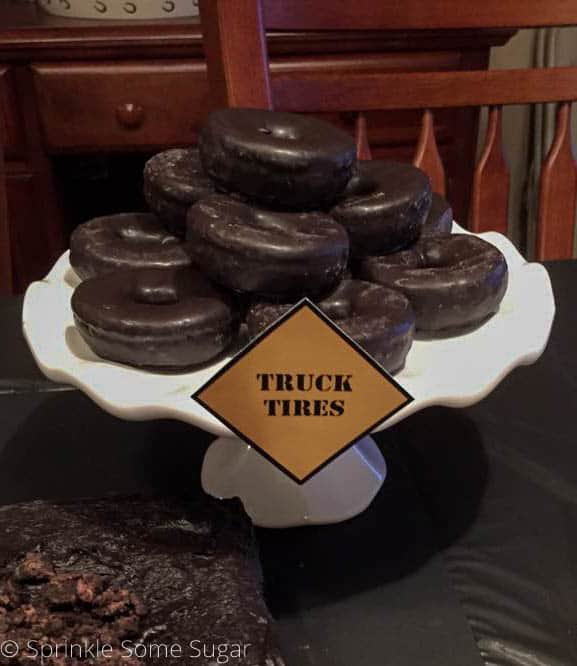
Before I start telling you about these adorable little mini apple pies, I told you in my last post how yesterday was John’s 2nd birthday party and that I would share pictures. It was such a great day! The day before, I baked/cooked everything starting at 7AM and ending at 1AM – talk about EXHAUSTED! My Friday included: baking a huge cake, cupcakes, brownies, cookies, making truffles, making two HUGE trays of manicotti (from scratch like I do for almost every occasion using my Grandmother’s recipe – SO good!), and buffalo wings. Oh yeah and decorating for almost three hours after everything. I literally felt like my back was about to break in half by the end of the night!! It was all worth it though, because the next day was a BREEZE and my little birthday boy was absolutely thrilled with all of the trucks and decorations, he had a blast! Well, here are the pictures! (Sorry, they’re iPhone photos!)
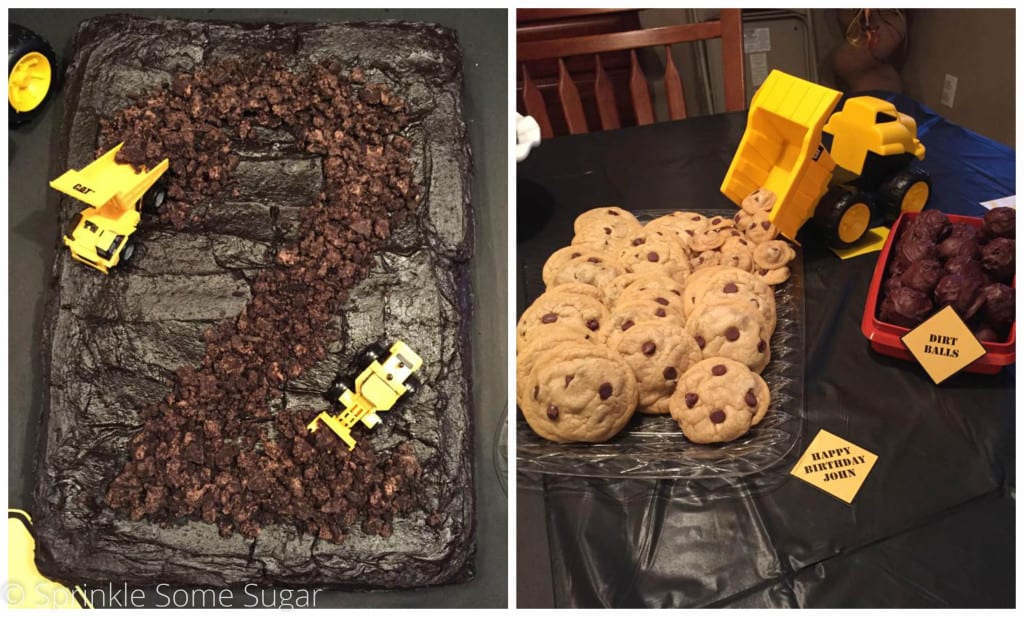
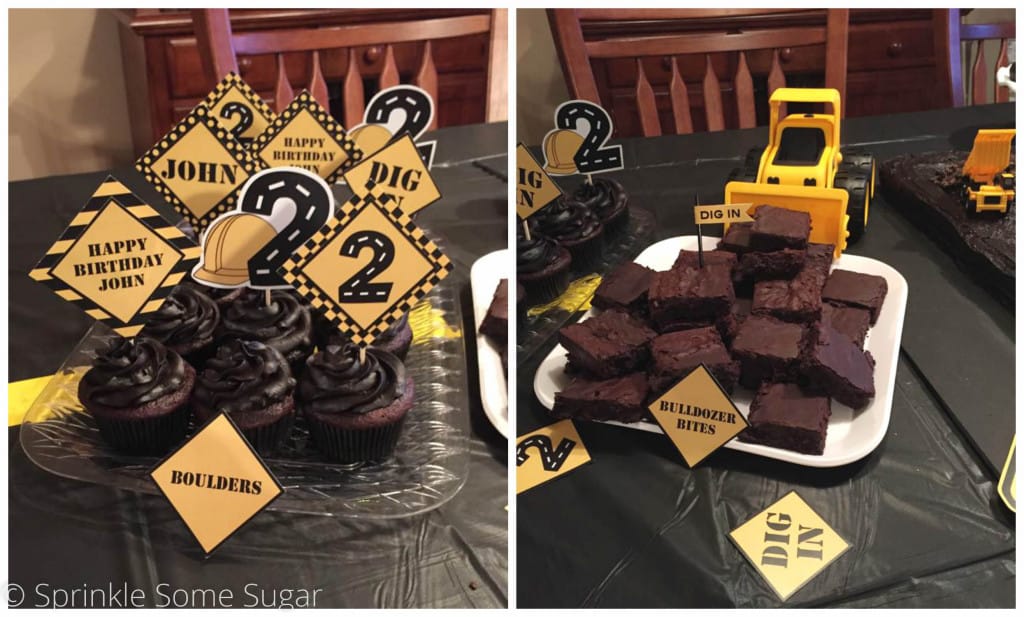
You can find recipes for all baked goods pictured above below:
Nutello Oreo Truffle recipe: coming SOON!
Chocolate Donuts.. courtesy of Entenmanns 😉
I hope you enjoyed the pictures! If you have any questions about where I purchased the printables from and what not, comment below!
Now, onto the reason you’re actually here, these mini apple pies! For ease, I used store bought pie crust but you can totally make a scratch one and use that. I am lazy. The filling is gooey, and so flavorful! You’re going to love it. There are notes of cinnamon and nutmeg swirling through giving it the most delicious, cozy flavor. Is there anything more cozy than apple pie on a cold day/night? Don’t think so.
First, make your apple pie filling and let it cool a bit. Then, start cutting out the first 9″ pie crust dough 3 1/2-4″circles with a cookie cutter or glass that’s around that size. Place them in well-greased muffin tin cavities and press them into the sides. Fill with apple pie filling. Take the second 9″ pie crust dough an cut it into 1/2″ strips. Cut the long strips into abut 2 1/2″ strips. Lay them out on a flat surface and arrange them three across and three down into a lattice pattern. Press down, flattening them slightly with the palm of your hand like this:
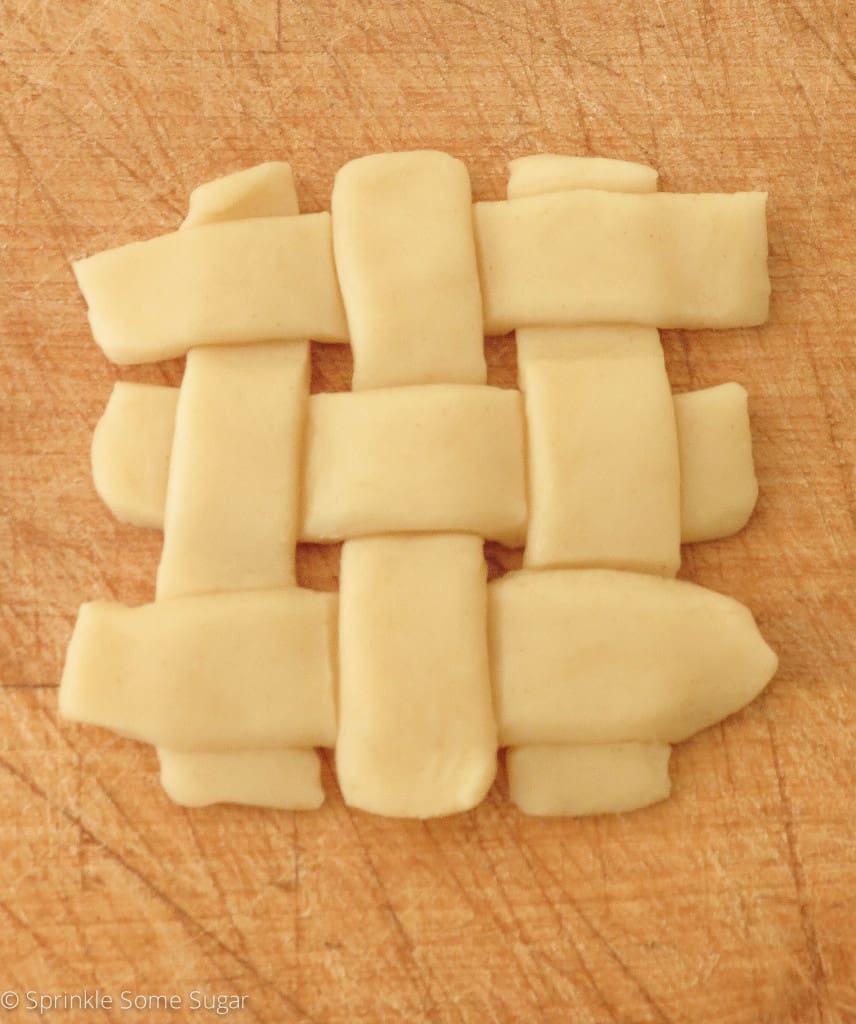
Then, lay flat on top of filled pie cups. Trim off excess and press edges down slightly. Sprinkle with some sugar, bake them up and taaaaa-da! The most adorable personal mini apple pies!
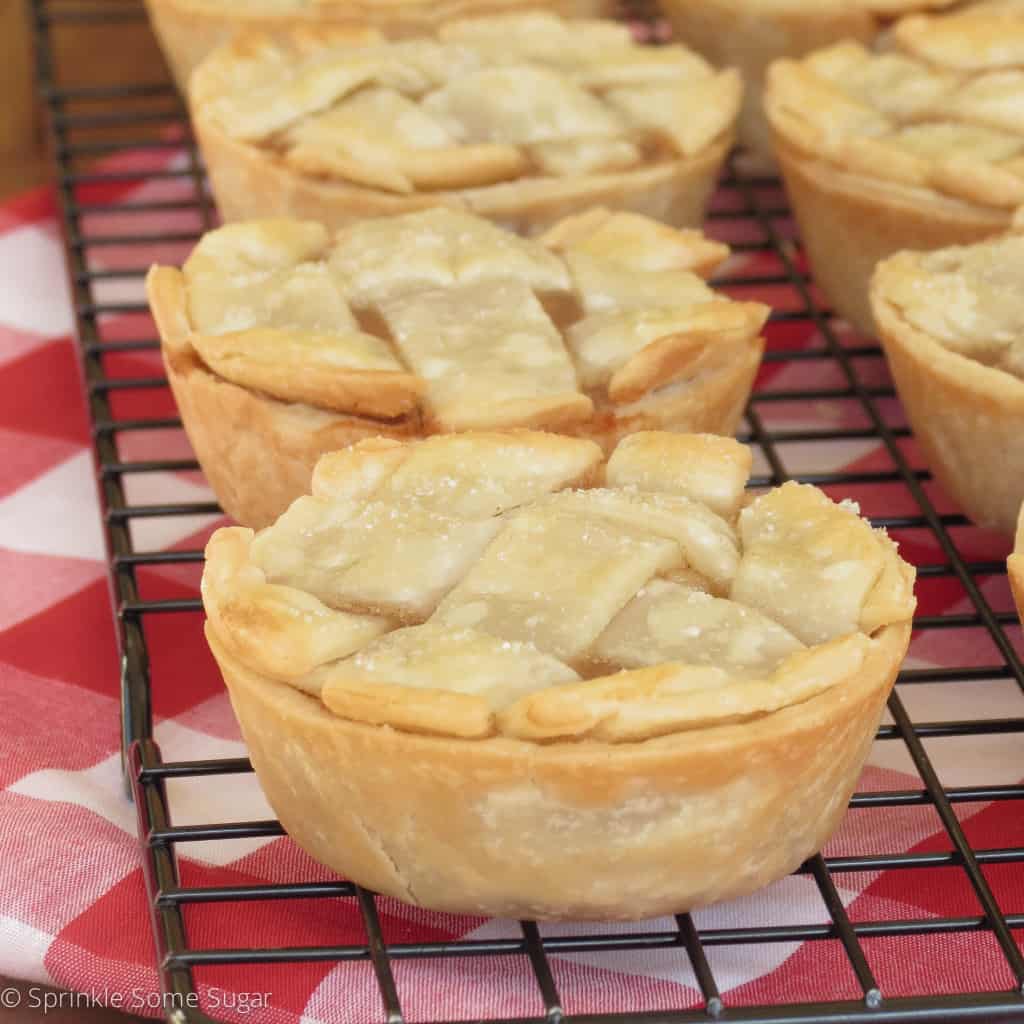
These are so cute to serve for dessert at a small gathering or even to little kids. I’m sure they would be ecstatic to have they’re own tiny pie!
Источник
Mini Apple Pies
Crisps & Pies
Last updated on: June 14, 2018
These Mini Apple Pies are easy to make and filled with a simple homemade apple pie filling. The perfect mini dessert for fall!

This recipe was requested by a wonderful reader named Stephanie after she tried my mini pecan pies. I loved the idea of making a recipe for mini apple pies, so I held onto it until fall was getting a little closer. I have to say that I’m glad I did because these pies are absolutely delicious.
While I love regular pie, there’s something about mini pies that make them so much better. Maybe it’s the fact that they’re perfectly portioned or they make a simple dessert you can just pick up and enjoy. Or maybe it’s that you can eat two and not feel so guilty about it.
And let’s be honest, mini desserts are just better than regular desserts. Right?

To start, you’ll need a standard 12-count muffin pan. This recipe is for mini apple pies because they’re smaller than a regular apple pie, but be sure to use a regular muffin pan (not a mini muffin pan).
You’ll also need two pie crusts, you can either use my homemade pie crust recipe or buy a box of pie crusts from the store. The store-bought pie crusts usually come in packages of two so they’re perfect for this recipe. If I’m being honest, I usually just cheat and use store-bought pie crusts when I’m making these pies.
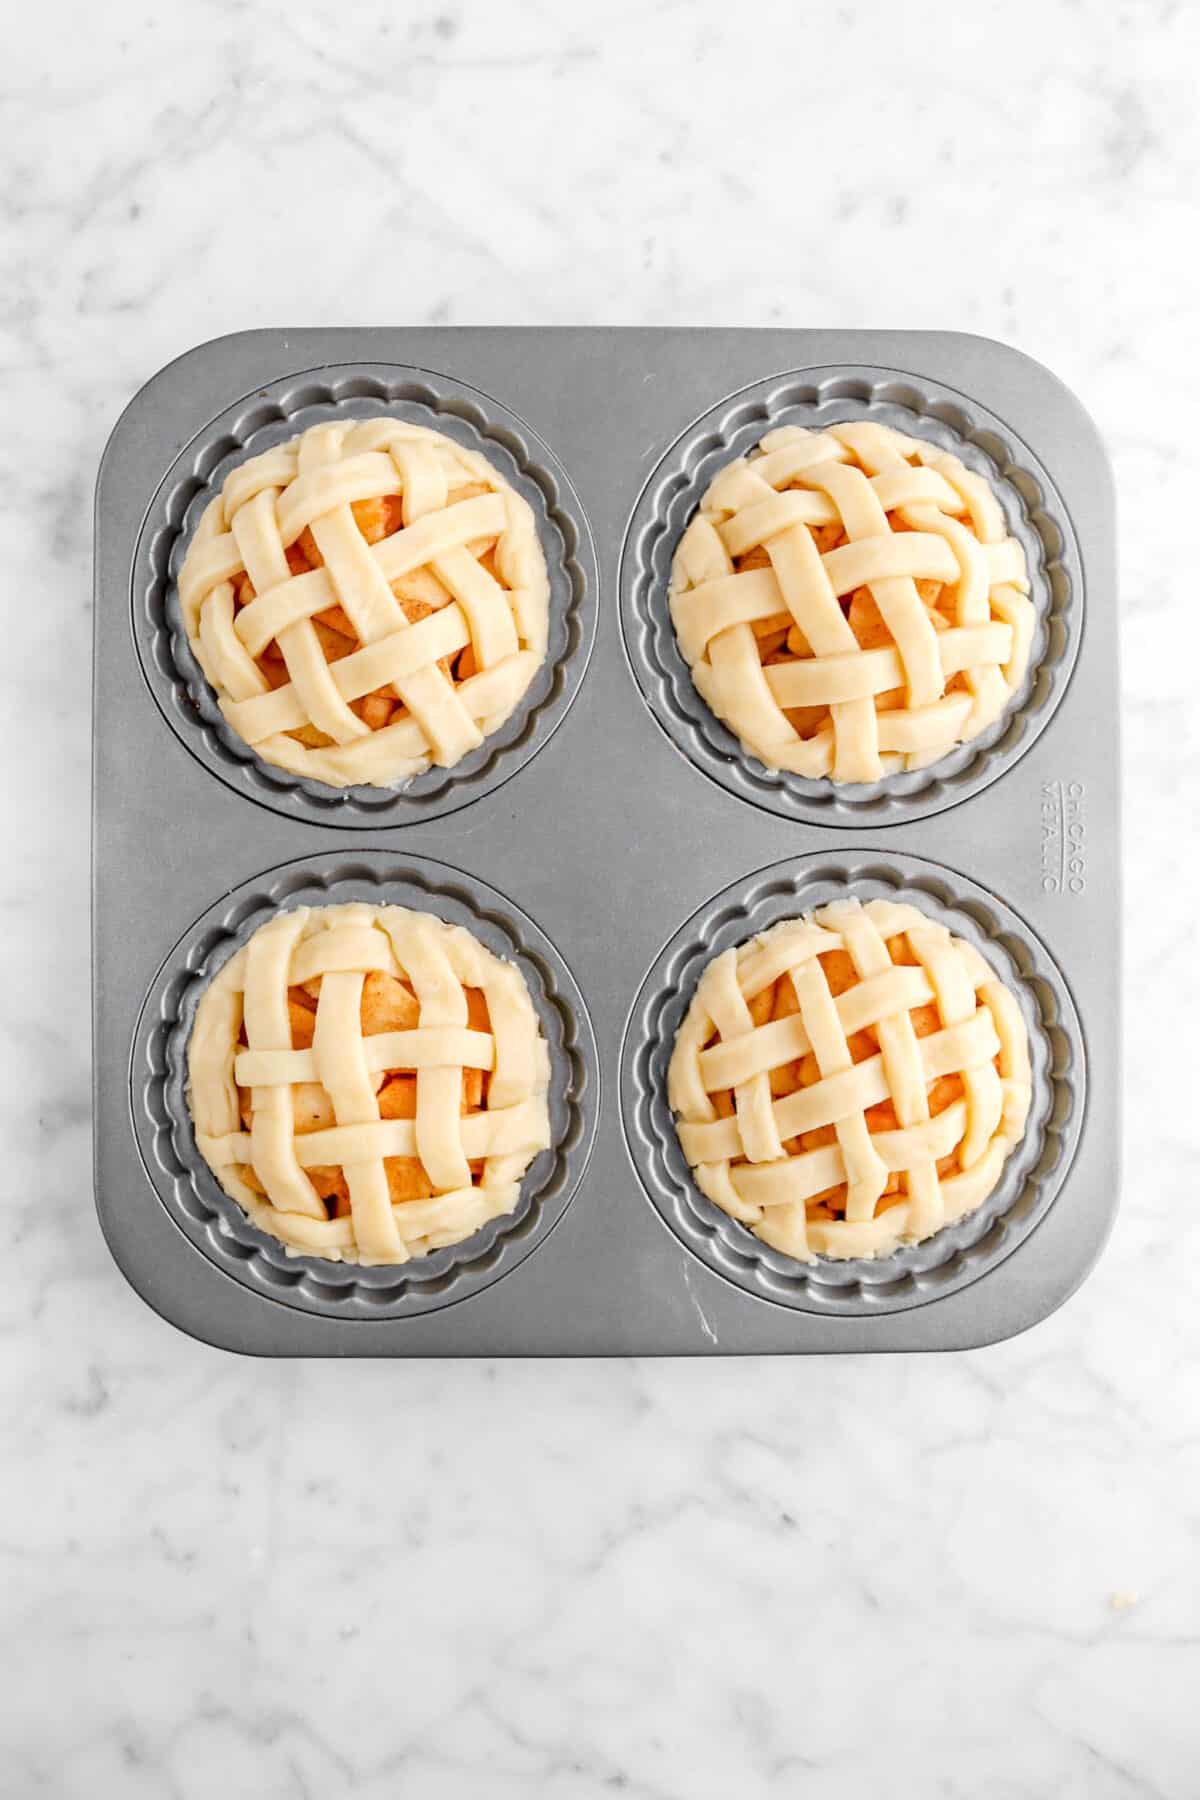
You want to cut the pie crust with a 3.5-inch cookie cutter to make circles that are big enough to fill each cavity in the muffin pan. They should look just like the picture above and mostly fill each cavity in your muffin pan. If you don’t have a circle cookie cutter that is the right size, just measure some glasses you have at your house and use that instead.

This filling is just a simple mixture of chopped apples, sugar, flour, cinnamon, vanilla, and a touch of nutmeg.
When I make any kind of apple pie I prefer to use a mix of sweet and tart apples, so I use Granny Smith and Gala/Honeycrisp apples in this recipe.

You can also decorate the tops of these miniature apple pies however you like. You won’t need all of the pie crusts for the bottom, so you’ll have some left to decorate the tops. I like to use it to make a simple lattice topping (in other words, no weaving) or cut out some cute pie crust decorations for the top with small cookie cutters.
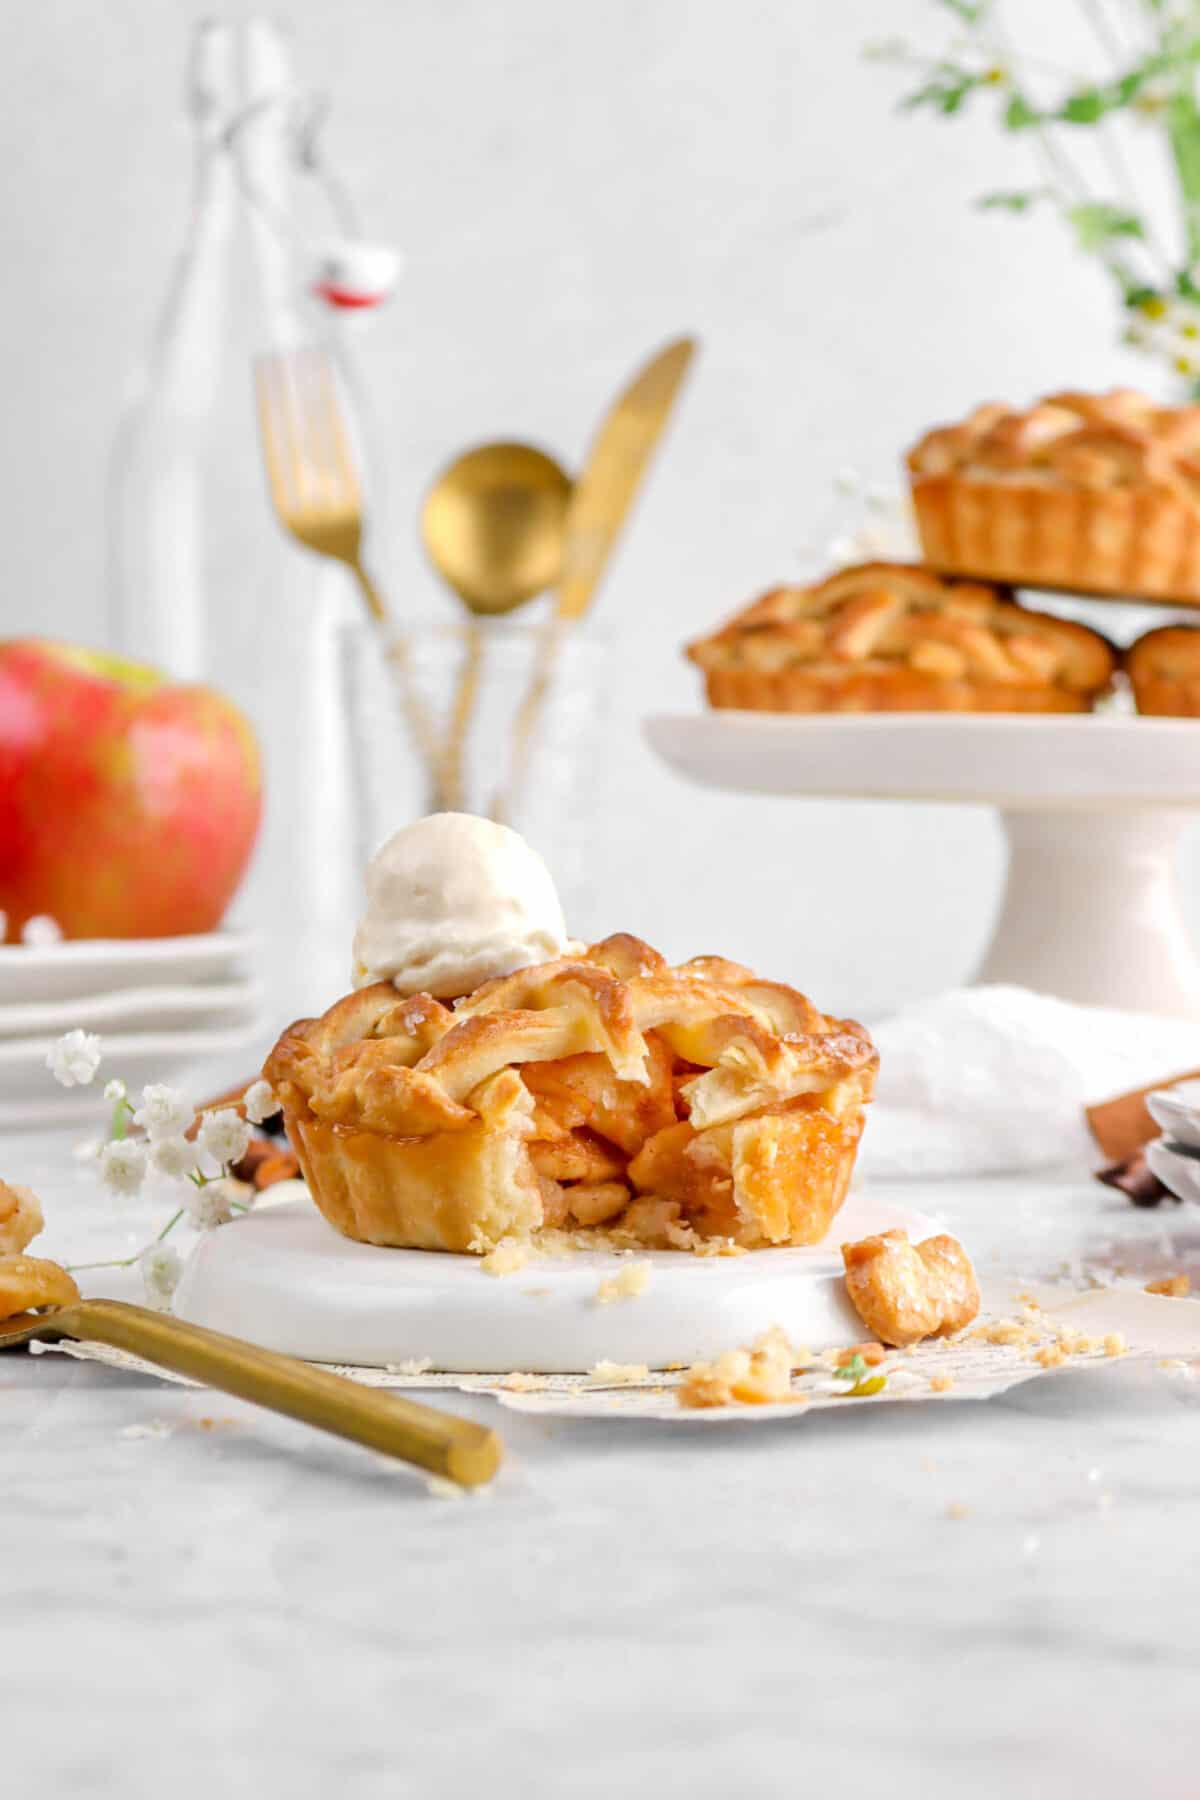
You can also make these just a bit easier and completely leave the top off and they still taste just fine! I love to serve them with a little scoop of ice cream and caramel on top.
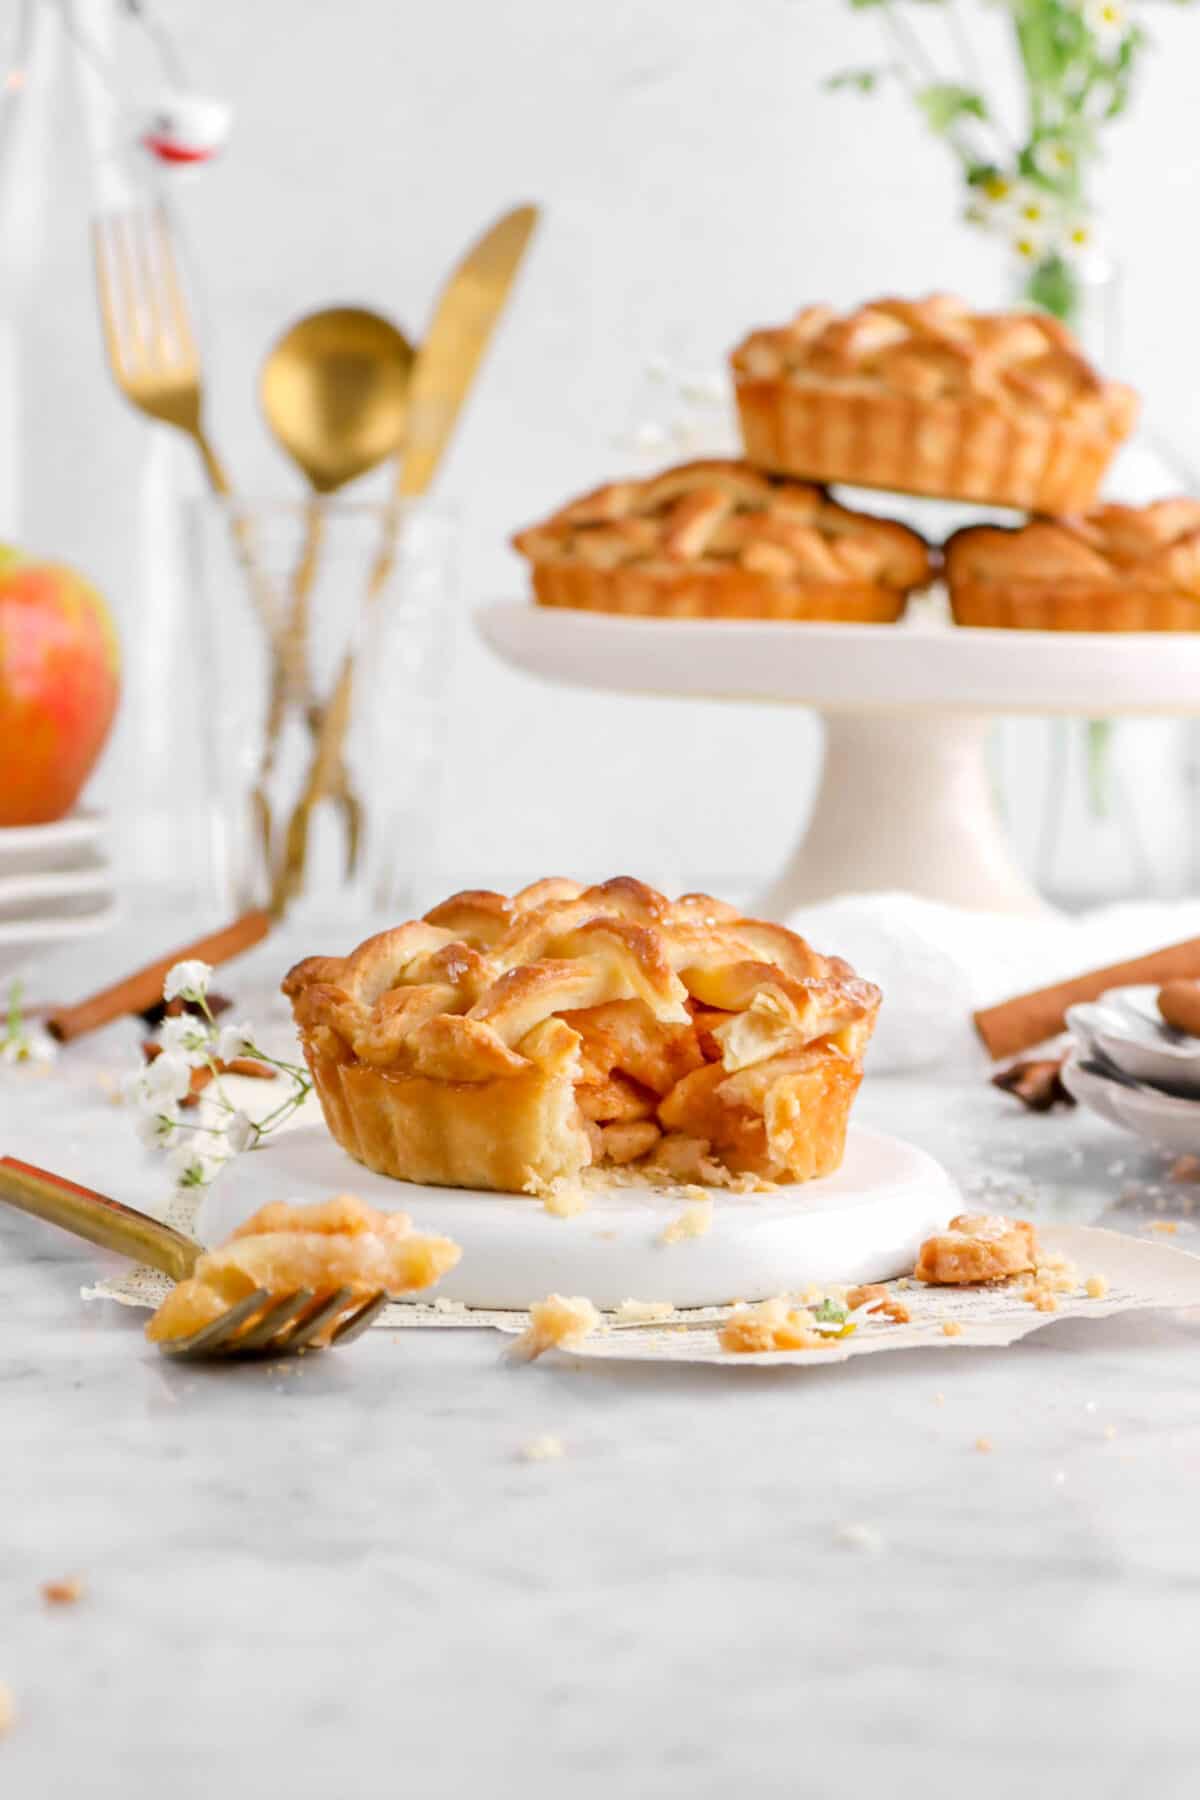
I mean, just look at how cute those pies are up there!
Источник
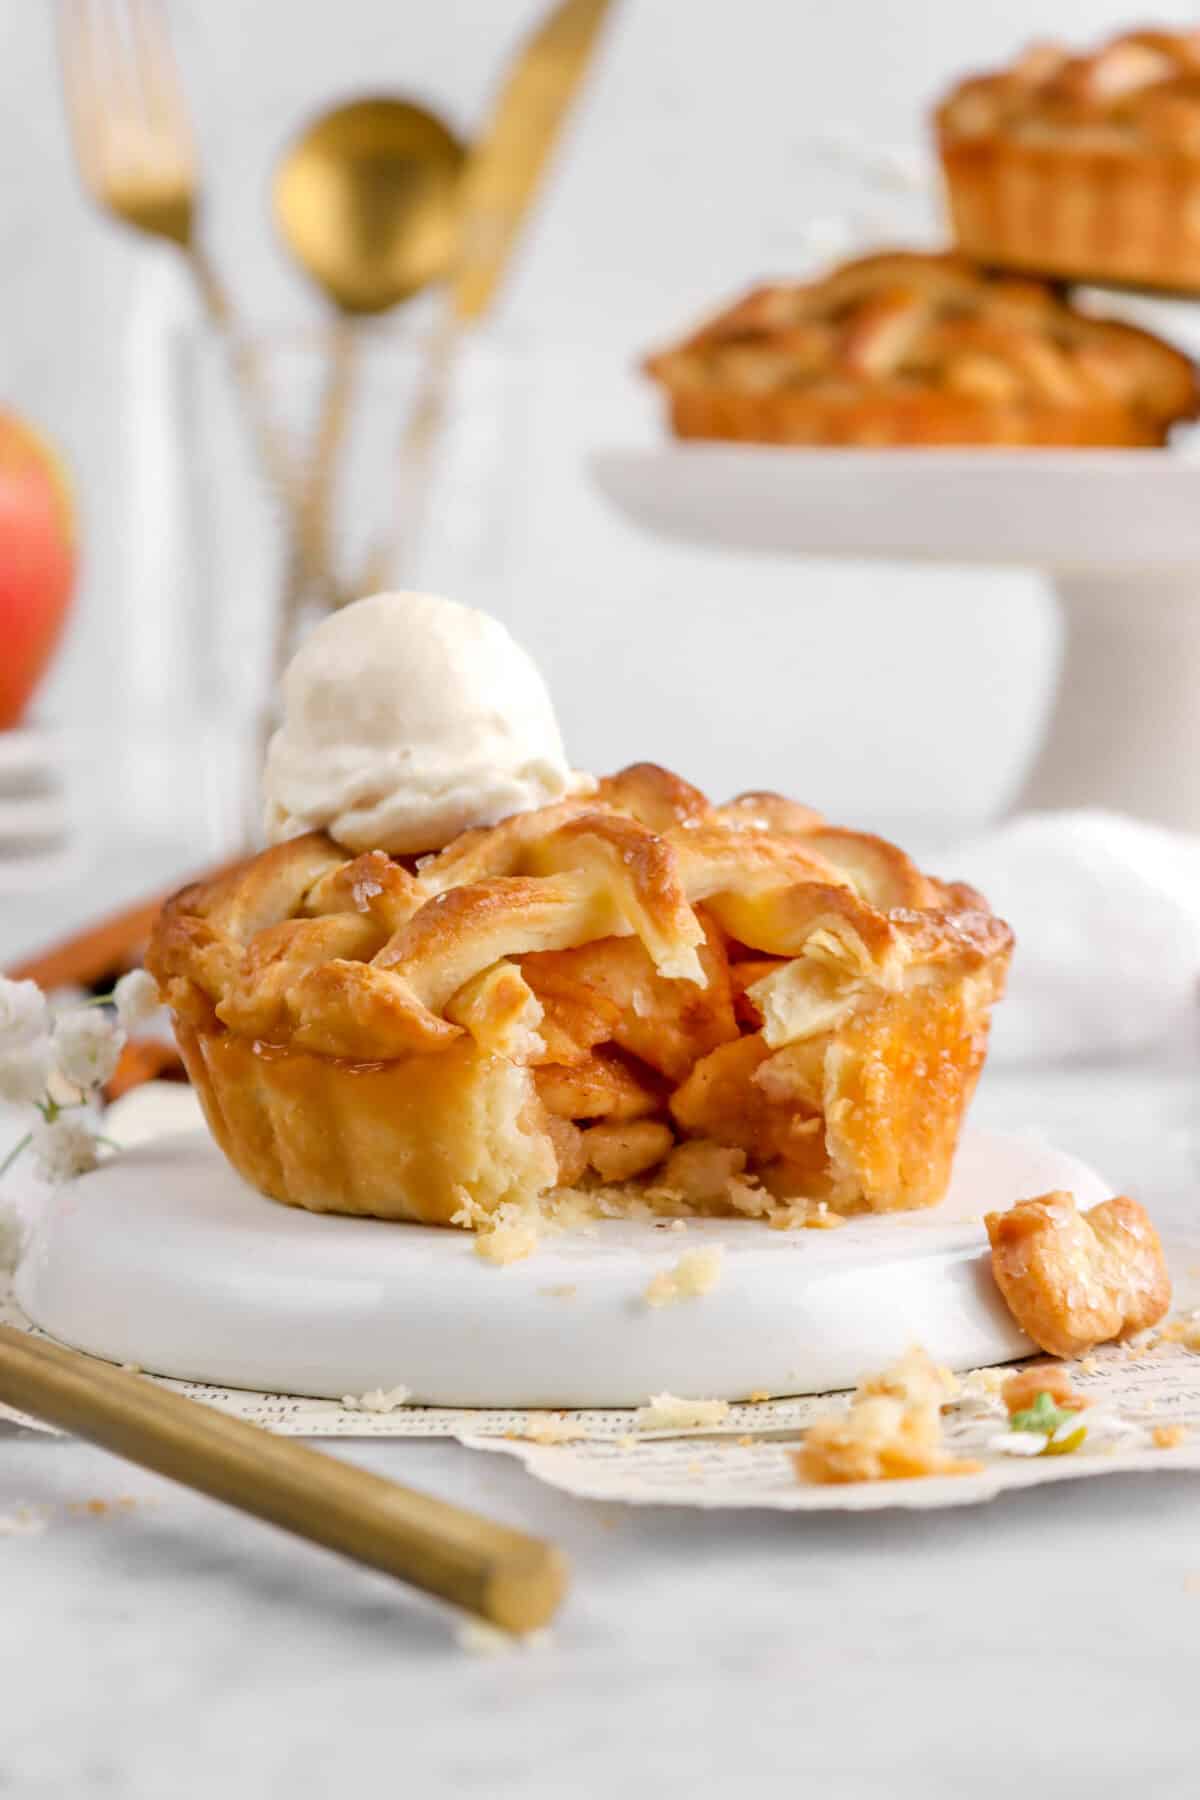
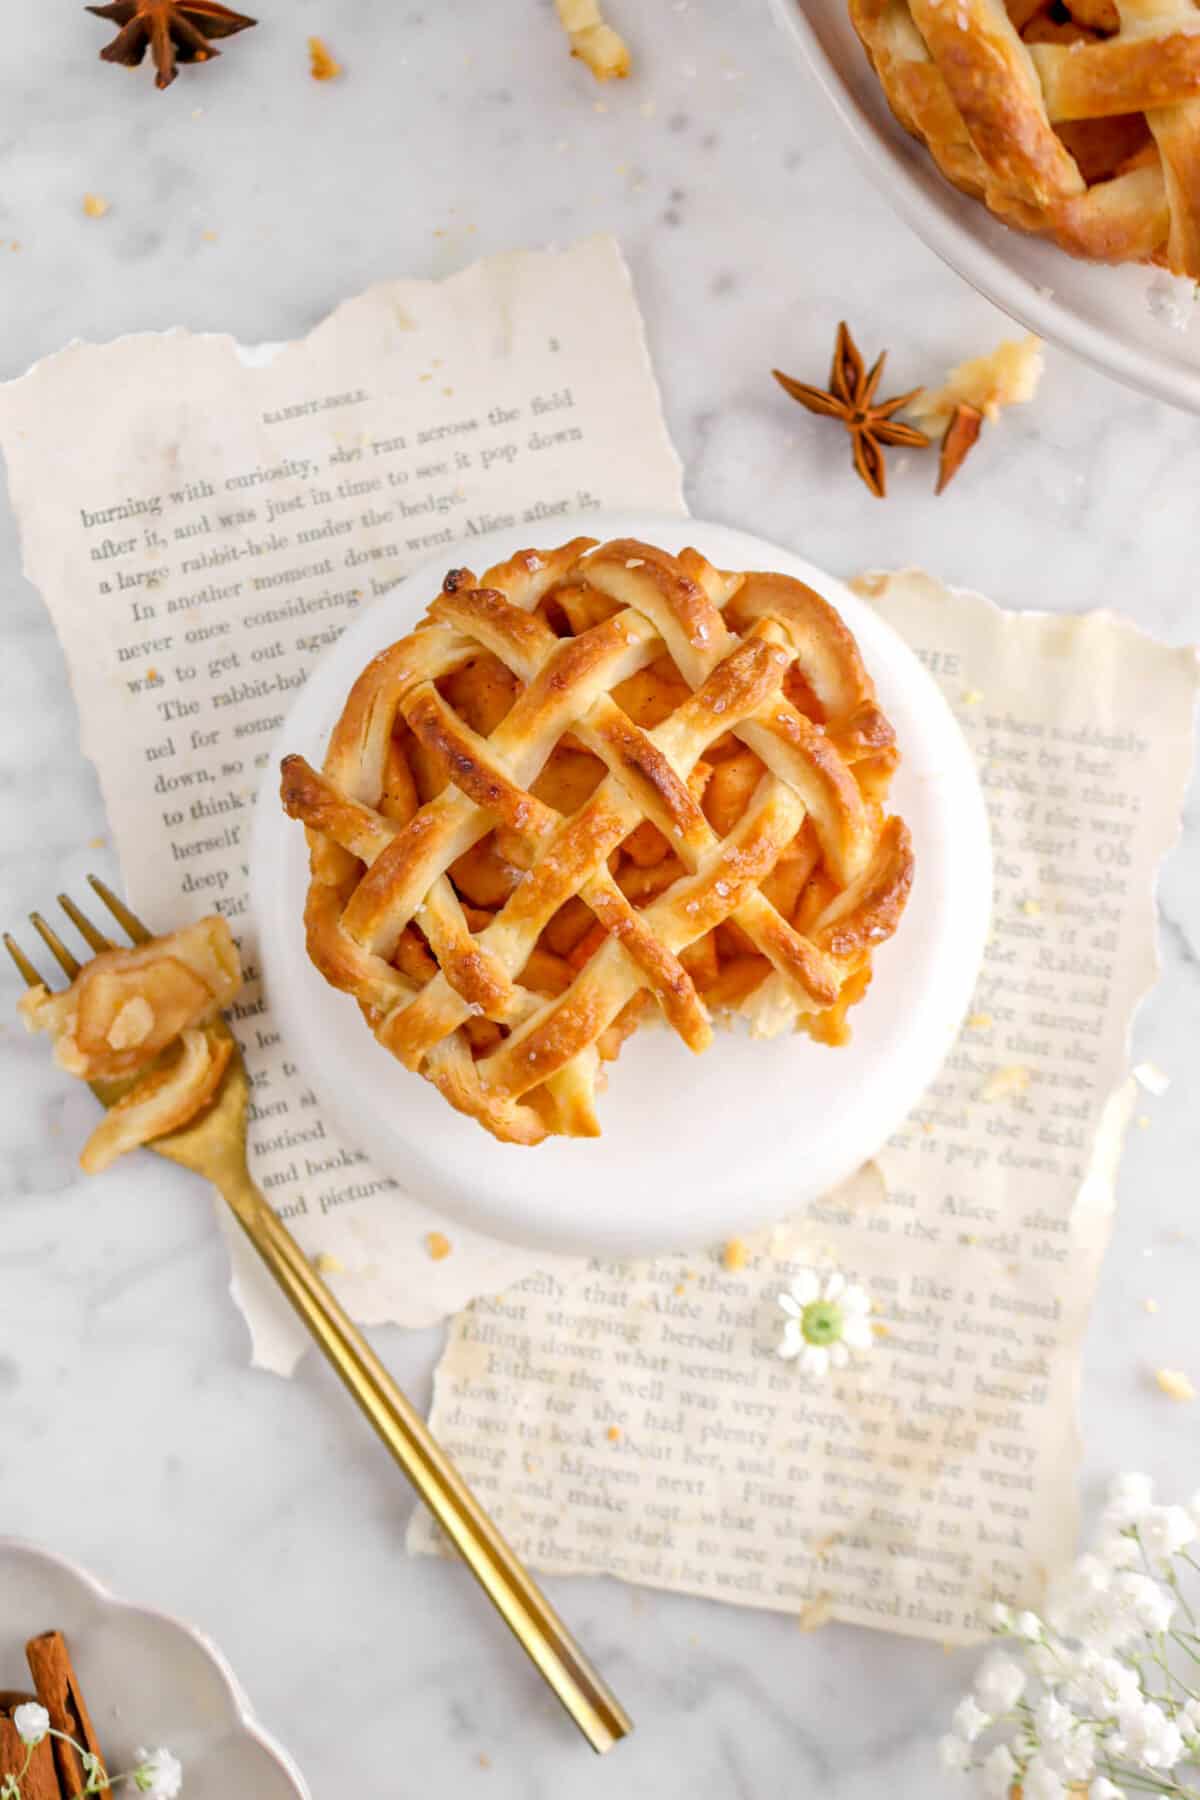
Mini Apple Pies
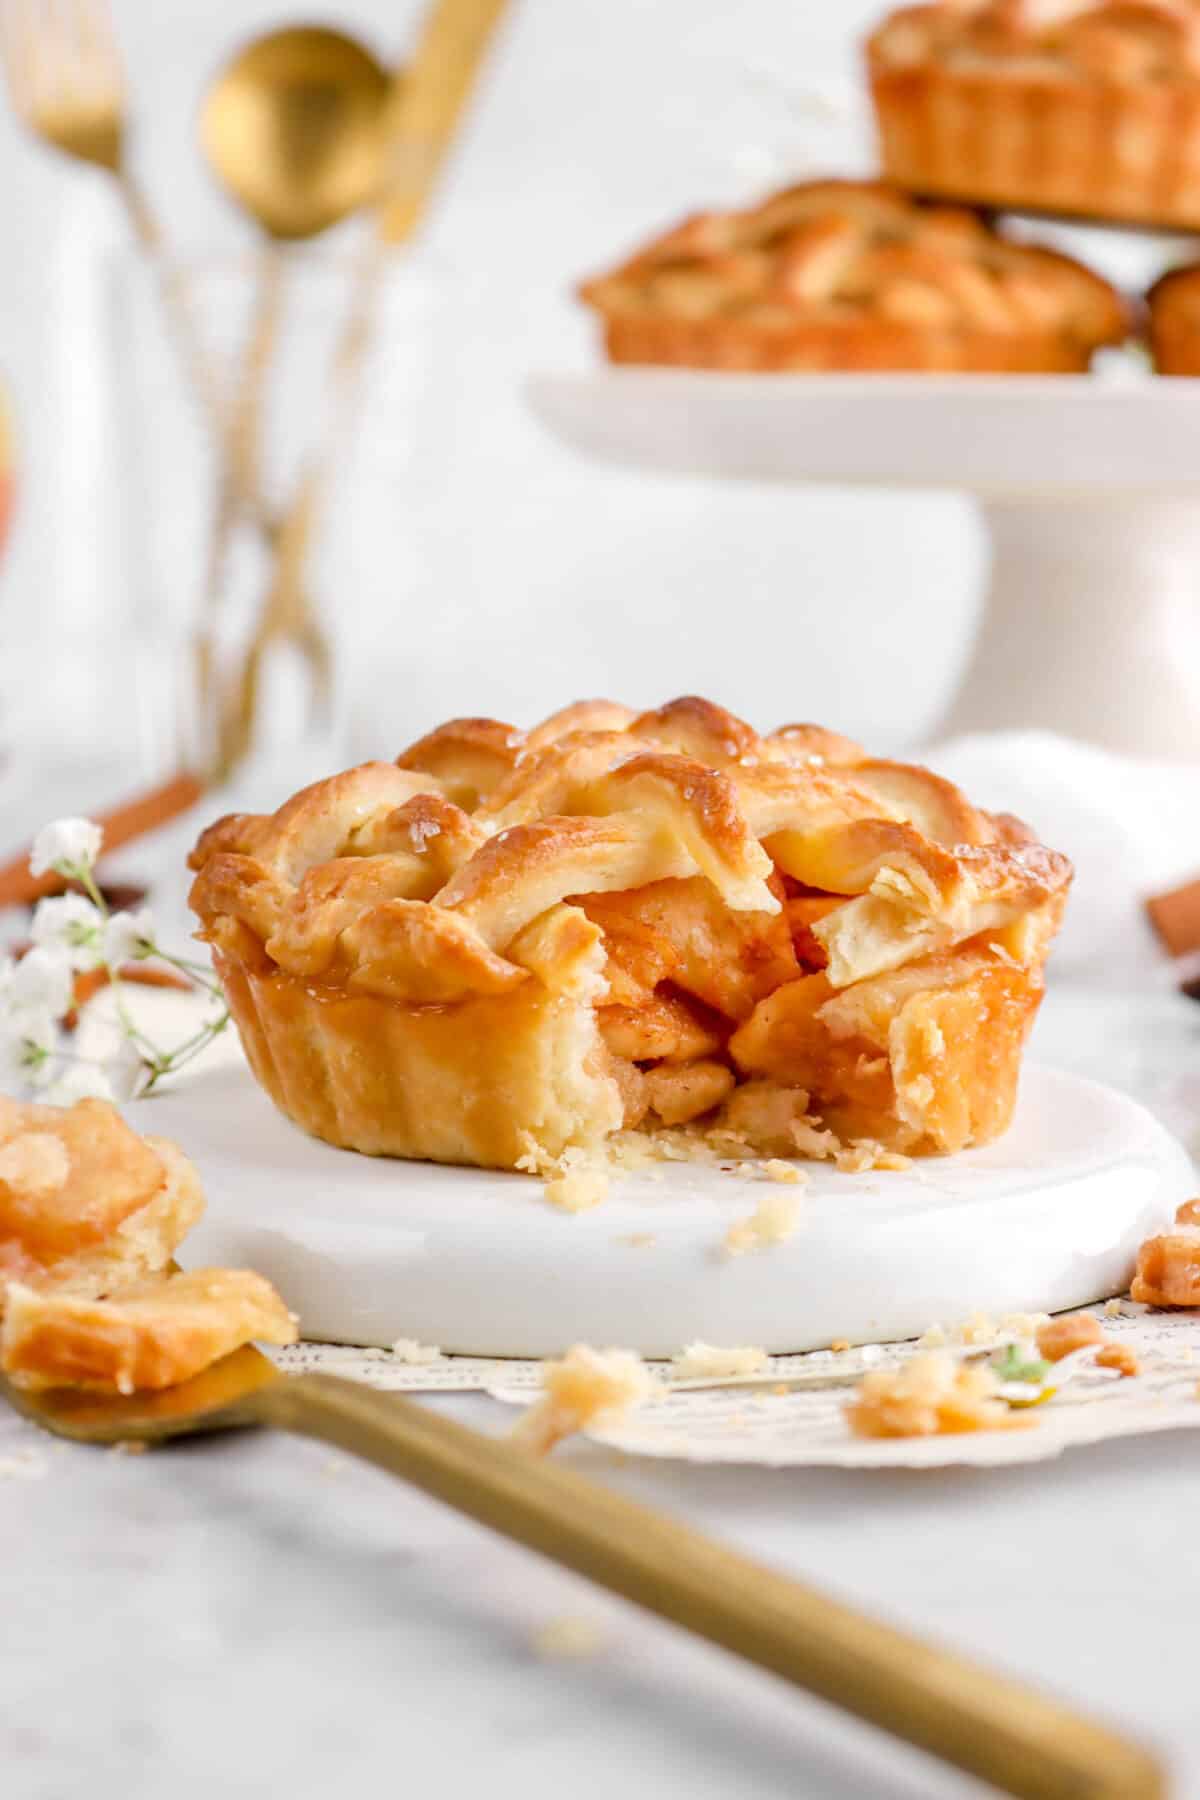
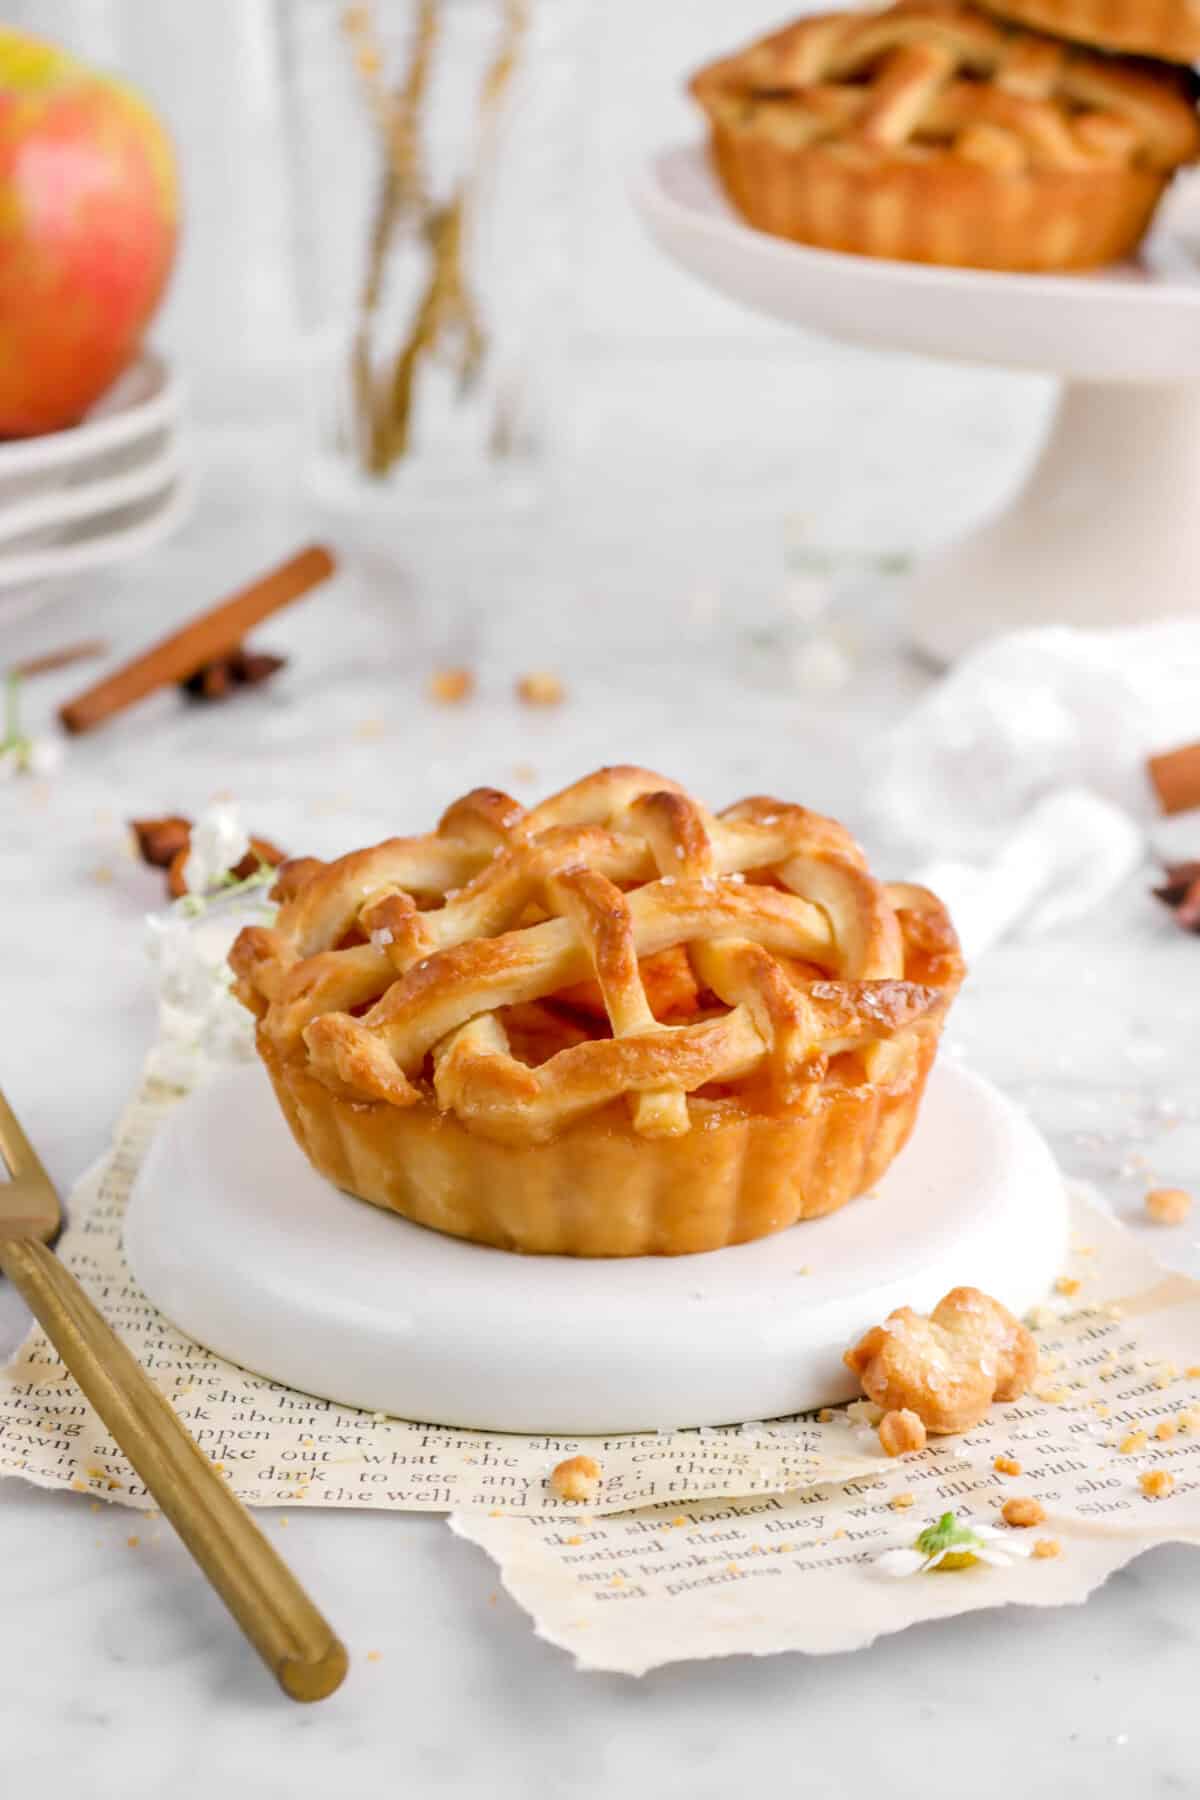
These Mini Apple Pies are a must-have dessert during Thanksgiving! They’re loaded with apples, juicy without having a soggy crust, and full of flavor. The pie crust is actually super simple to make! All you need is your mixer (no food processor!), some butter, flour, sugar, and ice cold water. Mix and refrigerate. It’s that easy! But, the filling is the real star here. Every bite has perfectly baked apples with hints of cinnamon, cloves, nutmeg, while being perfectly sweet. It’s the ultimate apple pie…but made smaller! Just before baking, the pies are topped with a gorgeous basket weave lattice, then sprinkled with course sugar, creating the ultimate sweet treat for the holiday’s. These mini pies are absolutely delicious and are sure to become a new Fall favorite! It’s the classic we all know and love, but made with a slight twist to make it even more special. SO. GOOD.
→ This post is also available as a Web Story: Mini Apple Pies
About The Recipe
It’s official! Thanksgiving is tomorrow and I could not be more excited to share this recipe with all of you! If you’ve been following our blog, you’ll know there’s nothing that I love more than a home-y Apple Pie. It was actually something I requested for my birthday when I was about 15 or so. It’s such a delicious dessert and it’s a serious crowd-pleaser.
We actually already have a classic apple pie recipe on our blog, but this year, we wanted to do something a little different.
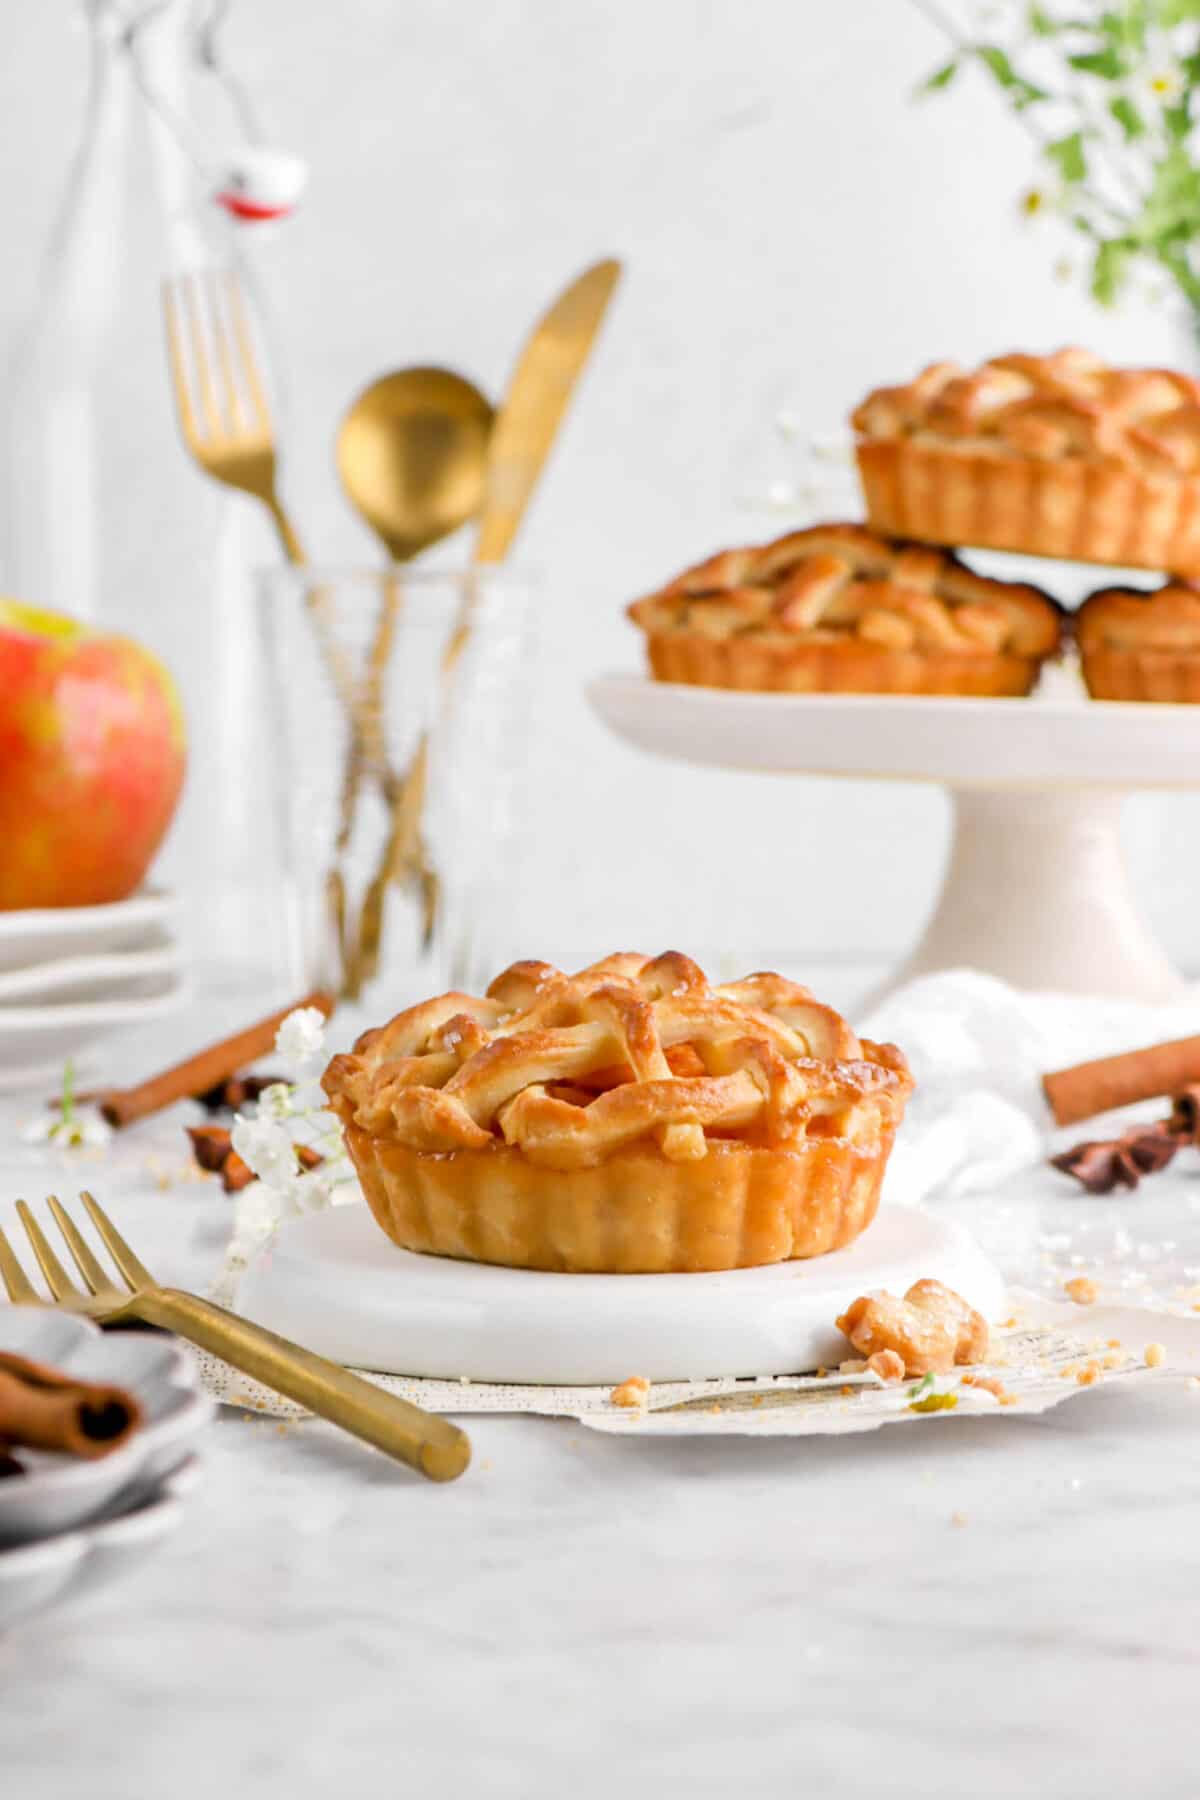
So, say “hello!” to these cute mini apple pies!
This whole recipe was reimagined from our classic pie. Which, while it was fun to do something totally different, caused us some real challenges when developing and testing this recipe.
The first test bake definitely didn’t go to plan. We totally got the proportions wrong. It was my brothers birthday and our attention was, admittedly, elsewhere. The pies still tasted good, but they didn’t brown and the crust was crispy! Kinda like a cookie, almost. We had too much sugar and too little butter.
So, we waited a few days before trying again. This time, it worked beautifully! We kept the same mixing method, as we fell in love with making pie crust in the mixer. It’s just so much easier! Especially since our food processor doesn’t have a big enough bowl to make extra pie crust…because let’s be real. The holiday’s are here and we need enough to share!

Oh, and during the shooting process, we have a bit more extra dough than what the recipe calls for. Don’t worry! It’ll still make the same. we just doubled the recipe because wanted extras for tomorrow!
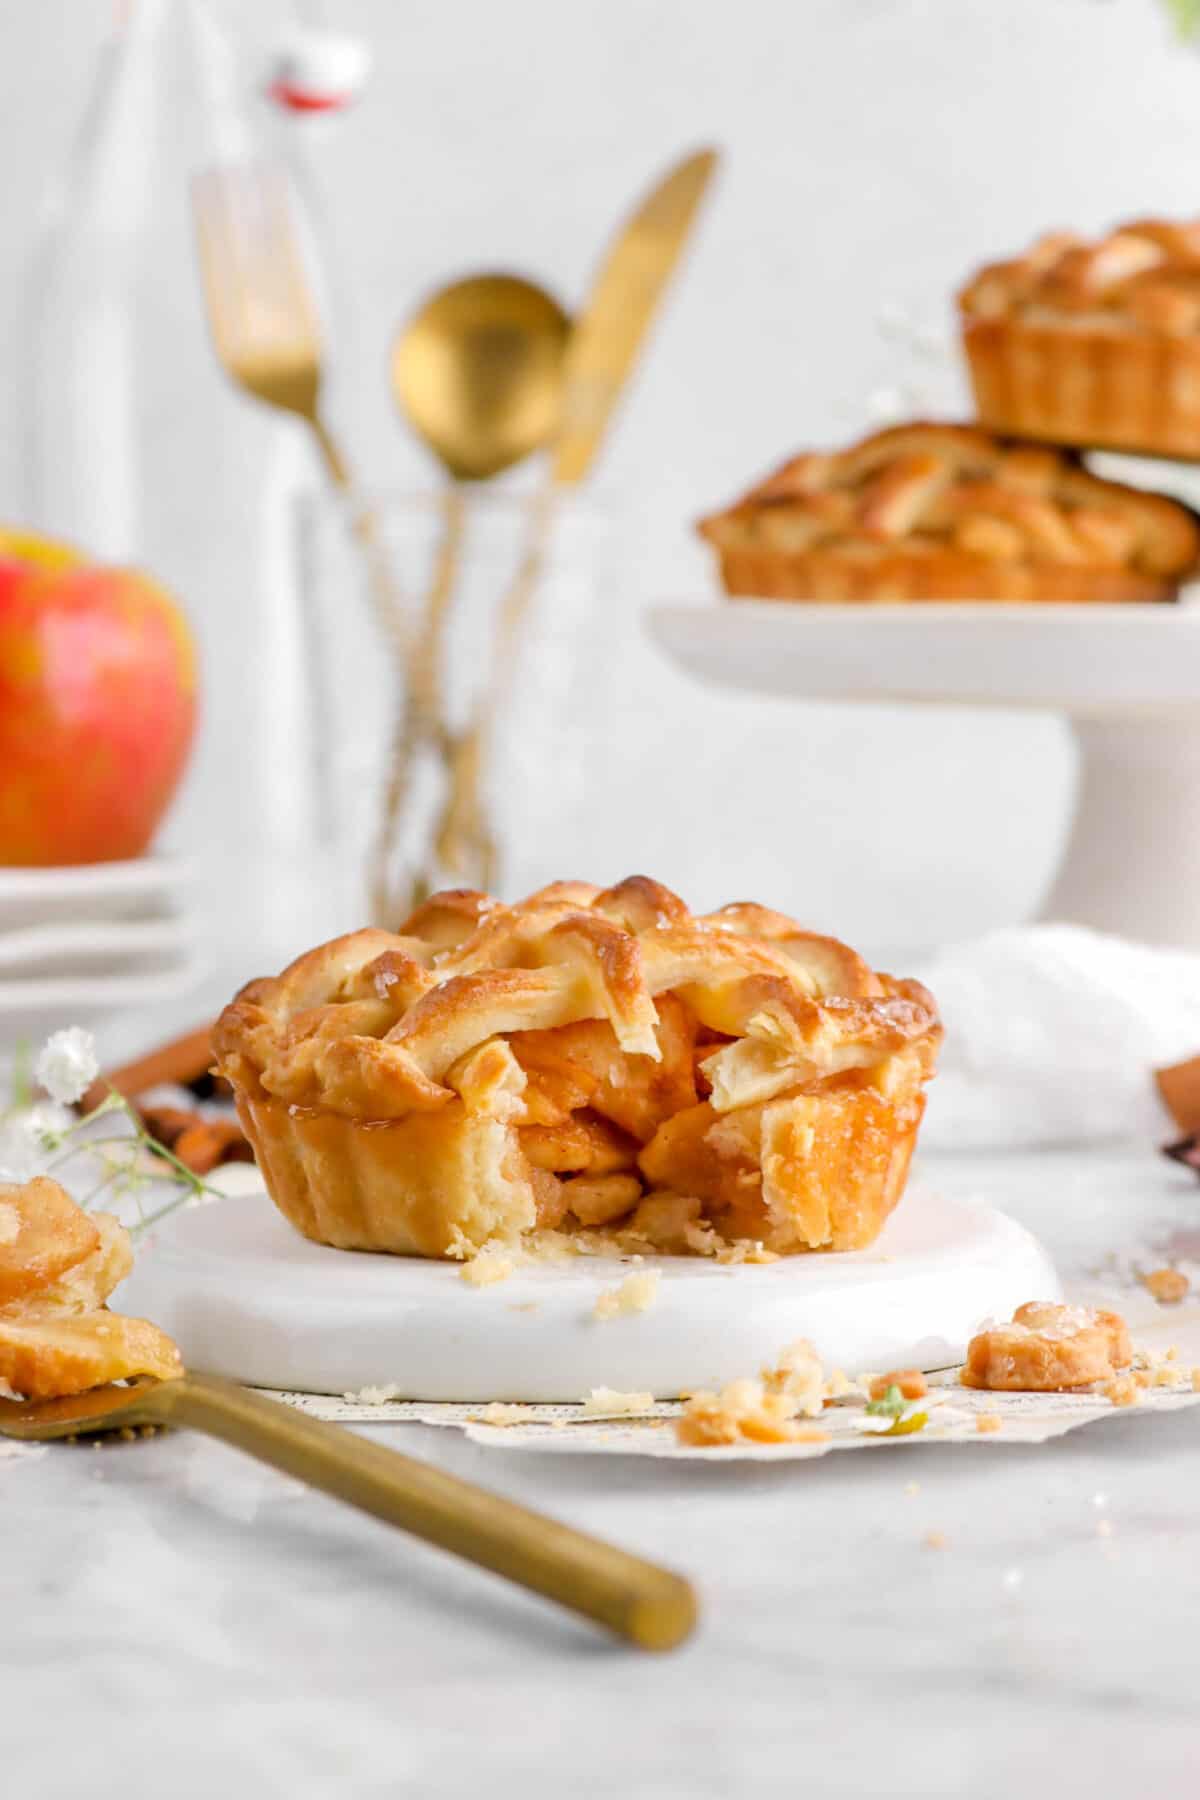
There’s no real crowd pleaser like a classic apple pie! Every bite of this sweet treat is sweet without being too sweet, perfectly spiced, apple-y, and buttery from the flakiest crust EVER.
Equipment Needed
- Stand-Mixer
- Parchment Paper
- Rolling Pin
- Plastic Wrap
- 6 Inch Ring Mold
- 5 Inch Ring Mold
- Mini Tart Pan
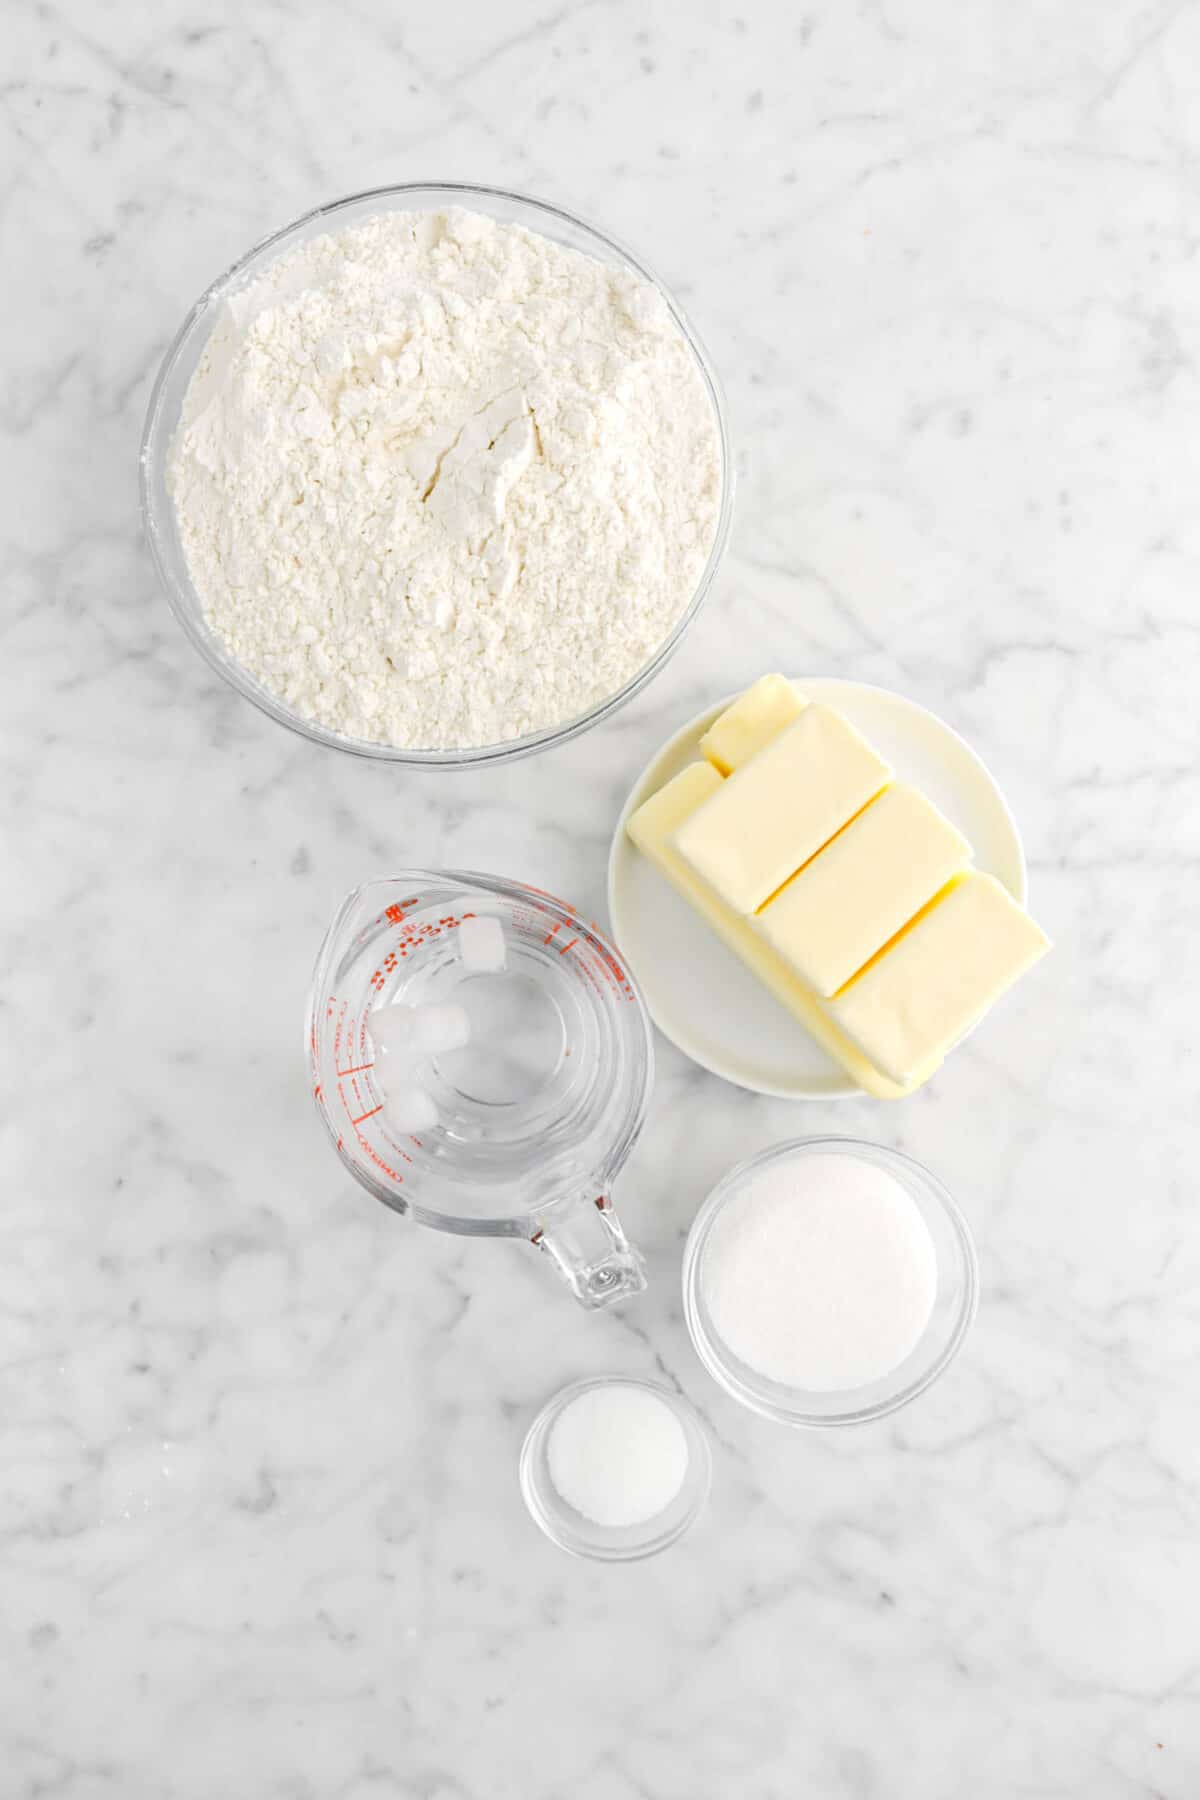
Ingredients
For The Pie Crust:
- All-Purpose Flour
- Granulated Sugar
- Salt
- Unsalted Butter
- Ice Water
For The Filling:
- Chopped Apples
- Granulated Sugar
- Apple Pie Spice
- Cornstarch
- Unsalted Butter

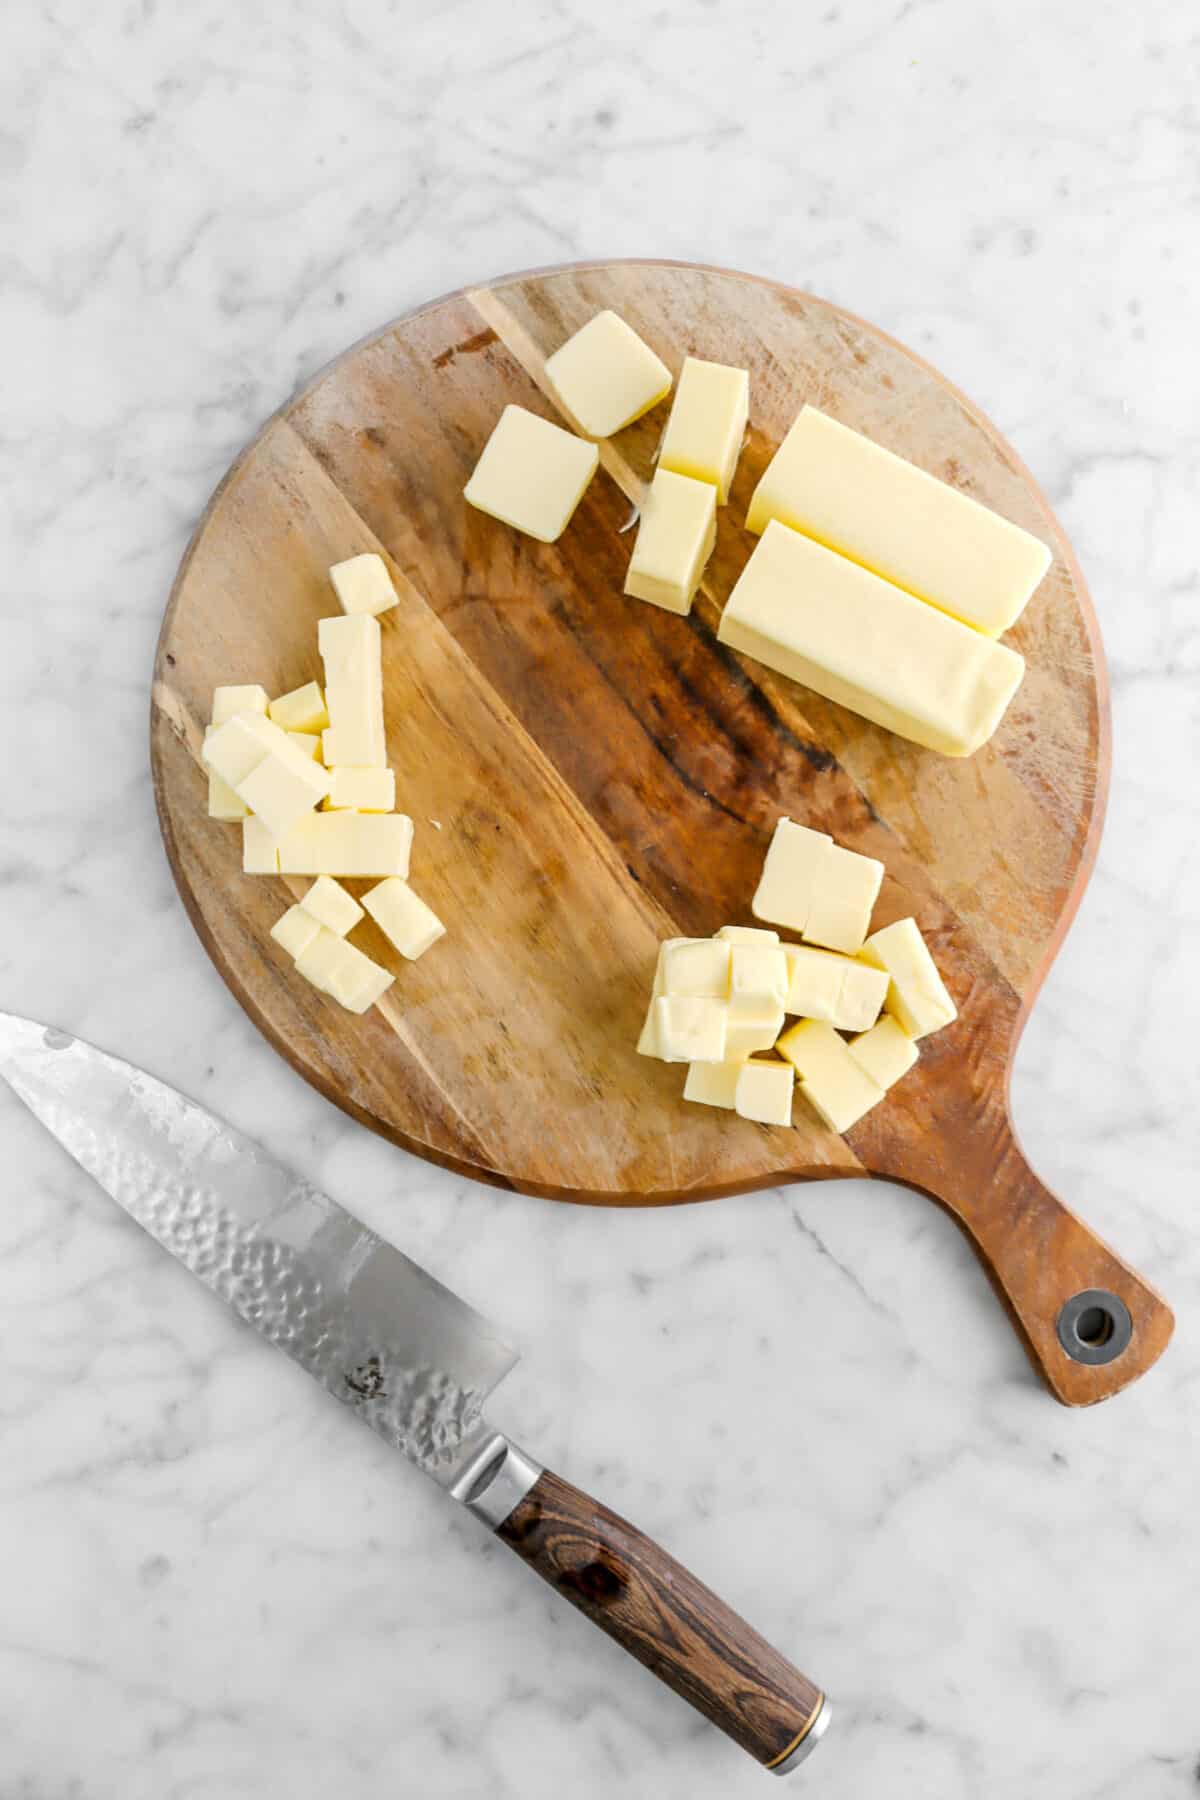
Instructions
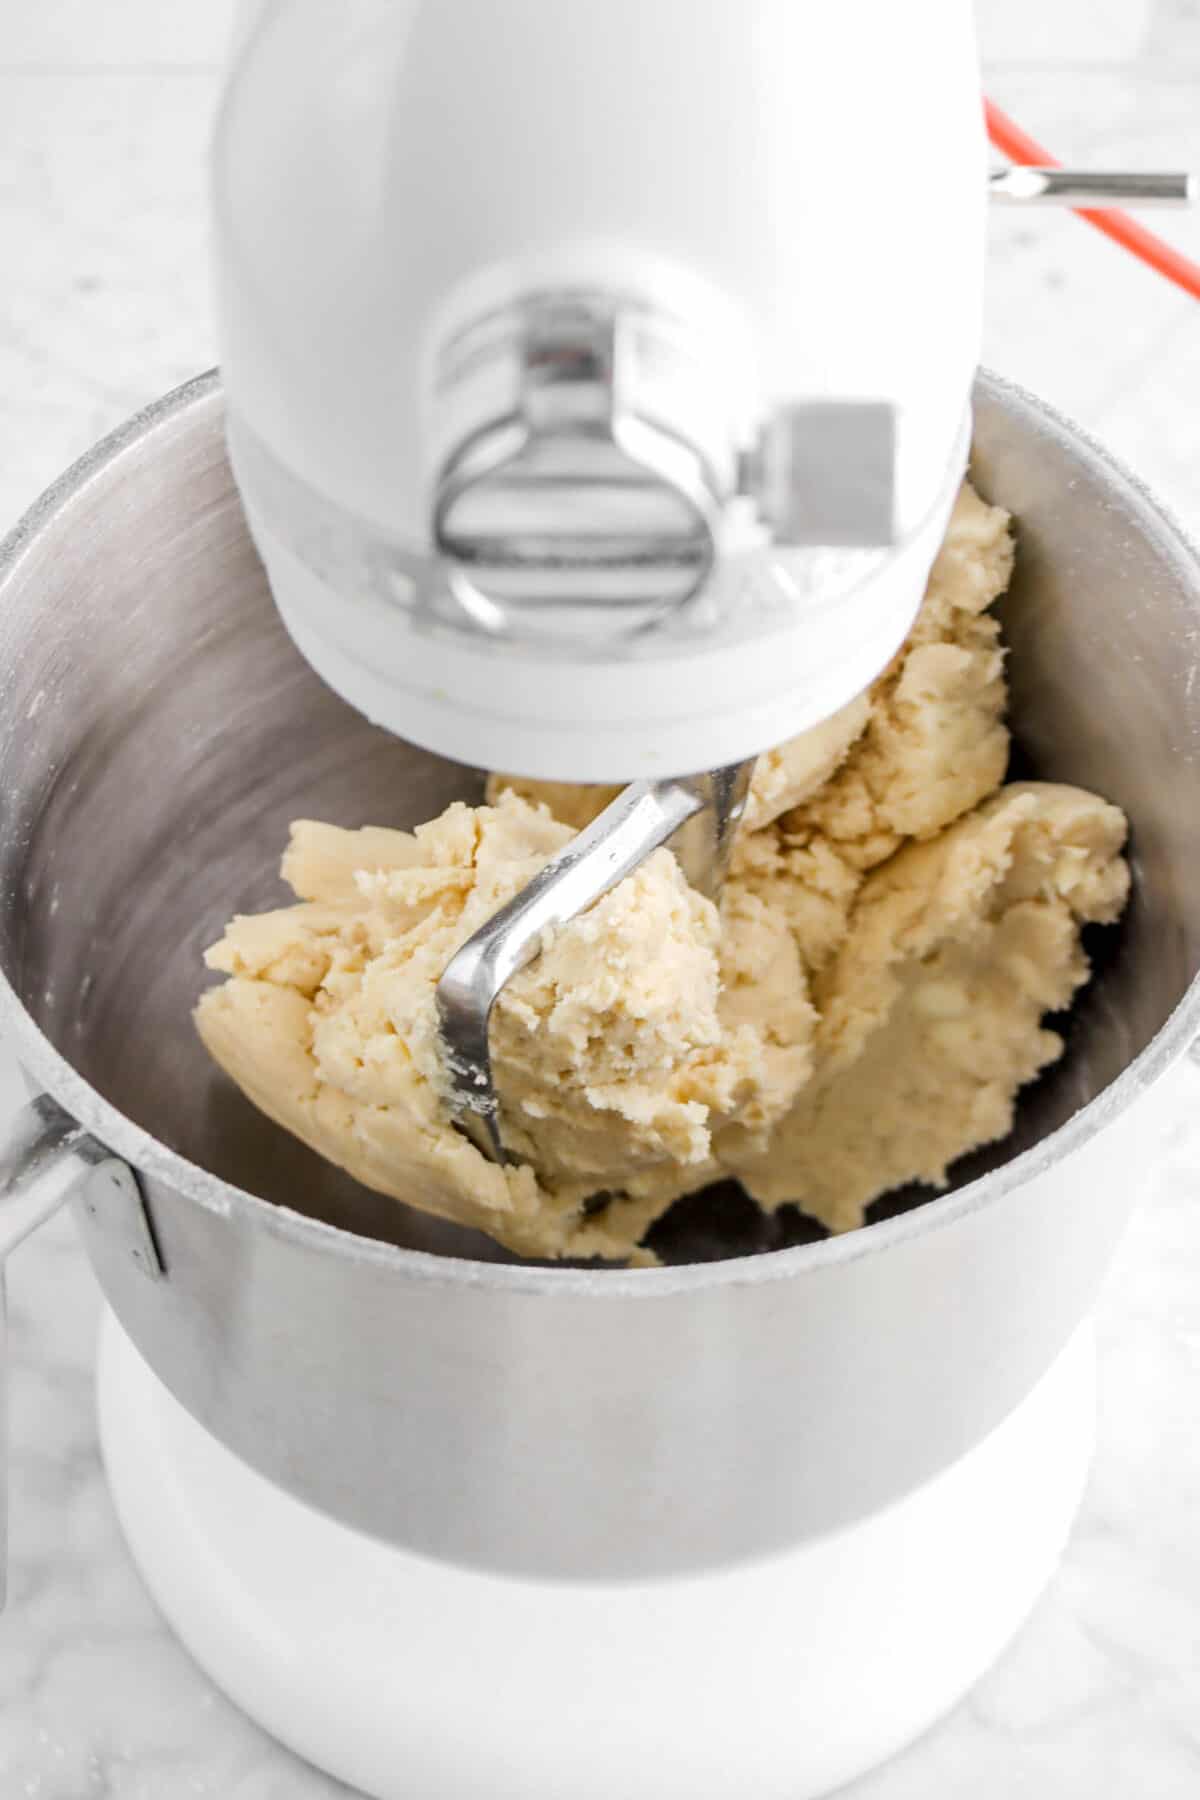
Chop the butter for the crust into small pieces. Remove 1/4 cup butter and return the rest to the refrigerator.
Combine the flour, sugar, salt, and 1/4 cup butter in the bowl of a stand mixer. Turn the mixer on a low speed and mix until mixture is about the texture of corn meal, anywhere between 3-4 minutes.

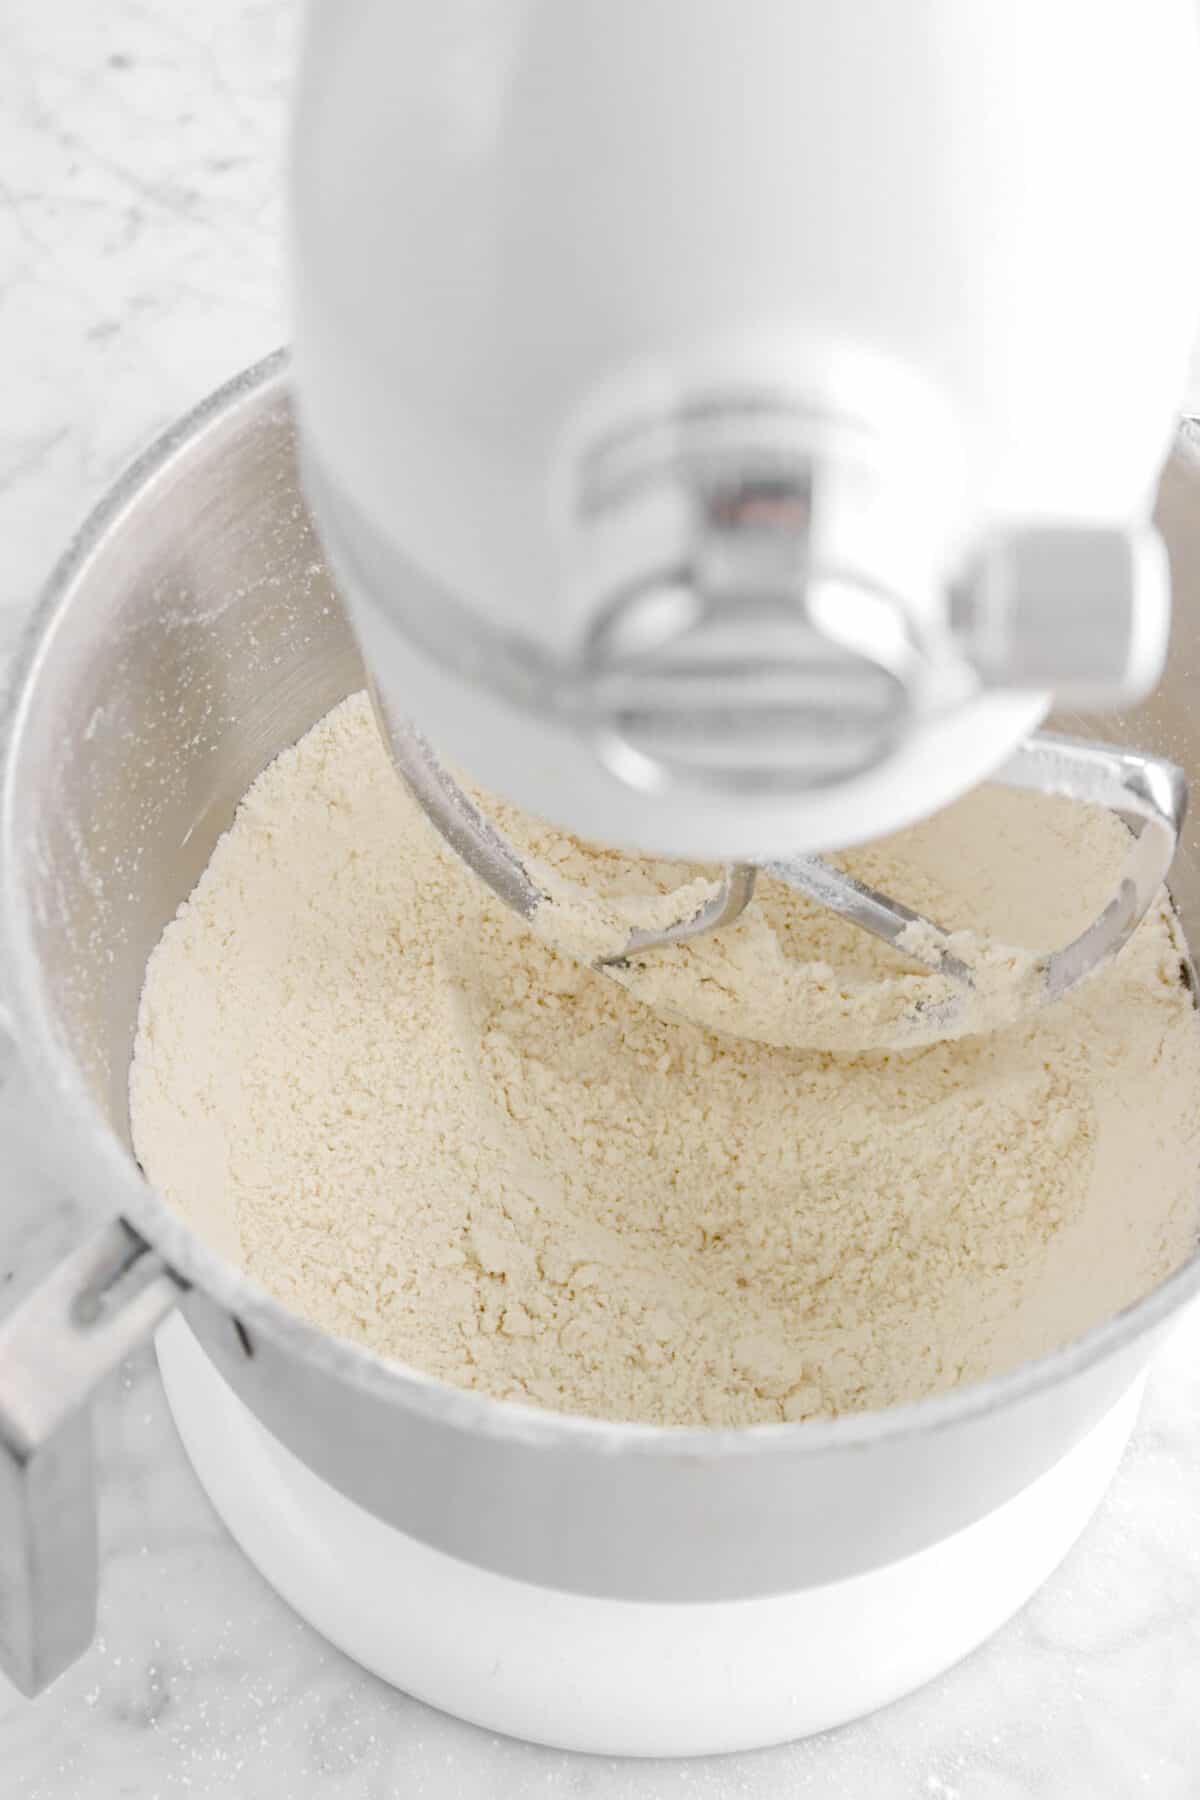
Add the rest of the butter and mix on medium low speed until just combined. You should still have pretty decent sized chunks of butter left in mixture.


Reduce the speed on the mixer to low. Add the ice water one Tablespoon at a time until the mixture just comes together.

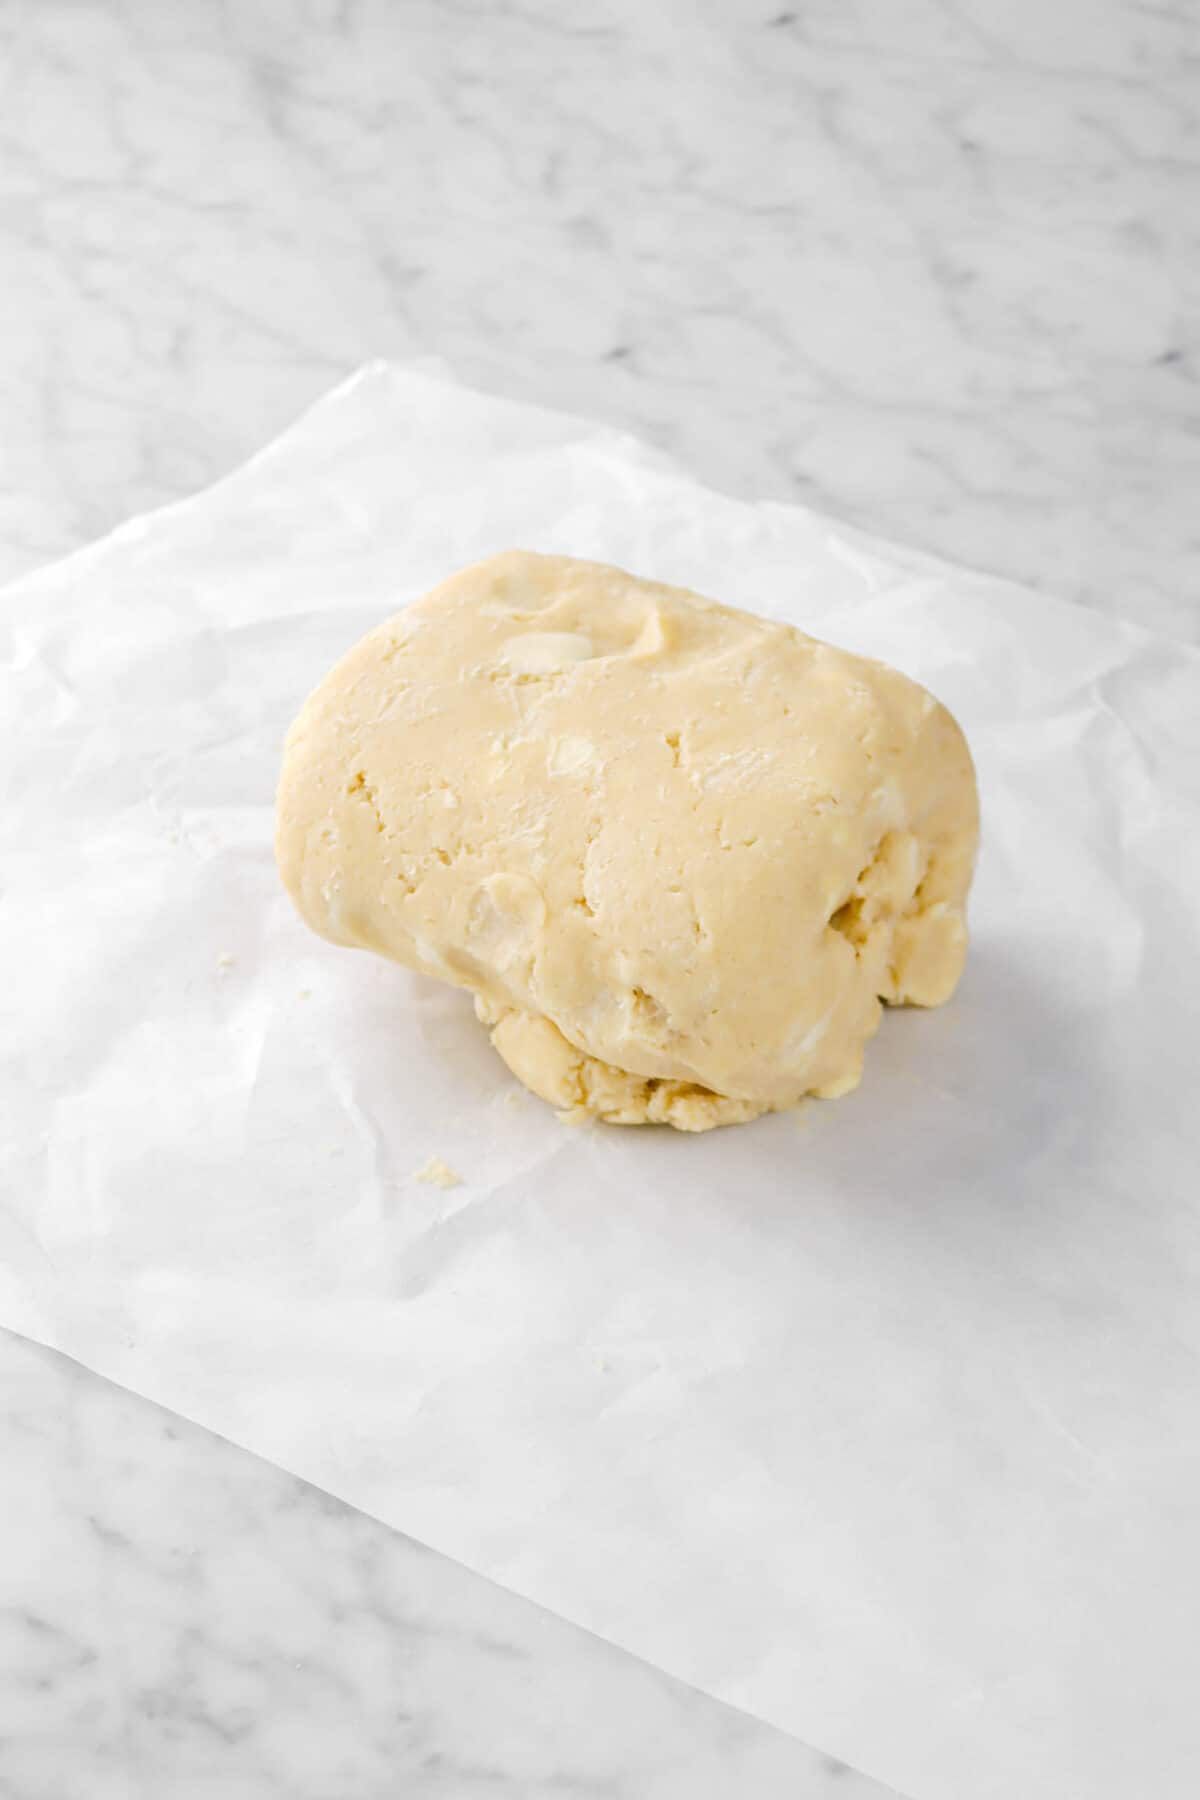
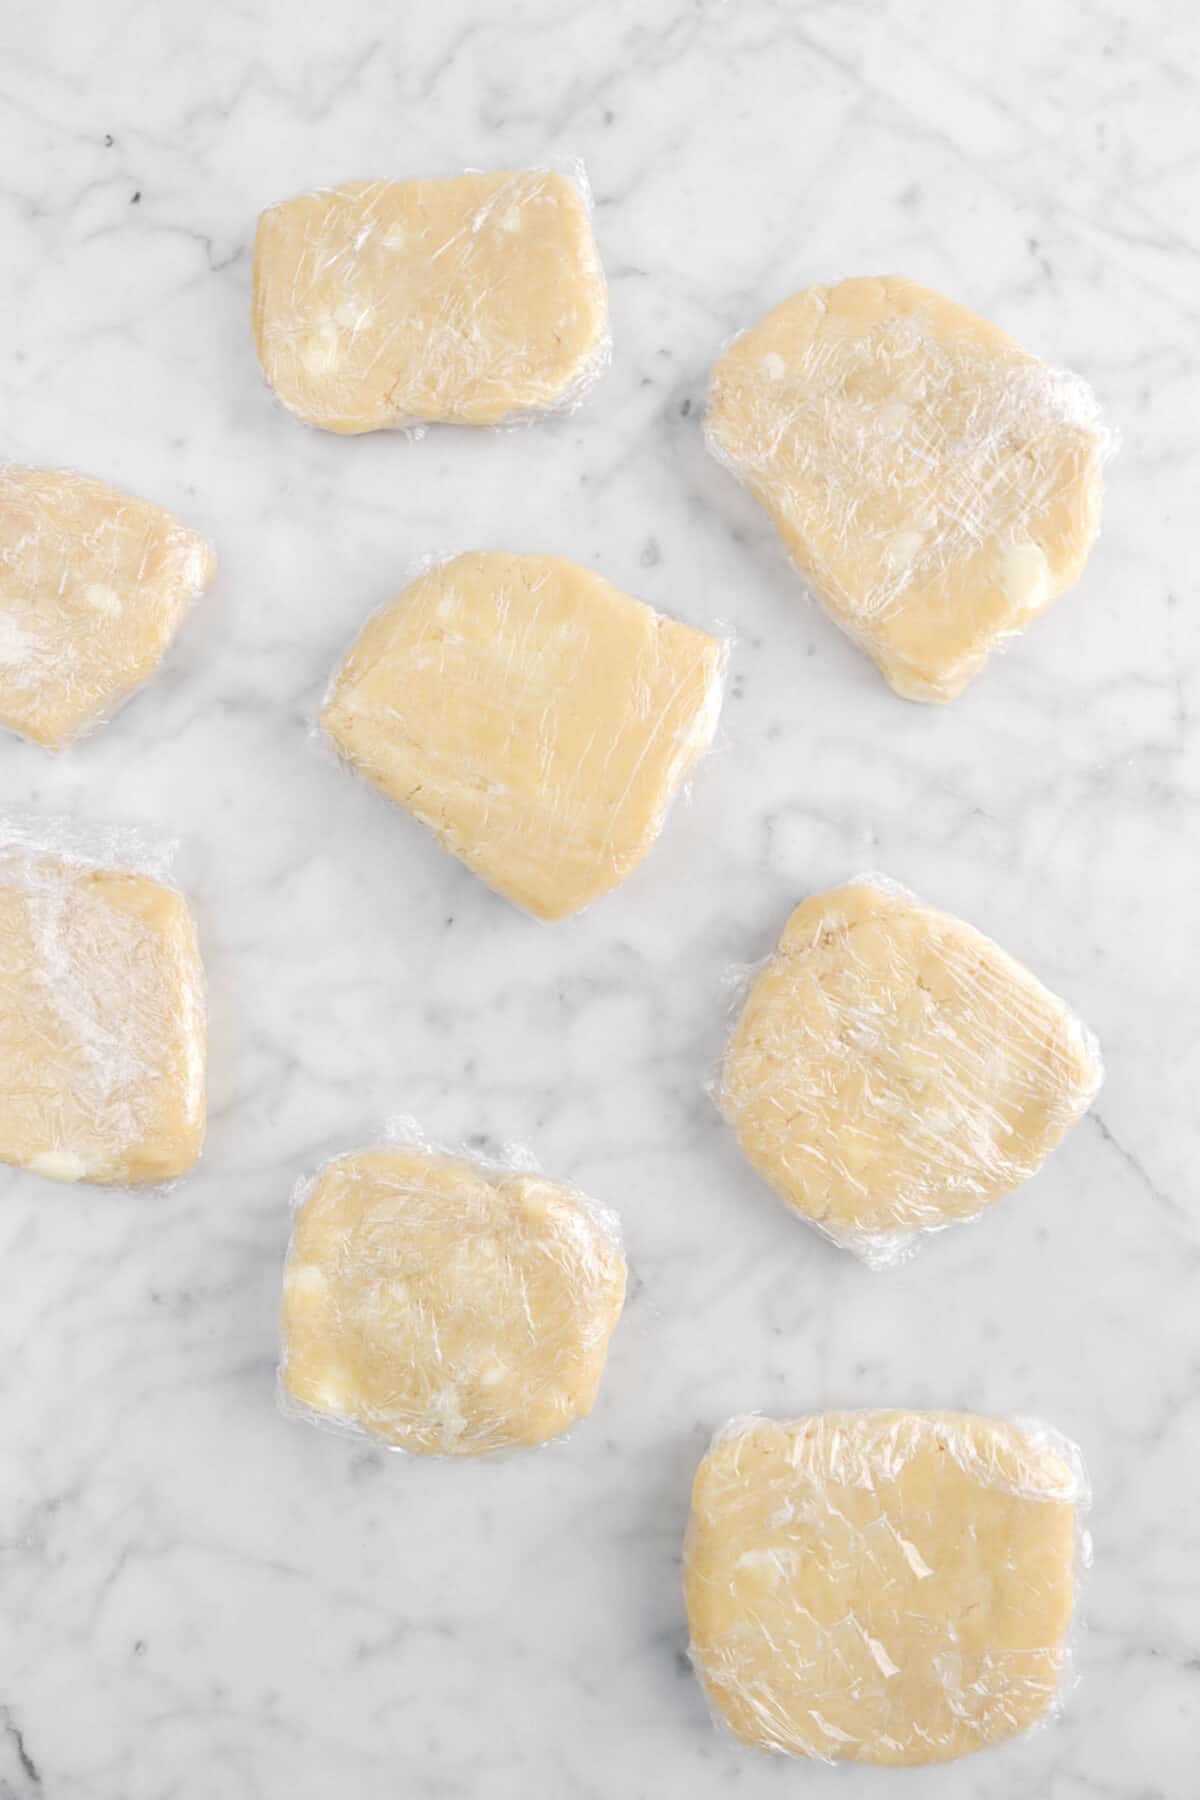
Turn out onto parchment paper and divide the dough into fourths. Form each 1/4 into a round. Wrap in plastic wrap and refrigerate for at least 4 hours.

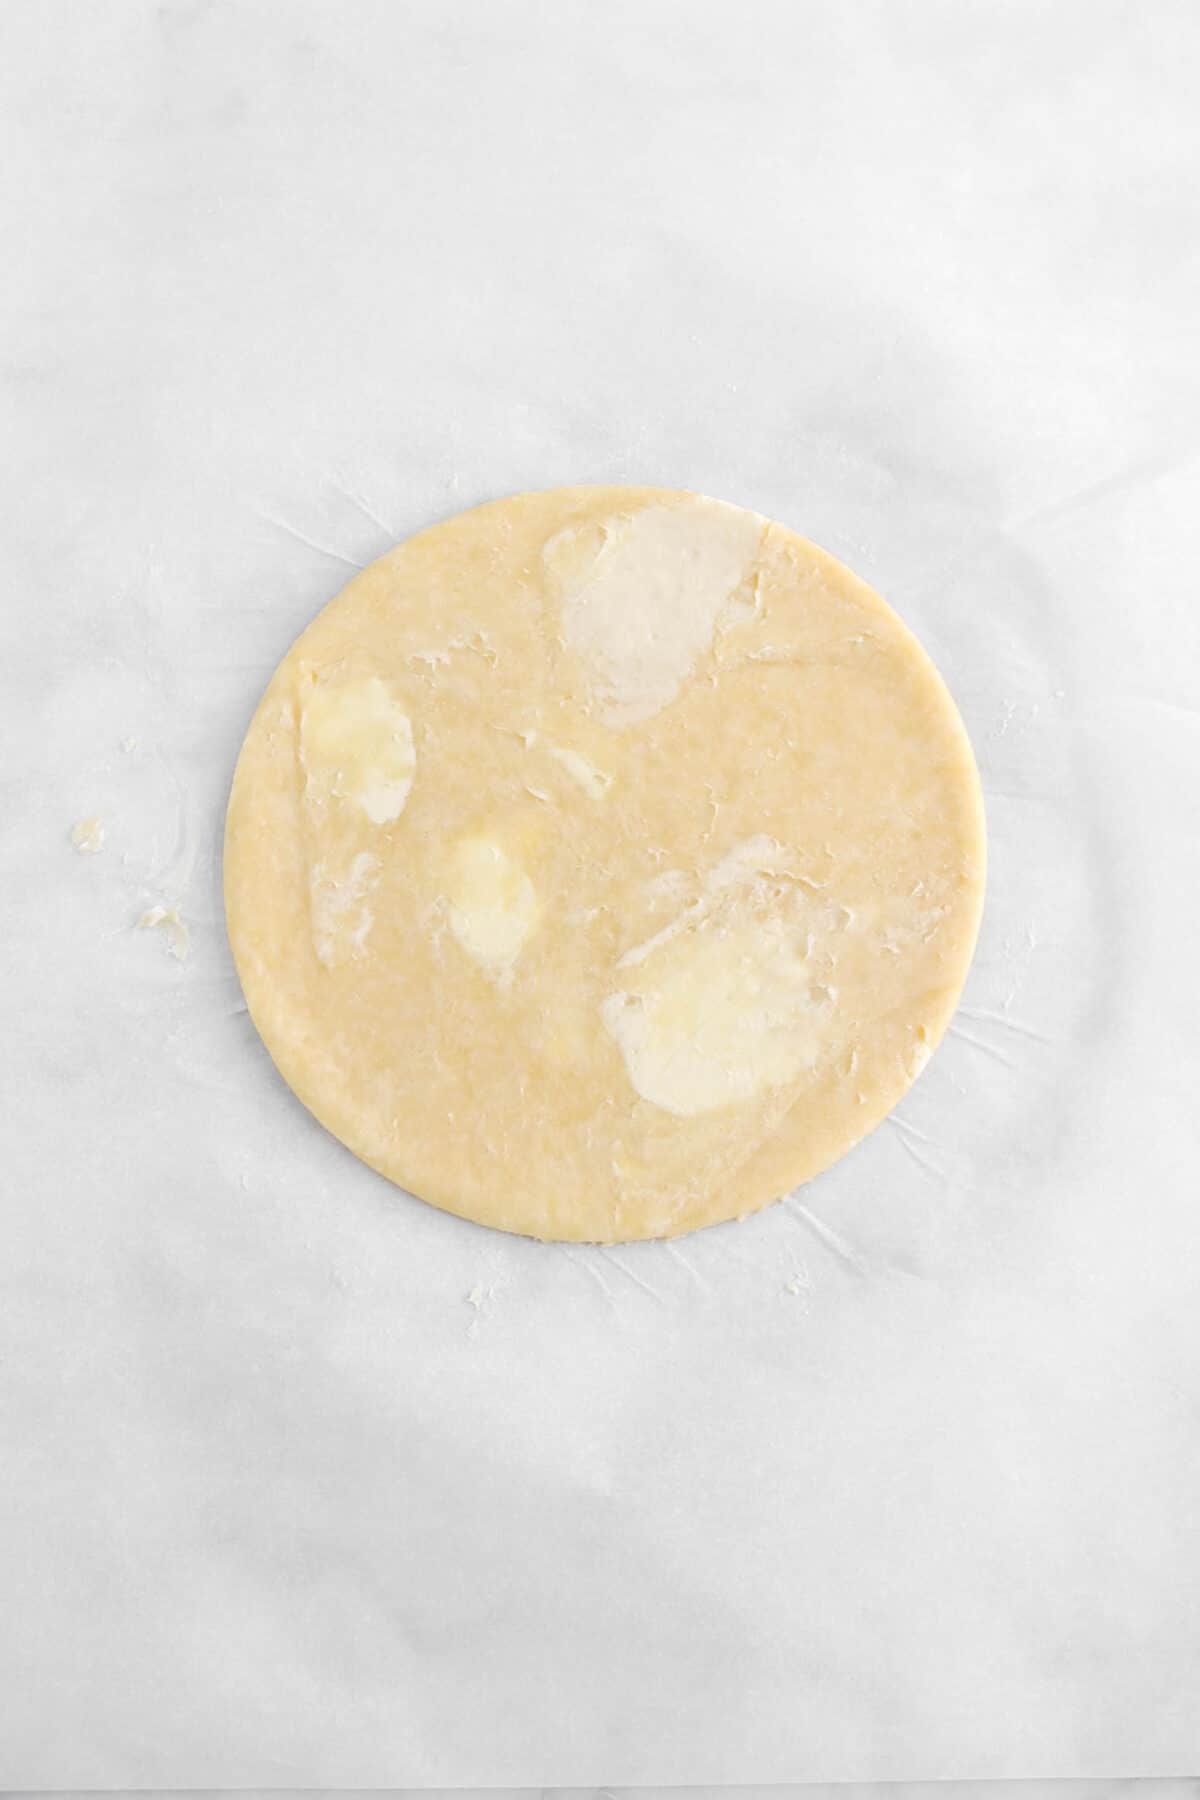
Working with one disc at a time, remove from the fridge. Place the dough between 2 pieces of parchment paper and roll into a round that is 3/16 inch thick.


Cut out a 6-1/2 inch circle and fit it into the tart pan. Reserve the scraps. Repeat with the 3 other pieces of dough. Place pie crusts in refrigerator until needed. If needed, after cutting new rounds, place scraps in the fridge.


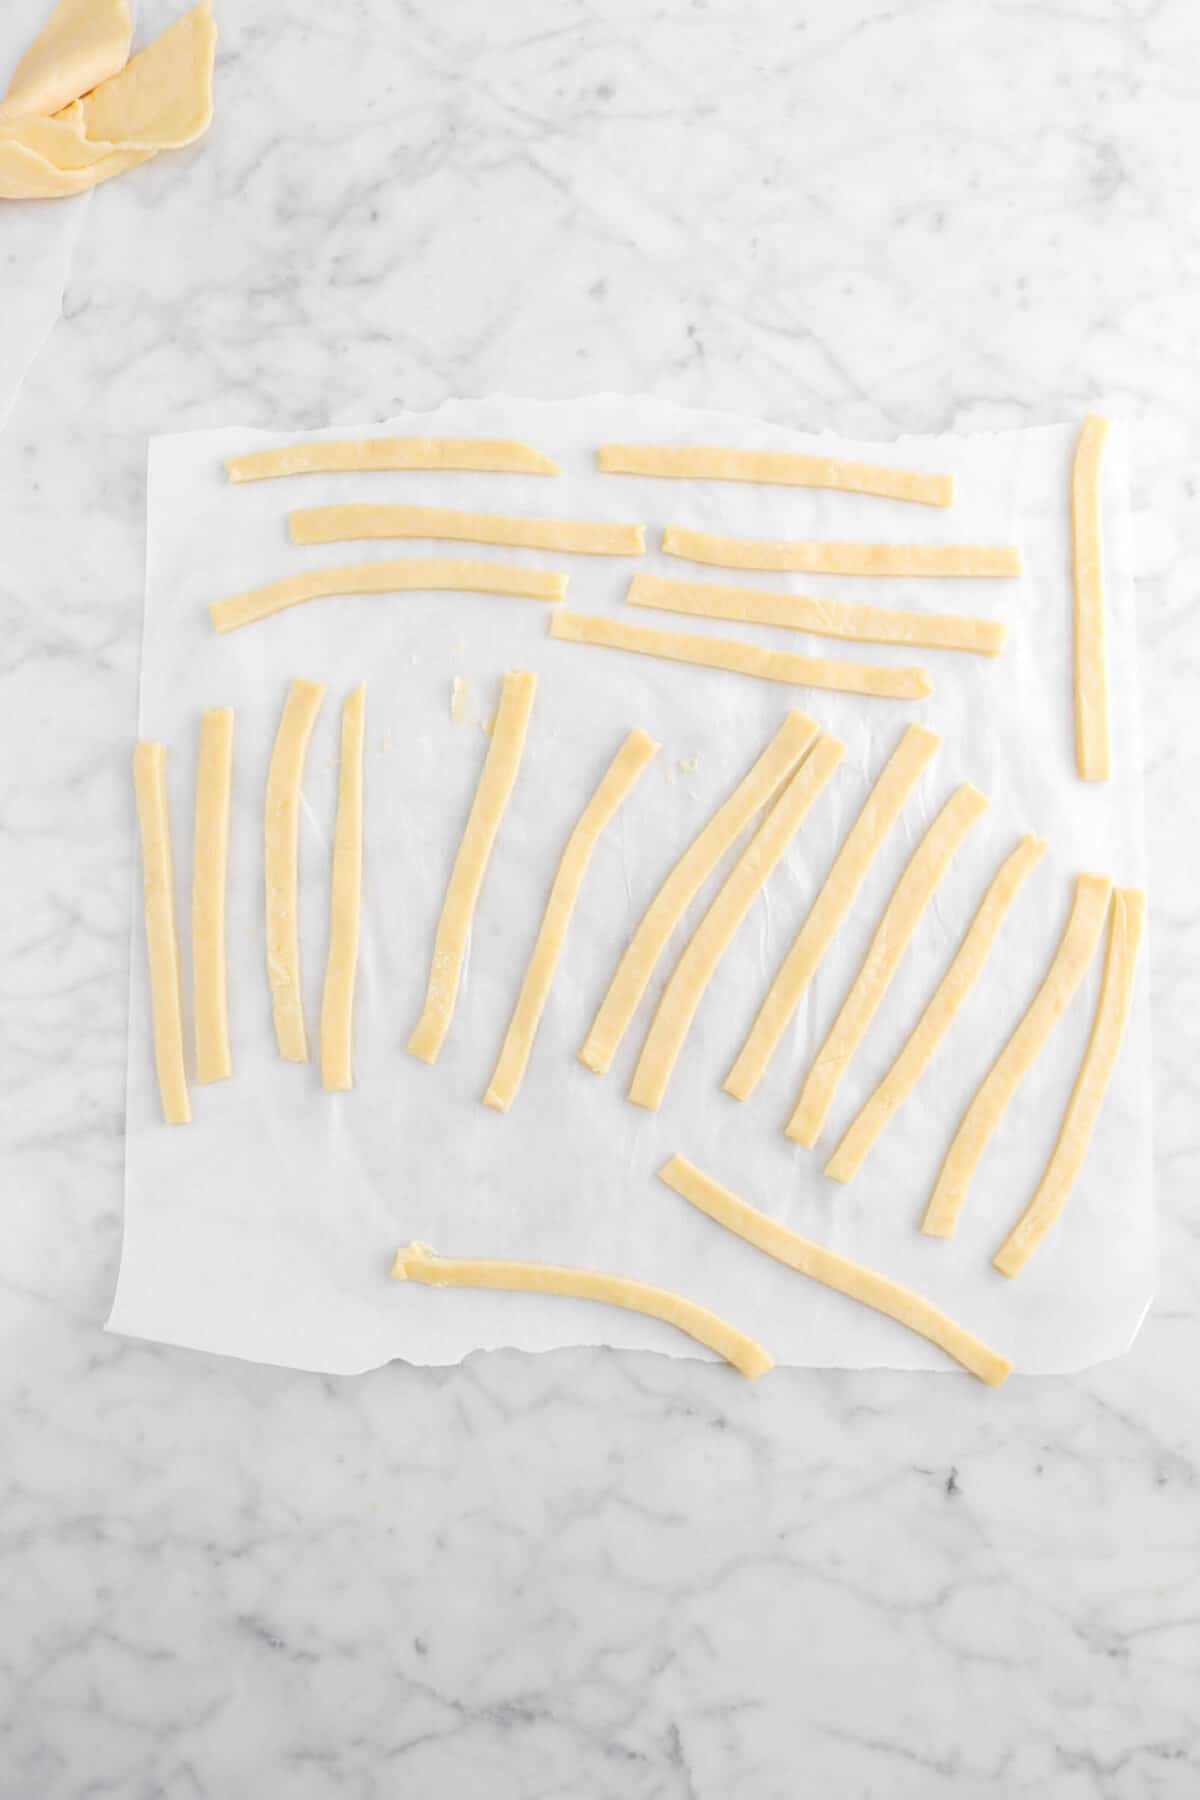
Re-roll pie crust scraps and cut into a rectangle. From there, cut 1/4-1/2 inch strands.


How To Lattice
Here’s where you need to take a deep breath and remember that there’s no need to worry! Latticing is actually pretty easy.
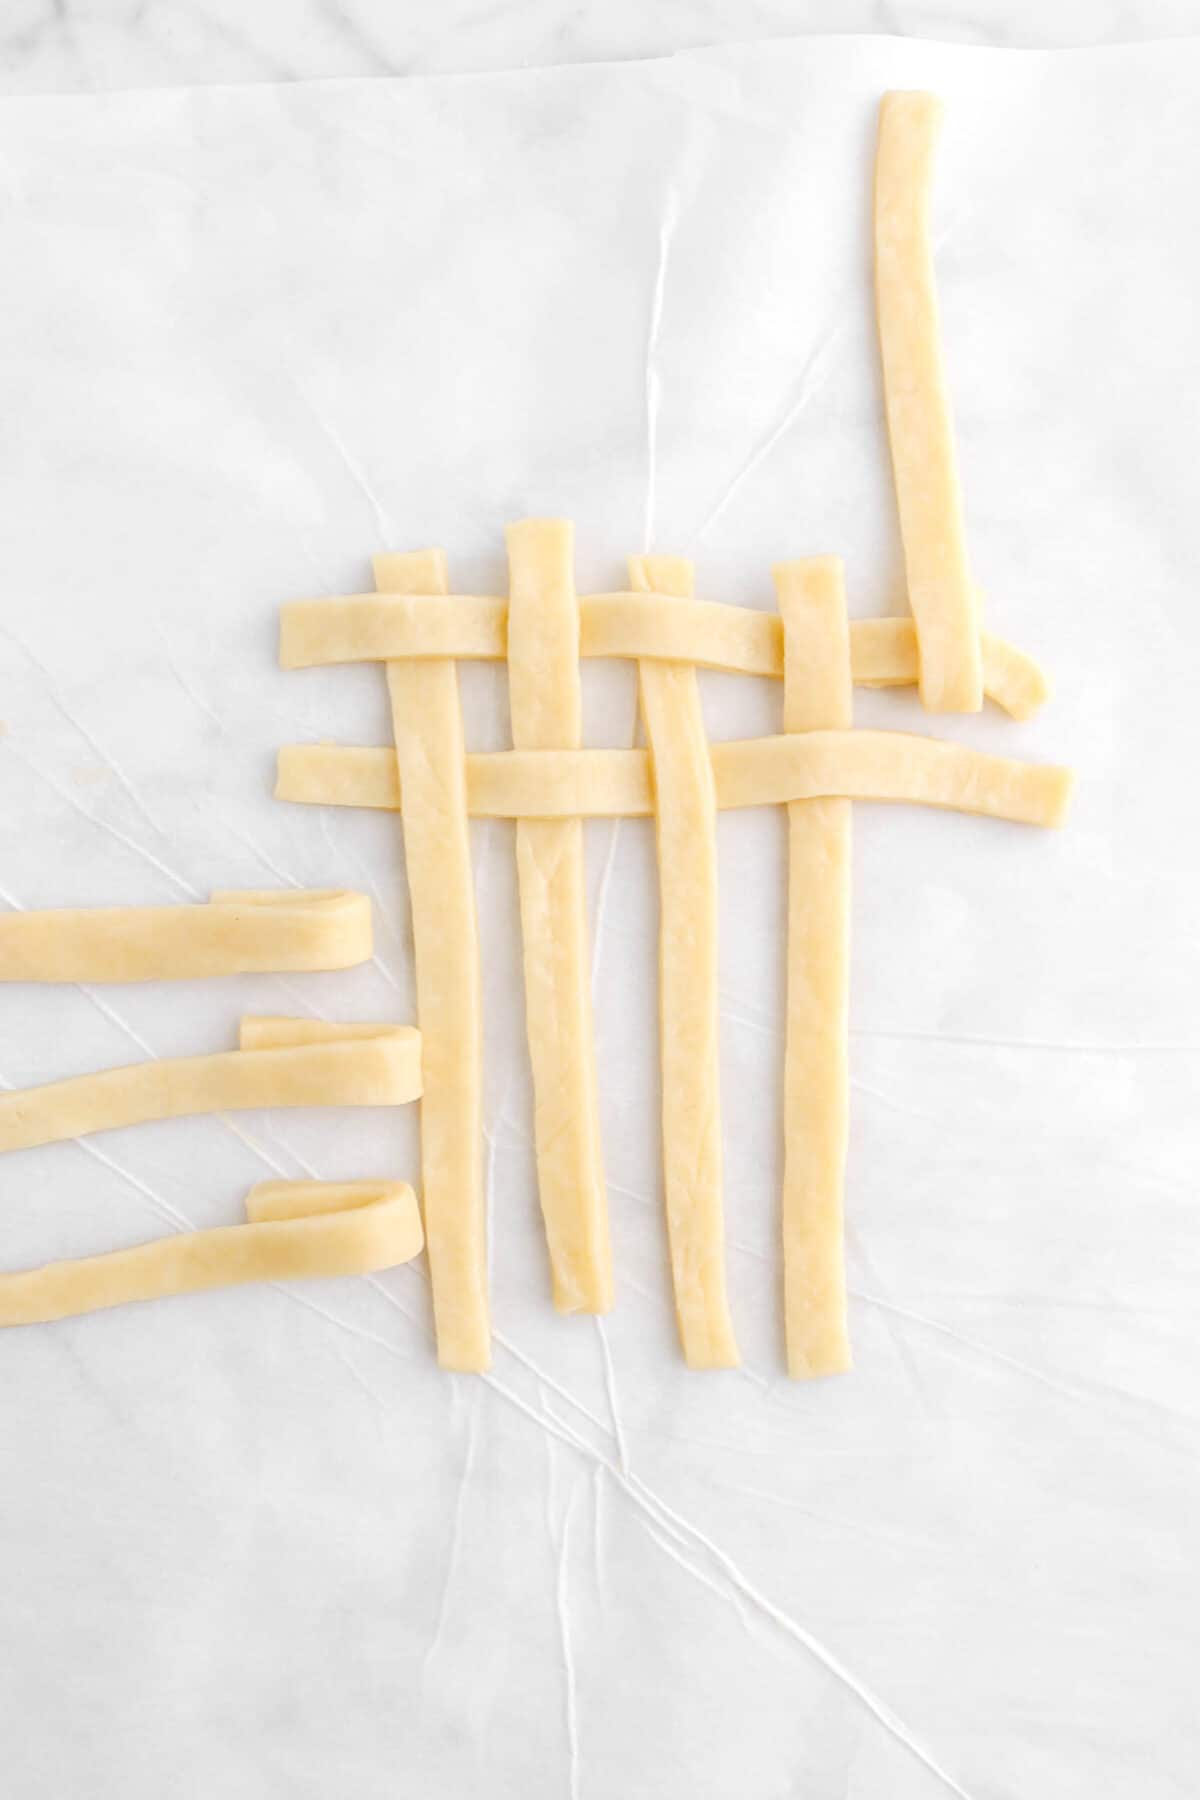
First, lay out ten strands of pie dough. Five going vertically (up and down) and five going horizontally (side to side). When placing the horizontal strands, fold them over themselves so a small amount of the strand is under itself. This will make latticing an easier and cleaner task.
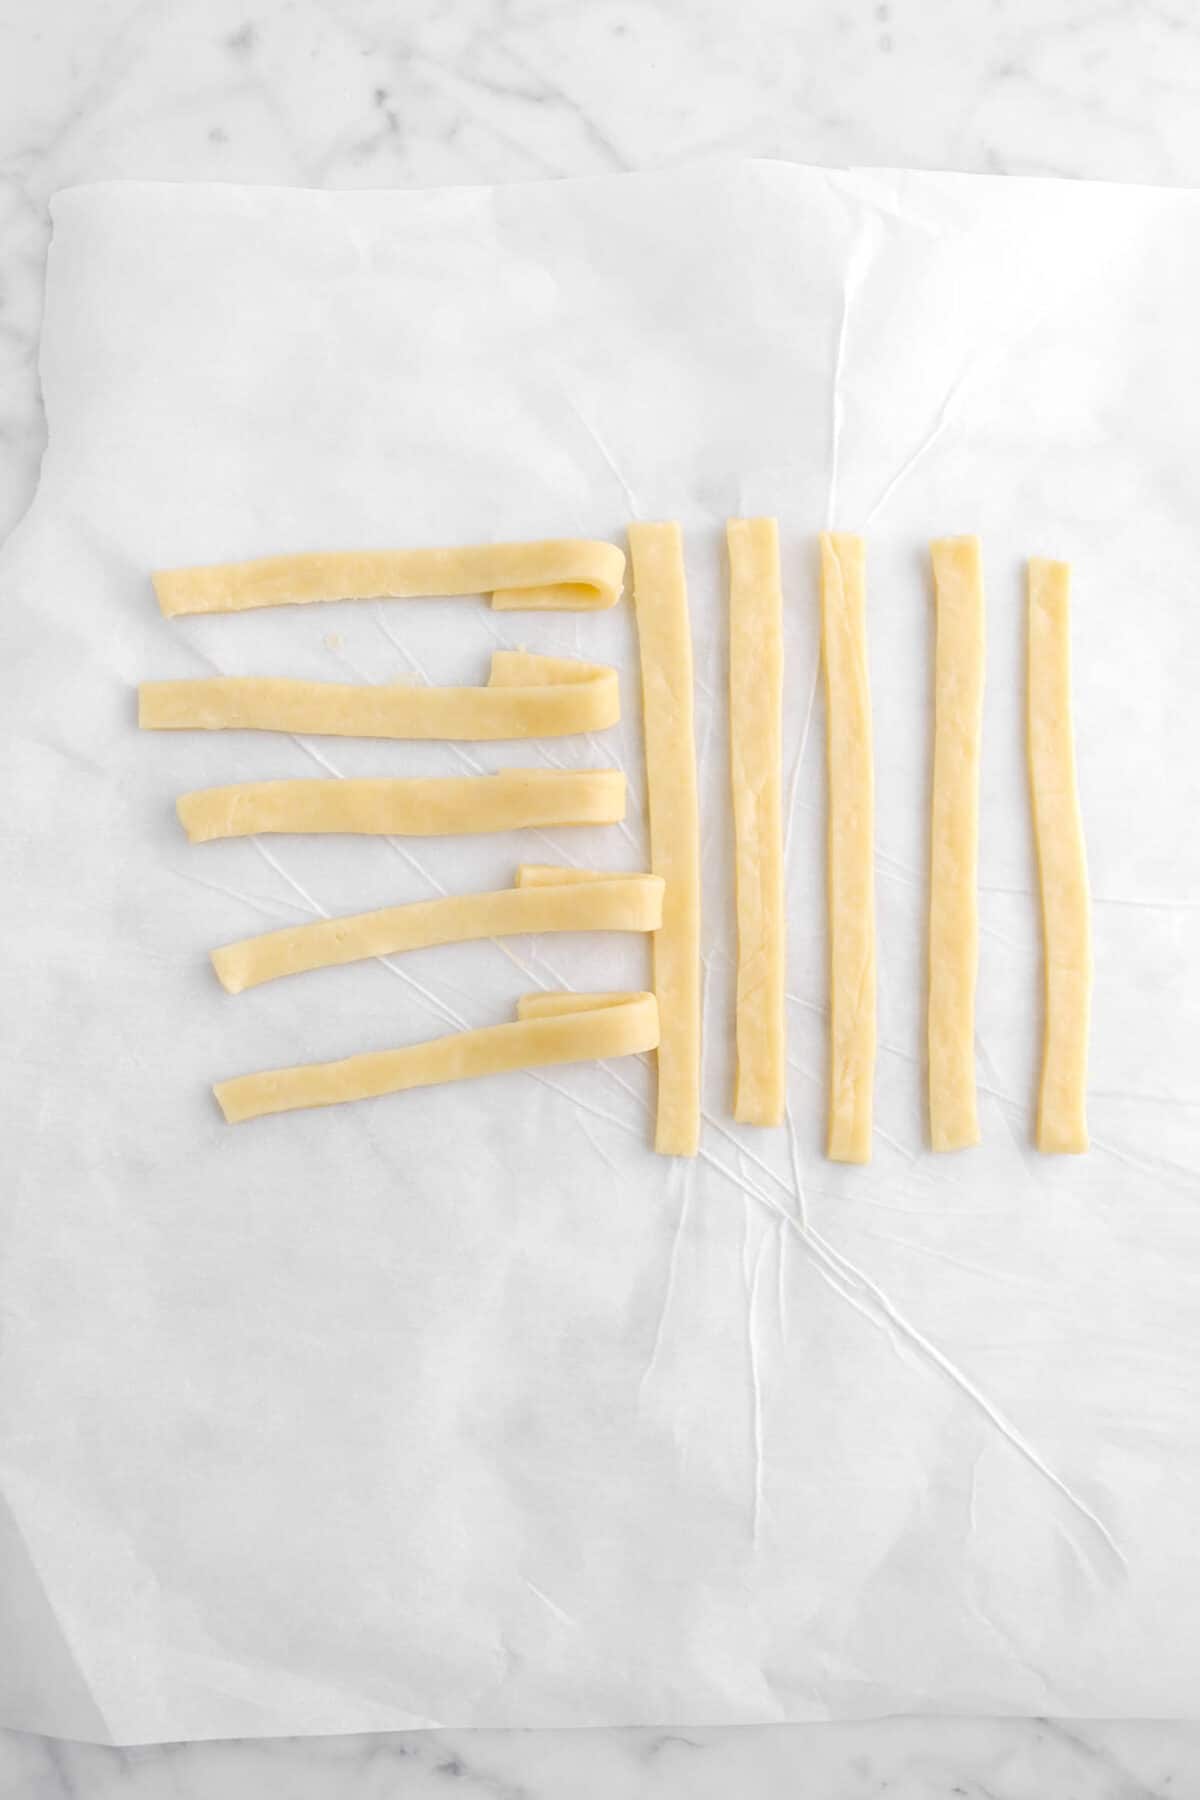
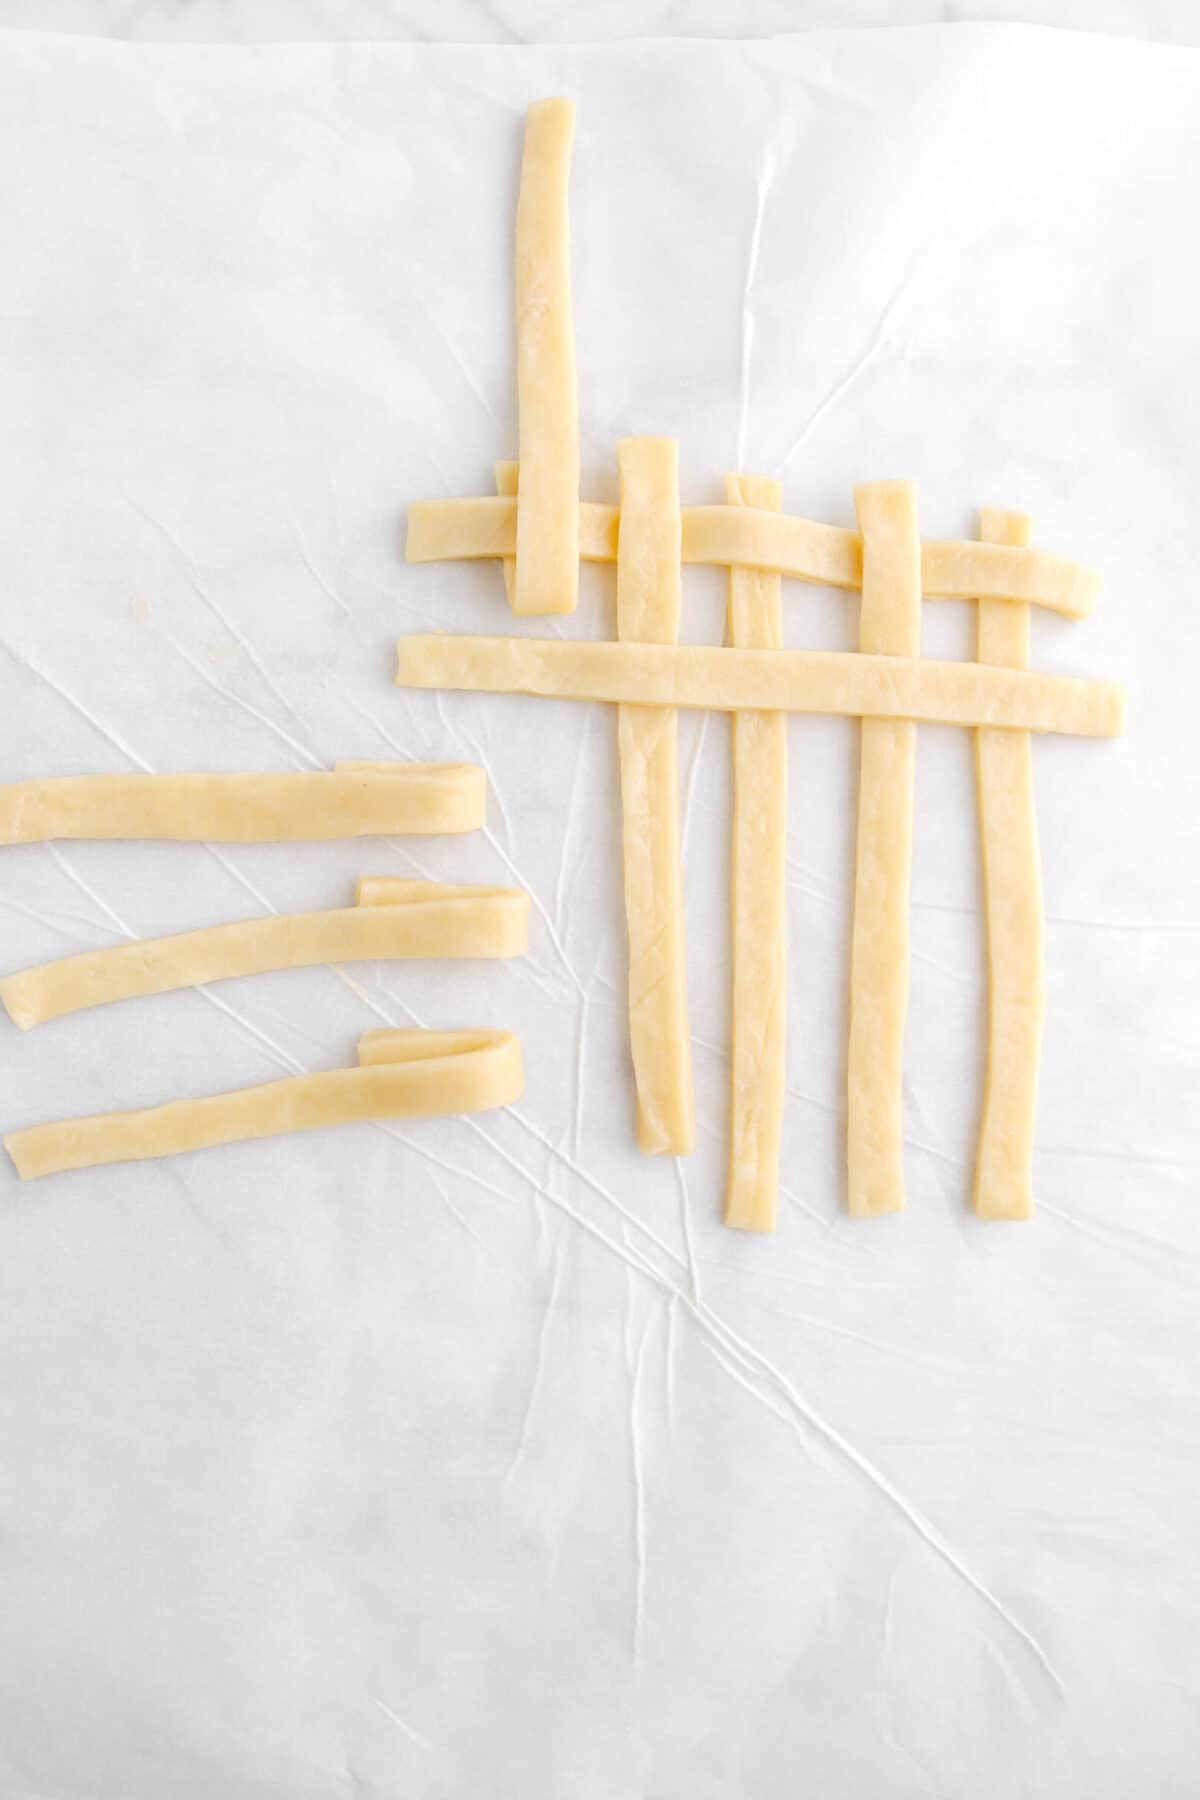
From here, it’s actually pretty simple. As you can see, I already did the top lattice. I started it with the first horizontal strand over the first vertical strand.
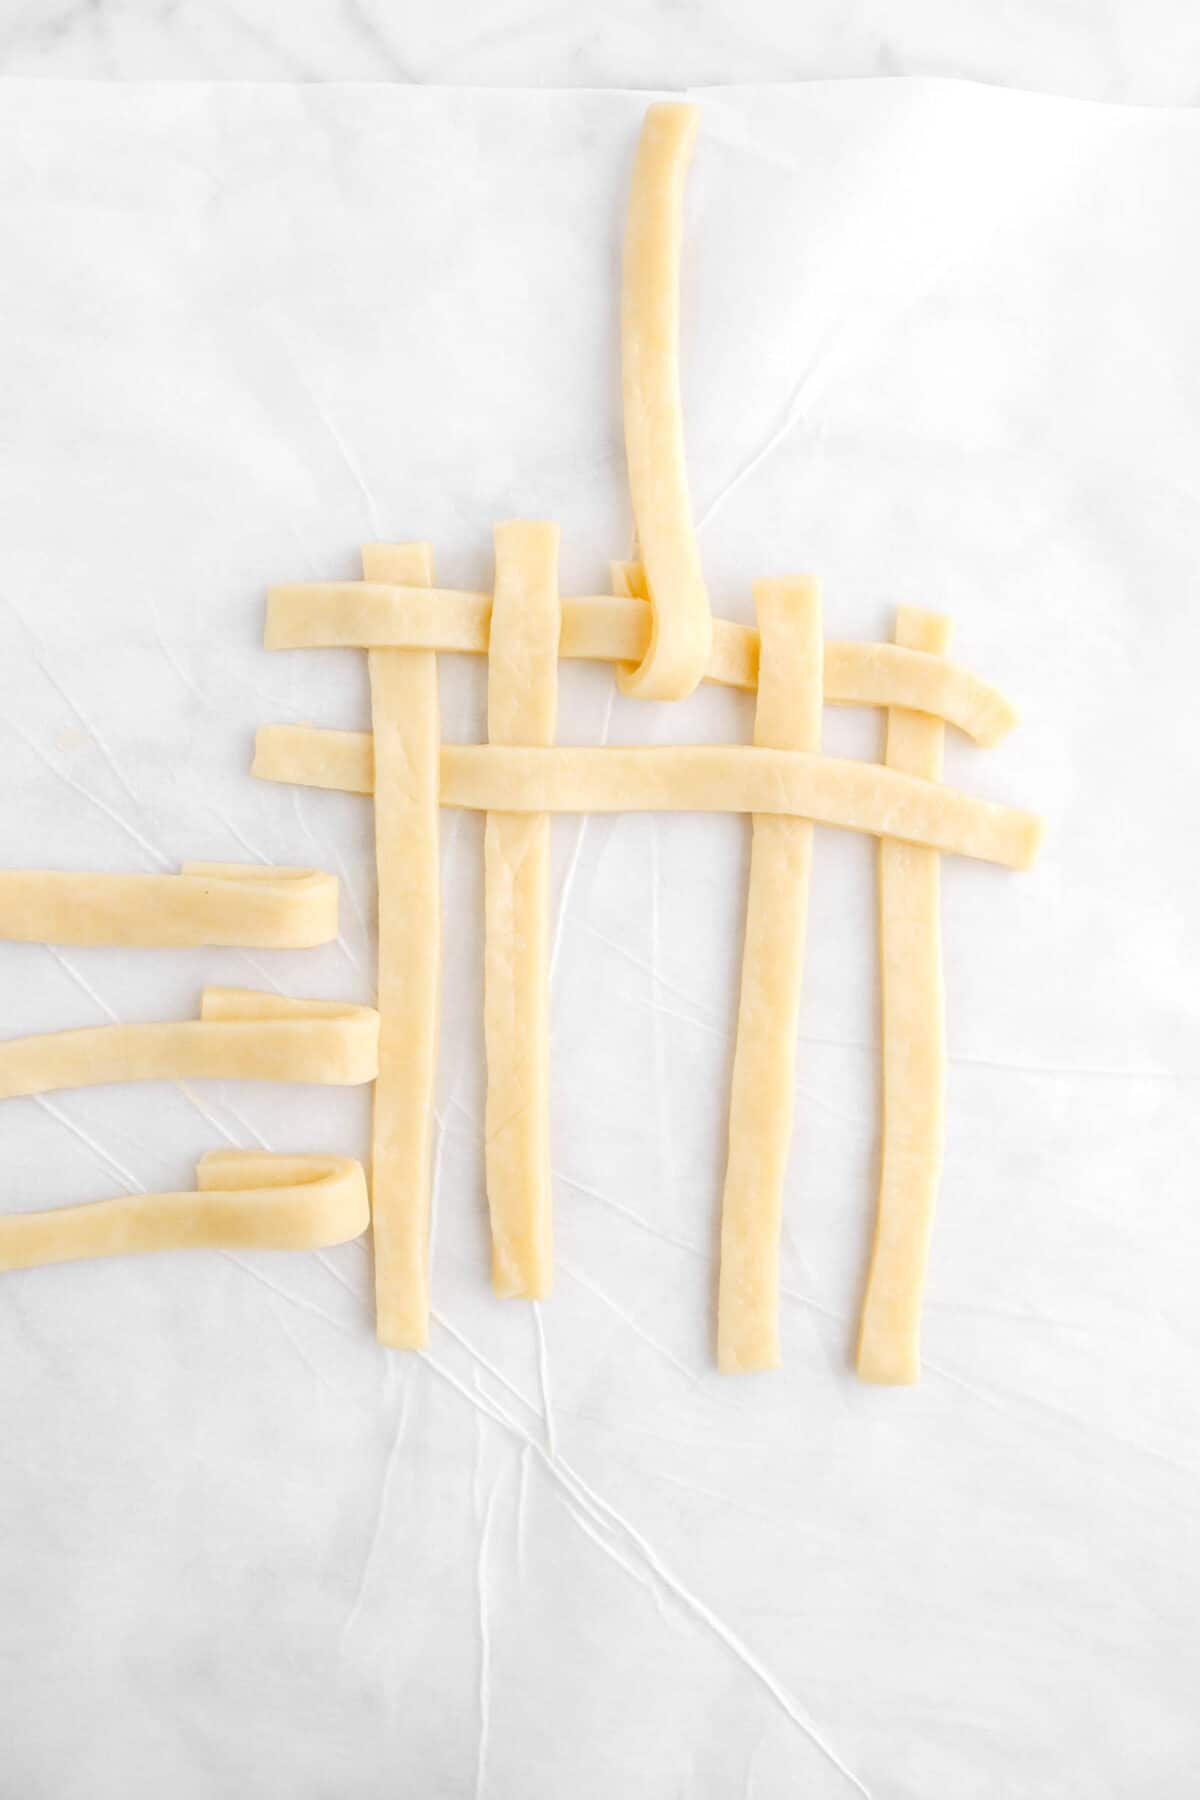
So, the second horizontal strand will start under the first vertical strand. Now, still working with the second horizontal strand, we are going to lay it over the second vertical strand. Pick up the third vertical strand and lay it out of the way. Lay the second horizontal strand across. Unfold the third vertical strand and lay it over the second horizontal strand. Lay the second horizontal strand across the fourth vertical strand. Pick up the fifth vertical strand and lay the second horizontal strand across. Place the fifth vertical strand over the second vertical strand and now you have the row of lattice complete! Repeat these steps all the way down, alternating between starting with the horizontal strand over the first vertical and under the first vertical.


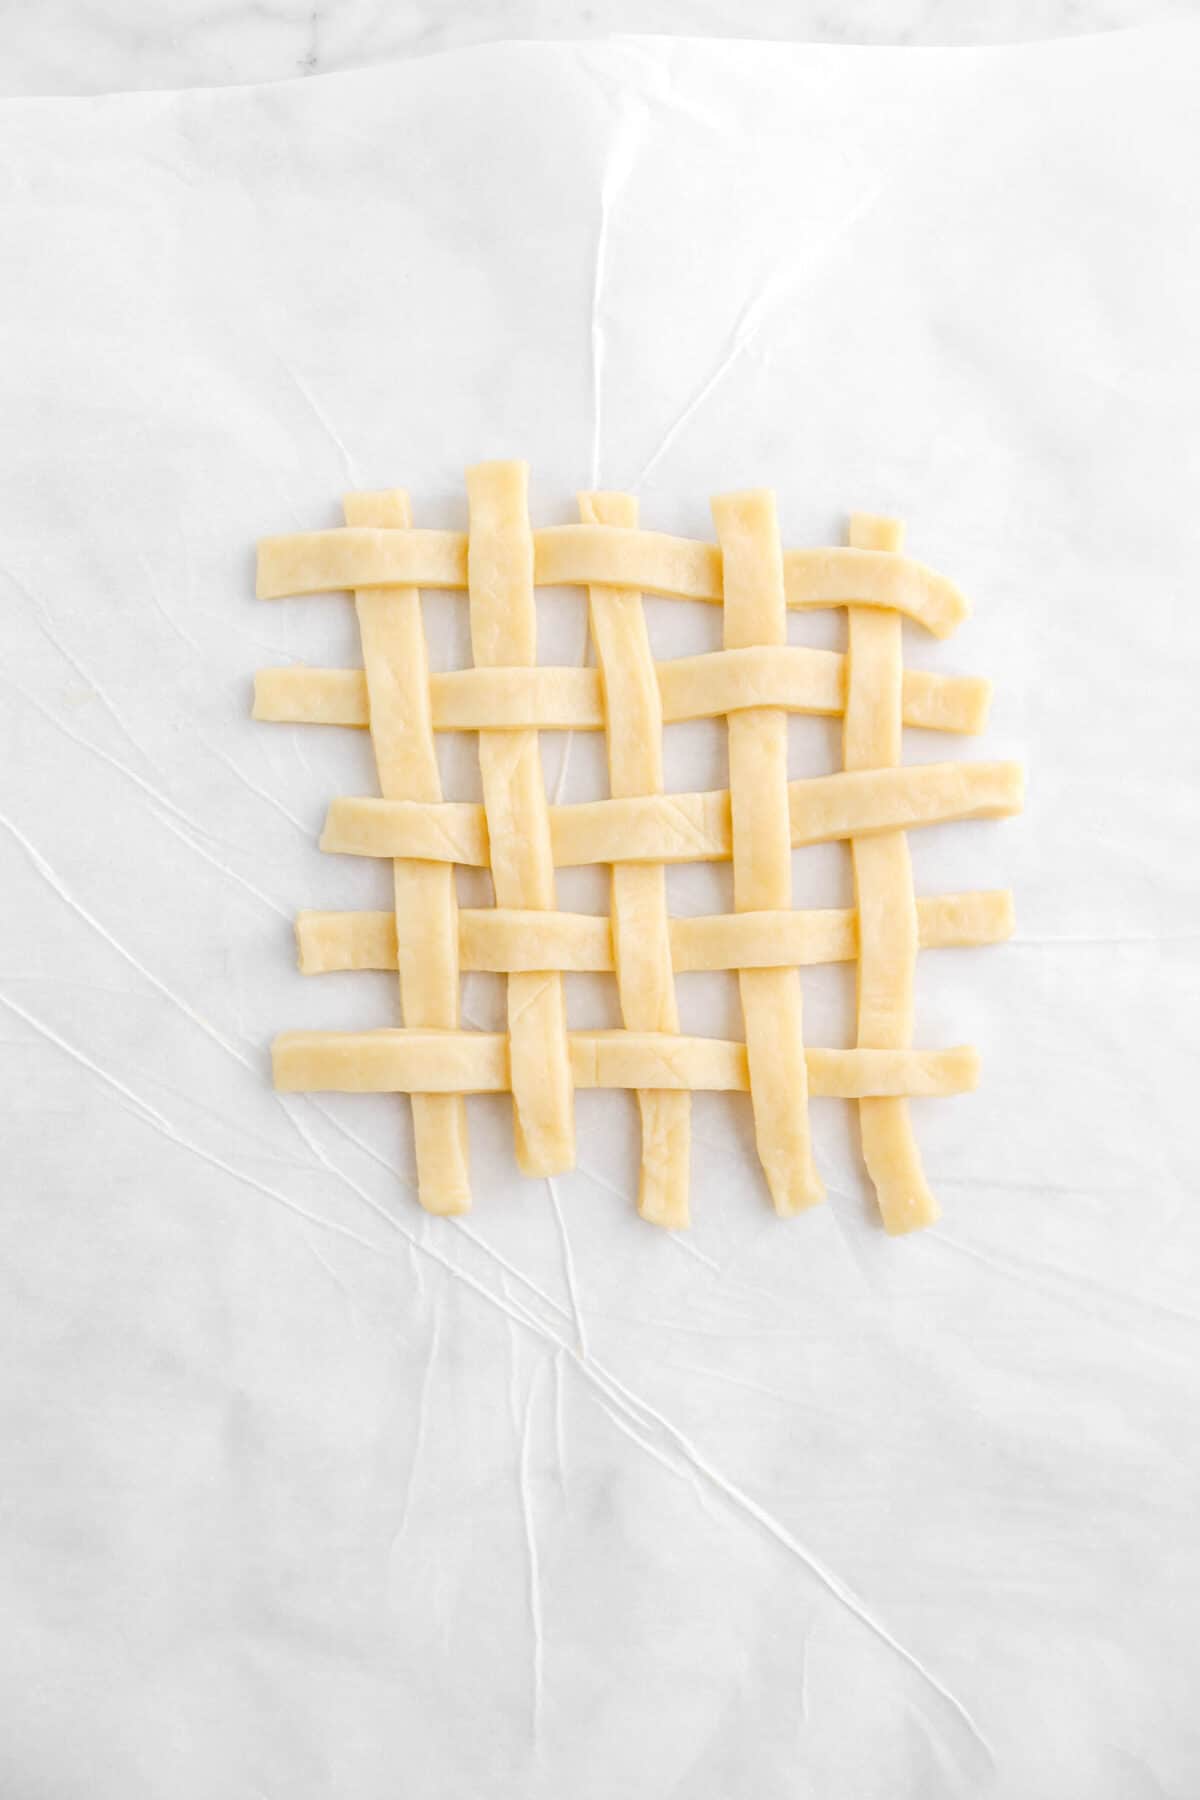
Place the completed lattice in the fridge and repeat three more times, placing each in the fridge after completeing.
Finishing The Pies
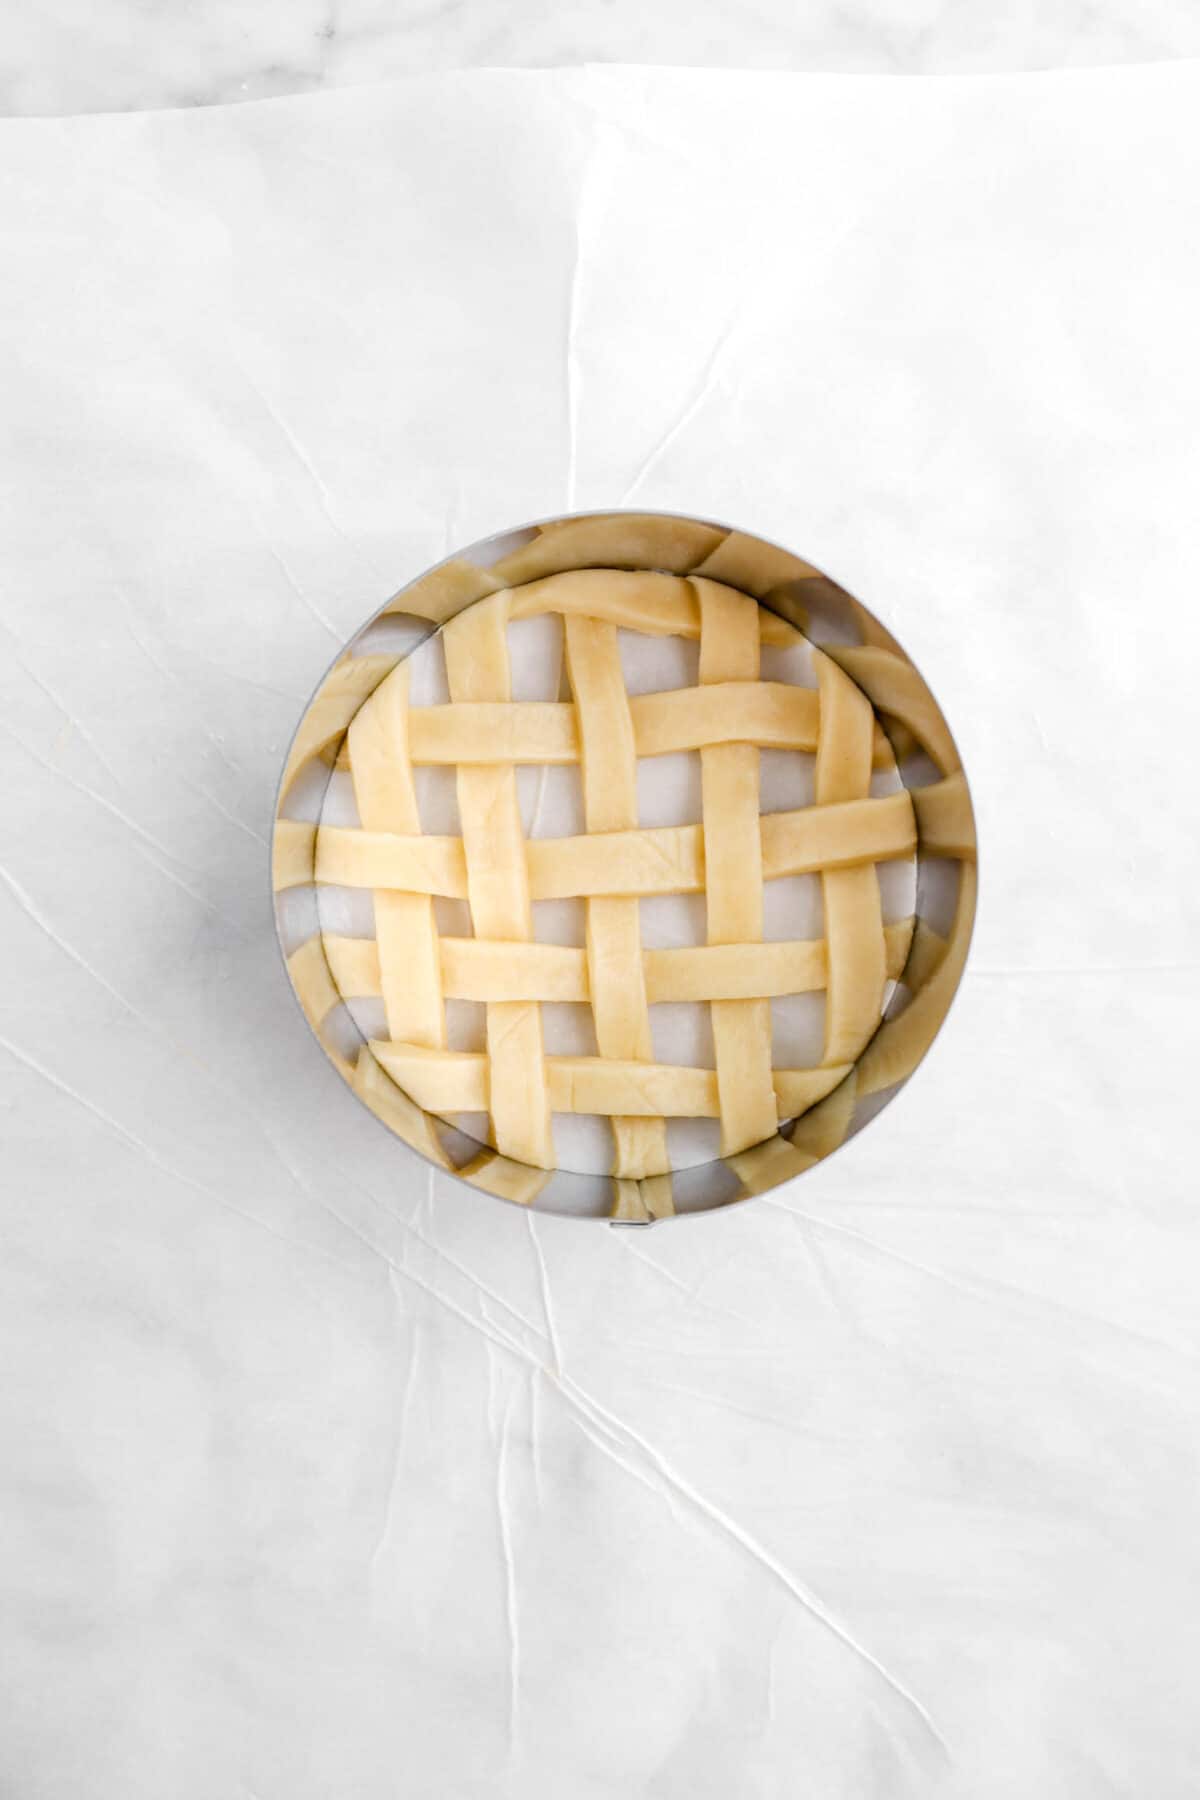
Using a sharp knife or a ring mold, cut the lattices into 5 inch circles. Remove excess and refridgerate.

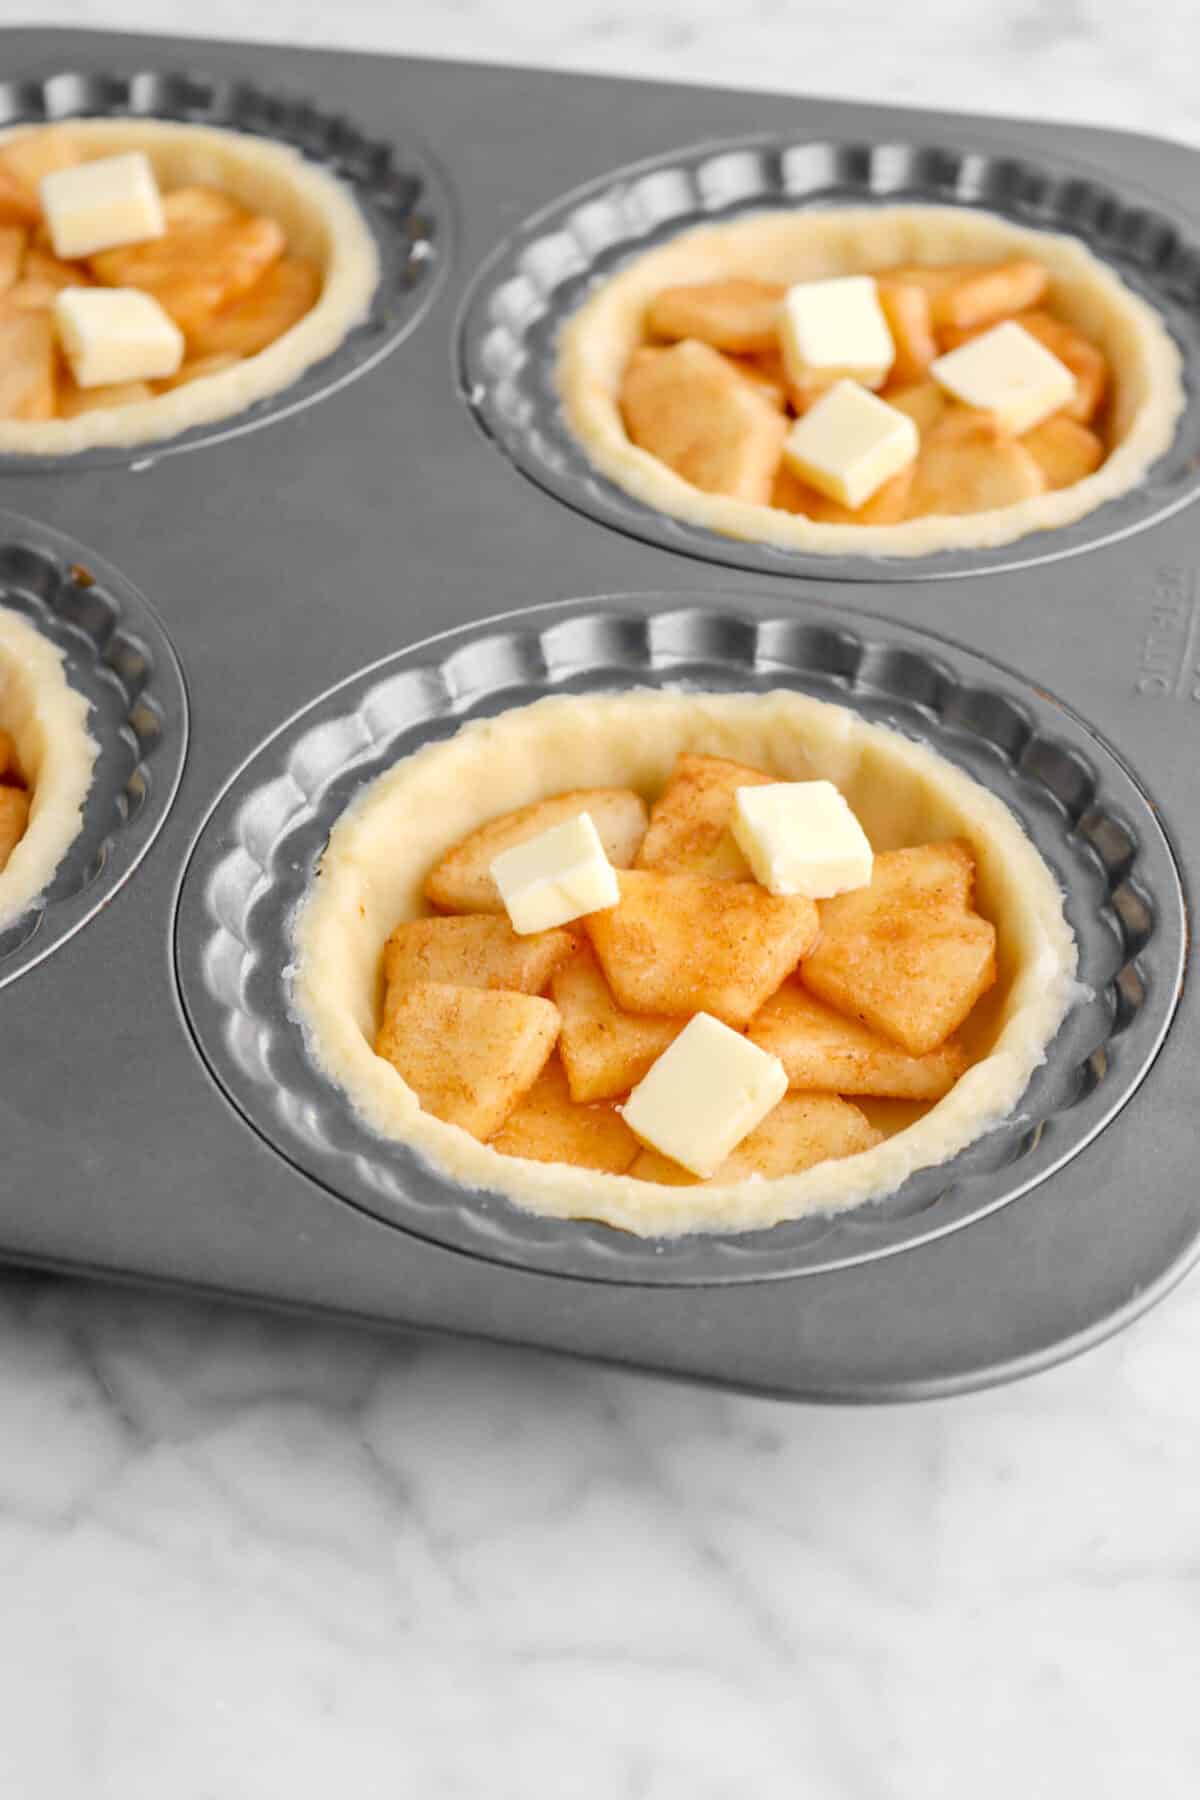
In a large bowl, combine the chopped apples, sugar, apple pie spice, and cornstarch.


Cut 4 Tablespoons butter into 4 pieces (1 Tablespoon each). Cut each piece into thirds. Set aside. Remove the pie crusts from the fridge and place 1/2 cup apple mixture in each of the pie molds. Add 3 pieces of butter to each. Top with 1/2 cup apple mixture, being sure to press filling down into molds.


Top each pie with lattice and seal edges. Trim edges, if needed.
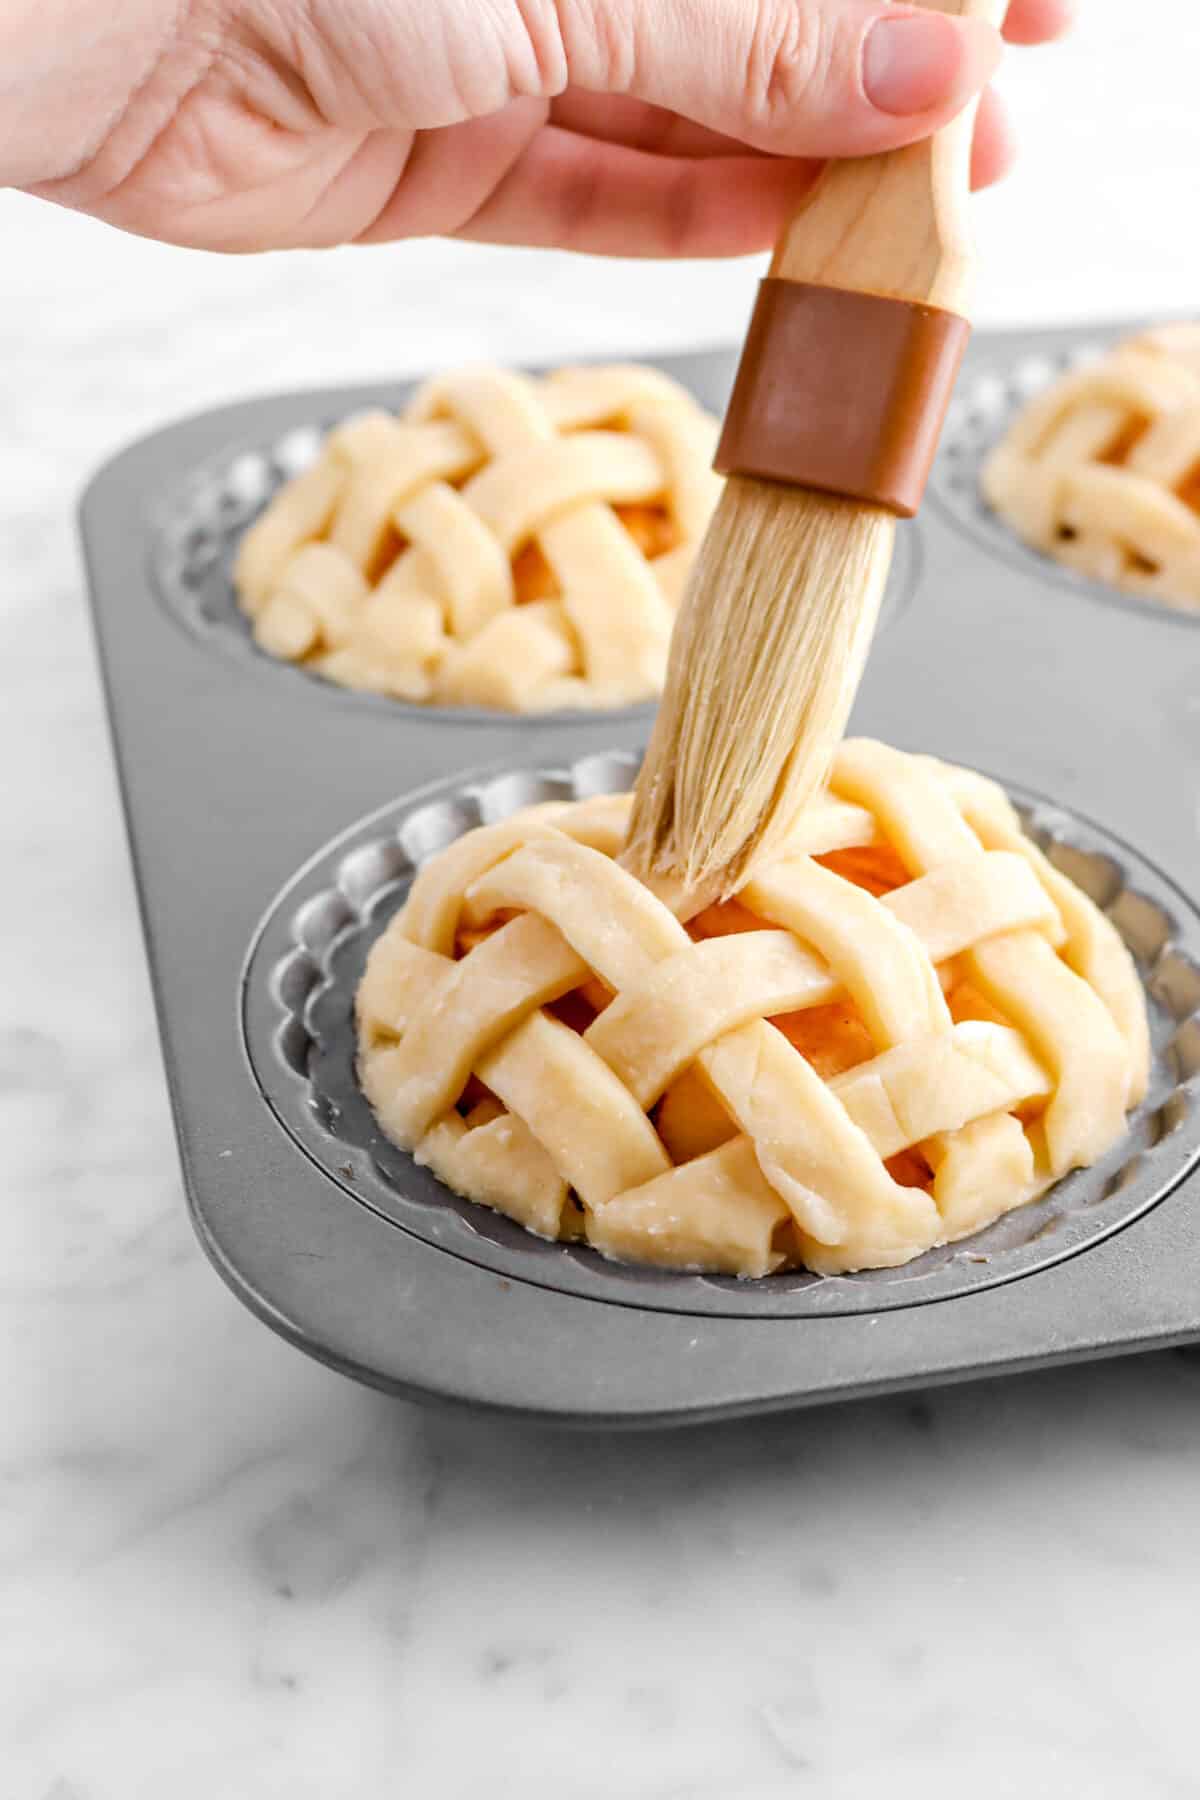
Brush the top of each pie with heavy cream and sprinkle with coarse sugar.

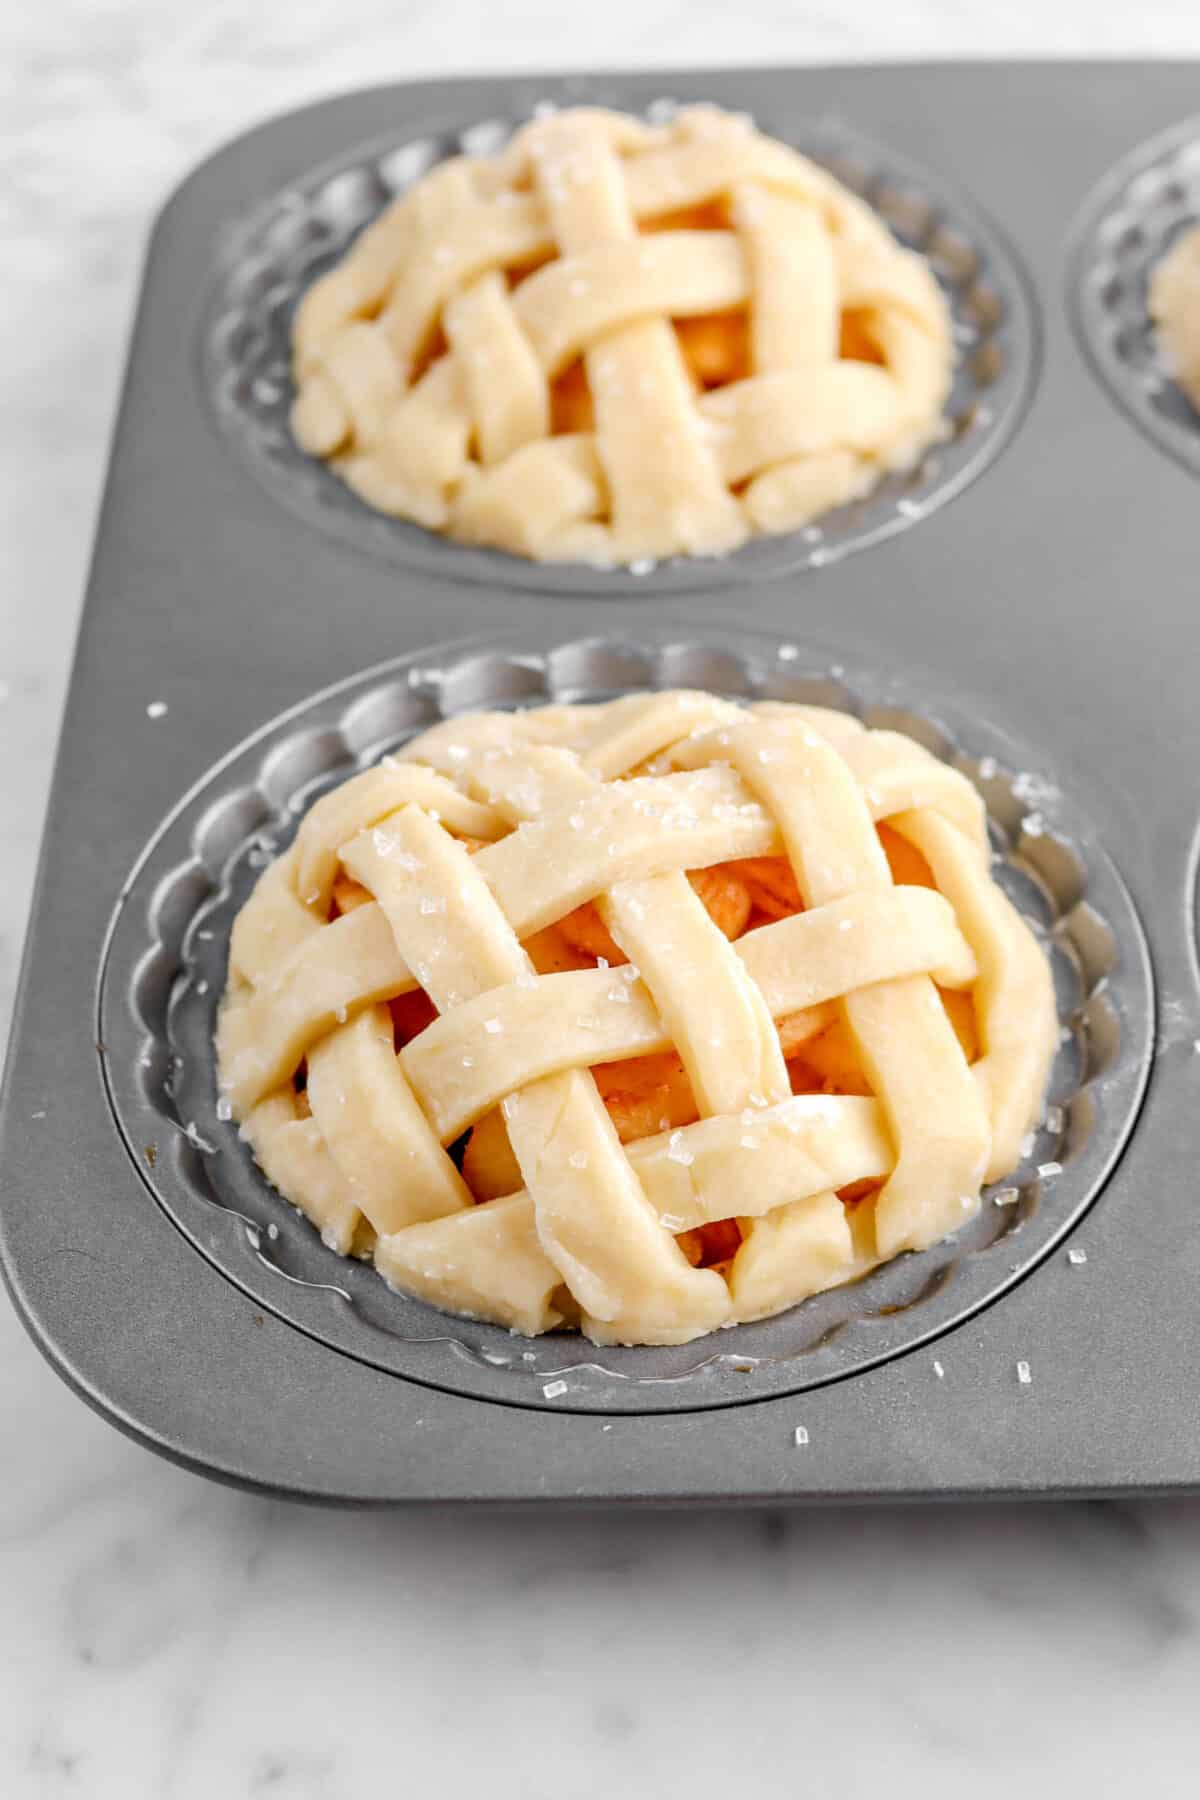
Place the pies in oven and bake at 375 degrees Fahrenheit for 25-30 minutes, or until golden brown. Take out of the oven and let the pan cool. Once the pan is cool enough to handle (it can still be warm. Just not hot!), take the pies out of the molds and remove the bottom plate. Place on wire cooling rack and let finish cooling.


Making Pie Crust in Mixer vs Food Processor
I know the sound of making a pie crust in the mixer is a little scary and kinda weird, but it genuinely works! A lot of food processors just don’t have the cup capacity for large amounts. When my mom owned her restaurants, she almost always used a mixer during the holiday’s to bake pies! She could double or even triple a pie crust recipe and have it come out just as flakey and tender as one made by hand or in the food processor.
So, as unconventional as a mixer may seem, it’s actually a great tool for making pie dough! Just follow the instructions and refer to the step-by-step photos above to ensure the perfect crust.
Which Variety of Apple To Use For This Recipe and How To Pick Them
With so many varietals, it can be hard to find the perfect apple for pie…well, worry no more! We did some testing to find the absolute best apple to bake in this pie.
We tried five varietals, all easy to find at your local grocery store. While they can all be used, there were definite favorites. Let’s get into it, shall we?
- Granny Smith: The forever classic! The one has a lot of upsides and it was our second favorite to bake with. It held up well, had a good flavor, but there was something missing. Still, a great contender and one of our absolute favorites!
- Golden Delicious: Delicious is definitely the perfect description of this apple! It’s a little more mild in flavor than the other apples we tried, but also a bit sweeter. It held it’s shape well, but I would personally say to combine it with the Granny Smith to give it a little oomph.
- Pink Lady: This apple holds up well as well when baked, but like the granny smith, it was a little more tart than we were looking for.
- Gala: Great in flavor, but it seemed to break down a bit more when baked and after storing. If you like a bit softer apple, this might be the best one for you!
- Honeycrisp: Our number one apple! The honeycrisp took us by complete surprise. Not only did it hold it’s own against the strong flavors of the apple pie spice, but it baked just as well as the granny smith! It was crisp and full of flavor. The best apple to use!
Now that we know Honeycrisp are the best apples to go with, let’s go get them! I recommend buying apples that are firm to the touch without any bruising or dings. Fresher the better! But, if you have older apples in the fridge, that’s okay, too! Just cut away any bruises.
The reason we prefer fresher apples is that it gives a bit more bite to the apple pie. There’s no mealy or grainy texture. It’s crisp, clean, and an easy texture to enjoy alongside a flake-y crust!
Can I Make This Into One Large Pie?
While you can, I don’t really recommend it. We have a delicious Homemade Apple Pie recipe that is for one large pie! It’s a little bit of a different and more traditional recipe, but equally delicious.
Should I Use Store-Bought Filling or Homemade
For this recipe, we highly recommend using the super easy filling stated in the recipe card for this pie. It’s fresher and has a bit more of a bite than cooked filling! If you prefer a softer filling in your pies, you can use our Homemade Apple Pie Filling for a more delicious pie that will be everyone’s favorite!

3 Tips For The Perfect Pie Crust
- Remember, the fridge is a pie dough’s best friend! You really need to keep it cold to ensure the best experience.
- Preheat the oven! I know this sounds simple, but when you put the cold dough into the hot oven, it creates steam. Therefore, flakier crust!
- Keep the butter chunks bigger and, when you’re rolling, if you see any chunks of butter on the edge, cut it off and place it back in the middle. Butter is your dough’s best friend!
What To Serve with Apple Pie
Whether you’re planning out a holiday dinner or just looking for some topping ideas, here are a few of our favorite things to serve alongside these delicious pies!
- Homemade Vanilla Ice Cream
- Caramel Apple Ice Cream
- Homemade Caramel Sauce
- Chantilly Cream
- Caramel Apple Layer Cake
- Homemade Pumpkin Pie
- Southern Pecan Pie
- Pumpkin Pie Bars
Expert Tips
- When making the pie crust, remember to keep the second addition of butter in larger chunks.
- The fridge is your best friend! With the high butter content, the dough can become soft quickly…especially on hot days!
- Don’t overwork the dough in the mixer. Follow the instructions for best results.
- Use fresh apples for the filling for the best flavor and texture.
- Don’t skip pressing the filling down! This helps ensure lots and lots of apple in each mini pie.
- Sealing the lattice is important! Use your fingers to press it down or use a butter knife. You may also need to cut off excess dough. Trim as needed.
- Be sure to lightly brush each pie with heavy cream! It helps the lattice evenly brown.
- 1 – 3/16 cups = 1 cup + 3 Tablespoons!
- 4 cups of apple is about 2 1/2 large apples.
When you make these Mini Apple Pies, leave a comment down below! We love hearing from you and answering any questions you might have! Also, be sure to tag us on social media and hashtag it #BakersTable.
Источник


