- 5 tips for preparing for Multi-Window in Android N
- Pro-tip 1: Use the right Context
- Pro-tip 2: Handle configuration changes correctly
- Pro-tip 3: Handle all orientations
- Pro-tip 4: Build a responsive UI for all screen sizes
- Pro-tip 5: Activities started by other apps must always support multi-window
- Test all the things!
- How To Enable Multi Window Feature In Android
- Steps To Enable Hidden Multi-Window Mode In any Android
- Using Build Prop Editor
- Using Multi Window: Split Screen
- Using Leena Desktop
5 tips for preparing for Multi-Window in Android N

If you’ve been digging through What’s New in Android N, you probably stumbled across multi-window support.
With split-screen multi-window, two apps will be visible side-by-side. Excited to see how this works, I know I immediately scanned through the documentation, looking for what new APIs made this sorcery work.
Turns out, there aren’t many new APIs. A few XML attributes for customizing whether you support multi-window at all and a few Activity methods to check whether you are currently in multi-window mode. So where’s the magic? The magic has been there all along.
And by magic, we mean Android’s resource system. One of the most powerful parts of the resource system is the ability to provide alternate resources — change dimensions, layouts, drawables, menus, etc. based on different qualifiers.
Multi-window takes advantage of the resource system by adjusting the configuration based on the size of your window — screen size is the obvious one, but the smallest width (i.e., the minimum of the width or height) and the orientation are also updated when resizing.
This takes us to the first tip.
Pro-tip 1: Use the right Context
Loading the proper resources requires the proper Context. If you’re using the Activity context for inflating your layouts, retrieving resources, etc, then you’re good to go.
However, if you’re using your Application context for anything UI related, you’ll find that the resources that are loaded are blissfully unaware of multi-window. Besides issues with not using your Activity’s theme, you may be loading the wrong resources entirely! Best to keep your UI stuff with the Activity Context.
Pro-tip 2: Handle configuration changes correctly
With the correct context in hand, you’ll be sure to get the right resources given the size of your window (whether it is full screen as before or split between your app and another). The process for reloading those resources is based on how you handle runtime changes.
The default case is that your whole activity is destroyed and recreated, restoring any state you saved in onSaveInstanceState() and reloading all of the resources/layouts. This has the nice property that you know everything is consistent with the new configuration and that every type of configuration is handled.
It should go without saying that each configuration change should be fast and seamless. Make sure you aren’t doing a lot of work in onResume() and consider using loaders to ensure your data survives configuration changes.
You can still handle the configuration change yourself in which case your Activity (and Fragments) will receive a callback to onConfigurationChanged() instead of being destroyed and recreated and you will need to manually update your views, reload resources, etc.
To catch the multi-window related configuration changes, you’d need to add an android:configChanges attribute to your manifest with at least these values:
Make sure you’re handling every resource that might be changing (as is your responsibility when you take on handling configuration changes yourself).
This includes reloading resources that might have been considered a constant before. Consider the case where you had a dimension in values and in values-sw600dp. In the non-multi-window world, you’d never switch between these two at runtime as the smallest width would never change (it would always be the smallest width of your device). However, with multi-window, you can and will have to switch between these resources as your app resizes.
Pro-tip 3: Handle all orientations
Remember way back in the intro where we talked about the orientation changing while the window resizes? That’s right: even if the device is in landscape, your app might be in ‘portrait’ orientation.
Turns out: “portrait” really just means the height is greater than the width and “landscape” means the width is greater than the height. So it certainly makes sense, with that definition in mind, that your app could transition from one to the other while being resized.
That also means that transitions between orientations should be as smooth as possible. Quoting the split screen material design specs:
Changing a device’s orientation should not cause the UI to change unexpectedly. For example, an app displaying a video in one of the split screens (in portrait mode) should not begin playback in full-screen if the device rotates to landscape mode.
Note: if you’d still want this type of functionality when your app is fullscreen, you’ll be able to use the inMultiWindowMode() method to check exactly which case you’re in.
Locking your screen orientation by using android:screenOrientation is also affected by multi-window. For apps not targeting Android N, adding android:screenOrientation means you will not support multi-window at all — you’ll always force the user out of multi-window mode. Things change a little when you target N — instead of not supporting multi-window at all, any orientation you set via android:screenOrientation is ignored when in multi-window mode.
Keep in mind that locking your orientation at runtime using setRequestedOrientation() will have no effect in multi-window mode, whether you target N or not.
Adding the android:immersive attribute to your Activity’s manifest also disables multi-window on apps not targeting N, with the same rules as android:screenOrientation above.
Pro-tip 4: Build a responsive UI for all screen sizes
Orientation isn’t the only thing that goes into designing for split screen. Multi-window is the first time your tablet UI (you have a tablet UI right? After all, 12.5% of 1.4 billion devices is a lot of devices…) is going to be shrunk down to a miniature size.
If you’ve been building a responsive UI that reacts to the available space and has relatively similar phone and tablet layouts, you’ll find you’ll be well prepared for multi-window. As suggested, scaling the UI down to 220dp wide/tall and building up from that size to the fullscreen size is a something you can do now.

However, if your mobile and tablet UIs are vastly different, don’t overwhelm users by switching between the two — stick with the tablet UI and work on scaling it down. There’s a number of responsive UI patterns you might consider employing to make resizing a seamless experience for your users — again, no N APIs needed.
Pro-tip 5: Activities started by other apps must always support multi-window
In the multi-window world, your whole task is represented by a single window. That’s why if you want to launch an adjacent activity you need to start a new task — new task, new window.
It also means the reverse is true, quoting that same page:
If you launch an activity within a task stack, the activity replaces the activity on the screen, inheriting all of its multi-window properties.
That means if you have an Activity that can be started by other apps, your activity will inherit the same multi-window properties as the calling Activity. This includes attributes such as minimal size. In cases of startActivityForResult(), your Activity must be part of the same task stack and even in the case of an implicit intent, you can’t guarantee that they’ll also include a FLAG_ACTIVITY_NEW_TASK.
Therefore every one of those activities (and any activities started by that Activity) must support multi-window, all the way down the smallest size. Test thoroughly!
Test all the things!
The best way to prepare for multi-window is to test your app. Even without any code changes or going through the process of setting up the Android N SDK, installing your existing app on an Android N device or emulator is a fantastic first step and an easy way to catch low hanging fruit and #BuildBetterApps.
Источник
How To Enable Multi Window Feature In Android
Enable Multi-Window Mode in any Android!
Well, the latest version of Android already has a multi-Window feature. It’s a feature that allows you to run two applications in a split-screen mode. Each of the applications gets fit in the split-screen.
However, many users don’t have this feature on their smartphones. It’s because they are running an older version of Android. So, if you are running an older version of Android and looking for ways to enable the split-screen feature on your device, you are reading the right guide.
Steps To Enable Hidden Multi-Window Mode In any Android
In this article, we will share a step-by-step guide on how to get a multi-window feature on any Android smartphone. Let’s check out.
Step 1. First of all, you need to root your Android as the method that you will be following will work on rooted Android so visit the link: Root Any Android Device In Single Click.
Step 2. After rooting your Android, you need to download and install Root Explorer from the Google play store. Now open the app and grant the superuser access.
Step 3. Now in the root explorer, you need to go to the directory /system/.
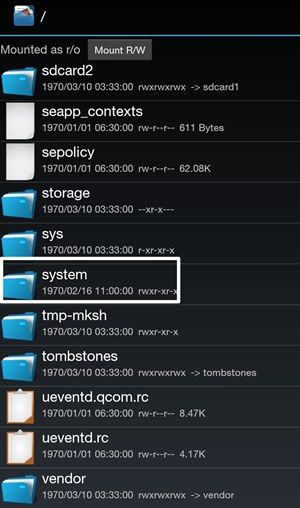
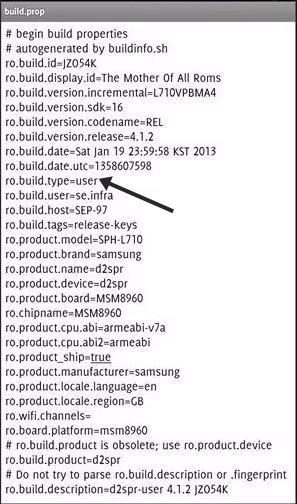
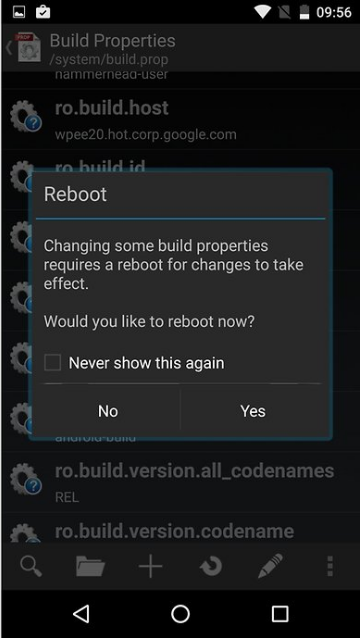
Step 4. Now in a system, you will find a file named build.prop tap on the file to open it. Now in the file, you need to change the value of build type from user to userdebug.
Step 5. Now save the file and reboot your Android device to make the changes to the device that you had made.
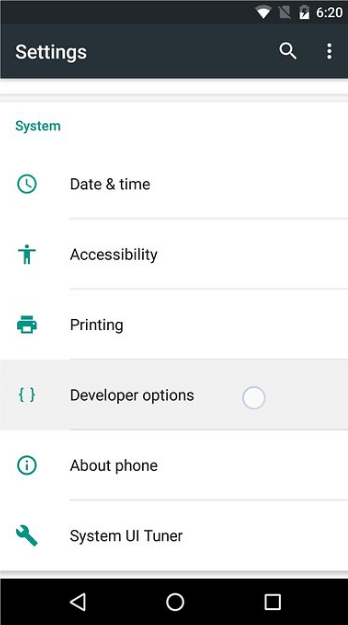
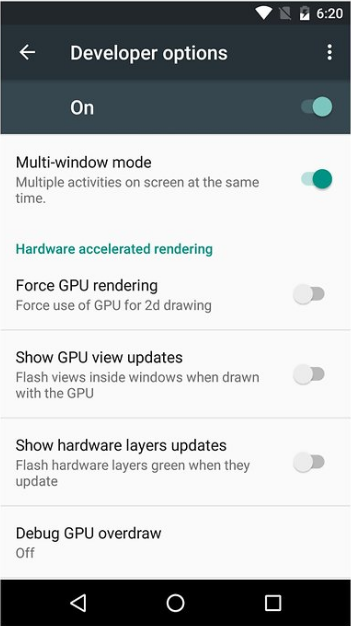
Step 6. Now you need to enable the developer mode and this can be enabled by heading to Settings -> About Phone -> Build Number (Tap on build number 7-10 times and your developer options will get activated). After activating developer mode, you need to go to Settings > Developer Options, and there you need to enable the Multi-window option by simply taping in front of it.
That’s it and you are done, now you can enjoy this cool multi-window feature on your Android and easily do multiple tasks on your Android with this multiple windows.
Using Build Prop Editor
Easily edit your build.prop or any other properties file on your Android device. BuildProp Editor comes with an intelligent code editor with syntax highlighting for multiple languages.
Step 1. You need to download and install Build Prop Editor on your rooted Android device, and open it and find ro.build.type. You need to edit the property value from User to userdebug
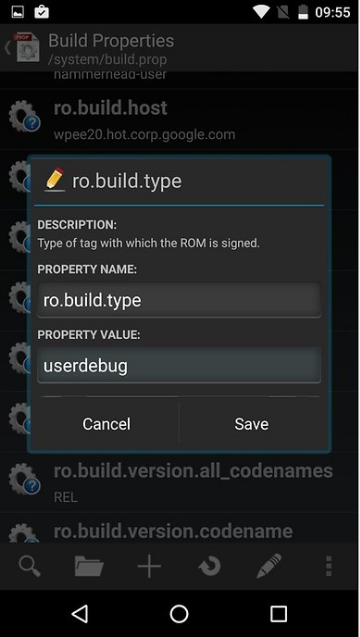
Step 2. Now save it, and it will ask you to reboot your device. Reboot it!
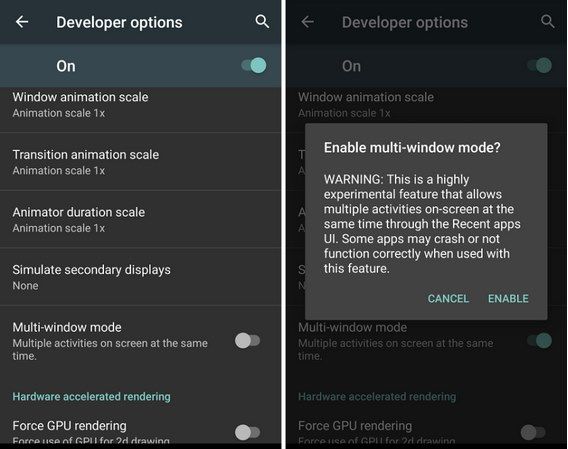
Step 3. After the reboot, head over the Settings>Developer option
Step 4. Now Find Multi-window mode and toggle it to “On”
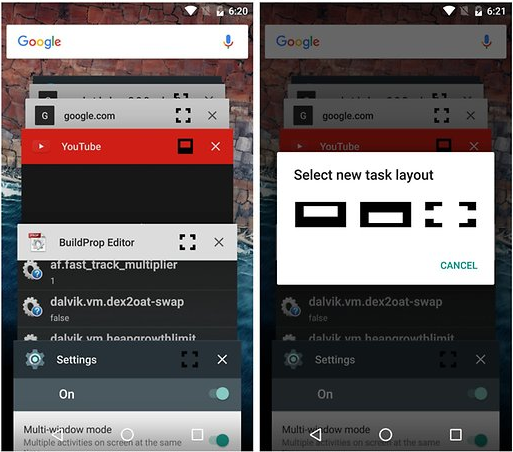
That’s it; you are done! now you will see a square bracket on the upper right side of each app card that is currently running on your device.
Using Multi Window: Split Screen
Multi Window Is the app by which we can An App By Which You Can Create Shortcuts Of Your Installed Apps Icon Into Multiple Window Tray. And By Clicking On These Shortcuts, You Can Easily Switch From One Task To Another During Your Current Task.
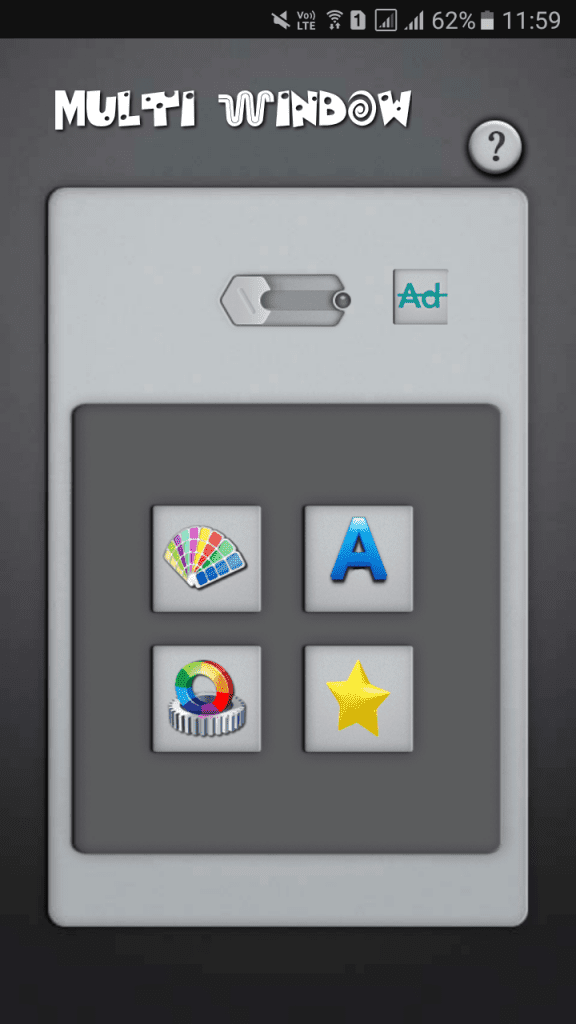
Step 1. First of all, download and install Multi Windows: Split Screen on your Android Smartphone.
Step 2. After downloading the app, you will see the screen like below.
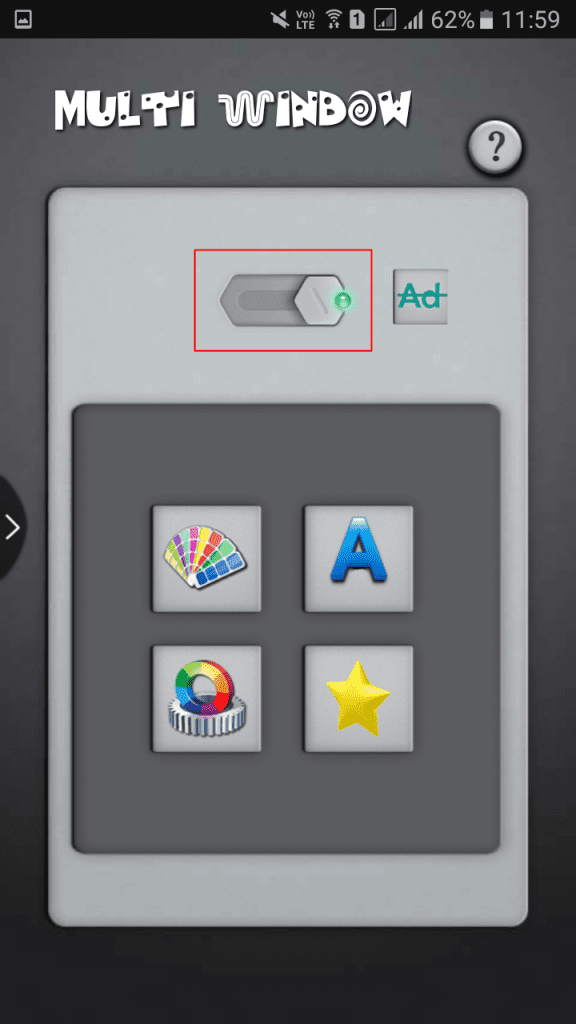
Step 3. You need to enable the Multi-window mode. Simply swipe the button shown in the screenshot from left to right.
Step 4. You can add your favorite apps that you want to run in multi-window mode by simply tapping on the three-dotted buttons.
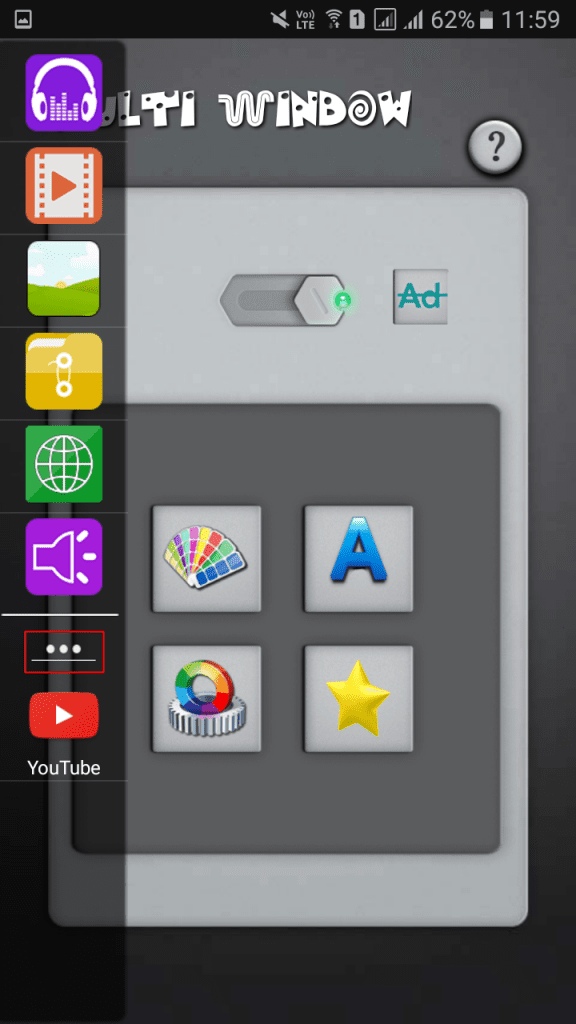
Step 5. Now trying running two apps from the app itself. Like I have run YouTube and Music player in Multiple window tray.

That’s it! you are done, this is how you can enable multi-window on almost any android device. This might not be the effective one. However, if you don’t have a rooted android device then this will help you.
Using Leena Desktop
Well, Leena Desktop UI is just like a launcher that can transform the look of your Android operating system. The launcher basically tries to port the desktop operating system to Android. So, with the desktop operating system, you can enjoy multi-window features. In short, you can enjoy a countless number of Windows with Leena Desktop UI.
Step 1. First of all, you need to download and install Leena Desktop UI on your Android device.
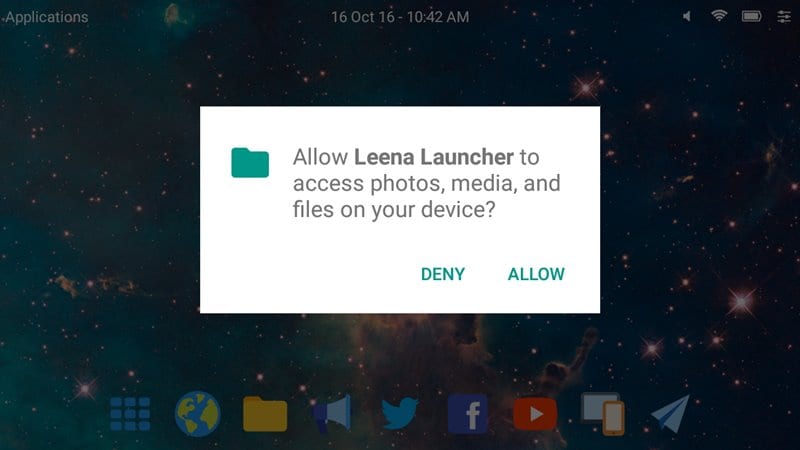
Step 2. Now you need to launch the app and you will be asked to grant few permissions. You just need to tap on the ‘Allow’ button to grant permissions.
Step 3. Once done, you will now see the main interface of the Leena Desktop UI. Here, you need to tap on the ‘Settings’ if you want to make any changes.
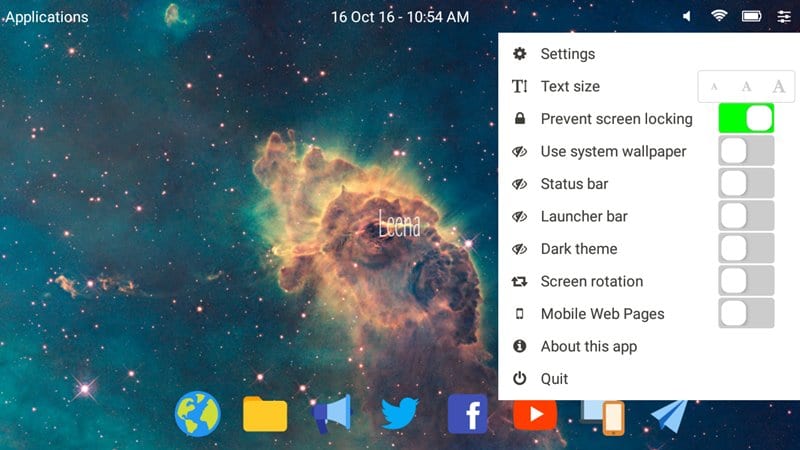
Step 4. Now you can open any app or feature and you will see that every app will appear on the window just like a desktop operating system.
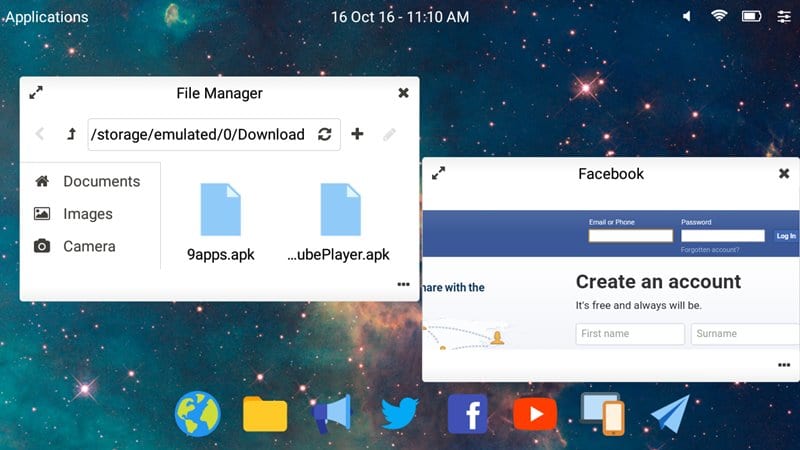
So, this is how you can use Leena Desktop UI to Enable Multi Window mode on your Android device. The app works on the non-rooted Android device.
So, this article is all about how to enable a multi-window feature on any Android. I hope this article helped you! Please share it with your friends also. If you have any doubts related to this, let us know in the comment box below.
Источник


