- [APP]carrier name
- Breadcrumb
- Holabalola
- Carrier Name Changer for Android
- [How To] Change Your Carrier Name (Now with Scrolling)
- Here is a guide to change the carrier name on your notification bar and lockscreen
- MiserableChimp
- How to Fix Mobile Data Not Working on Android
- Reset Your APNs
- Set APN Protocol to iPv4/IPv6
- Enter Your APN Settings Manually
- Wipe Cache Partition from Recovery
- Reset Your Phone’s Network Connection
- Enable the Right Network Mode
- Remove and Re-Insert Your SIM Card
- Do You Have a Mobile Data Limit?
- Never Miss Out
[APP]carrier name
Breadcrumb
Holabalola
Member
This is an app that changes what carrier name is diplayed in for example the lock screen and the status bar. It requires root because it modifies system files, and because it uses root it’s potentially dangerous. Use it at your own risk, I’m not responsible if your device explodes in your face!
I had much trouble figuring out how to do this so I wanted to spare others the trouble by making this app. Please send me bug reports so I can fix any bugs you find.
Update1: Don’t use any special characters because it will be used in an xml file so for example a double quote sign will break the file.
Update2: This will probably not work on the evo with stock rom and will not work with any rom that only shows what network you’re connected to. This app only changes the carrier name wich is taken from your sim card. There are some roms that allows you to change this for example Cyanogenmod 6 where you can change so that it shows your spn.
Update3: I’m currently working on making this app work on all android devices by patching framework-res.apk
This app is also availble on the android market for $0.99, please consider buying the app it would make my face go
ChangeLog:
[1.0]
— Initial release
[1.1]
— Big bug fix, should be working now
[1.2]
— Should be supported on more devices now
— Backup function now works as initially intended
Источник
Carrier Name Changer for Android
This is not new but still worth writing about as many members are not aware of itВґs existence. If you come form the Windows Mobile age, youВґll probably remember about this application on your old devices. This application allowed you to change the name of your carrier to whatever name you wanted. Now, thanks to XDA member Holabalola we have it for our Android devices. Carrier Name requires a rooted device and may not work as intended on all devices andt Android versions.This app won’t work on devices that are NAND protected or on CDMA devices.
You can get the free version only for XDA members on the original thread.
Originally posted by Holabalola
[APP]carrier name
This is an app that changes what carrier name is diplayed in for example the lock screen and the status bar. It requires root because it modifies system files, and because it uses root it’s potentially dangerous. Use it at your own risk, I’m not responsible if your device explodes in your face!
I had much trouble figuring out how to do this so I wanted to spare others the trouble by making this app. Please send me bug reports so I can fix any bugs you find.
Update1: Don’t use any special characters because it will be used in an xml file so for example a double quote sign will break the file.
Update2: This will probably not work on the evo with stock rom and will not work with any rom that only shows what network you’re connected to. This app only changes the carrier name wich is taken from your sim card. There are some roms that allows you to change this for example Cyanogenmod 6 where you can change so that it shows your spn.
Источник
[How To] Change Your Carrier Name (Now with Scrolling)
Edit: If you are running one of the Froyo based roms, you can edit the build.prop file located in your system folder and achieve the same results easier:
ro.cdma.home.operator.alpha=Virgin Mobile
You can use more than the 17 charatcer limit of the eri.xml edit using this method, confirmed by mmarz
Thanks to mmarz for posting this in info!
Ever wanted to get rid of the Virgin Mobile on your lockscreen and notification dropdown?
The carrier name can be altered via the eri.xml file located in your framework-res.apk
Method one: Only allows 17 characters
1) Put the ROM.zip file you used to flash your current ROM on your computer
2) Right click and choose Open Archive (I suggest using 7-zip)
3) Navigate to /system/framework and drag the framework-res.apk file to your desktop
4) Right click the framework-res.apk file and select Open Archive (again, I suggest using 7-zip)
5) Navigate to /res/xml and drag the eri.xml file to your desktop
6) Open the eri.xml file with a hex editor like HxD
7) Press ctrl+f and type Virgin Mobile
8) Highlight the words Virgin Mobile (they appear selected, but highlight them with your mouse)
9) Type what you want, keep it to the same number of characters or less, then type spaces till the rest of Virgin Mobile is gone
10) Save and close the hex editor
11) Drag the eri.xml file back into the framework-res.apk, choose yes to copy, then close the window
12) In the opened ROM archive, navigate to /system/framework and drag your framework-res.apk file into it, then choose yes to copy, and close the window
13) Place the ROM.zip on your sdcard
14) Reboot into recovery, wipe cache, wipe dalvik cache, then install the ROM.zip file as normal
15) Reboot and you should see your customized carrier name on the lock screen and notification dropdown.
I modified these instructions from this post I found via google
Some posts I’ve read indicate you can use more characters, and that on some phones long messages scroll, I haven’t tested it with more than 13 characters, the amount for Virgin Mobile
Edit: it appears 17 characters is the max, unless someone finds a way to add more.

Method two: Allows more characters, I have used 50 successfully, but more than 20 gives issues with some themes
1) Download apk_manager
2) Follow it’s instructions to decompile your framework-res.apk (see above methods instructions for how to get the apk from your ROM’s zip)
3) In apk_manager folder, in the projects folder, navigate to framework-res.apk/res/xml and edit eri.xml with a good text editor
4) Press cntrl+f in the text editor and search for Virgin Mobile
5) Change it to whatever you want, I have successfully used 50 characters, which makes a scrolling banner
6) Save and close the text editor, then navigate back up to the main apk_manager folder
7) In the apk_manager command window, follow instructions to recompile as a system apk
8) In the apk_manager folder, in the place-apk-for-modding-here folder, delete the original framework-res.apk
9) Rename the unsignedframework-res.apk file to framework-res.apk
10) Drag this new framework-res.apk folder to your ROM’s open archive and choose yes to copy
11) Place the modified ROM zip file on your sdcard, reboot into recovery, flash it, and reboot.
This will scroll on the lockscreen, but not on the notification dropdown. On aospCM7, if you use compact carrier label, it will by layered over the notification title, with the normal non-comapct carrier name, it word wraps.
(I will probably edit these instructions, was in a hurry with method two) 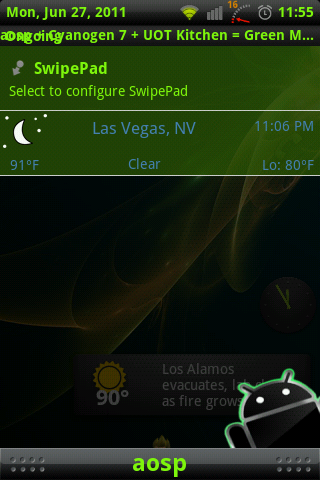
Источник
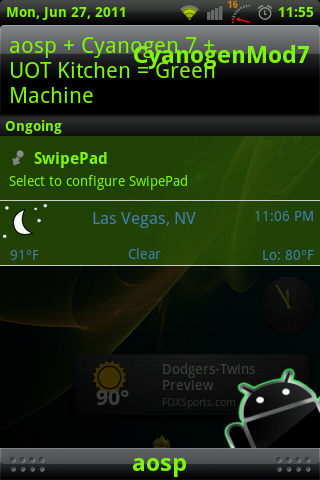
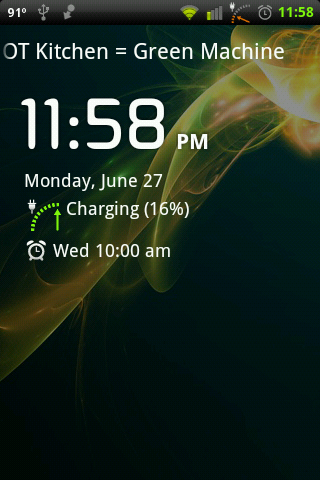
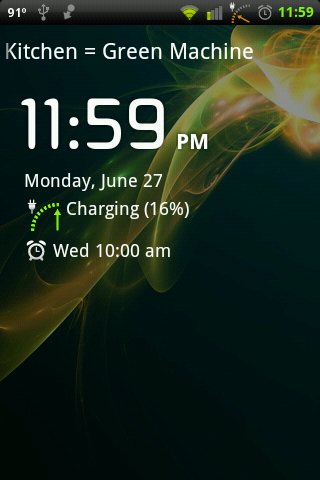
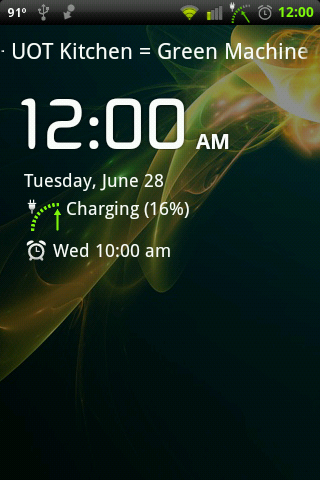
Here is a guide to change the carrier name on your notification bar and lockscreen
MiserableChimp
Member
[How to] change the carrier name on your notification bar and lockscreen
A LOT OF TEXT BUT HONESTLY IT IS VERY EASY
SCREENSHOTS OF MY PHONE AT BOTTOM. ENJOY!
MAKE SURE YOU HAVE A BACKUP USING BOOTSTRAP RECOVERY IN CASE.
ROOT NEEDED FOR THIS OBVIOUSLY
Thanks and credit goes to these guys I just wrote this up and tested.
bad4u
928Droid
fmkaiba
hacku
tparker76
thebowers
What you need to download on your phone:
1. Android Terminal Emulator from jack palevich (free market)
2. Root explorer from speed software (paid but worth it market)
What you need on your computer:
1. HxD hex editor application (google it)
2. 7zip application (google it)
Here is the guide:
1. Go into root explorer navigate to system/framework
2. Hit mount r/w on top then hold and copy framework-res.apk
3. Paste framework-res.apk on root of sdcard
4. Mount the phone to your pc AND move framework-res.apk to desktop
5. Right click framework-res.apk on desktop hit 7zip then hit open archive
6. Navigate to res/xml/ find eri.xml and drag it to your desktop
KEEP ARCHIVE OPEN YOU WILL BE BACK
7. Right click eri.xml on desktop open with HxD
8. Now look to the right side of the screen and find «Verizon Wireless»
9. Highlight the whole word «Verizon wireless»
10. While highlighted type your new name..16 LETTERS MAX
(if any «Verizon wireless» is left just keep hitting space bar after new name)
11. Now save your new eri.xml and drag it back into archive
12. Close the archive
13. Put framework-res.apk back on root of sdcard
14. Now on your phone open Android Terminal Emulator on phone and type
Su
mount -o rw,remount -t ext3 /dev/block/mmcblk1p21 /system
cp /sdcard/framework-res.apk /system/framework
reboot
I did not even get a chance to type reboot it just did. so don’t freak out lol
Источник
How to Fix Mobile Data Not Working on Android

Cellular data, mobile data, whatever you want to call it, is one of those things that only becomes a life necessity once you acquire your first smartphone. It’s only when you lose connectivity that you realize you don’t know how to get anywhere without Google Maps, don’t have anything to read without Flipboard, and don’t know how to communicate with people through any medium other than WhatsApp.
When mobile data stops working on Android, it’s world-shattering, in other words. Here are some tips on how to get it back.
Also read:  How to Create Your Own Android Widget
Reset Your APNs
Access Point Names (APNs) are the means by which your mobile network provider connects your phone to the mobile Internet. It sets your phone up with all the crucial settings, like IP addresses and gateways, to (hopefully) get you connected. However, this process can sometimes go wrong and require a reset. The following shows how to do it.
Go to “Settings -> Network & internet -> Mobile network -> Advanced -> Access Point Names.”
You should see a list of APNs (potentially with only one network on them). Tap the menu icon at the top right, then “Reset to default.”

Set APN Protocol to iPv4/IPv6
This option doesn’t exist in the APN settings of all phones, but some devices (like the OnePlus 3) give you the option of leaving the APN Protocol field blank. If that’s the case in your network’s APN settings, make sure it says IPv4/IPv6 instead. Likewise, with other devices, make sure it says this rather than just one of the two.

Enter Your APN Settings Manually
It’s a sad but not uncommon occurrence for your APN settings to get out of whack after an Android software update, and if a standard reset doesn’t fix the problem, then you may need to enter your APN address manually.
1. Go to your APN list using the method in the previous tip, then tap the “+” icon in the top-right corner.

3. Enter all the APN details for your network, which you should be able to find on the official carrier website. Or you can check out this list of APN settings for US, UK, Indian and other national carriers.

4. Save your new APN settings, then select them from the APN list on your device.
Wipe Cache Partition from Recovery
On your phone, there’s a fair portion of your device’s memory dedicated to the cache – where data for various apps and processes is stored “on the backburner,” activating automatically so that these apps and processes boot up more quickly on your device.
But sometimes, as reported by certain Android users, errors can occur in the cache which can cause crucial processes – in this case your data connection – to stop working. To fix this, you need to clear the system cache partition, which is accessed from your phone’s recovery screen. Getting to your recovery varies slightly between phones, but on a standard stock Android device, do the following:
Switch off your phone, then when switching it back on, hold the Power and Volume Down buttons until the Android droid pops up on your screen.
Use the volume buttons to navigate to “Recovery Mode.” On the next screen, it may “No command.”

If you see this, you need to try holding different combinations of the volume buttons and the power button until you enter recovery (depending on your device).
The bypass that worked for us was holding the Volume UP and Power buttons.

Once you’re in recovery, use the volume buttons on your phone to select “wipe cache partition” or “wipe cache,” then select the option using the power button.
The process should only take a few seconds. Once it’s done, reboot your phone.
Reset Your Phone’s Network Connection

A simple and powerful fix for data not working on your Android device is to enter an SCRTN (Special Code to Reset the Network). Note that this fix will only work for phones using CDMA networks. In the U.S., these networks are T-Mobile, Verizon and US Cellular.
Assuming you’re with a CDMA network, go to your phone dial pad and enter the following code, depending on your device:
- Google Pixel, Moto G7: *#*#72786#*#*
- Nexus 5, Nexus 6, Moto G5: #*#*72786##
- Other Android phones: ##72786#
Note that phone carriers are slowly trying to phase out CDMA networks, as they seek to move wholly onto the faster, more recent LTE standard, so this particular fix may not exist for much longer.
Also read:  How to Fix the Obtaining IP Address Error on Android
Enable the Right Network Mode
Starting with the simplest solution, it’s possible that during an update, or simply in the phone’s default settings, the network mode (3G, 4G, etc.) of your phone is set to one that doesn’t offer optimal coverage.
If you have a 4G phone, for example, you should always make sure 4G is selected in your network modes to catch those sweet 4G rays. Or if your phone isn’t 4G but you’re running on an OS that features it as a network mode (by rooting, for example), your phone may be trying to connect to 4G signals that it’s not capable of.

Changing this is simple. Go to “Settings -> Network & Internet -> Mobile network -> Preferred network type,” then switch to the one that best suits your phone. As my phone is a 4G, I go for 2G/3G/4G Auto so that it always tries to connect to the best signal available.
Also read:  How to Fix Android Delayed Notifications Issue
Remove and Re-Insert Your SIM Card
Some will scoff at the very mention of suggestions like “reboot your phone” and “remove and reinsert your SIM card,” but these should always be the first port of call when trying to fix mobile data issues. Another option is to test your phone with another SIM card to see if the issue originates in the phone or the card.
There’s also an extra little trick to rebooting your phone that could help:
- Before rebooting, turn on Airplane Mode.
- Wait for 30 seconds, then turn Airplane Mode off.
- If you still don’t have data, turn airplane mode back on, turn your phone off, wait for a minute, turn your phone back on, turn airplane mode off, wait for 30 seconds, then turn mobile data on.
If this fails, then try the following fixes.
Do You Have a Mobile Data Limit?
Every Android phone lets you set your own mobile data limits and warnings for when you’re about to reach your limit. These aren’t usually switched on by default, but maybe you set a limit previously, have since upgraded your tariff, and have forgotten to update your mobile data limit accordingly. To check this:
Go to “Settings -> Network & Internet -> Mobile network.”
Make sure “Mobile data” is switched on, then tap “Data warning & limit.”

Here you need to make sure that “Set data limit” is switched off, or at least that it isn’t any lower than the limit provided by your network.

There it is: the key to getting you back online just when you thought you’d have to start resorting to paper maps and pigeon mail to communicate with people.
Also read:  How to Eliminate the “Unfortunately, App Has Stopped” Messages
Now that you have mobile data working again, why not put it to the test with one of these Internet speed test apps. Alternatively, check out our list of the best Firefox for Android add-ons.
Never Miss Out
Receive updates of our latest tutorials.
Content Manager at Make Tech Easier. Enjoys Android, Windows, and tinkering with retro console emulation to breaking point.
Источник


