- [Tutorial][NEWBIE ONLY] How to Install & Run Android on SE X1
- Breadcrumb
- squallvai
- How to run Android apps on any Windows 11 PC without Windows Insider
- How to run Android apps on any Windows 11 PC
- Step 1 – Grab the installer package of the Windows Subsystem for Android
- Step 2 – Install the Windows Subsystem for Android package
- Step 3 – Sideloading apps on the Windows Subsystem for Android
- No need to run android
[Tutorial][NEWBIE ONLY] How to Install & Run Android on SE X1
Breadcrumb

squallvai
Senior Member
[Tutorial][Newbie Only] How to Install & Run Android on SE X1
[email protected] Post here if you have Trouble Installing Android on [email protected]=
So, All Troubles are Gathered in One Thread

This tutorial is ONLY intended for NEWBIE Like ME, Who don’t Know How to Run Android on X1 at first place
I’m not Pro on Andoid Stuff + This is my First Guide on XDA.
And I’m Not Use English as my daily Language
So If there is Any Mistakes Please Tell me
Any Suggesstions & Critics are wellcomed
Mods Please delete my Thread if it’s posted Already
THANKS
Please Note that Android for X1 is Still in Delvelopment state..
So there Might be some non working camera, Bluetooth, GPS, Apps, etc.
But Hei. we Run Android On Our Winmo Device
So.. Use it at Your Own Risk
OK Let’s Begin
Currently, We Run Android From SD Card by Run Haret.exe
Just wait and see untill Developers Create a Pefect Android Build for Us
Then Maybe we will able to Flash it to our Phone to replace Winmo
Basicly There is two type of Android Build For X1
at least for Now. Next?? Who Know
1. Fat32 Build
This is old method to Run android on our device
+ No need to create partition on SD Card.
+ No need to install andoid, just copy files to SD Card then Run Haret.exe
— It’s slower Android build
Main Files on Fat32 Build may Looks like this
Fat32 Build Installation:
1. Download Android & Unzip
2. Copy All Files to Root of SD Card
3. Run Haret.exe
2. EXT2 Build (introduced by Neopeek)
it’s usually faster than Fat32 Build
— Need to Create EXT2 Partition
— Need to install Android before run Haret.exe
+ Android run Stable, Faster & Smoother.
Main Files on EXT2 Build may Looks like this
EXT2 Build Installation:
1. Create EXT2 Partition on SD Card (Explained Later)
2. Download Android & Unzip
3. Copy All Files to Root of SD Card
4. Install Android by Run install.exe from npkinstall Folder
3. ClockWorkMod [CWM] Build (introduced by Neopeek)
Currently, This is Best method to Run android on our device
— Need to Create 4 Partition on SDCard [Fat32 & 3 ext2 Partition]
+ Easy to install & Change to another Android
+ Android run Stable, Faster & Smoother. than any Fat32 or EXT2 Method
+ Easy doing a wipe, cleaning cache, (re)formatting sd-card
+ Easy adding/update files on ROM even after installing android & More
+ Superuser & adsblocker working perectly
+ Enable to mount system as writable
Profits for Developers
+ No need to play around with rootfs any more.
+ Android system structure is now 99% native android compatible. Meaning that rom devs simply work with the /system folder.
+ ROM installation / update is done via ZIP files as on native android devices. No tgz, tar.gz or ext2 files any more!
Main Files on ClockWorkMod [CWM] Build may Looks like this
ClockWorkMod [CWM] Build Installation:
Preparation:
1. Create Fat32 & 3 EXT2 Partition on SD Card (Explained Later)
2. Download Neopeek’s CWM
3. Copy npkboot folder on Root SD
4. Get kernel, ts-calibration & startup.txt for X1 then copy to npkboot folder
5. Download Android CWM compartible & copy Zip ROM on Root SD
Launch CWM & Android Installation
1. Run HARET, wait until it ask to press «Volume Down»
2. Press «Volume Down» shortly to Launch CWM
3. Go to «install zip from sd card» to install Android
4. Choose your android rom (zip file) that you want to install then click «yes»
5. When installation finish, go to CWM main menu & Choose Reboot
To Run Android just run Haret.exe from npkboot folder and wait as usual
Neopeek’s CWM Screenshot
*It’s Recomended to Backup All Your Files on SD Card
Preparation:
1. Install Minitool Partition manager
2. Connect Phone to PC then Choose USB Connection or You can Plug your SD Card to PC Using Card Reader
Create Partition:
1. Open Minitool Partition Wizard
2. Delete Existing Partition from SDCard
3. Create Fat32 Partition, Set As Primary.
4. Create EXT2 Partition, Set As Primary.
5. Create Linuxswap Partition, Set As Logical.
Video Guide to Create EXT2 Partition
2. Create CWM Partition on SD Card
Preparation:
1. Install Minitool Partition manager
2. Connect Phone to PC then Choose USB Connection or You can Plug your SD Card to PC Using Card Reader
Create Partition:
1. Open Minitool Partition Wizard
2. Delete Existing Partition from SDCard
3. Create Fat32 Partition, Set As Primary.
4. Create EXT2 Partition (System) about 150MB-200MB depend on ROM, Set As Primary.
5. Create EXT2 Partition (Data) about 150MB-250MB Set As Primary.
6. Create EXT2 Partition (Cache) about 50MB Set As Primary.
Video Guide to Create EXT2 Partition
Thanks to BlackRa1n
Источник
How to run Android apps on any Windows 11 PC without Windows Insider
It’s been just a day since Microsoft unveiled the long-anticipated Windows Subsystem for Android for Windows 11. The company has also published a plethora of documentation related to the integration with Amazon Appstore and Android app development on Windows using the native Android subsystem. However, unlike typical bleeding edge features, the Dev channel of Windows 11 isn’t officially permitted to access the initial preview for Android apps. For now, not only you’ll need to be enrolled in the Beta channel, but also your PC’s region should be set to the United States. Apart from these “soft” restrictions, you can only run a small set of Android apps published to the Amazon Appstore that are approved by Microsoft and Amazon at this moment.
If you’re on the Stable or Dev channel of Windows 11 and you don’t want to change the update channel just for the sake of running Android apps, then you would be glad to know that the current release of the Windows Subsystem for Android can be easily installed and run on the unsupported builds as well as on legacy platforms without any kind of modifications. It is also possible to sideload Android apps using ADB, which means you can enjoy all the bells and whistles without limiting yourself to the Amazon Appstore offerings.
Note: Before we get into the manual installation process of the Windows Subsystem for Android, keep in mind that the current release is nowhere near a stable milestone. Microsoft has put the restrictions by keeping the performance parameters in mind, which is why you may face occasional glitches (or even crashes) on the unsupported platforms. It is always a good idea to create a full disk image of your current Windows 11 installation before tinkering with it so that you can quickly revert back to a working state.
How to run Android apps on any Windows 11 PC
Step 1 – Grab the installer package of the Windows Subsystem for Android
Just like the Windows Subsystem for Linux (WSL), the Windows Subsystem for Android is also distributed through the Microsoft Store for devices running Windows 11. Since Microsoft doesn’t offer an official way to fetch the direct download link of an app package from its Store, we will opt for a third-party site to pass the hurdle.
- Click here to open the website of Online link generator for Microsoft Store by @rgadguard.
- The product ID of the Windows Subsystem for Android app is 9P3395VX91NR, so you have to put the same in the search box after selecting “ProductId” from the first drop-down menu. Alternatively, you can directly put https://www.microsoft.com/en-us/p/windows-subsystem-for-android/9p3395vx91nr as the “URL (link).” Next, select the channel as “Slow” from the second drop-down menu.

- Locate the largest file from the list. It should be a MSIX Bundle (with the extension .msixbundle) sized a little over 1 GB. This is the main installer package for the Windows Subsystem for Android. Click on the filename to download the file.
- At the time of writing this article, the version number of the Windows Subsystem for Android package is 1.7.32815.0. We’ve also mirrored this particular build for easy-downloading. The SHA-1 hash of the MSIX Bundle for this version is 0c4b3430bcd37be562f54322c79fb14f11ce1348 .

Step 2 – Install the Windows Subsystem for Android package
A MSIX Bundle is a packaging format that comprises multiple MSIX packages – each of which can support a specific system architecture. This is why you can install the package on both traditional x64 PCs, as well as on compatible ARM64 devices.
- Open Windows Terminal as administrator and start a PowerShell instance. To do so, right click on the Start button and select Windows Terminal (Admin). By default it should open with PowerShell, but if it doesn’t, then invoke a new tab with PowerShell.
- Execute the following command to install the MSIX Bundle you downloaded:

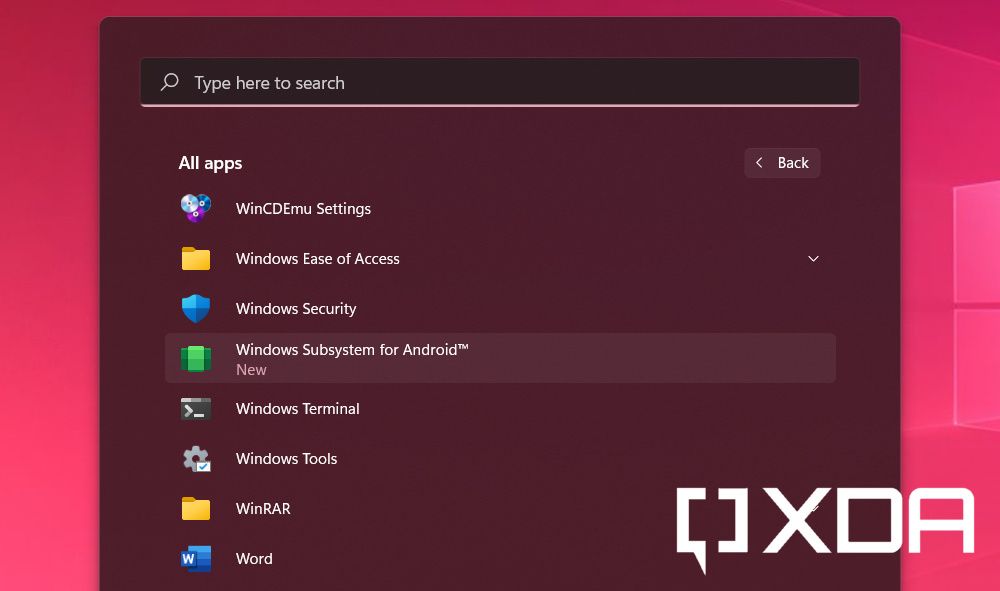
Step 3 – Sideloading apps on the Windows Subsystem for Android
Now that we’ve installed the Windows Subsystem for Android, it’s time to configure it for app sideloading. To make things easier, we have a separate comprehensive tutorial for sideloading Android apps on Windows 11. Take a look at the guide below:
The end result should be something like this:

Termux, a popular Android terminal emulator app running under Windows 11
As you can see, the screenshots have been taken on a Windows 11 instance that is running build 22000.258, i.e. the first post-General Availability update. Matter of fact, the model of the CPU is the Intel Core i5-6500T, which is neither officially supported by the Windows Subsystem for Android, nor Windows 11. We haven’t encountered any groundbreaking glitches so far, but your mileage may vary.
Stay tuned to XDA as we cover all the updates and new features related to the Windows Subsystem for Android as they come out!
Источник
No need to run android
Краткое описание:
Запуск виртуальной машины на базе Android.
VMOS is an APP software based on Virtual Machine (VM). VMOS can be installed in the form of a normal APP to Linux or Android system through VM technology. That is to run another complete Android system through an application Moreover, VMOS is not controlled by the host system. (Android on the phone).
VMOS Features:
— Create a Fake Phone Environment: Use VMOS to create a full virtual Android environment with a working Play store and network connectivity. This virtual Android machine will run Android 5.1.1 and appears as a native OS with full touch control just like you would use on your primary Android system. The Android VM is complete with an app drawer, Google services, and some standard apps like a file manager and internet browser. You can sign in with your gmail account and access the full Play store and download new apps as well.
— Root Support: The virtual machine that you create in VMOS can be rooted without affecting the primary system. This is a good solution for anyone looking to run root apps but don’t have the ability to root their actual phone. This is also an essential feature for developers testing apps. Root access is often required for specific functions of different applications. Now developers can run them without risking corrupting the primary system.
— Multiple Accounts and Apps: With the ability to run two Android systems on one phone, you can use the virtual space to run duplicated apps with different accounts. The VM is a good way to keep your personal apps and accounts separate from your work. Sign in with your personal email, snapchat, twitter ect. on your main system, then put all of your work related accounts on the VM. You can run VMOS in a floating window, making it easy to switch between systems quickly, giving you faster access to duplicated apps.
ПЕРЕД ТЕМ, КАК ЗАДАТЬ ВОПРОС — ПРОЧИТАЙТЕ ШАПКУ!
Если установить образ VMOS выше версии вашего Android на устройстве, то образ не запустится по ограничению ядра.
VMOS Pro не запустится, если в вашем устройстве менее 2ГБ ПЗУ-памяти
Приложение позволяет создать «второе пространство» внутри себя (с приложениями которые вы туда установите), работает одновременно и независимо с другими приложениями пользователя (при достаточном количестве оперативной памяти). Это не эмулятор и в Recovery через программу не войти!
Версии:
Версия PRO имеет Android 7 и поддерживает 64bit arm v8a приложения, возможность иметь несколько разных виртуальных машин и многое другое. Является улучшенной версией старого VMOS.
GL — глобальный релиз программы, имеет английский язык, редко обновляется
CN — китайский билд, имеет китайский язык, часто обновляется, в связи с этим имеет больший функционал в отличии от глобальной
- Нажать на установку в маркете.
- Принудительно закрыть маркет.
- Снова в него зайти.
Если не заработало — попробуйте перезапустить VMOS.
- VMOS вправе работать нестабильно, как и программы в нём. На вашем устройстве теперь работают сразу две системы.
- Если есть проблемы с одной программой/игрой, можно попробовать поменять как и приложение, так и используемый ром.
- Для более-менее стабильной работы VMOS Pro необходимо 2гб+ ОЗУ.
Q. Как работает VMOS?
A. VMOS — это новая и инновационная технология. Он виртуализирует собственную операционную систему Android на вашем телефоне. С VMOS вы можете переключаться между реальной и виртуальной системами в любое время. Данные и приложения хранятся локально.
Q. На какой телефон можно установить приложение?
A. Телефон должен иметь больше 32 ГБ памяти и 3 ГБ оперативной памяти, также телефон должен работать на версии android 5.1 и выше.
Q. Могу ли я клонировать приложение из реальной системы в ВМ?
A. Да. File→Choose APP→Import [Файл -> выбрать приложение -> импорт].
Q. Как дела с быстродействием системы?
A. На самом деле, данное приложение работает быстрее, чем облачные, так как все данные хранятся в локальном хранилище.
Q. Почему VMOS нужен доступ к хранилищу, информации об устройстве, расположению, IMEI и аудио?
A. VMOS требует данные разрешения для лучшего эмулирования системы.
Q. VMOS безопасен для реального устройства?
A. Конечно, реальный телефон и VMOS используют разные операционные системы. Данные из обеих систем не будут мешать друг другу.
Внимание, лайфхак! Если изучить шапку темы, то ты получишь ответ на 99% своих вопросов и проблем!
Источник


