- Запуск NodeJS-приложения на Android
- Termux
- Клавиатура
- NodeJS
- Express
- Nodemon
- MongoDB
- Building a Node.js application on Android
- Building a Node.js application on Android — Part 1: Termux, Vim and Node.js
- What we are going to do
- 1. Termux
- Configuration
- Storage
- Keyboard
- Using multiple sessions
- Accessing Help in Termux
- 2. Vim
- Using the different modes
- Not getting lost and learning more about Vim
- 3. Node.js
- In a nutshell
- Wrapping it up
- How to Create a Mobile App with NodeJS
- What’s a Mobile Backend?
- MBaaS
- Express
- Security
- Express Alternatives
- How to Create a Mobile App with NodeJS
- Prerequisites
- 1. Express and React Native Project Set-Up
- 2. Code Express Server Routes
- Create Routes
- Test Server Setup
- 3. Connect React Native to Express Server
- Navigation
- Homescreen.js
- Add the getNotes Function
- Find Your Local IP Address
- Add the deleteNote Function
- Test the Routes
- 4. Add FaiRESTdb API Calls to Server
- Sign Up For a Free Account on RapidAPI
Запуск NodeJS-приложения на Android
Без сомнения, вам понравится запускать NodeJS на своем Android-устройстве. Благодаря эмулятору терминала и Linux-окружения для Android, разработка веб-приложений на смартфоне перестанет быть для вас проблемой.

Termux
Termux — это бесплатное приложение, которое можно установить прямо из магазина Google Play. Требуется версия Android 5.0 или более поздняя. Не требует root-прав.
При открытии Termux вас приветствует интерфейс командной строки. Рекомендуется проверить наличие обновлений сразу после установки Termux. Введите следующую команду и нажмите Enter:
Termux поставляется в минимальной базовой комплектации, так что вы должны установить coreutils для полноценного использования команд командной строки, таких как mv, ls и др.

Termux хранит данные в собственном хранилище данных, т.е. папка $HOME находится внутри частной области Termux, как у обычного Android приложения. Удаление Termux вызовет потерю этих данных. Если вы собираетесь хранить там важные файлы, то используйте termux-setup-storage, чтобы обеспечить сохранение данных во внешнем хранилище (например на SD-карте).
Итак, давайте создадим папку для нашего приложения и перейдем в этот каталог:
Клавиатура
В этот момент вы, скорее всего, почувствуете некоторые проблемы при работе в консоли со стандартной клавиатурой. Чтобы обойти их, я установил хакерскую клавиатуру из Google play. Это сенсорная клавиатура, которая имеет все необходимое для написания кода — Esc, Tab и клавиши со стрелками.
Для написания кода нам понадобится любой текстовый редактор, доступный в консоли. Вы можете установить Emacs или Vim, но для простоты можно использовать nano. Установим его:
Создадим файл app.js и откроем его в редакторе:
Напишем какой-нибудь простой NodeJS-код для проверки:
Чтобы выйти из nano, нужно нажать Ctrl+X, написать ‘yes’ и нажать Enter.
NodeJS
Теперь самое время установить NodeJS. Сделать это очень просто:
Теперь мы можем наконец запустить наш скрипт:
Express
Вместе с NodeJS нам доступен пакетный менеджер npm. Давайте воспользуемся им:
Откроем app.js и напишем/скопи-пастим туда следующий код:
Это должно вывести в консоль номер порта по которому отвечает сервер. Если вы откроете http://localhost:8080/ в браузере, то увидите на странице следующий текст:
Nodemon
Чтобы избежать перезагрузки сервера вручную каждый раз при изменении файла app.js мы можем установить nodemon. Nodemon — это утилита, которая будет отслеживать изменения в вашем коде и автоматически перезапустить сервер.
Теперь вы можете запустить сервер с помощью команды nodemon вместо node:
Даже с хакерской клавиатурой писать код на сенсорном экране не очень удобно. Скорее всего, вы пишите свой код в гораздо более удобных местах и храните его в репозитории. Установим git:
Теперь вы можете запускать git команды вроде git push, git pull и т.д. без каких-либо ошибок.
MongoDB
К сожалению, у меня не получилось запустить MongoDB-сервер на Android. В качестве альтернативы можно использовать облачные сервисы, типа MongoLab или довольствоваться чем-то вроде NeDB.
Источник
Building a Node.js application on Android
by Aurélien Giraud
Building a Node.js application on Android — Part 1: Termux, Vim and Node.js
If you are excited about Node.js and own an Android device, no doubt you’ll enjoy running Node.js on it. Thanks to Termux a terminal emulator and Linux environment for Android, the fun of developping Node.js web applications is just a few ‘npm install’s away!
What we are going to do
I will show how to get started with Node.js using Termux on Android. We are also going to use Express and see how to store our app’s data in NeDB, a lightweight JavaScript database, whose API is a subset of MongoDB’s.
In this first post, we will limit ourselves to setting up our Node.js development environment, that is:
- Install and configure Termux.
- Install and see how to use Vim as a text editor. (This section can be skipped if you already know Vim.)
- Install and run Node.js.
1. Termux
Termux combines terminal emulation with a Linux package collection. It comes as a free app that can be installed directly from the Play Store or from F-Droid catalogue.
Configuration
When you open Termux, you are greeted by a Command Line Interface (CLI). Right after installing Termux, it is recommended to check for updates, and upgrade if need be. So type the following commands at the prompt — that is, after the ‘$’ sign — and press :
Termux comes with a minimal base system, so you should also install ‘coreutils’ for the full-fledged variants of base CLI utilities such as ‘mv’, ‘ls’, etc.
Storage
There are three main types of storage in Termux:
- App-private storage: This is right where you are when you start Termux.
- Shared internal storage: Storage in the device available to all apps.
- External storage: Storage on external SD cards.
Although the environment setup in Termux is similar to that of a modern Linux distribution, running on Android implies differences and so far I have only managed to run Node.js fully while storing my data in Termux’s private storage (option 1 above).
So let’s create a directory for our app and change to this directory:
Keyboard
I have only been using a soft keyboard so far and I encountered some issues with the default touch keyboard while using the volume up key as a replacement for , or the Arrow keys.
To circumvent these issues, I installed Hacker’s Keyboard from the Play Store and I really like it. It is a touch keyboard that can be used instead of the default one and has all the keys needed for writing code and using the terminal.
You can find useful information about using a touch or hardware keyboard with Termux directly on the Help page.
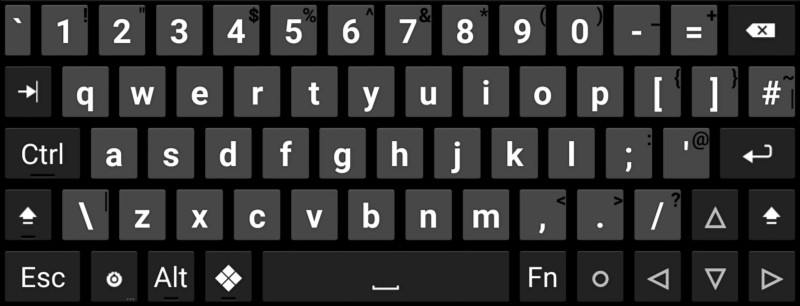 The Hacker’s keyboard
Using multiple sessions
One more thing I would like to mention about Termux: if you swipe the screen left to right from its left edge, it opens a menu that enables to start or switch between multiple Termux sessions.
Accessing Help in Termux
In Termux, you can access the help documentation, which contains all the necessary information, by long pressing the screen, and clicking first on ‘More’, then on ‘Help’. Note though, that this help documentation cannot be accessed when your device isn’t connected to the internet.
2. Vim
Vim is a text editor that can be used right in the Command Line Interface and it is available as a package in Termux. So let’s install it:
Vim’s interface is not based on menus or icons but on commands given in a text user interface. In case you are new to it I’m going to guide you through the very basics of Vim.
First, create the file ‘server.js’:
To edit this file with Vim, simply type:
 Vim displaying the content of the empty file server.js
Using the different modes
Vim behaves differently, depending on which mode you are in. At start, you are in what is called command mode. You should see a cursor on the first line, tildes (
) on the other lines and the name of the file at the very bottom.
Tilde lines are here to indicate that these lines are not part of the content of the file.
To start writing into the file, you need to switch to writing mode. So just type the letter “i”. At the very bottom, you should now see something like this:
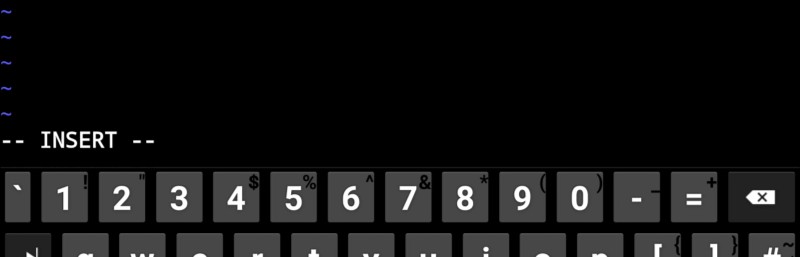 Vim is now in writing mode
So now go on. Write something.
Done? So here is how you can save your changes/quit Vim. First you need to come back to the command mode by pressing and then you have the choice:
- Type :w and press to save (write) the changes.
- Type :wq and press to save the changes and quit.
- Type :q! and press to quit without saving the changes.
And that is about it for our very short introduction to Vim.
Not getting lost and learning more about Vim
If you are lost, you can press and type :help followed by . This will open Vim help documentation.
Something like this simple Vim Reference might be useful if you are new to Vim. Alternatively, you can type ‘vimtutor’ in the terminal for a 30 minutes tutorial, play a learning game at http://vim-adventures.com/ or follow the interactive tutorial at http://www.openvim.com/.
3. Node.js
Installing Node.js is very simple:
If you haven’t done it yet, create a folder for the application, move into it and type:
This will ask you a bunch of questions, and then write a ‘package.json’ file for you. (You can just press for each question asked.)
Now let us check that everything is working all right. Open server.js
Save the changes and quit Vim.
Now we have everything in place and we can finally run node:
This should print the text “This is Node.js running on Android.” in the terminal.

In a nutshell
As a recap, here is the whole process again (with minor differences as it is all done directly from the command line).
Wrapping it up
We have seen how to use Termux on Android, how to edit files with Vim and how to run Node.js.
Here are a the main links related to Termux: its web page, its wiki and its GitHub repositories. It can be installed from the Play Store or from the F-Droid catalogue.
In the next post we are going to build a basic Node.js application using the Express web framework and a lightweight JavaScript database called NeDB which uses MongoDB’s API and can be used to develop and run a web application in Termux.
In the meantime, happy coding!
If this article was helpful, tweet it.
Learn to code for free. freeCodeCamp’s open source curriculum has helped more than 40,000 people get jobs as developers. Get started
freeCodeCamp is a donor-supported tax-exempt 501(c)(3) nonprofit organization (United States Federal Tax Identification Number: 82-0779546)
Our mission: to help people learn to code for free. We accomplish this by creating thousands of videos, articles, and interactive coding lessons — all freely available to the public. We also have thousands of freeCodeCamp study groups around the world.
Donations to freeCodeCamp go toward our education initiatives and help pay for servers, services, and staff.
Источник
How to Create a Mobile App with NodeJS
Last Updated on April 23, 2021 by Jarrett Retz 1 Comment
Table of Contents
What’s a Mobile Backend?
It does not take an expert to determine that the computing power of a server is most likely greater than the computing power of a mobile device.
If an application has a heavy computational load than it becomes more efficient for the mobile device to send parameters to a backend server to do the heavy lifting and then returning the result. A common pattern in React, when communicating between a front-end client and a back end server, is to use JSON.
This can become a simple process: a mobile app outsourcing it’s functionality to APIs with API requests for increased performance.
A mobile backend is simply the server, database, service, etc. that is not local to the mobile device that handles aspects of the processes of the mobile app.
MBaaS
Many companies, or developers, want to increase the functionality of their apps and they want it done quickly. In recent years, companies have been created to help increase the speed that mobile apps are developed and decrease the amount of work that goes into maintaining their architecture.
These companies are known as selling Mobile Backend as a Service (MBaaS). Furthermore, as described on Wikipedia, mobile backend as a service provides developers a, “…way to link their applications to backend cloud storage and APIs exposed by back end applications while also providing features such as user management, push notifications, and integration with social networking services.”
We will not be setting up any accounts with MBaaS providers for our application, but it could be considered in the design of your future mobile applications. Below is a list of popular MBaaS providers:
Express
With a myriad of HTTP utility methods and middleware at your disposal, creating a robust API is quick and easy.
Express is a Node.js framework for creating web application servers or APIs. Express is easy to set up, as you will see later and can be extended to include many features. Also, Express integrates all the benefits of Node.js (i.e asynchronous code).
Although Express can be a web application server, we are going to use it as an API to proxy our interactions with a database API.
Security
Whether developing front-end static websites, or a mobile application, security becomes an issue quickly. Reading from the Expo documentation,
Never put any secret keys inside of your app, there is no secure way to do this! Instead, you should store your secret key(s) on a server and expose an endpoint that makes API calls for your client and passes the data back.
Setting up an Express API on a server to handle the sensitive actions of our app allows us to secure secret keys. Later, we are going to demonstrate this process when we hide the value of our RapidAPI secret key.
Express Alternatives
To reiterate, some of the main advantages of Express are;
- Node.js asynchronous code and performance
- easy setup
- extensible middleware
- security
Considering the advantages, it’s safe to say that we are making a good choice when using Express. However, below is a list of other popular Node.js libraries that share some of the same functionality of Express:
All are reputable and have their advantages! You can read more about each by following the links. Ok, time to get started with the application!
How to Create a Mobile App with NodeJS
The application is bootstrapped with Expo. Expo allows us to quickly set up a React Native project while providing a project structure so we can quickly get into coding out the components.
Furthermore, Expo is the nicest way to get started without being too picky about the type of operating system that you are using on your desktop or smartphone.
The application will use an Express server running locally to handle the database requests that are made using the FaiRESTdb API on RapidAPI as our database.
In addition to the individual use of React Native, Expo, and Express, this tutorial will show you how we can combine the three to create a secure mobile application that can store and retrieve data.
Prerequisites
- Wireless internet connection that both your phone and laptop/desktop can connect to
- You will not be able to use Expo if they are connected to different wireless networks
- NodeJS 12 LTS or greater installed locally. There are installation instructions on NodeJS.org.
- Expo requires Git. You can download Git from here.
- The minimum operating system requirements for smartphones are:
- Android version is Lollipop (5)
- iOS version 10.0
- Basic understanding of ReactJS or Javascript
- Expo client application downloaded on your smartphone
-
1. Express and React Native Project Set-Up
Open up a new terminal and run the following commands
You are then prompted for the type of project to initialize by the Expo-CLI. Choose the managed workflow, tabs.
Change directories into the new project, cd expo-client .
In the apps root directory, run the command npm start and grab your smartphone.
Check to make sure that both your smartphone and computer are connected to the same wireless network.
If you are using Android, use the Expo client app to scan the QR-code that appears in the terminal (or the Qr-code in the web browser). If you are using iOS, you can use the camera’s built-in QR-code scanner. Select the camera app and point it at the QR-code.

After scanning, the Expo app opens and the Javascript bundle starts to build. This can take a couple of minutes. When it finishes, our app should appear on the smartphone with the template code. Your smartphone should now show the template code for our project!
It can take a few tries for the connection to stabilize
Observing the new project can be a little intimidating. However, it’s important to remember that many of the time-consuming aspects of setting up a mobile React Native project are handled with Expo.
To observe how we are going to develop the app, open up a text editor in the rapidapi-mobile-app-node folder, and make an edit to the file expo-client/screens/HomeScreen.js (make an edit to one of the
components). This change will be reflected in the application running on your smartphone.
You do not need to have an Expo account to use the client app on your smartphone. After opening the app and scanning the QR-code, navigate to the Projects tab to open (or reopen) your project.
If you want to learn more about Expo, you can check out their documentation by following this link.
2. Code Express Server Routes
In your terminal, navigate to the root project directory: rapidapi-mobile-app-node .
In this directory execute the commands below.
The commands create a new NPM project and download some of the packages that we are going to use.
Nodemon is a development tool library that detects file changes in the project and restarts the development server. Add the below dev script to the package.json file in the express-server folder.
Next, we can create the Express server. Create a new file in express-server named server.js and add the code,
Above is a basic Express server setup. After we add the /notes routes this server will be ready for use. Express is widely used because—with the code above—we have almost completely set up a working server.
Create Routes
Currently, server.js is importing a file that does not exist. Let’s create that file. In express-server , create the folder routes with the file notes.js .
Next, inside of the notes.js , add the code:
This file defines three routes:
- / returns all of our stored notes
- /add adds a note
- /delete deletes a note
Back in the server.js file, we imported the routes and gave them all a base URL of /notes . Therefore, the true URL for these routes is /notes , /notes/add , and /notes/delete .
The file currently does not call the FaiRESTdb. We will add that later. For now, we are focusing on connecting the mobile front-end to the server.
Test Server Setup
In the terminal, checking to make sure that you are in the express-server folder, run npm run dev .
If Listening on port 3001 is logged to the terminal then the server has been set up correctly.
Keep the server running.
3. Connect React Native to Express Server
We can now start working on the user interface of our app.
Navigation
The first thing to change in the Expo app is the navigation labels. Our app will have two screens, and they will be titled ‘View Notes’ and ‘Add Note’.
Change the INITIAL_ROUTE_NAME variable to equal ‘Notes’ .
Next, change the string values for each of the components to match the code below:
Then, make similar changes to the switch statement in the getHeaderTitle function.
Finally, open expo-client/navigation/LinkingConfiguration.js and change the screens object to,
Our navigation is now representative of our apps subject matter.
Homescreen.js
The Homescreen.js has a lot of code that we don’t need. Replace the code with the following simple components and accessory code.
At the top of the file, we are making the necessary imports from react-native . Also, we are importing icons from Expo.
Next, we are defining our Homescreen React component function. Inside the function, we immediately use React hooks to create two state variables ( notes , activeNote ).
After the state variables we declare two functions:
- getNotes will be used to retrieve the notes from the server
- createTwoButtonAlert is used to generate an alert popup when a note is selected to provide actions to be executed on the note
Finally, we create React Native components, which are currently not utilized (because we have no notes). The app on your phone should now look like this.
Add the getNotes Function
The getNotes function is a simple fetch API call to the Node server that is running on our computer. This function is also going to be run when the app loads, and we are going to use the React useEffect hook to accomplish that.
We could have put the fetch function inside the useEffect hook, but we wanted to expose the function to be used outside of the hook (i.e to refresh the notes).
Complete the getNotes function and add the useEffect hook to our component with the code below.
This will almost work (if your Node server is still running). We can’t use localhost in this situation because the Expo app is running on a different device than our computer. However, they are using the same WiFi network. This means that we can find the local IP address of our computer (that is running the Express server) and enter that IP address into the URL of the fetch function.
Find Your Local IP Address
On Mac, open up your Network Preferences.
My local IP address 192.168.0.110. Therefore, my Express server is running at http://192.168.0.110:3001. We added :3001 to the end of the address because that’s the port that we chose to expose the Express app on.
This IP address is also referred to as your private IP address.
On Windows, open up the Command Prompt and enter ipconfig .
The terminal will display network information. Your private IP address is the IP address with the label IPv4 address:
Once you have this information, replace the localIPaddress part of the fetch function with your private IP address.
The application is now able to fetch the placeholderData from the default /notes route on the server. You should see the placeholder notes after you reload your app.
We now have communication between our mobile app and backend server!
Add the deleteNote Function
When you select a note there is an alert pop-up that asks if you want to delete the note. Unfortunately, we have not added this function to the app.
Underneath the React.useEffect hook add:
The function sends the activeNote ID to the server for deletion. Also, it filters the current notes array and saves a new array without the note that was deleted.
Again, you need to add your IP address to the fetch URL.
LinksScreen.js
This file is used for adding a note to the database. Therefore, replace the current code with the code below.
It looks likes a lot of code, but the bottom section is mostly styling. The screen is an input component with a submit button and a modal informing the user that the note was added successfully. The LinksScreen , or Add Note screen now looks like the image below.
Test the Routes
We can now use the app and make sure that our data is being passed between the server and the application properly.
First, we can assume that the /notes route is working because we can render the placeholder data.
Next, try to delete one of the notes by selecting it and choosing Delete. The terminal running our Express server should log the note’s ID and the note should temporarily disappear from the home screen of the application.
Finally, try adding a note. The note content should be logged to the server terminal and the success modal should appear!
Perfect! We are now ready to hook up the backend to an API database service.
4. Add FaiRESTdb API Calls to Server
Sign Up For a Free Account on RapidAPI
To use the FaiRESTdb API in the next section, you will need an account. Visit RapidAPI to get signed up!
Источник
-


