- Первый опыт: Mac Mini на M1
- Первый запуск
- Переходим к софту
- Rosetta 2
- macOS Big Sur: How to setup Node.js on Apple M1 Machine
- About the author
- How to Fix React and Node-Sass Issue with Docker on the new Apple M1 Chips?
- Why couldn’t we start our application?
- Installing nodejs on macOS Apple Silicon (M1)
- Share on
- You may also enjoy
- Display latest blog posts on GitHub profile readme
- July 19, 2020
- Kotlin Type Aliases
- June 27, 2020
- Introduction to Kotlin (Part 3): classes, properties, objects, and interfaces
- June 12, 2020
- Introduction to Kotlin (Part 2): if, when, and looping
- May 25, 2020
- Node sass apple m1
Первый опыт: Mac Mini на M1
Очень кратко о моем первом опыте использования (бенчмарков не ждать).
Сразу после онлайн презентации, где Apple представили свои новые продукты на собственном чипе, я отправился на сайт и, выбирая между MacBook Pro и Mac Mini, остановился на втором. Так как большого смысла в том, чтобы брать еще одну прошку в наше «работай из дома» время я не увидел, плюс 13-дюймовый экран мне показался маленьким, а единственной фичей, за которую я бы предпочел макбук, был трекпад. Поэтому наличие Magic Mouse, валяющейся на нижней полке в шкафу, развеяло все сомнения. Выбор пал на Мак Мини с 16Гб оперативной памяти и 1Тб SSD.
Начнем с того, что заказ обещали привезти 24-27 ноября, а привезли 17. Шел он ко мне из Китая и дошел успешно. Минималистичная упаковка, минимум бумажек и кабель питания — в общем все как полагается.

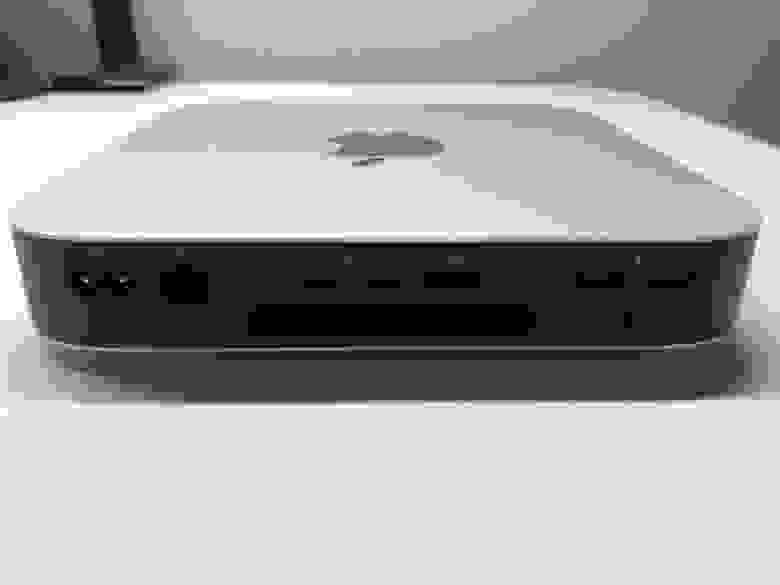
В коробке у нас небольшой серый блок с 2 USB-A, 2 USB-C, HDMI, Ethernet, разъемом для питания и небольшим отверстием системы охлаждения.
Первый запуск
Этот шаг, как и полагается, прошел быстро: язык, конфиденциальность, всякие лицензионные соглашения, ну вы понимаете. UI как и ожидалось на высоте, работает шустро и красиво — на выходе у меня 28-дюймовый 4к монитор, встроенный GPU справляется без особых усилий. (в отличии от моей 1660 Ti, которая не всегда справляется с этим монитором)
Переходим к софту
Я в основном занимаюсь web-разработкой: Java на бакенде и Vue (node js для сборки) на фронте, работаю в IDE от Jetbrains. С чего здесь начать? С того, что ничего из этого не портировано под новую архитектуру, и именно тем, как они справились с этой проблемой, я был восхищен. Сразу после настройки системы, я пошел шерстить гитхабы на предмет того, как все это добро собрать под новый проц (кто-то подготовил EA версии, кто-то патчи, кто-то еще тестирует, а кто-то пока даже не чешется).
Первое, что я решил сделать: установить хром, чтобы восстановить все свои закладки и начать настраивать среду. Ребята из гугла предоставили версию под M1. Установил, и первым его действием был вопрос — хочу ли я сделать его браузером по умолчанию, а вторым — краш при попытке войти в аккаунт. Удалив хром, я немного приуныл. Ну что же, мне ничего не оставалось, как довериться Apple и начать вести себя как юзер, вместо того, чтобы шерстить трекеры на предмет готовности той или иной софтины к M1.
Rosetta 2
Я просто пошел и скачал тулбокс от Jetbrains, установил его и запустил, на что ОС мне выкинула окошко, мол, этот софт еще не поддерживает новую архитектуру, хочу ли я установить Rosetta и запустить через неё, на что я ответил да и больше ни разу не видел этого окна. Тулбокс запустился, я затянул им phpstorm и IDEA, и они запустились без каких-либо проблем и полностью прозрачно.
IDEA подтянула мне последнюю версию JDK, и дальше все было как обычно — стабильно и быстро, каких-то реальных провалов по производительности я не заметил, за исключением пожалуй того, что обе IDE запускались дольше секунд на 5-10. (В комментариях меня попросили отметить, что это все же время холодного старта — когда вы видите цветной прямоугольник на котором написано название запускаемой IDE. Что вполне ожидаемо исходя из документации Rosetta 2. Однако все остальные операции остались без заметных изменений, например загрузка проекта). Также немного просел хот-релоад, теперь он занимает на 2-3 секунды дольше чем обычно, примерно 5%-10%.
Дальше дело было за фронтом. Также просто скачал установщик с сайта node.js и запустил. Один из свежих проектов подтянул зависимости и собрал все, что ему нужно (с помощью node-gyp). Фронт собирается также медленно, как и на моем PC, какой-то заметной разницы я не обнаружил. Второй проект упал на сборке node-sass, но после обновления зависимостей все завелось.

Spotify, Steam — также спокойно запустились через Розетту. Ради интереса я попробовал запустить Доту, она запустилась, играть можно, но просадки ФПС сильно заметны. Другие игрушки, оптимизированные под платформу Эплла, играются куда лучше.
Температура Mac Mini, за время его активного использования, ощутимо не изменялась (корпус все время был холодный).
Не смотря на то, что довольно много приложений все еще не портировано, устройство имеет хороший потенциал, ведь даже приложения, запущенные через Rosetta, практически не отстают от их же производительности на нативной х86_64 платформе. (В сравнение с моей текущая конфигурацией AMD Ryzen 7 2700X/32Gb ОЗУ/SSD) А общая производительность системы с запущенными несколькими средами разработки, браузером с десятками вкладок, вебпак сервером с хот-релодом и объемного приложения на спринге не может не впечатлить, учитывая наличие всего 16Гб оперативной памяти. Будет интересно посмотреть, что будет, когда все эти приложения будут запущены нативно.
По итогу, пользоваться девайсом мне понравилось. Я понимаю, что на пути будет много трудностей, но могу с уверенностью сказать, что покупкой я доволен и буду пытаться переносить всю свою разработку с моего Linux PC на новый мак мини.
Если вам хочется несколько бенчмарков можете обратится к это статье:
Источник
macOS Big Sur: How to setup Node.js on Apple M1 Machine
Recently I bought an Apple’s M1 Macbook Pro. As I am still transitioning from my old MacBook, it might be helpful to document some findings from the developer perspective, especially for developers working with javascript stuff on a daily basis like me.
So far, the transitions are pretty smooth, and many developer tools have also been updating their latest versions to work natively with the M1 machine (yes, including docker).
If you are installing Node.js, I recommend using Node Version Manager (nvm) over Homebrew. It’s similar to RVM (Ruby Version Manager) for Ruby language that allows you to switch between Node versions, which is essential easily.
Install the latest version.
Restart terminal and run the final command.
Confirm that you are using the latest version of Node and npm.
First, confirm that you are on arm64
Sometimes you still need to work on x64 architecture. Most likely because some of the libraries or npm packages that you are using are not working natively with M1 yet.
Switch to x64 architecture environment.
check that the architecture is correct.
Install node using nvm. This should download the precompiled x64 binary:
Now, check that the architecture is correct:
It is now safe to return to the arm64 zsh process:
We’re back to a native shell:
Create a Rosetta Terminal
You can also set the Open using Rosetta option on Terminal.app or iTerm.app until more stuff works with arch64 and the toolchain on the M1 macs (most if not all of this stuff already works, though).
- Right click the app (Terminal, iTerm, etc.)
- Tap «Get Info»
- Select «Open using Rosetta»
- Restart terminal

But I’d prefer the former way, because by using arch -x86_64 zsh you can use Rosetta on a need to use base and not need to run the whole terminal in Rosetta mode.
Finding and installing native applications
Right now, there are still a few applications that don’t offer full native support for Apple Silicon. So we have to install the x86_64 versions of these applications. This means that Rosetta will run in the background to translate the application and make it compatible to run on the M1, but this also means that it will not run fully ARM optimized.
You can visit the website “Does it ARM?” or Is Apple silicon ready? and search for any app. It’s a great resource to find and install Apple Silicon versions of your apps.
That’s it. I hope it helped speed up your process of developing apps on your Apple Silicon Macs.
About the author
Hey, I’m Anas, a software engineer and maker of things. I publish articles about modern JavaScript, design, and programming.
Источник
How to Fix React and Node-Sass Issue with Docker on the new Apple M1 Chips?

Aug 13 · 3 min read
You can just replace node-sass with a package called sass which is supprisngly enough (or not) the official JavaScript based version of the SASS transpiler.
Last week I started working for a new company and was assigned to set up Docker for our devleopment enviornment. It was quite a straightforward setup: a few React apps, two Node.js apps, a Mongo service and Redis service.
After completing the setup we started testing it on the various machines our team members have: Mac, Windows, Linux. Everything was working beautifully, that’s until we had to try it on the new Macbook Air.
W h en we were trying to launch any of the React apps, we were quickly prompted with the following error:
Error: Node Sass does not yet support your current environment: OS X Unsupported architecture (arm64) with Unsupported runtime (93)
Node-sass has been widely used by web developers in the last years. It has been adopted by Facebook into their create-react-app setup which made it a standard library for compiling SASS files in React apps.
Why couldn’t we start our application?
The new Macbook Air comes with the new Apple M1 Chip which is an ARM based chip (vs AMD ones).
When you’re building a Docker image based on an image from Docker Hub for example, it will look for a version of that image that was built for the same chip architecture as your machine has, and if there are not any it will run the image on a simluator to match your machine’s architecture (these cases comes with very noticable performance issues).
So, in our case we had a Node based image that was running our React app. Node has an ARM build version of that image, so Docker picked up on that version for the new Macbook Air.
Here come’s the problem: node-sass isn’t a plain JavaScript library, but a JavaScript wrapper for the original C++ SASS transpiler, they have to release an apropriate build for ARM with the appropriate binaries for it to be able to work on ARM based machines.
Another problem is, that node-sass is deprecated so we can’t really be sure on when a solution might come. According to a GitHub disccusion progress can’t be made on such build because of the lack of ARM support with their CI&CD services.
So to fix the issue, we replaced node-sass with sass, which is a JavaScript version of the SASS transpiler (not a C++ transpiler wrapper, but a full on transpiler).
In order to replace node-sass with sass that’s all you need to do:
If you get compilation errors because of some soon to be deprecated SASS syntax, you can just install an older version of sass until you are ready to migrate:
That’s about it. Simple isn’t it?
I hope you found this information useful. Let me know if you have any uptakes in the comments section.
Источник
Installing nodejs on macOS Apple Silicon (M1)
I recently bought a new MacBook Pro with the M1 Apple Silicon CPU. While most things seem to be working great, some developer tools are not yet distributed as native aarch64 binaries. Currently, nodejs is one of those tools. The developers are working on official support, but it isn’t available yet. Fortunately thanks to the nvm project it is still easy to get up and running.
First, if you do not already have the xcode command line tools installed you should install them. This will download the needed C++ compiler and other development tools. Do this by running:
Once that completes, install nvm per their instructions. The command will look something like the following (to ensure you get the latest version of nvm use the command from Github).
Note that if you do not already have a profile file (
/.bashrc) for your shell it won’t be able to install correctly. You should create the appropriate file(s) first before running the command below.
Now that you have nvm installed you can run the following command to install node. Version 15 is the one that currently (Jan 2021) works on aarch64 for Mac.
If everything works correctly this step will take a while to compile everything and copy the newly buily node to the correct install location inside the
/.nvm directory. After the build and install completes test the install by running:
You will probably need to close and re-open your terminal for the command to be found.
Finally, you will want to clear the nvm cache to reduce clutter. After the build mine was consuming about 11GB, vs about 100MB once the cache was cleared. This can be done using:
Hopefully, this helps someone else that is also on the bleeding edge of Apple hardware!
This article is also published on dev.to.
Updated: January 19, 2021
Share on
You may also enjoy
Display latest blog posts on GitHub profile readme
July 19, 2020
Recently GitHub updated the user profile page to allow custom user-defined content to be displayed. This is done via a profile README.
Kotlin Type Aliases
June 27, 2020
Something I recently learned about in Kotlin, that I do not see talked about very often, are type aliases. Type aliases allow for custom names to be specifi.
Introduction to Kotlin (Part 3): classes, properties, objects, and interfaces
June 12, 2020
In part one of this series we talked about variables, types, and functions, and in part two we covered conditionals and looping. In part three we will now t.
Introduction to Kotlin (Part 2): if, when, and looping
May 25, 2020
In part one of this Introduction to Kotlin series, we talked about what Kotlin is and about some of the basics of the language (variables, types, and functio.
Источник
Node sass apple m1
Warning: LibSass and Node Sass are deprecated. While they will continue to receive maintenance releases indefinitely, there are no plans to add additional features or compatibility with any new CSS or Sass features. Projects that still use it should move onto Dart Sass.
Node version support policy
- Supported Node.js versions vary by release, please consult the releases page.
- Node versions that hit end of life https://github.com/nodejs/Release, will be dropped from support at each node-sass release (major, minor).
- We will stop building binaries for unsupported releases, testing for breakages in dependency compatibility, but we will not block installations for those that want to support themselves.
- New node release require minor internal changes along with support from CI providers (AppVeyor, GitHub Actions). We will open a single issue for interested parties to subscribe to, and close additional issues.
Below is a quick guide for minimum and maximum supported versions of node-sass:
| NodeJS | Supported node-sass version | Node Module | |||||||||||||||||||||||
|---|---|---|---|---|---|---|---|---|---|---|---|---|---|---|---|---|---|---|---|---|---|---|---|---|---|
| Node 17 | 7.0+ | 102 | |||||||||||||||||||||||
| Node 16 | 6.0+ | 93 | |||||||||||||||||||||||
| Node 15 | 5.0+, Some users have reported issues installing on Ubuntu due to node being registered to another package. Follow the official NodeJS docs to install NodeJS so that #!/usr/bin/env node correctly resolves. Compiling on Windows machines requires the node-gyp prerequisites. Are you seeing the following error? Check out our Troubleshooting guide.** Having installation troubles? Check out our Troubleshooting guide. Install from mirror in China Special: file or data must be specified Path to a file for LibSass to compile. Special: file or data must be specified A string to pass to LibSass to compile. It is recommended that you use includePaths in conjunction with this so that LibSass can find files when using the @import directive. importer (>= v2.0.0) — experimental This is an experimental LibSass feature. Use with caution.
Function Parameters and Information:
Handles when LibSass encounters the @import directive. A custom importer allows extension of the LibSass engine in both a synchronous and asynchronous manner. In both cases, the goal is to either return or call done() with an object literal. Depending on the value of the object literal, one of two things will happen. When returning or calling done() with < file: "String" >, the new file path will be assumed for the @import . It’s recommended to be mindful of the value of prev in instances where relative path resolution may be required. When returning or calling done() with < contents: "String" >, the string value will be used as if the file was read in through an external source. Starting from v3.0.0: this refers to a contextual scope for the immediate run of sass.render or sass.renderSync importers can return error and LibSass will emit that error in response. For instance: importer can be an array of functions, which will be called by LibSass in the order of their occurrence in array. This helps user specify special importer for particular kind of path (filesystem, http). If an importer does not want to handle a particular path, it should return null . See functions section for more details on Sass types. functions (>= v3.0.0) — experimental This is an experimental LibSass feature. Use with caution. functions is an Object that holds a collection of custom functions that may be invoked by the sass files being compiled. They may take zero or more input parameters and must return a value either synchronously ( return . ; ) or asynchronously ( done(); ). Those parameters will be instances of one of the constructors contained in the require(‘node-sass’).types hash. The return value must be of one of these types as well. See the list of available types below:
types.Color(r, g, b [, a = 1.0]) or types.Color(argb)
types.List(length [, commaSeparator = true])
An array of paths that LibSass can look in to attempt to resolve your @import declarations. When using data , it is recommended that you use this. true values enable Sass Indented Syntax for parsing the data string or file. Note: node-sass/libsass will compile a mixed library of scss and indented syntax (.sass) files with the Default setting (false) as long as .sass and .scss extensions are used in filenames. Used to determine whether to use space or tab character for indentation.
Used to determine the number of spaces or tabs to be used for indentation. Used to determine whether to use cr , crlf , lf or lfcr sequence for line break. Special: When using this, you should also specify outFile to avoid unexpected behavior. true values disable the inclusion of source map information in the output file.
Special: Required when sourceMap is a truthy value Specify the intended location of the output file. Strongly recommended when outputting source maps so that they can properly refer back to their intended files. Attention enabling this option will not write the file on disk for you, it’s for internal reference purpose only (to generate the map for example). Example on how to write it on the disk
Determines the output format of the final CSS style. Used to determine how many digits after the decimal will be allowed. For instance, if you had a decimal number of 1.23456789 and a precision of 5 , the result will be 1.23457 in the final CSS. true Enables the line number and file where a selector is defined to be emitted into the compiled CSS as a comment. Useful for debugging, especially when using imports and mixins.
Enables source map generation during render and renderSync . When sourceMap === true , the value of outFile is used as the target output location for the source map with the suffix .map appended. If no outFile is set, sourceMap parameter is ignored. When typeof sourceMap === «string» , the value of sourceMap will be used as the writing location for the file. true includes the contents in the source map information true embeds the source map as a data URI
the value will be emitted as sourceRoot in the source map information render Callback (>= v3.0.0) node-sass supports standard node style asynchronous callbacks with the signature of function(err, result) . In error conditions, the error argument is populated with the error object. In success conditions, the result object is populated with an object describing the result of the render call.
Version information (>= v2.0.0) Both node-sass and libsass version info is now exposed via the info method: Since node-sass >=v3.0.0 LibSass version is determined at run time. Listing of community uses of node-sass in build tools and frameworks. @jasonsanjose has created a Brackets extension based on node-sass: https://github.com/jasonsanjose/brackets-sass. When editing Sass files, the extension compiles changes on save. The extension also integrates with Live Preview to show Sass changes in the browser without saving or compiling. Brunch’s official sass plugin uses node-sass by default, and automatically falls back to ruby if use of Compass is detected: https://github.com/brunch/sass-brunch Recompile .scss files automatically for connect and express based http servers. This functionality has been moved to node-sass-middleware in node-sass v1.0.0 @stephenway has created an extension that transpiles Sass to CSS using node-sass with duo.js https://github.com/duojs/sass @sintaxi’s Harp web server implicitly compiles .scss files using node-sass: https://github.com/sintaxi/harp @dbashford has created a Mimosa module for sass which includes node-sass: https://github.com/dbashford/mimosa-sass Node-sass includes pre-compiled binaries for popular platforms, to add a binary for your platform follow these steps: Check out the project: Command Line Interface The interface for command-line usage is fairly simplistic at this stage, as seen in the following usage section. Output will be sent to stdout if the —output flag is omitted. node-sass [options] [output] Or: cat | node-sass > output node-sass src/style.scss dest/style.css Options: The input can be either a single .scss or .sass , or a directory. If the input is a directory the —output flag must also be supplied. Also, note —importer takes the (absolute or relative to pwd) path to a js file, which needs to have a default module.exports set to the importer function. See our test fixtures for example. The —source-map option accepts a boolean value, in which case it replaces destination extension with .css.map . It also accepts path to .map file and even path to the desired directory. When compiling a directory —source-map can either be a boolean value or a directory. Binary configuration parameters node-sass supports different configuration parameters to change settings related to the sass binary such as binary name, binary path or alternative download path. Following parameters are supported by node-sass:
These parameters can be used as environment variable:
As local or global .npmrc configuration file: As a process argument:
If you are using self-signed certificates for your binary then SASS_REJECT_UNAUTHORIZED will override (rejectUnauthorized)[https://nodejs.org/docs/latest/api/tls.html#tls_tls_createserver_options_secureconnectionlistener]. Install runs only two Mocha tests to see if your machine can use the pre-built LibSass which will save some time during install. If any tests fail it will build from source. This module is brought to you and maintained by the following people: Note on Patches/Pull Requests Copyright (c) 2015 Andrew Nesbitt. See LICENSE for details. Источник  Введение Технологии развиваются с невероятной скоростью  Введение: Apple является одной из самых известных и  Кастомизация гаджетов Apple – это процесс изменения |
