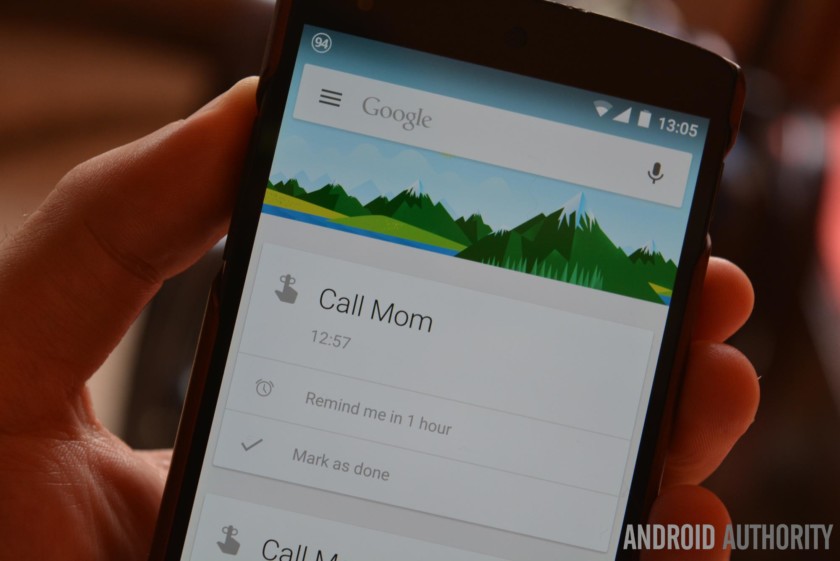
- Notification reminder on android
- 10 best reminder apps for Android
- The best reminder apps for Android
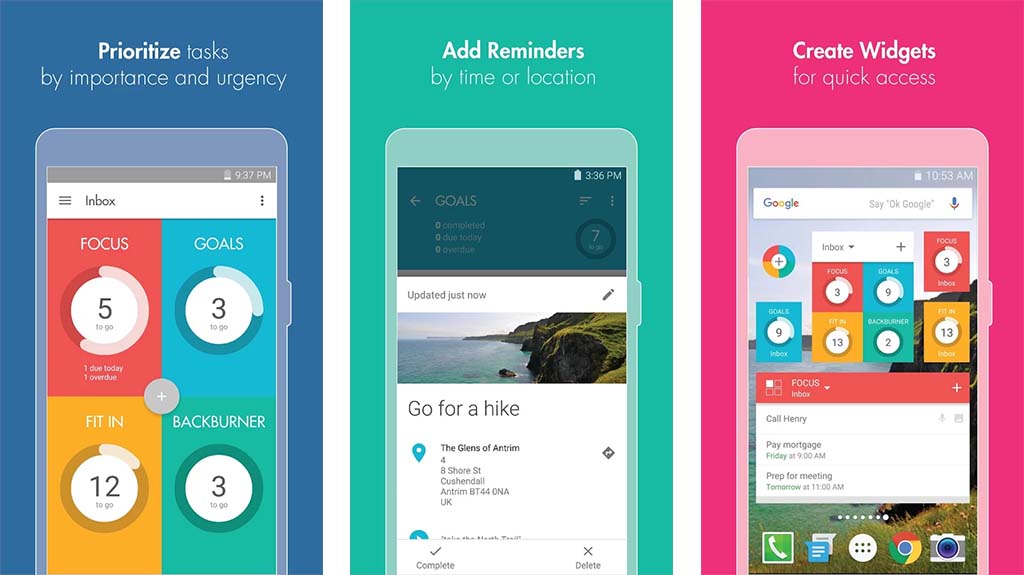
- BZ Reminder
- Calendar Notify
- Google Keep Notes
- Heynote
- Life Reminders
- Microsoft To-Do
- TickTick
- Todoist
- Personal assistant apps
- Android Notifications Tutorial: Getting Started
- Version
- Getting Started
- Displaying your First Notification
- Create a Notification Channel
- Register the Notification Channel
- Create a Notification
- Pending Intents
- Notifying the Manager
- Taking it a step further with Alarms
- Creating an Alarm to send a Notification
- 1. Pet Type Notification Channel’s
- 2. Alarm Time
- 3. Creating the PendingIntent
- 4. Scheduling the Alarm
- 5. Create a BroadcastReceiver
- 6. Create the Notification and Issue It
- Where to Go From Here?
Notification reminder on android

Краткое описание:
Периодические звуковые напоминания о пропущенных уведомлениях
Описание:
К сожалению Android не имеет встроенной возможности делать звуковые оповещения о пропущенных звонках, сообщениях, других уведомлениях (лишь светодиоды мигают). Эта утилита с открытым исходным кодом позволяет отслеживать уведомления от любых приложений, которые важны Вам и уведомлять периодически, используя звуковой сигнал.
Запустите приложение, разрешите ему отслеживать уведомления, выберите периодичность напоминаний и важные приложения. Если в системе присутствуют необработанные уведомления от выбранных приложений, вы будете получать периодические звуковые напоминания.
Батарея расходуется только если присутствуют уведомления, требующие периодических напоминаний. Приложение будит телефон, чтобы осуществить звуковое оповещение и засыпает опять.
Необходимо минимальное количество разрешений
Буду рад слышать ваши отзывы и предложения.
Требуется Android: 4.0 и выше
Русский интерфейс: Да
Сообщение отредактировал httpdispatch — 09.03.21, 13:16
— исправлена совместимость с Android 4.3
— исправлена ошибка с выделением элементов по нажатию на чекбокс в окне выбора приложений
— экспериментальная версия для Android 4.0-4.2
В Android 4.0-4.2 нет стандартного способа отслеживать удаление уведомлений, так что приложение для этих версий экспериментальное. Жду ваших отзывов.
У кого Android 4.3 и выше необходимо устанавливать версию с суффиксом v18 (работает точнее)
Для Android 4.0-4.2 версию с суффиксом v14
(если уведомление не было удалено+) или (не открывали приложение+) создавшее уведомление +А можно это прикрутить в программу?
Сообщение отредактировал BOTROBOTMOD — 26.11.15, 06:39
На данный момент на Android 4.0-4.2 приложение работает следующим образом:
1. Вы выбираете приложения, о пропущенных уведомлениях которых необходимо напоминать (например звонилка) и интервал напоминаний
2. Программа (звонилка) создала уведомление (пропущенный вызов), которое находится в статусной строке
3. Экран телефона выключен, вы должны слышать периодическое звуковое напоминание (громкость и мелодия берется из системных настроек звука).
4. После включения экрана и пока он включен звукового напоминания не будет
5. Вы вновь выключили экран, но не обработали пропущенное уведомление (не смахнули его или не открывали приложение звонилки или не нажимали кнопку очистить все уведомления). Вновь будут подаваться периодические звуковые напоминания
6. Как только вы удалите уведомление из статусной строки или запустите приложение создавшее его (звонилку), звуковое напоминание не должно подаваться до следующего пропущенного уведомления
Скажите, что бы вы хотели прикрутить к текущему сценарию?
Источник
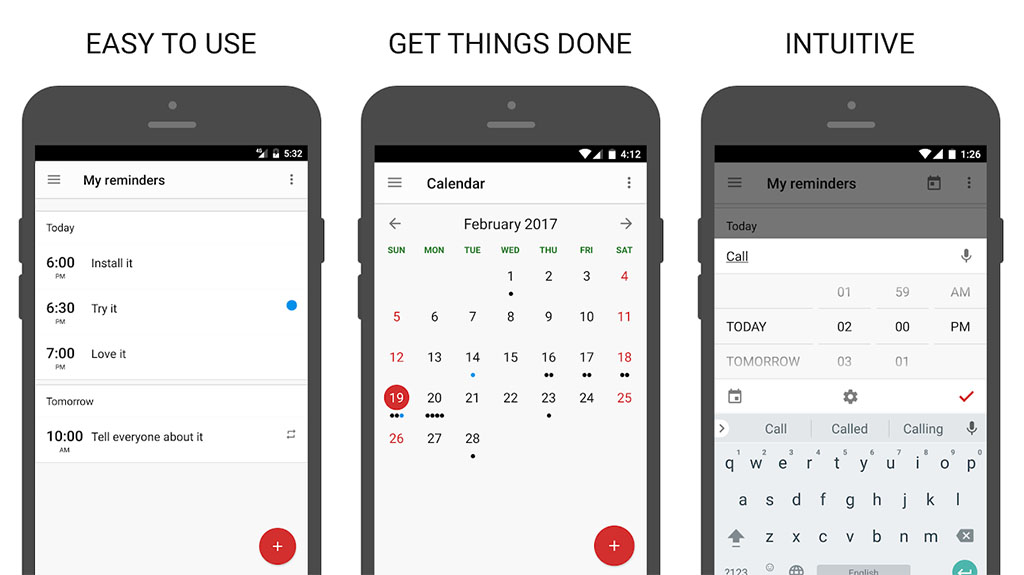
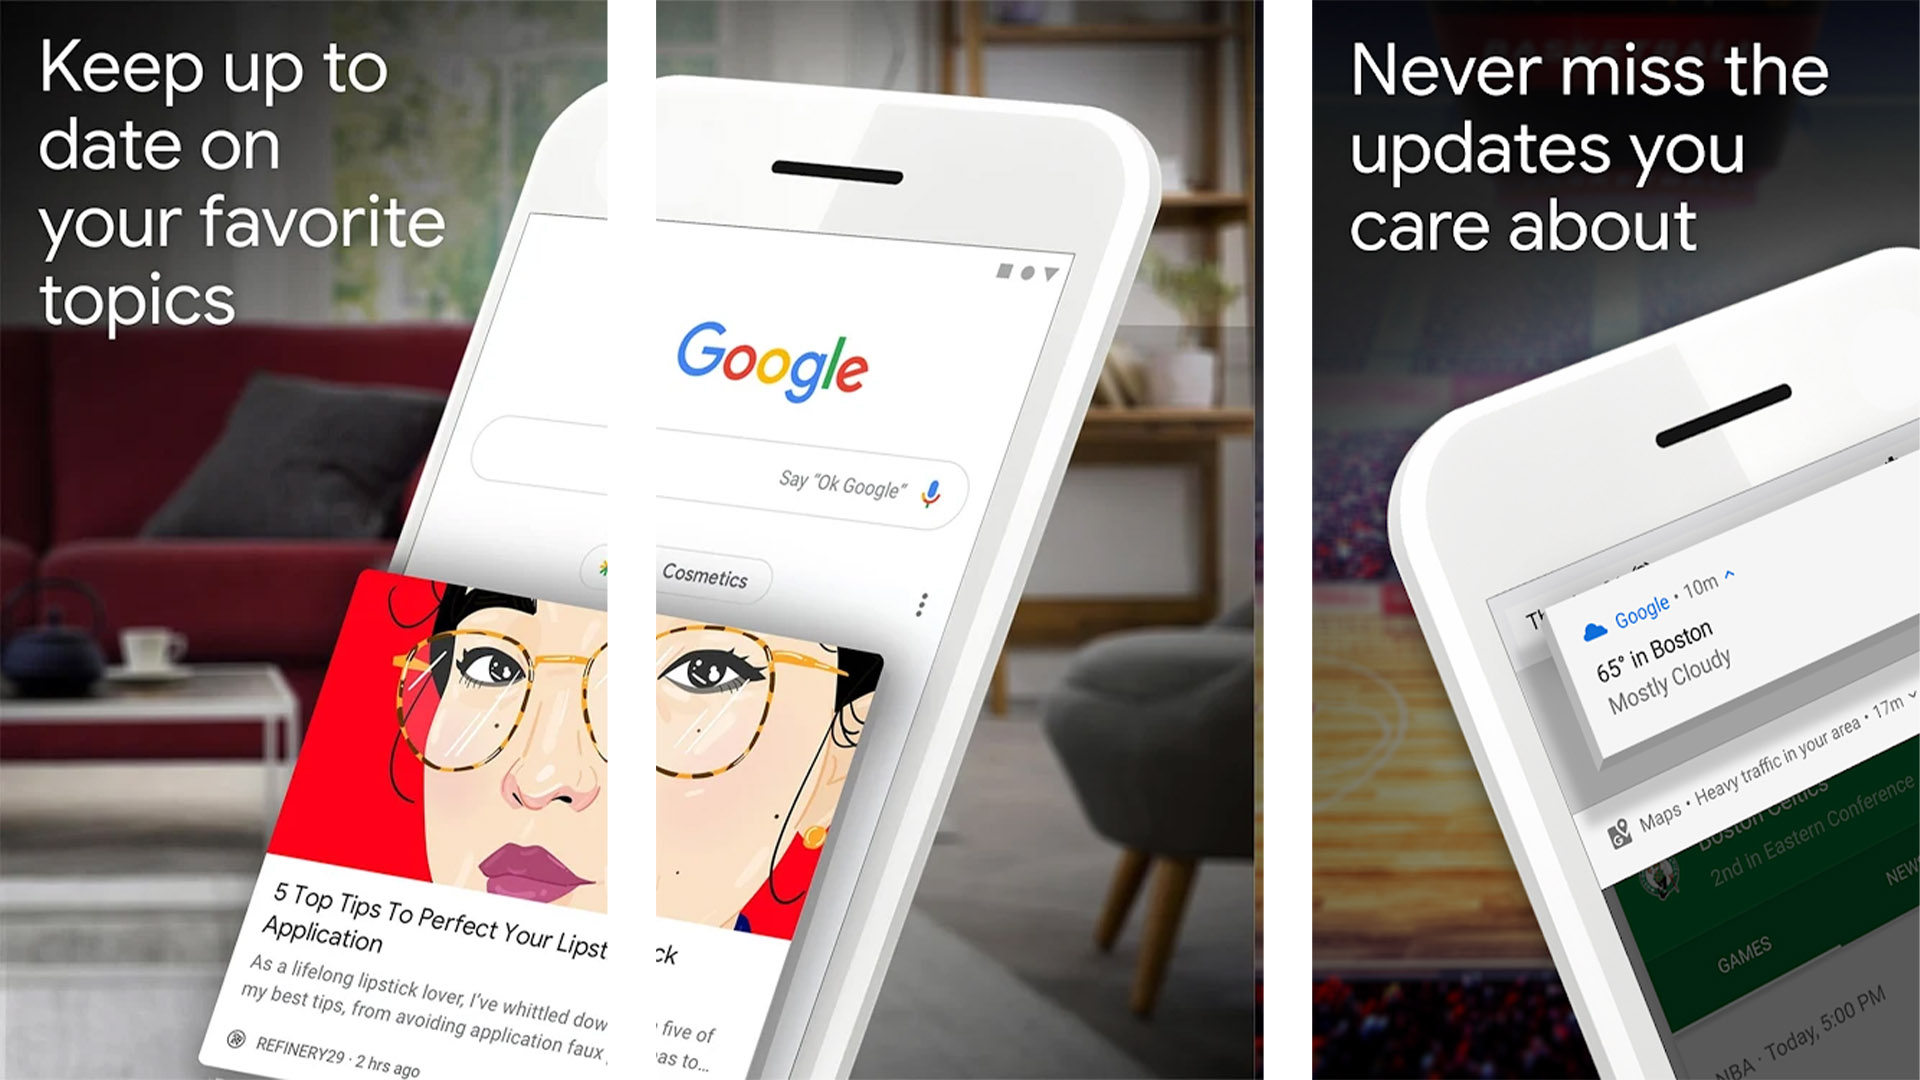
10 best reminder apps for Android
We all need a little reminder to do things sometimes. We live in a world filled with distraction and various shiny things that often lead us off course of whatever it is we’re trying to do. Thus, setting reminders can not only be productive but a savior in some situations. There are a variety of ways to use reminders on Android. You can set them up in your calendar app, a dedicated to-do list app, and some apps exist only to serve up reminders when you need them. Even some note-taking apps have reminder functionality built-in. It’s honestly pretty difficult to not find a good reminder app because they are literally everywhere. We’ll take a look at the best reminder apps for Android here!
The best reminder apps for Android
BZ Reminder
Price: Free / $3.99
BZ Reminder is a very simple to-do list app. You can set reminders, and then the app reminds you when it’s time. The app has a robust but short list of features. You can color-code tasks and reminders for easier organization. Additionally, it comes with Android Wear support, alerts, recurring tasks (for taking out the garbage every week), and even set hourly reminders for things like drinking water. It also has widgets, a simple calendar included, and more. The app isn’t as complex as the big names in this space. However, it’s one of the best simple reminder apps for personal use.
Calendar Notify
Price: Free / Up to $5.49
Calendar Notify is an above-average calendar app and a great reminder app. It syncs to Google Calendar, so you can use both if you need to. It delivers a quick view of your agenda and schedule in a spiffy widget format. In addition, you get some widgets along with a high degree of customization. Of course, you can add in reminders to your calendar tasks and get notifications for it as needed. The benefit of having a widget on the home screen with the info and also notifications helps a lot. It’s a bit simpler than the stock Google Calendar app, but you can use both interchangeably for more control.
Google Keep Notes
Price: Free
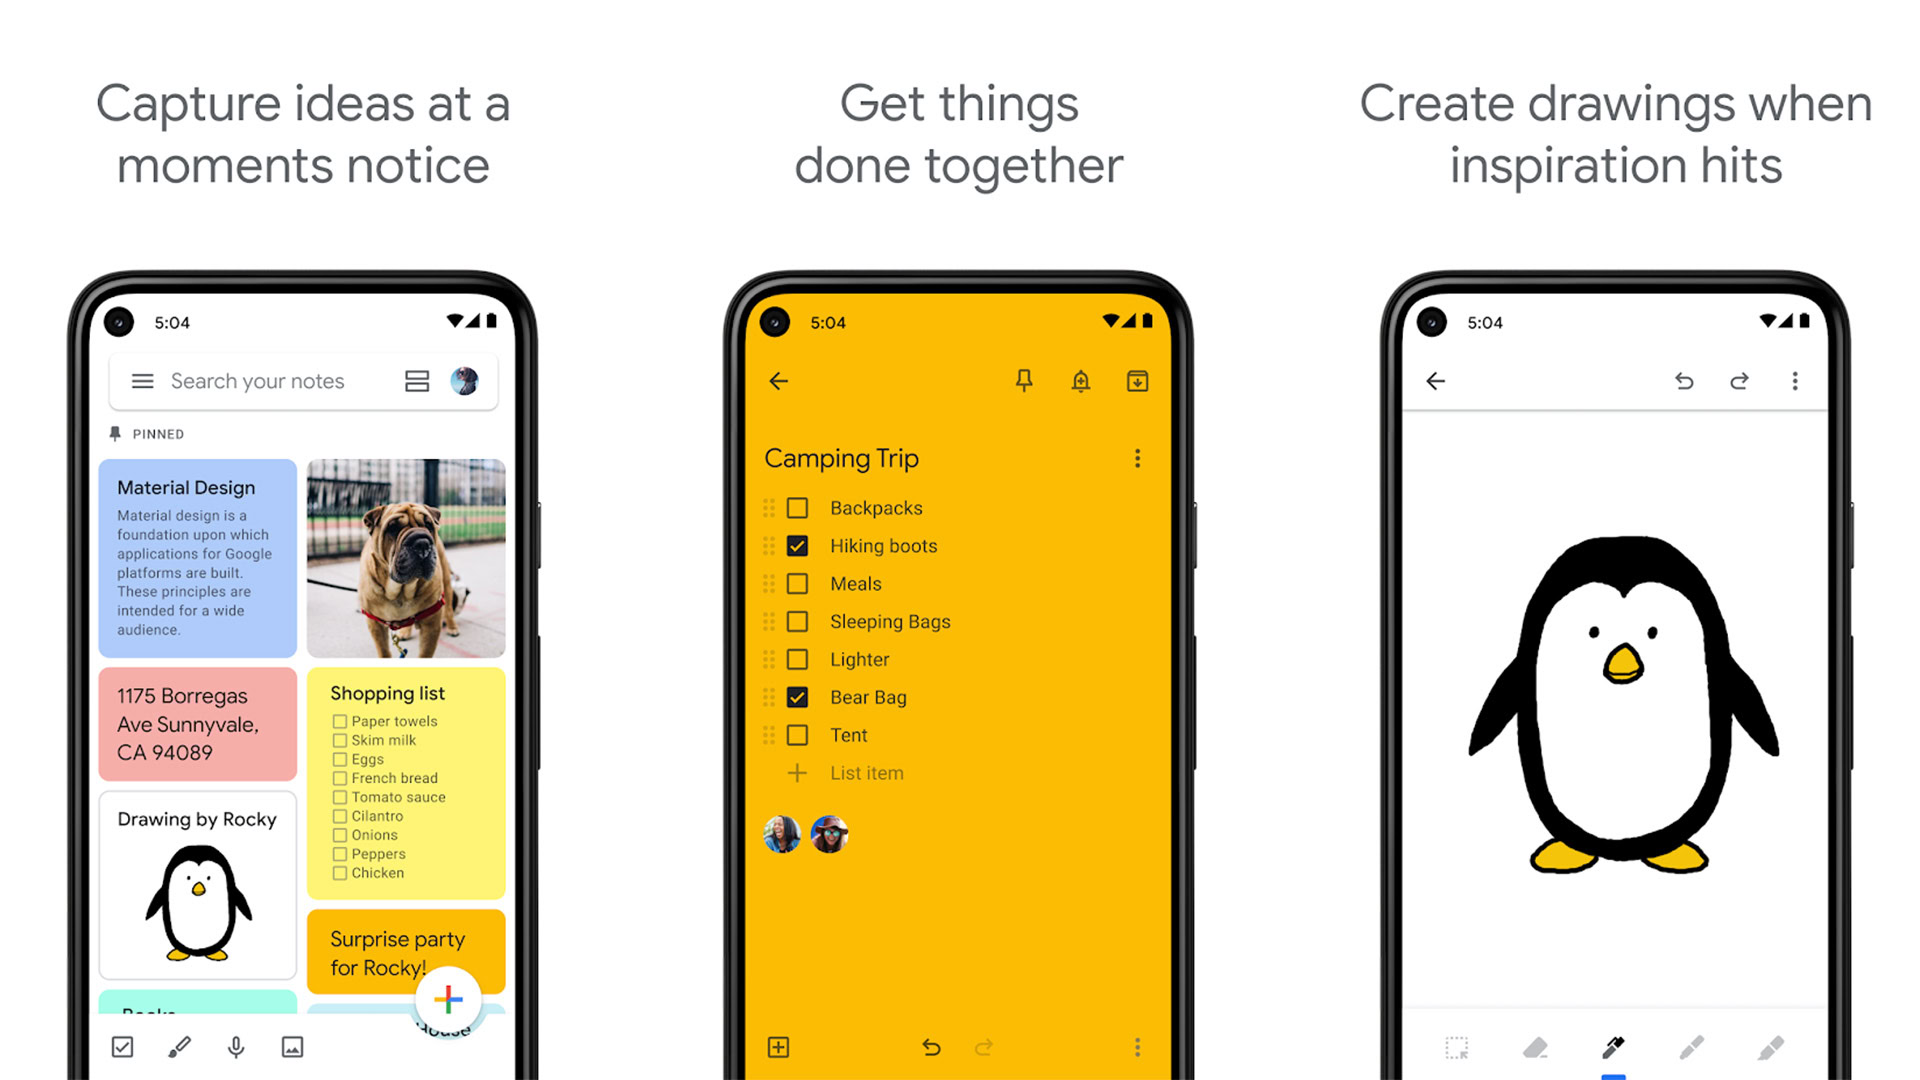
Google Keep Notes is probably the best note-taking app available right now. It’s also about two or three feature updates away from being a to-do list app. It features collaboration features that let you share notes with others. You can also take text, list, photo, audio, and video notes. The reminders feature is fairly simple but effective. You can set notes to pop up as notifications at certain times or places. For instance, you can make your shopping list note pop up when your GPS indicates that you’re at your local grocery store. It also saw a major redesign in late 2018 that makes it even more pleasant to look at.
Heynote
Price: Free
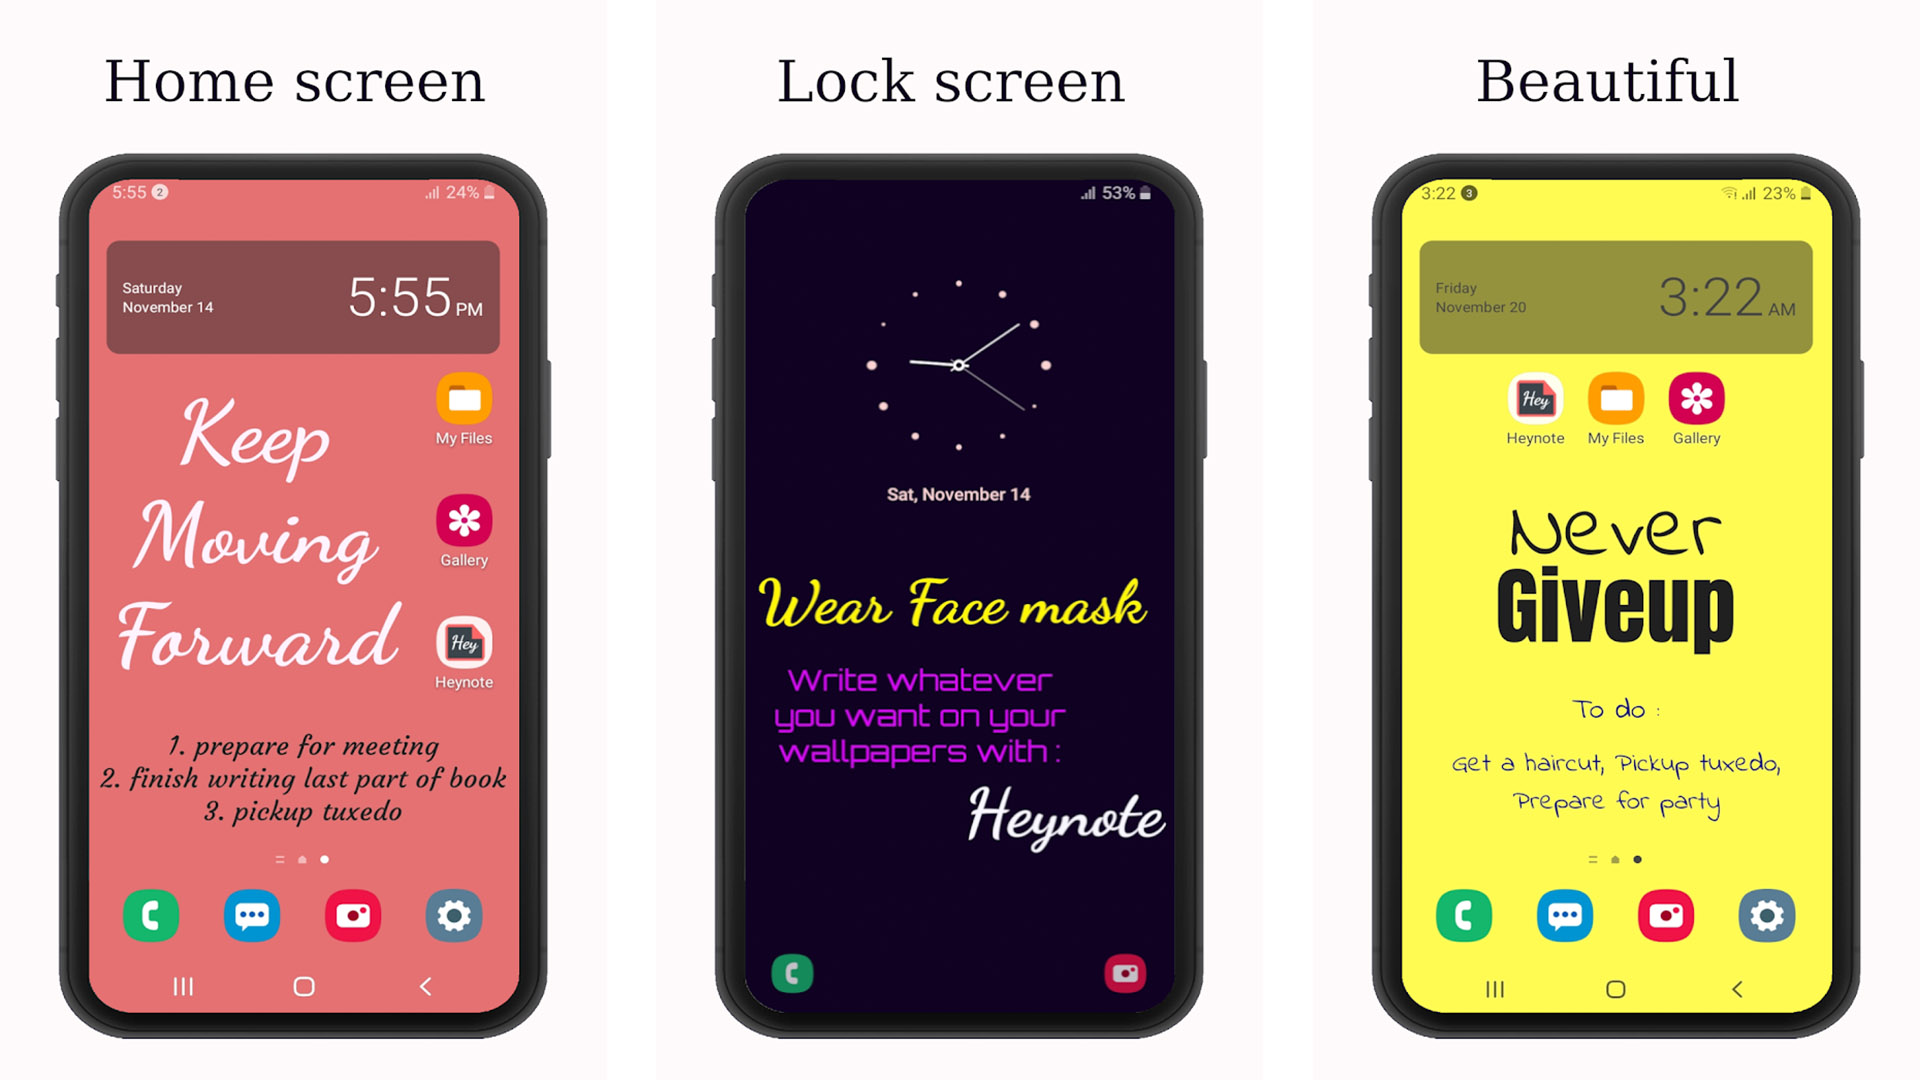
Heynote is kind of a wildcard in this space. It’s actually a live wallpaper app mixed with a note-taking app. You leave notes on your wallpaper and re-apply it to get your reminders right on your home screen at all times. It’s a neat way to accomplish the feat without extra push notifications or a widget. You can create notes over plain backgrounds or simply write them over your existing wallpaper. Just remember that this is a wallpaper app, so if you decide you don’t like it, you still have to switch your wallpaper back to what it was manually. It’s also entirely free as of this writing.
Price: Free / $1.99
Ike To Do List is another unique reminder app. It uses President Eisenhower’s Priority Matrix. You put in a bunch of tasks and assign them an importance value. The app then prioritizes the tasks. It also comes with reminders, due dates, images, audio, notes, widgets, customization, and more. It definitely covers all of the basics and does so in a fun way. The app is free. The pro version goes for $1.99 and unlocks all themes, widgets, and some additional features.
Life Reminders
Price: Free / $4.00
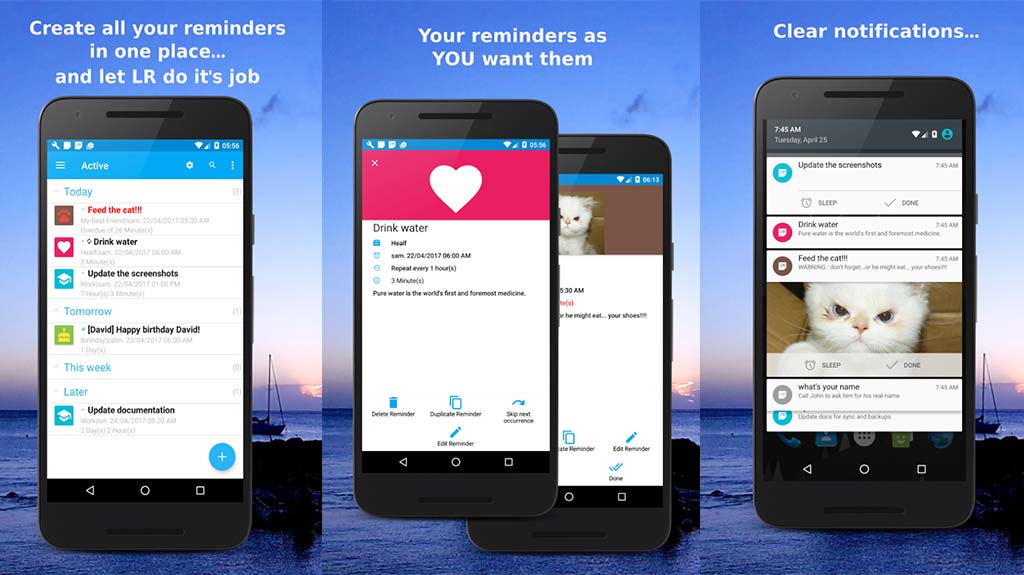
Life Reminders is one of the simple reminder apps. It lets you create tasks with a deadline. The app simply reminds you when it’s time to do it. It can even set up phone calls or send SMS/text messages on a schedule. Tasks are repeatable on a daily, weekly, or monthly schedule. Additionally, the app uses Material Design, supports seven languages, and more. Otherwise, the app is simple, and it works well. The free version has most of the features.
Microsoft To-Do
Price: Free
Microsoft To-Do is Microsoft’s to do list app. It works cross-platform with Windows devices. Some other features include collaboration features so you can share tasks with family, friends, and coworkers. You also get recurring tasks, reminders, and some more granular features like notes and subtasks. It’s a perfectly good reminder app, and it’s usable on your windows PC or laptop. That makes it a good candidate for people on a budget who still want all of the features and cross-platform support with their Windows PC.
TickTick
Price: Free / $27.99 per year
TickTick is an up-and-coming to-do list app. It has many features, including reminders, recurring tasks, widgets, various customization options, and even a calendar. TickTick rounds out the experience with Material Design, syncing between devices, collaboration with other TickTick users, and more. It works great for a variety of situations. However, it works best in a household or work environment where multiple people use the same app. The free version is more than good enough for personal use. The pro version runs for $27.99 per year, and it’s mostly for businesses.
Todoist
Price: Free / $29 per year
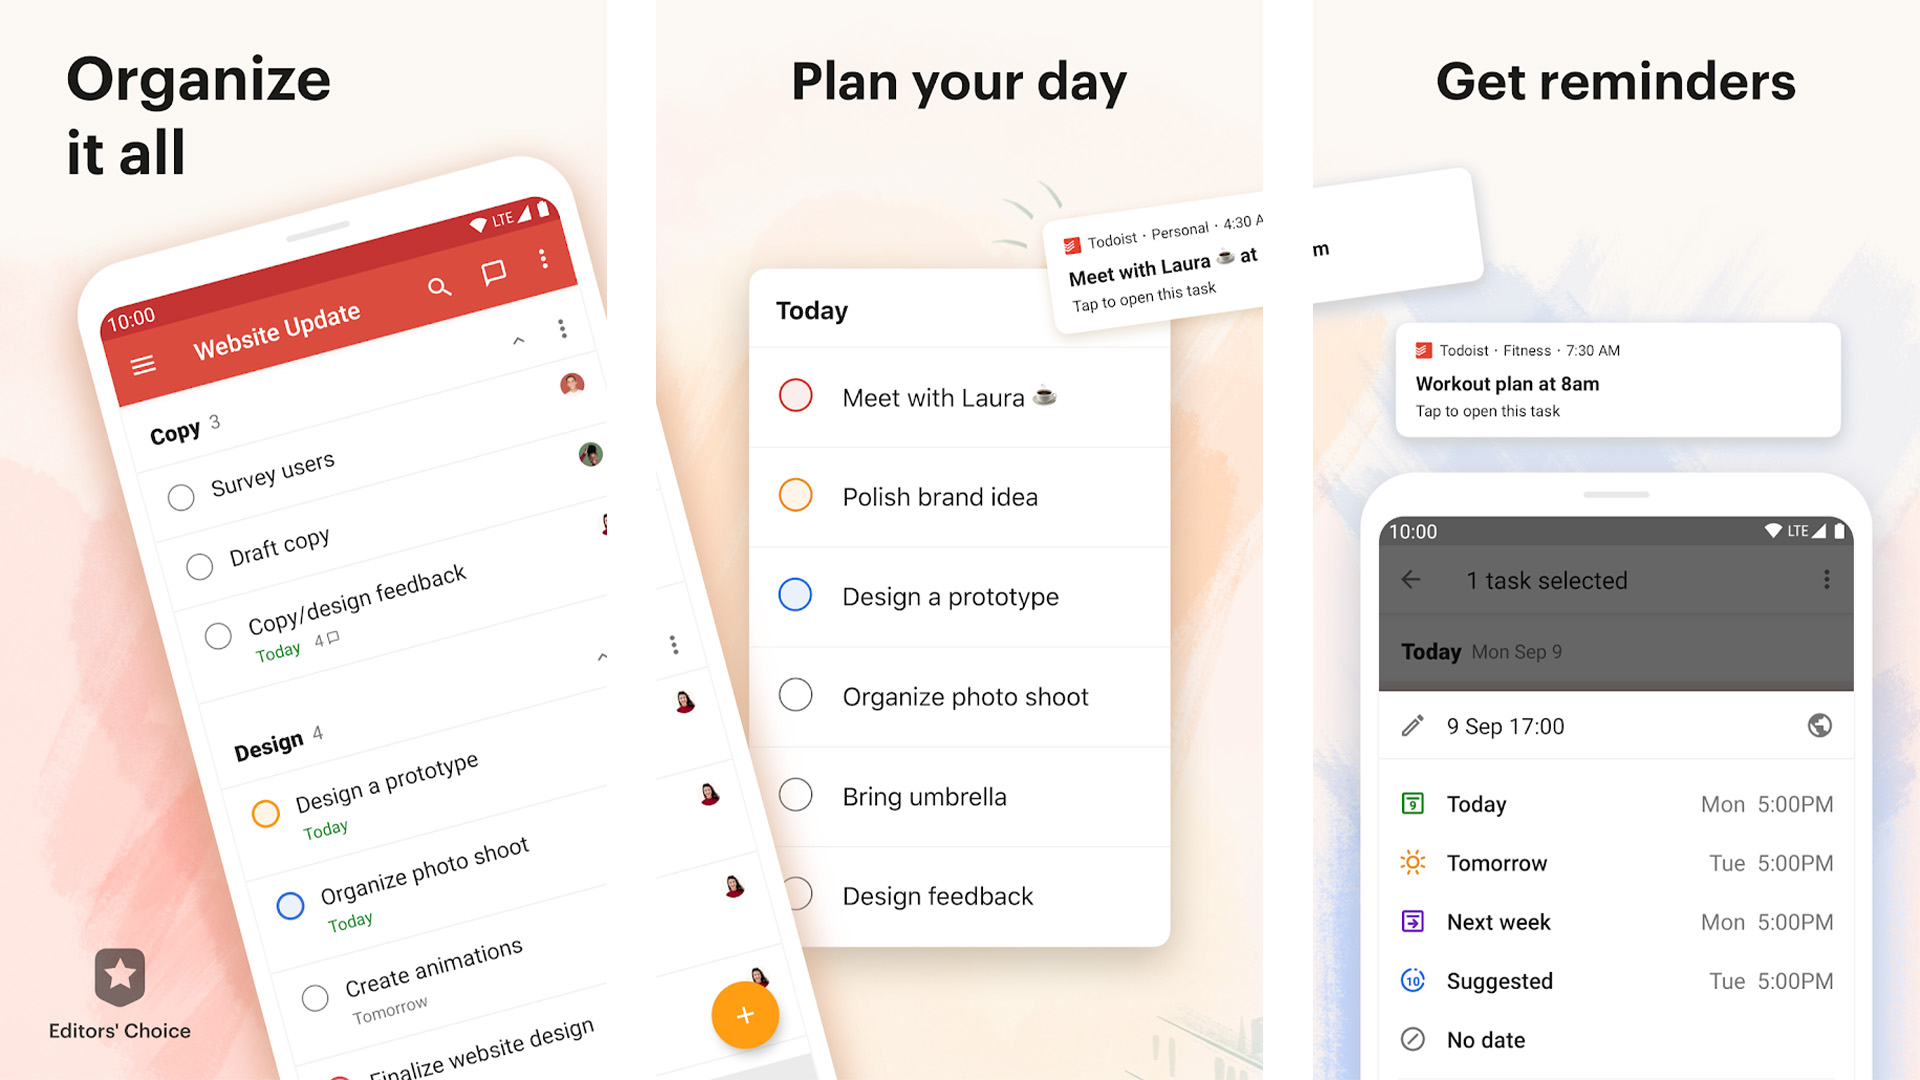
Todoist is among the best to-do list apps. It’s powerful, stylish, and it works really well. Along with the app, it comes with a Chrome extension and a native PC app. That way, you can stay synced up everywhere. It supports most of the basic features you’d need in a to do list app. The only downside is that the actual reminders part is a premium feature. You can still view your to-do lists in both the app and widget format. We would’ve liked at least a single reminder per task in the free version. We only recommend this one as a reminder app if you plan on going premium with it anyway. Those looking for free options should check out the other apps on this list.
Personal assistant apps
Price: Free (usually)
Personal assistant apps are all the rage right now. The popular ones include Google Assistant, Amazon Alexa, Microsoft’s Cortana, and Samsung’s Bixby. All of these personal assistant apps are also good reminder apps. You simply engage with them and ask them to remind you to do something at a certain time. They usually comply without any hassle. Assistant is probably the best one here and works on most Android devices. Alexa is right up there but only works on Amazon devices. Cortana works on most things, but it’s a little incomplete, while Bixby is the one we’d recommend for Samsung owners (assuming they don’t already use Google Assistant). Hit the button to see our list of the best personal assistant apps on Android!
If we missed any of the best reminder apps for Android, tell us about them in the comments! You can also click here to check out our latest Android app and game lists!
Thank you for reading! Check these out too:
Источник
Android Notifications Tutorial: Getting Started
In this Android Notifications tutorial, you will learn how to create an App that allows you to set reminders at different schedules.

Version
- Kotlin 1.3, Android 8.1, Android Studio 3

In this tutorial, you will be issuing Notifications to remind yourself to take care of those dearest to your heart: your pets.
Notifications are a handy way to add features and functionality to your application without your users directly interacting with them. For example, they can be used to add playback controls to a music app, provide quick actions to respond to sms or email and alert about breaking news stories among many others.
You will work with the Notification APIs to issue Notifications with the NotificationManager, schedule Alarms with the AlarmManager and enhance them by using groups, channels and actions.
Note: This tutorial assumes you have basic knowledge of Kotlin and Android. If you’re new to Android, check out our Android tutorials. If you know Android, but are unfamiliar with Kotlin, take a look at Kotlin For Android: An Introduction. I also assume you have knowledge of the compatibility libraries to backport functionality to an older version of the OS.
Getting Started
Start by downloading the project materials by using the Download Materials button found at the top or bottom of this tutorial. Unzip the contents to a folder and remember the location. Open Android Studio and, at the splash page, choose Open an existing Android Studio Project, navigate to the recently downloaded folder and select PetMedicineReminder-Starter.
Once the starter project finishes loading and building, run the application on a device or emulator.
Once the app is running, load the sample data by selecting the overflow icon in the top right and tapping Load Sample Data. When the data loads, you should see a listing of reminders to administer medications to a few pets.

Not super exciting but here is where you will display your first notification.
Displaying your First Notification
In order to display a notification, you will have to do some setup work. You will need to:
- Create a notification channel.
- Register the notification channel.
- Create a notification.
- Send a notification using NotificationManager.
Create a Notification Channel
Notification channels provide a common visual and auditory experience for notifications of a similar type. Since their introduction in API 26, you are now required to set a channel for a notification, otherwise they will not display on newer versions of Android.
Open the NotificationHelper.kt file under the notif directory and add the following code to the createNotificationChannel() method:
- Safety checked the OS version for API 26 and greater.
- Created a unique name for the notification channel. The name and description are displayed in the application’s Notification settings.
- Created the channel using the NotificationManager.
Nice work! Now you need to call this method.
Register the Notification Channel
Open the PetRx.kt application file under the root package and add the following code to the onCreate() method:
Now that the channel is created, you can send a notification to it when the sample data is loaded.
Create a Notification
Open the NotificationHelper.kt file and navigate to createSampleDataNotification() . Add the following code:
- Create the unique channelId for this app using the package name and app name.
- Use NotificationCompat.Builder to begin building the notification.
- Set a small icon to be display in the notification shade. This is the only required attribute.
- Set a title for the notification.
- Set content for the notification.
- Set the style of the notification style to NotificationCompat.BigTextStyle() .
- Set the notifications priority to the default priority. Priority indicates how much of the user’s attention the notification should draw. You will see other usages later but acceptable values include:
- PRIORITY_MIN
- PRIORTY_MAX
- PRIORITY_LOW
- PRIORTY_HIGH
- PRIORITY_DEFAULT
- Set the notification to auto cancel when tapped.
Pending Intents
So far you have created the notification channel and began building a notification but you want to direct the user somewhere when they tap on the notification. This requires adding a PendingIntent to the notification calling setContentIntent when building the notification. A PendingIntent is roughly described as an action to be taken at a later point in time.
Add the following lines to the createSampleDataNotification() method inside the apply lambda just after setAutoCancel(autoCancel) :
- Created an Intent to launch the MainActivity .
- Wrapped the Intent in a PendingIntent , created through the getActivity() method which returns a description of an Activity to be launched.
- Called setContentIntent() to attach it to the NotificationCompat.Builder .
Notifying the Manager
The last piece to issuing a notification is getting a reference to the NotificationManagerCompat system service and calling notify() .
Add the following code after the apply lambda:
- Used the app’s Context to get a reference to NotificationManagerCompat .
- Called notify() on the NotificationManager passing in an identifier and the notification.
Re-run the application, delete the data from the menu Delete Data and reload it from the menu Load sample data item. If everything was successful, you should now see a notification icon in the status bar! Pull down the notification shade and you will see the full notification issued from your application indicating your sample data has loaded. Great!

Taking it a step further with Alarms
Issuing a notification after an action is performed is cool, but you are building a reminder application to administer medicine to your pets based on a schedule. This requires you to issue the notifications at some point in the future. The AlarmManager system service allows you to do just that. Notice, each item in the list of reminders includes the days and time to administer the medicine. You will use this information to schedule the alarms in the next section.
Creating an Alarm to send a Notification
In order to create an alarm to trigger a notification, you will need to do the following:
- Create notification channels for each pet type.
- Determine the time and date to schedule the alarm.
- Create a PendingIntent to add to the alarm.
- Schedule it with the AlarmManager .
- Register a BroadcastReceiver to listen for the alarm.
- Create the notification and issue it.
1. Pet Type Notification Channel’s
Since you already have experience creating notification channels, just copy this code and paste it into the onCreate() method of the application class PetRx.kt .
Notice that, for each channel, you specify a different level of importance. When creating channels, you should carefully think about the user experience you are creating.
Channels & Importance
- Cats: NotificationManagerCompat.IMPORTANCE_LOW – Low notification importance: shows everywhere, but is not intrusive.
- Dogs: NotificationManagerCompat.IMPORTANCE_HIGH – Higher notification importance: shows everywhere, allowed to makes noise and peek.
- Other: NotificationManagerCompat.IMPORTANCE_NONE – A notification with no importance: shows nowhere, is blocked.
Because the application supports multiple pet types, and you want to stay organized, it’s important to add a channel for each different pet type. This will allow your users to configure specific behavior based on that pet’s type and control them individually from the device’s app settings.
Open the overflow menu and tap Manage Channels to see the registered channels for your application.

2. Alarm Time
The sample app contains a model named ReminderData . Each ReminderData object contains both a time and a list of days. When the user creates the reminder, this information is input and saved to a local database. You’ll make use of the ReminderData when working with the AlarmManager to create an alarm. More on this in a bit.
3. Creating the PendingIntent
Open the AlarmScheduler.kt file under the notif package and navigate to the createPendingIntent(): PendingIntent? method.
Add the following code:
- Create the Intent with a destination of AlarmReceiver::class.java (this class should already exist, but you’ll fill it in in the next section).
- Set the action for the Intent .
- Set the type – This has to be unique so you construct it using the day, the pet’s name, the medicine and the pet type. If this is not unique it will overwrite any other PendingIntent with this same type. If you are interested you can read more about how two Intent’s are considered equal.
- Add the reminder’s ID in the Intent ‘s bundle so you can use it in the AlarmReceiver .
- Create the PendingIntent using the getBroadcast() method. This is very important because you are creating the Intent with a BroadcastReceiver as a target.
4. Scheduling the Alarm
Now that the notification channels are set up and you have created a unique PendingIntent for each reminder, it’s time to actually schedule the alarms.
Open the AlarmScheduler.kt file and find the scheduleAlarm() method.
Add the following code:
You just did three important things:
- Set up a Calendar for the alarm’s time using the ReminderData.
- Checked whether that alarm should be scheduled today and scheduled it if so.
- Else, schedule the alarm to repeat every week at that time.
5. Create a BroadcastReceiver
There are just a few more things to consider when dealing with alarms, but how do they tie back into the notifications? Well, the instances of PendingIntent you registered through the AlarmManager were created using the PendingIntent.getBroadcast() method. This method allows you to send a broadcast to the system that notifies any listeners of the action you set for the Intent .
Open a file named AlarmReceiver in the notif package. Make sure it inherits from the BroadcastReceiver() base class and implement the onReceive() method.
With this code, you:
- Check that the Intent’s action matches the one from the Intent you created above.
- Looked up the ReminderData in the database using the extra from the Intent’s Bundle.
- Create the notification using the ReminderData.
Open AndroidManifest.xml and register the AlarmReceiver by adding this xml inside the application tag:
All right, you have finally made it to the last step! Now you will issue the notification for the pet’s medication.
6. Create the Notification and Issue It
Open the NotificationHelper class one more time, navigate to the createNotificationForPet() method and add the following code:
- Create a group notification.
- Create a notification for the pet.
- Add an action to the notification for the pet.
- Called notify using NotificationManager for both notifications.
1. Create a Group Notification
Group notifications, along with channels, help you stay organized as more notifications are introduced into your applications. They will help the notifications issued from your app group together in the notification shade. Since the sample app supports reminders for cats, dogs and other pets, you already have the groups you need to get started.
Modify the buildGroupNotification(context: Context, reminderData: ReminderData) method like below:
- Using the same channelId , create the group notification.
- Set this notification as the group summary (useful on versions of Android prior to API 24).
- Set the group to the pet type name (i.e. Cat, Dog, or Other).
2. Create a Notification
Next, you need to create the notification using the same channelId . This time, you will also add a large icon to the notification to make it distinguishable from the other pet types.
Navigate to the buildNotificationForPet(context: Context, reminderData: ReminderData) method and modify it like below:
- Build the Notification using the same channelId as the group notification.
- Using the ReminderData get a drawable reference for the large icon.
- Apply the large icon to the notification.
- Set the notification’s group.
3. Add an Action to the Notification

Actions help provide quick access to features that aren’t necessarily scoped to the in-app experience. Say, for example, you receive a notification from your email client and you either want to respond to it or archive the email. Actions can provide this behavior.
Navigate to createPendingIntentForAction() in NotificationHelper and add the following code:
- Create an Intent to launch the AppGlobalReceiver
- Wrap the Intent in a PendingIntent
Note: The AppGlobalReceiver has been created and registered in the AndroidManifest.xml for you.
Finally, build and re-run the application to see this all in action. When the app is running delete and reload the sample data and the alarms will schedule in the background. When the notifications display, you should see them group together and have an action to update the medicine as administered.

Note: The progression of notifications grouping, depicted over time.
Wow! Look at you go. Now you have a fully functional application for reminding you to administer medication to your pets.
Where to Go From Here?
If you had trouble completing the tutorial, the final project is available in the original download under the PetMedicineReminder-Finished folder. Download it using the Download Materials button found at the top or bottom of this tutorial. For some additional features in the application, please poke around the source code.
In this tutorial, you have learned how to create notifications, notification channels, notification groups, and customize their display and behavior. You have learned how to add actions to notifications and work with the AlarmManager to schedule notifications to display in the future. You have also taken a brief look into the BroadcastReceiver .
If you have any questions or comments, please feel free to join the discussion below or reach out for more details. Good luck and happy coding!
Источник


