- Реализация «Onboarding Experience» в вашем приложении
- How to Create an Onboarding Screen in Android?
- What is Onboarding Screen?
- What we are going to build in this article?
- Step by Step Implementation
- Walkthrough – Onboarding screen in an android studio – City Guide – 3
- What is the Walkthrough/Onboarding Screen?
- Join Us
- Categories
- Store Data in Firebase database in an Android Studio # 15
- Firebase phone authentication in android studio 2020 – Part 14
- Complete Form Validation in the android studio – Part 12
- Onboarding with Android ViewPager: The Google Way
- The ‘Onboarding Experience’
- When to use it?
- Getting Started
- Tabbed Activity Template
- Layout:
- Controlling color with ViewPager
- Updating the Indicators
- Calling it in
- Trigger first time launch
- Final Output
Реализация «Onboarding Experience» в вашем приложении
Привет всем постояльцам хабра!
В этой статье хотел бы рассказать о внедрении «Onboarding Experience» в приложение, над которым вы работаете или собираетесь работать.
«Onboarding Experience» — это небольшая презентация внутри приложения, которая показывает о возможностях вашего приложения в виде такого себе слайд-шоу. Такую практику демонстрации функционала приложения применяют многие компании, такие как, например Google.
Пример «Onboarding Experience» в приложении Google Drive:
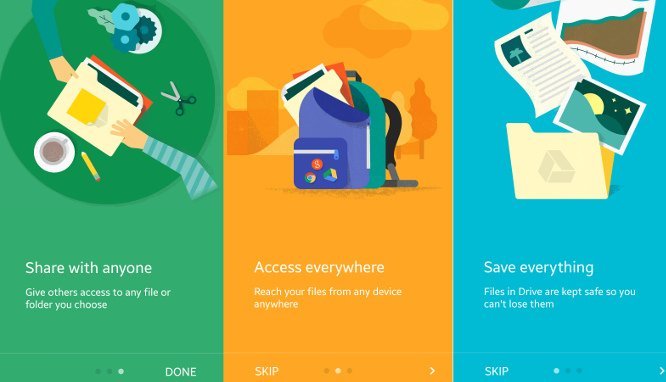
Также, «Onboarding Experience» называется «App Intro» или «Product Tour». Вы можете называть это как хотите, ведь суть его не меняется.
Итак, моя история о внедрении данной фичи началась после того, как один из заказчиков мобильного приложения попросил реализовать такую вещь, ведь ему очень понравилось, как это выглядит в других приложениях.Скажу сразу, в его приложении я еще не внедрил App Intro, но уже разобрался как это сделать быстро и безболезненно.
Я начал искать библиотеку на GitHub, подразумевая, что кто-то точно такое реализовывал и сделал нечто подобное и мне нужно в несколько кликов поменять графику, добавить несколько слайдов и просто немного подшаманить под свои требования.
Потратив не так много времени, как я и ожидал — я нашел, то что мне нужно здесь.
Почитав, немного «about» я нашел самый оптимальный вариант реализации этой библиотеки. Вы можете углубиться и настроить все под свои нужды. Например, вы можете использовать данную библиотеку с Fragments или просто с Activity, изменить вид анимации, установить вибрацию при свайпе и многое другое. Я же расскажу и покажу самый минимальный вариант реализации.
Итак, реализацию выделю в семь пунктов, для удобной и понятной читабельности, а также главные аспекты выделю жирным шрифтом:
1) Добавляем в build.grade (низшего уровня) своего проекта зависимости:
dependencies <
compile ‘com.github.paolorotolo:appintro:3.3.0’
>
2) Создаем фрагмент SampleSlide.java:
3) Создаем класс CustomIntro.java:
4) В папке layout создаем сколько нужно лейаутов для Intro (если три, то intro_1.xml, intro_2.xml, intro_3.xml)
Где и что менять для разных layout думаю разберетесь сами, я дал пример одного из intro.xml
5) В MainActivity.java пишем следующий код в методе OnCreate для отображения Intro один раз при первом запуске. Делаем это при помощи «thread»:
5) В Manifest декларируем наше Activity:
6) В styles.xml не забываем сделать свою кастомную тему для отображения Intro в полный экран без Toolbar:
7) И самое последнее действие, в папку drawable кладем те изображения, которые будут использоваться на экранах.
Здесь можно поэкспериментировать, например, с векторной графикой или сделать ее более изящной, как делает Google. Я положил обычные .png файлы с разрешением 256×256.
Источник
How to Create an Onboarding Screen in Android?
Hello geeks, today we are going to learn that how we can add Onboarding Screen to our android application in the android studio so that we can provide a better user experience to the user of the application.
What is Onboarding Screen?
The onboarding screen can be understood as a virtual unboxing of an application. Users go through a series of screens which finally directs users to the application interface. Goals or purposes of Onboarding screen:
Attention reader! Don’t stop learning now. Get hold of all the important Java Foundation and Collections concepts with the Fundamentals of Java and Java Collections Course at a student-friendly price and become industry ready. To complete your preparation from learning a language to DS Algo and many more, please refer Complete Interview Preparation Course.
- Welcomes user and excite them about application ahead.
- Tell the features or functions of the application.
- Allow users to register or log in.
- Collect information about the interests of the user(for example – when we open the Spotify application for the first time it asks the user to select singers which he/she likes).
What we are going to build in this article?
Here is the sample video of the onboarding screen which we are going to create in this article. Note that we are going to implement this project using the Java language.
Step by Step Implementation
Step 1: Create a new project
If you don’t know how to create a new project in Android Studio then you can refer to How to Create/Start a New Project in Android Studio?
Step 2: Navigate to Build scripts -> build.gradle(module) file and add the following dependency in it
After adding this dependency click on sync now to save all the changes.
Источник
Walkthrough – Onboarding screen in an android studio – City Guide – 3

In this tutorial, we will learn how to create a walkthrough screen/onboarding screen in android studio. This screen is also called as one time screen of an android app. One time screen because it only displays only for one-time, after that it won’t show until the application is reinstalled.
What is the Walkthrough/Onboarding Screen?
Walkthrough and onBoarding screens are screens for first-time users of the android app.
Now the question arises who are first-time users of our application?
First-time users are those users who download and install our application and use it for the first time.
To learn in detail just follow our Youtube tutorial..
Android Related Videos
Related Articles that you might want to check out.
Our Projects Make Us Proud
Join Us
Videos are always a better source for in-depth knowledge so, join us at YouTube and get notified on each new upload.В

Categories
For a better understanding of the topics and to save time, you can choose the specific fields mention below.


Store Data in Firebase database in an Android Studio # 15
In this tutorial, we are going to store the user’s data we get in signup activities inside the firebase realtime database. In the previous activity, we performed phone number verification using firebase and now we will store data once the phone number has been.

Firebase phone authentication in android studio 2020 – Part 14
In this tutorial, we will create firebase OTP authentication in android studio. We will pass data from previous activities which are signup OR forget password. In our previous tutorial we set up firebase in the android studio so, if you are new here then please watch.

Complete Form Validation in the android studio – Part 12
In this tutorial, we will create or perform form validation in android studio at multiple fields. We will validate username, email, password, phone number, date of birth(age) and also gender validation. We will use Material design fields we already created in login.
Источник
Onboarding with Android ViewPager: The Google Way
by Suleiman · Published December 16, 2015 · Updated May 24, 2017
In this tutorial, learn to create an onboarding experience for your apps with Android ViewPager. Similar to the product tour app intro in Google Drive app.
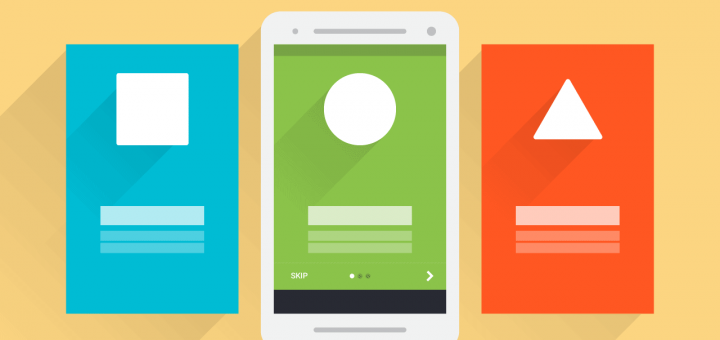
When you launch an app for the first time, you see the onboarding experience. It displays slides, highlighting features about the app with vibrant imagery. Let’s make one for our app, the way Google does for theirs.
The ‘Onboarding Experience’
Its also known as App Intro or Product Tour. Call it what you want, but its what every user sees when opening a new app. Also, every other app includes it. Google too.
This type of Onboarding is known as Top User Benefits model, as noted in the Material Design spec.
Display a brief autoplay carousel (or animatic) highlighting up to three benefits of using the app. – material.google.com
When to use it?
According to specs, use it when your app uses new features or major changes.
DO NOT use it to highlight common features your users expect your app to have. In short, avoid anything that is trivial. Because its is called ‘Top User Benefits’ for a reason 😉
We will replicate the Product Tour seen on the Google Drive Android App.
Upon first look, it may appear the background transitions color when the slide changes. But look closer and you’ll will notice the drag changes color.
In this tutorial we will:
- create an onboarding experience for our app with ViewPager
- control color transition while swiping
- display these slides when launching app for the first time
Getting Started
Add the support libraries to your build.gradle file:
Here’s what I’m using:
- Android Studio 1.5.1
- Build Tools v23.0.2
- Support Libraries v23.1.1
- Gradle 1.5.0
Let’s use the updated App templates provided by Android Studio, to jumpstart this tutorial. Right click your package > New > Activity > Tabbed Activity. Then, set the Navigation Style to Swipe Views (ViewPager). 
READ ALSO:
Tabbed Activity Template
I must say, this template did half the setup work for us. Brilliant!
First, lets see what we have:
- Our Activity (I called it PagerActivity)
- SectionsPagerAdapter ( ViewPager Adapter. Handles the slides)
- PlaceholderFragment (responsible for each slide’s layout)
So with all this in place, let’s tweak it to our needs. Open your Activity layout.xml and do the following:
- Remove the Toolbar
- Add the button bar (which controls the ViewPager)
The button bar is what you noticed below the onboarding screen.
Layout:
Button Bar
- Skip Button
- Circle pager indicator (we’re rolling our own here)
- Next/ Finish Button
I wrapped all of this within a FrameLayout and added it to my Activity layout XML.
Fragment
Here’s the layout breakdown for the ViewPager Fragment .

With the layout in place, lets get the onboarding to work with the ViewPager .
Controlling color with ViewPager
The pager adapter is already tied to the ViewPager, so thats one less to worry about.
As we swipe through, the color updates itself. In other words, the distance offset by the swipe determines the amount of color to change.
We will have 3 simple slides, with a set color for each.
We can detect changes to the ViewPager using the OnPageChangeListener ; the meat of this tutorial.
We’ve created a ArgbEvaluator object to update the color. The transition happens from the previous slide’s color, to the next slide’s color.
The updateIndicators() method as you guessed, updates the pager indicators by toggling two drawables.
NOTE:
colorList[position == 2 ? position : position + 1] indicates that if the position is at the last slide, don’t increment. Array size basics (goes from zero to (n-1). Otherwise this gives us an ArrayIndexOutOfBoundsException.
The page variable helps track the ViewPager’s current page position. Remember to increment this in your Next button’s click listener! onPageSelected() method is where we handle setting the background color for each slide.
Finally check if we’re on the last slide and make the finish button visible.
Updating the Indicators
I toggle between two simple drawables for the pager indicators.
indicator_selected.xml
indicator_unselected.xml
Calling it in
The onboarding screen is best called when the app is launched for the first time. This helps in making the user aware of what this app has to offer. However, from the second launch onwards, the app loads the home screen. We can achieve the same via a simple boolean SharedPreference .
Alternatively, if your app introduces major changes in an update, highlighting them with onboarding screens is a good approach.
Here are 2 handy utility methods for reading and saving a SharedPreference:
Trigger first time launch
Check the SharedPreference before you set your Activity ‘s layout. Then launch the onboarding if needed.
Finally, to make the app know the onboarding is complete, we update this preference to false. Do this in your Finish button’s click listener (The one we make visible on the last slide!).
APP INTRO LIBRARY:
If you want a more simpler solution, or don’t want deal with all this yourself, here’s a library alternative by Paolo Rotolo.
KOTLIN ALTERNATIVE:
For all the Kotlin lovers out there, here’s a library by Edgar Fernandes based on this post.
Taking it Further
If you’re not satisfied with such a ‘simplistic’ implementation. Or if you want to take it to the next level. Say with added animations and PageTransformers, there’s a brilliant post on Medium by Michell Bak that will help.
Final Output
Phew! That was quite some work. But hey, the new Activity templates in Android Studio took care of half the work, didn’t it? We just modified the layout to our liking and made the ViewPager do a nice color transition.
Here’s the result:
SOURCE CODE:
GitHub.
That’s a wrap for this post. We created a nice onboarding experience for our app’s first time users. Used the ViewPager’s scroll listeners to create a nice color transition on swipe. We even used a little SharedPreferences to display this screen for the first launch.
My ‘images’ don’t quite match with the ones you see on the Drive app. But I’m sure you can come up with something better! Drop ’em in the comments below.

Product Designer who occasionally writes code.
Источник


