# Legacy macOS: Online method
This method allows us to download legacy versions of macOS including 10.7 to current, however these are only recovery installers so require an internet connection inside the installer itself
To start, you’ll want to use macrecovery.py instead. This tool is actually already bundled in OpenCorePkg:
Instructions for running are quite simple, choose from one of the below commands depending on which OS you want to download:
- macOS 12, Monterey Note: As this OS is quite new, there’s still some issues with certain systems to resolve. For more information, see here: macOS 12: Monterey
- For first time users, we recommend macOS Catalina (10.15) or Big Sur (11)
- CAUTION: With macOS 11.3 and newer, XhciPortLimit is broken resulting in boot loops
(opens new window) . We advise users either install an older OS(ie. macOS 10.15, Catalina) or find a 11.2.3 or older Big Sur installer
- For education purposes, we have a copy provided here: macOS 11.2.3 InstallAssistant(macOS)
(opens new window) and disabled XhciPortLimit , you can boot macOS 11.3+ without issue
From here, run one of those commands in terminal and once finished you’ll get an output similar to this:
Once this is done, format your USB as FAT32 with GUID Partition Scheme:
Источник
# Making the installer in Windows
While you don’t need a fresh install of macOS to use OpenCore, some users prefer having a fresh slate with their boot manager upgrades.
To start you’ll need the following:
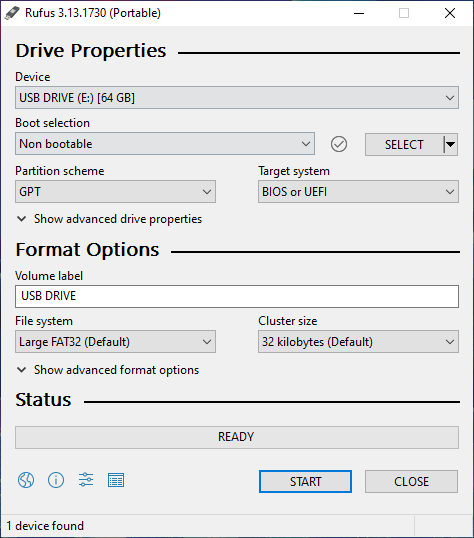
For USB larger than 16 GB to format in FAT32 use Rufus method
# Downloading macOS
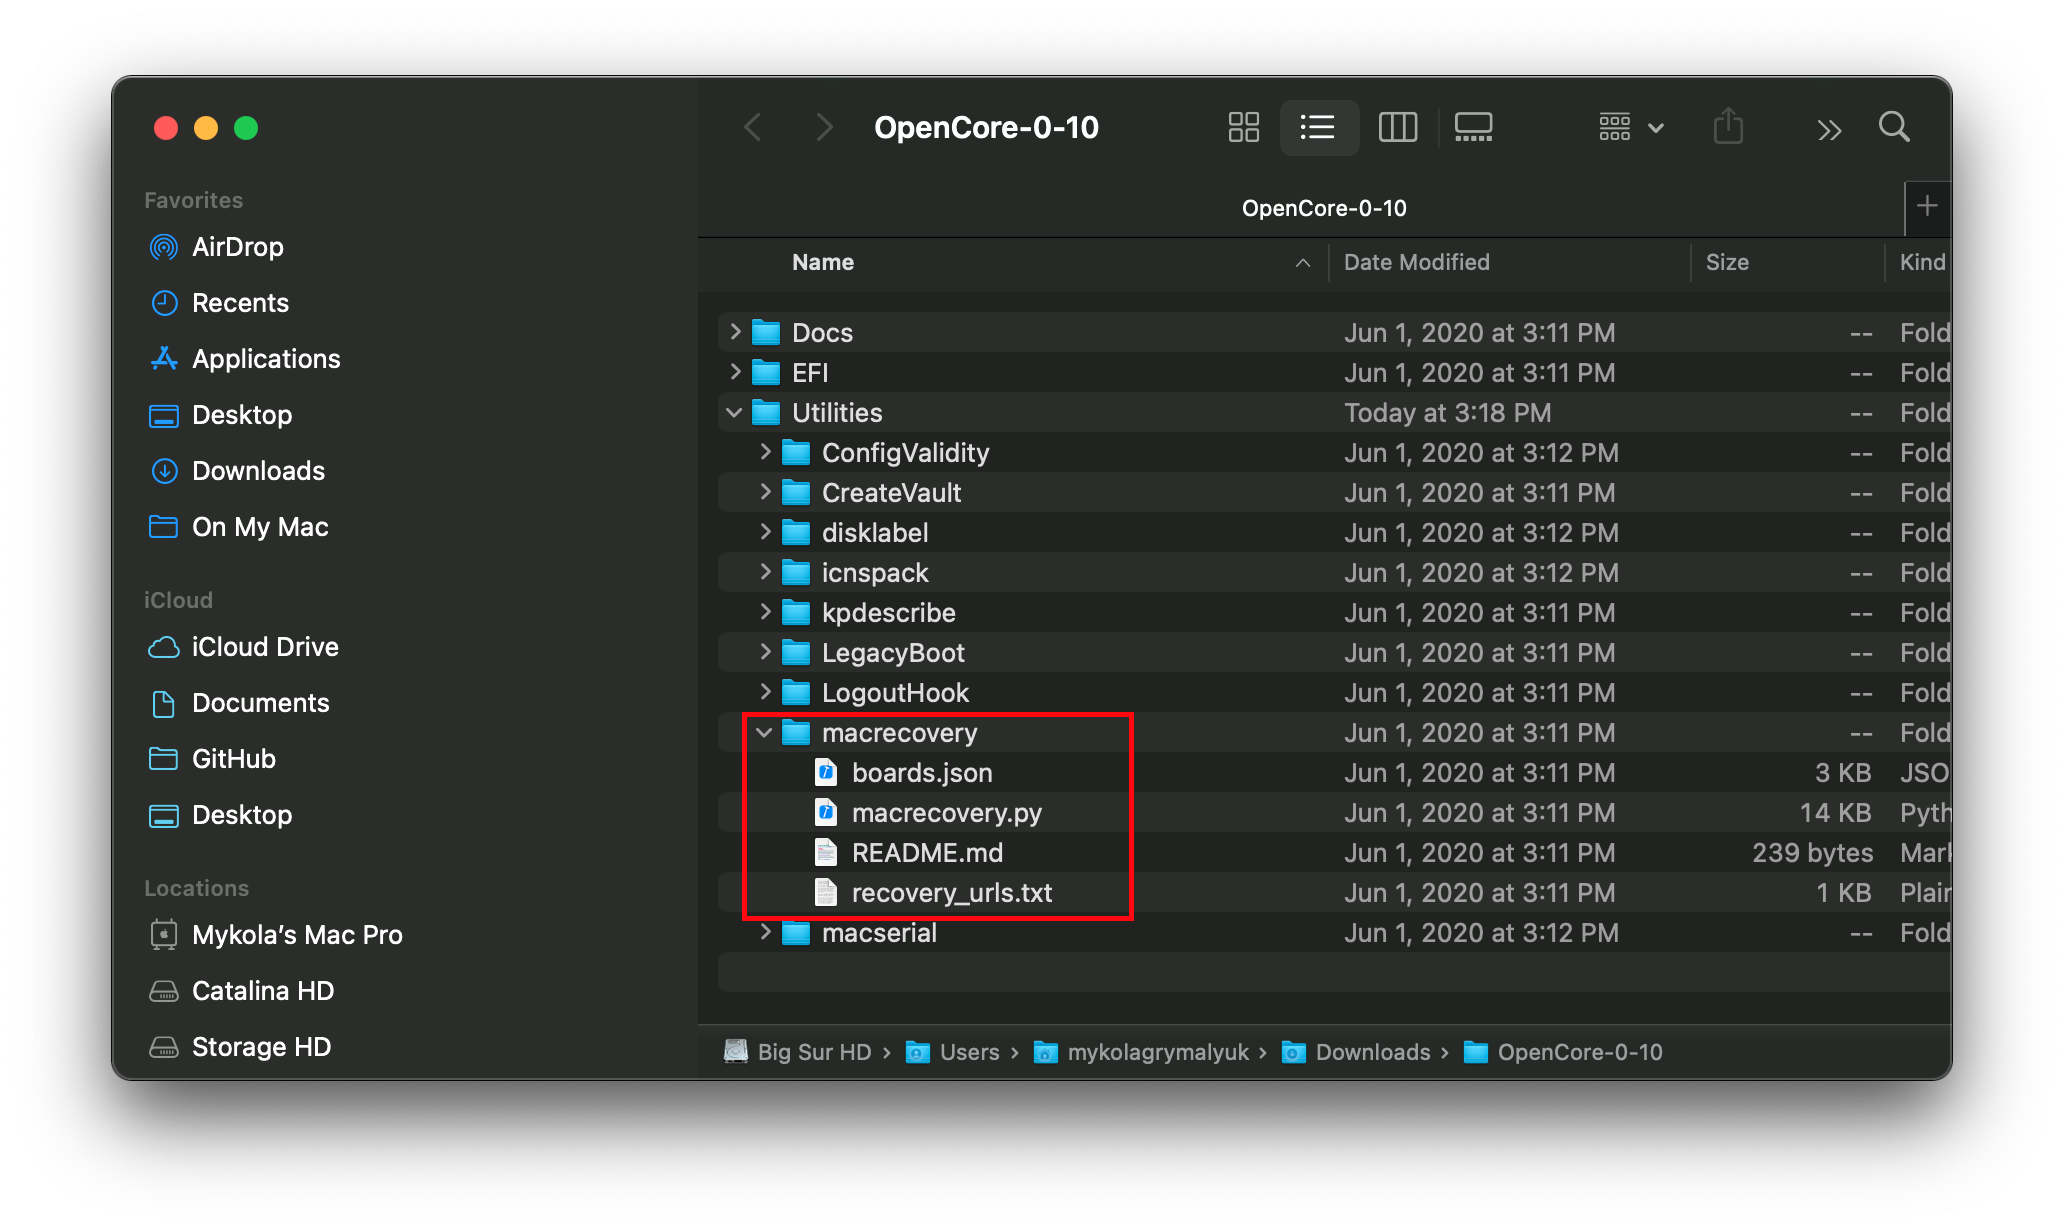
To grab legacy installers is super easy, first grab a copy of OpenCorePkg
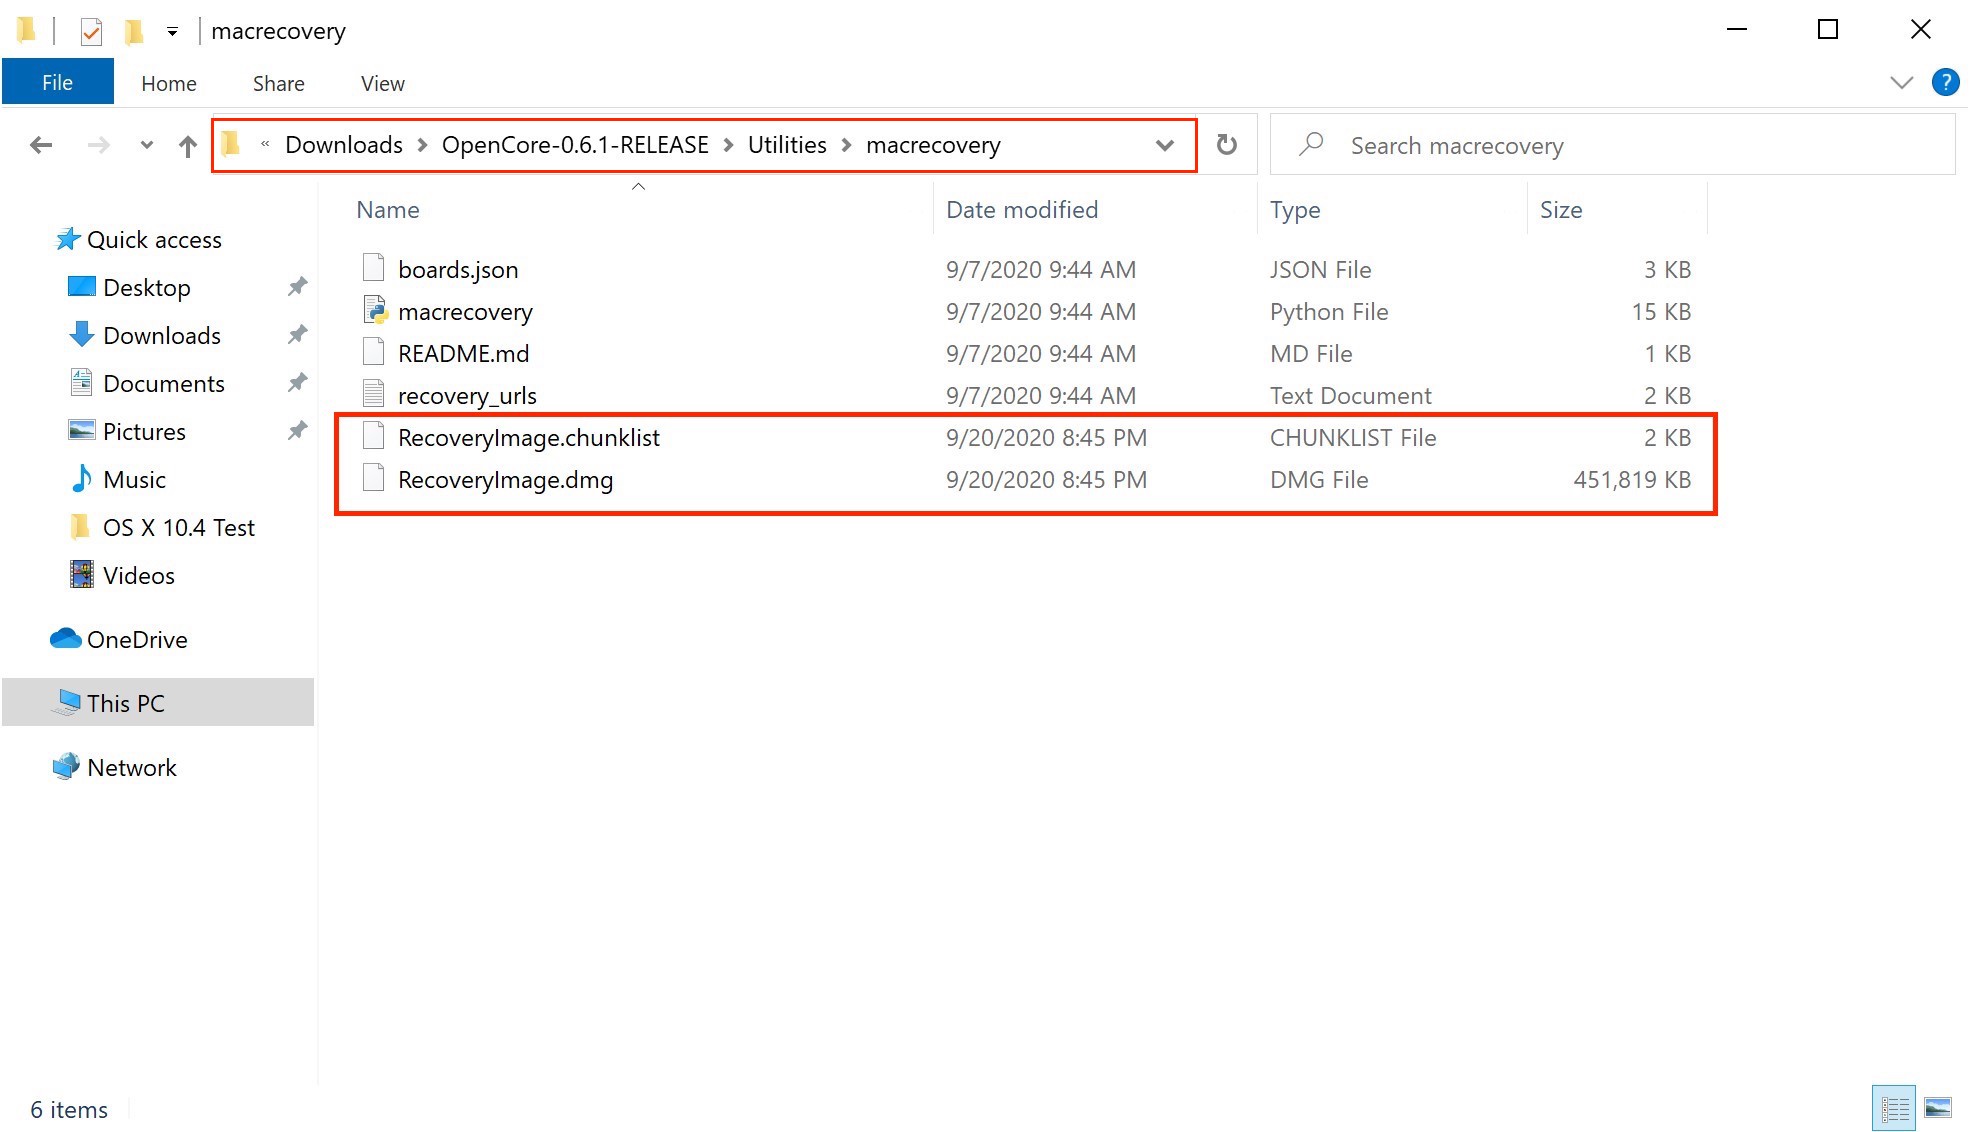
(opens new window) and head to /Utilities/macrecovery/ . Next copy the folder path for the macrecovery folder:

From here, you’ll want to open up a Command Prompt and cd into the macrecovery folder that we copied earlier:

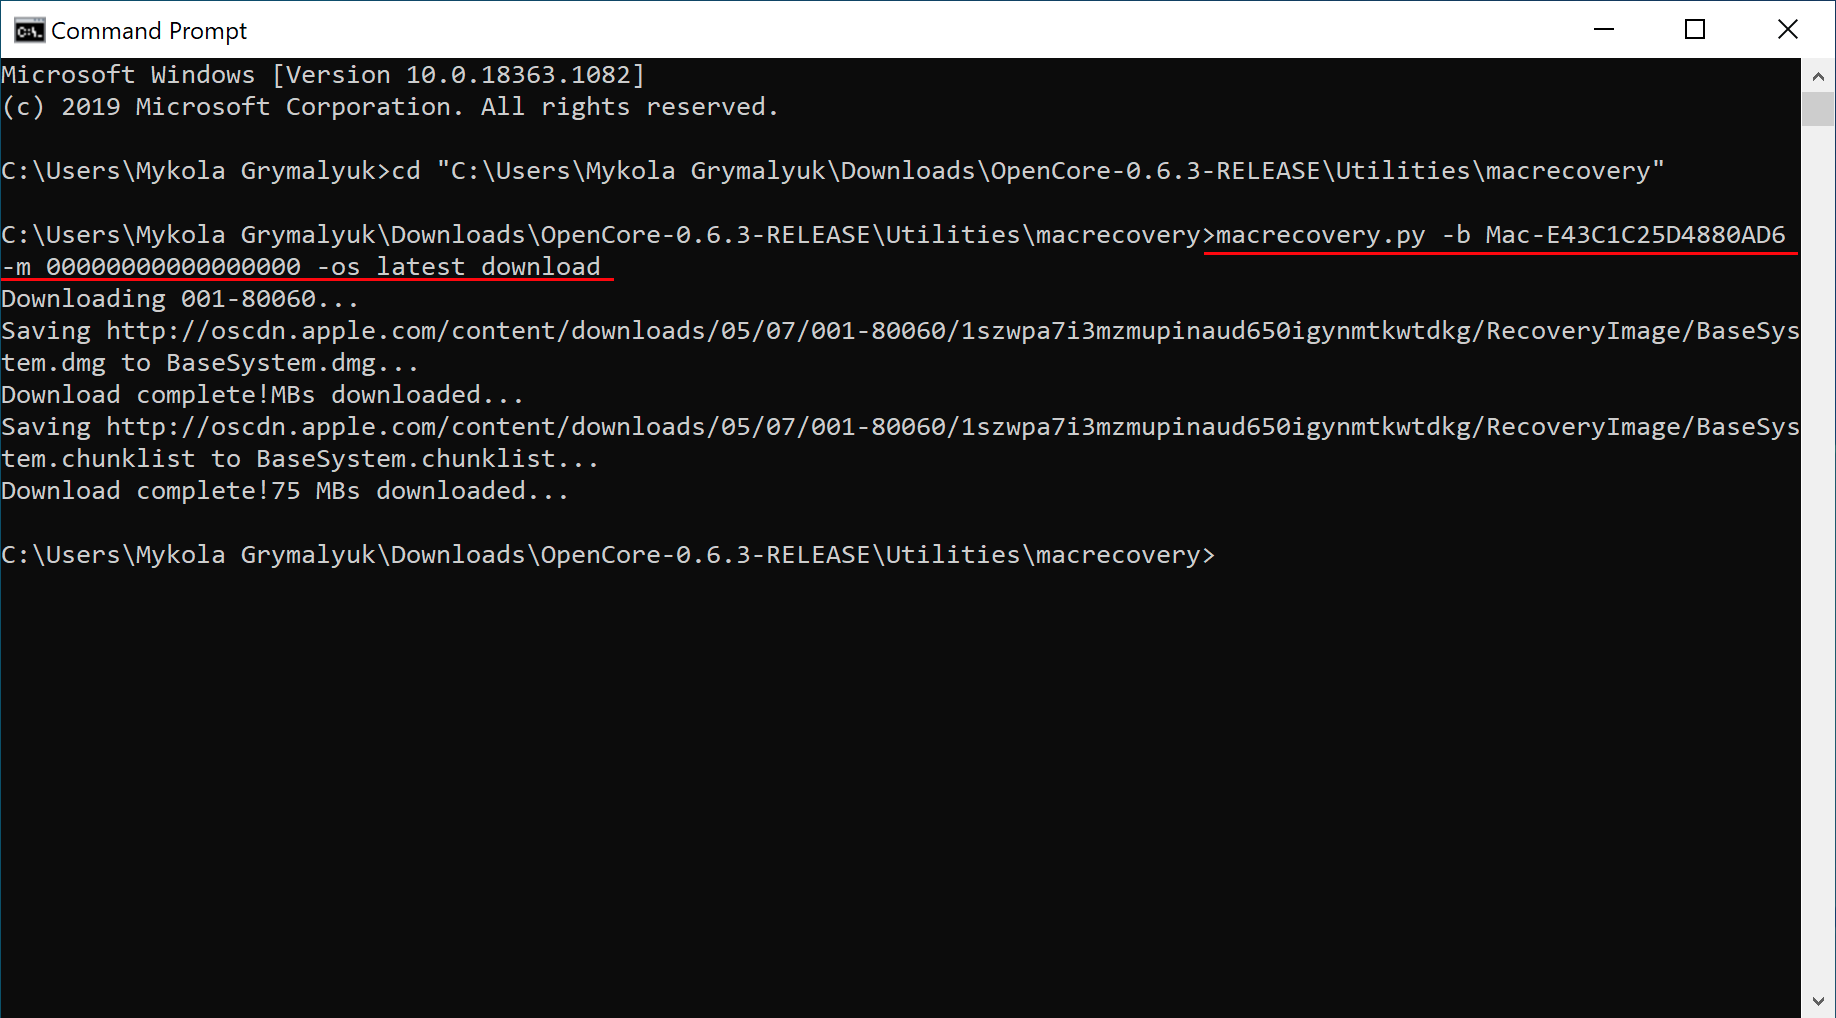
Now run one of the following depending on what version of macOS you want(Note these scripts rely on Python
(opens new window) support, please install if you haven’t already):
- macOS 12, Monterey Note: As this OS is quite new, there’s still some issues with certain systems to resolve. For more information, see here: macOS 12: Monterey
- For first time users, we recommend macOS Catalina (10.15) or Big Sur (11)
- CAUTION: With macOS 11.3 and newer, XhciPortLimit is broken resulting in boot loops
(opens new window) . We advise users either install an older OS(ie. macOS 10.15, Catalina) or find a 11.2.3 or older Big Sur installer
- For education purposes, we have a copy provided here: macOS 11.2.1 20D75 Recovery Image
(opens new window) and disabled XhciPortLimit , you can boot macOS 11.3+ without issue
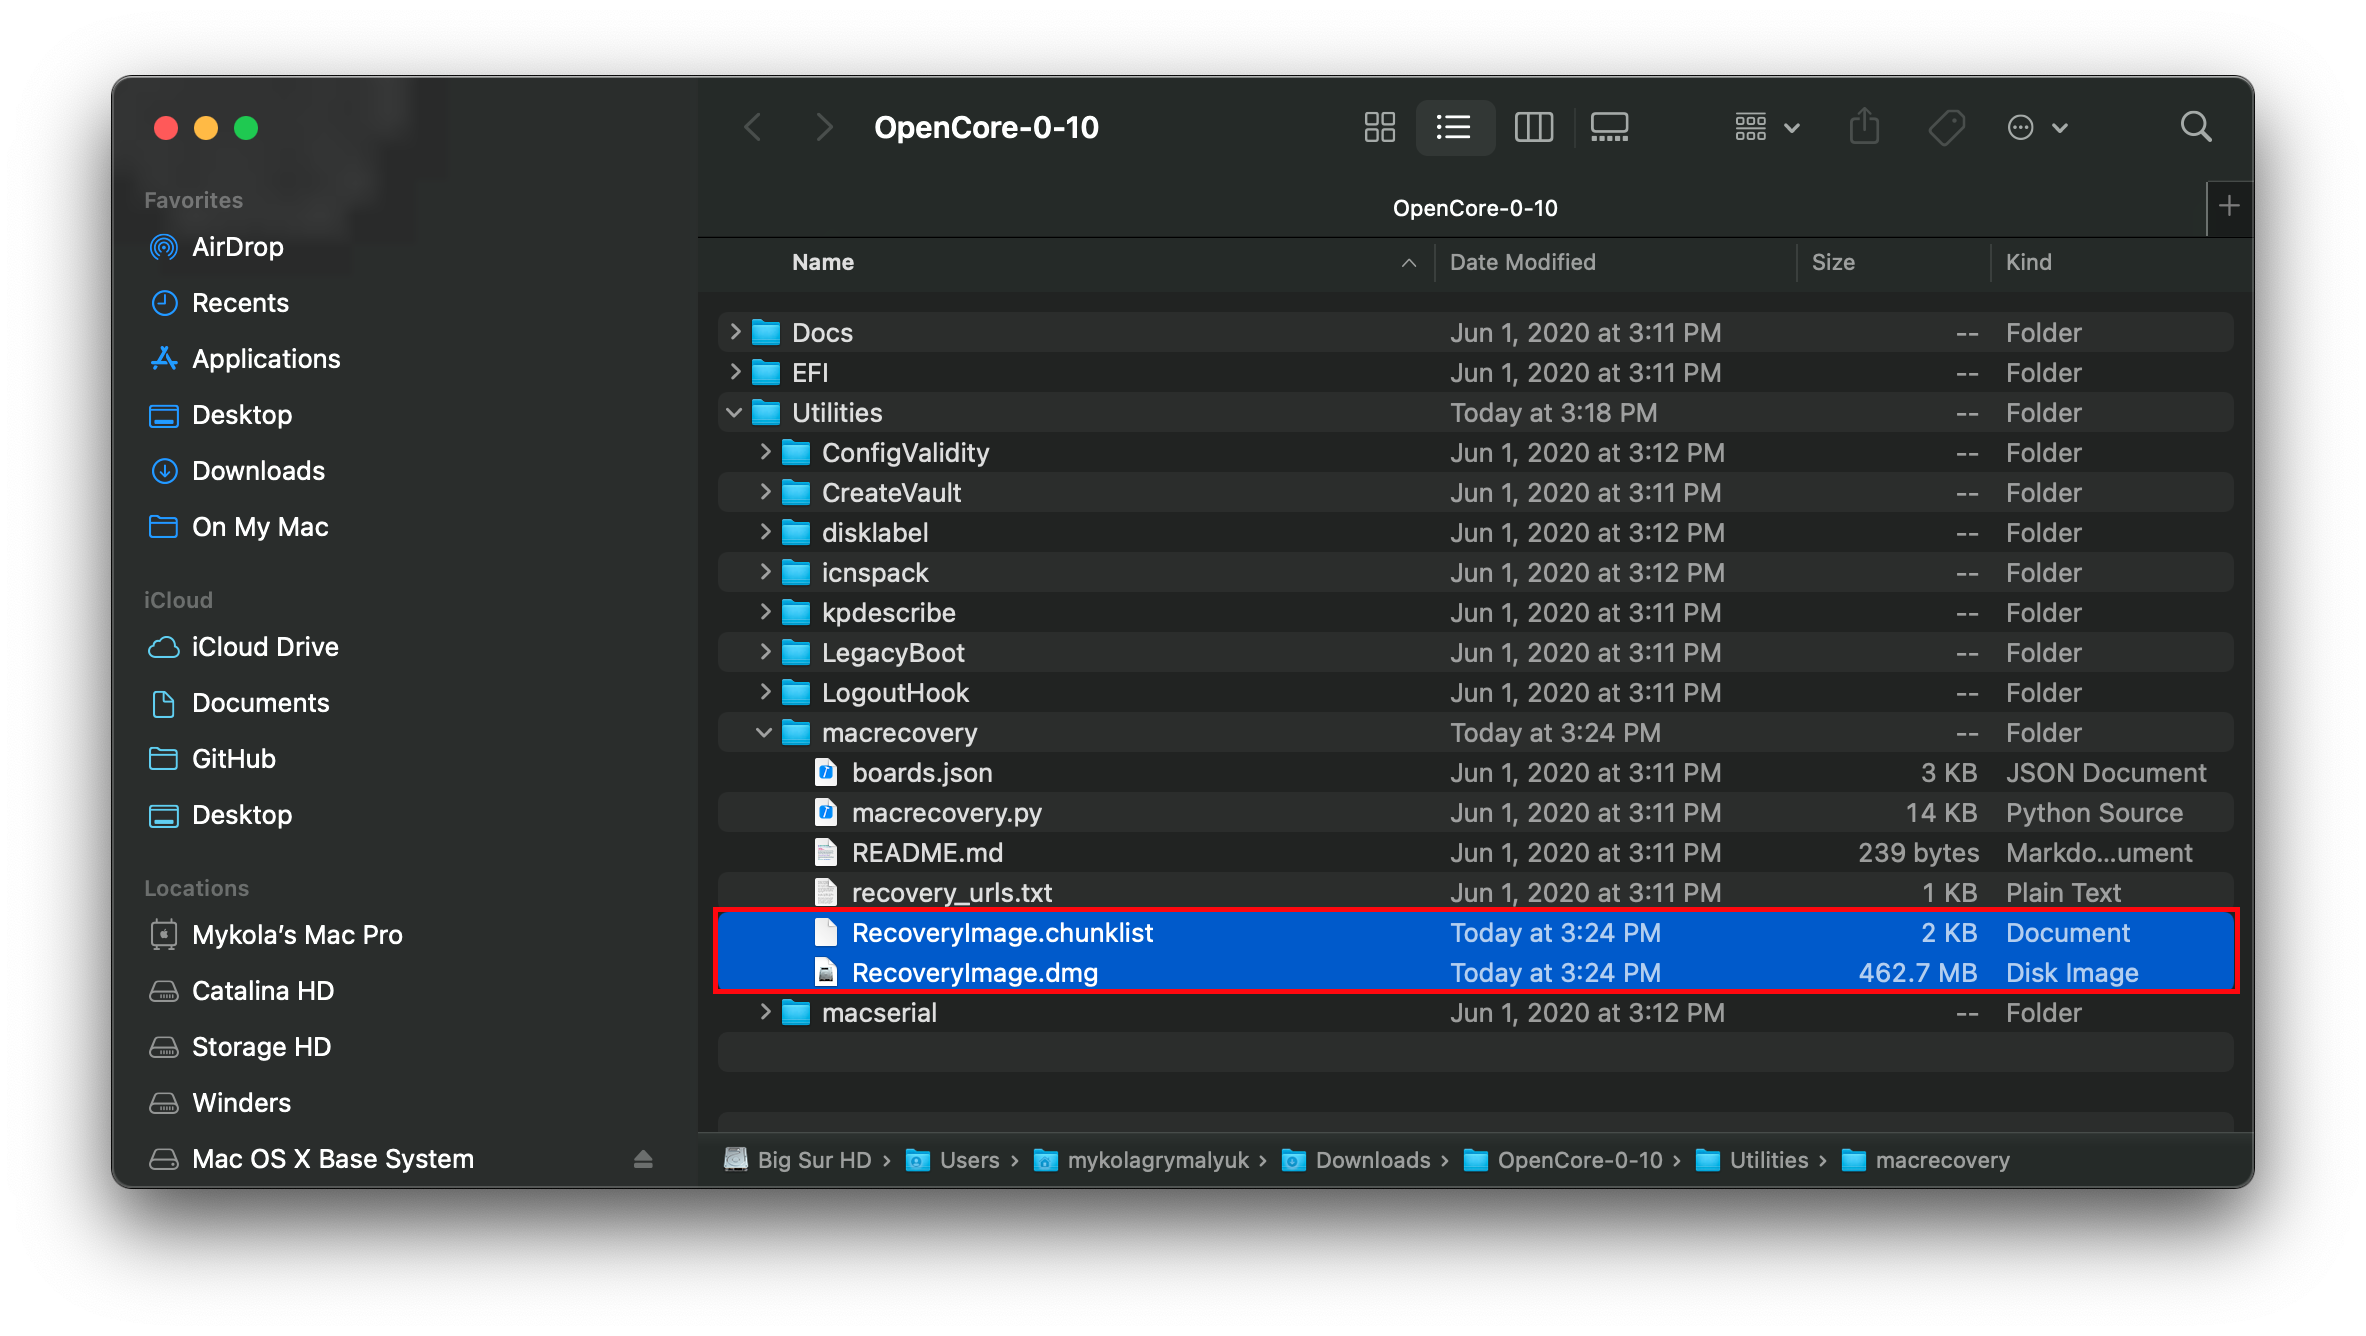
This will take some time, however once you’re finished you should get either BaseSystem or RecoveryImage files:
| BaseSystem | RecoveryImage |
|---|---|
 |  |
Now with our installer downloaded, we’ll next want to format out USB.
# Making the installer
Here we’ll be formatting our USB and adding macOS onto it, we have 2 options:
- Disk Management method
- GUI Based, simplest way
- Only UEFI systems are supported(ex. 2012+)
- Rufus method
- GUI Based, simplest way
- For larger USB drives(16GB+)
- diskpart method
- Command line based, little more work
- Required for legacy systems(ie. non-UEFI, pre-2012)
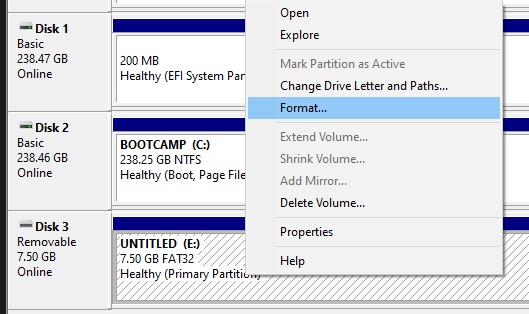
# Disk Management method
Simply open up Disk Management, and format your USB as FAT32:
- Right click the Start Button on your task bar and select Disk Management.
- You should see all of your partitions and disks. On the bottom half, you’ll see your devices. Find your USB.
- You’ll want to format the USB to have a FAT32 partition.
- If you have multiple partitions on the USB, right click each partition and click Delete Volume for your USB (This will remove data, make sure you have backups and only remove partitions from your USB)
- Right click the unallocated space and create a new simple volume. Make sure it is FAT32 and at least a gigabyte or two big. Name it «EFI».
- Otherwise, right click the partition on the USB and click Format and set it to FAT32.
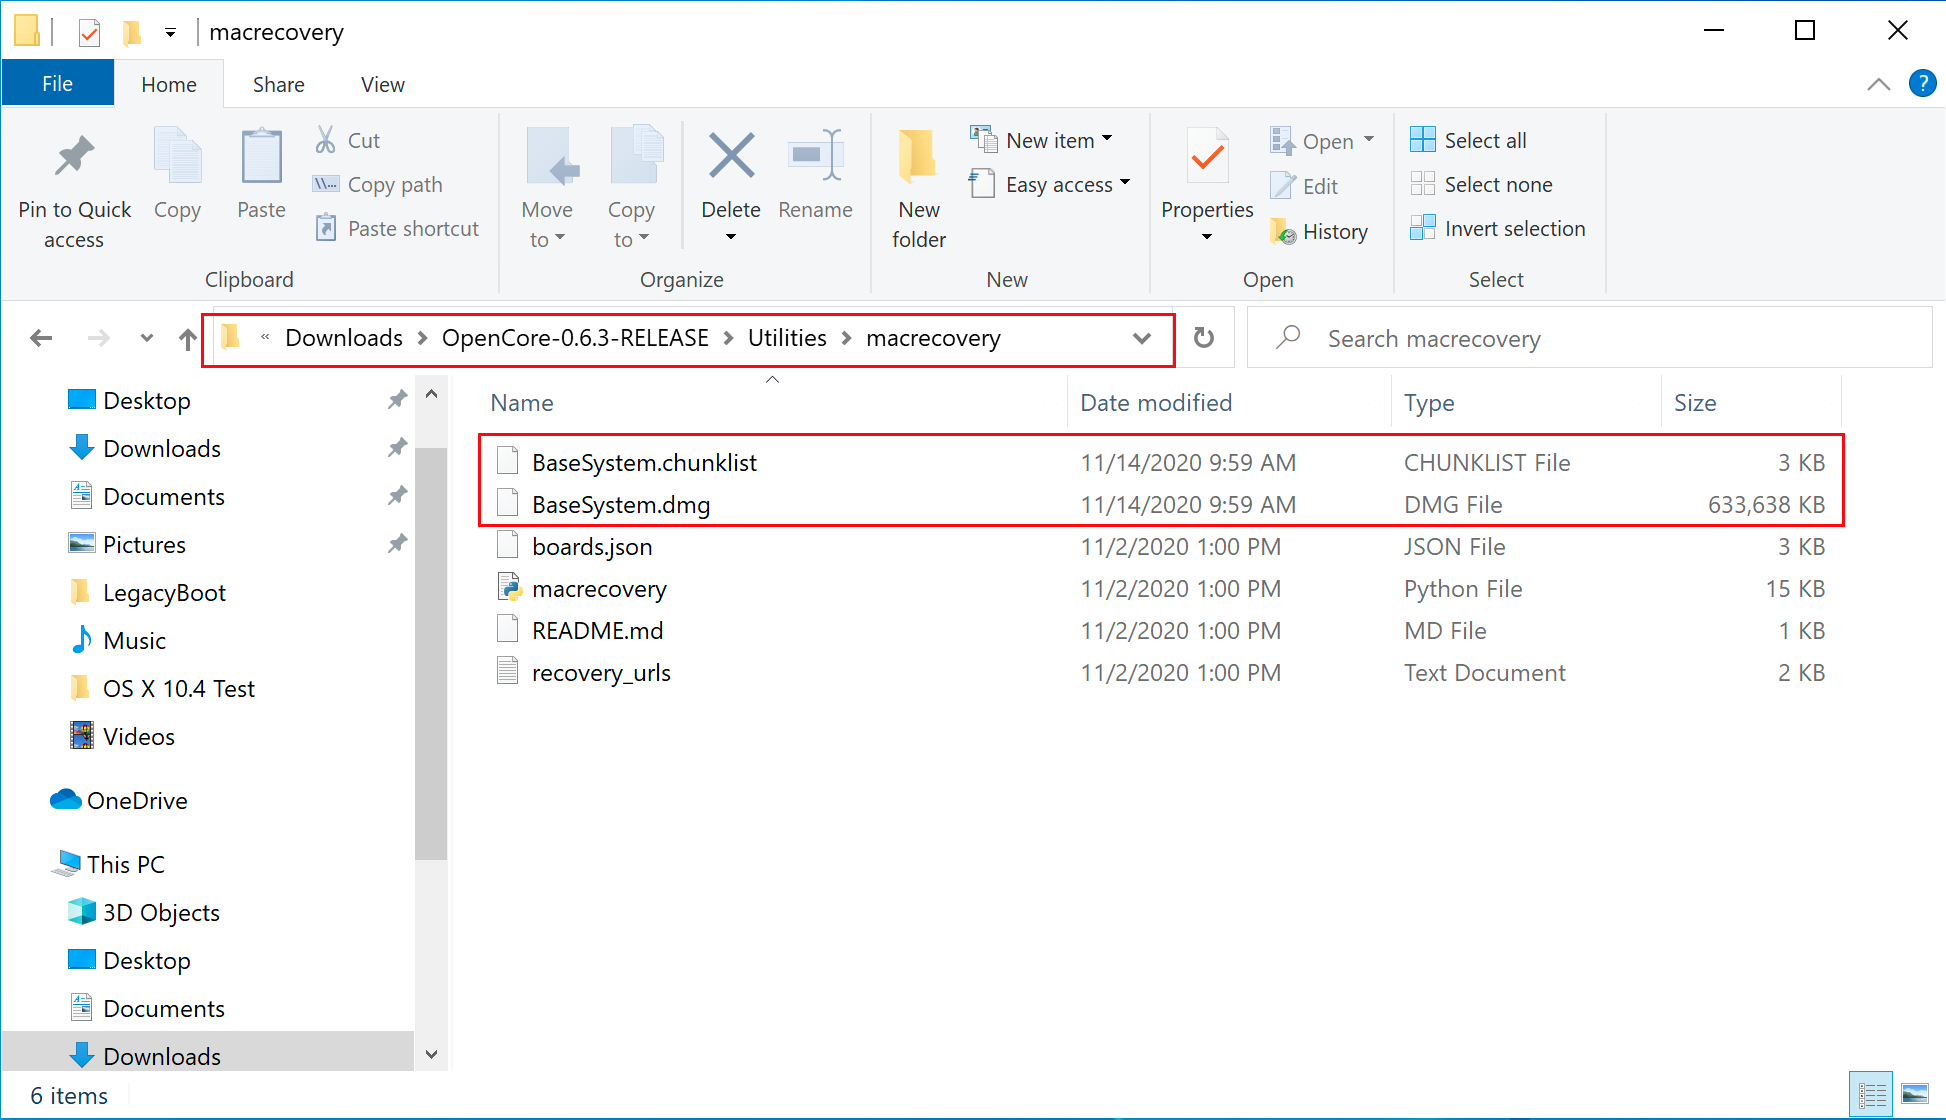
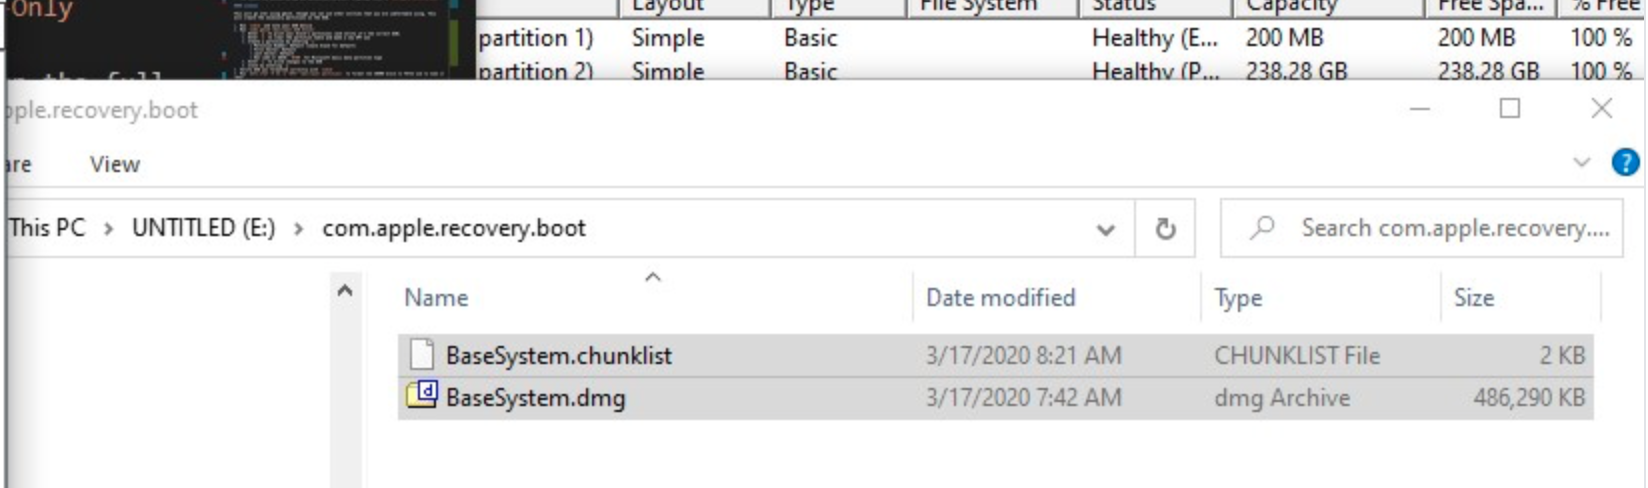
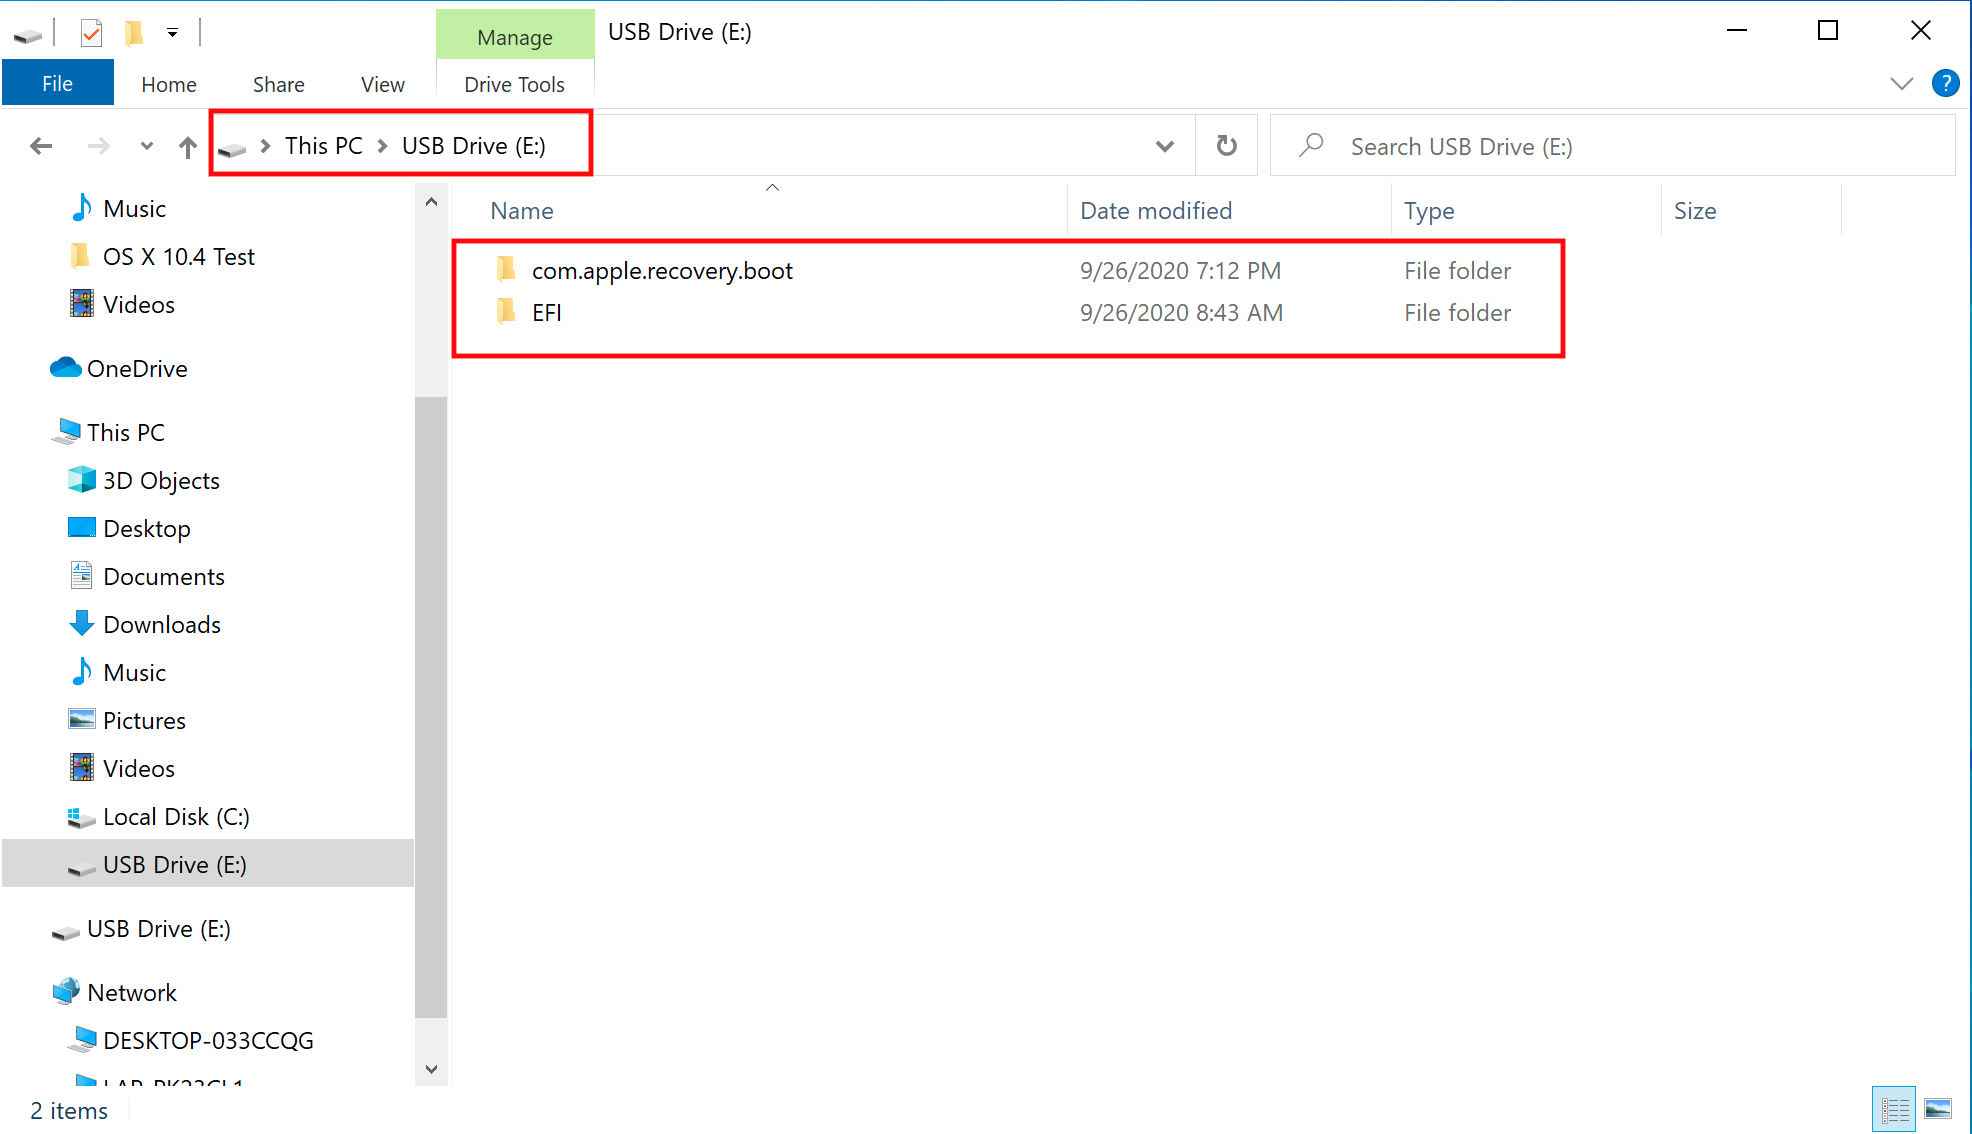
Next, go to the root of this USB drive and create a folder called com.apple.recovery.boot . Then move the downloaded BaseSystem or RecoveryImage files. Please ensure you copy over both the .dmg and .chunklist files to this folder:
Now grab OpenCorePkg you downloaded earlier and open it:
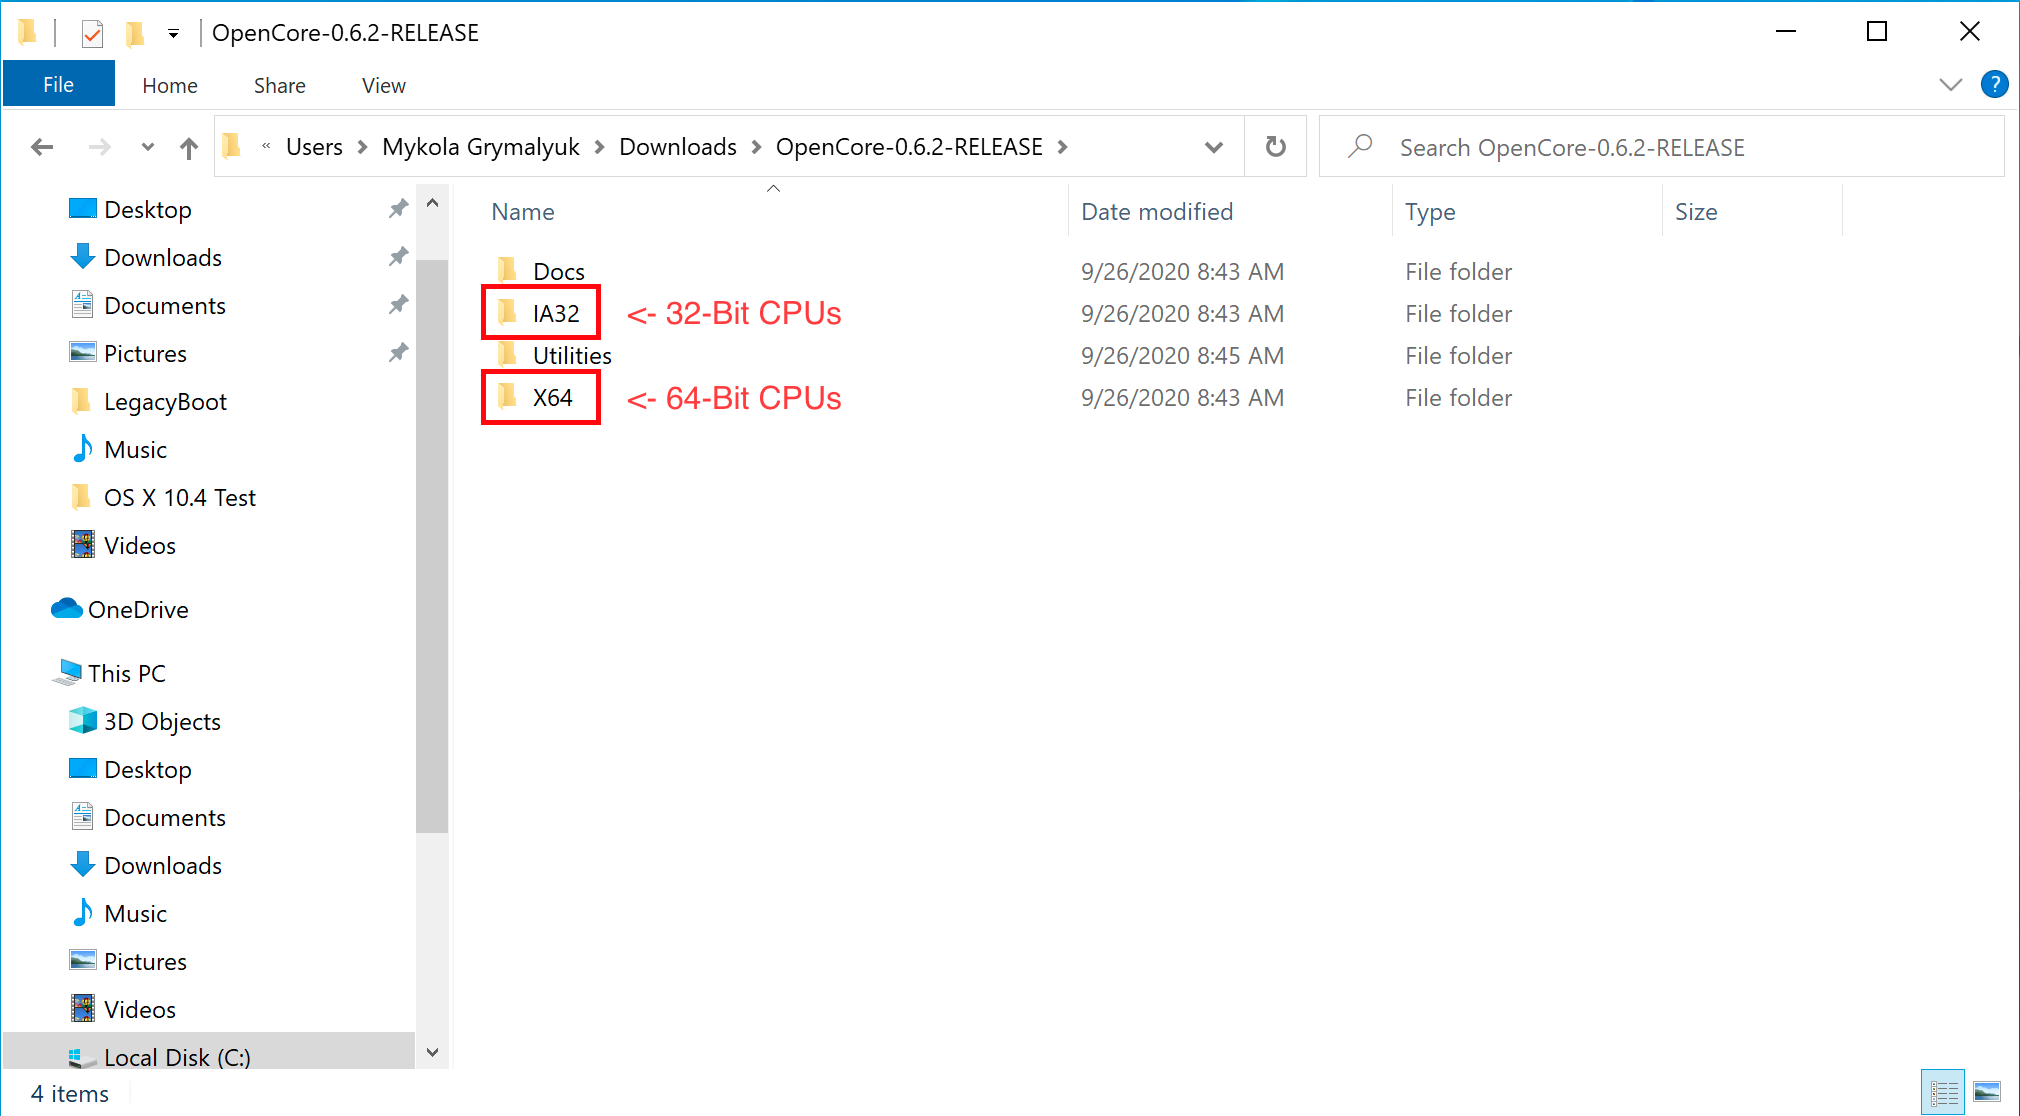
Here we see both IA32(32 Bit CPUs) and X64(64 Bit CPUs) folders, choose the one that’s most appropriate to your hardware and open it. Next grab the EFI folder inside and place this on the root of the USB drive along side com.apple.recovery.boot. Once done it should look like this:
# Rufus method
(opens new window)
Next, go to the root of this USB drive and create a folder called com.apple.recovery.boot . Then move the downloaded BaseSystem or RecoveryImage files. Please ensure you copy over both the .dmg and .chunklist files to this folder:
Now grab OpenCorePkg you downloaded earlier and open it:
Here we see both IA32(32 Bit CPUs) and X64(64 Bit CPUs) folders, choose the one that’s most appropriate to your hardware and open it. Next grab the EFI folder inside and place this on the root of the USB drive along side com.apple.recovery.boot. Once done it should look like this:
# diskpart method
Press Windows + R and enter diskpart .
Now run the following:
Next, go to the root of this USB drive and create a folder called com.apple.recovery.boot . Then move the downloaded BaseSystem or RecoveryImage files. Please ensure you copy over both the .dmg and .chunklist files to this folder:
Now grab OpenCorePkg you downloaded earlier and open it:
Here we see both IA32(32 Bit CPUs) and X64(64 Bit CPUs) folders, choose the one that’s most appropriate to your hardware and open it. Next grab the EFI folder inside and place this on the root of the USB drive along side com.apple.recovery.boot. Once done it should look like this:
Legacy Install Setup
If your firmware does not support UEFI, see below instructions:
To start, you’ll need the following:
Next, open up BOOTICE and ensure you’ve selected the right drive.
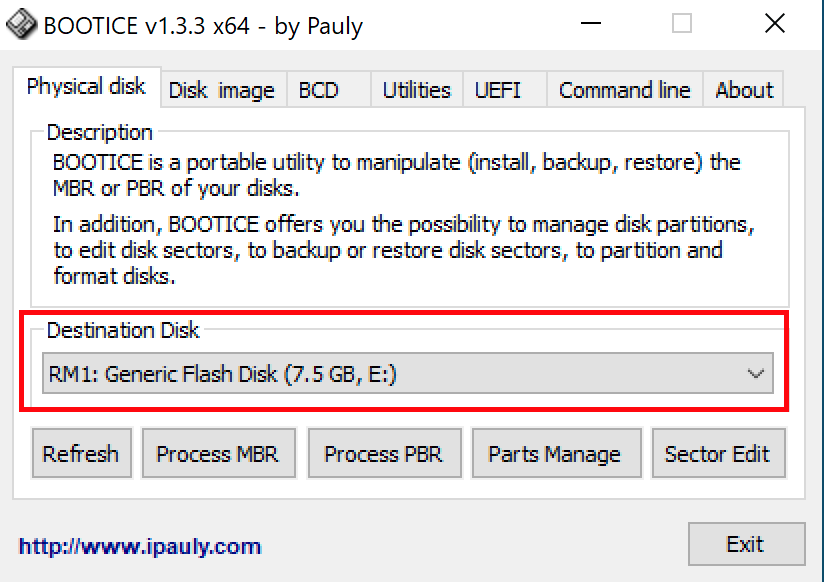
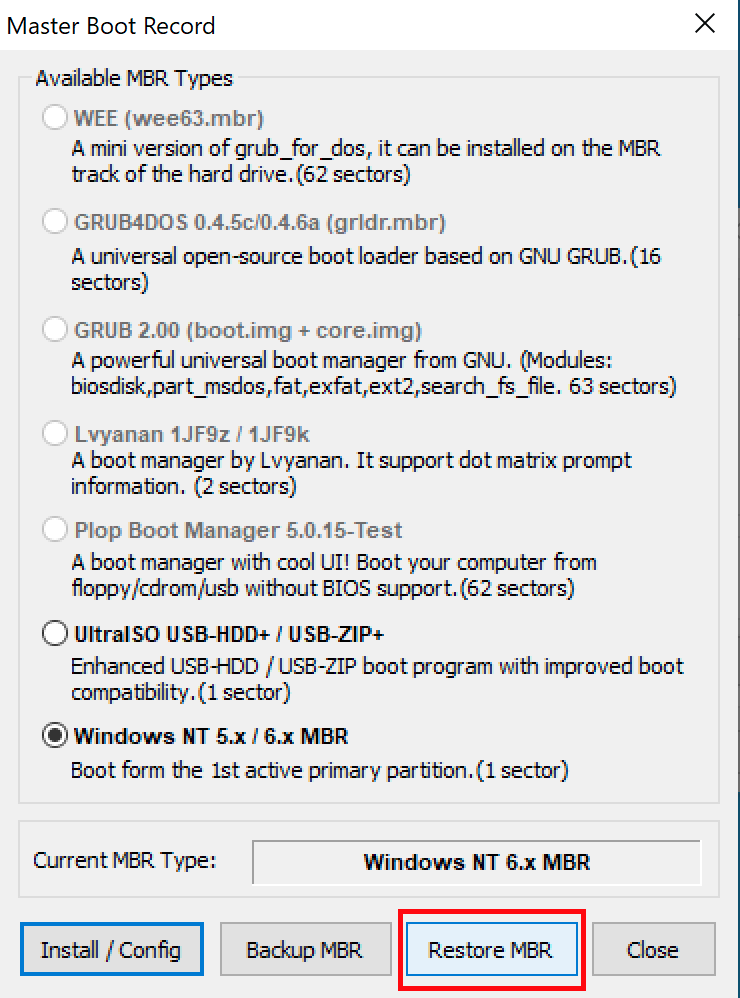
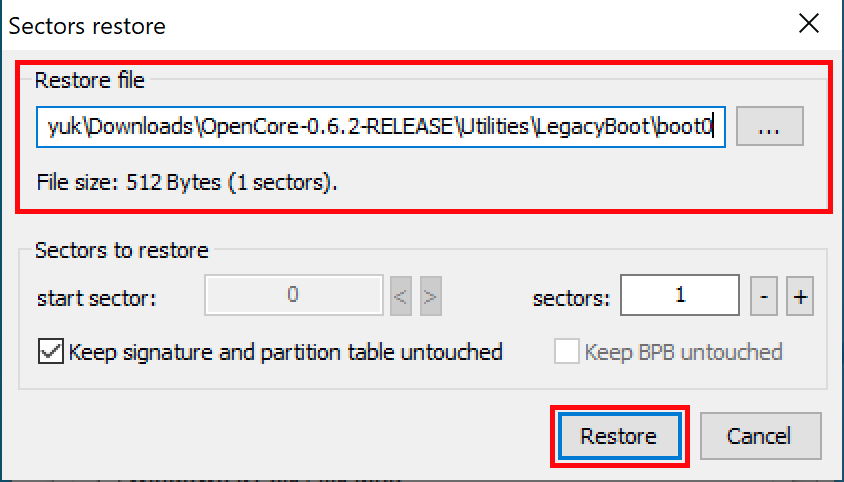
Next, enter «Process MBR» then select «Restore MBR» and select the boot0 file from Utilities/LegacyBoot/ in OpenCorePkg:
| Restore MBR | Restore boot0 file |
|---|---|
 |  |
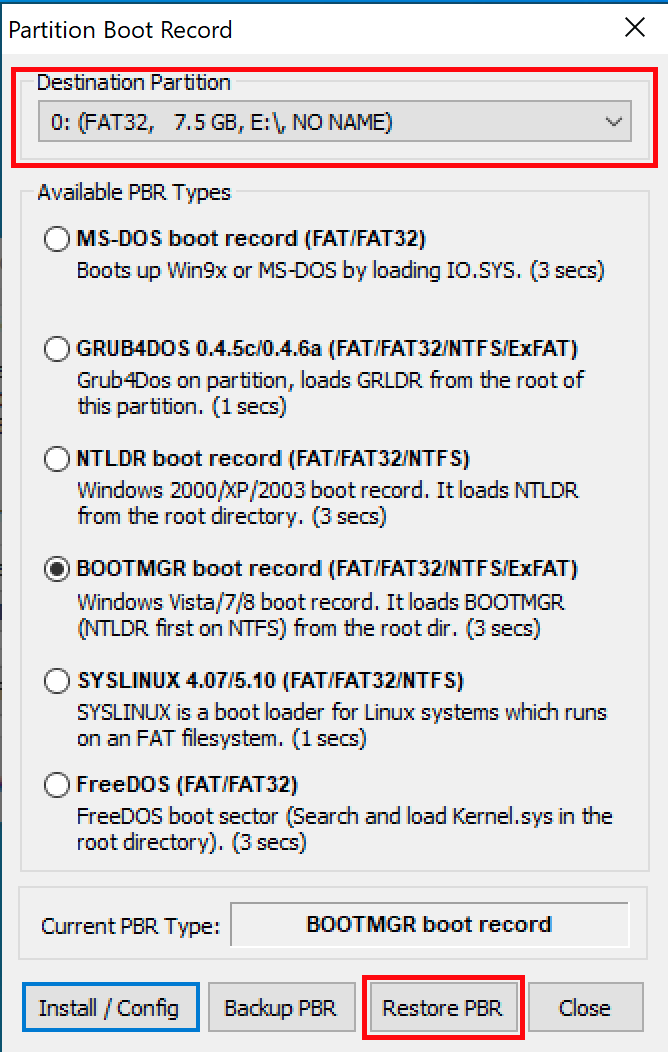
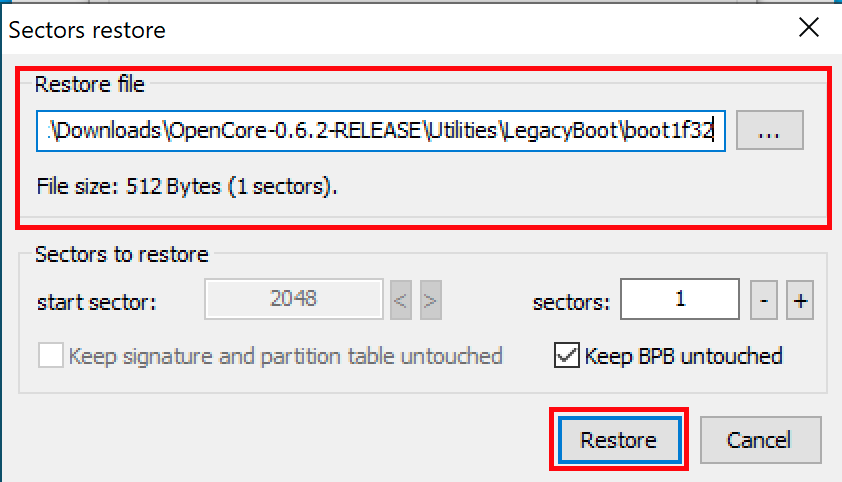
Then head back to the main screen and select «Process PBR» then «Restore PBR». From here, choose the boot1f32 file from Utilities/LegacyBoot/ in OpenCorePkg:
| Restore PBR | Restore boot1f32 file |
|---|---|
 |  |
Once this is done, head back to your USB and do 1 final thing. Grab either the bootx64(64 Bit CPUs) or bootia32(32 Bit CPUs) file from Utilities/LegacyBoot/ and place it on the root of your drive. Rename this file to boot to ensure DuetPkg can properly:
Источник
# Понимание процесса загрузки macOS
Итак, при устранении неполадок в хакинтоше, может быть немного сложно понять, где вы именно застряли, поскольку точное ключевое слово по которому вы пытаетесь найти, может не совпадать с чем-либо в Google. Хотя эта страница не решит всех ваших проблем, по крайней мере, она должна помочь понять, где в процессе загрузки macOS вы застреваете, и надеемся, подскажет, по какой причине вы застряли.
# Загрузка OpenCore
Этот раздел будет кратким, так как проблемы с загрузкой OpenCore довольно редки и обычно являются простой ошибкой пользователя:
- Включение системы и поиск загрузочных устройств
- Система находит BOOTx64.efi на вашем USB-накопителе с OpenCore в EFI/BOOT/
- Загружается BOOTx64.efi, который потом по цепочке загружает OpenCore.efi из EFI/OC/
- Применяются свойства NVRAM
- EFI драйверы загружаются из EFI/OC/Drivers
- Устанавливается Graphics Output Protocol(GOP)
- Загружаются ACPI таблицы из EFI/OC/ACPI
- Применяются данные SMBIOS
- OpenCore загружает и показывает вам все возможные варианты загрузки
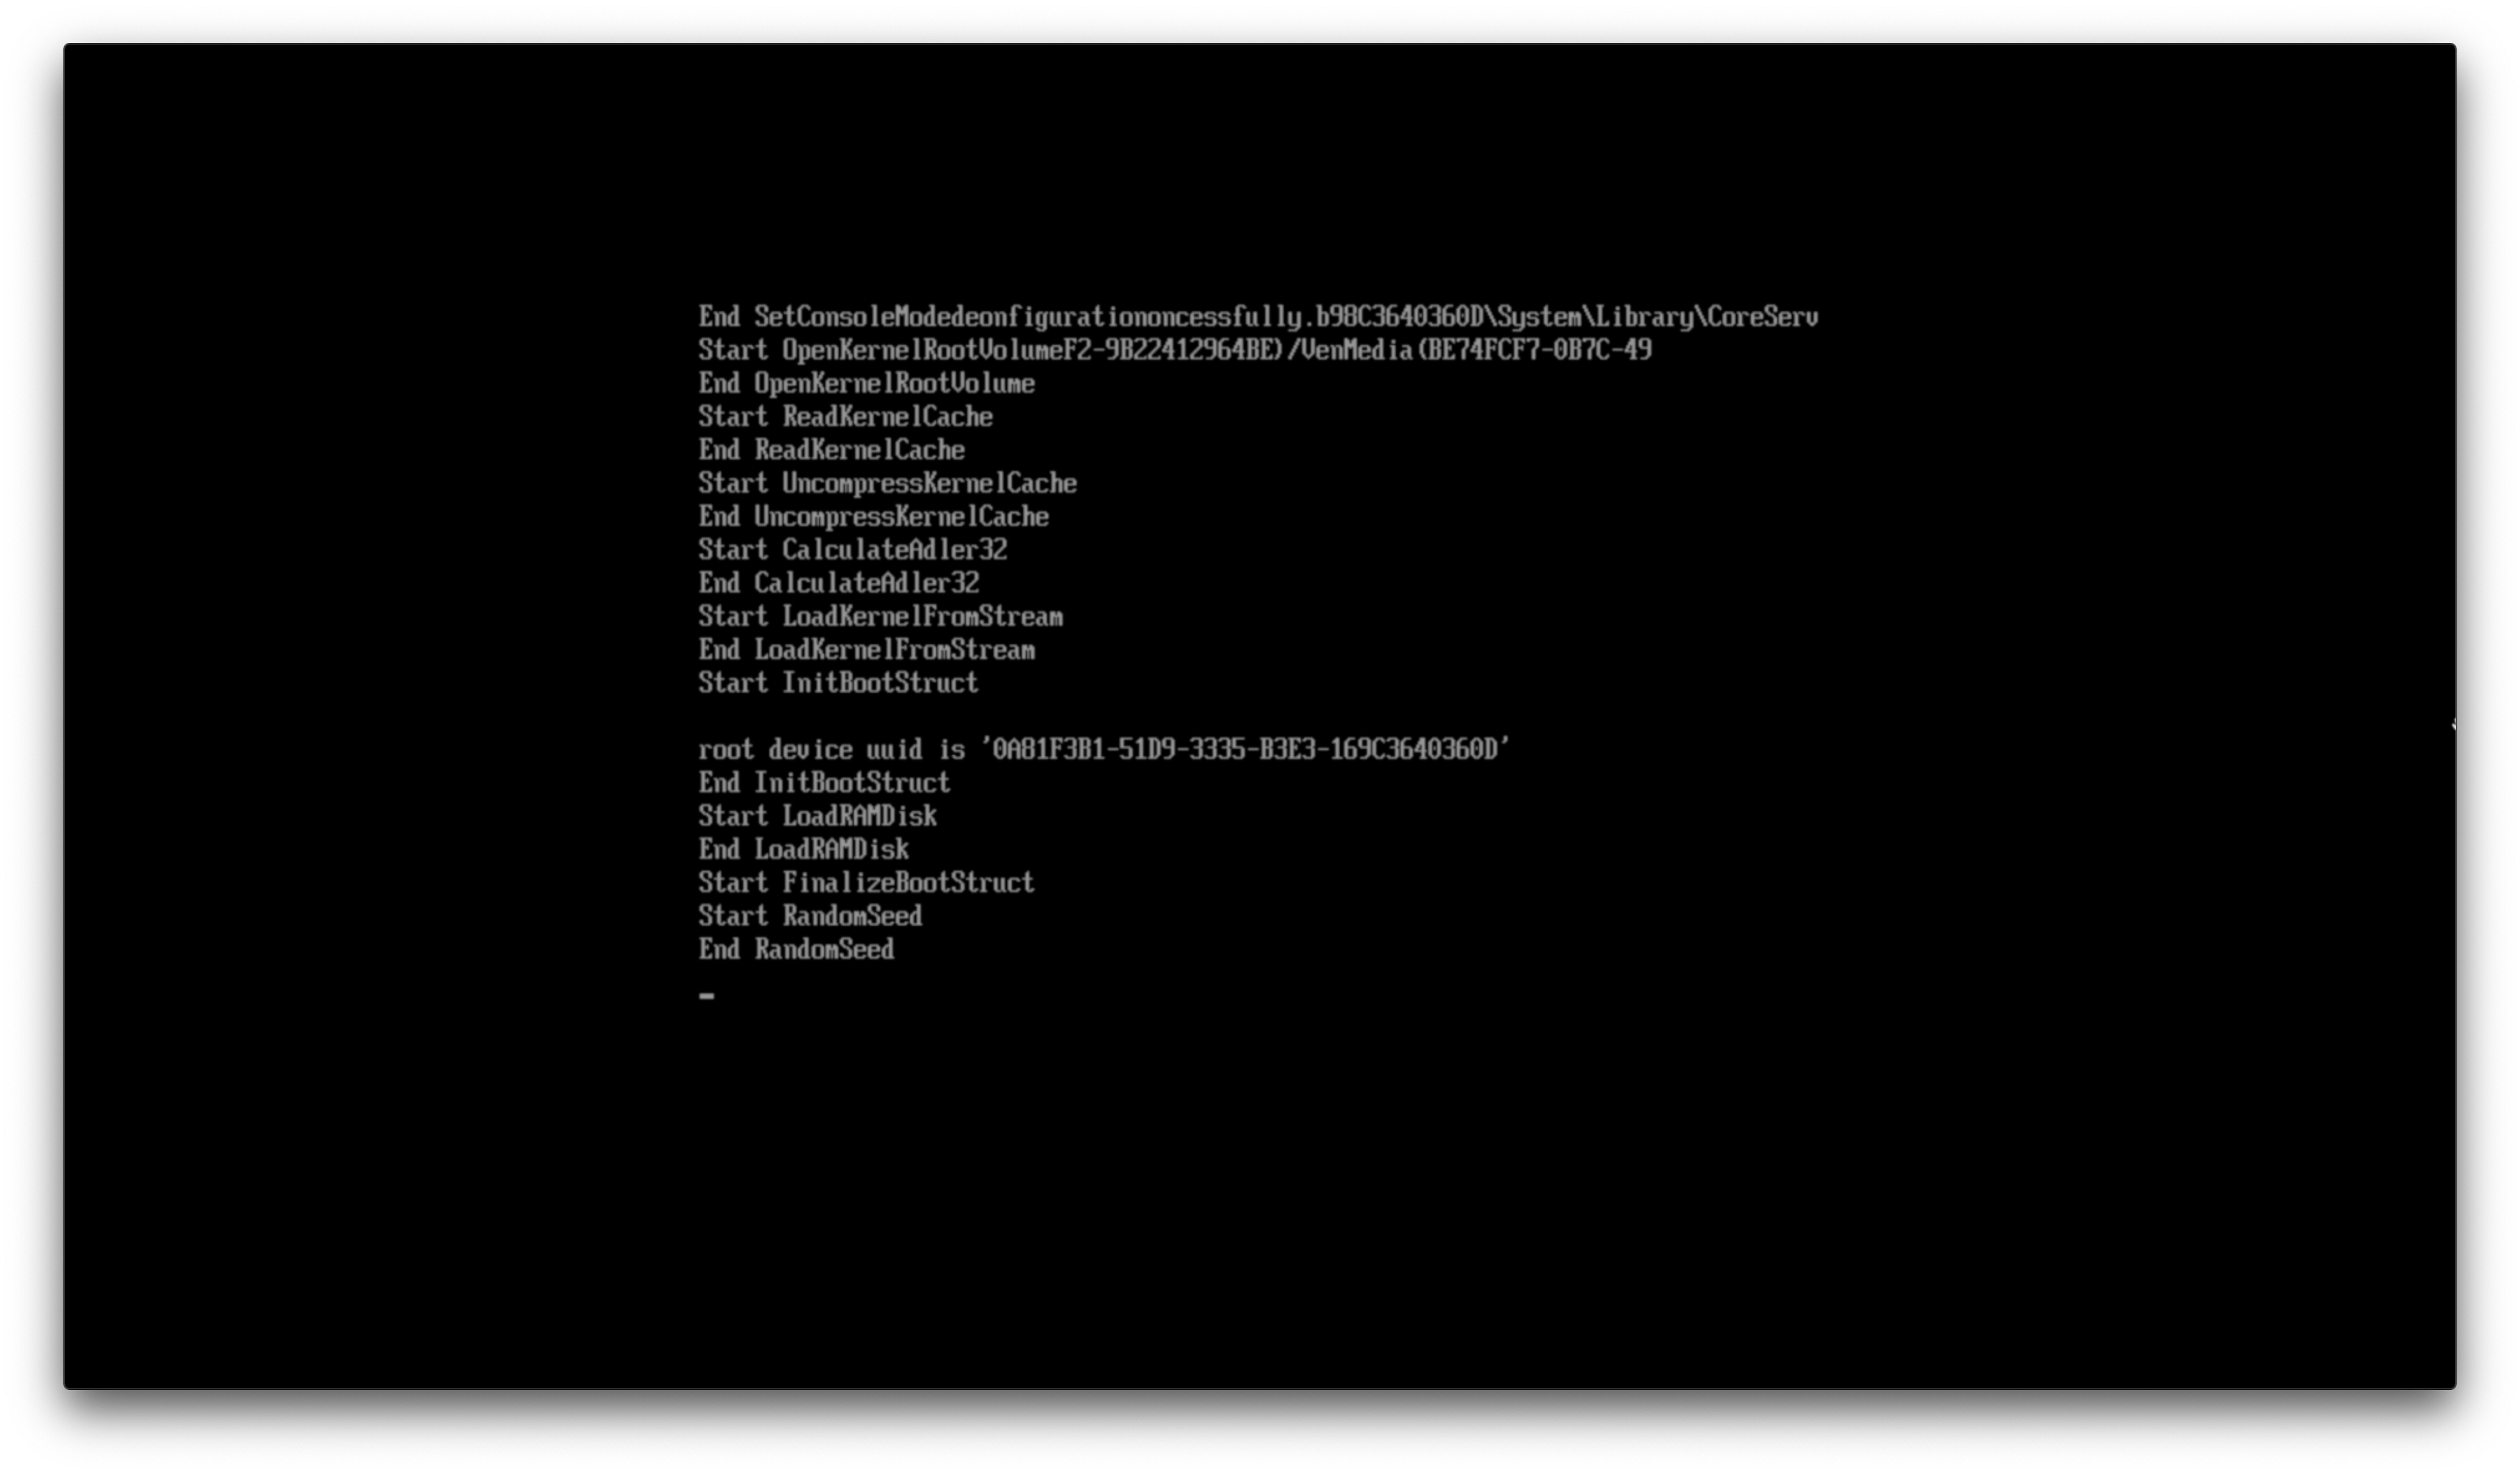
- Теперь вы загружаетесь в установщик macOS
Если на этом этапе у вас возникли проблемы с загрузкой, главное, что нужно проверить:
Об остальных возможных проблемах, смотрите здесь:
# boot.efi Handoff
Здесь выходит на сцену загрузчик macOS(boot.efi), в частности, то, что он делает — подготавливает среду для загрузки ядра, где OpenCore и инжектирует кексты. Если вы застряли на этом этапе, скорее всего, проблема с загрузкой ядра. Основные виновники:
Об остальных возможных проблемах, смотрите здесь:
Примечание: В macOS 10.15.4, Apple изменила протокол отладки boot.efi, поэтому всё будет выглядеть несколько иначе, чем раньше, но все те же правила по-прежнему применяются
# XNU/Kernel Handoff
Теперь, когда boot.efi всё настроил для нас, мы можем понаблюдать, как ядро делает свое дело. Этот раздел обычно называют Этапом укоренения (Rooting phase)
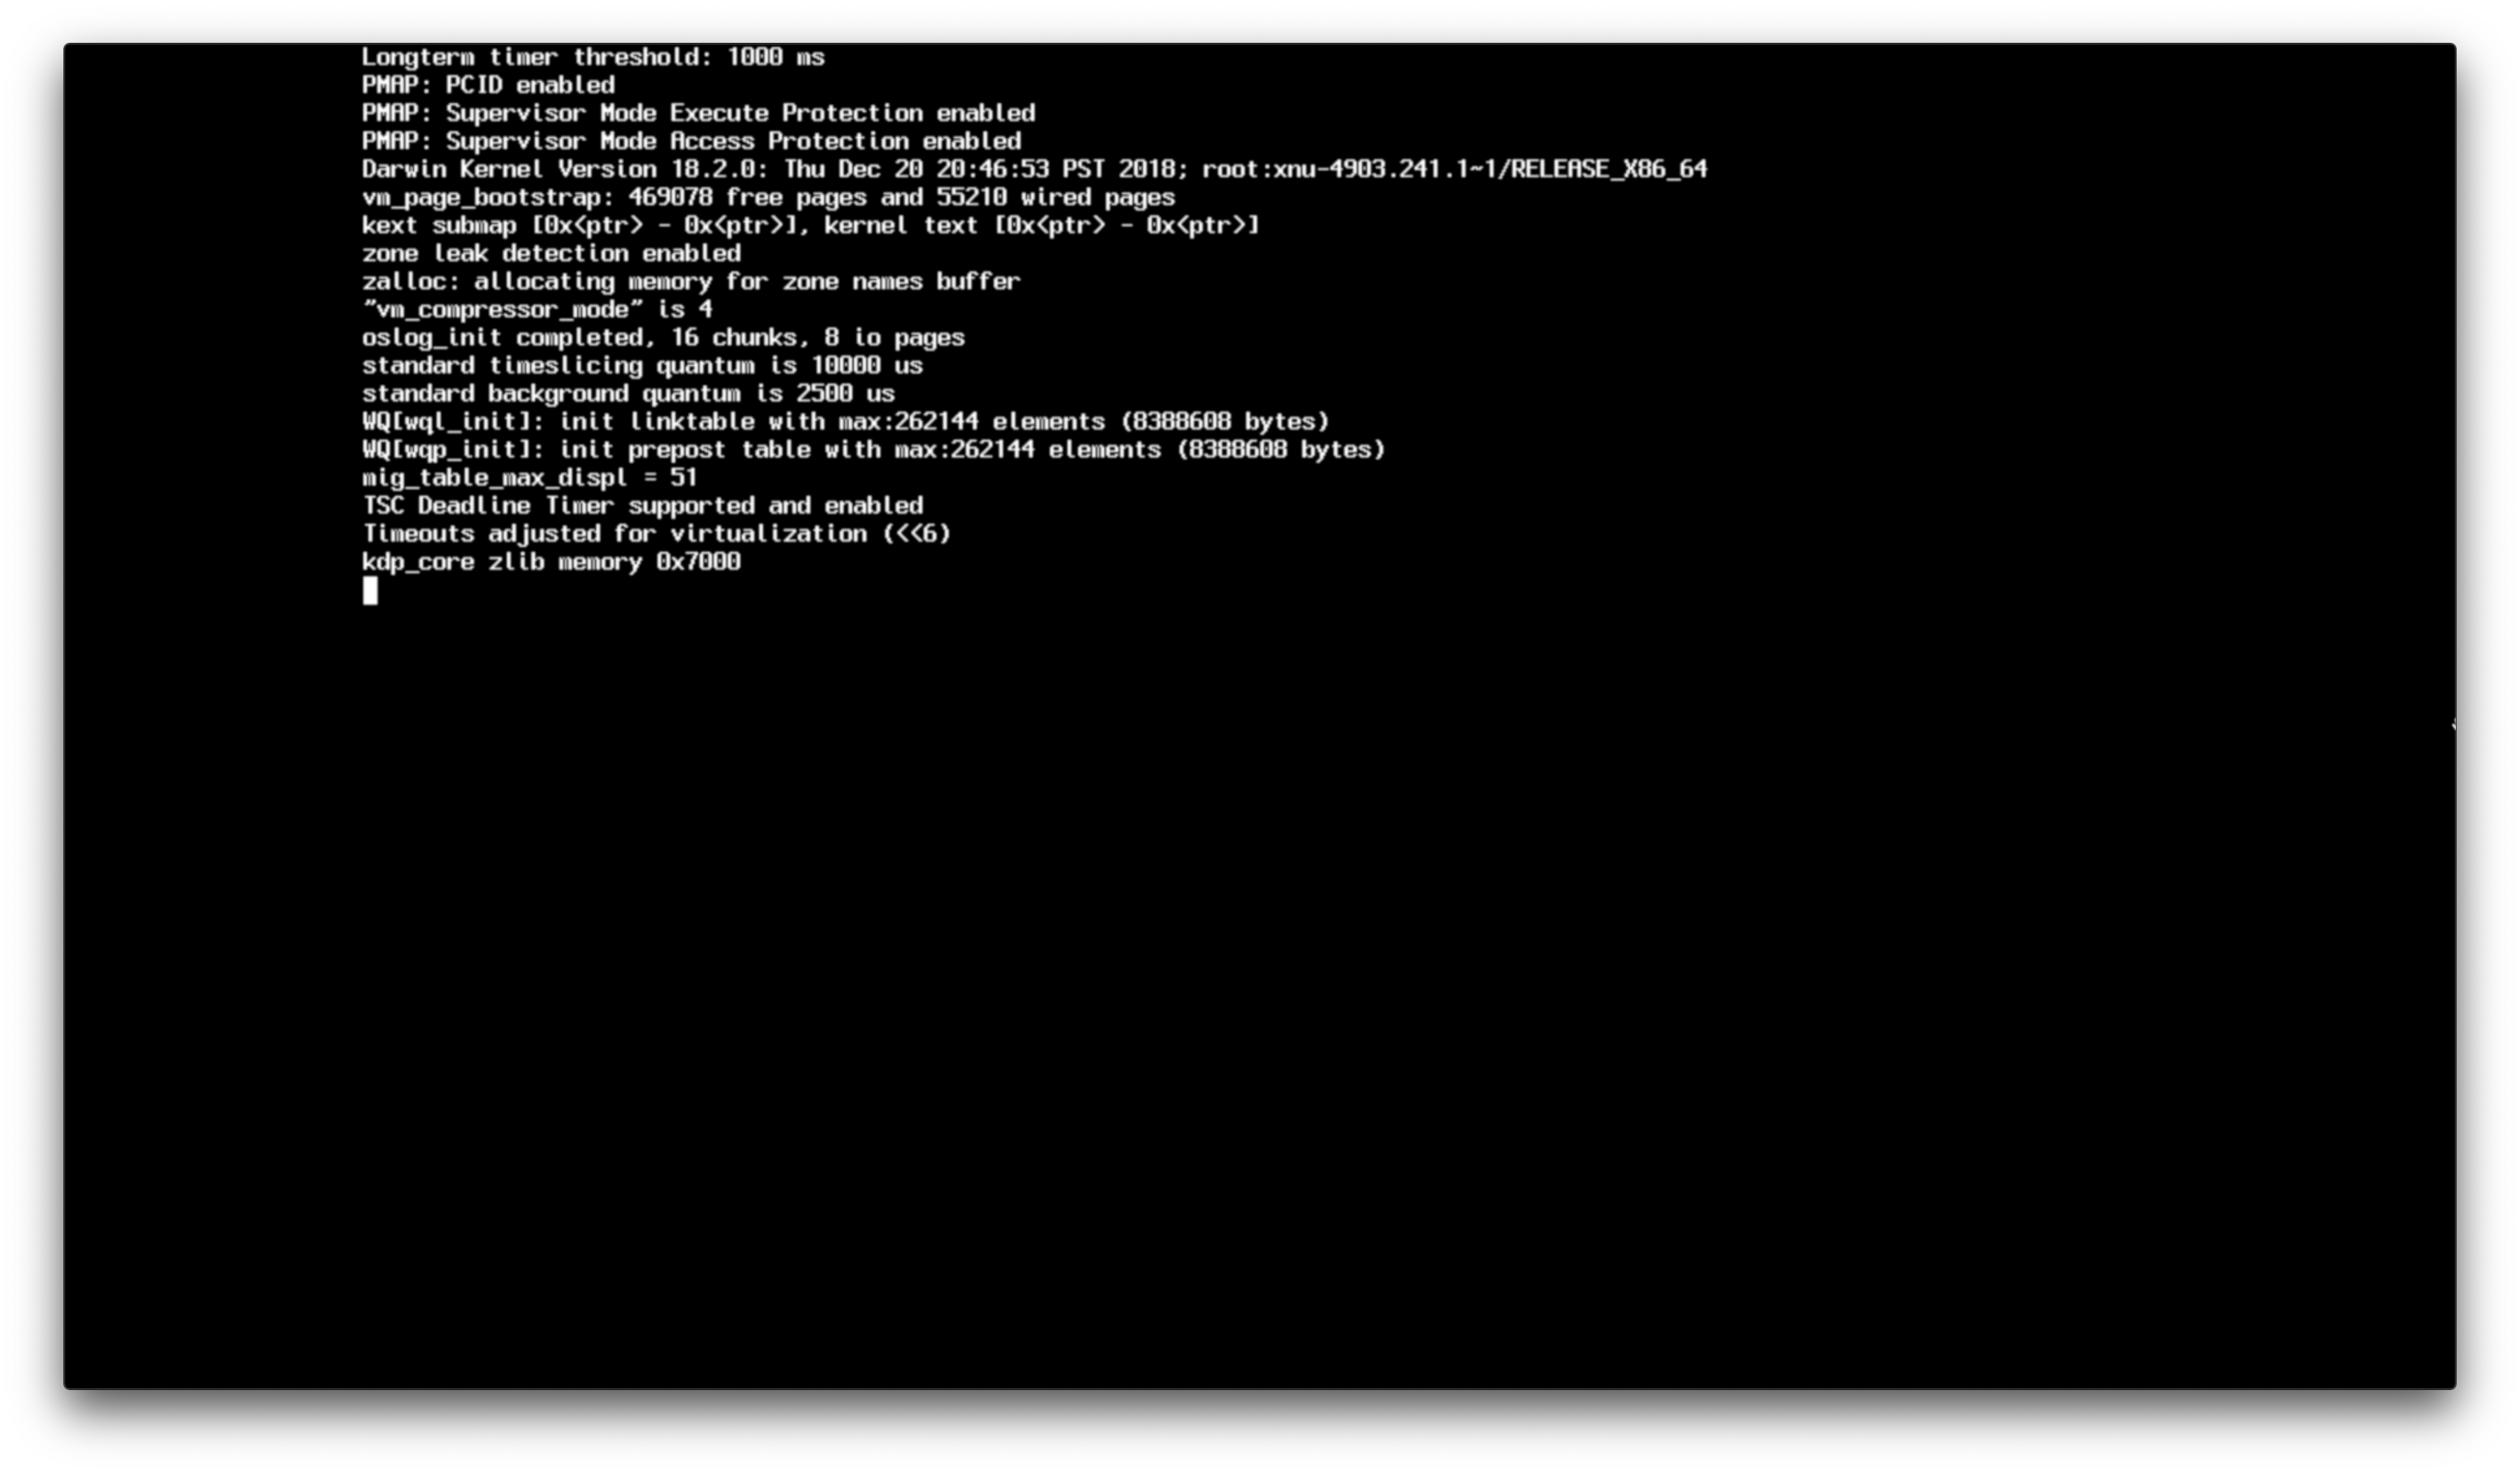
В этом разделе проверяются данные SMBIOS, загружаются ACPI таблицы/Кексты, и macOS пытается привести всё в порядок. Обычно ошибки возникают в результате:
- Поврежденные SSDT
- Поврежденные кексты(или неправильно настроенные в вашем config.plist -> Kernel -> Add)
- Испорченная Memory Map
Подробнее об устранении неполадок см. здесь:
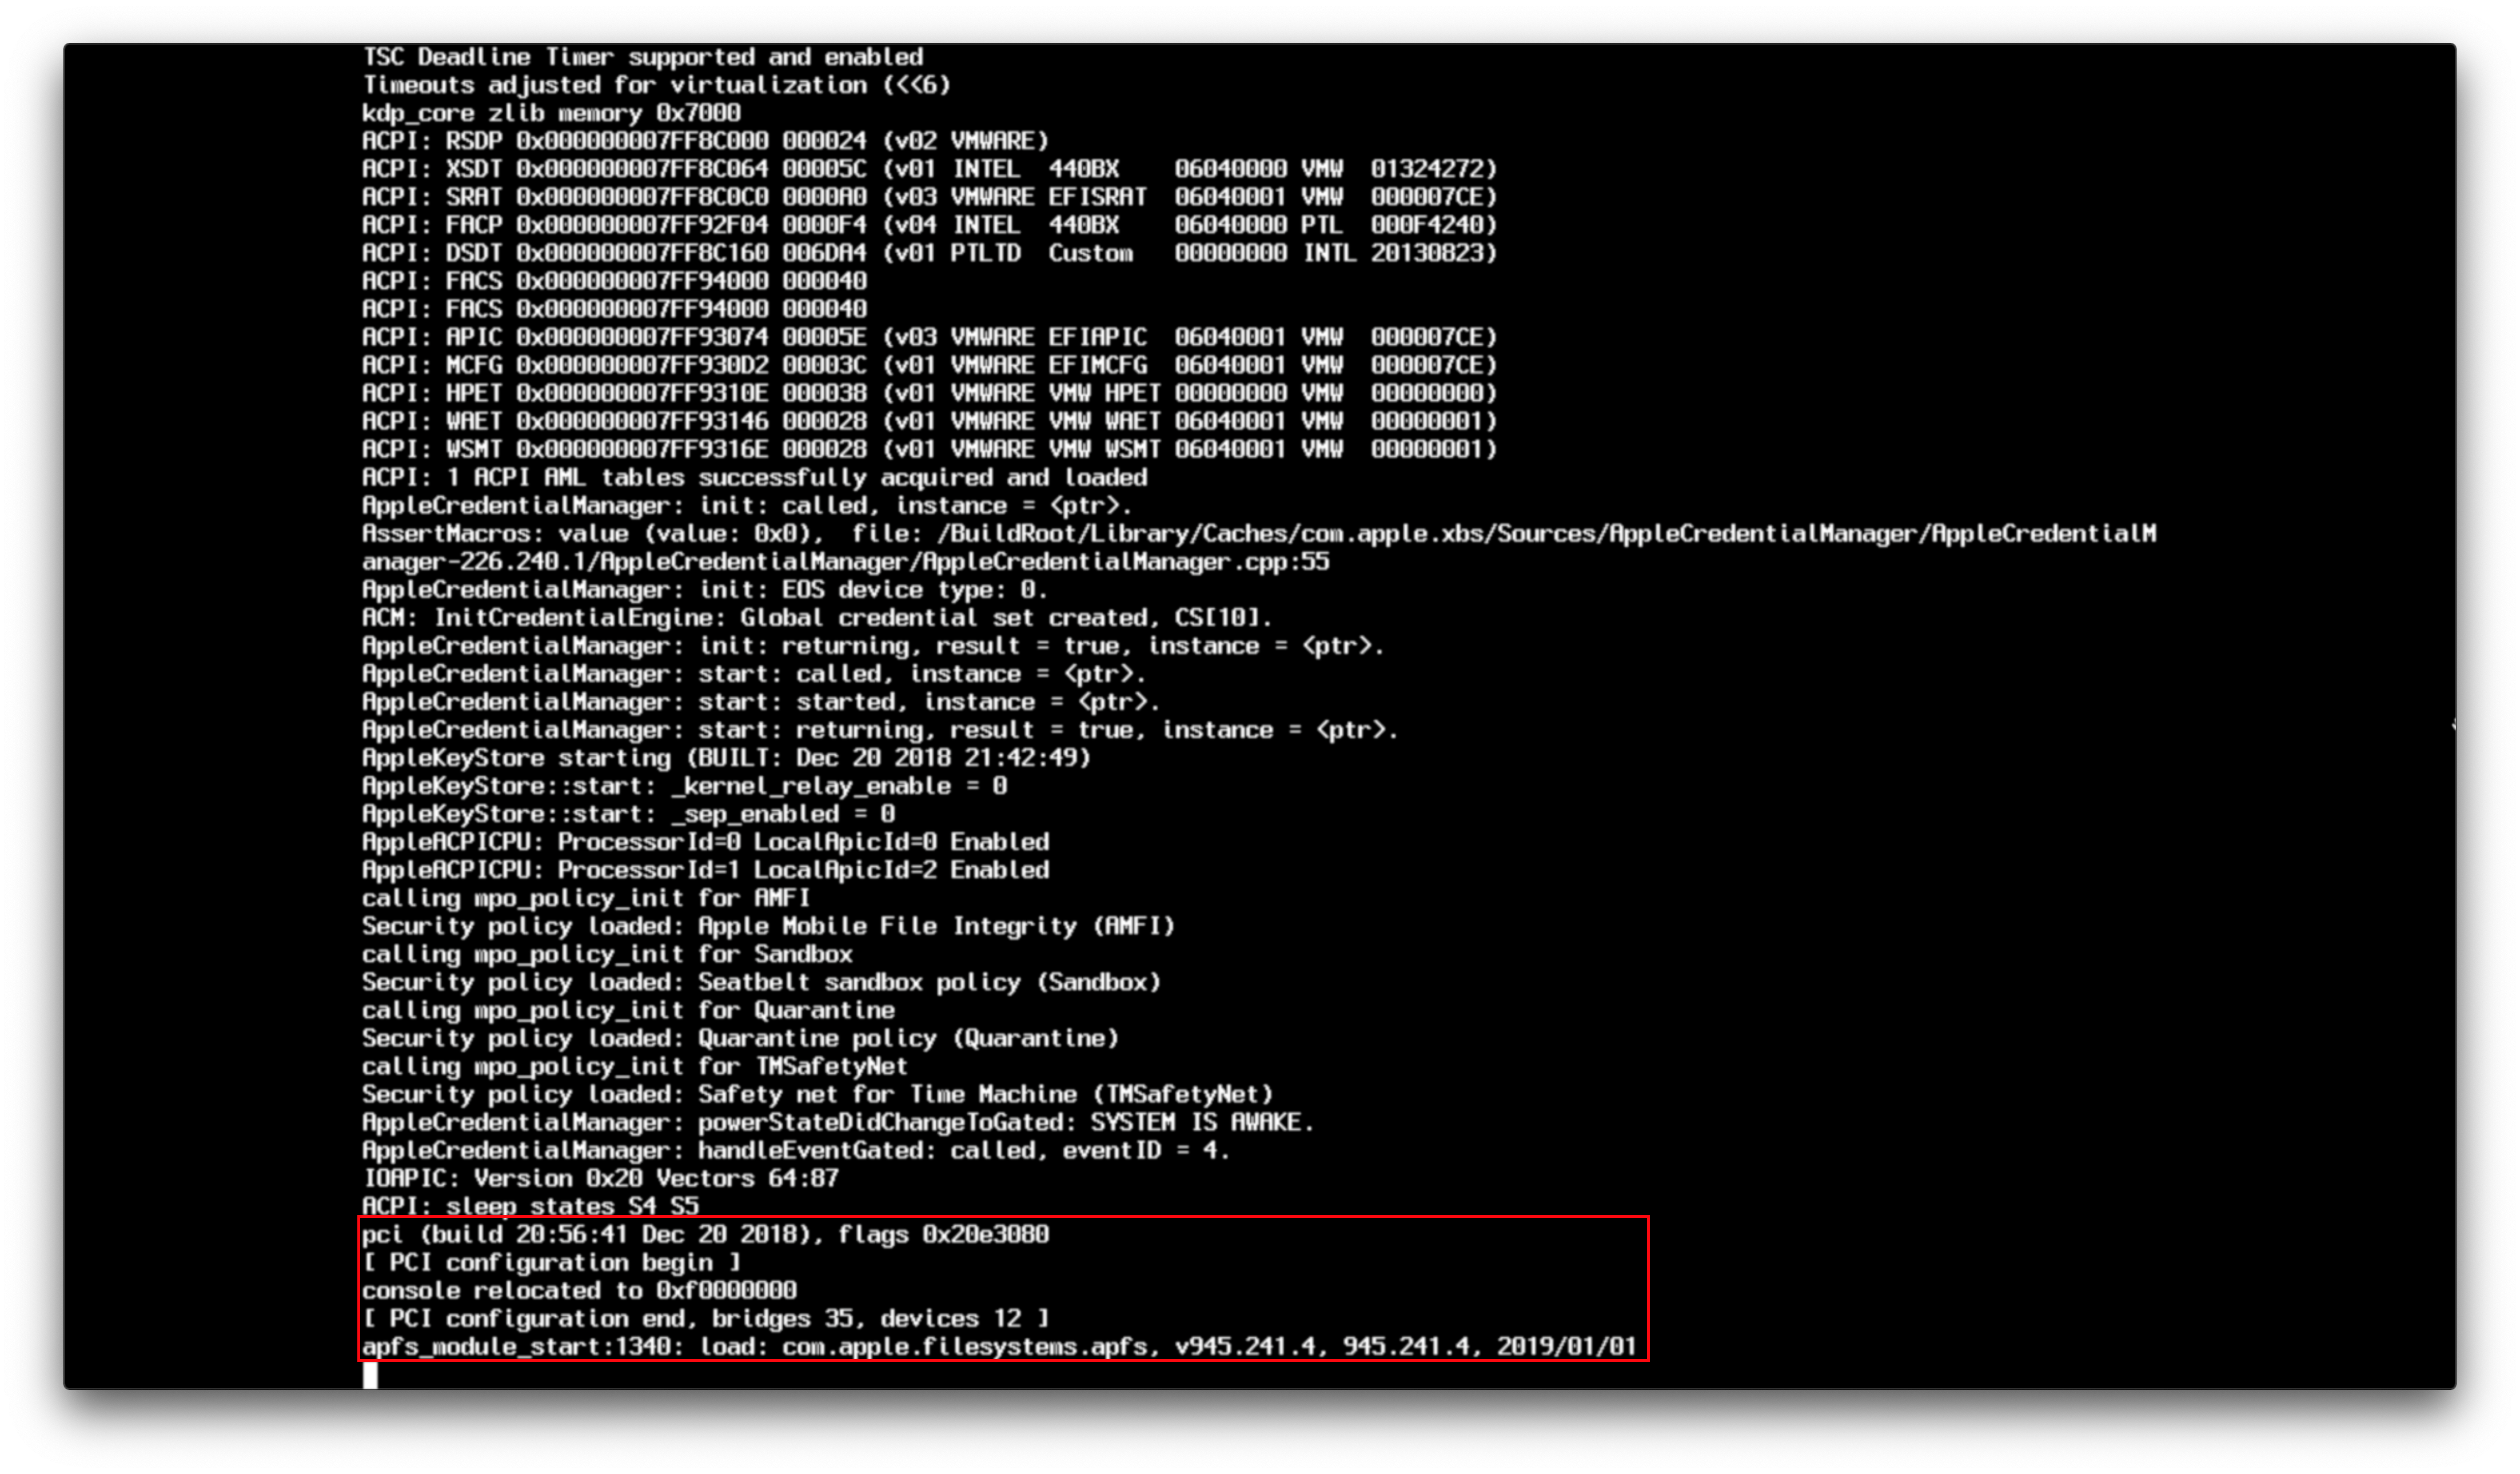
Здесь теперь у нас [ PCI configurations begin ] (прим. пер. — Начало конфигурации PCI), этот раздел можно рассматривать как тест аппаратной части наших систем, кекстов и SSDT, которые мы инжектировали, и где IOKit запускает аппаратные пробы для поиска устройств для подключения.
Основное, что здесь проверяется:
- Встроенные контроллеры (EC)
- Хранилище(NVMe, SATA, т.д.)
- PCI/e
- NVRAM
- RTC
- PS2 и I2C
Более подробную информацию о том, как обойти эту область, смотрите здесь:
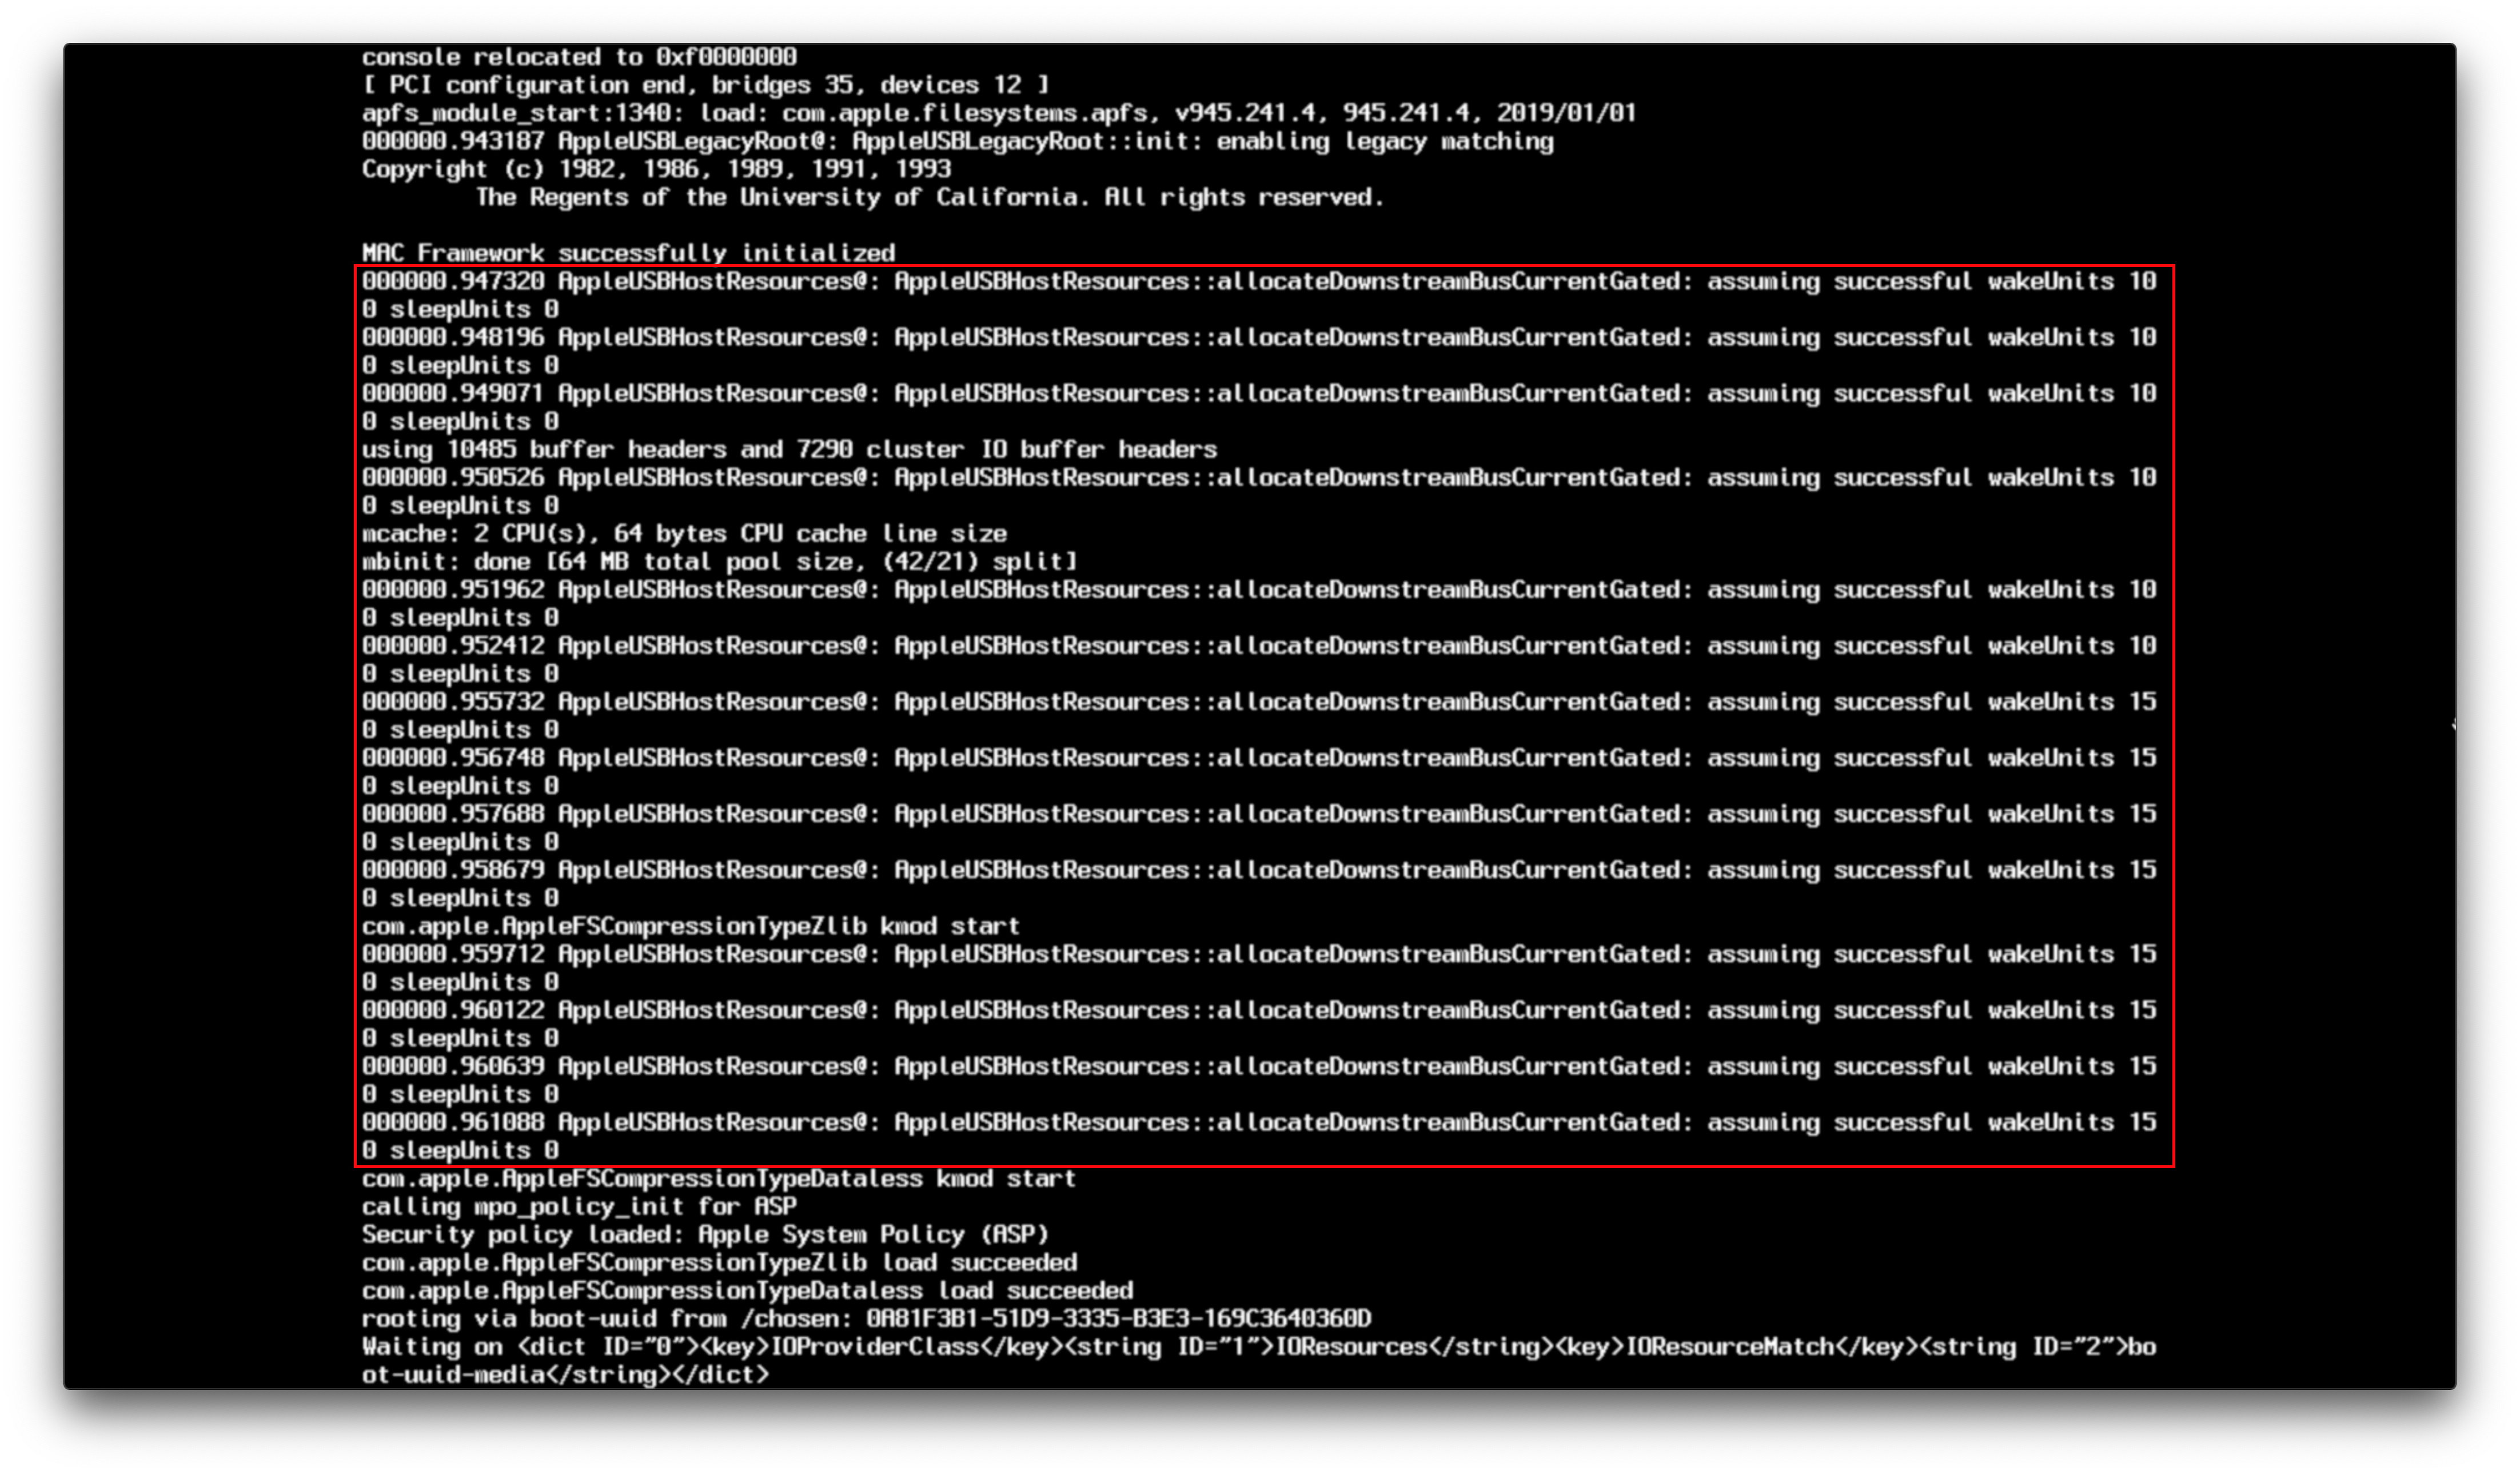
Здесь вступает в игру ограничение в 15 портов и USB Mapping, а также появляются печально известные ошибки «Waiting for Root Device». Основные вещи, которые необходимо проверить:
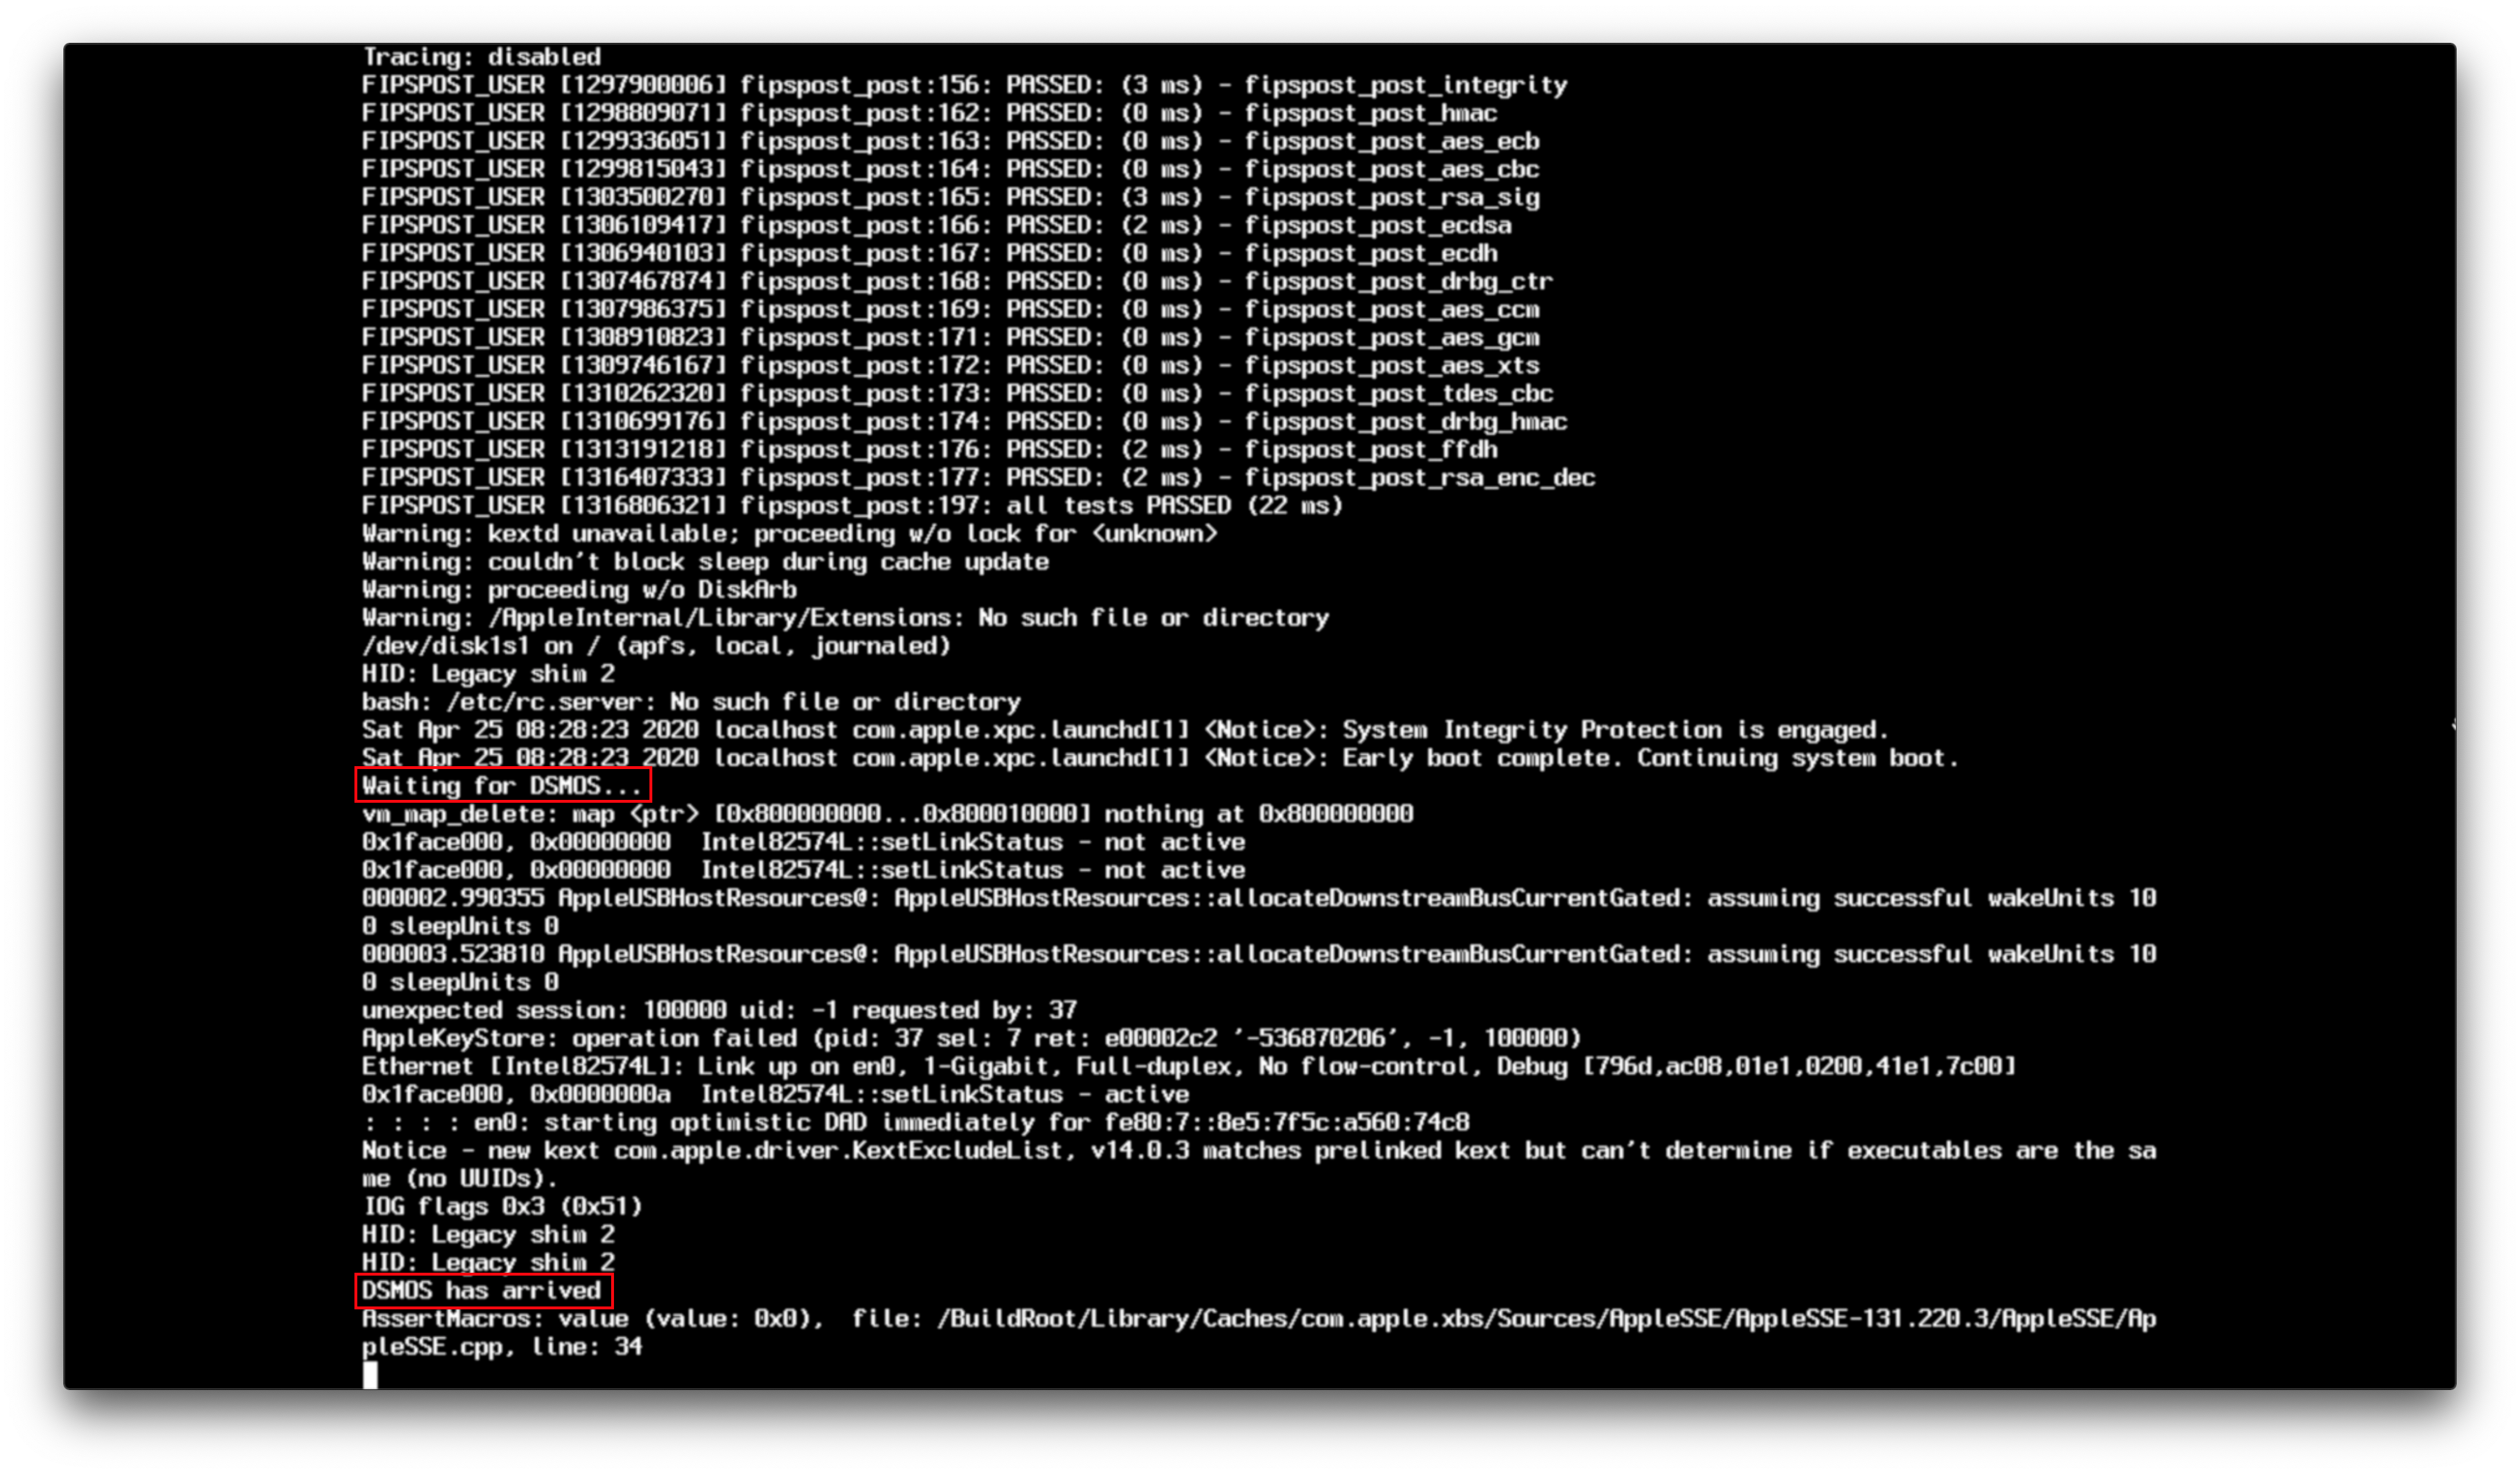
А здесь выходят на сцену наши FakeSMC/VirtualSMC и творят свои чудеса, сам по себе DSMOS это кекст, который проверяет, есть ли в вашей системе SMC и запрашивает ключ. Если этот ключ отсутствует, DSMOS не расшифрует остальные бинарные файлы, и вы застрянете здесь. Также вы можете застрять на AppleACPICPU, что является точно такой же ошибкой.
Источник: Dont Steal Mac OS X.kext
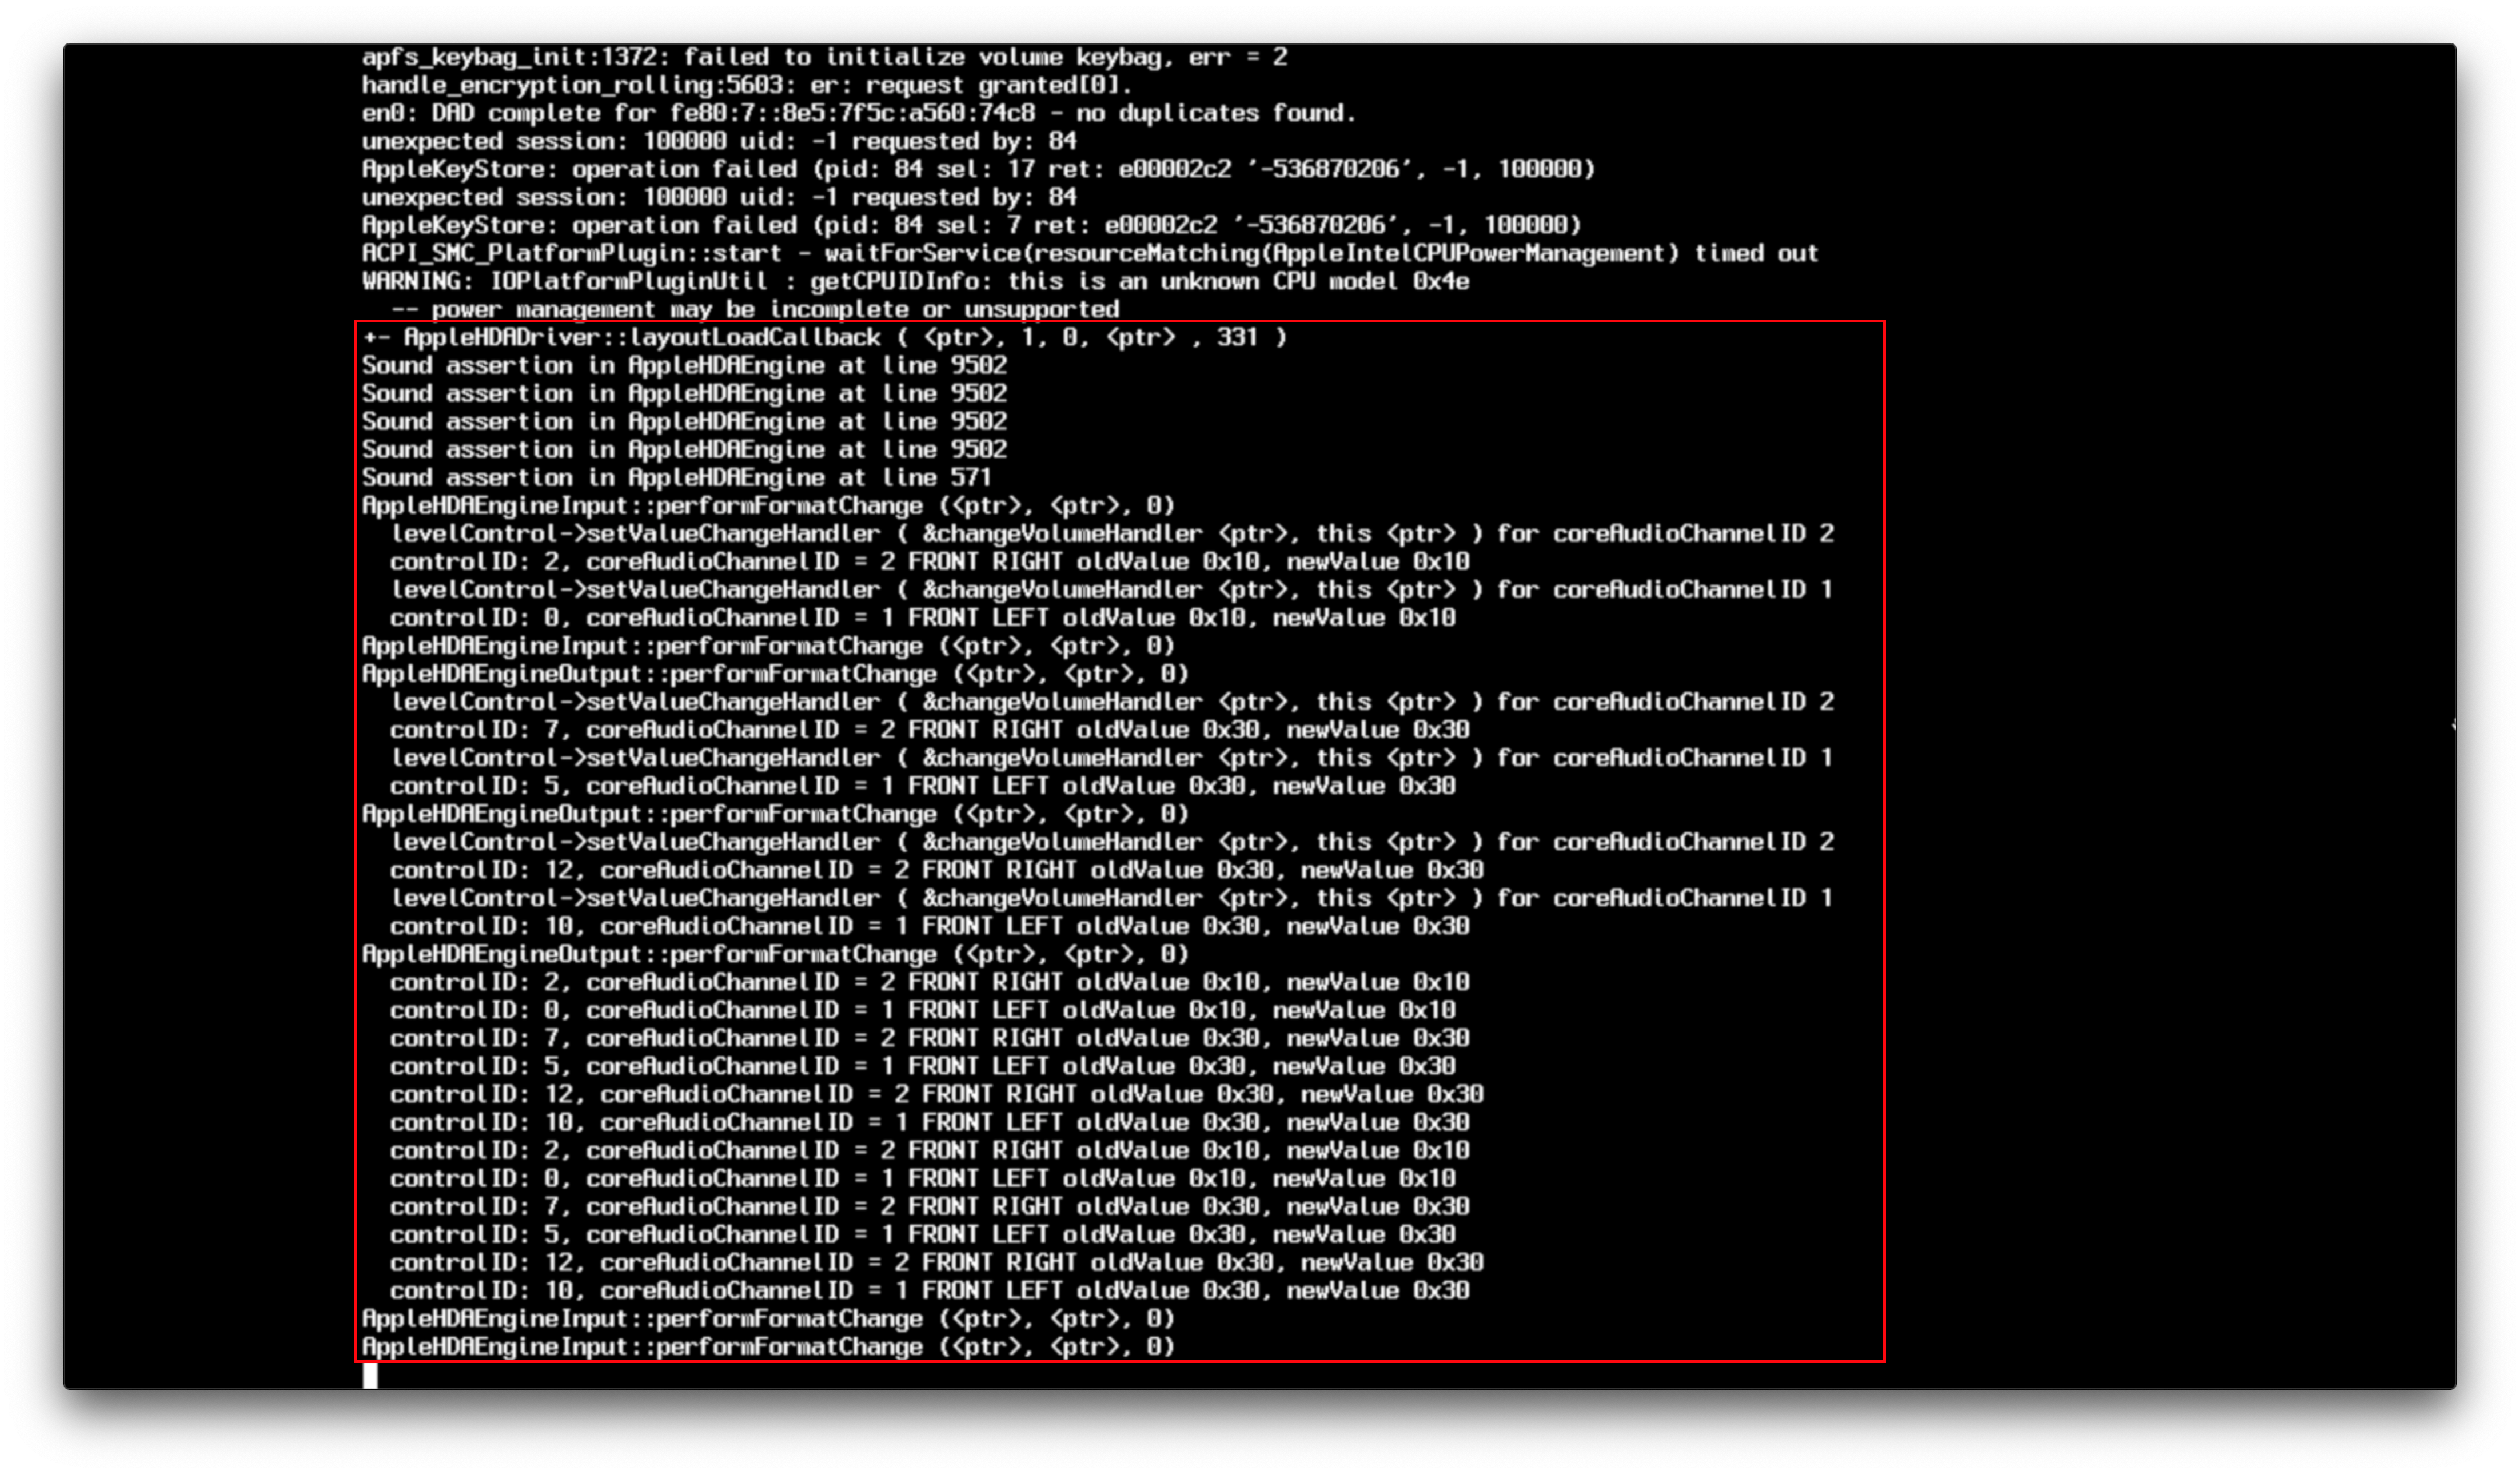
А вот тут и вступает аудиодрайвер Apple, и здесь AppleALC сияет. Обычно здесь редко можно увидеть проблемы, но если вы их увидете, попробуйте отключить AppleALC и любые другие кексты, связанные со звуком.
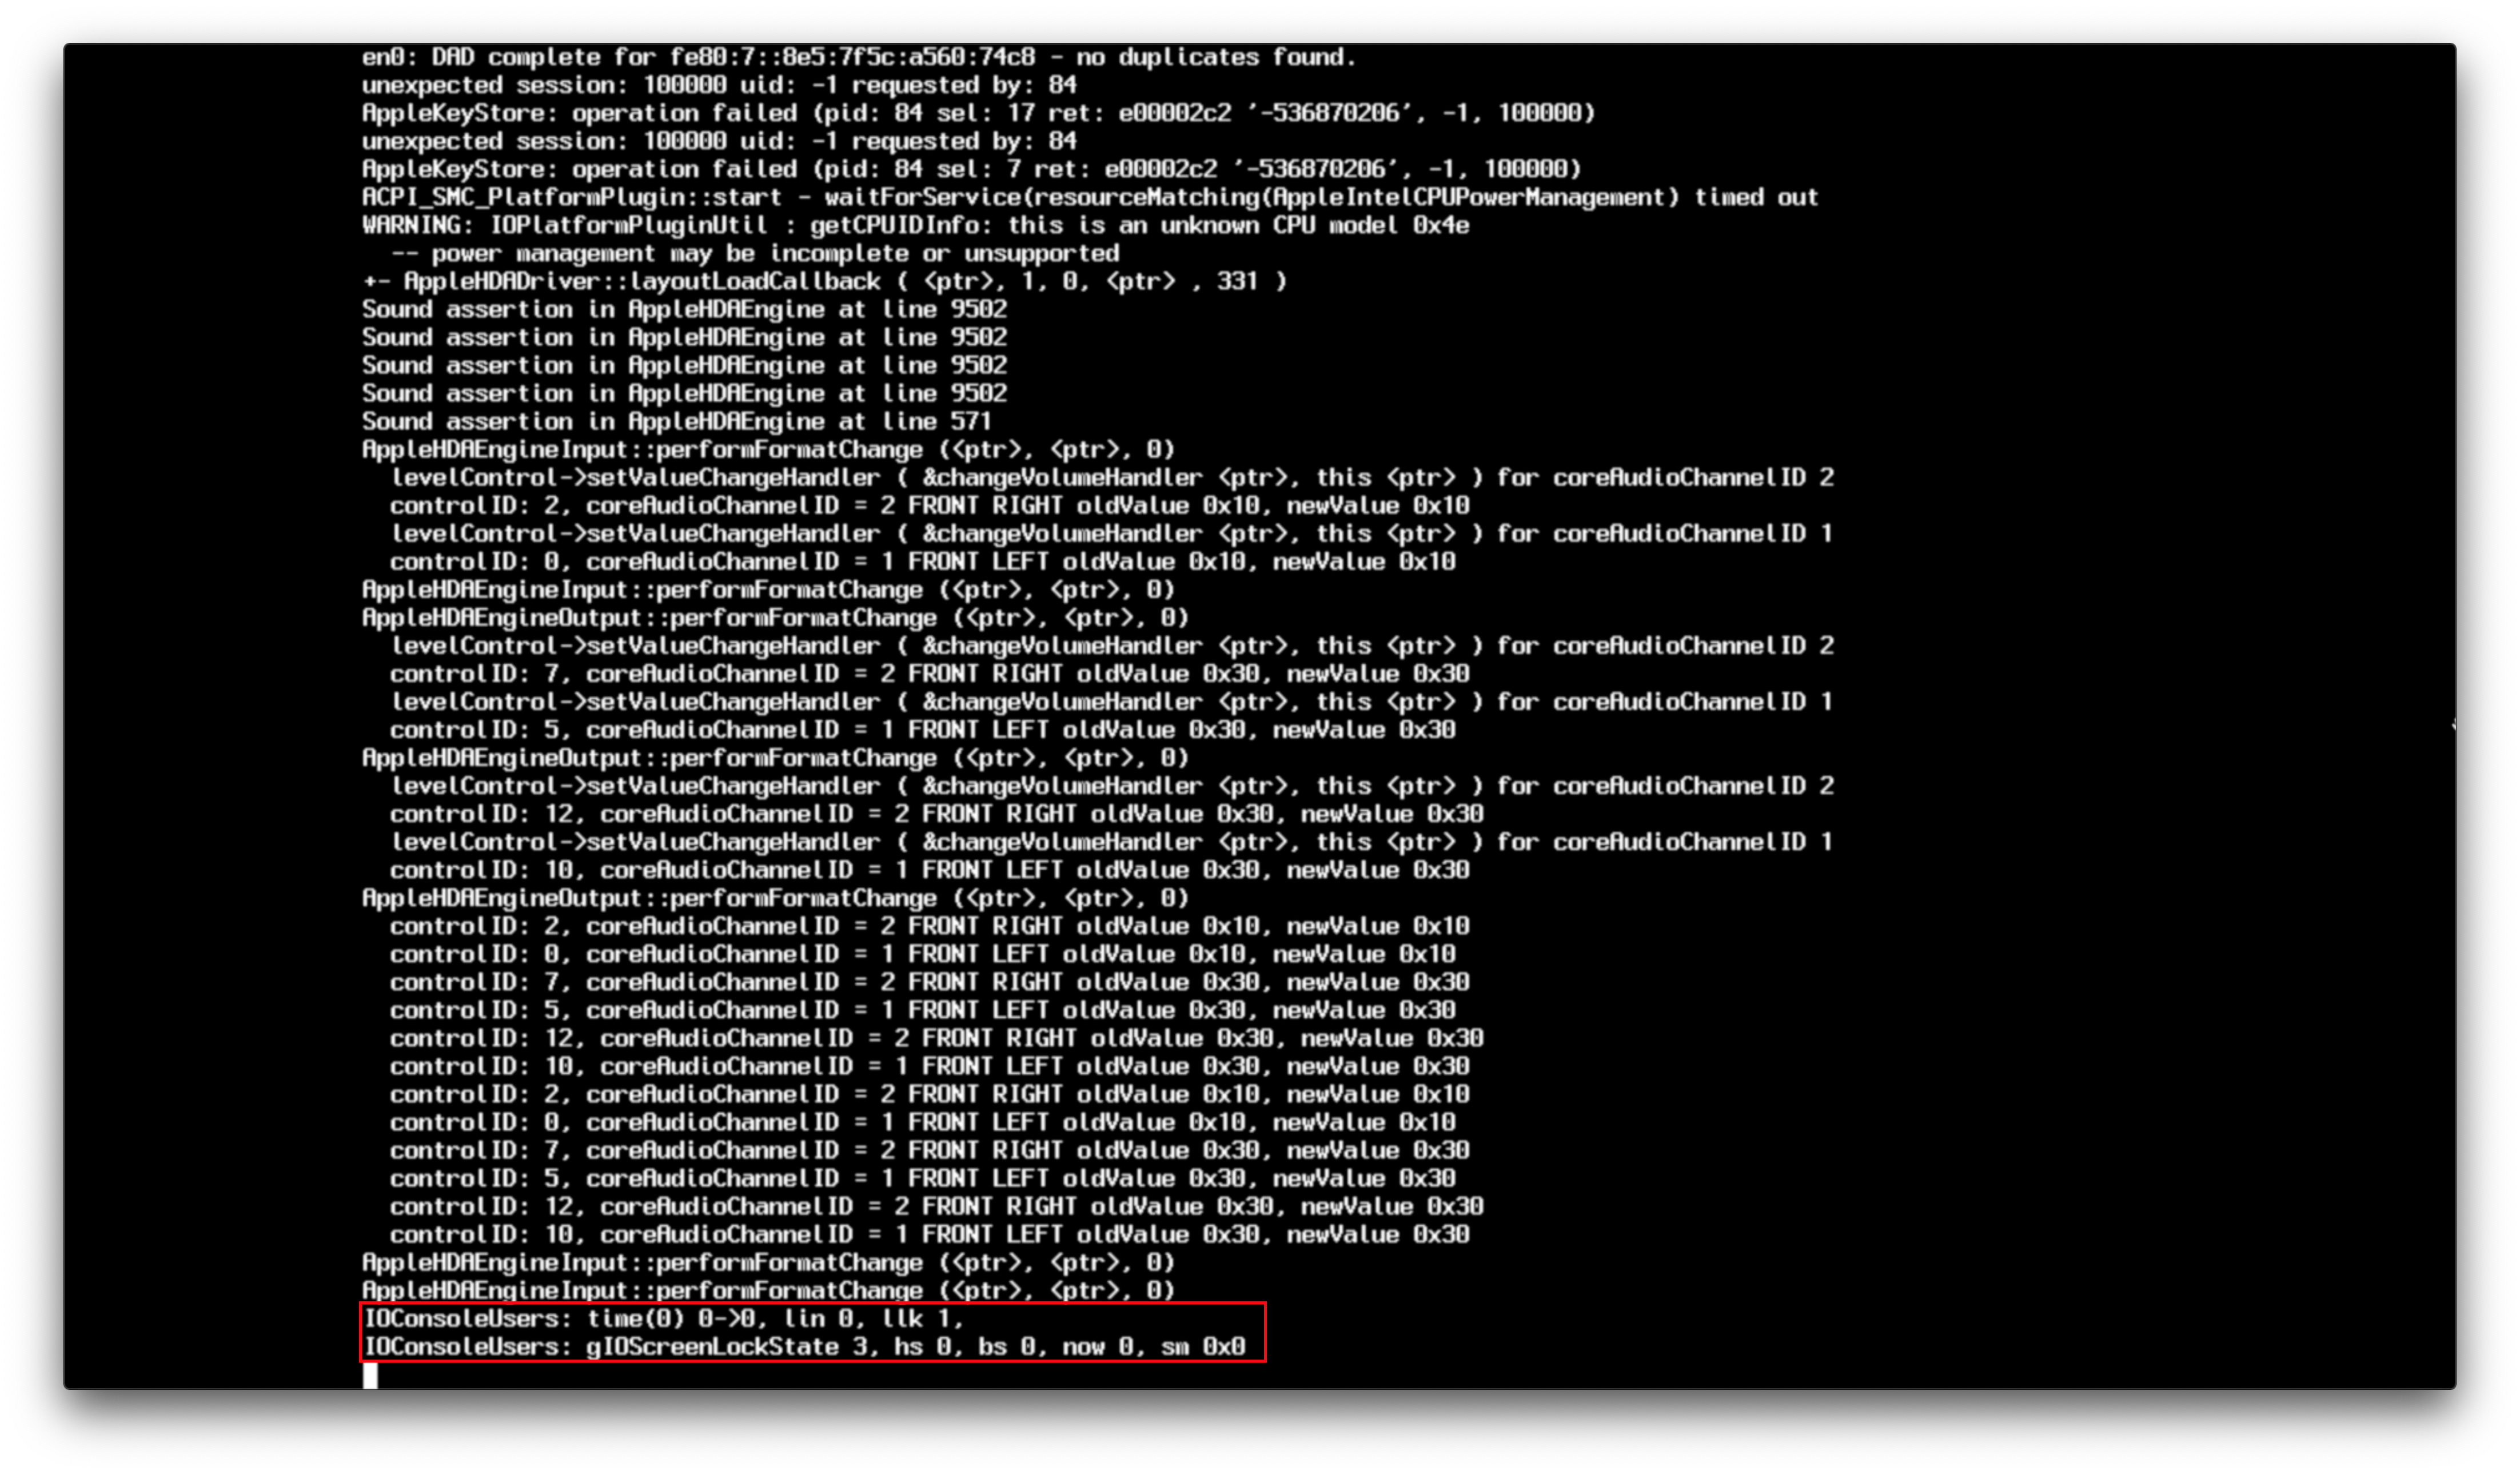
И здесь мы подбираемся к инциализации драйвера графического процессора, и где WhateverGreen тоже творит свою магию. Обычно, ошибки здесь связаны с графическим процессором, а не с самим WhateverGreen. Основные виновники:
# macOS Handoff

И наконец-то вы преодолели всю эту многословность! Если вы застряли на логотипе Apple после Verbose, то есть пара вещей, которые нужно проверить:
Источник


