- Button
- 1. Атрибут android:onClick
- 2. Метод setOnClickListener()
- 3. Интерфейс OnClickListener
- Состояния кнопки
- Как создать плавающую кнопку для Android приложения
- How to add Extended Floating Action Button in Android | Android Studio | Java
- Step 1: add the dependency
- Step 2: add the drawable files
- Step 3: design the XML file
- Step 4: add the functionality
- How to Add and Customize Back Button of Action Bar in Android?
- Adding Action Buttons
- This lesson teaches you to
- You should also read
- Specify the Actions in XML
- Download action bar icons
- Add the Actions to the Action Bar
- Respond to Action Buttons
- Add Up Button for Low-level Activities
Button
Button (Кнопка) — это компонент, который может быть нажат пользователем для подтверждения какого-либо действия. Она является одним из основных элементов интерфейса и имеет большое значение в приложении.
Кнопка состоит из текста или иконки (или текста с иконкой), который сообщает пользователю, какое действие произойдёт после нажатия.
Поскольку Button является наследником TextView, ему доступны атрибуты для работы с текстом, такие как android:textColor, android:textAlignment и другие.
Недостаточно просто разместить кнопку на экране разметки, нужно ещё создать обработчик нажатия на кнопку. Существует несколько способов, как это можно сделать:
1. Атрибут android:onClick
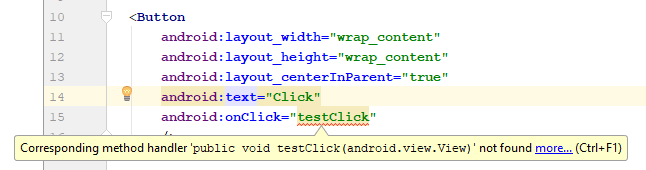
Когда вы создаёте Button, вы можете в XML добавить ему атрибут android:onClick. Создадим на активности простую кнопку:
Теперь добавим этой кнопке атрибут android:onClick и в значении напишем имя метода, который будет обрабатывать нажатие. Если в классе активности этого метода нет, Android Studio скажет, что такой метод не найден.
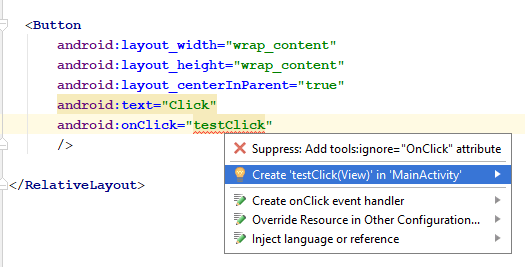
В этом случае можно установить курсор на имени метода и нажать комбинацию Alt + Enter, затем выбрать опцию Create, после чего студия сама создаст в классе активности метод с таким названием. Либо можно перейти в класс активности и вручную создать этот метод, передав ему в параметры View.
Перейдя в MainActivity, можно увидеть, что теперь там есть метод testClick(View view). Внутри него уже писаться код, который должен выполняться после нажатия на кнопку.
Чтобы использовать метод для обработки кликов, он должен соответствовать следующим требованиям:
- быть public
- возвращать void
- принимать в качестве единственного параметра экземпляр класса View
2. Метод setOnClickListener()
Кроме XML, обработчик нажатия можно задать программно в коде активности. Аналогично создадим кнопку, однако на этот раз укажем идентификатор с помощью атрибута android:id.
Теперь в коде активности определим эту кнопку и вызовем для неё метод setOnClickListener(), который установит на кнопку слушатель, отлавливающий нажатия на кнопку.
3. Интерфейс OnClickListener
Ещё одним способом, с помощью которого можно обрабатывать нажатия кнопок, является использование интерфейса. Интерфейс — это абстрактный класс, в котором описаны только методы без самой реализации. Реализация таких методов происходит в классе, к которому этот интерфейс подключается.
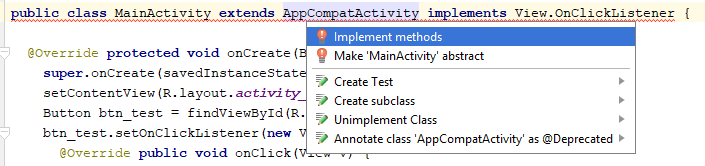
Чтобы добавить в класс интерфейс, нужно воспользоваться ключевым словом implements. Подключим интерфейс OnClickListener к нашей активности.
Android Studio выдаст сообщение, что мы должны реализовать метод, описанный в подключенном интерфейсе.

Поставим курсор на выделенную строку и нажмём комбинацию Alt + Enter, затем выберем опцию Implement methods.
Появится окно, в котором будет предложен список методов, которые мы хотим реализовать. В данном случае нам нужен метод onClick().
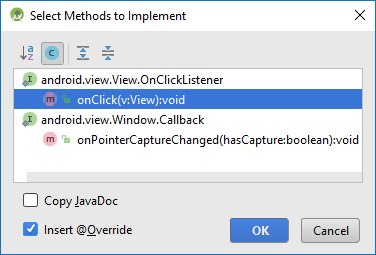
Теперь у нас на активности есть соответствующий метод.
Сделаем обработку нажатия. Аналогично предыдущему способу, нам понадобится кнопка с идентификатором.
Вернёмся в метод onClick(). В этот метод будут попадать нажатия кнопок на активности, поэтому нам нужно добавить здесь проверку на идентификатор. Добавим следующий код.
Если у вас на активности всего одна кнопка, проверка с помощью switch необязательна, однако если вы хотите обрабатывать в этом методе нажатия нескольких кнопок, то нужно будет проверять идентификатор и, исходя из этого, выполнять соответствующие операции.
Теперь нужно только привязать к кнопке слушатель как мы это делали во втором способе. Единственное отличие — вместо создания нового слушателя мы будем указывать текущий.
Состояния кнопки
Кроме всего прочего, у Button есть возможность отслеживать состояния нажатий. Делается это с помощью селектора.
У селектора есть следующие атрибуты, определяющие состояние элемента:
- android:state_pressed — когда пользователь нажимает на элемент.
- android:state_focused — когда на элементе установлен фокус ввода.
- android:state_enabled — когда элемент доступен.
- android:state_checked — когда элемент в списке был отмечен.
Создадим селектор, который при нажатии на кнопку будет менять её цвет, со следующим кодом.
Затем добавляем этот селектор в атрибут кнопки android:background.
Источник
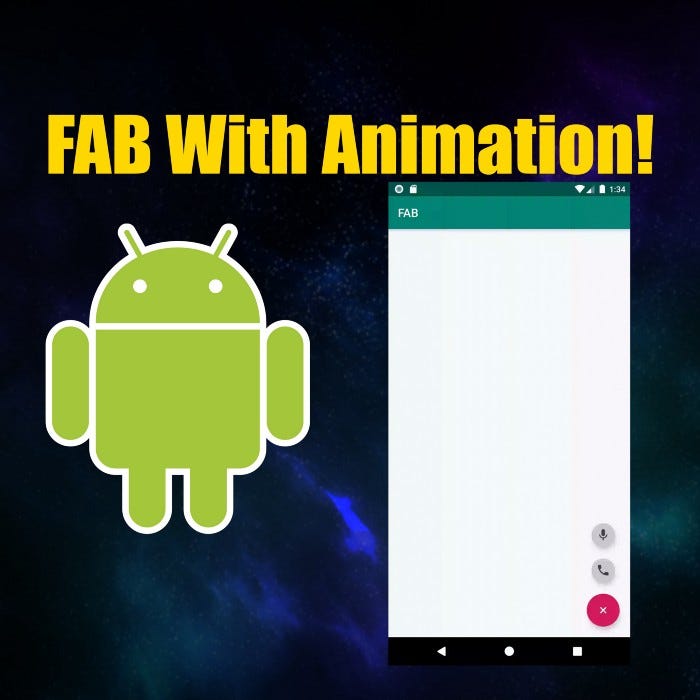
Как создать плавающую кнопку для Android приложения

Sep 25, 2019 · 5 min read
Для начала создайте пустой Android проект.
Добавьте зависимость Android Design, потому что FAB находится в этой библиотеке. Скопируйте и вставьте её в свой проект.
Если вы не знаете, что такое привязка данных и как она работает, рекомендую почитать статьи и документацию.
Я расскажу о привязке данных только то, что понадобится для этого проекта. Для привязки данных вам больше не нужно писать findViewById . Вы можете хранить XML в одной переменной и использовать его в FAB activity.
Чтобы включить привязку данных, вставьте в build.gradle (app level) эти строки:
После запуска Activity_fab должен выглядеть так:

Теперь о б ерните этот код в тег для того, чтобы привязка данных работала.

coordinatorLayout — это мощный FrameLayout . Используйте его, если хотите взаимодействовать с более чем одним дочерним представлением или макетом верхнего уровня decor/chrome.
Давайте добавим LinearLayout в coordinatorLayout . Добавьте следующий код:
Теперь можно добавить плавающую кнопку действия (FAB) в linear layout.
Добавьте этот код в colors.xml .
Нам нужно добавить три иконки, которые будут отображаться на кнопках. Я использую иконки Android Material. Вы можете использовать свои собственные иконки.
Привязываем иконку add к кнопке FAB. Ваш код должен выглядеть так:
Источник
How to add Extended Floating Action Button in Android | Android Studio | Java

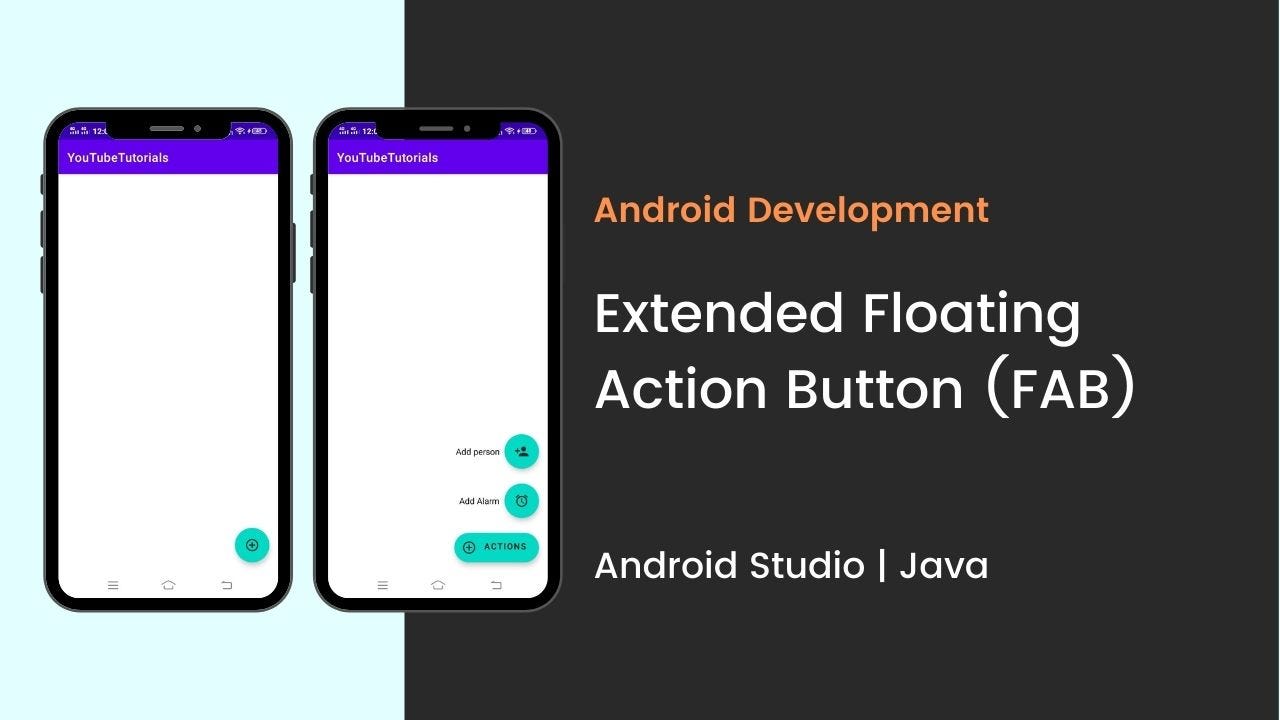
How to add Extended Floating Action Button in Android | Android Studio | Java.
In this tutorial, we are going to create an extended floating action button in android. A floating action button (FAB) performs the primary, or most common, action on a screen. It appears in front of all screen content, typically as a circular shape with an icon in its center.
Extended Floating Action Button is the newly introduced class with Material Components library in Android.
Material Components is introduced with SDK 28 or Android P. It’s a superset of Support Design Library with lots of new additions and improvements. And, in this tutorial, we are going to create an extended floating action button.
So, let’s start creating the extended FAB.
Before going to create let’s see what you’re going to see.
Step 1: add the dependency
make sure to add the material design dependency in your build.gradle app file.
Step 2: add the drawable files
before going to design the main XML file, first, import the drawable files. Below drawable files that I used in my project.

Step 3: design the XML file
now, design the main XML file, add the Extended Floating Action Button that is set as the parent FAB and also add the child FAB. Here as a child FAB, I used two FABs.
parent FAB: Action
child FAB 1: Alarm
child FAB 2: Person
Step 4: add the functionality
now in the main JAVA file add the functionality for the extended FAB and add the click listener in the child FAB.
Источник
How to Add and Customize Back Button of Action Bar in Android?
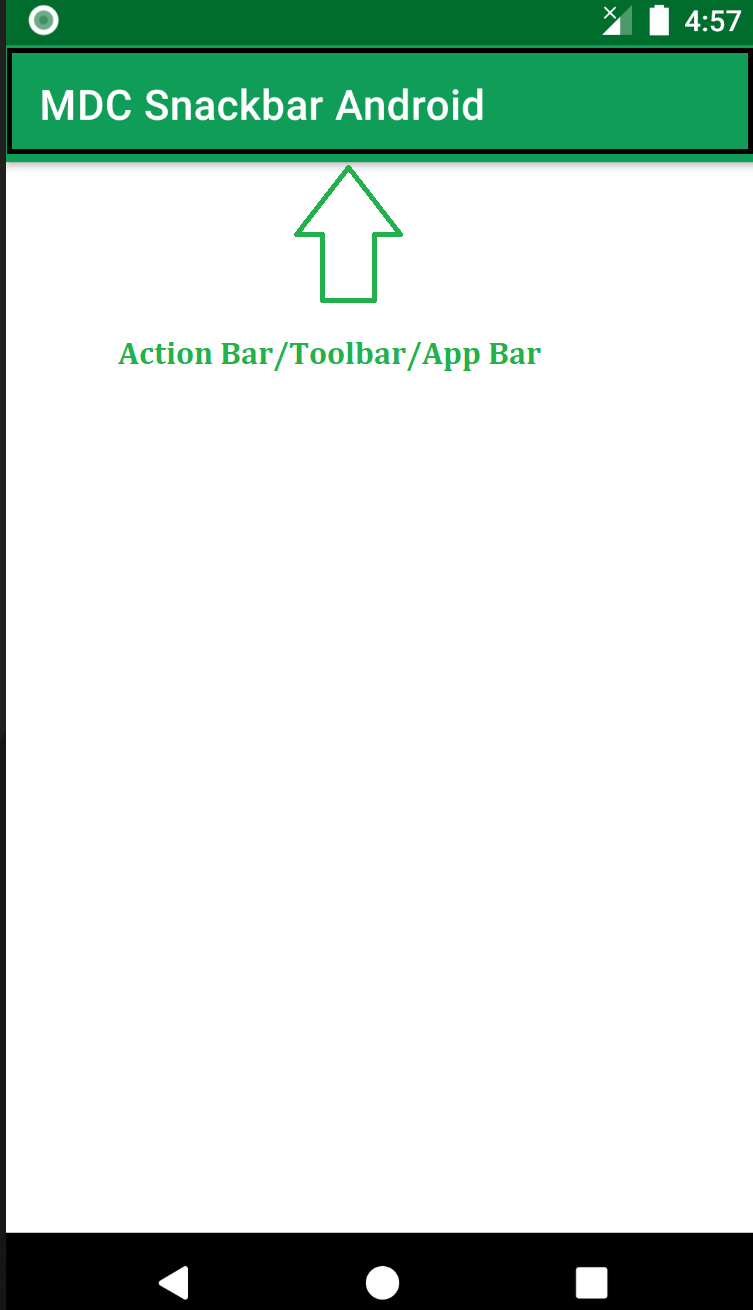
The action bar (sometimes referred to as the app bar), if it exists for an activity, will be at the top of the activity’s content area, typically directly underneath the status bar. It is a menu bar that runs across the top of the activity screen in android. Android ActionBar can contain menu items that become visible when the user clicks the “menu” button. In general, an ActionBar composed of the following four components:
- App Icon: App branding logo or icon will be shown here
- View Control: A dedicated space to display the Application title. Also provides the option to switch between views by adding spinner or tabbed navigation
- Action Buttons: Major actions of the app could be added here
- Action Overflow: All unimportant action will be displayed as a menu
Below is a sample image to show where the Action Bar/Toolbar/App Bar is present on an android device.
Attention reader! Don’t stop learning now. Get hold of all the important Java Foundation and Collections concepts with the Fundamentals of Java and Java Collections Course at a student-friendly price and become industry ready. To complete your preparation from learning a language to DS Algo and many more, please refer Complete Interview Preparation Course.
The action bar is a primary toolbar inside an activity that can be used to display an activity title and other interactive items. One of the most used items is a Back Navigation Button. The back button is used to move backward from the previously visited screen by the user. Most Android devices have a dedicated back button still a back button on the action bar enhances the user experience.
Источник
Adding Action Buttons
This lesson teaches you to
You should also read
The action bar allows you to add buttons for the most important action items relating to the app’s current context. Those that appear directly in the action bar with an icon and/or text are known as action buttons. Actions that can’t fit in the action bar or aren’t important enough are hidden in the action overflow.

Specify the Actions in XML
All action buttons and other items available in the action overflow are defined in an XML menu resource. To add actions to the action bar, create a new XML file in your project’s res/menu/ directory.
Add an element for each item you want to include in the action bar. For example:
Download action bar icons
To best match the Android iconography guidelines, you should use icons provided in the Action Bar Icon Pack.
This declares that the Search action should appear as an action button when room is available in the action bar, but the Settings action should always appear in the overflow. (By default, all actions appear in the overflow, but it’s good practice to explicitly declare your design intentions for each action.)
The icon attribute requires a resource ID for an image. The name that follows @drawable/ must be the name of a bitmap image you’ve saved in your project’s res/drawable/ directory. For example, «@drawable/ic_action_search» refers to ic_action_search.png . Likewise, the title attribute uses a string resource that’s defined by an XML file in your project’s res/values/ directory, as discussed in Building a Simple User Interface.
Note: When creating icons and other bitmap images for your app, it’s important that you provide multiple versions that are each optimized for a different screen density. This is discussed more in the lesson about Supporting Different Screens.
If your app is using the Support Library for compatibility on versions as low as Android 2.1, the showAsAction attribute is not available from the android: namespace. Instead this attribute is provided by the Support Library and you must define your own XML namespace and use that namespace as the attribute prefix. (A custom XML namespace should be based on your app name, but it can be any name you want and is only accessible within the scope of the file in which you declare it.) For example:
Add the Actions to the Action Bar
To place the menu items into the action bar, implement the onCreateOptionsMenu() callback method in your activity to inflate the menu resource into the given Menu object. For example:
Respond to Action Buttons
When the user presses one of the action buttons or another item in the action overflow, the system calls your activity’s onOptionsItemSelected() callback method. In your implementation of this method, call getItemId() on the given MenuItem to determine which item was pressed—the returned ID matches the value you declared in the corresponding element’s android:id attribute.
Add Up Button for Low-level Activities

Figure 4. The Up button in Gmail.
All screens in your app that are not the main entrance to your app (activities that are not the «home» screen) should offer the user a way to navigate to the logical parent screen in the app’s hierarchy by pressing the Up button in the action bar.
When running on Android 4.1 (API level 16) or higher, or when using ActionBarActivity from the Support Library, performing Up navigation simply requires that you declare the parent activity in the manifest file and enable the Up button for the action bar.
For example, here’s how you can declare an activity’s parent in the manifest:
Then enable the app icon as the Up button by calling setDisplayHomeAsUpEnabled() :
Because the system now knows MainActivity is the parent activity for DisplayMessageActivity , when the user presses the Up button, the system navigates to the parent activity as appropriate—you do not need to handle the Up button’s event.
For more information about up navigation, see Providing Up Navigation.
Источник


