- Android SDK: создание приложения для рисования — сенсорное взаимодействие
- Формат урока
- Просмотр конечного результата
- 1. Подготовка к рисованию
- Шаг 1
- Шаг 2
- Шаг 3
- Шаг 4
- 2. Содействие рисованию
- Шаг 1
- Шаг 2
- Шаг 3
- 3. Выбор цветов
- Шаг 1
- Шаг 2
- Шаг 3
- Вывод
- Learn to create a Paint Application for Android
- Tiny Paint — Android Apps on Google Play
- Tiny Paint is a simple and efficient drawing application.
- Tiny Paint Pro — Android Apps on Google Play
- Tiny Paint Pro is a simple and efficient drawing application.
- Finger Path Object
- Create the Paint View
- Manage the users’ touches on the screen
- User Interface of the Paint Application
- Implement the Main Activity
- Enjoy Paint Application on Android
- Learn to create a Paint Application for Android
- Finger Path Object
- Create the Paint View
- Manage the users’ touches on the screen
- User Interface of the Paint Application
- Implement the Main Activity
- Enjoy Paint Application on Android
Android SDK: создание приложения для рисования — сенсорное взаимодействие
Russian (Pусский) translation by Elen (you can also view the original English article)
В серии нескольких статье мы создадим приложение для рисования с помощью пальцев для Android, использующее сенсорное взаимодействие. У пользователя будет возможность выбирать цвет из цветовой палитры, размер кисти, стирать, создавать новый рисунок или сохранять уже существующий в галерее устройства.
Формат урока
Данный урок по созданию приложения для рисования будет состоять из трех частей:
Просмотр конечного результата


В первой части серии нескольких уроков мы создадим пользовательский интерфейс. Во второй части мы осуществим рисование на холсте и выбор цветов. В заключительной части мы представим возможность стирать, создавать новые рисунки и сохранять их в галерее пользовательского устройства. Мы рассмотрим опции, которые вы сможете использовать для улучшения этого приложения, проходя в будущем другие учебные материалы, включая заливку холста, прозрачность и другое взаимодействие, отличное от сенсорного.
1. Подготовка к рисованию
Шаг 1
В прошлый раз мы создали класс с именем «DrawingView», который представляет собой пользовательский View для функций рисования, которые должны выполняться внутри. Мы создали схему объявления класса и метод с именем «setupDrawing» — вот сейчас мы сделаем это. В своем классе DrawingView добавьте следующие операторы импорта:
Затем добавьте некоторые переменные экземпляра в верхней части класса:
Когда пользователь прикасается к экрану и перемещает палец, чтоб рисовать, мы будем использовать Path для отслеживания его действий рисования на холсте. Как холст, так и рисунок поверх него представлены объектами Paint. Начальный цвет краски соответствует первому цвету в палитре, которую мы создали в последний раз, и которая будет первоначально выбрана при запуске приложения. Наконец, мы объявляем переменные для холста и растрового изображения: пути пользователя, нарисованные с помощью drawPaint , будут нарисованы на холсте, который нарисован canvasPaint .
Шаг 2
Давайте создадим в методе setupDrawing некоторые из этих переменных, чтобы установить класс для рисования. Сначала создайте объекты рисования Path и Paint:
Затем установите начальный цвет:
Теперь задайте начальные свойства пути:
Мы изменим часть этого кода в следующем уроке, когда реализуем возможность выбора размеров кистей; пока мы установим произвольный размер кисти. Настройка сглаживания, штрихов и стилей сделает рисунки пользователя более гладкими.
Завершите метод setupDrawing , создав экземпляр объекта Paint:
На этот раз мы устанавливаем сглаживание, передавая параметр конструктору.
Шаг 3
Нам нужно переопределить несколько методов, чтобы сделать пользовательскую функцию View в виде чертежа. Во-первых, все еще находясь внутри класса DrawingView , переопределите метод onSizeChanged , который будет вызываться, когда пользовательскому View присваивается размер:
Внутри этого метода вызовите сначала метод суперкласса:
Теперь создайте холст для рисования и растрового изображения, используя значения ширины и высоты:
Шаг 4
Чтобы позволить классу функционировать как View чертежа пользователя, нам также необходимо переопределить метод onDraw , поэтому сейчас добавьте его в класс:
Внутри метода нарисуйте холст и путь рисования:
Пока мы еще не реализовали возможность для пользователя рисовать путь с помощью Paint, но как только мы это сделаем, он будет представлен в View. Каждый раз, когда пользователь рисует с помощью сенсорного взаимодействия, мы аннулируем View, заставляя выполняться метод onDraw .
2. Содействие рисованию
Шаг 1
Когда чертеж View находится на экране приложения, мы хотим, чтобы пользователь касался его для регистрации в качестве операций рисования. Для этого нам нужно проследить сенсорные события. В своем классе drawingView добавьте следующий метод:
Внутри метода извлеките X и Y позиции касания пользователя:
Шаг 2
Параметр MotionEvent в onTouchEvent методе позволит нам реагировать на определенные события прикосновения. Действия, в которых мы заинтересованы, чтобы применить рисование, — down , move и up . Добавьте оператор switch в метод для ответа на каждый из следующих:
Найдите минутку, чтобы просмотреть этот код. Когда пользователь касается View, мы перемещаемся в это положение, чтобы начать рисовать. Когда он двигает пальцем по View, мы рисуем путь вместе с его прикосновением. Когда он забирает свой палец от View, мы рисуем Path, и перезагружаем его для следующей операции рисования.
Шаг 3
После оператора switch завершите метод, сделав недействительным View и вернув истинное значение:
Вызов invalidate вызовет выполнение метода onDraw .
3. Выбор цветов
Шаг 1
Теперь давайте реализуем возможность пользователя выбирать цвета из палитры. В главном Activity приложения добавьте следующие импорты:
Добавьте в класс следующую переменную экземпляра:
Это представляет экземпляр пользовательского View, который мы добавили в макет. Внутри onCreate , после существующего кода, создайте эту переменную, извлекая ссылку на нее из макета:
Теперь у нас есть View, который отображается в Activity, на котором мы можем вызвать методы в классе DrawingView .
Шаг 2
Мы устанавливаем исходный цвет в классе чертежа View, давайте теперь настроим пользовательский интерфейс, чтобы отображать и управлять им. В основном классе Activity добавьте другую переменную экземпляра, чтобы отобразить кнопку цвета на палитре:
Внутри onCreate мы теперь хотим получить первую кнопку цвета краски в области палитры, которая изначально будет выбрана. Сначала найдите Linear Layout, содержащуюся внутри:
Получите первую кнопку и сохраните ее как переменную экземпляра:
На кнопке мы будем использовать другое изображение, которое можно нарисовать, чтобы показать, что оно выбрано в настоящий момент:
Добавьте этот файл в чертежи вашего приложения, указав ему имя «paint_pressed.xml» и введя следующую форму:
Это очень похоже на «paint.xml», который мы создали в последний раз, но с темным цветом вокруг краски.
Шаг 3
Теперь мы можем позволить пользователю выбирать цвета. Когда в последний раз мы создавали макет, мы указали атрибут onClick для кнопок цветовой палитры; теперь добавьте метод в свой основной класс Activity:
Внутри этого метода сначала убедитесь, что пользователь щелкнул цвет краски, который не выбран в данный момент:
Внутри блока if найдите тег, который мы установили для каждой кнопки в макете, представляя выбранный цвет:
Для установки цвета нам нужно использовать собственный класс View. Перейдите в класс DrawingView и добавьте следующий метод:
Внутри метода начните с аннулирования View:
Затем выполните анализ и установите цвет для рисования:
Вернемся к нашему основному Activity и в методе paintClicked , после получения тега цвета, вызовите новый метод на пользовательский чертежный объект View:
Теперь обновите пользовательский интерфейс, чтобы отобразить новую выбранную краску, и установите предыдущую версию в обычном режиме:
Вывод
Теперь вы можете запустить приложение и рисовать на холсте, выбрав цвета для рисования. Вы видите, что кнопки цветовой палитры соответствуют выбранному цвету в данный момент. В этом уроке мы проработали основные функции любого приложения для рисования под Android, поэтому теперь у вас должны быть основные навыки для реализации собственных функций рисования в других приложениях. В заключительной части серии этих уроков мы реализуем стирание, выбор размера кисти и ластика, сохранение рисунков и начало рисования новых.
Источник
Learn to create a Paint Application for Android

Jun 6, 2017 · 5 min read
Paint applications are become famous thanks to Microsoft Paint, well known as simply Paint or Paintbrush. It was a simple computer graphics application included with all versions of Microsoft Windows. In this tutorial, you are going to discover how to create a Paint Application for Android which will let users to draw on the screen with their fingers.
Our Paint Application for Android will offer the following features to users :
- Draw paths with fingers on the screen
- Normal mode
- Emboss mode
- Blur mode
- Clear option to remove all paths on the screen
Note that you can discover this tutorial in video directly on YouTube :
Even better, you can enjoy the demo of this Paint Application directly on your Android smartphones and tablets by downloading Tiny Paint on the Google Play Store :
Tiny Paint — Android Apps on Google Play
Tiny Paint is a simple and efficient drawing application.
Tiny Paint Pro — Android Apps on Google Play
Tiny Paint Pro is a simple and efficient drawing application.
Finger Path Object
The first step is to create a FingerPath Object to represent a path drawn with the finger on the screen. Our FingerPath class will have several fields letting us to define :
- Color of the path
- Emboss mode or no
- Blur mode or no
- Stroke width of the path
- Path object from the standard SDK representing the path drawn
Our object will be just like that :
Create the Paint View
With the possibility to represent a path drawn with the finger of the user on the screen, we need now to define a custom view to draw these paths on the screen. For that, we are going to create a PaintView class.
Obviously, our PaintView class will extend the View object from the standard SDK. The PaintView class will have some constants like the size the stroke width for the path also known as brush size or still the color of the path drawn.
The PaintView will store several FingerPath objects inside an ArrayList field. Besides, the PaintView object has a field for the Canvas used to draw the paths represented on the screen to the user.
In the constructor of the PaintView, we initialize the Paint Object used to draw the paths on the Canvas. We need to define the style of the Paint Object as STROKE. Then, we set the stroke join and stroke cap to ROUND. Finally, we create an EmbossMaskFilter Object for the emboss mode and an BlurMaskFilter for the blur mode.
This gives us the following code for the PaintView at this stage of the tutorial :
Now, we add an init method on the PaintView class. This method will take a DisplayMetrics Object in parameter and will be responsible to define the height and width of the PaintView. Furthermore, we initialize the Canvas and its underlying Bitmap used to draw paths on the screen.
The PaintView will expose three methods to switch between the three modes of drawing : normal, emboss and blur. The clear method will let us to clear the PaintView by clearing the list of Finger Paths. To let the users to visualize the changes on the screen, we don’t forget to call the invalidate method to redraw the PaintView.
Then, we override the onDraw method of the View class. First we save the current state of the Canvas instance before to draw the background color of the PaintView. We iterate on the list of Finger Paths and we draw the Path Object contained in the current FingerPath Object on the Canvas.
To apply the specific effect defined by the user, like emboss or blur, we set the corresponding mask filter on the Paint Object used to draw the FingerPath if needed. Finally, we draw all these elements on the Canvas of the PaintView and we restore the current Canvas.
At this stage, we have the following code for our PaintView :
Manage the users’ touches on the screen
Now, we need to manager the users’ touches on the screen to save the paths drawn on the screen with their fingers. We override the onTouchEvent method and we define three methods to manage the three following actions :
- ACTION_DOWN with a touchStart method
- ACTION_MOVE with a touchMove method
- ACTION_UP with a touchUp method
In the touchStart method, we start by creating a new Path and a new FingerPath Objects. We save the current coordinates (x,y) of the finger of the user and we call the moveTo method of the Path object.
In the touchMove method, we check if the move on the screen if greater than the touch tolerance defined as a constant previously. If yes, we call the quadTo method of the Path Object starting from the last point touched and going to the average position between the first position and the current position.
In the touchUp method, we end the line by calling the lineTo method of the Path object with the last position touched on the screen.
With these methods implemented, you can access to the complete code of the PaintView below :
User Interface of the Paint Application
With the PaintView Object created, we can define the User Interface of our Paint Application for Android. This UI will just display a PaintView matching its parent for width and height :
Implement the Main Activity
Last step is to implement the Main Activity and writing its Java code. In this activity, we just need to make the link between menu displayed to user with options (normal, emboss, blur or clear) offered by the PaintView.
Besides, we need to load a DisplayMetrics object for the Main Activity and the initialize the PaintView Object with it in parameter.
It gives us the following code :
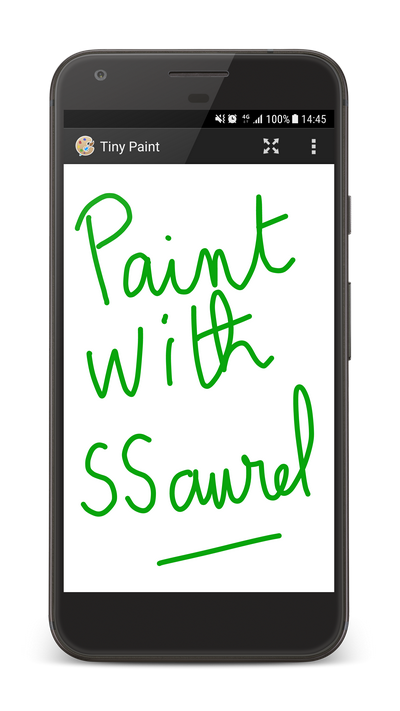
Enjoy Paint Application on Android
Now, you can run your Paint Application and enjoy painting on Android.

By using the base of our Pain Application, you can add a lot of new features like a color picker or the possibility to save your creations. It’s your turn to play !
Источник
Learn to create a Paint Application for Android
Paint applications are become famous thanks to Microsoft Paint, well known as simply Paint or Paintbrush. It was a simple computer graphics application included with all versions of Microsoft Windows. In this tutorial, you are going to discover how to create a Paint Application for Android which will let users to draw on the screen with their fingers.
Our Paint Application for Android will offer the following features to users :
- Draw paths with fingers on the screen
- Normal mode
- Emboss mode
- Blur mode
- Clear option to remove all paths on the screen
Note that you can discover this tutorial in video directly on YouTube :
Even better, you can enjoy the demo of this Paint Application directly on your Android smartphones and tablets by downloading Tiny Paint on the Google Play Store :
Finger Path Object
The first step is to create a FingerPath Object to represent a path drawn with the finger on the screen. Our FingerPath class will have several fields letting us to define :
- Color of the path
- Emboss mode or no
- Blur mode or no
- Stroke width of the path
- Path object from the standard SDK representing the path drawn
Our object will be just like that :
Create the Paint View
With the possibility to represent a path drawn with the finger of the user on the screen, we need now to define a custom view to draw these paths on the screen. For that, we are going to create a PaintView class.
Obviously, our PaintView class will extend the View object from the standard SDK. The PaintView class will have some constants like the size the stroke width for the path also known as brush size or still the color of the path drawn.
The PaintView will store several FingerPath objects inside an ArrayList field. Besides, the PaintView object has a field for the Canvas used to draw the paths represented on the screen to the user.
In the constructor of the PaintView, we initialize the Paint Object used to draw the paths on the Canvas. We need to define the style of the Paint Object as STROKE. Then, we set the stroke join and stroke cap to ROUND. Finally, we create an EmbossMaskFilter Object for the emboss mode and an BlurMaskFilter for the blur mode.
This gives us the following code for the PaintView at this stage of the tutorial :
Now, we add an init method on the PaintView class. This method will take a DisplayMetrics Object in parameter and will be responsible to define the height and width of the PaintView. Furthermore, we initialize the Canvas and its underlying Bitmap used to draw paths on the screen.
The PaintView will expose three methods to switch between the three modes of drawing : normal, emboss and blur. The clear method will let us to clear the PaintView by clearing the list of Finger Paths. To let the users to visualize the changes on the screen, we don’t forget to call the invalidate method to redraw the PaintView.
Then, we override the onDraw method of the View class. First we save the current state of the Canvas instance before to draw the background color of the PaintView. We iterate on the list of Finger Paths and we draw the Path Object contained in the current FingerPath Object on the Canvas.
To apply the specific effect defined by the user, like emboss or blur, we set the corresponding mask filter on the Paint Object used to draw the FingerPath if needed. Finally, we draw all these elements on the Canvas of the PaintView and we restore the current Canvas.
At this stage, we have the following code for our PaintView :
Manage the users’ touches on the screen
Now, we need to manager the users’ touches on the screen to save the paths drawn on the screen with their fingers. We override the onTouchEvent method and we define three methods to manage the three following actions :
- ACTION_DOWN with a touchStart method
- ACTION_MOVE with a touchMove method
- ACTION_UP with a touchUp method
In the touchStart method, we start by creating a new Path and a new FingerPath Objects. We save the current coordinates (x,y) of the finger of the user and we call the moveTo method of the Path object.
In the touchMove method, we check if the move on the screen if greater than the touch tolerance defined as a constant previously. If yes, we call the quadTo method of the Path Object starting from the last point touched and going to the average position between the first position and the current position.
In the touchUp method, we end the line by calling the lineTo method of the Path object with the last position touched on the screen.
With these methods implemented, you can access to the complete code of the PaintView below :
User Interface of the Paint Application
With the PaintView Object created, we can define the User Interface of our Paint Application for Android. This UI will just display a PaintView matching its parent for width and height :
Implement the Main Activity
Last step is to implement the Main Activity and writing its Java code. In this activity, we just need to make the link between menu displayed to user with options (normal, emboss, blur or clear) offered by the PaintView.
Besides, we need to load a DisplayMetrics object for the Main Activity and the initialize the PaintView Object with it in parameter.
It gives us the following code :
Enjoy Paint Application on Android
Now, you can run your Paint Application and enjoy painting on Android.
By using the base of our Pain Application, you can add a lot of new features like a color picker or the possibility to save your creations. It’s your turn to play !
Источник


