- Android — JSON Parser
- JSON — Elements
- JSON — Parsing
- Example
- Полный список
- Parsing between JSON and Kotlin Object with Google Gson Library
- Configuring Module: app/ build.gradle
- Parsing class object into json string
- Parsing json string into class object
- Customizing json keys while parsing
- Parsing nested json string to nested object
- Skipping nested hierarchy while parsing
- Parsing between a Collection, List or Array
- Parse class in android
Android — JSON Parser
JSON stands for JavaScript Object Notation.It is an independent data exchange format and is the best alternative for XML. This chapter explains how to parse the JSON file and extract necessary information from it.
Android provides four different classes to manipulate JSON data. These classes are JSONArray,JSONObject,JSONStringer and JSONTokenizer.
The first step is to identify the fields in the JSON data in which you are interested in. For example. In the JSON given below we interested in getting temperature only.
JSON — Elements
An JSON file consist of many components. Here is the table defining the components of an JSON file and their description −
| Sr.No | Component & description | ||||||||||||||||||||||||||||
|---|---|---|---|---|---|---|---|---|---|---|---|---|---|---|---|---|---|---|---|---|---|---|---|---|---|---|---|---|---|
| 1 |
| Sr.No | Method & description | ||||||||||||||||||||||||
|---|---|---|---|---|---|---|---|---|---|---|---|---|---|---|---|---|---|---|---|---|---|---|---|---|---|
| 1 | |||||||||||||||||||||||||
| 4 | getInt(String name) This method returns the integer value specified by the key This method returns the long value specified by the key This method returns the number of name/value mappings in this object.. This method returns an array containing the string names in this object. ExampleTo experiment with this example , you can run this on an actual device or in an emulator.
Following is the content of the modified main activity file src/MainActivity.java. Following is the modified content of the xml HttpHandler.java. Following is the modified content of the xml res/layout/activity_main.xml. Following is the modified content of the xml res/layout/list_item.xml. Following is the content of AndroidManifest.xml file. Let’s try to run our application we just modified. I assume you had created your AVD while doing environment setup. To run the app from Android studio, open one of your project’s activity files and click Run Above Example showing the data from string json,The data has contained employer details as well as salary information. Источник Полный список— парсим XML с помощью XmlPullParser XmlPullParser – XML-парсер, который можно использовать для разбора XML документа. Принцип его работы заключается в том, что он пробегает весь документ, останавливаясь на его элементах. Но пробегает он не сам, а с помощью метода next. Мы постоянно вызываем метод next и с помощью метода getEventType проверяем, на каком элементе парсер остановился. Основные элементы документа, которые ловит парсер: Напишем приложение, которое возьмет xml-файл и разберет его на тэги и аттрибуты. Project name: P0791_ XmlPullParser В папке res создайте папку xml, и в ней создайте файл data.xml: Это файл с описанием телефона Samsung Galaxy. Указаны его цена, характеристики экрана и возможные цвета корпуса. Данные выдуманы и могут не совпадать с реальностью 🙂 В onCreate мы получаем XmlPullParser с помощью метода prepareXpp и начинаем его разбирать. Затем в цикле while мы запускаем прогон документа, пока не достигнем конца — END_DOCUMENT. Прогон обеспечивается методом next в конце цикла while. В switch мы проверяем на каком элементе остановился парсер. START_DOCUMENT – начало документа START_TAG – начало тега. Выводим в лог имя тэга, его уровень в дереве тэгов (глубину) и количество атрибутов. Следующей строкой выводим имена и значения атрибутов, если они есть. END_TAG – конец тэга. Выводим только имя. TEXT – содержимое тэга В методе prepareXpp мы подготавливаем XmlPullParser. Для этого вытаскиваем данные из папки res/xml. Это аналогично вытаскиванию строк или картинок – сначала получаем доступ к ресурсам (getResources), затем вызываем метод, соответствующий ресурсу. В нашем случае это — метод getXml. Но возвращает он не xml-строку , а готовый XmlPullParser. Все сохраним и запустим приложение. START_DOCUMENT START_DOCUMENT срабатывает два раза по неведомым мне причинам. Далее можно наблюдать, как парсер останавливается в начале каждого тега и дает нам информацию о нем: имя, уровень (глубина), количество атрибутов, имена и названия атрибутов, текст. Также он останавливается в конце тега и мы выводим имя. В конце парсер говорит, что документ закончен END_DOCUMENT. Если xml у вас не в файле, а получен откуда-либо, то XmlPullParser надо создавать другим способом. Перепишем метод prepareXpp: Здесь мы сами создаем парсер с помощью фабрики, включаем поддержку namespace (в нашем случае это не нужно, на всякий случай показываю) и даем парсеру на вход поток из xml-строки (укороченный вариант data.xml). Все сохраним и запустим. Смотрим лог: START_DOCUMENT Здесь уже START_DOCUMENT сработал один раз, как и должно быть. Ну и далее идут данные элементов документа. Присоединяйтесь к нам в Telegram: — в канале StartAndroid публикуются ссылки на новые статьи с сайта startandroid.ru и интересные материалы с хабра, medium.com и т.п. — в чатах решаем возникающие вопросы и проблемы по различным темам: Android, Kotlin, RxJava, Dagger, Тестирование — ну и если просто хочется поговорить с коллегами по разработке, то есть чат Флудильня — новый чат Performance для обсуждения проблем производительности и для ваших пожеланий по содержанию курса по этой теме Источник Parsing between JSON and Kotlin Object with Google Gson Library
Sazzad Hissain Khan Jun 27, 2019 · 2 min read In this tutorial I will discuss about how to parse a class object into json string and convert it back from json string to class object in Android Kotlin using popular Gson library. Configuring Module: app/ build.gradleTo use the Gson library you need to add following dependency in your projects module gradle file ( Module: app/build.gradle) and re sync. Let’s assume, we have a data class Student, Parsing class object into json stringIf you want to convert single hierarchical class object into equivalent json string you simply need to call Gson().toJson() Parsing json string into class objectOn the other hands , you can convert a json string into class object with below code. If you do not declare SerializedName (discussed in next section), your class field name should be same to json keys. Customizing json keys while parsingSometimes server provided json keys are not neat and clean or not satisfactory with your project coding styles you follow. So you might want to make your data class field names non identical to json key names. You can do that with SerializedName annotation before each field. Parsing nested json string to nested objectWhat if the json string is not of a simple single level object rather it also have nested json object? Let’s say some json string like below one? In that case you can define nested classes and use them with Gson Skipping nested hierarchy while parsingSometime you might want to skip deep down lower hierarchy of json object because it requires creating many small nested data classes. In that case one trick is to store lower level json objects as string in the parent class field. For example, In the above json format if you don’t want to deal with city and post at that granular level so defining data class Address might be an overhead. You can simply store address object as a string in your student class. In that case you need to use JsonDeserializer . Thus you can parse a nested hierarchical json object into a less hierarchical class object, Similarly when we want to retrieve back the json string from the class object the specific field requires to be parsed directly from string representation to json object. In that case we use JsonSerializer. To call this toJason() we need to use like, Parsing between a Collection, List or ArrayGson is capable of parsing to and from an array or a list automatically into json object and vice versa. See the below code snippet, Источник Parse class in android
A library that gives you access to the powerful Parse Server backend from your Android app. For more information about Parse and its features, see the website, getting started, and blog. The Parse Android SDK has the following Android API and Gradle Plugin compatibility.
Add this in your root build.gradle file (not your module build.gradle file): Then, add the library to your project build.gradle replacing latest.version.here with the latest released version (see JitPack badge above). Initialize Parse in a custom class that extends Application : The custom Application class must be registered in AndroidManifest.xml : Note that if you are testing with a server using http , you will need to add android:usesCleartextTraffic=»true» to your above definition, but you should only do this while testing and should use https for your final product. See the guide for the rest of the SDK usage. We want to make contributing to this project as easy and transparent as possible. Please refer to the Contribution Guidelines. More Parse Android Projects These are other official libraries we made that can help you create your Parse app.
As of April 5, 2017, Parse, LLC has transferred this code to the parse-community organization, and will no longer be contributing to or distributing this code. Источник  Когда к мобильному устройству присоединены наушники  ОС Google Android развивается, и по всему видимому |
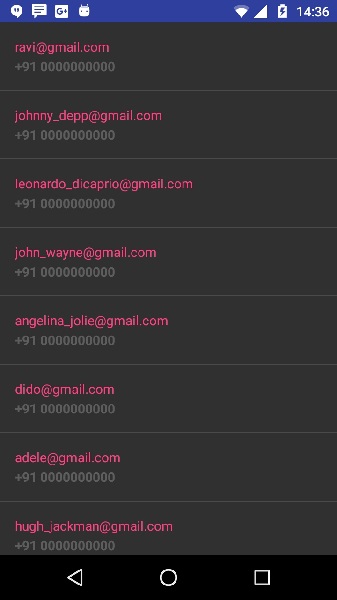
 icon from the toolbar. Android studio installs the app on your AVD and starts it and if everything is fine with your setup and application, it will display following Emulator window −