- If you forgot your iPhone passcode
- Step 1: Make sure that you have a computer (Mac or PC)
- Step 2: Turn off your iPhone
- Step 3: Put your iPhone in recovery mode
- Step 4: Restore your iPhone
- Need more help?
- Use a passcode with your iPhone, iPad, or iPod touch
- Set up a passcode
- Change your passcode or passcode settings
- Get help
- If an alert says to change your passcode or you can’t adjust your passcode settings
- If you forgot your passcode
- Change your Apple ID password
- On your iPhone, iPad, iPod touch, or Apple Watch
- On your Mac
- On the web
- Learn more about passwords and your Apple ID
- Require a password for App Store and iTunes purchases
- Require a password on your iPhone, iPad, or iPod touch
- Require a password on your Mac
- Require a password on your PC
- Require a password on your Apple TV 4K or Apple TV HD
- Require a password on your Apple TV (3rd generation)
- About turning off password protection
- Manage what kids buy or download
If you forgot your iPhone passcode
Forgot your iPhone passcode? Learn how to get your iPhone into recovery mode so you can erase it and set it up again.
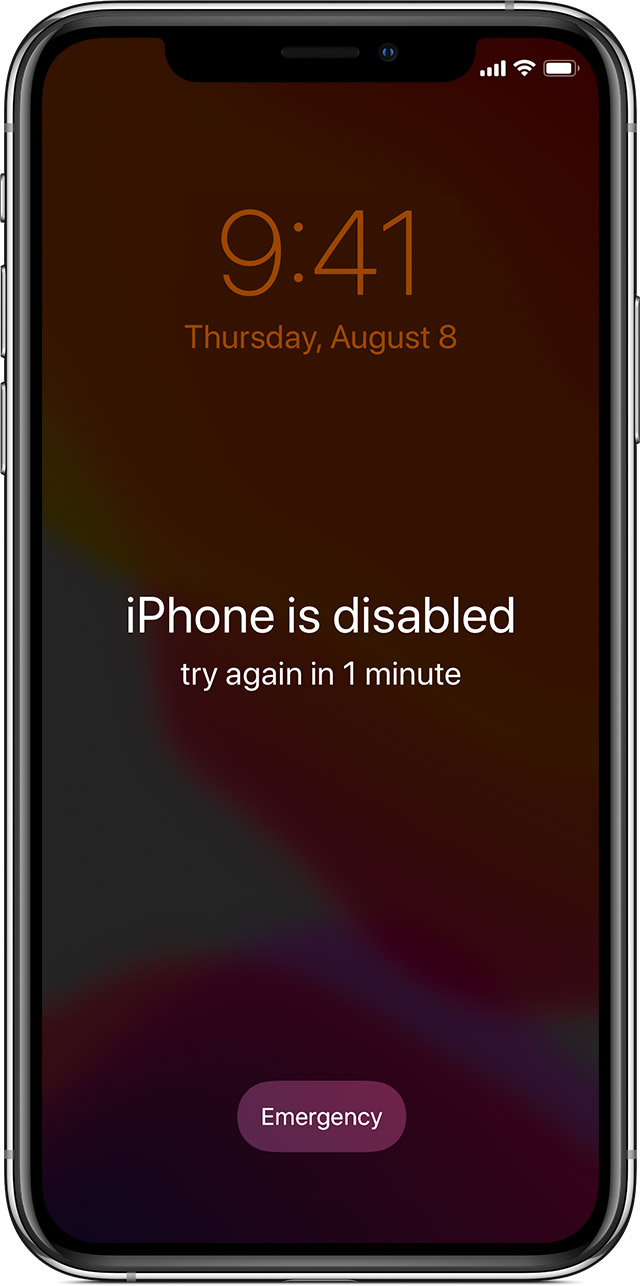
If you enter the wrong passcode on your iPhone Lock Screen too many times, an alert lets you know that your iPhone is disabled. If you can’t remember your passcode when you try again, you need to use a computer to put your iPhone in recovery mode. This process deletes your data and settings, including your passcode, giving you access to set up your iPhone again.
After you erase your iPhone, you can restore your data and settings from backup. If you didn’t back up your iPhone, you can set it up as a new device and then download any data that you have in iCloud.
![]()
Step 1: Make sure that you have a computer (Mac or PC)
This process requires a Mac or PC. If you’re using a PC, make sure that it has Windows 8 or later, and that iTunes is installed. You also need the cable that came with your iPhone, or another compatible cable, to connect your iPhone to the computer.
If you don’t have a computer and you can’t borrow one, you need to go to an Apple Retail Store or Apple Authorized Service Provider for help.

Step 2: Turn off your iPhone
- Unplug your iPhone from the computer if it’s connected.
- Turn off your iPhone using the method for your iPhone model:
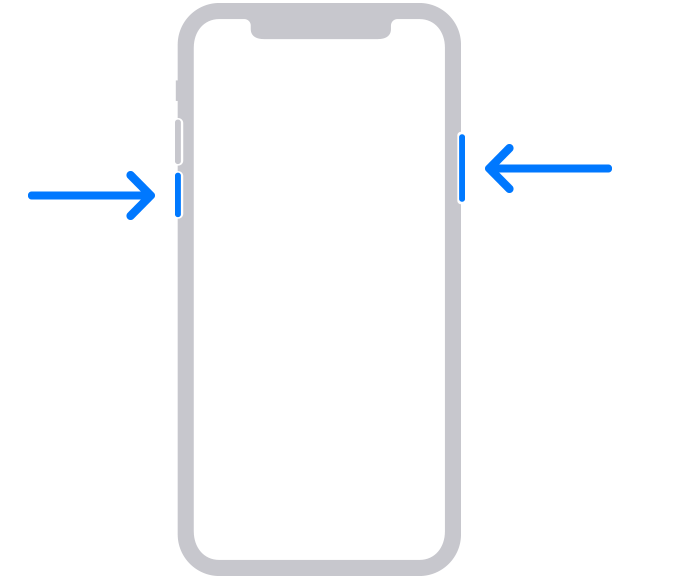
- iPhone X or later, iPhone SE (2nd generation), iPhone 8, and iPhone 8 Plus: Press and hold both the Side button and the Volume down button until the power off slider appears.

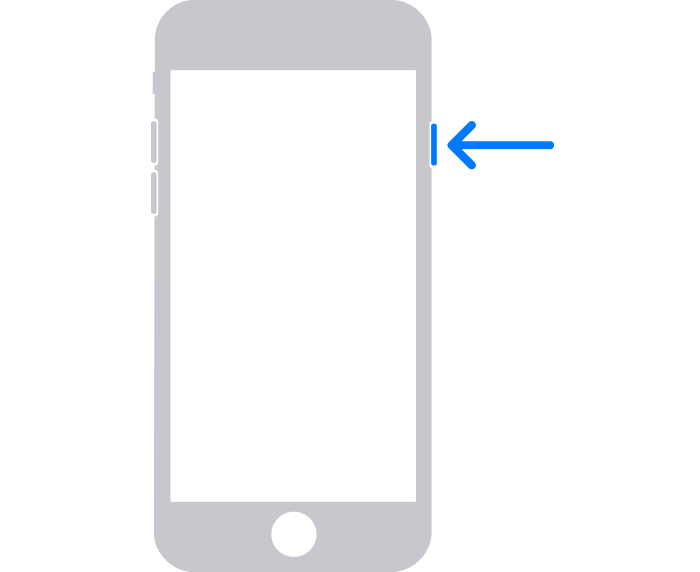
- iPhone 7 and iPhone 7 Plus: Press and hold the Side button until the power off slider appears.
- iPhone SE (1st generation), and iPhone 6s and earlier: Press and hold the Side (or Top) button until the power off slider appears.
- iPhone X or later, iPhone SE (2nd generation), iPhone 8, and iPhone 8 Plus: Press and hold both the Side button and the Volume down button until the power off slider appears.
- Drag the slider to turn off your iPhone, then wait a minute to make sure that it turns off completely.

Step 3: Put your iPhone in recovery mode
- Get ready by finding the button on your iPhone that you’ll need to hold in the next step:
- iPhone X or later, iPhone SE (2nd generation), iPhone 8, and iPhone 8 Plus use the Side button.
- iPhone 7 and iPhone 7 Plus use the Volume down button.
- iPhone SE (1st generation), and iPhone 6s and earlier use the Home button.
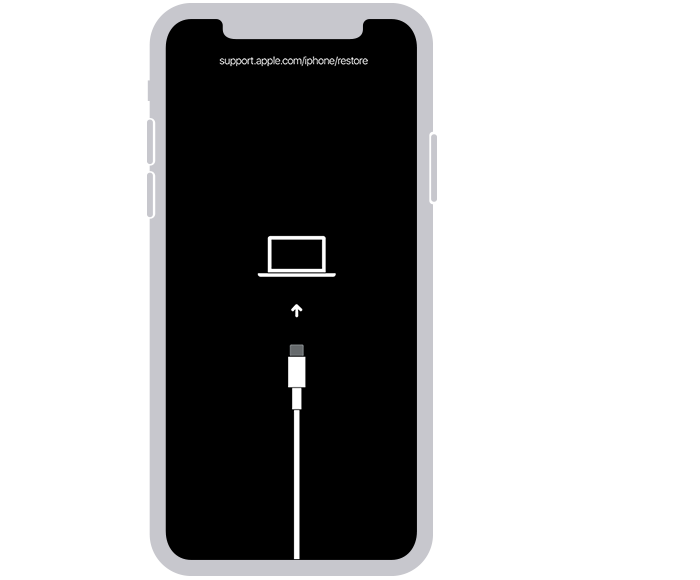
- Press and hold the correct button for your iPhone while immediately connecting your iPhone to the computer. Don’t let go of the button.
- Keep holding the button until you see the recovery mode screen on your iPhone, then let go.
If you see the passcode screen, you need to turn off your iPhone and start again.
If you can’t get your iPhone to show the recovery mode screen and you need help, contact Apple Support.
Step 4: Restore your iPhone
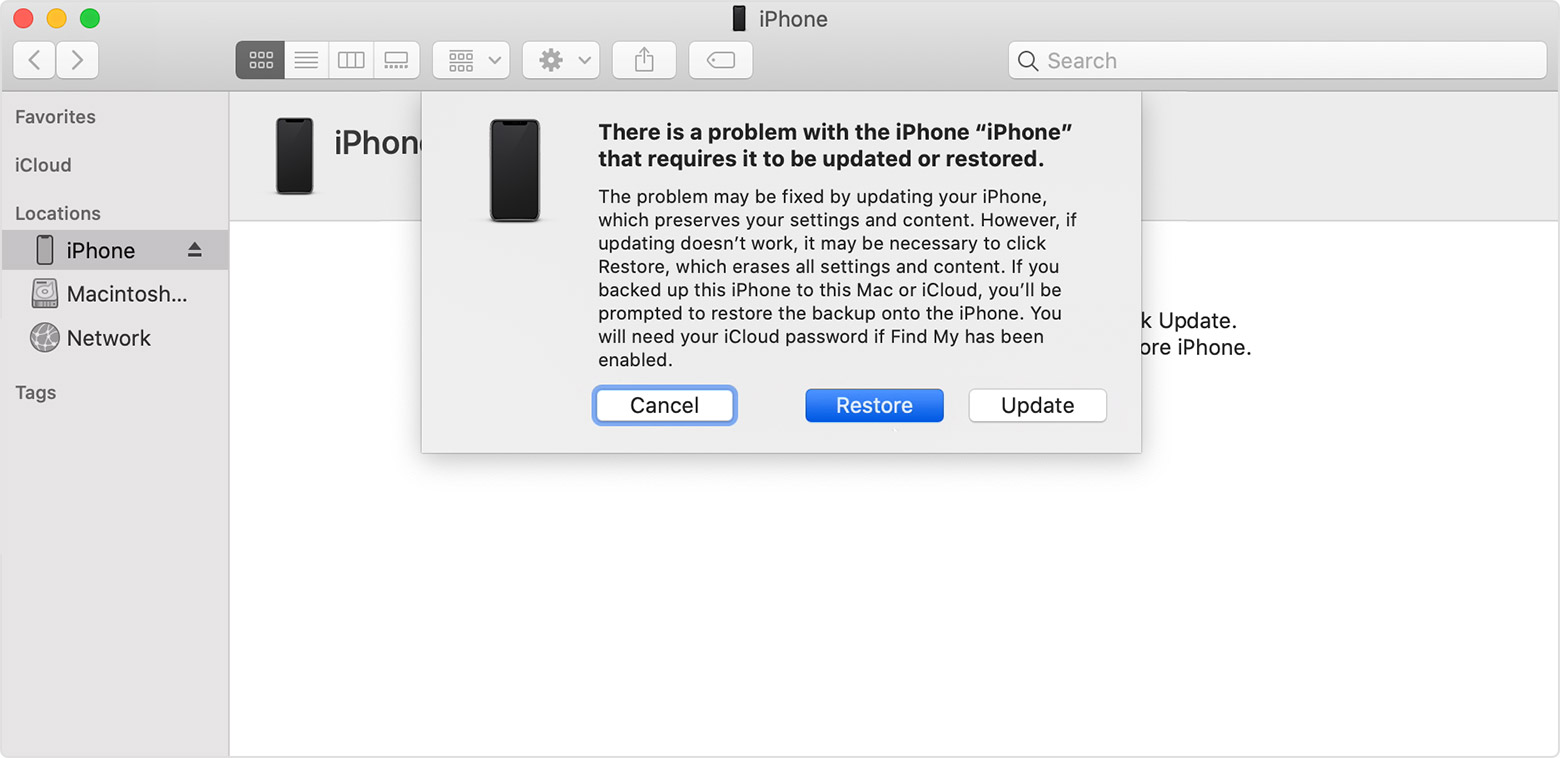
- Locate your iPhone in the Finder or in iTunes on the computer that it’s connected to. (Learn how to find your connected iPhone.)
- Choose Restore when you see the option to Restore or Update. Your computer downloads software for your iPhone and begins the restore process. If the download takes more than 15 minutes and your device exits the recovery mode screen, let the download finish, then turn off your iPhone and start again.
- Wait for the process to finish.
- Disconnect your iPhone from the computer, then set up and use your iPhone.
Need more help?
If you can’t complete any of these steps, if you’re still prompted for a passcode, or if you need any other assistance, contact Apple Support.
Источник
Use a passcode with your iPhone, iPad, or iPod touch
Learn how to set, use, and change a passcode on your iPhone, iPad, or iPod touch.
Set a passcode on your device to help protect your data. If your device supports Touch ID, you can often use your fingerprint instead of your passcode. If your device supports Face ID, you can use face recognition instead of your passcode. Your device will require your passcode when you do the following:
- Turn on or restart your device
- Press the Home button or swipe up to unlock your device (you can change this)
- Update your software
- Erase your device
- View or change passcode settings
- Install iOS or iPadOS Configuration profiles
![]()
Set up a passcode
Change your settings
Get help with passcode
Set up a passcode
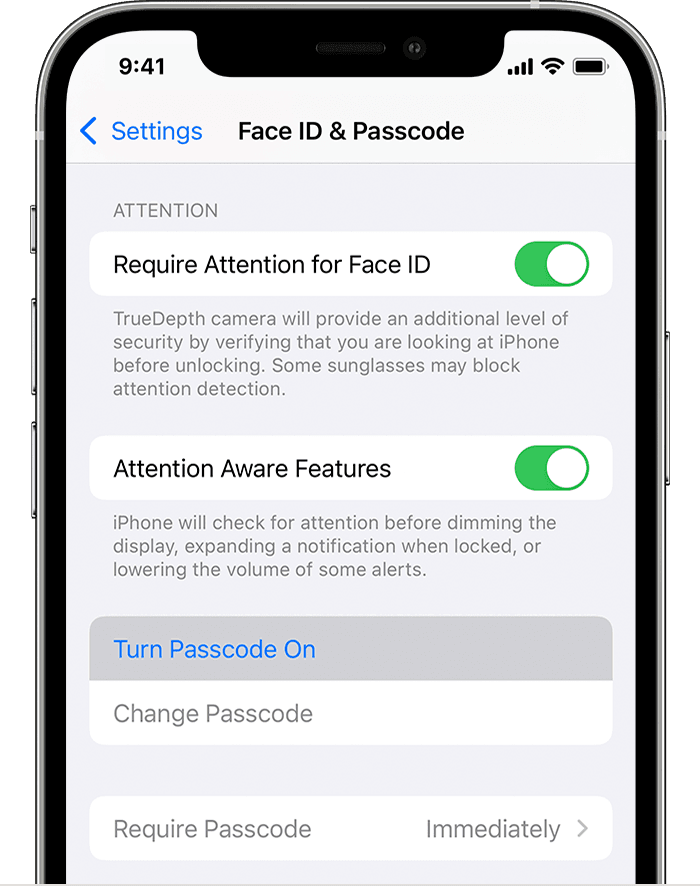
- On iPhone X and later, or iPad with Face ID, go to Settings > Face ID & Passcode. On earlier iPhone models, go to Touch ID & Passcode. On devices without Touch ID, go to Settings > Passcode.
- Tap Turn Passcode On.
- Enter a six-digit passcode. Or tap Passcode Options to switch to a four-digit numeric code, a custom numeric code, or a custom alphanumeric code.
- Enter your passcode again to confirm it and activate it.
Change your passcode or passcode settings
On iPhone X and later, or iPad with Face ID, go to Settings > Face ID & Passcode. On earlier iPhone models, go to Settings > Touch ID & Passcode. On devices without Touch ID, go to Settings > Passcode.
You’ll find several settings and options:
- Turn Passcode Off: Tap this option to turn off your passcode.
- Change Passcode: Enter a new six-digit passcode. Or tap Passcode Options to switch to a four-digit numeric code, a custom numeric code, or a custom alphanumeric code.
- Require Passcode: As soon as you lock your screen, the default for this setting will ask you to enter your passcode to unlock. If you don’t want an immediate passcode requirement, change this setting. (For your own security, if you use Touch ID or Apple Pay, you can’t change the immediate passcode requirement).
- Allow Access When Locked: Use this option to allow access to some features when your device is locked, including Today View, Notification Center, Control Center on iPhone and iPod touch or iPad, Siri, Reply with Message, Home Control, Wallet, Return Missed Calls, and USB accessories.
- Erase Data: Choose whether to erase your device automatically after ten failed passcode attempts. If you don’t enable this option, your device will need to be restored on a computer after ten failed attempts.
Get help
Follow the steps in this section for help with things like passcode settings, alerts, and forgotten passwords.
If an alert says to change your passcode or you can’t adjust your passcode settings
Configuration profiles and email accounts based on Microsoft Exchange (common with business or education devices) sometimes have passcode policies that cause issues like this:
- You can’t turn off your passcode.
- You can’t change passcode settings because they’re unavailable, gray, or dimmed.
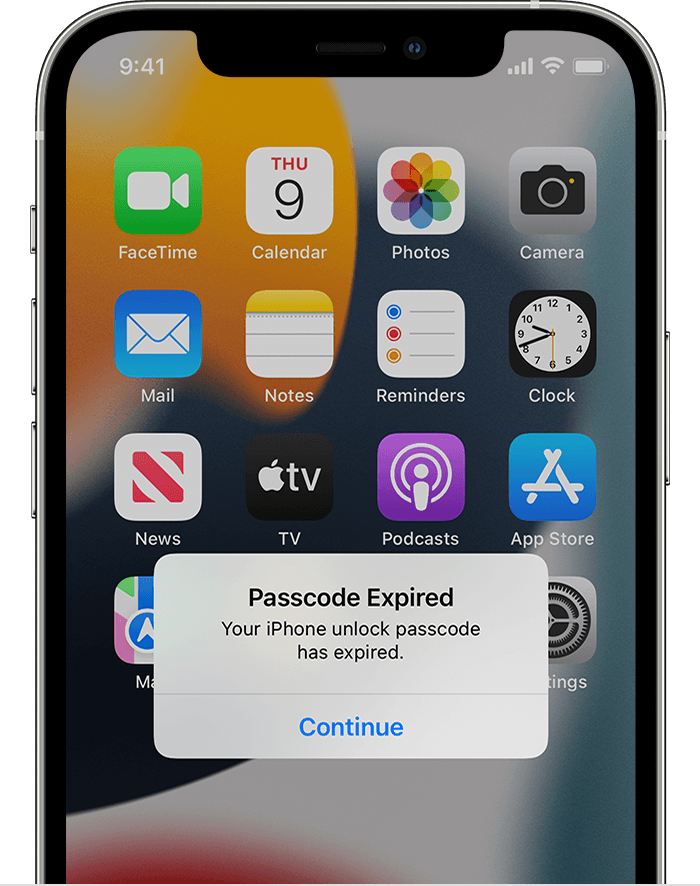
- You see an alert about a Passcode Requirement. For example, you might see a message that says you must change your iPhone unlock passcode within 60 minutes.
Contact your IT administrator for help. If you don’t use a configuration profile or Microsoft Exchange account, or if your device is personally owned, make sure you update your device to the latest version of iOS or iPadOS.
If you forgot your passcode
If you or someone else enters the wrong passcode too many times, your device will disable itself temporarily. If so, get help with a forgotten passcode or disabled device. If you forgot your Restrictions passcode, learn what to do.
Источник
Change your Apple ID password
Follow these steps to change your Apple ID password.
On your iPhone, iPad, iPod touch, or Apple Watch
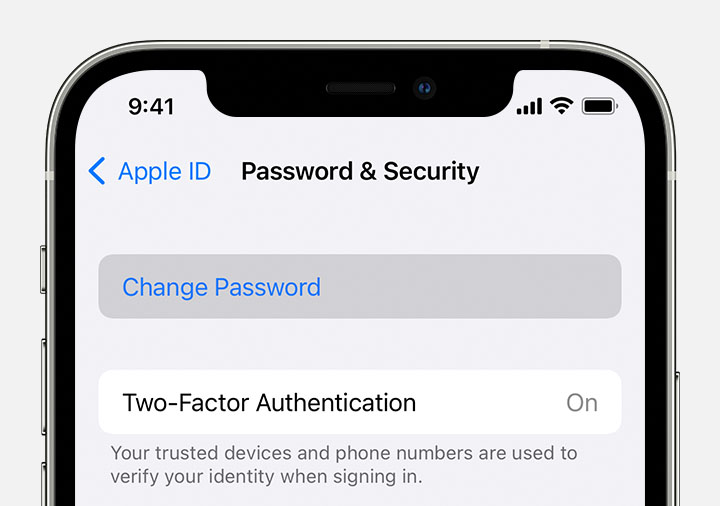
- Tap Settings > [your name] > Password & Security.
- Tap Change Password.
- Enter your current password or device passcode, then enter a new password and confirm the new password. Forgot your password?
- Tap Change or Change Password.
- Sign in with your new Apple ID password to access Apple features and services.
On your Mac
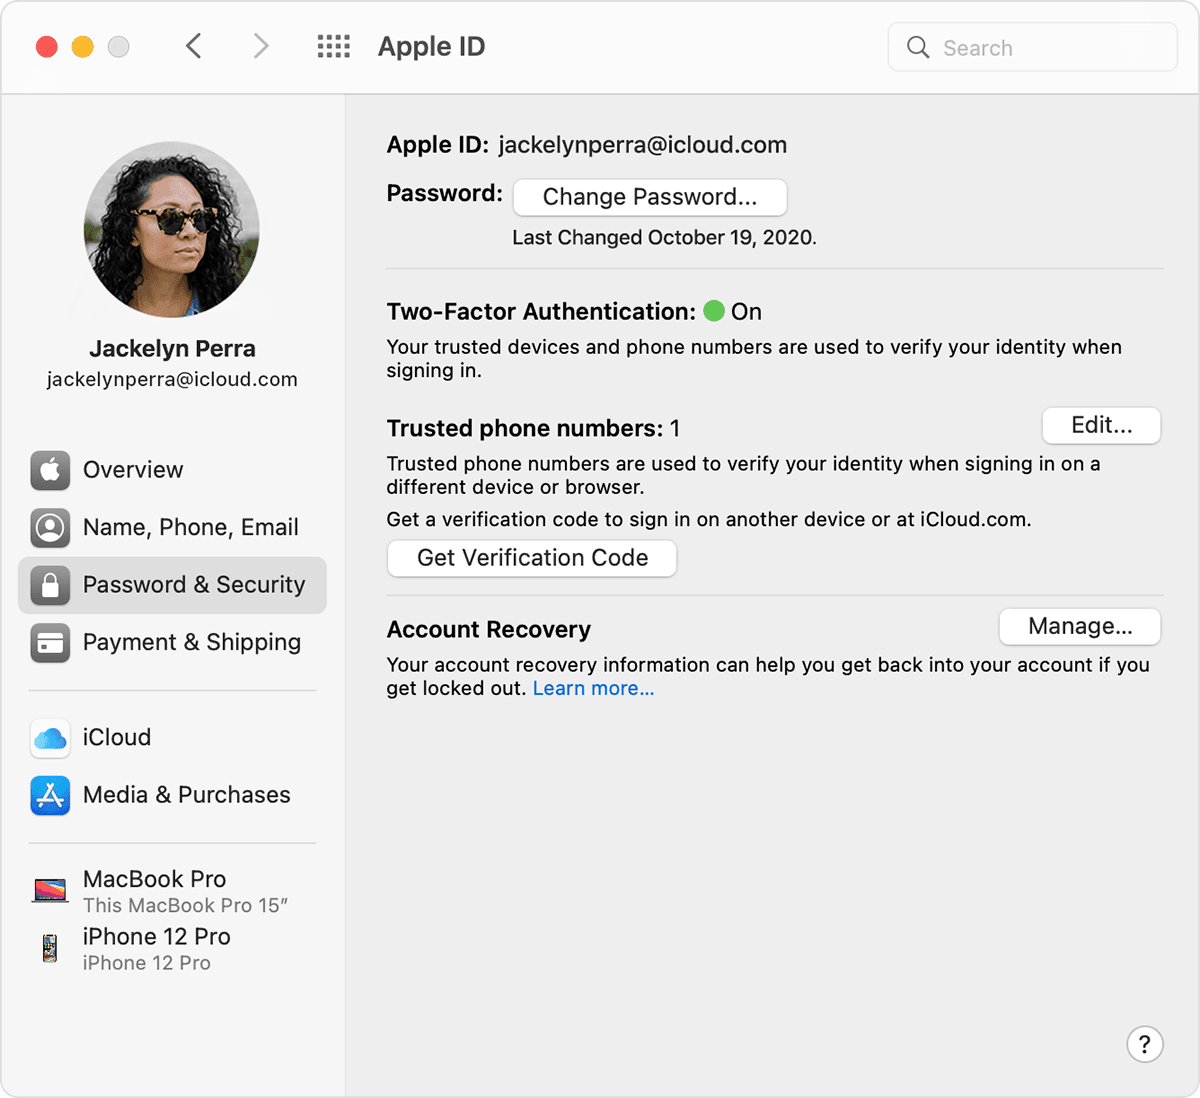
- Choose Apple menu > System Preferences, then click Apple ID.
- Click Password & Security.
- Click Change Password. Before you can reset your Apple ID password, you’ll be required to enter the password used to unlock your Mac.
On the web
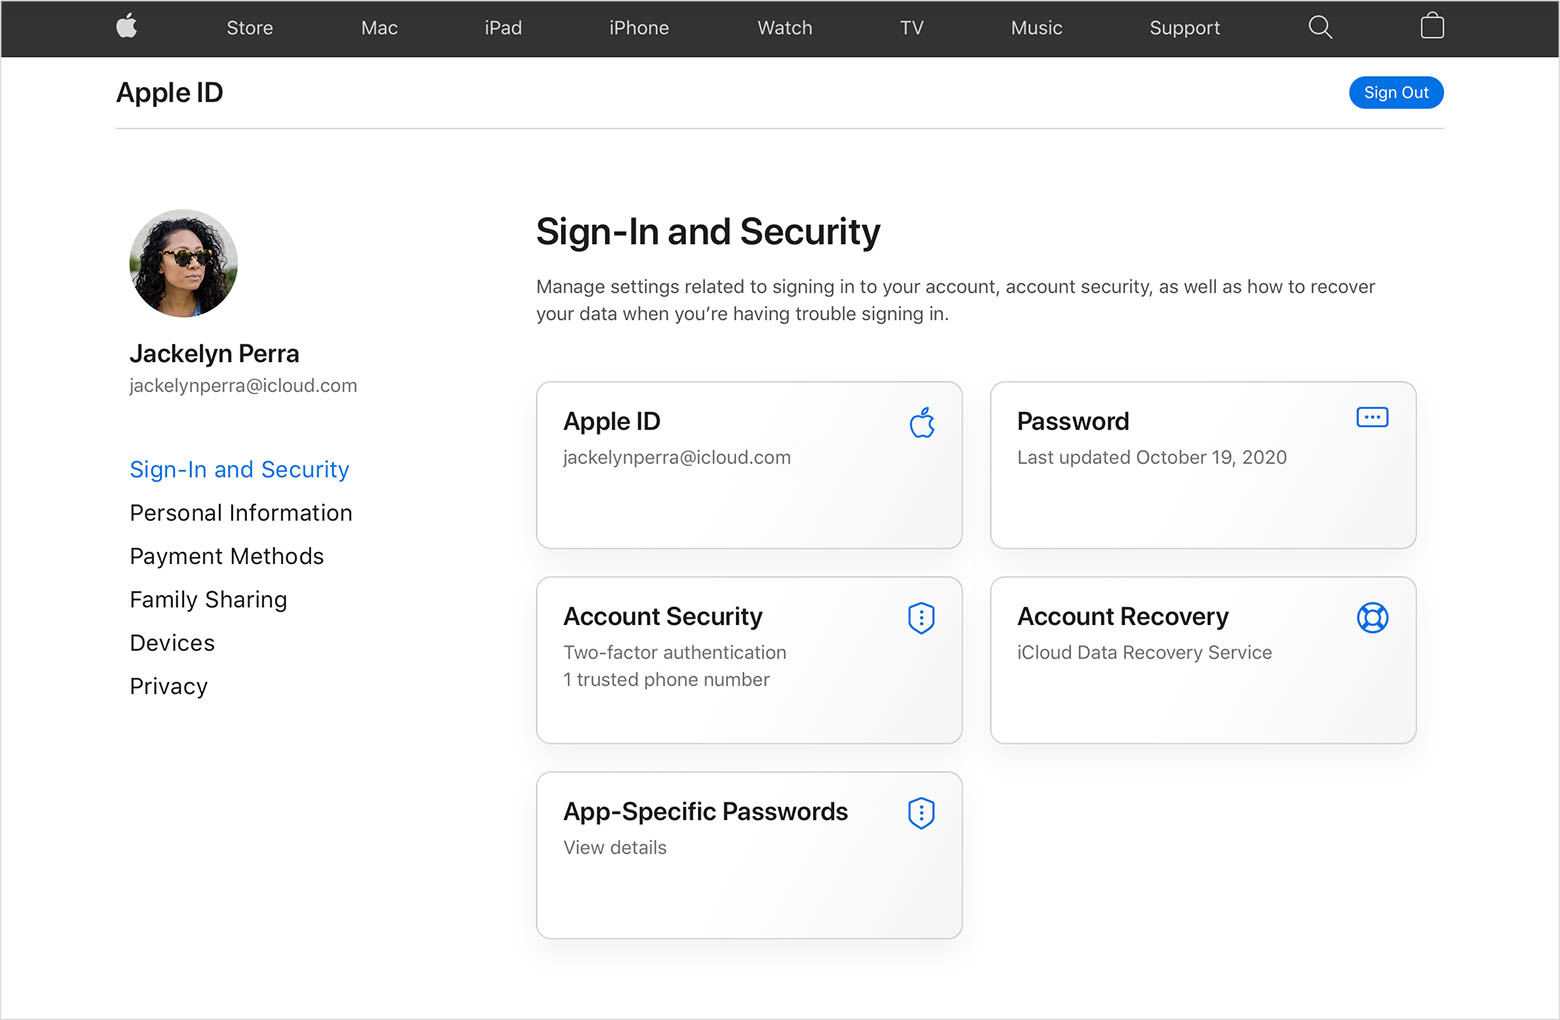
- Sign in to appleid.apple.com.
- In the Sign-In and Security section, click Password.
- Enter your current password, then enter a new password and confirm the new password. Forgot your password?
- Click Change Password.
- Sign in with your new Apple ID password to access Apple features and services.
Learn more about passwords and your Apple ID
Your Apple ID is the account you use to access Apple services like the App Store, Apple Music, iCloud, iMessage, FaceTime and more.
When you create a new password, keep the following in mind:
- Your new Apple ID password must contain at least eight characters, a number, an uppercase letter, and a lowercase letter.
- You can’t use spaces, the same character three times in a row, your Apple ID, or a password you’ve used in the last year.
FaceTime is not available in all countries or regions.
Источник
Require a password for App Store and iTunes purchases
You can require a password for every purchase or require a password every 15 minutes.
You can choose how often you want to enter your password when you buy items (including in-app purchases) from the App Store and iTunes Store:
- Always Require—Every time you make a purchase, you’ll be asked to enter your password, even if you’re signed in with your Apple ID.
- Require After 15 Minutes—If you entered your password within the last 15 minutes, you won’t be asked to enter your password again.
If you don’t want to enter a password when you download free items, follow the steps below and turn off password protection for free items.
Require a password on your iPhone, iPad, or iPod touch
- Open the Settings app.
- Tap your name.
- Tap Media & Purchases.
- Tap Password Settings, then choose the setting that you want.
If you don’t see Password Settings, you have turned on Face ID or Touch ID for App Store and iTunes Purchases. To change this, go back to Settings, tap «Face ID & Passcode» or «Touch ID & Passcode», then turn off Face ID or Touch ID next to iTunes & App Store.
Require a password on your Mac
- On your Mac, choose the Apple menu () at the top of your screen, then choose System Preferences.
- Click Apple ID.
- Click Media & Purchases.
- Select the settings that you want for free downloads and purchases. If you have Touch ID turned on for purchases, you won’t see this menu.
If you’re using an older version of macOS, open iTunes, choose iTunes > Preferences, then click the Store tab.
Require a password on your PC
If you’re using a PC, open iTunes. From the top of the iTunes window, choose Edit, then choose Preferences. Click the Store tab. Then select the settings that you want for purchases and free downloads.
Require a password on your Apple TV 4K or Apple TV HD
- From the Home screen, select Settings.
- Select Users and Accounts.
- Select [your name]’s Account.
- Under Require Password, choose the settings that you want for purchases and free downloads.
Require a password on your Apple TV (3rd generation)
- From the Home screen, select Settings > iTunes Store > Sign In.
- Sign in with your Apple ID and password.
- After you click Submit, you’ll see a screen that says «Remember Password?» Select your preferred level of protection:
- Choose Yes if you want the Apple TV to remember your password for purchases as long as you’re signed in with your Apple ID.
- Choose No if you want to enter your password each time that you make a purchase in the iTunes Store.
To change your password settings, sign out, then follow the steps above to sign in again.
About turning off password protection
You can’t completely turn off password protection for paid items on your iPhone, iPad, iPod touch, or computer. On Apple TV, you can turn off password protection for both free and paid items.
If you enabled Touch ID or Face ID for App Store and iTunes Store purchases, you’ll be asked to use Touch ID or Face ID for every download, even if the item is free.
Manage what kids buy or download
If you use Family Sharing, you can use Ask to Buy to control what kids buy. When a child asks to buy an item or download a free item, the family organizer can approve or decline the request.
Information about products not manufactured by Apple, or independent websites not controlled or tested by Apple, is provided without recommendation or endorsement. Apple assumes no responsibility with regard to the selection, performance, or use of third-party websites or products. Apple makes no representations regarding third-party website accuracy or reliability. Contact the vendor for additional information.
Источник


