- Проверьте, включено ли в моем приложении доступ к использованию
- How to Disable Apps With Usage Access on Android Oreo
- How to Enable/Disable Apps With Usage Access on Android Oreo 8.0 & 8.1
- How To : Get the iPhone’s ‘Guided Access’ on Android to Lock Kids (& Troublesome Friends) Out of Apps
- Step 1: Install Touch Lock
- Step 2: Permit Usage Access
- Step 3: Adjust Settings
- Step 4: Prevent Accidental Touches
- question
- Usage access permission
- 1 Answer
- Request app permissions
- Basic principles
- Workflow for requesting permissions
- Determine whether your app was already granted the permission
- Explain why your app needs the permission
- Request permissions
- Allow the system to manage the permission request code
- Kotlin
- Kotlin
- Manage the permission request code yourself
- Kotlin
- Kotlin
- Handle permission denial
- One-time permissions
- Android auto-resets permissions of unused apps
- Request to become the default handler if necessary
- Grant all runtime permissions for testing purposes
- Additional resources
Проверьте, включено ли в моем приложении доступ к использованию
Я использую новый API UsageStatsManager для получения текущего приложения переднего плана в Android 5.0 Lollipop. Чтобы использовать этот API, пользователь должен включить приложение в окне « Settings->Security->Apps with usage access экраном Settings->Security->Apps with usage access .
Я посылаю пользователя непосредственно на этот экран с этим намерением:
Теперь я хочу подтвердить, что пользователь включил мое приложение. Я хотел сделать так, как будто я проверяю, что пользователь разрешил моему приложению использовать NotificationListenerService но я понятия не имею, что такое String-ключ, если он существует.
Второй подход заключался в том, чтобы запросить статистику использования и проверить, возвращает ли он результаты (он возвращает пустой массив, когда приложение не включено), и оно работает большую часть времени, но иногда оно возвращает 0 результатов, даже когда мое приложение включено.
Есть ли способ проверить, включено ли у моего приложения доступ к использованию?
Получил отличный ответ от кого-то в Twitter, протестировал работу:
Это альтернативные решения:
Ранее я использовал тот же код, что и Bao Le, но я столкнулся с проблемой, что определенные устройства (например, VF-895N) сообщают статистику использования, как включенную, даже если они не являются. В качестве обходного пути я изменил свой код следующим образом:
Успешно протестирован на нескольких устройствах.
Этот код работает в леденец и зефир, я использовал этот код в своем приложении
Если они используют планшет Amazon Fire (и, возможно, другие устройства Fire OS), пользователь может загрузить приложение у пользователя, установленного в Google Play Store, а затем у вас нет опции, которую вы хотите активировать в своей ОС. Я знаю это, потому что, как пользователь Fire OS, это случилось со мной несколько минут назад. Обнаружение того, имеет ли пользователь Fire OS, и если да, то предлагаемый вариант, который действительно существует, был бы фантастическим для пользователя и разработчика.
Источник
How to Disable Apps With Usage Access on Android Oreo
Last Updated on March 7, 2021 by Bestusefultips
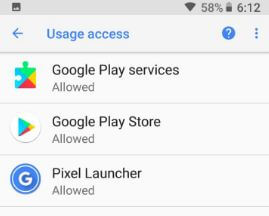
Here’s a complete guide to enable or disable apps with usage access permission Android Oreo devices. By default allow or turn on usage access permission on Android Oreo 8.1 & 8.0 and other devices. This usage access feature allows an app to track what other apps that you’re using on your device and how often, as well as your operator, language settings, and other details. By default, three apps enable usage access permission including Google play services, Google play store, and Pixel launcher. Different android device has slightly different settings to disable it.
Read Also:
How to Enable/Disable Apps With Usage Access on Android Oreo 8.0 & 8.1
By default turn on apps with usage access on android Oreo devices. You can disable it using the below settings.
Step 1: Go to Settings in your Android Oreo devices
Step 2: Tap on Apps & notifications.
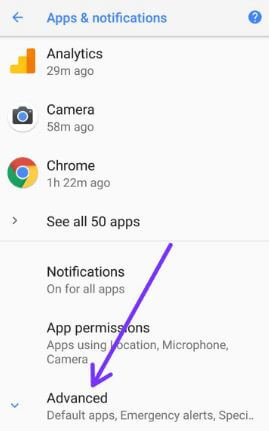
Step 3: Scroll down at the end of the page and tap on Advanced.
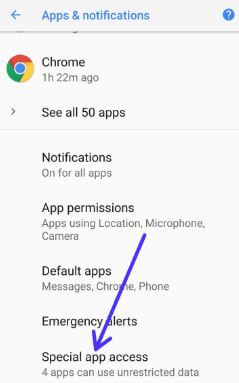
Step 4: Tap on Special app access.
Here you’ll see several settings such as Battery optimization in Oreo, Display over other apps, Usage access, Unrestricted data, DND access, Picture-in-picture mode, install unknown apps, and more.
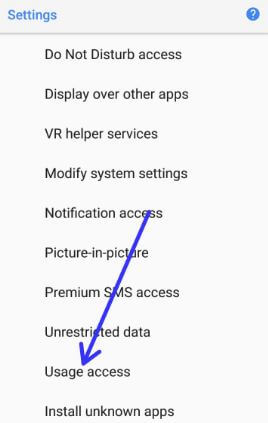
Step 5: Tap on Usage access.
A list of supported apps is the view in your Oreo device screen. You can also select show system apps to disable app permit usage access.
Step 6: Tap on App you want to disable usage access.
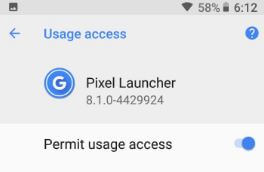
By default enabled app usage access.
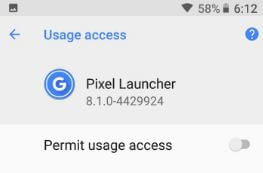
Step 7: Toggle off Permit usage access
Now stop app usage access permission on your Android Oreo devices.
Now that’s all. I hope this tutorial helpful to enable/disable apps with usage access on Android Oreo 8.0 & 8.1 devices. If you have any kind of trouble, tell us in below comment box. We’ll respond as soon as possible. Don’t miss out to check out our other Android Oreo tips.
Источник
How To : Get the iPhone’s ‘Guided Access’ on Android to Lock Kids (& Troublesome Friends) Out of Apps
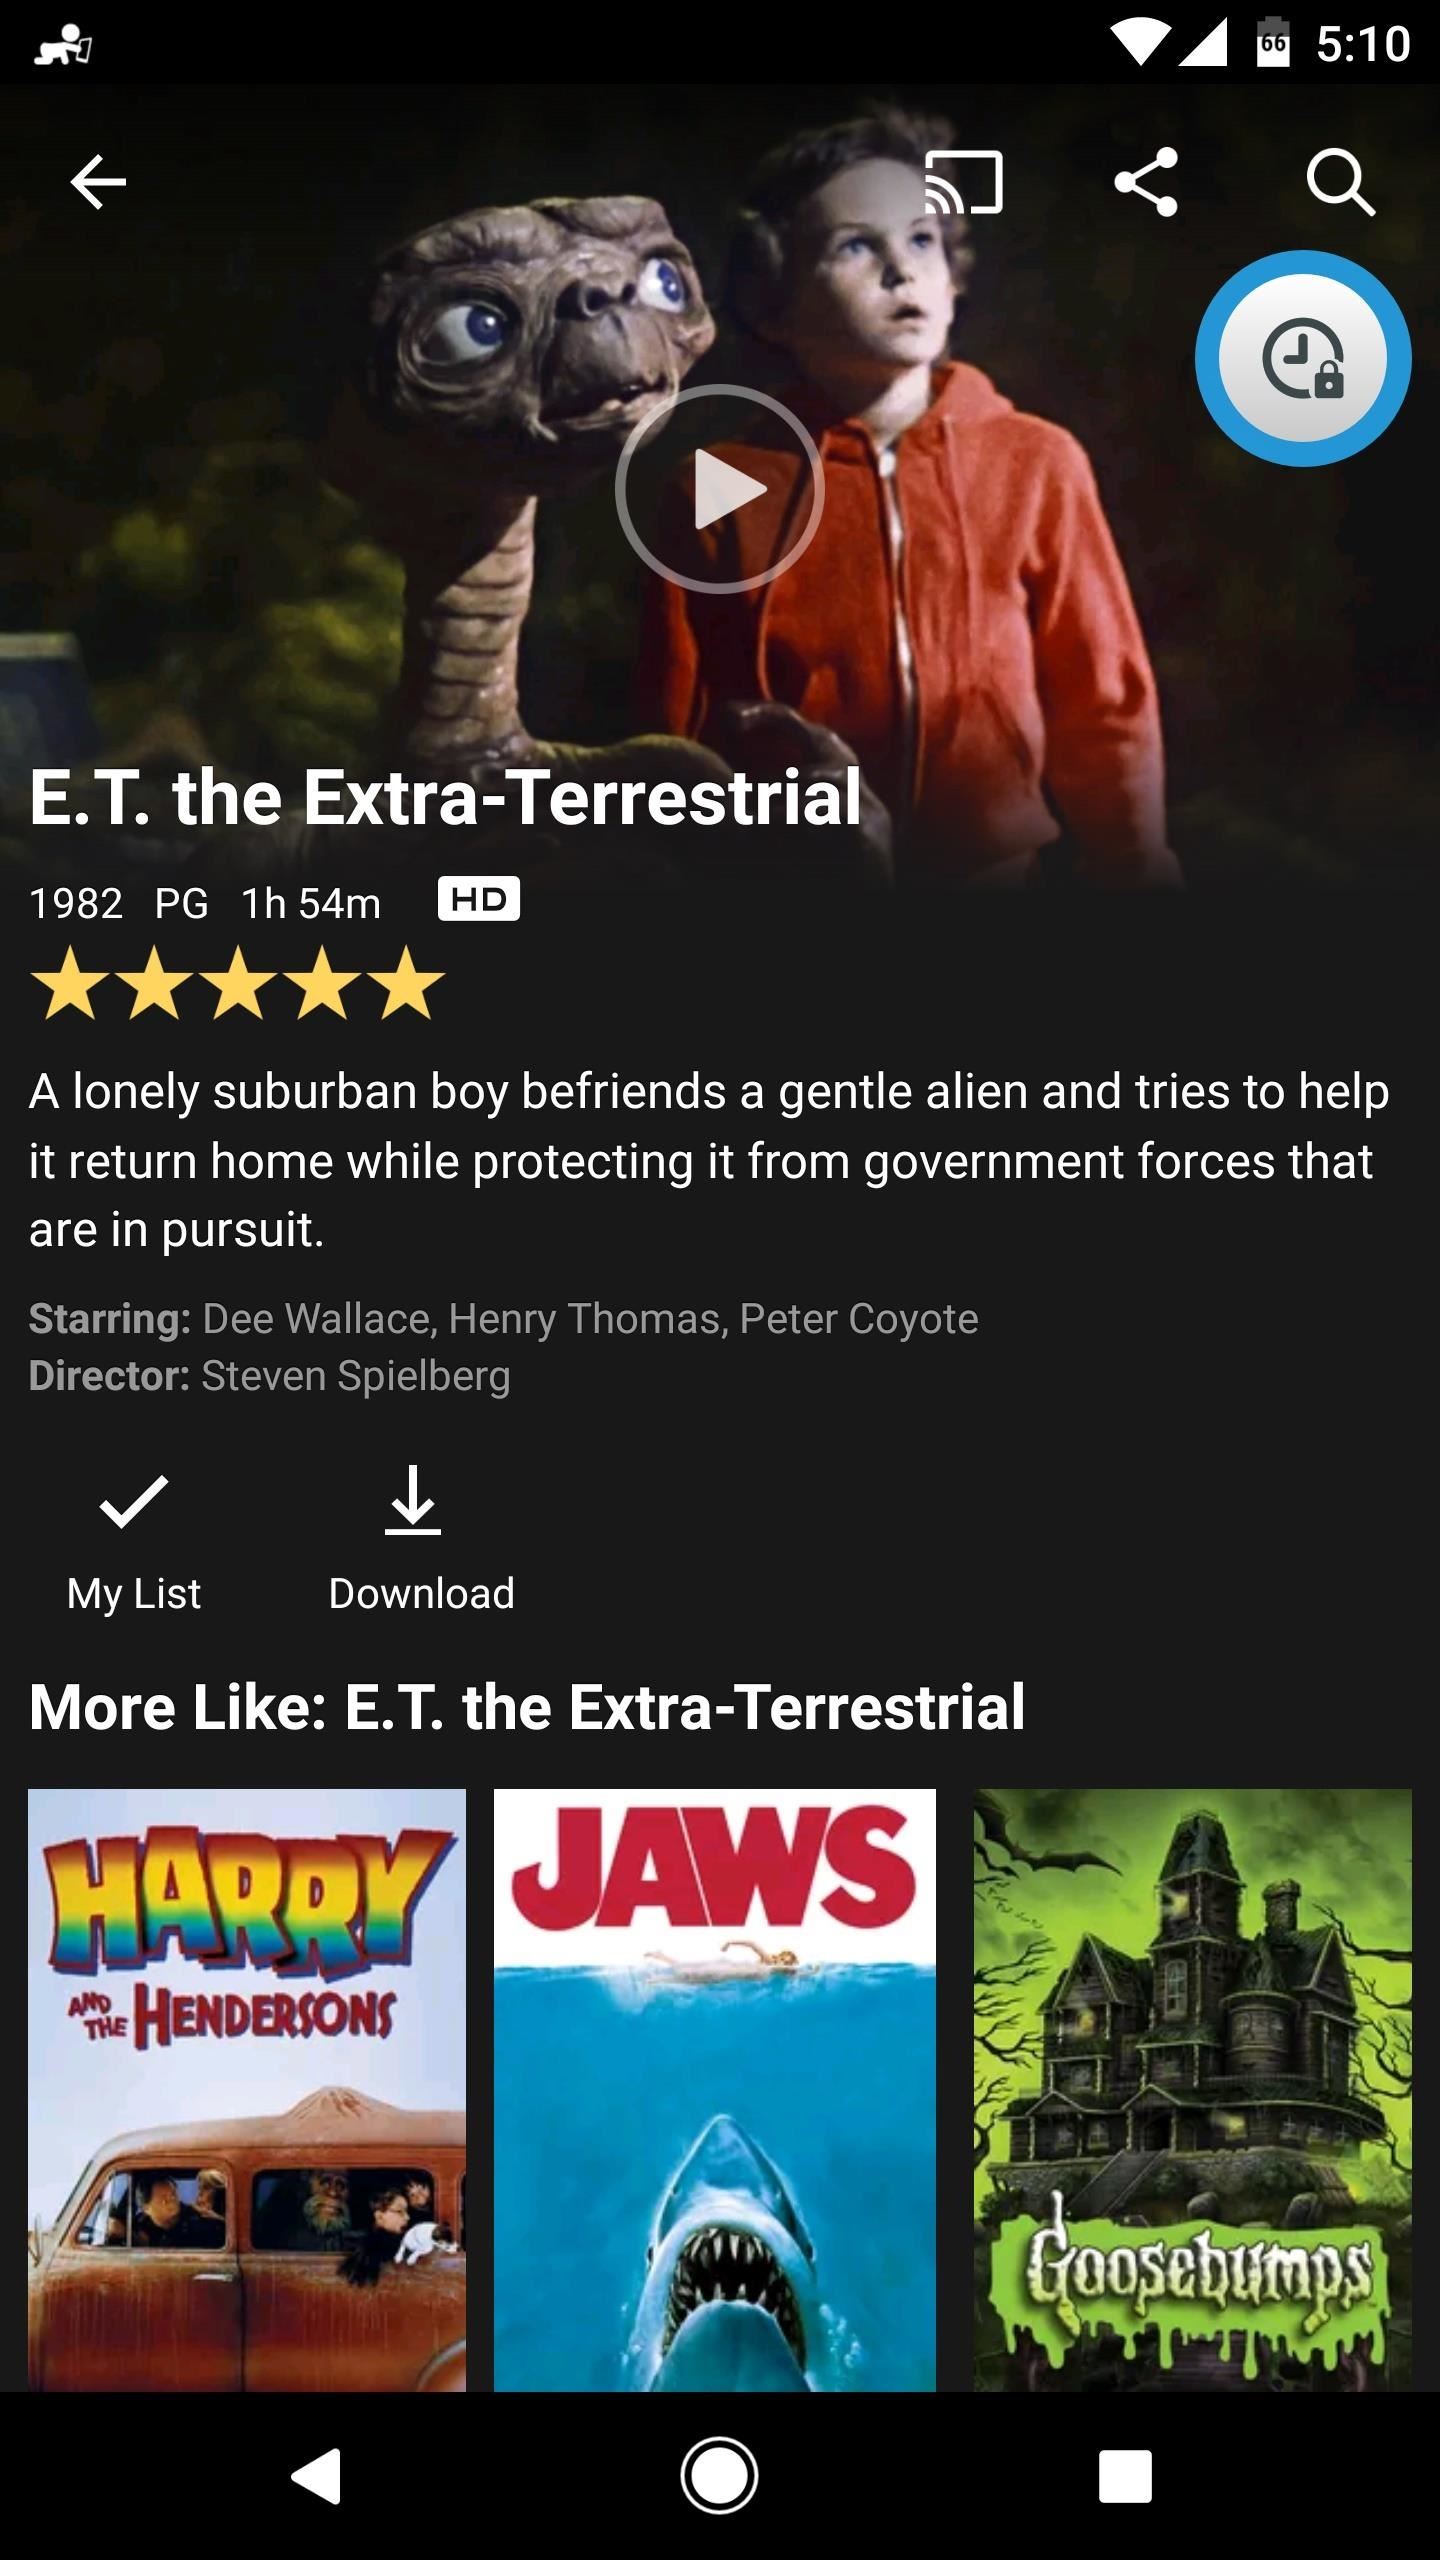
If you’re a parent of a toddler (or have a friend that acts like a toddler), you occasionally need to take a break just to preserve your mental health. The perfect way to buy yourself some «me time» in this scenario would be to pull up an episode of Dora the Explorer on Netflix or YouTube, then hand your phone or tablet over to your child (or child-like friend) and try your best to relax while they’re occupied.
The only problem here is that kids are curious creatures. If left unsupervised for too long, it’s entirely possible that a few inadvertent touches could end up uninstalling some of your apps, changing system settings, browsing provocative photos and videos, or even worse.
Some newer Android devices have a feature called Screen Pinning that locks the foreground app in place to prevent kids from roaming too far. But this still allows them to interact with the screen, which might lead to accidental pausing and seeking while playing their favorite video.
So to help with this issue, the development team at KidScrape created an app that lets you easily lock your screen to prevent your toddler from touching anything while they’re watching videos, similar to the iPhone’s Guided Access feature. Samsung does have a similar feature for Galaxy devices called Interaction Control, but you have to turn off a lot of helpful features just to use it, which is annoying.
Step 1: Install Touch Lock
The app that makes it easy to keep toddlers from touching the wrong button on your phone is called Touch Lock — Touch Blocker. It’s available for free on the Google Play Store, so go ahead and get it installed.
Step 2: Permit Usage Access
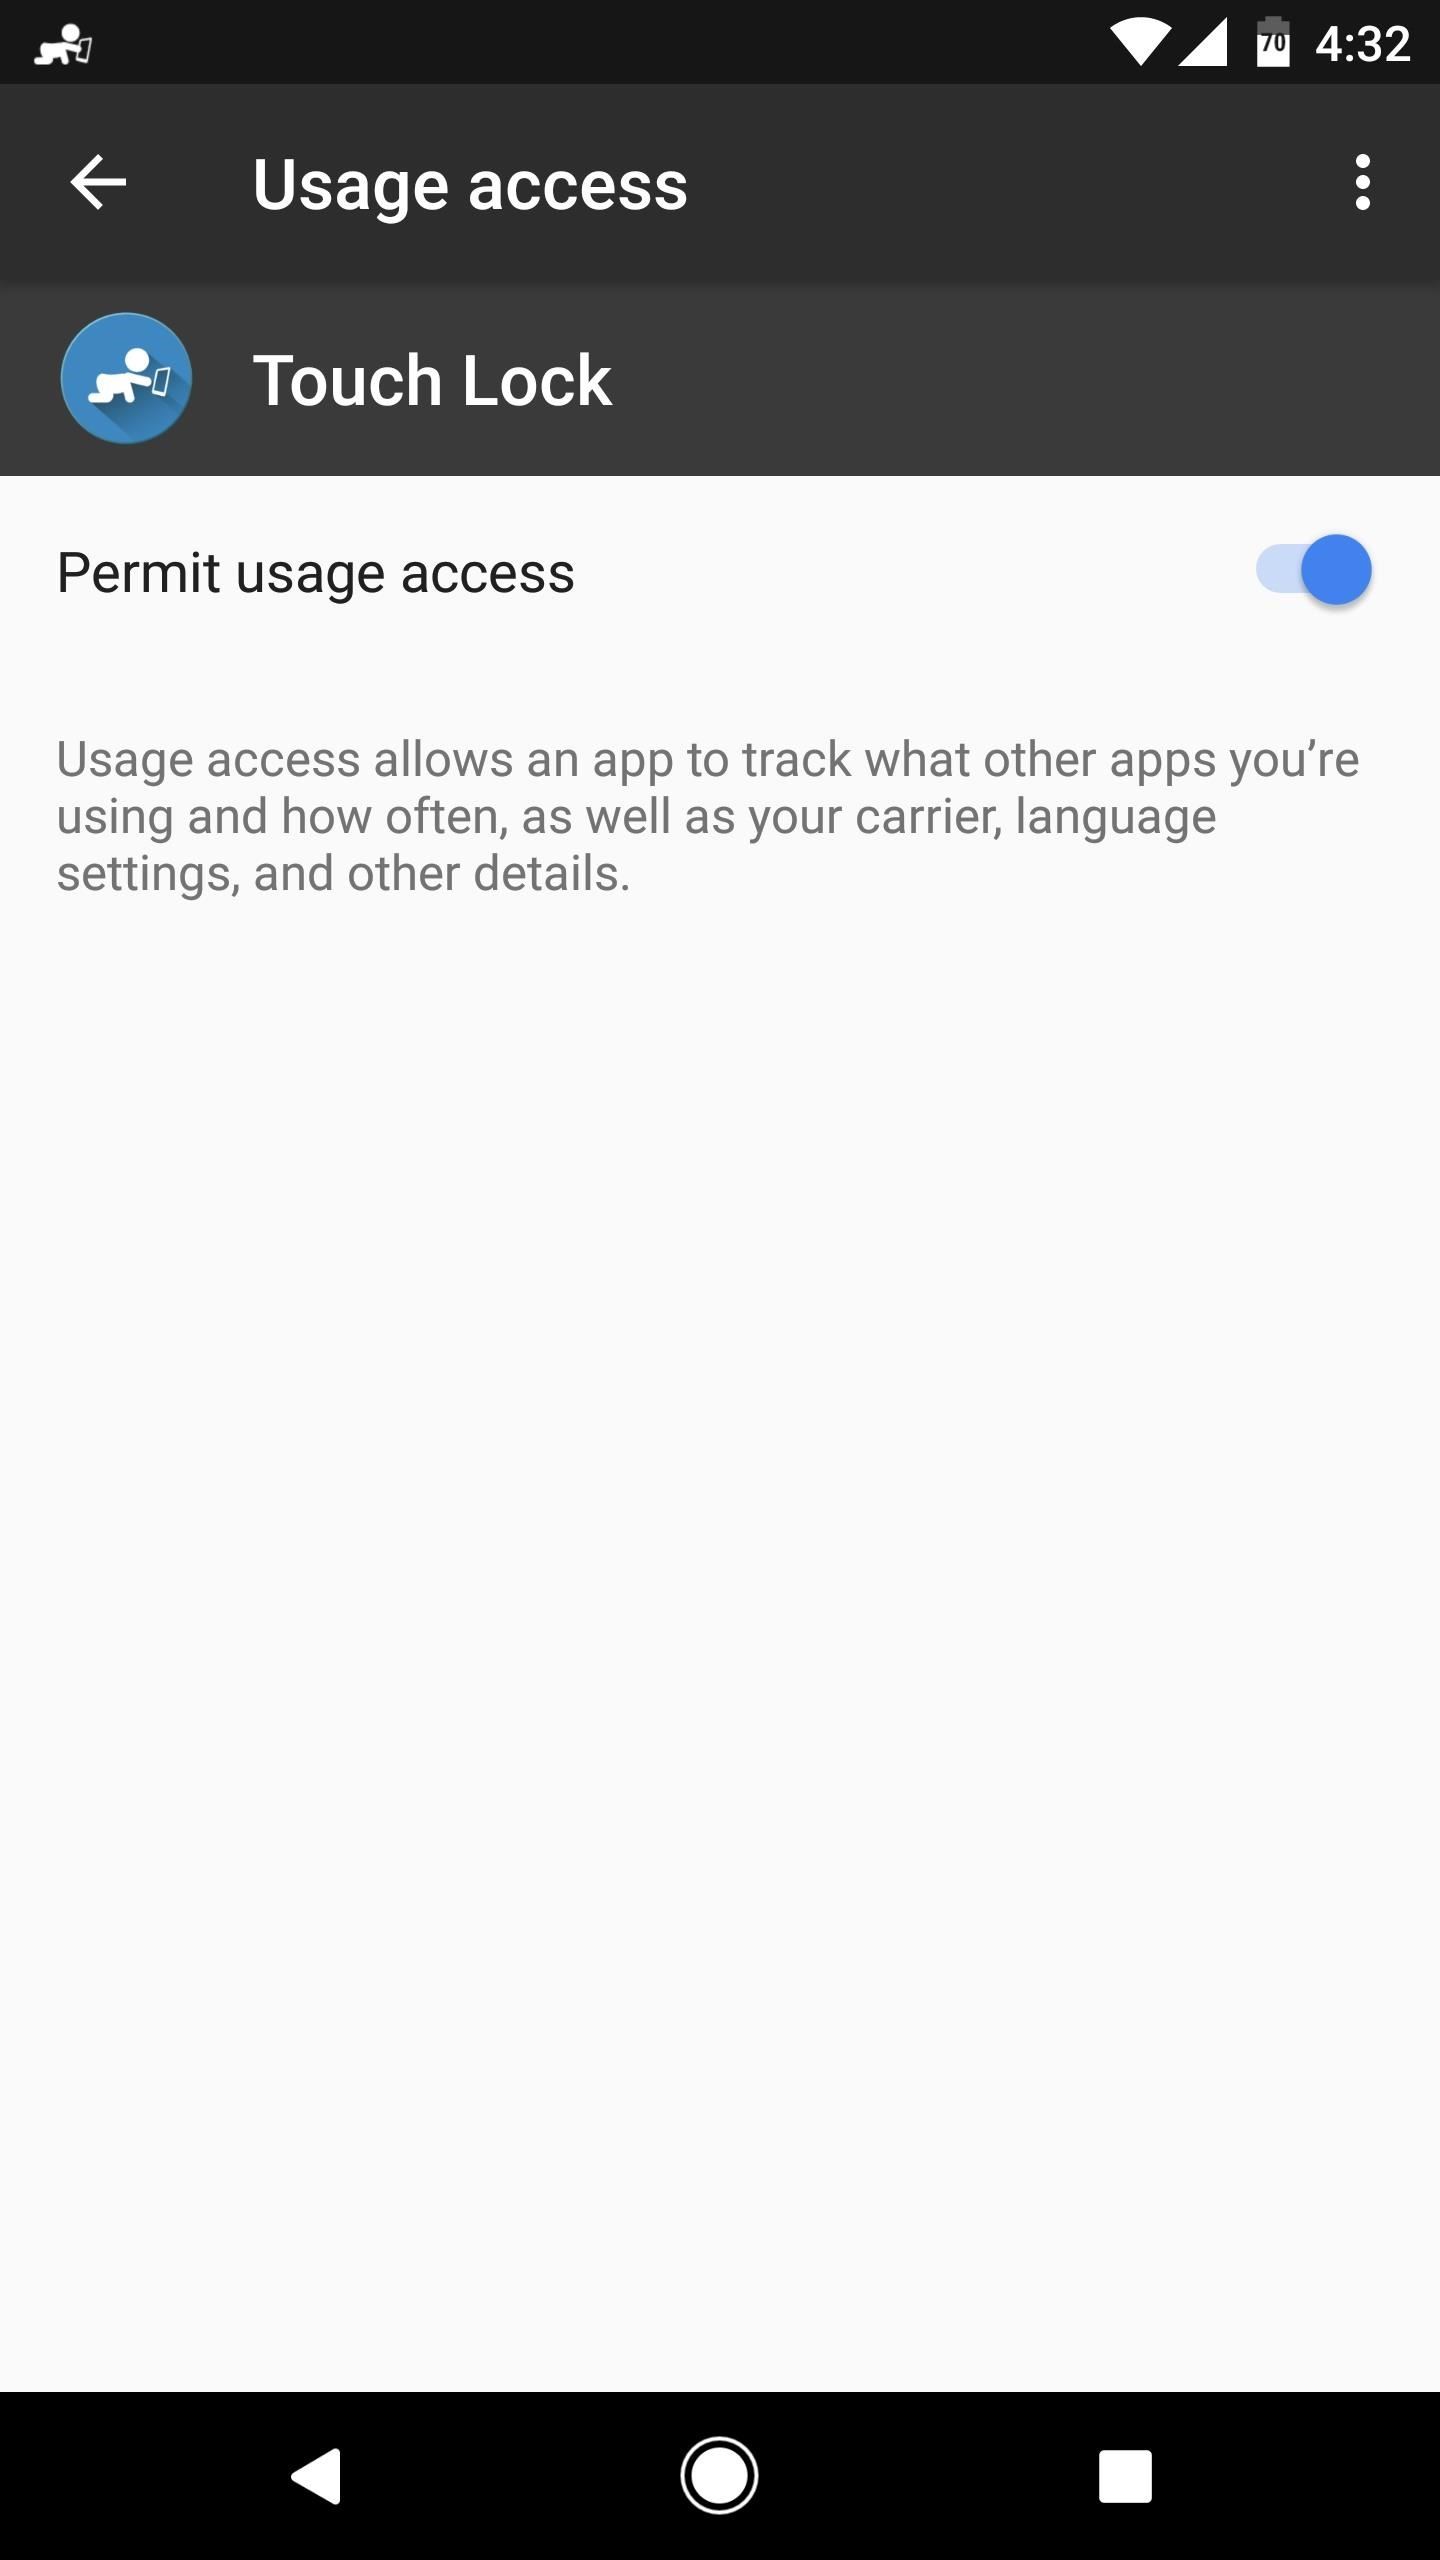
When you first launch the app, you’ll be greeted by a set-up guide. Go ahead and flip through this, and when you reach the third screen, you’ll be asked to grant usage access to Touch Lock, which is required for the app to be able to lock your screen while a video is playing.
So tap the «Enable Now» button when prompted, then you’ll be taken to a system settings menu. From here, select Touch Lock from the list, then on the following screen, enable the switch next to the «Permit usage access» option, and you’ll be all set to go.

Step 3: Adjust Settings
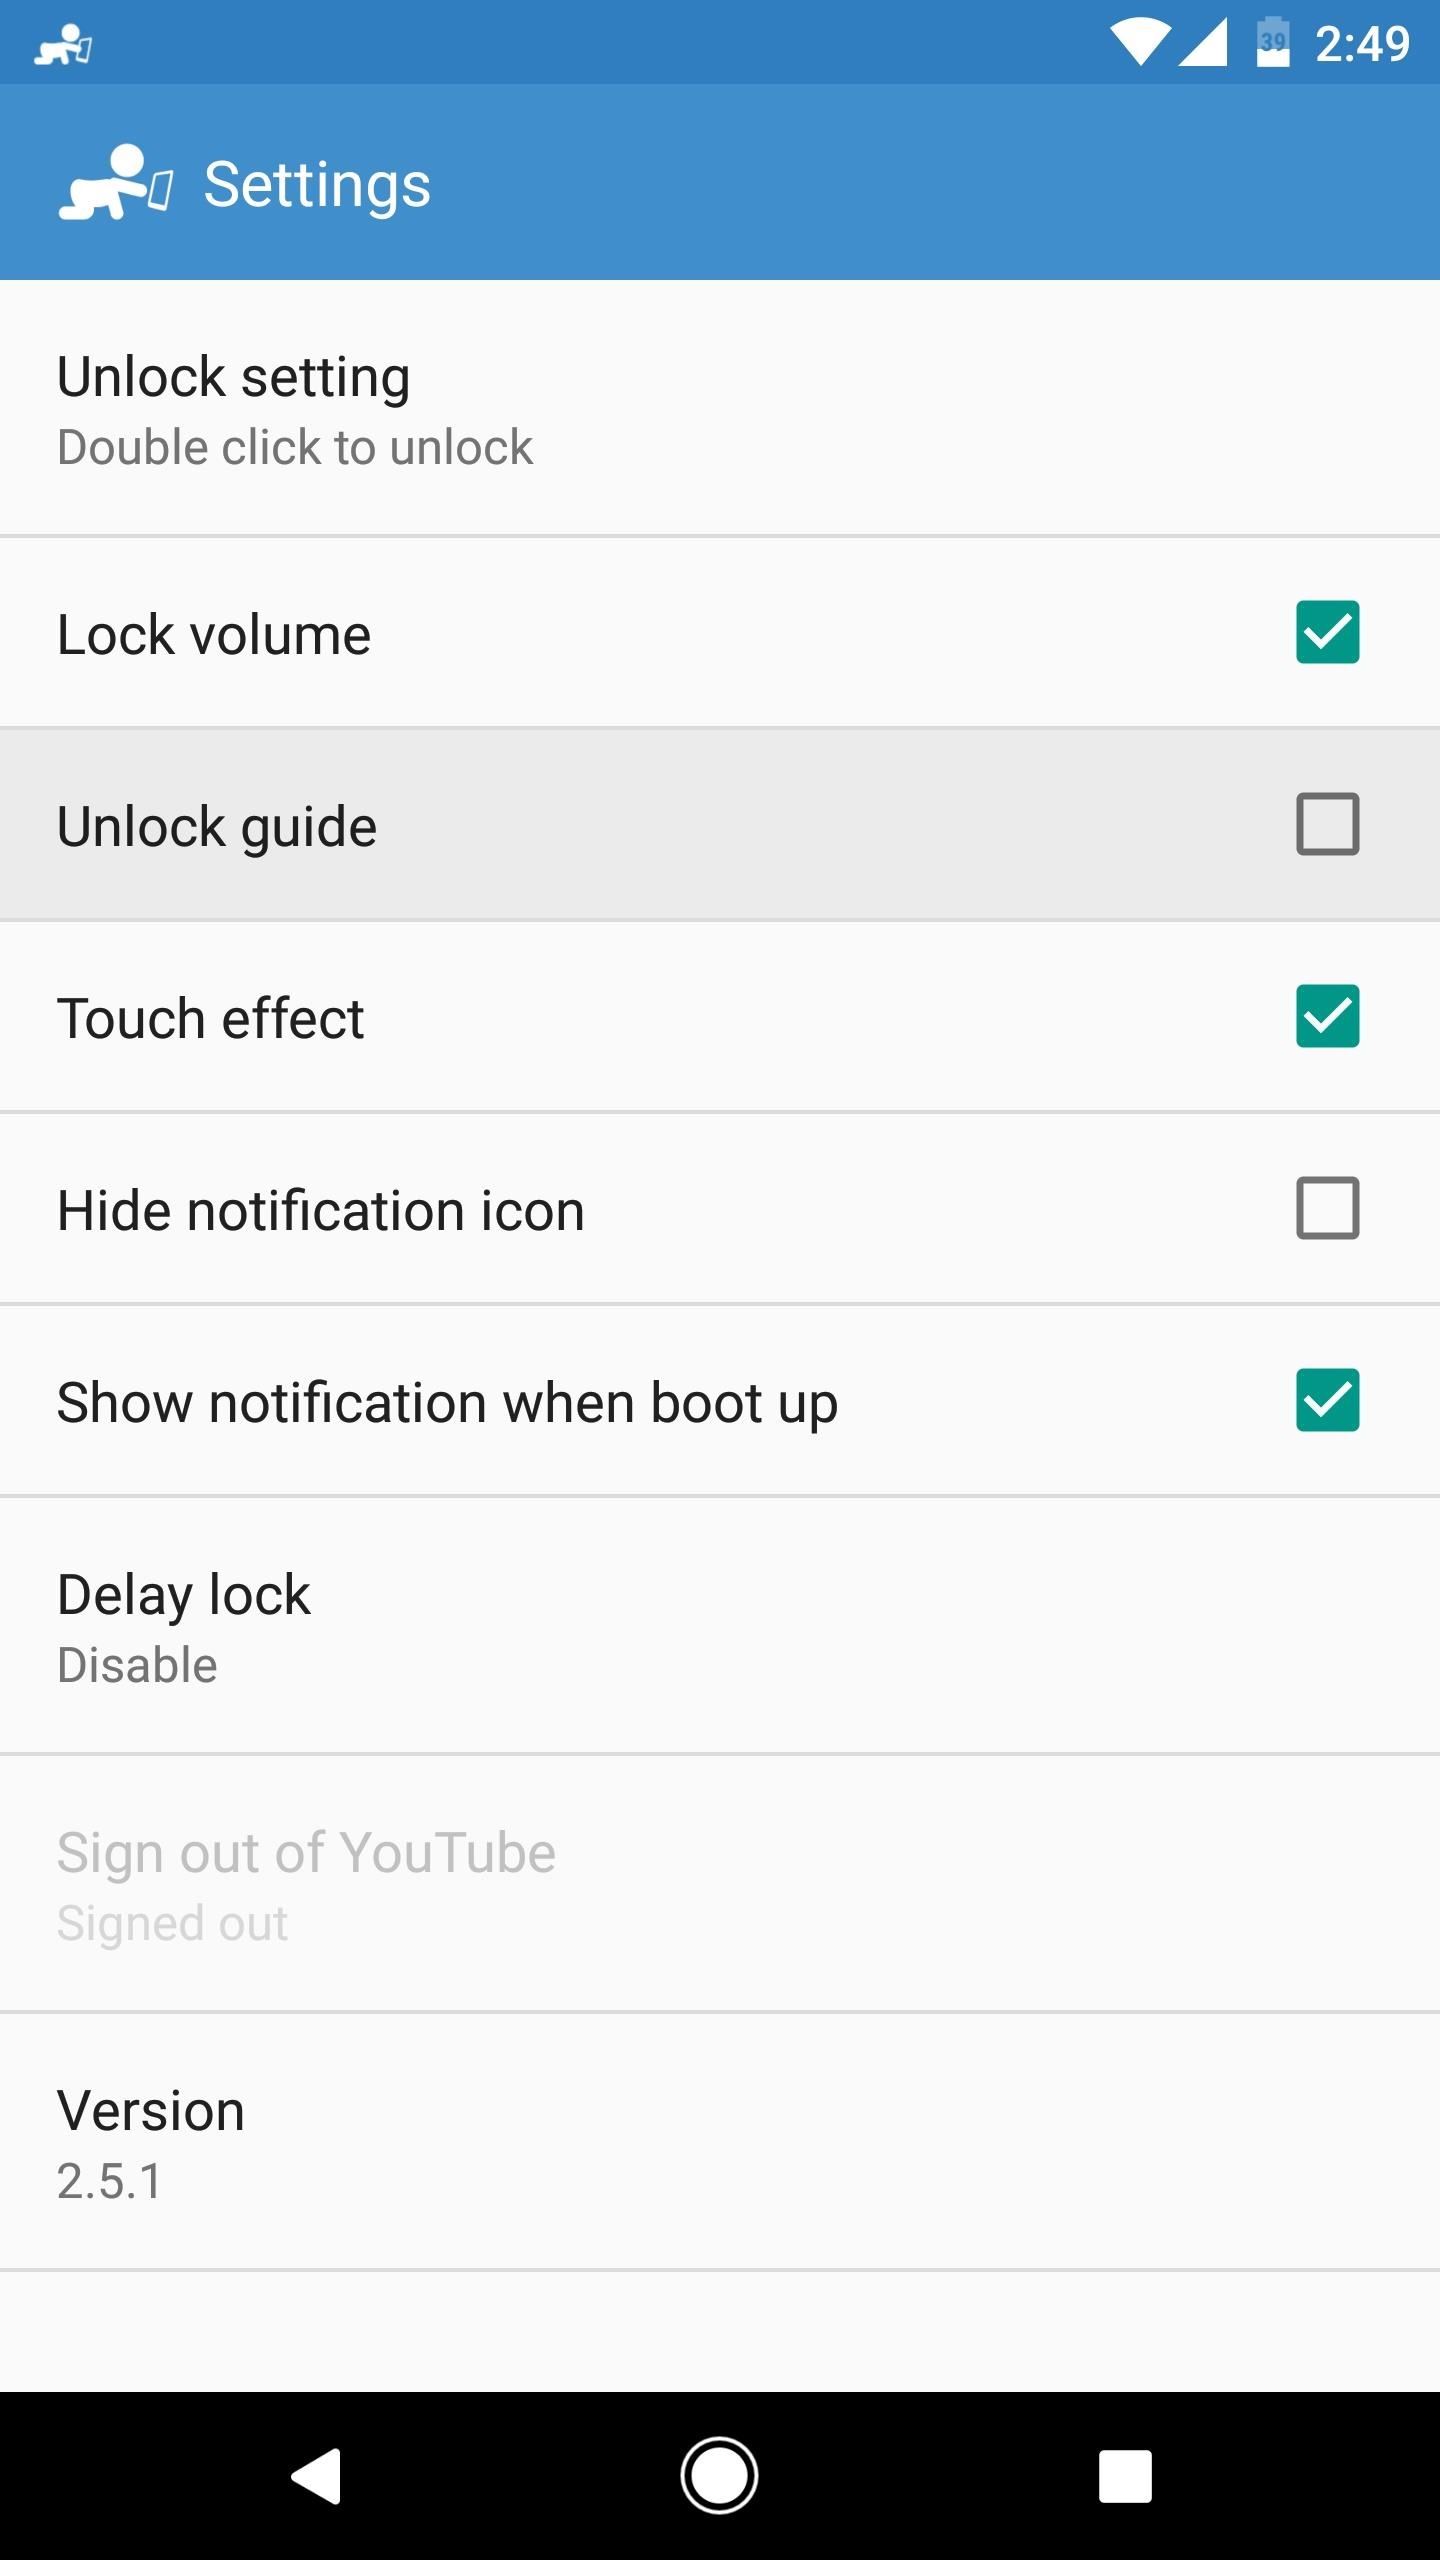
Next, head back to Touch Lock, then tap the three-dot menu button and head to Settings. From here, make sure to disable the «Unlock guide» option, as this would only serve to let someone else know how to unlock the device. Then, if you’d like, you can also change the «Unlock setting» option to require three or four taps instead of just two.

Step 4: Prevent Accidental Touches
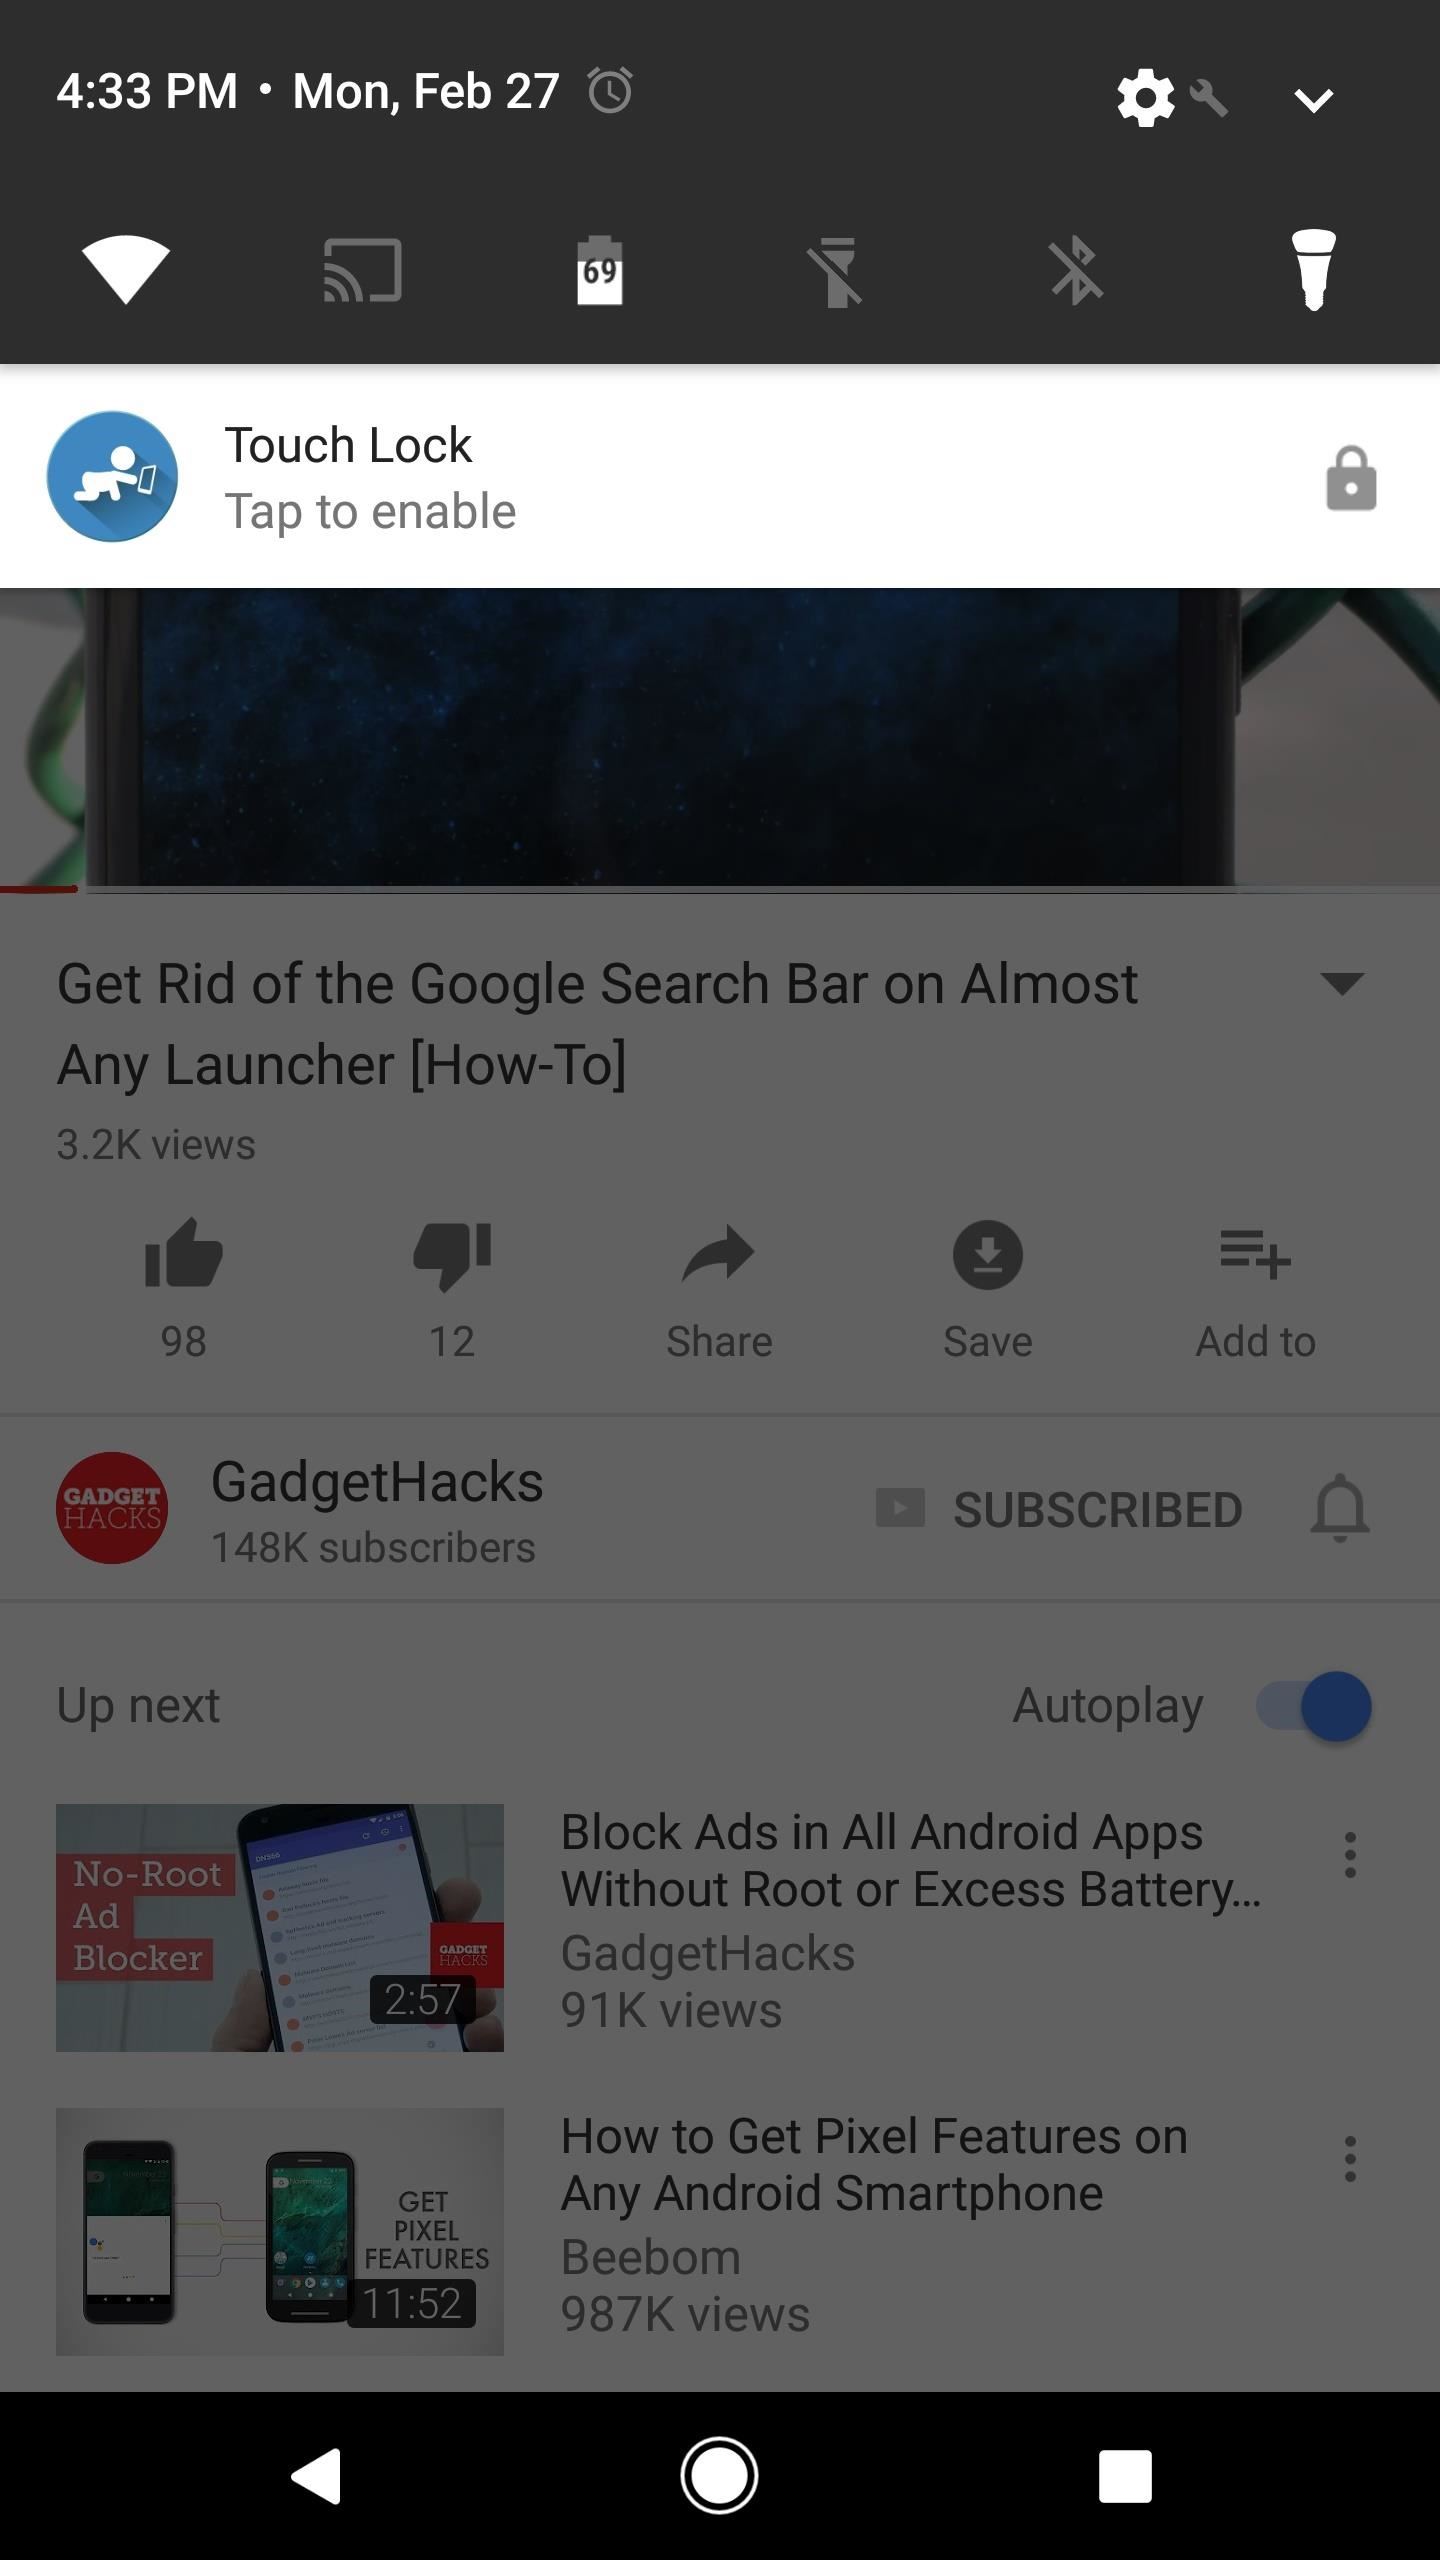
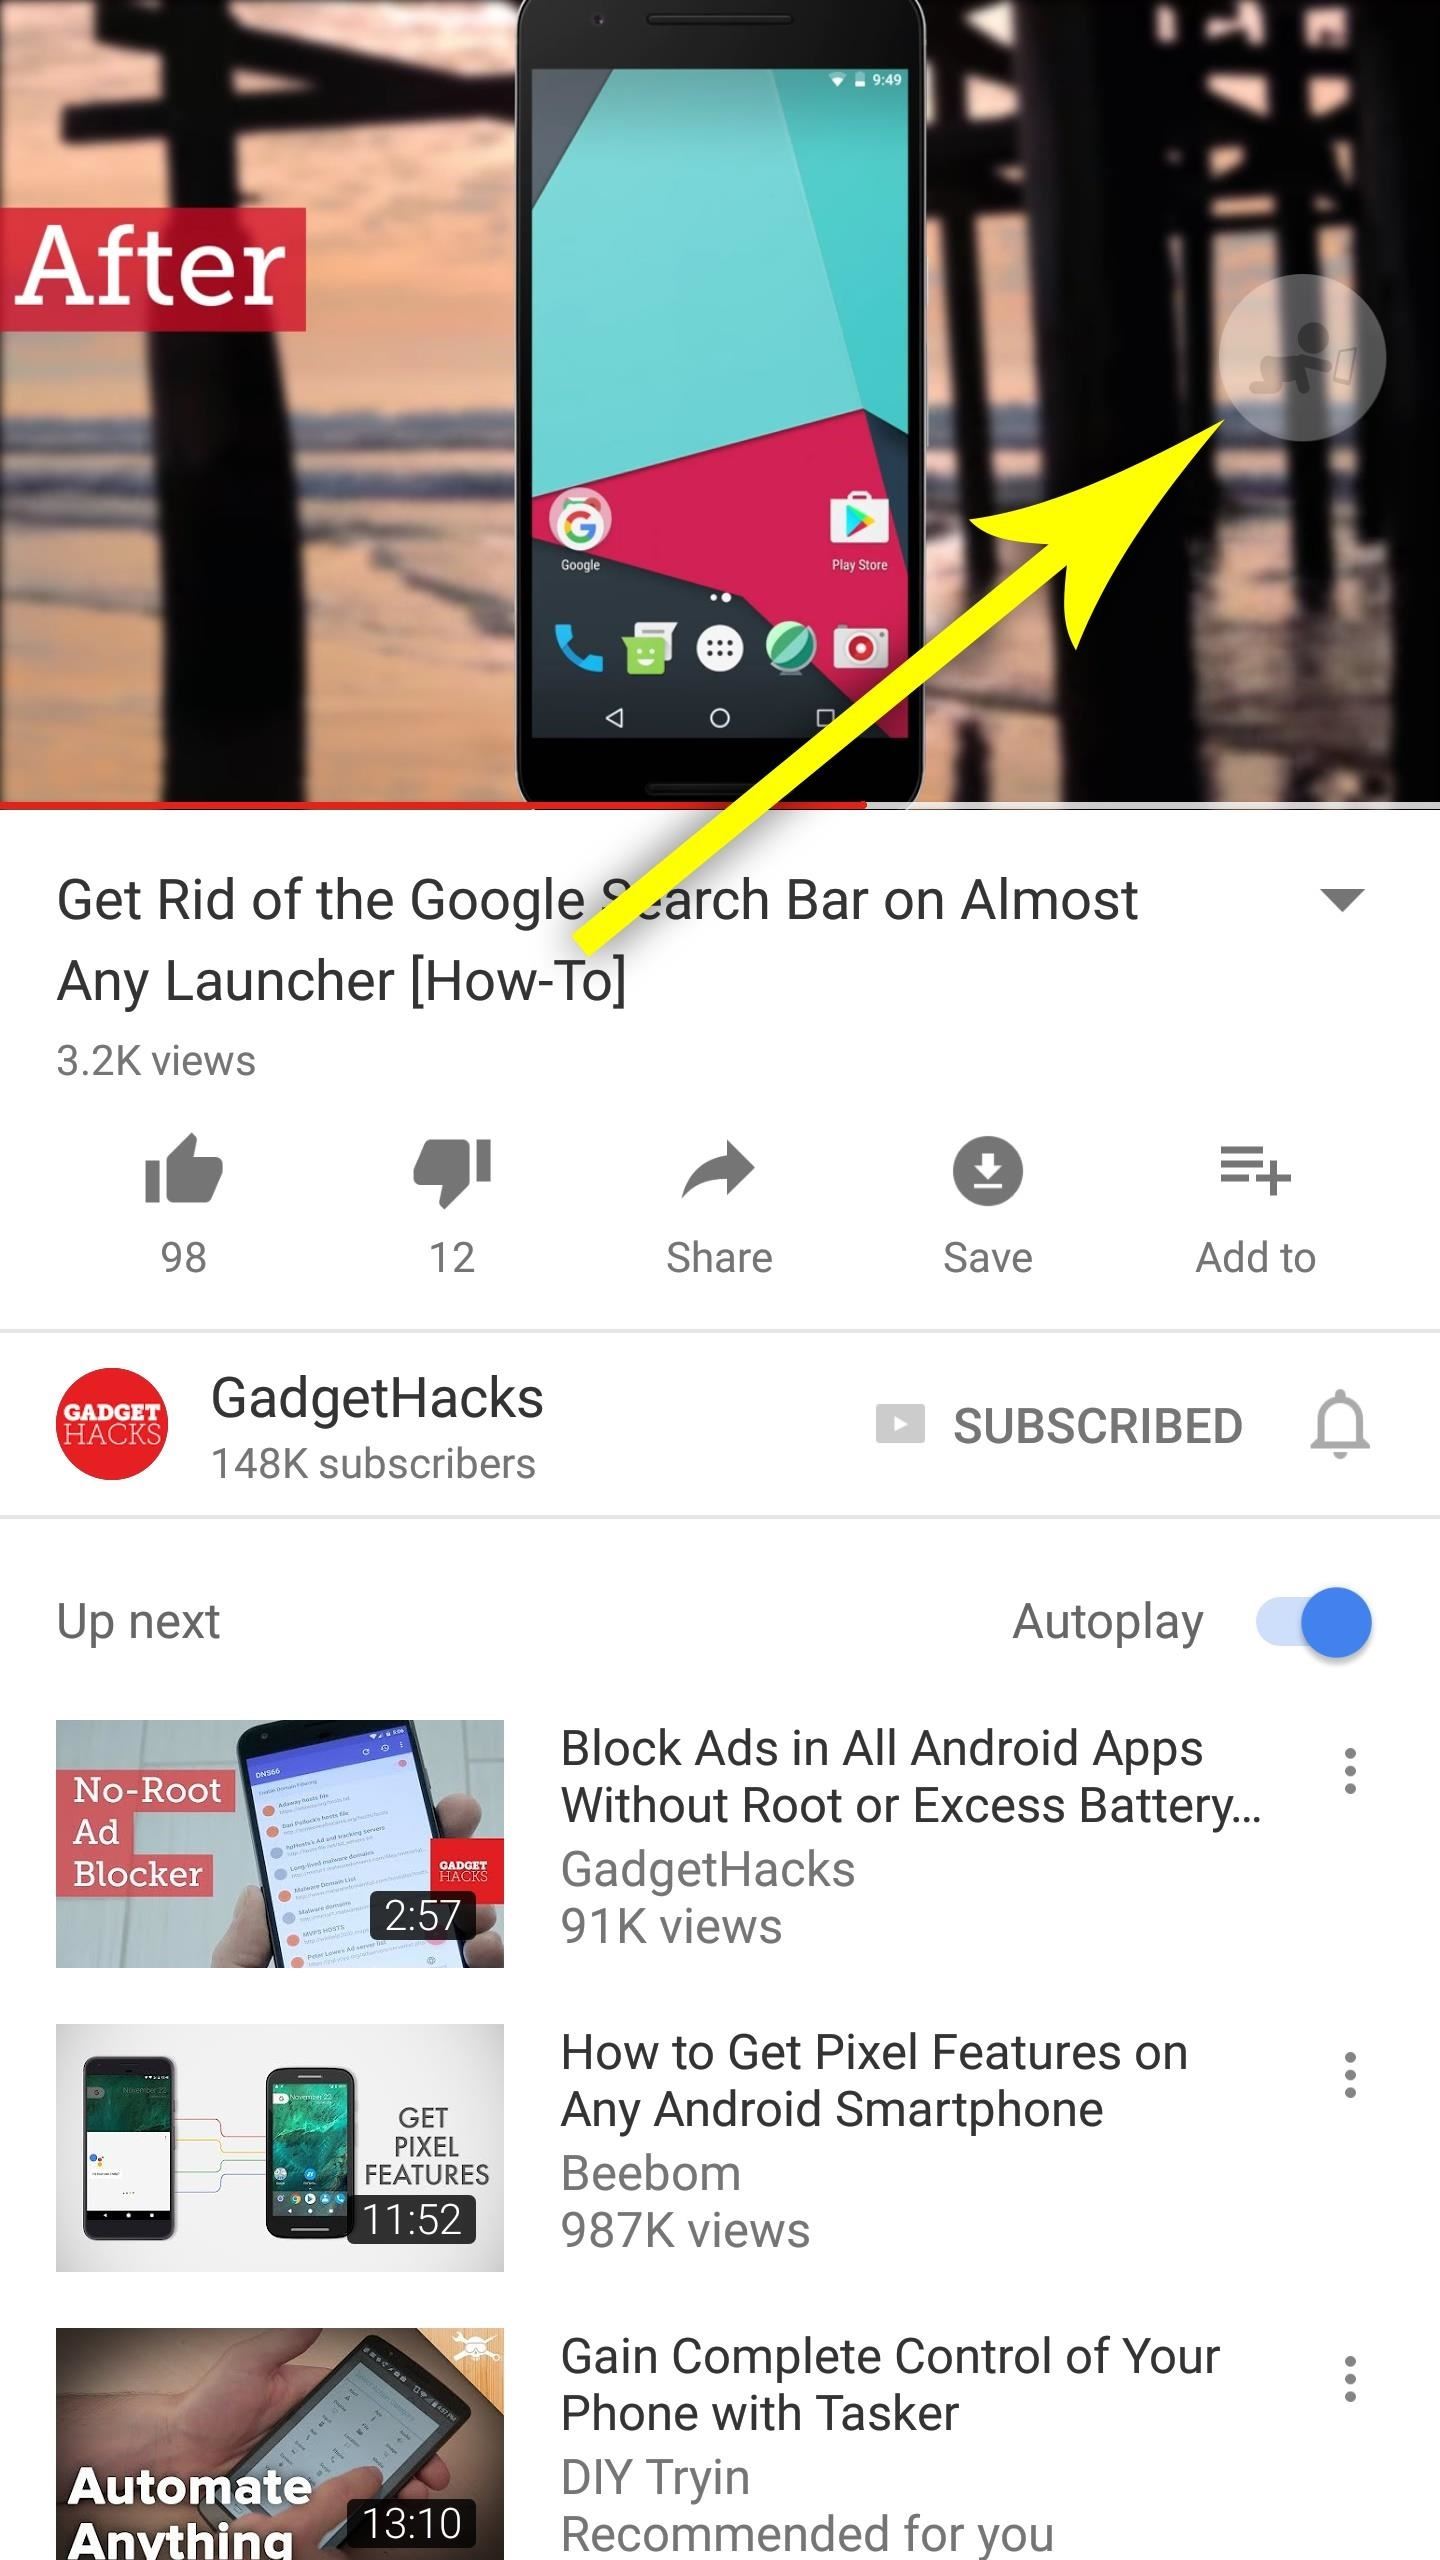
From now on, whenever you want to hand your device over to your toddler (or even to a nosy friend) to watch a video on YouTube or a similar service, start by playing the video. From there, simply swipe down from the top of your screen and tap the Touch Lock notification, then your screen will instantly be locked. Touching the screen at this point won’t do anything. Then, when you take the phone back, you can unlock the screen by double-tapping the small, semi-transparent icon on the right side of your screen.
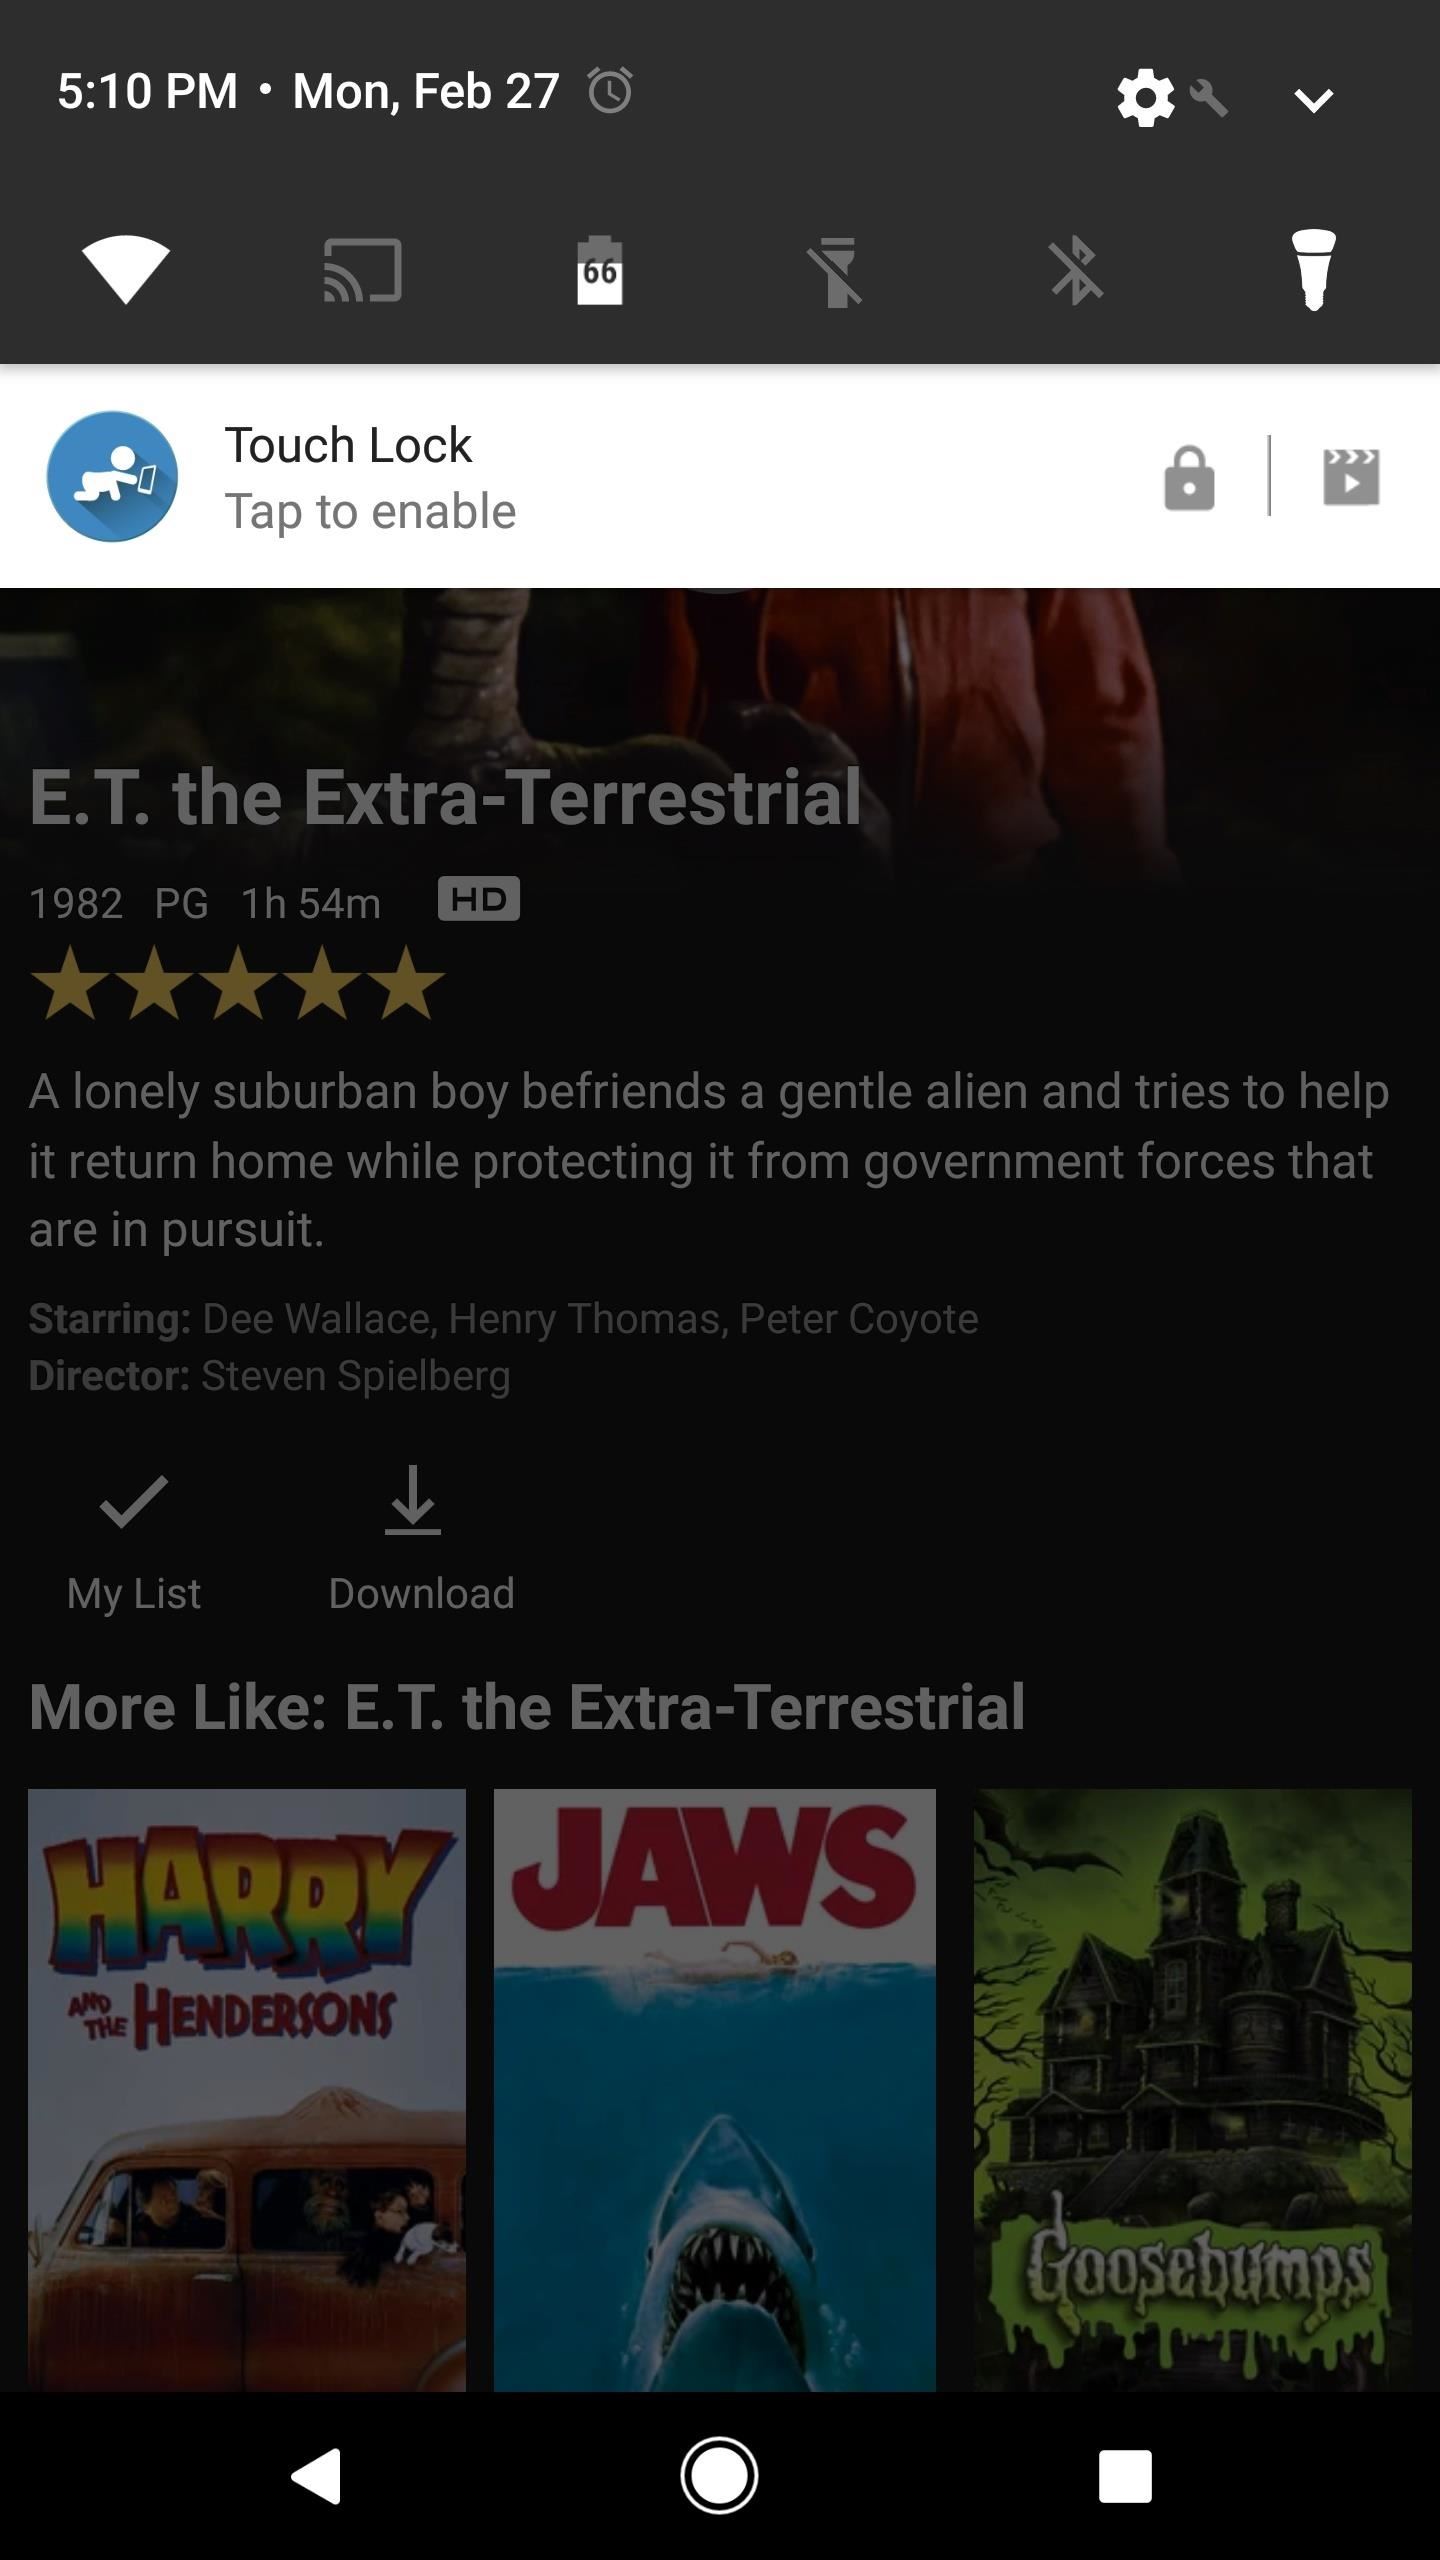
With Netflix videos, the process is slightly different. For these, start by opening the Netflix app and selecting a show or movie—but before you actually press the play button on a video, tap the Touch Lock notification. Then, simply press play on your video, and TouchLock will automatically lock the screen after playback begins. From there, unlocking the device works the same as it does with YouTube, so simply double-tap the transparent icon after you take the phone back.
This is a very useful feature to have in your arsenal of Android tools, but we hope to see some future improvements with Touch Lock to make it even more like Apple’s Guided Access, which can let you highlight specific areas of the screen to disable—not just the whole screen. That would be great for games, especially. Guided Access also lets you set a PIN code to disable the restrictions, which would make it even harder for someone to access the rest of the device.
Keep Your Connection Secure Without a Monthly Bill. Get a lifetime subscription to VPN Unlimited for all your devices with a one-time purchase from the new Gadget Hacks Shop, and watch Hulu or Netflix without regional restrictions, increase security when browsing on public networks, and more.
Источник
question
Usage access permission
I am building an ‘App locker’ App in which I’ve displayed all the User Apps and System App in Listview, and I’ve added a toggle button to this listview, on turning (toggle button) ON/OFF, I want to lock/unlock the app of the phone. And lock is based on Pattern.
Whenever the App, which I locked, there should appear a Pattern Lock for Unlocking the app.
For this I need to grant my App USAGE ACCESS.
How to achieve that
1 Answer
Welcome to our Microsoft Q&A platform!
Whenever the App, which I locked, there should appear a Pattern Lock for Unlocking the app. For this I need to grant my App USAGE ACCESS.
The PACKAGE_USAGE_STATS is a dangerous permission which cannot be requested in a pop-up dialog at runtime such as requesting the READ_EXTERNAL_STORAGE permission. We can only guide the user to open the Apps with **strong text**Usage Access setting page.
Here is the code to open the Setting Application page
If the response is helpful, please click «Accept Answer» and upvote it.
Note: Please follow the steps in our documentation to enable e-mail notifications if you want to receive the related email notification for this thread.
Sir, Thanks for the reply, I Implemented this using dependency in android on button click. But I can’t see my app in there in the grant access section in phone. Do I need to do more stuff for achieving the same
Thanks
Источник
Request app permissions
Every Android app runs in a limited-access sandbox. If your app needs to use resources or information outside of its own sandbox, you can declare a permission and set up a permission request that provides this access. These steps are part of the workflow for using permissions.
If you declare any dangerous permissions, and if your app is installed on a device that runs Android 6.0 (API level 23) or higher, you must request the dangerous permissions at runtime by following the steps in this guide.
If you don’t declare any dangerous permissions, or if your app is installed on a device that runs Android 5.1 (API level 22) or lower, the permissions are automatically granted, and you don’t need to complete any of the remaining steps on this page.
Basic principles
The basic principles for requesting permissions at runtime are as follows:
- Ask for permissions in context, when the user starts to interact with the feature that requires it.
- Don’t block the user. Always provide the option to cancel an educational UI flow related to permissions.
- If the user denies or revokes a permission that a feature needs, gracefully degrade your app so that the user can continue using your app, possibly by disabling the feature that requires the permission.
- Don’t assume any system behavior. For example, don’t assume that permissions appear in the same permission group. A permission group merely helps the system minimize the number of system dialogs that are presented to the user when an app requests closely-related permissions.
Workflow for requesting permissions
Before you declare and request runtime permissions in your app, evaluate whether your app needs to do so. You can fulfill many use cases in your app, such as taking photos, pausing media playback, and displaying relevant ads, without needing to declare any permissions.
If you conclude that your app needs to declare and request runtime permissions, complete these steps:
- In your app’s manifest file, declare the permissions that your app might need to request.
- Design your app’s UX so that specific actions in your app are associated with specific runtime permissions. Users should know which actions might require them to grant permission for your app to access private user data.
- Wait for the user to invoke the task or action in your app that requires access to specific private user data. At that time, your app can request the runtime permission that’s required for accessing that data.
Check whether the user has already granted the runtime permission that your app requires. If so, your app can access the private user data. If not, continue to the next step.
You must check whether you have that permission every time you perform an operation that requires that permission.
Check whether your app should show a rationale to the user, explaining why your app needs the user to grant a particular runtime permission. If the system determines that your app shouldn’t show a rationale, continue to the next step directly, without showing a UI element.
If the system determines that your app should show a rationale, however, present the rationale to the user in a UI element. This rationale should clearly explain what data your app is trying to access, and what benefits the app can provide to the user if they grant the runtime permission. After the user acknowledges the rationale, continue to the next step.
Request the runtime permission that your app requires in order to access the private user data. The system displays a runtime permission prompt, such as the one shown on the permissions overview page.
Check the user’s response, whether they chose to grant or deny the runtime permission.
If the user granted the permission to your app, you can access the private user data. If the user denied the permission instead, gracefully degrade your app experience so that it provides functionality to the user, even without the information that’s protected by that permission.
Figure 1 illustrates the workflow and set of decisions associated with this process:
 Figure 1. Diagram that shows the workflow for declaring and requesting runtime permissions on Android.
Determine whether your app was already granted the permission
To check if the user has already granted your app a particular permission, pass that permission into the ContextCompat.checkSelfPermission() method. This method returns either PERMISSION_GRANTED or PERMISSION_DENIED , depending on whether your app has the permission.
Explain why your app needs the permission
If the ContextCompat.checkSelfPermission() method returns PERMISSION_DENIED , call shouldShowRequestPermissionRationale() . If this method returns true , show an educational UI to the user. In this UI, describe why the feature, which the user wants to enable, needs a particular permission.
Additionally, if your app requests a permission related to location, microphone, or camera, consider explaining why your app needs access to this information.
Request permissions
After the user views an educational UI, or the return value of shouldShowRequestPermissionRationale() indicates that you don’t need to show an educational UI this time, request the permission. Users see a system permission dialog, where they can choose whether to grant a particular permission to your app.
Traditionally, you manage a request code yourself as part of the permission request and include this request code in your permission callback logic. Another option is to use the RequestPermission contract, included in an AndroidX library, where you allow the system to manage the permission request code for you. Because using the RequestPermission contract simplifies your logic, it’s recommended that you use it when possible.
Allow the system to manage the permission request code
To allow the system to manage the request code that’s associated with a permissions request, add dependencies on the following libraries in your module’s build.gradle file:
You can then use one of the following classes:
- To request a single permission, use RequestPermission .
- To request multiple permissions at the same time, use RequestMultiplePermissions .
The following steps show how to use the RequestPermission contract. The process is nearly the same for the RequestMultiplePermissions contract.
In your activity or fragment’s initialization logic, pass in an implementation of ActivityResultCallback into a call to registerForActivityResult() . The ActivityResultCallback defines how your app handles the user’s response to the permission request.
Keep a reference to the return value of registerForActivityResult() , which is of type ActivityResultLauncher .
To display the system permissions dialog when necessary, call the launch() method on the instance of ActivityResultLauncher that you saved in the previous step.
After launch() is called, the system permissions dialog appears. When the user makes a choice, the system asynchronously invokes your implementation of ActivityResultCallback , which you defined in the previous step.
Note: Your app cannot customize the dialog that appears when you call launch() . To provide more information or context to the user, change your app’s UI so that it’s easier for users to understand why a feature in your app needs a particular permission. For example, you might change the text in the button that enables the feature.
Also, the text in the system permission dialog references the permission group associated with the permission that you requested. This permission grouping is designed for system ease-of-use, and your app shouldn’t rely on permissions being within or outside of a specific permission group.
The following code snippet shows how to handle the permissions response:
Kotlin
And this code snippet demonstrates the recommended process of checking for a permission, and requesting a permission from the user when necessary:
Kotlin
Manage the permission request code yourself
As an alternative to allowing the system to manage the permission request code, you can manage the permission request code yourself. To do so, include the request code in a call to requestPermissions() .
Note: Your app cannot customize the dialog that appears when you call requestPermissions() . The text in the system permission dialog references a permission group, but this permission grouping is designed for system ease-of-use. Your app shouldn’t rely on permissions being within or outside of a specific permission group.
The following code snippet demonstrates how to request a permission using a request code:
Kotlin
After the user responds to the system permissions dialog, the system then invokes your app’s implementation of onRequestPermissionsResult() . The system passes in the user response to the permission dialog, as well as the request code that you defined, as shown in the following code snippet:
Kotlin
Handle permission denial
If the user denies a permission request, your app should help users understand the implications of denying the permission. In particular, your app should make users aware of the features that don’t work because of the missing permission. When you do so, keep the following best practices in mind:
Guide the user’s attention. Highlight a specific part of your app’s UI where there’s limited functionality because your app doesn’t have the necessary permission. Several examples of what you could do include the following:
- Show a message where the feature’s results or data would have appeared.
- Display a different button that contains an error icon and color.
Be specific. Don’t display a generic message; instead, mention which features are unavailable because your app doesn’t have the necessary permission.
Don’t block the user interface. In other words, don’t display a full-screen warning message that prevents users from continuing to use your app at all.
At the same time, your app should respect the user’s decision to deny a permission. Starting in Android 11 (API level 30), if the user taps Deny for a specific permission more than once during your app’s lifetime of installation on a device, the user doesn’t see the system permissions dialog if your app requests that permission again. The user’s action implies «don’t ask again.» On previous versions, users would see the system permissions dialog each time your app requested a permission, unless the user had previously selected a «don’t ask again» checkbox or option.
In certain situations, the permission might be denied automatically, without the user taking any action. (Similarly, a permission might be granted automatically as well.) It’s important to not assume anything about automatic behavior. Each time your app needs to access functionality that requires a permission, you should check that your app is still granted that permission.
To provide the best user experience when asking for app permissions, also see App permissions best practices.
One-time permissions
Starting in Android 11 (API level 30), whenever your app requests a permission related to location, microphone, or camera, the user-facing permissions dialog contains an option called Only this time, as shown in Figure 2. If the user selects this option in the dialog, your app is granted a temporary one-time permission.
Your app can then access the related data for a period of time that depends on your app’s behavior and the user’s actions:
- While your app’s activity is visible, your app can access the data.
- If the user sends your app to the background, your app can continue to access the data for a short period of time.
- If you launch a foreground service while the activity is visible, and the user then moves your app to the background, your app can continue to access the data until that foreground service stops.
- If the user revokes the one-time permission, such as in system settings, your app cannot access the data, regardless of whether you launched a foreground service. As with any permission, if the user revokes your app’s one-time permission, your app’s process terminates.
When the user next opens your app and a feature in your app requests access to location, microphone, or camera, the user is prompted for the permission again.
Android auto-resets permissions of unused apps
If your app targets Android 11 (API level 30) or higher and isn’t used for a few months, the system protects user data by automatically resetting the sensitive runtime permissions that the user had granted your app. Learn more in the guide about app hibernation.
Request to become the default handler if necessary
Some apps depend on access to sensitive user information related to call logs and SMS messages. If you want to request the permissions specific to call logs and SMS messages and publish your app to the Play Store, you must prompt the user to set your app as the default handler for a core system function before requesting these runtime permissions.
For more information on default handlers, including guidance on showing a default handler prompt to users, see the guide on permissions used only in default handlers.
Grant all runtime permissions for testing purposes
To grant all runtime permissions automatically when you install an app on an emulator or test device, use the -g option for the adb shell install command, as demonstrated in the following code snippet:
Additional resources
For additional information about permissions, read these articles:
To learn more about requesting permissions, download the following sample apps:
- Android RuntimePermissionsBasic Sample Java | Kotlin
Content and code samples on this page are subject to the licenses described in the Content License. Java is a registered trademark of Oracle and/or its affiliates.
Источник


