Phantom Thief Celianna скачать игру бесплатно на ПК
Год выхода: 2018 Разработчики: Acerola ОС: Windows 7, 8, 10 Процессор: Intel Core2 Duo Видео: DirectX 9/OpenGL 4.1 Оперативка: 4 Gb Место: 4 Gb Отзывы о игре: Смешанные 64% из 203 отзывов положительные Версия: Последняя версия (Полная)
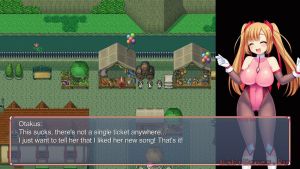
Игра Phantom Thief Celianna сосредоточена на путешествии по подземельям и сражении с монстрами. Есть несколько типов врагов: одни передвигаются по фиксированному маршруту, другие будут прятаться и преследовать, а третьи заставят прийти к ним в ловушку. Противники не будут пытаться убить или причинить вред, но они очень заинтересованы в том, что находится у главной героини между ног.
История Phantom Thief Celianna рассказывает о приключениях трех девушек
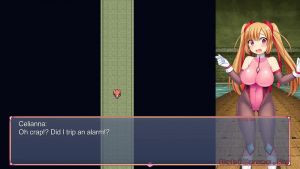
Селианна. Выходец из небогатой семьи. Ее мать таинственно исчезла, но она не теряет оптимизма, всегда жизнерадостная и готова помочь другим, хоть и чересчур наивна.
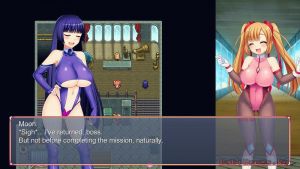
Мун. Гордая, целеустремленная и рациональная. Избегает разговоров о своих родителях.
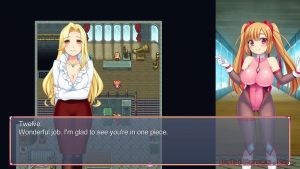
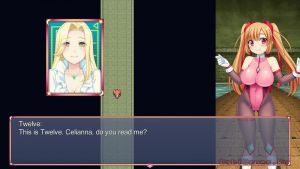
Твелв. Лидер группы и самая старшая в команде, получает информацию о миссиях. Спокойна и безмятежна, если не спрашивать ее о прошлом.
По мере прохождения нужно следить за тремя характеристиками: жизнь, возбуждение и моча. Первая уменьшается каждый раз, когда персонажа похищает противник. В более низких уровнях она восстанавливается после побега, а на высокой сложности придется использовать предметы. Шкала возбуждения изначально пустая и наполняется, когда героиня попадает в плен и похитители делают с ней «чистые и невинные» вещи. Показатель мочи тоже начинается с нуля и заполняется по мере передвижения по миру. Если шкала заполнена, персонаж опорожняется в том месте, где находится и это добавляет от 30 до 50 очков к шкале возбуждения. Доступен контент 18+ в виде плохих концовок и анимаций, которые появляются в галерее. Для того чтобы разблокировать анимацию, шкалу возбуждения должно заполнить одно Существо, которое также может выпускать белую субстанцию и оплодотворять девушку. Для того, чтобы открыть плохой конец, героиня должна попасть в ловушку и подождать, пока шкала жизни исчерпается.
Phantom Thief Celianna скриншоты:
Скачать Phantom Thief Celianna бесплатно на пк
Размер: 2.8 Gb. Версия: Последняя версия (Полная)
Источник
Phantom Thief Sylphy
Обзор игры Phantom Thief Sylphy
Phantom Thief Sylphy — это игра в жанре rpg и логическая, разрабатываемая Azurezero для платформы PC. Окружение в игре относится к cтилистике аниме, а выделить особенности можно следующие: сексуальный контент, нагота, протагонистка, хентай, головоломка, исследования, чёрный юмор, ролевая игра, приключенческий экшен, несколько концовок, 2d, милая, для одного игрока, аниме, тёмное фэнтези, приключение, юмор, расследования, экшен, достижения steam. Вам будут доступны такие игровые режимы как «для одного игрока».
Во всем мире игра Phantom Thief Sylphy распространяется по модели разовая покупка издателем Azurezero. На данный момент стадия игры — запущена, а дата её выхода — 08.09.2021. Бесплатно скачать Phantom Thief Sylphy, в том числе и через торрент, нельзя, поскольку игра распространяется по модели разовая покупка.
MMO13 еще не вынес Phantom Thief Sylphy оценку. Игра распространяется в магазине Steam, пользователи которого оценивают эту игру своими отзывами на 10. баллов из 10.
Официальное описание игры гласит:
«Phantom Thief Sylphy is an Erotic Stealth Adventure Game. Sneak, evade capture and solve puzzles as you steal from the rich and powerful and expose their corruption. Try not to get caught though, lest you become another victim.»
Full game walkthrough, as well as a separate mini-guide for the achievements and for finding all of the CGs and other fun bits. Spoiler Alert.
Game Controls
The mouse also works. Sylphy will path to the spot you click. The mouse pathing can be awkward if you are doing puzzles, and clicking does not work on some things (getting out of boxes, for example).
Opening the menu lets you examine your items, change game options, save, or return to the title screen. Of the various options, I recommend turning “Always Dash” ON. There are a lot of chase scenes where you have to dash, and there are only a couple of puzzles where dashing can make it harder. BTW, holding Shift with “Always Dash” on will make you walk at normal speed.
Interlude 1: Sylphy’s Apartment
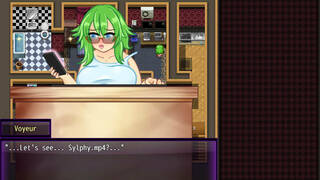
Enter the room with the green-haired girl to meet Voyeur, Sylphy’s partner. Interact with her to get a mission briefing. If you go to the bathroom and interact with the tub, you can see a bath scene (this leaves Sylphy naked). You can dress her again by interacting with the dresser in the bedroom.
Stand in front of the mirror here and use the GRAPPLE GUN to break the mirror and earn the “7 years bad luck” achievement.
The hidden achievement “Doing it for the attention” is earned by starting any level naked.If you want you can do it for the first level, but it is unnecessary and makes the level harder.
Whenever you are ready, go back downstairs. Make sure to restock on BATTERIES and then interact with the wall where it says “Mission Start” to continue.
Level 1: Gallery
From the starting room, head north one room to find a library. Head to the west door to find a N/S hallway and another room to the west with a bunch of pillars – the painting is there, but ignore it for now. There is a guard to the north – you can just defeat him (MUCH faster) or go the long way.
If you are going the long way, enter the hallway, go south, then west. Go south through the door into another hallway. Continue west into a room with a red carpet and some obelisks. There is a guard walking in a clockwise circle to avoid. Proceed through the north door to enter a gallery with a bunch of art on the walls. Stick to the west wall of the room and go all the way to the north, avoiding the patrolling guards (two patrol clockwise, two are static). Once you reach the top of the room, head to the east wall, then go south to find a door into the first hallway again (where you can see the central room with the pillars). Go north to the base of the stairs, go east then south to enter the left door to the target room. A cutscene will stop you and inform you of the laser beams – tripping them will give you a GAME OVER.
When you have control again, go north and use the GRAPPLE GUN to climb up. Go east until you are clear of the pool, then use the GRAPPLE GUN to descend. You are now finally behind the guard you could have just shocked at the beginning. Go east past the stairs to enter a room with another guard patrolling clockwise, some inert knights, and a big chair.
You can sneak past the guard to sit on the chair. If you stand in the chair’s seat for a few seconds, Sylphy will remark on how comfy it is. After the dialogue ends, you will get the “Comfy Chair” achievement.
Use the GRAPPLE GUN to ascend to the balcony and head east to find the security station. Interact with the black computer to get the HARD DISK (will not show up in your inventory), then interact with the TV screen to see the laser pattern for the target room. Exit the monitor when done.
Retrace your steps while avoiding the guards and enter the right door of the target room. Go south and then east until you are at the corner of the NE-most pillar. Navigate the puzzle using the memorized laser pattern or the spoiler below.
Each movement corresponds to passing one pillar in the specified direction. From the top-right corner of the NE-most pillar, go south 3 times, west once, north twice, west twice, south once, east once, south once, west twice, north 3 times, and finally east twice. Proceed straight north to the painting.
Interact with the painting to enter Level 1.5: Minotaur’s Mistress.
Level 1.5: Minotaur’s Mistress (part 1)
Head south through to enter a hallway and continue west to see a weird symbol on the wall. These symbols serve as respawn points if you are captured. Continue west to see your first Minotaur (you get a cutscene if you stand in front of the doorway). Minotaurs are unkillable (the first time you run into one it will deplete all your BATTERIES). If you are within a certain range of one they will follow you – get too close and they will become enraged and much faster. You need to dash in order to lead them into traps and get around them. Once your BATTERIES are depleted, each time a Minotaur catches you it will remove a piece of your clothing (bra, panties, corset). If you have no clothing left, getting caught will force an H-scene – afterwards you will respawn at the closest wall symbol (until a certain point, later).
To earn the “Ooops!” achievement, fire your GRAPPLE GUN right at a Minotaur. You will end up in the same space as the Minotaur and things will proceed as if you otherwise ran into him.
When you regain control, dash east and go north through the second door. You want the Minotaur to keep following you but not catch up. If you lose him, go back to get his attention. Continue following the linear path and go east to enter a new screen. A cutscene will play where the Minotaur falls into a hole after Sylphy dodges him with her GRAPPLE GUN. When you can move again, drop down the hole after the Minotaur to FLOOR B1, then go west to another screen.
There is another Minotaur here and a respawn point to the north. Get the Minotaur to chase you around one of the walls to get past him and continue west, then north to find another path above you (there should be a treasure chest in a small, inaccessible room right next to you. Use the GRAPPLE GUN to ascend, then go west and descend to find an area with a boulder, a hole, and a green switch on the wall. The switch resets the boulder – drop down the hole first to FLOOR B2. You should be in a small room with a treasure chest behind some spikes and a green switch on the FLOOR. Go south and interact with the door to open it, then return to where you dropped down and ascend with your GRAPPLE GUN to B1. Push the boulder into the hole (left 4 spaces, up one space, then left 5 spaces, reset with switch if needed). When the boulder drops, the hole will close. Go back east, up the wall, then down, then east to return to the hole you dropped down after the first Minotaur (the other Minotaur is gone now) and GRAPPLE GUN up to FLOOR G.
Go west to the starting area, then follow the path all the way to the east where you found the first Minotaur. Go north and follow the path around and descend the stairs to FLOOR B1. There is nothing to the east from here, go west and then north past the west door, then east to find a grassy area. Drop down to FLOOR B2.
Go south, then west, then follow the linear path north to find a staircase to FLOOR B3. Go south, then east to find another weird wall symbol and a switch, use the GRAPPLE GUN to press it and lower the spikes. Continue north. There is a tile shuffling puzzle here – if you stand on a tile next to the empty space and press Z it will move into the empty space. The green wall switch resets it. Solving the puzzle will create a bridge across the gap to the north…OR just use your GRAPPLE GUN across the gap to grab the STONE TABLET. Proceed south past the way you came in to see a door blocked by flames – you need to put them out first. Continue to the west to find a room with a red carpet and some statues – grab the blue EMPTY BOTTLE on the west table, then retrace your steps to the staircase to FLOOR B2. Go back to where you dropped down and GRAPPLE GUN to FLOOR B1.
Follow the path around to the west door and proceed to enter a new area. Follow the path west and down the stairs to see a lot of water (you are now on FLOOR B2). There is a Minotaur staring at the wall here – stay away and he will ignore you. Proceed east and cross the second bridge and interact with one of the waterfalls. You will have the option to drink the water or fill up your bottle. Drinking the water will cause you to pass out and trigger an H-scene (note that this will destroy any clothes you are wearing). Go ahead and fill your bottle to lose the EMPTY BOTTLE and gain WATER. Proceed east past the wall symbol to enter a new area.
A Minotaur is to the north – avoid him by getting his attention, and then using your GRAPPLE GUN to vault over the spikes to the east (there is a ledge you can grapple to). Go north into the room to see a familiar boulder. Be careful – if it gets stuck, you need to repeat all the steps and press the wall switch on FLOOR B1 to reset the boulder again. Push the boulder down 3 spaces, right 6 spaces, and up 3 spaces onto the switch. Open the treasure chest to get your first TORN PAINTING SCRAP (#1) and see a cutscene.
When you regain control, go south and then east to find a wall symbol and an oddly-shaped hole. Interact with the hole and use the STONE TABLET to open the wall symbol. Enter and then climb the shaft up to FLOOR B1 with your GRAPPLE GUN (you will have to avoid the spikes by alternating ascending, descending, and moving side to side). Now on FLOOR B1, you will see a chest in front of you. Open it for another cutscene and a TORN PAINTING SCRAP (#2). Descend back down to FLOOR B2 and head north up the hallway, avoiding the Minotaur if needed. Go down the staircase to the east to FLOOR B3.
Level 1.5: Minotaur’s Mistress (part 2)
Follow the path past the spikes, then south to the fire you had to ignore previously. Interact and use the WATER to douse it (gaining the EMPTY BOTTLE again), entering the door to find a sarcophagus. Use the GRAPPLE GUN on the left candlesticks to open it. Open the chest to see a cutscene (better love story than Twilight!) and find the final TORN PAINTING SCRAP (#4). Pay your respects, then follow the path back to the staircase up to B2, then continue back to B1. Follow the path back around to the staircase to FLOOR G.
If you want, you can go through the western door first and fill up your EMPTY BOTTLE again to get more WATER. This will change your post-mission cutscene dialogue with Voyeur, though not significantly.
When you try to return to the painting, the path is blocked by a pillar. IT’S A TRAP! During the cutscene, the game will prompt you to SAVE – MAKE SURE TO DO IT. If you are captured by the Minotaur after the cutscene ends, it will trigger a different H-scene and cause a GAME OVER, forcing you to continue from your most recent save instead of just respawning you. Otherwise, the Minotaur follows all the normal Minotaur rules, except it ignores your STUN GLOVES entirely. Run away from the Minotaur, making sure to dash – the path is mostly linear and you are heading to the room where you found the sarcophagus and the final TORN PAINTING SCRAP. Big things to remember – after the stairs down to B1, go west (east is a dead end). After dropping down the hole in the grassy area, go west instead of east. You can’t really lose him since he will catch up every time you transition to a new FLOOR. When you make it to the sarcophagus room, you are in the clear. The Minotaur will spare you and return you to the painting. Interact with it to lose all 4 TORN PAINTING SCRAPS and return to the Gallery.
Level 1.9: Gallery Revisited
Interlude 2: Sylphy’s Apartment
It is recommended that you take a bath before starting the next mission and do not interact with the dresser to put your clothes back on. Starting Level 2 without clothes on will give you the “Doing it for the attention” achievement if you do not already have it, and is needed for another achievement that can only be obtained in Level 2.
When you are ready to go, return to the basement and interact with the “Mission Start” wall to get going.
Level 2: Hedd’s Mansion
If you are naked, you can get an achievement here. Go west up the ladder, then go north and walk to the end of the walkway over the pool. Interact to leap in and climb out automatically. If you are naked, you will get the “Skinny Dipping” achievement. When I tested it, this did not work if you were wearing clothes.
When you’re done, head north past the pool to reach a gravel path. Follow the path west to see the mansion’s entrance. Avoid the guards by following the wall south, then west past the fountain. Either go through the hedge maze or just follow the path to find a window at the mansion’s west corner. Lockpick it to enter the basement. Go through the door in the NE corner to enter the main mansion. Let’s call it FLOOR G.
Your goal here is to find a KEYCARD, then locate the hidden vault. The keycard is in the casino in the middle of FLOOR G, though some finesse is required to get it. Follow the hallway to the east and use your GRAPPLE GUN to climb to the ledge, proceeding east past the three guards. Drop down when clear, then follow the hallway north past the bathroom. Stepping on the gray tile will transition you to the kitchen. The chefs don’t count as guards, but they will throw you out of the kitchen if you talk to them. Go through the west door to see a door to the south between two staircases. Entering it will transition you to the casino.
The KEYCARD is on the first table to the right. To get it, sneak up on the first bunny girl to the left, then the one next to the banquet table, then the one next to the KEYCARD. Escape up the left staircase to FLOOR F1. Go west, then south and go up the narrow staircase to FLOOR F2. While the game in the middle of the room is cool, it doesn’t appear to do anything, so just exit to the south onto a terrace. From the terrace, you can jump down to a lower terrace on the west or east. Choose one and enter the door to go to FLOOR F1. If you chose west, you will be in a locker room – follow the path east to find a big E/W hallway. If you chose east, you will be in the master bedroom, just go east and exit the door to the north.
If you go west down the hallway, you can find some interesting easter eggs. A guard protects a small library with a bunch of “interesting” reading material that may foreshadow your future experiences. Continue following the hallway north to find a room full of some interesting machines. Interacting with them triggers a dialogue with Voyeur.
At the east end of this hallway is a door protected by a guard – sneak up behind him and knock him out, then lockpick the door to enter the room. Interact with the weird painting to reveal a keypad – use your KEYCARD on the keypad to open a hidden door in the fireplace. There is a small security room – interact with the switch in the NE corner, then interact with the computer to see a new path in the garden hedge maze. Exit the room and return to the hallway outside – follow the hallway west, then south to the changing rooms, and take the south door to the balcony. Use the GRAPPLE GUN on the railing to drop to the garden, then enter the hedge maze and go down the ladder to FLOOR B1.
Level 2.5: The Hidden Warehouse
Go east to find a box you can hide in – get used to seeing a lot of these. Interact to enter the box, then interact again to exit in the direction you were last facing. Enemies cannot see you when you are in boxes (even if they are right next to you), so use them to evade patrolling enemies going forward. Going east to the junction will trigger a cutscene – now you need to find two KEYCARDS to open the vault. Interact with the left keypad and use your KEYCARD to activate one of them, then continue east from the junction. When you get to the corner, look out for the fast guard that patrols the hallway to the south. When he is moving away from you, enter the nearby box to hide. When he passes you, you can knock him out (or just make a dash for the other crate). Follow the hallway west to a junction with more guards and a brief cutscene. There is no point in going north, so continue west and use the gaps in the boxes to hide when the guard is looking. Knock him out when you get close, then continue north. You can interact with the white table to open a shortcut, then continue the path north and down the stairs to FLOOR B2.
Follow the path to trigger a cutscene. This FLOOR consists of many similar E/W hallways with jail cells (the closed jail cells you can lockpick are respawn points) and patrolling guards. After the scene go east, then south at the lounge. Lockpick the door to the east – you can interact with the boxes in here to find out even more about Hedd’s dirty business. To the west is the first guard – some of the guards in this area follow a very particular pattern where they will face north towards an open jail cell for a few seconds, then move one cell to the east or west, and look north again. They move pretty quickly so it can be hard to knock them out – instead, one of the cells in their patrol route will have a box you can hide in – jump in and wait for them to pass, then sneak by. At the end of this hallway, go south, then to the east, continuing the pattern of hiding in the box (or bonking the guard if you’re quick). At the end of the hall, go south again, then west (no guard this time). Go south to find an interesting room (it’s where you get tortured during the H-scene with the guards). You can activate the pink massager on the table and it will move. Continue to the east to enter a new area.
Just in this room, guards will remove two pieces of clothing if you are out of BATTERIES. Two guards patrol clockwise around some jail cells – take them out or sneak by and go through the southern door.
In this next room (and all subsequent ones), guards will instantly remove all your clothing and capture you if you are out of BATTERIES. Take out the guard in front of you (you can get behind him without him noticing) and take the path between the crates in the middle of the room, continuing south to another room with two patrolling guards (counter-clockwise this time). Deal with them and go through the door to the east.
Before stepping on the different-colored FLOOR tile you probably want to SAVE. This section is a chase sequence, and you are now naked (unsure if this is a bug). Once you step on the FLOOR plate, lasers will block the path behind you, starting a cutscene. After it ends, you will have to follow the (mostly) linear path to the end while dashing to avoid the guards. The guards will interact with you as normal – if you are out of BATTERIES, this will be a little difficult. Getting captured will respawn you with no BATTERIES, so it is probably better to reload your save. The correct path at each fork (ignoring paths with guards) from the beginning is: north, north, south. Once you see two FLOOR panels like the one at the beginning, run past them to block the path with lasers, ending the chase. SAVE AGAIN, the next section can trigger a GAME OVER and there is no prompt or chance to save once it starts. Continue north when you are ready and activate the switch to gain the SLAVE COLLAR.
Sylphy has been captured by Mr. Hedd and a H-scene will play. Once the cutscene ends, Sylphy will be in a race against time to pick the machine’s lock before she succumbs to pleasure. You have to move your cursor through the maze, crossing each space once using your mouse or arrow keys. There is a Lust gauge at the top of the screen that will fill up over time – from time to time, the machine will switch to a second mode where Sylphy is assaulted by a massager for a variable amount of time. If you move while the second mode is active, the Lust gauge will fill very quickly. Using sound cues helps here – the machine’s pace will speed up during the second mode, and a “bloop” sound will play when it switches back to the first mode. Pressing X at any point will reset your cursor but keep your Lust gauge intact, which can be a pain. If your Lust gauge fills completely, it will trigger a GAME OVER. I won’t give specific directions for this part, but either route (up or to the left) works, just make sure not to move during the second mode.
Once you complete the timed puzzle, a cutscene will play and you will gain KEYCARD R and USB STICK (FULL). After the scene ends, you will be back in your apartment’s basement.