- Learn to create a Pie Chart in Android with MPAndroidChart
- Related Posts
- Build a Binary Converter Android App with Kotlin
- Develop a Chuck Norris Facts Android App with Kotlin
- Parsing XML data in Android Apps
- 4 Comments Already
- Using MPAndroidChart for Android Application — PieChart
- Android Pie Chart – How to Create Pie Chart in Android Studio
- How to show label inside Android pie chart
- How to increase label text size of pie chart graph
- Adding label in the center of pie chart graph in Android
- 17 Comments
Learn to create a Pie Chart in Android with MPAndroidChart
In the serie exploring MPAndroidChart, today you’re going to learn how to create a pie chart in Android. A Youtube demo video how you steps by steps how to create a pie chart in Android with MPAndroidChart :
Note that MPAndroidChart is open source and available here on Github : https://github.com/PhilJay/MPAndroidChart . Source code for MainActivity is the following :
Related Posts

Build a Binary Converter Android App with Kotlin

Develop a Chuck Norris Facts Android App with Kotlin

Parsing XML data in Android Apps
4 Comments Already
I am adding this library in android studio and using in my android project, but the UI design is not good. Like legend text size is not correctly placed, legend text size is too large, legend is overlapping on pie chart, description is also not aligned properly etc.
Please help me. How I can resolve this issue?
How to reduce the total Pie Chart circle size?
How to show percentage calculation text only inside the pie chart circle? (Remove i.e “Sony”, “LG” ) can possible to show percentage text, outside the pie chart circle?
Awsome … But
How to display percentege on piechart slice for android
I used this code piechat displays very small and not visible text on piechart slice how to increase the size of piechart
Источник
Using MPAndroidChart for Android Application — PieChart

Sep 9, 2020 · 4 min read
MPAndroidChart is powerful in drawing chart for android application. This article is going to go through the procedures with you on how to apply MPAndroidChart to draw a pie chart.
- Android Studio 4.0.1
- MPAndroidChart 3.0.3
Notes that there exist syntax differences bewteen MPAndroidChart version 3 and version 2.
- Import the MPAndroidChart to the project.
Find the build.gradle file in Gradle Scripts folder and insert the code below. (Choose the build.gradle with remark (Module: app))
2. Declare the BarChart view in the layout xml
- Navigating to the java file of the activity.
- Declaring pieChart as global variable
3. Calling findViewById in onCreate() to get the view of the BarChart in the layout xml
4. Defining showPieChart() function
show P ieChart() is a function responsible for capturing data input and output the pie chart with the data.
- If the size of colors is smaller than size of typeAmountMap, then the color will be reused according to the order.
- If a color array is stored in xml, use following code
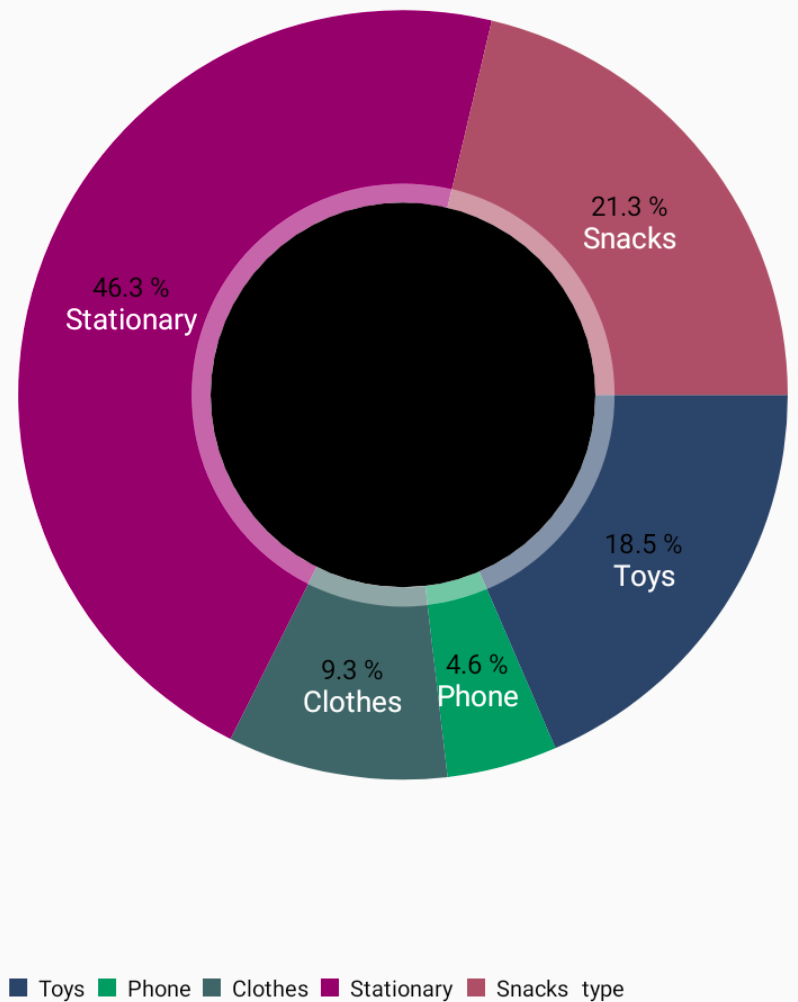
- Purpose of using a pie chart is going to find out the ratio among entries rather than the actual value.
To change the value to percentage, add the following code
However, the code only convert the value to 1d.p and add % after the value instead of converting the value to the real percentage. We are going to solve this in the next part.

This is the pie chart we have drawn so far. The percentage add up to more than 100% when is incorrect. We will solve it and make a better appearance by calling a new function in the next part.
5. Defining initPieChart() function
initPieChart() is a function that modify the appearance of the chart which should be called before showPieChart()
- Use ContextCompat. getColor() if the color is stored in xml
- To use a solid pie chart instead of a hollow pie chart, add following code
- To trigger event when click on the entry
Setting a listener for the entry
with pieChartOnChartValueSelectedListener() defined as follow:
Here is the final version of pie chart that we have drawn.
In this article, we have go through how to apply the MPAndroidChart to our android application to draw a pie chart. A lot of functions are introduced which some of them may not be suitable for creating you own pie chart or no need to explicitly call it so apply them with care and refer to the documentation from time to time.
Источник
Android Pie Chart – How to Create Pie Chart in Android Studio
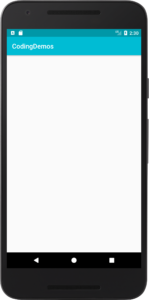
Hi and welcome to another tutorial from Codingdemos, in this tutorial you will learn how to create pie chart in Android Studio. You will be building an app that will show a quarterly sales of a company for the year inside a pie chart graph.

By the end of this tutorial, you will have an app that looks like this. (Large preview)
You will be using a 3rd party library called Hellocharts-Androidto help you build Android pie chart.
Check out the previous tutorial if you are interested in learning how to draw line chart in Android.
In this tutorial we will be using the following:
- – Android studio version 3.0.1
– Android emulator Nexus 5X with API 26
– Minimum SDK API 16
1- Open up Android Studio and open any project that you have in your computer.
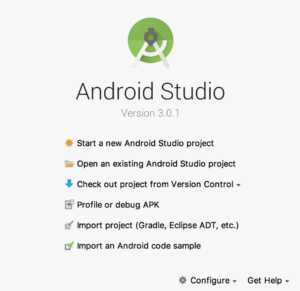
Create new Android Studio project or open existing project. (Large preview)
2- Open up build.gradle (module:app) and add the library in the dependencies.
3- Next you need to open up build.gradle (Project) and add Jcenter because this library is available through it.
4- Now sync your project by clicking on Sync Now.

5- Open up colors.xml file to change the colors of the main app.
6- Build and run the app to see the new colors.
7- Open up activity_main.xml and add the following code for Android pie chart view.
8- Next you need to reference pie chart view inside MainActivity.java file.
9- Now you need to initialize the data which will appear later inside Android pie chart. You will do that by declaring List of a type SliceValue like the following.
10- You can add data inside pieData list like this.
SliceValue will take 2 arguments:
- Float value which represent the size of pie chart.
- Color which you can set for that particular pie chart
11- Create PieChartData so that you can pass pie chart data inside this model.
12- Next you can set the pie chart data inside pieChartView to be able to see the actual data appears inside Android pie chart.
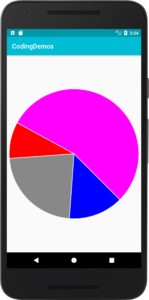
13- Build and run the app to see the result.
How to show label inside Android pie chart
14- Modify pieData code to include label along with size and color of pie chart like this.
15- Make sure to include the following code, otherwise the label will not appear inside pie chart graph.
16- Now build and run the app to see pie chart graph.
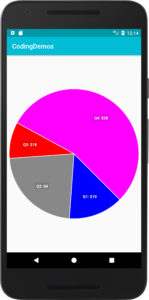
Android pie chart with label. (Large preview)
How to increase label text size of pie chart graph
17- You can increase the label text size of the pie chart by modifying the code in step 15 to the following code.
18- Build and run the app to see the result.

Increased label text size in pie chart graph. (Large preview)
Adding label in the center of pie chart graph in Android
19- You can further customize the appearance of Android pie chart by adding a label in the center of the graph like this.
20- Build and run the app to see the output.
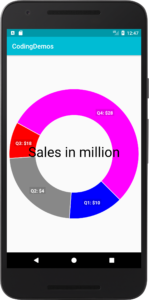
Showing pie chart with label in center. (Large preview)
21- You can also adjust the size as well as the color of the center text like this.
22- Now build and run the app.
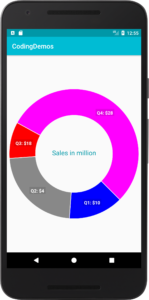
Customized the appearance of pie chart graph. (Large preview)
23- Here is the full code for activity_main.xml file.
24- Here is the full code for MainActivity.java file.
25- I hope you find this tutorial helpful and if you have any question please post them in the comment below.
17 Comments
I am trying to add the values of piechart from two different functions and now what happens is the new value replaces the whole pie chart what should i do
Hi, how are you creating those values for the piechart?
import android.content.Intent;
import android.graphics.Color;
import android.support.v7.app.AlertDialog;
import android.support.v7.app.AppCompatActivity;
import android.os.Bundle;
import android.view.View;
import android.widget.Button;
import android.widget.EditText;
import android.widget.ImageButton;
import android.widget.TextView;
import android.widget.Toast;
import java.util.*;
import lecho.lib.hellocharts.model.PieChartData;
import lecho.lib.hellocharts.model.SliceValue;
import lecho.lib.hellocharts.view.PieChartView;
public class Main2Activity extends AppCompatActivity <
final ArrayList expTit = new ArrayList();
final ArrayList expAmt = new ArrayList();
PieChartView pieChartView;
final List pieData = new ArrayList();
public void popbox(View view)
<
ImageButton plus = (ImageButton) findViewById(R.id.plus);
plus.setOnClickListener(new View.OnClickListener() <
@Override
public void onClick(View view) <
AlertDialog.Builder mBuilder = new AlertDialog.Builder(Main2Activity.this);
View mView = getLayoutInflater().inflate(R.layout.popup,null);
final EditText title = (EditText) mView.findViewById(R.id.title);
final EditText amount = (EditText) mView.findViewById(R.id.bgamount);
Button expAdd = (Button) mView.findViewById(R.id.expAdd);
expAdd.setOnClickListener(new View.OnClickListener() <
@Override
public void onClick(View view) <
if(title.getText().toString().isEmpty())
<
Toast.makeText(Main2Activity.this, “Empty Feild”, Toast.LENGTH_SHORT).show();
>
else
<
Toast.makeText(Main2Activity.this, “Congratulations”, Toast.LENGTH_SHORT).show();
expTit.add(title.getText().toString());
expAmt.add(Integer.parseInt(amount.getText().toString()));
int sum=0;
for (Integer number : expAmt) <
sum+=number;
>
TextView t1=(TextView)findViewById(R.id.exp);
pieData.add(new SliceValue(sum, Color.RED).setLabel(“B”));
t1.setText(“Expense: “+Integer.toString(sum));
>
>
>);
mBuilder.setView(mView);
AlertDialog dialog = mBuilder.create();
dialog.show();
>
>);
>
public void popbox2(View view)
<
Button budget = (Button) findViewById(R.id.budget);
budget.setOnClickListener(new View.OnClickListener() <
@Override
public void onClick(View view) <
AlertDialog.Builder mBuilder = new AlertDialog.Builder(Main2Activity.this);
View mView = getLayoutInflater().inflate(R.layout.popup2,null);
final EditText bgamount = (EditText) mView.findViewById(R.id.bgamount);
Button budAdd = (Button) mView.findViewById(R.id.budAdd);
budAdd.setOnClickListener(new View.OnClickListener() <
@Override
public void onClick(View view) <
if(bgamount.getText().toString().isEmpty())
<
Toast.makeText(Main2Activity.this, “Empty Feild”, Toast.LENGTH_SHORT).show();
>
else
<
Toast.makeText(Main2Activity.this, “Congratulations”, Toast.LENGTH_SHORT).show();
TextView t=(TextView)findViewById(R.id.bug);
t.setText(“Budget: “+bgamount.getText().toString());
pieData.add(new SliceValue(Integer.parseInt(bgamount.getText().toString()), Color.BLUE).setLabel(“c”));
>
>
>);
mBuilder.setView(mView);
AlertDialog dialog = mBuilder.create();
dialog.show();
>
>);
>
public void actFunc(View view)
<
Intent intent1 = new Intent(Main2Activity.this,Main3Activity.class);
intent1.putExtra(“expTit”,expTit);
Intent intent2 = new Intent(Main2Activity.this,Main3Activity.class);
intent2.putExtra(“expAmt”,expAmt);
startActivity(intent1);
startActivity(intent2);
>
@Override
protected void onCreate(Bundle savedInstanceState) <
super.onCreate(savedInstanceState);
setContentView(R.layout.activity_main2);
pieChartView = findViewById(R.id.chart);
PieChartData pieChartData = new PieChartData(pieData);
pieChartData.setHasLabels(true).setValueLabelTextSize(20);
pieChartData.setHasCenterCircle(true).setCenterText1(“Expense Pie”).setCenterText1FontSize(20).setCenterText1Color(Color.parseColor(“#0097A7”));
pieChartView.setPieChartData(pieChartData);
>
>
Its the code if you could look every time different function runs it takes whole pie
Источник


