- # Genymotion Plugins
- # Genymotion plugin for Android Studio
- # Pre-requisite
- # Installing the plugin
- # Using the plugin
- # Running Android applications
- How to Install Genymotion Emulator and Add it’s Plugin to Android Studio?
- Step by Step Implementation
- How to know the Android SDK path in your system?
- How to add Genymotion Plugin to Android Studio?
- Installing GenyMotion Plugin on Android Studio
- Android Studio recognizes Genymotion
- How to Install GenyMotion – A Fast and Easy to Use Android Emulator with many Features
- How to use GenyMotion as Android Emulator:
- Advantages of Genymotion:
- Steps to Install GenyMotion and Use it as Virtual Emulator for Android Studio:
- Steps to Install Genymotion Plugin:
- Creating a Virtual Device in Genymotion:
- Testing Android App on Genymotion:
# Genymotion Plugins
This section gives you information about Genymotion plugins for Android Studio.
Genymotion plugin for Eclipse
The Genymotion plugin for Eclipse is no longer maintained and we no longer support nor distribute it.
# Genymotion plugin for Android Studio
The Genymotion plugin for Android Studio allows you to test your application developed with the Android Studio IDE. It uses ADB to connect to any active virtual device and push your application.
This section explains how to install, use the plugin and run Android applications.
# Pre-requisite
You need to set Genymotion Desktop to use the same Android SDK tool (adb) as Android Studio.
Please see ADB chapter for instructions.
# Installing the plugin
You can install Genymotion plugin for Android Studio from AS marketplace:
- Start Android Studio.
- Go to:
- Windows and Linux: File/Settings
- macOS: Android Studio/Preferences
- Select Plugins and go to Marketplace.
- Type Genymotion in the search box.
- Click Install, then Apply and OK.
# Using the plugin
The toolbar, where Genymotion plugin icon is displayed, is hidden by default. To display it, click View в†’ Appearance and select Toolbar (View в†’ Toolbar for older versions).
To start using the plugin:
- Click
 from the Android Studio toolbar. The following window opens:
 - Browse for the [Genymotion]В application installation directory:
- Windows: C:\Program Files\Genymobile\Genymotion
- macOS: /Applications/Genymotion.app
- Linux: /home/ /genymotion or /opt/genymotion
- Click OK.
- ClickВ to open the Genymotion Device Manager window:
From this window, you can perform the following actions:- Create a new virtual device using New This automatically starts the Genymotion creation wizard.
- Start a virtual device using Start
- Refresh the list of virtual devices using Refresh.
 from the Android Studio toolbar. The following window opens:

The virtual device activation status is displayed in the Status column. Values can be:
- Off: the virtual device is deactivated.
- Paused: the virtual device has been started and paused. The Restart action gets back to the exact same state.
- On: the virtual device is activated, but not connected to ADB. It means that you cannot select this virtual device in the Choose Device window of the ADB plugin.
# Running Android applications
- ClickВ from the Android Studio toolbar.
- Select the virtual device you want to use and click Start.
- Close the Genymotion window.
- In your application project, click . The Choose Device window opens.
- Click on the virtual device you started or created.
After a reboot or an unexpected halt of a virtual device, its name in the Choose Device window may become irrelevant. Close and reopen the plugin to solve this.
While GenymotionВ plugin window is open, errors are displayed in the Android Studio console.
Источник
How to Install Genymotion Emulator and Add it’s Plugin to Android Studio?
Genymotion is an Android Emulator that is faster than the Android Studio Emulator. Genymotion emulator offers a wide range of virtual devices for development, test, and demonstration purpose. It has a very simple user interface and one can directly use it from Android Studio by installing its plugin only once. The Genymotion plugin for Android Studio allows testing the application developed with the Android Studio IDE. It uses ADB to connect to any active virtual device and push the application. So in this article let’s discuss how to install the Genymotion Emulator and also installing its plugin in the Android Studio to run the program.
Step by Step Implementation
Step 1: First we have to install Genymotion in our own system. So to download Genymotion please go to this site. Then click on the “Download Genymotion Personal Edition” button.
Note: Please sign in yourself to Genymotion if you have already not an account on Genymotion.
Step 2: In the next step click on the button as your requirement. If you have already installed VirtualBox on your system then go for the 2nd button and if not then go for the 1st button as shown in the below image. If you are using macOS or Linux then scroll below on that page and get your file.

Step 3: Once the download is completed install the Genymotion in your system and open Genymotion. After opening Genymotion sign in yourself with your ID and password.
Note: If a pop-up will arise on the screen then click on the Personal Use button.
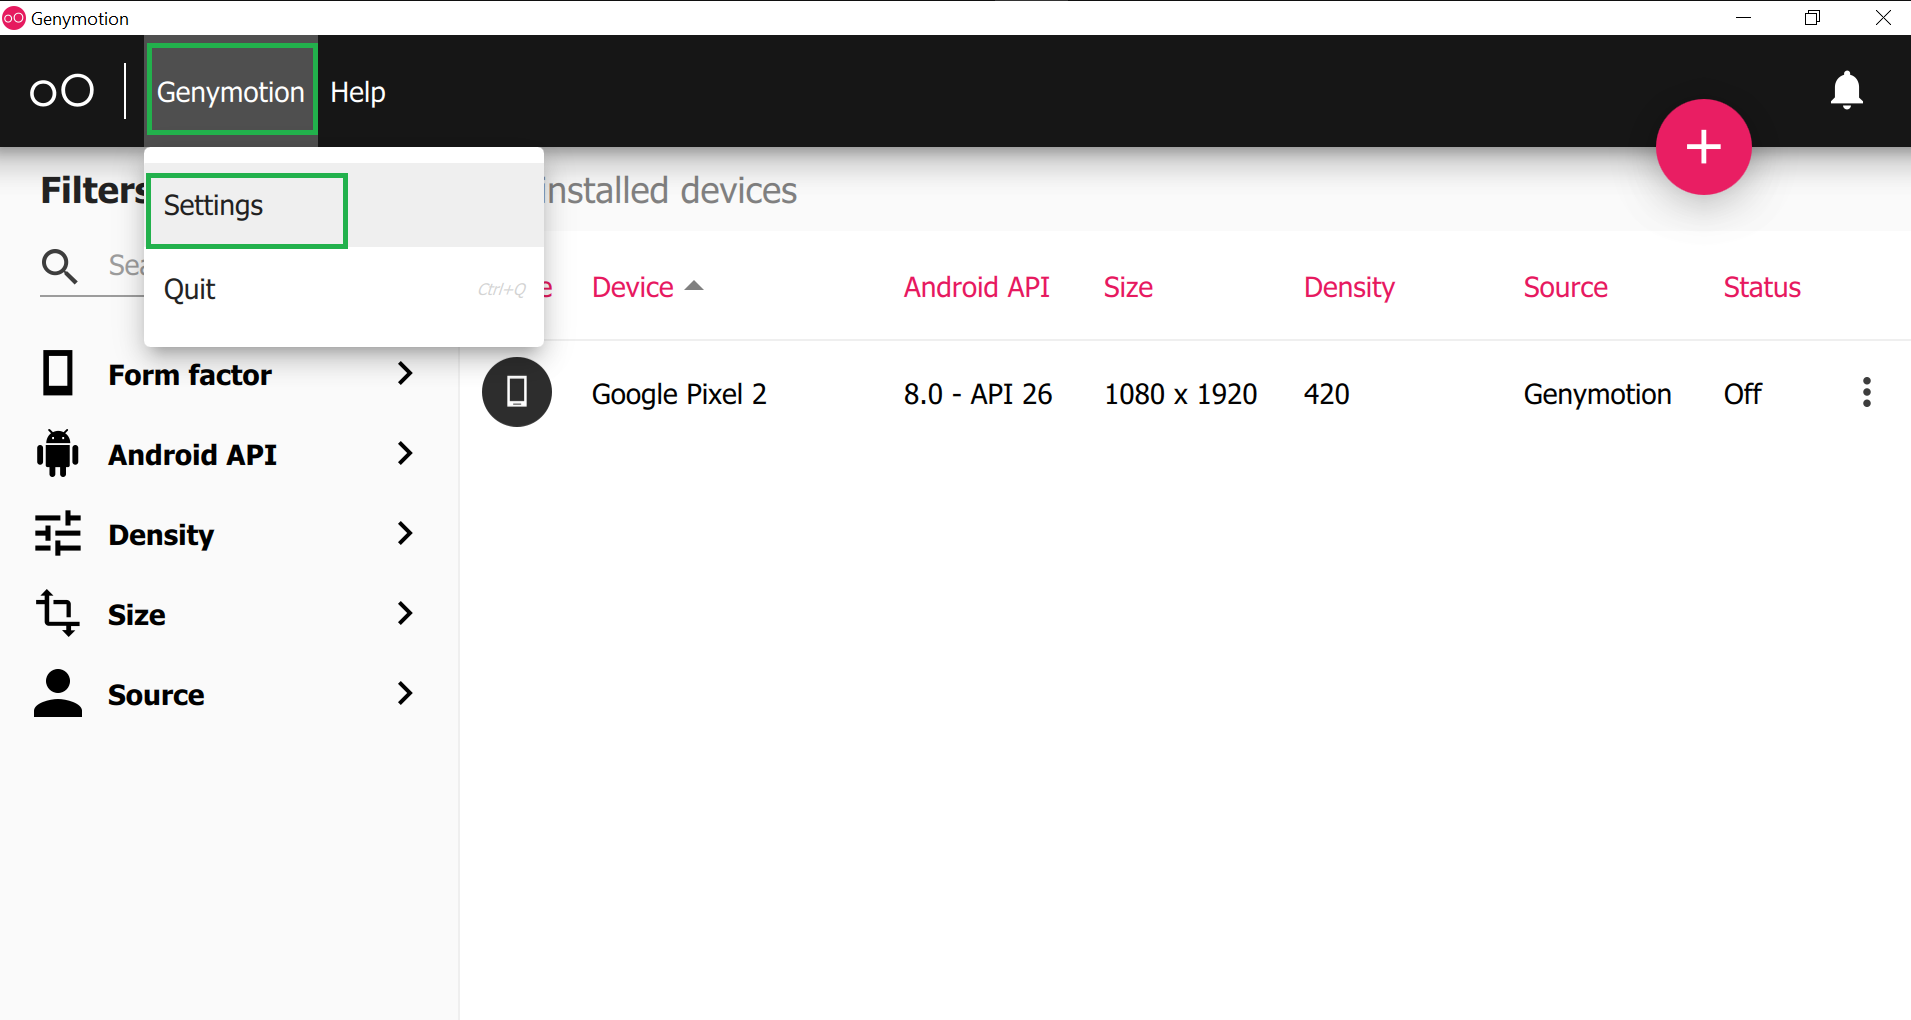
Step 4: Now click on the Genymotion and go to the Settings as shown in the below image.
Step 5: Then go to ADB and choose “Use custom Android SDK tools” and select your Android SDK path as shown in the below image. And there is nothing to do with other widgets. Now close this screen.

How to know the Android SDK path in your system?
To know the Android SDK path open your Android Studio and click on the Tools > SDK Manager as shown in the below image.

Then a screen will arise as in the below image and you can locate your Android SDK path.

Step 6: Now click on the ‘pink +‘ screen as shown in the below image.

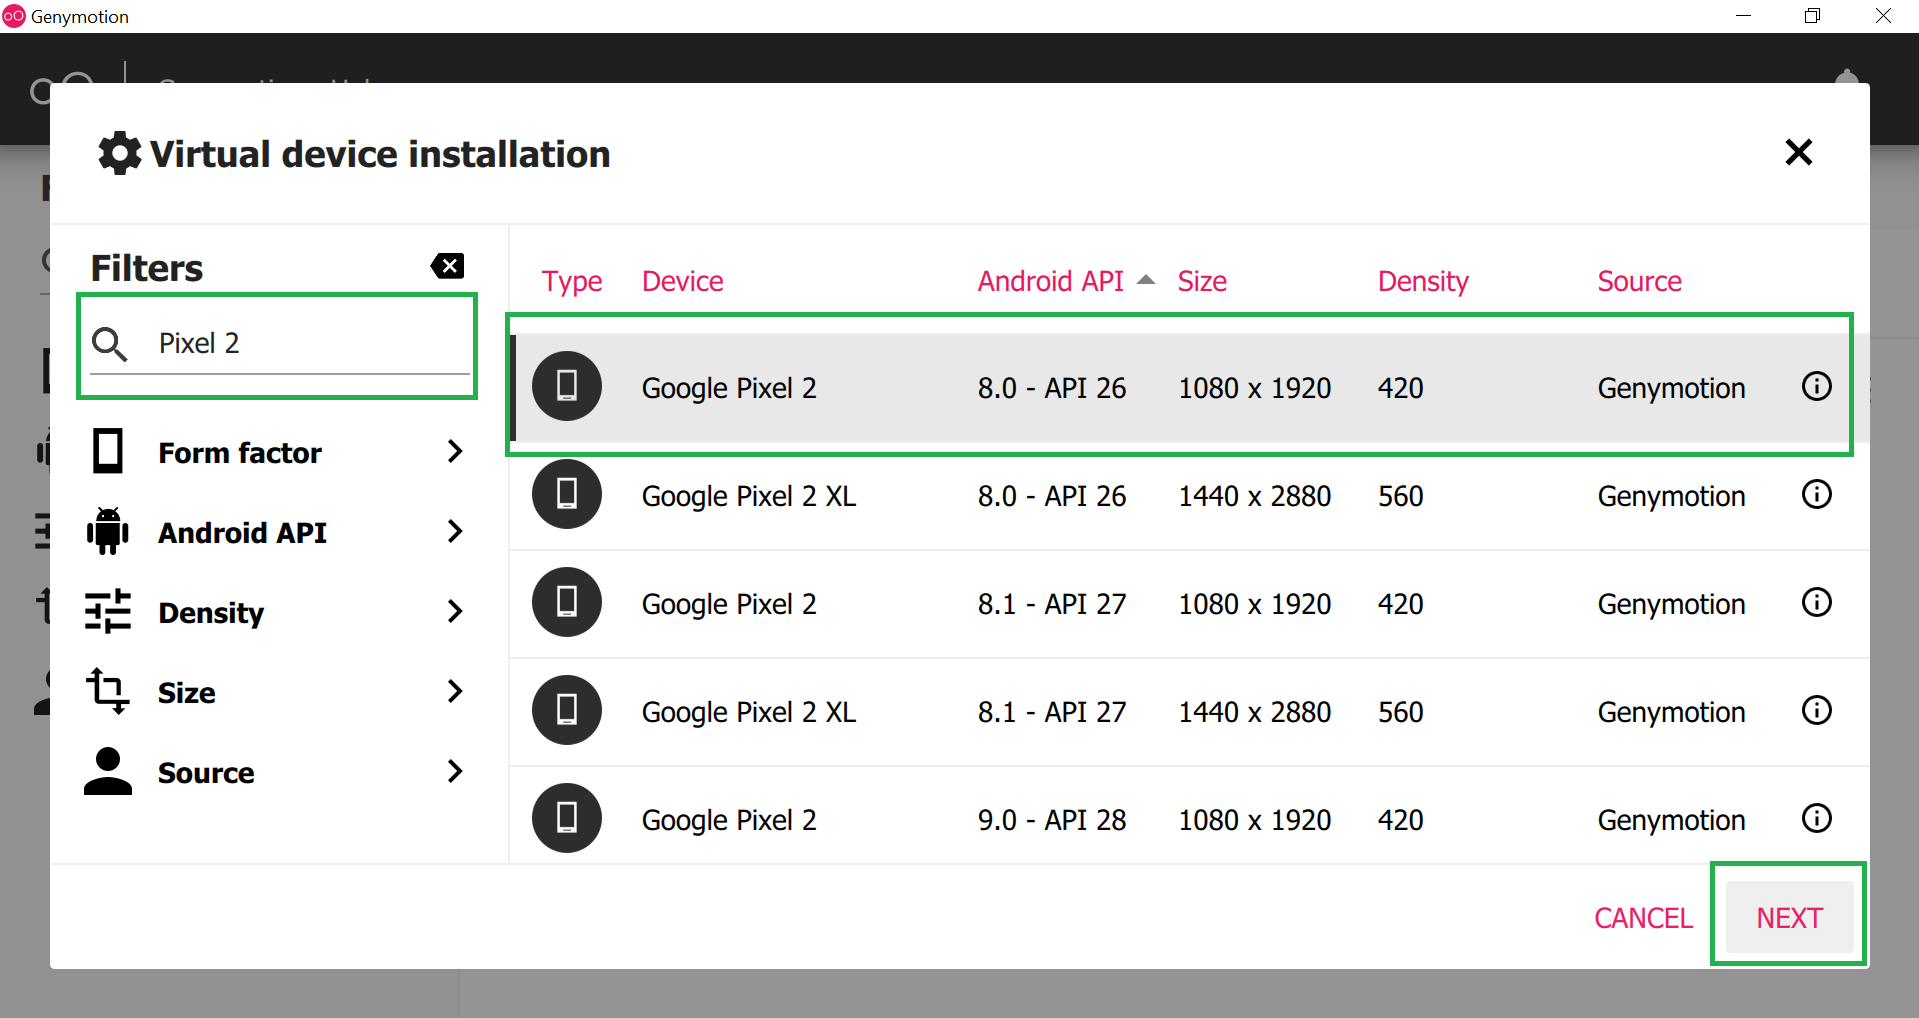
Step 7: Now search your favorite virtual device name and click on the device name and at last click on the NEXT button as shown in the below image.
Step 8: Choose an appropriate name for your emulator and then click on the INSTALL button. This will take a few times to download the required files.

Step 9: After successfully downloaded the required files you can find your emulator on the main screen. Now click on the Start button as shown below image and your Genymotion emulator is ready for use.

This is how Genymotion Emulator looks like.

How to add Genymotion Plugin to Android Studio?
In computing, a plug-in is a software component that adds a specific feature to an existing computer program. When a program supports plug-ins, it enables customization.
Similarly, we have to add the Genymotion plug-in to Android studio to use the Genymotion Emulator for developing and testing the project. To do so follow the following steps:
Step 1: Open the Android Studio and go to File > Settings and a pop-up will arise as seen in the below image. This will automatically select the Plugins section. Then search the Genymotion plugins and click on the Install button. This will download some files and it will ask to restart the Android studio and so click on the Restart Android Studio button.
Note: We have already installed the Genymotion plugin so it’s showing installed.

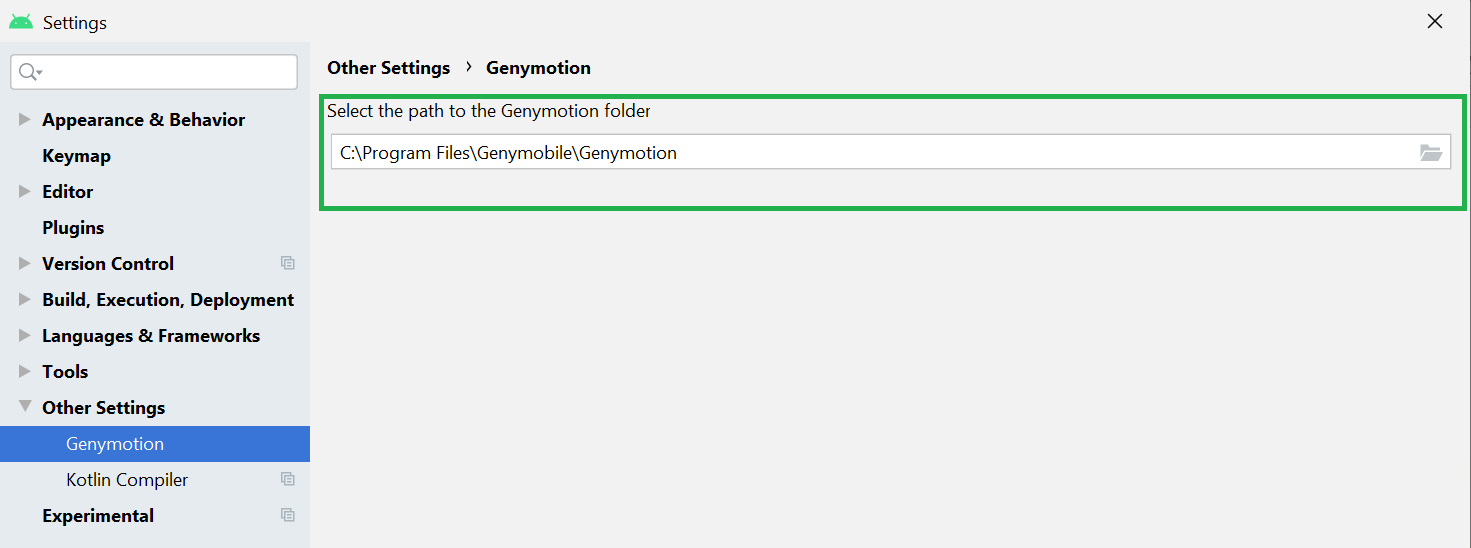
Step 2: After successfully restart the Android Studion again go to File > Settings > Other Settings > Genymotion as shown in the below image.

Step 3: Then select the path to the Genymotion folder. In most cases, you can find the path at C:\Program Files\Genymobile\Genymotion. Then just click on OK and you are done.
Make sure your Genymotion Emulator is started and you can see the Genymotin Emulator is active you can execute your program on that emulator as shown in the below image.
Источник
Installing GenyMotion Plugin on Android Studio
I will show you how to install GenyMotion plugin on Android Studio development tool. As you know, most emulators work slowly and because of this situation, it is difficult to get the required performance while developing applications. The best way to solve this situation is to install Genymotion plugin. We have already written the installation of the Genymotion Editor.
NOTE: Installing the Genymotion plugin without installing Genymotion will not work. First, install the Genymotion from the link here.
Android Studio recognizes Genymotion
After installing Genymotion, let’s take a look at how we can get Android Studio to recognize it.
We open Android Studio and click Settings on the File tab.
 Android Studio Settings
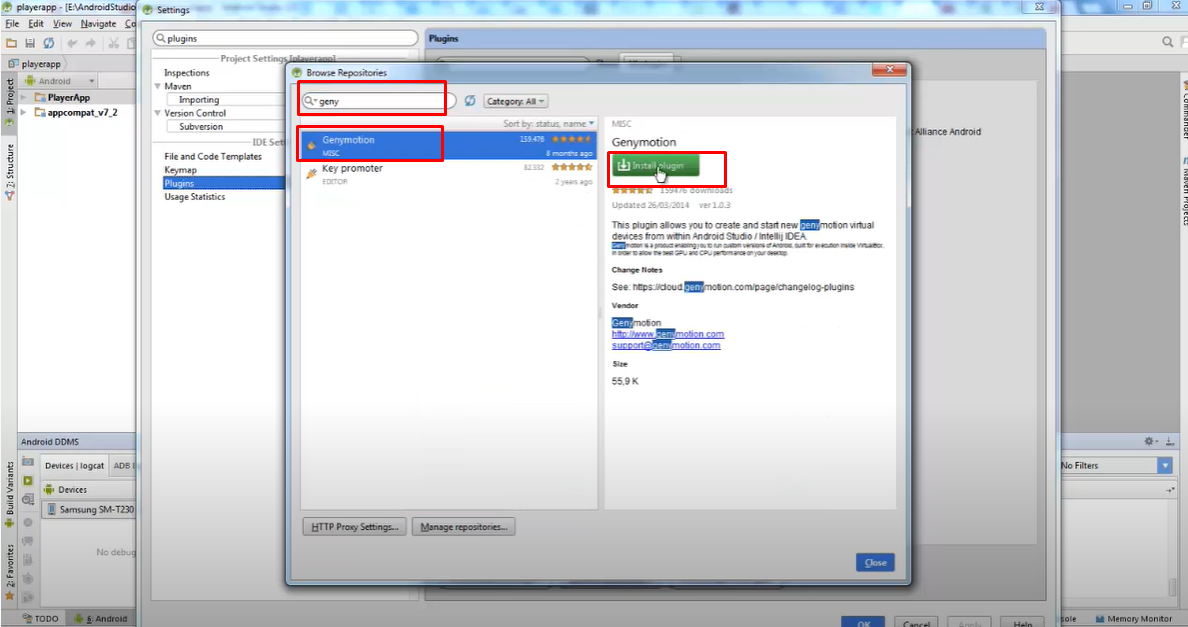
On the page we see, we select the “Plugins” tab in the left menu and click “Browse Repositories”.
 Plugins and Browse Repositories
As you can see, we come across a page with a search menu with many options, from here we find Genymotion, right-click and click “Install Plugin” and the Genymotion plugin is installed.
 Install Genymotion Plugin
In order to see the Genymotion icon in our development tool, it is enough to select the Toolbar from the View section. As shown in the figure, we can create and use an emulator in the style we want from Genymotion Device Manager.
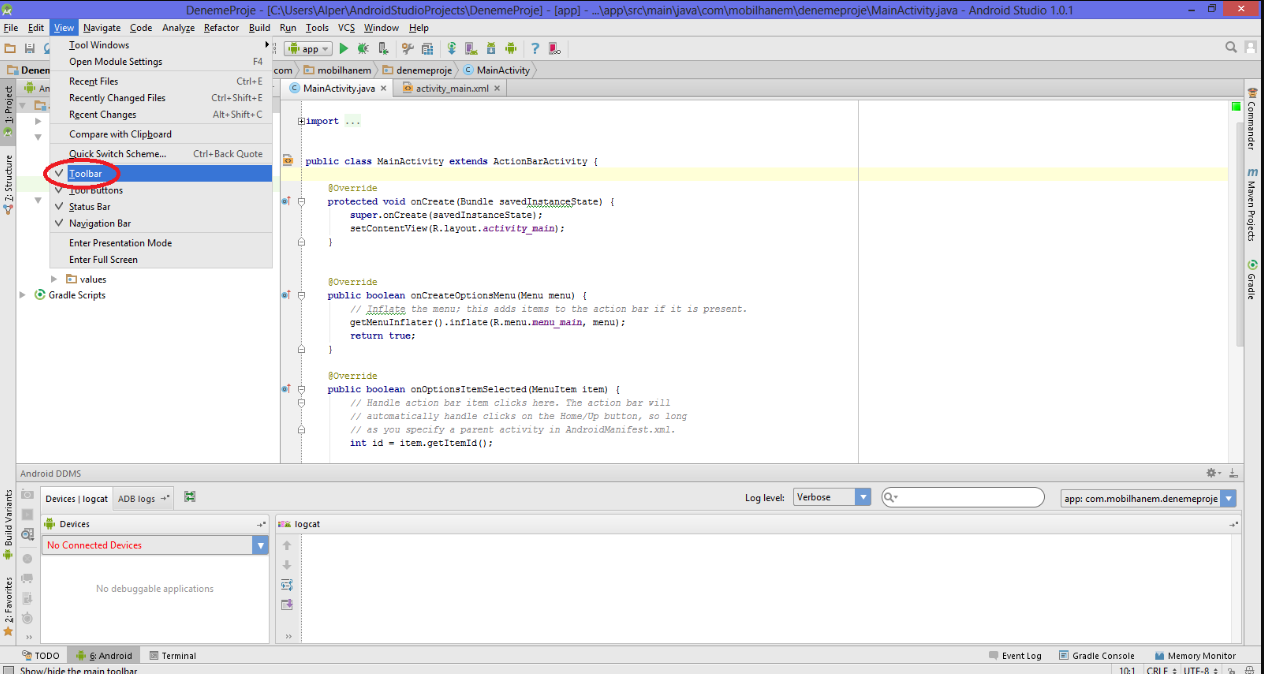 Select the Toolbar
We have added Genymotion Device Manager as seen. We can add a new device by clicking on the plugin.
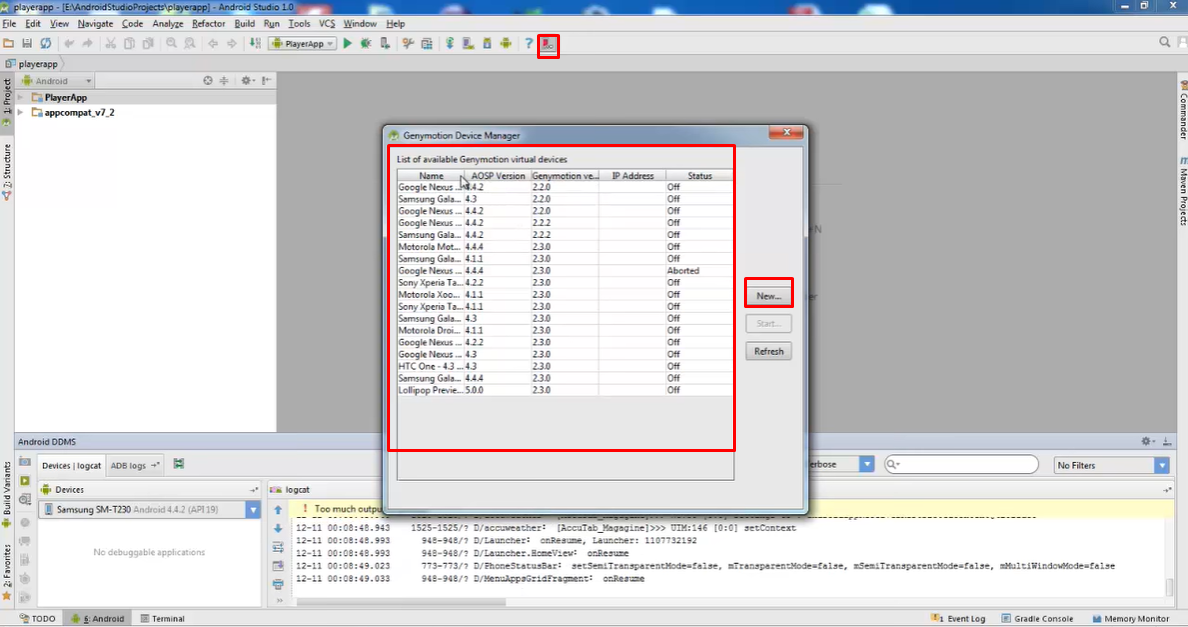 Genymotion Device Manager
You can add the device you want by selecting the android version on this screen.
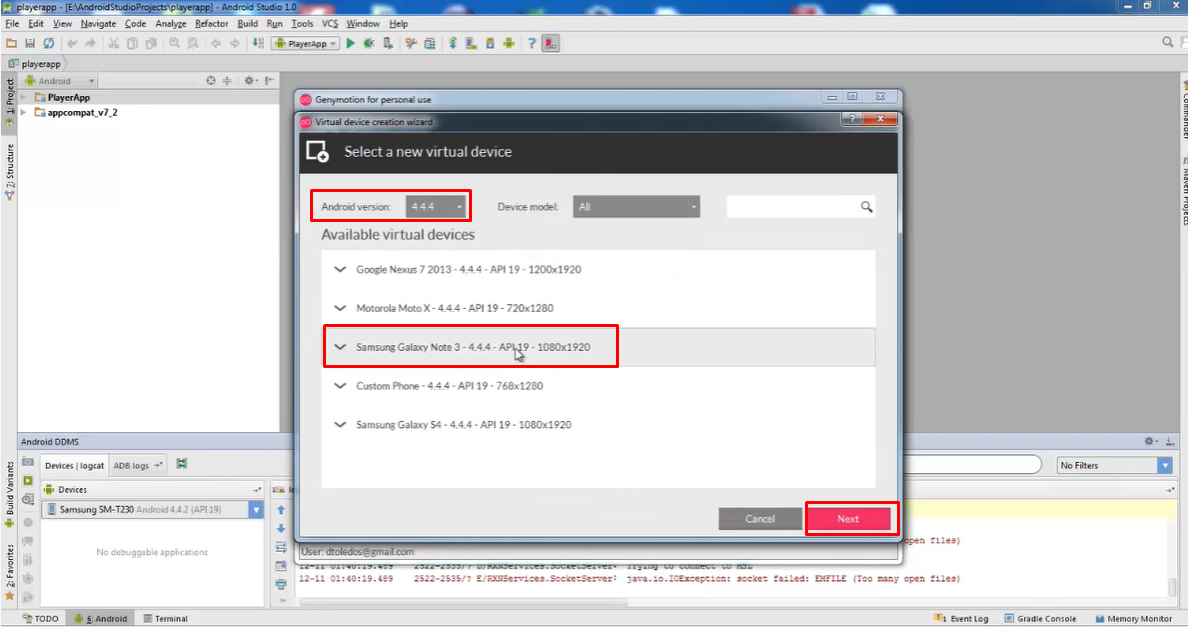 New virtual device
Select the desired device from the “List of Available Genymotion Device Manager” page and click the “start” button.
The device we want successfully has started.
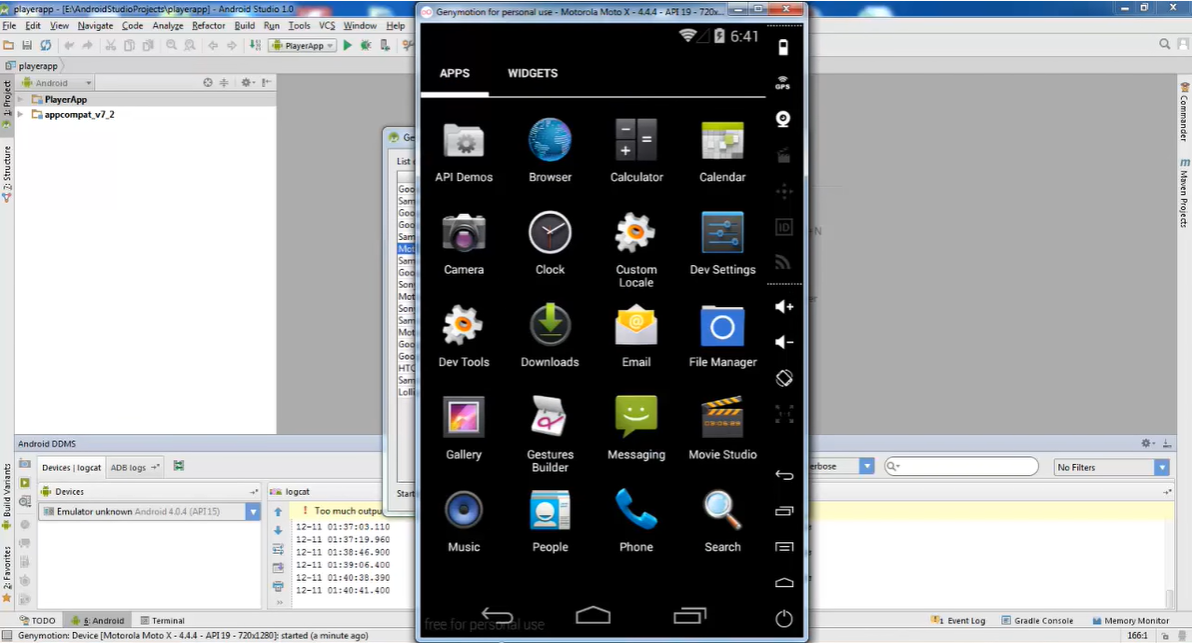 Genymotion device start
Источник
How to Install GenyMotion – A Fast and Easy to Use Android Emulator with many Features
How to use GenyMotion as Android Emulator:
Ever felt that android emulator is slow? Ever felt that emulator is not not as good as Real Device? If so GenyMotion may be for you. GenyMotion is simply a Virtual Android Emulator but with more features and much more faster than Android Studio’s Emulator.
Advantages of Genymotion:
- Its Faster to start, easier to use, resizable.
- It has many options such as: Change Battery Level, GPS sensor, Gyroscope etc.
Steps to Install GenyMotion and Use it as Virtual Emulator for Android Studio:
Installation of Genymotion is simple. Here are the steps to install Genymotion:
Subscribe to our Newsletter!
Never miss Upcoming articles, free e-books, weekly updates on latest news from Android and Coding Community.
- To download GenyMotion, visit the website and choose Free or Business Account. A free account is usually sufficient for personal use. However if you want to get more features you need a Business Account.
- After you choose download, it will take you to another page showing a link called Get Genymotion.
- Now Download the file and install it. It also prompts to install Oracle Virtualbox. Install it and complete the setup process.
- You can additionally install Genymotion Plugin to start Genymotion’s emulator from Android.
 A free account is usually sufficient for personal use. However if you want to get more features you need a Business Account.
Steps to Install Genymotion Plugin:
- Go to File > Settings > Plugins.
- Click on Browse Repositories.
- Now Click on Genymotion and click Install Plugin.
- Restart Android and you can now directly launch Genymotion by clicking the icon in Android Studio.

Creating a Virtual Device in Genymotion:
Creating a virtual device in Genymotion is very easy. You just have to just click on Add button on top of Genymotion window and choose any device listed below. Hit Next button and Click Finish after the required files are downloaded.
Now you can start your virtual device by selecting on the required device and clicking on Start Button.
Testing Android App on Genymotion:
- To test android app on Genymotion, we launch the emulator using either Genymotion plugin or Genymotion.exe file and pressing Start button.
- After the emulator is launched, we can test the app on android device by running the app as usual by launching the app by clicking Run Button.
- Now You can see the Genymotion Emulator Displayed on the list as shown below. Now select it and hit Run.

 Genymotion Virtual Emulator
Now you can successfully run your android App on Genymotion.
Источник


