- How to Make Android Apps for Beginners
- How to Make an App in Java
- Run Android Studio
- Start Working on Java App Development
- Modify the App Layout
- Add Constraints
- Assigning Activity to the Button
- Conclusion
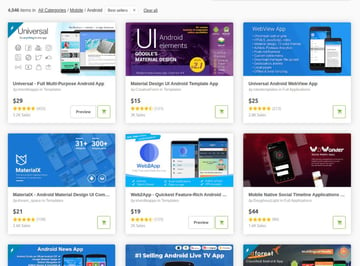
- Android App Templates and UI Kits From CodeCanyon
- Пишем своё первое приложение на Android
- Предисловие
- Подготовка к разработке
- Создание Android-приложения
- Запуск и тестирование приложения
- Заключение
- UPD: Устранение возможных ошибок
How to Make Android Apps for Beginners
Are you a new developer learning Java? Read ahead to learn how to make your first Java Android app as a beginner.
Creating a mobile application is a big step towards turning your idea into reality. But the primary concern among new developers is how to make an Android app with all the resources at their disposal. If you’re a beginner, you won’t know the purpose of many of them. So it’s important to begin from the basics and know the starting point.
This guide will walk you through the basics of building an Android app and answer your questions about how to make an app with Java. We’ll be creating a Java Android app using Android Studio as our Integrated Development Environment (IDE).
How to Make an App in Java
To start making a Java Android app, you have to start with an IDE. There are several options for IDEs, but two of the most efficient ones are Eclipse and Android Studio.
For this guide, we are using Android Studio 3.1.3. Android Studio is a complete IDE that offers tools to make app development very simple and easy. It has an advanced code editor and several app design templates. There are tools for development, debugging, and testing as well.
You can learn how to install Android Studio in our post on how to get started making Android apps.


Run Android Studio
Let’s begin with a new project on Android Studio. It gives the option to Create New Project on the welcome screen. You can also continue with your current project if you have one.


Once you choose to create a new project, the next step is choosing your activity. You will be provided with several options, but we’ll begin with an Empty Activity for this tutorial on creating a Java app.


The next step is configuring your activity by giving it a name. Let’s name our app MyBasicApp. From the drop-down menu, choose the Java language. Click Finish.
Now we are ready to start creating our app!
Start Working on Java App Development
At this stage, Android Studio has created two folders that are visible in the left corner. They are:
- A folder for MyBasicApp—this folder carries the code for your app.
- A folder of Gradle scripts—Gradle is a free and open-source tool used by Android Studio to turn the code into an .apk file for your app.
Since we selected the Basic Activity template, Android Studio has created some preset files for our project. You can expand the folders to view them.
Clicking on the app folder will give a drop-down menu with three to four subfolders: manifests, Java, Java (generated), and res. Expanding each one of them will open more folders. Each folder stores a separate component of your project.
In the MyBasicApp folder, go to the Java folder and click on com.example.mybasicapp. This folder contains the source code of your Java Android app.
Now, click the res folder and open the layout folder. It contains a file activity_main.xml. It is the layout of your app. Click to open it.
Now your project view has opened the source code and the layout in two separate tabs. It looks like this:


The .xml file gives you a layout where you can drag and drop elements to build your file. You can also change it to code editor by clicking on text at the bottom left corner. Now you can edit the source code instead of adding elements to the design layout.
In the layout editor, the left pane contains all the elements that you can add to the layout. If you see the component tree, there is just one element—Hello World—in our app.
The elements we add to our layout will be shown in the component tree and how they are added in relation to each other.
Here, ConstraintLayout is the root of the view hierarchy (it is the dimensions of the page on which components will be added).
The ConstraintLayout has a TextView called Hello World.
The TextView is the component that came with a blank activity. The layout at this stage looks like this:


The XML code for this layout will be this:
It has one root hierarchy with just one text element.
Note that this is the basic layout that Android Studio generated itself. We haven’t made any modifications to it yet.
Modify the App Layout
The next step is to modify the layout by adding components of your choice and associating activities with them.
Here you can either start with this ConstraintLayout with TextView in it, or you can clear the ConstraintLayout and begin with a clean slate in terms of layout.
Let’s say you want to change the text on the TextView . You can go to the code editor and view the properties of the TextView element. The code will be like this:
Change the string to whatever you like. For now, I’ll stick with Hello World.
If you have set up an Android Virtual Device (AVD) in the Studio, the app will run on the simulator like this:


This is the basic TextView with Hello World! as its string. You can modify the attributes of this text component. Edit the text, font, size, and color to give a new look to TextView .
The XML code for these changes would be this:
We have changed the font to Sans Serif and made the color darker gray . The font size is also increased to 30sp , and the text is made bold.
The changes as visible in the AVD:


Add Constraints
Up to now, we’ve just modified the stock Empty Activity set up by Android Studio. Now, we will see how to add constraints and views to the user interface.
In the Layout Editor, there is a palette on the right side from where you can choose the constraints you’d like to add.


You can add more than one view and constrain them to top, bottom, left, or right. These views have attributes that can be edited to modify them.
To better understand what an attribute is, select textView in the Component Tree and look at the Constraint Widget in the Attributes panel.


The square represents the constraints.
The rectangular box and each of the four dots represent a constraint. You can increase or decrease their value based on the point where you want to place the view.
Here is how it looks in the Layout Editor.


You can drag and drop the Views from the left palette to add them in the ConstraintLayout . After adding them, you can apply constraints to determine their position. Each new button added to the layout is given a unique identity.
Here is how your layout will look after adding the constraints to the views:


Here is the XML code for the finished layout:
Assigning Activity to the Button
The layout design is the meat of your app. You have added a Button , but it doesn’t do anything when pressed. To make it interactive and responsive to users’ actions, we have to assign activity to it.
Let’s say this is the last step on your app, and upon clicking Next you want people to see the message Finish. Here’s how to do it.
The Next button has an id called @+id/next . Since no other element is using this id, we can use it to find the button and add it to the Java code so that the activity doesn’t get associated with another button.
The id for a view helps you identify it as each id differs from other viewers’ id. With the findViewByID() function, next can be found through its id, R.id.next .
Here is the final code that will display the finish message:
Run the app to see how the Button works.


Conclusion
This guide covered everything from setting up the Android Studio to coding and testing a Button . It’s not hard to get started coding an app—Java mobile app development has become easier since a lot of elements are drag and drop.
Android App Templates and UI Kits From CodeCanyon
You may have noticed that our app looks very plain and simple. That’s because we’re using the default theme, without applying any styles to our views. CodeCanyon is full of Android UI kits that offer beautiful, hand-crafted styles you can apply to your views.


The kits generally also have several custom views and layouts. You can refer to the following articles to learn more about them:
Источник
Пишем своё первое приложение на Android

Предисловие
Подготовка к разработке
Установка среды разработки Eclipse
Тут всё просто. Идём в раздел Downloads на официальном сайте и качаем версию Classic. Далее просто распакуйте архив, куда вам хочется, я же решил это сделать в почетную директорию C:\Eclipse
Установка ADT плагина к Eclipse
Запускаем Eclipse, и открываем диалог установки плагина через меню Help → Install new software. В поле Work with вписываем адрес загрузки плагина dl-ssl.google.com/android/eclipse (если не получилось, то плагин можно скачать и установить вручную по ссылке http://developer.android.com/sdk/eclipse-adt.html), далее в таблице ниже появится Developer Tools, отмечаем его и идем далее.

После успешной установки, можно перезапустить среду Eclipse.
Установка среды для Java: JDK и JRE
Если у вас еще не установлены Java Development Kit (JDK) и Java Runtime Environment (JRE), то их необходимо установить. Сделать это можно на сайте Oracle. Скачайте и установите JDK и JRE.
Установка Android SDK
Дело осталось за малым — это скачать и установить свежий Android SDK. Это делается на сайте для Android разработчиков. Я лично установил SDK опять-таки в почётную директорию C:\Android. После этого необходимо добавить платформы и прочие дополнительные элементы SDK. Я добавил все доступные версии, так как планирую делать приложения и для ранних платформ, а также USB-драйвер и примеры приложений.
Подготовка к разработке завершена. Теперь следующий этап — создание приложения.
Создание Android-приложения
Перед тем как создать своё первое приложение, можно создать виртуальное Android-устройство, чтобы быстро тестировать на нём свой свеженаписанный софт. Вначале я хочу сказать вам несколько слов по поводу Android Virtual Device (AVD). Это виртуальный смартфон с ОС Android, на котором вы с легкостью сможете запускать созданную вами программу. Как можно заметить, преимущество Android Virtual Device состоит в том, что наглядно можно увидеть как будет работать Ваша программа на разных смартфонах с Android, а не покупать весь модельный ряд и тестировать приложение на каждом из них.
Приступим к созданию виртуального устройства Android. Следуем в меню по пути Window → Android SDK and AVD Manager.
Выбираем New в правой части окна, в появившемся окне вписываем имя виртуального устройства, платформу (допустим Android 2.1), размер карты памяти (допустим 512 Mb), тип дисплея (допустим HVGA). Затем жмем внизу на кнопку Create AVD.
Теперь создадим проект. Для этого идем по пути в меню File → New → Other, в появившемся списке Android → Android Project.
В качестве примера расскажу о разработке одной моей простейшей программы UfaTermometr, показывающей текущую температуру с датчиков, расположенных на одном из объектов местной энерго-компании.
После создания проекта, слева вы увидите дерево директорий. Перво-наперво загрузим свою иконку приложения, а точнее 3 иконки под разные варианты. В папку drawable-hdpi грузим png-картинку с прозрачным фоном размером в 72×72, в drawable-mdpi соответственно 48×48 и в drawable-ldpi самую маленькую размером 36×36. Делать это можно простым перетаскиванием файлов прямо на дерево. Следующим шагом будут элементы управления. В моей программе было необходимо всего три элемента интерфейса: ImageView (просто картинка логотип приложения), Button (обновить значение температуры) и TextView (вывод значения температуры). Все эти элементы управления нужно описать в специальном xml-файле. В дереве он расположен по адресу res → layout → main.xml. Во-многом разметка элементов управления сходна с вёрсткой веб-страниц, тут есть и padding, и margin, и аналог align. Код main.xml моего приложения:
xml version =«1.0» encoding =«utf-8» ? >
LinearLayout xmlns:android =«schemas.android.com/apk/res/android»
android:orientation =«vertical»
android:layout_width =«fill_parent»
android:layout_height =«fill_parent»
>
ImageView android:layout_width =«fill_parent»
android:layout_height =«wrap_content»
android:src =»@drawable/droid»
android:layout_gravity =«center_horizontal|center»
android:layout_margin =«0px»
/>
Button
android:id =»@+id/refrbutton»
android:layout_width =«wrap_content»
android:layout_height =«wrap_content»
android:gravity =«center_horizontal»
android:layout_gravity =«center_horizontal|center»
android:textSize =«30px»
android:padding =«20px»
android:layout_marginTop =«10dip»
android:text =«Обновить»
/>
TextView
android:layout_width =«fill_parent»
android:layout_height =«wrap_content»
android:text =». »
android:textSize =«100dip»
android:gravity =«center_horizontal»
android:id =»@+id/temper»
android:textColor =»#EEE3C4″
/>
LinearLayout >
Подробно останавливаться на разметке элементов управления не буду, так как это всё достаточно подробно описано в мануале и вообще интуитивно понятно, особенно тому, кто имел дело с html/css-вёрсткой и/или разработкой в какой-либо визуальной среде (например, Delphi). Единственное, обратите внимание как я загрузил произвольное изображение в ImageView. В поле src указывается путь, начинающийся с символа @ и далее указываете адрес по дереву. В папке res я заблаговременно создал подпапку drawable и «закинул» туда логотип, а затем просто указал ImageView путь. Легко? По мне так очень.
Непосредственно код приложения располагается по пути src → «ваше название package» → «название приложения».java.
По-умолчанию создается «болванка» главного класса и от неё уже дальше можно плясать. Не буду останавливаться на тонкостях такого простого кода как у меня в примере, но поясню, что логика работы объясняется тремя простыми шагами:
- Загрузить HTML-страницу со значениями температуры
- С помощью регулярок «вытащить» температуру
- Показать в TextView значение температуры
Заметьте, что когда приложению требуются какие-то системные разрешения, нужно указывать их в манифесте AndroidManifest.xml. В данном конкретном случае мы используем подключение к Интернет, соответственно добавляем строчку в указанный выше xml-файл.
Собственно сам код, реализующий указанную выше логику работы:
package app.test.ufatermometr;
import android.app.Activity;
import android.os.Bundle;
import android.view.View;
import android.widget.TextView;
import android.widget.Button;
import java.io.InputStreamReader;
import java.net.URL;
import java.net.URLConnection;
import java.util.regex.*;
public class UfaTermometr extends Activity
<
@Override
public void onCreate(Bundle savedInstanceState)
<
super.onCreate(savedInstanceState);
setContentView(R.layout.main);
final Button button = (Button) findViewById(R.id.refrbutton);
button.setOnClickListener( new Button.OnClickListener() <
public void onClick(View v) // клик на кнопку
<
RefreshTemper();
>
>);
RefreshTemper(); // при запуске грузим температуру сразу
>;
//—————————————————————-
public String GetTemper(String urlsite) // фукция загрузки температуры
<
String matchtemper = «» ;
try
<
// загрузка страницы
URL url = new URL(urlsite);
URLConnection conn = url.openConnection();
InputStreamReader rd = new InputStreamReader(conn.getInputStream());
StringBuilder allpage = new StringBuilder();
int n = 0;
char [] buffer = new char [40000];
while (n >= 0)
<
n = rd.read(buffer, 0, buffer.length);
if (n > 0)
<
allpage.append(buffer, 0, n);
>
>
// работаем с регулярками
final Pattern pattern = Pattern.compile
( » [^-+0]+([-+0-9]+)[^ [^(а-яА-ЯёЁa-zA-Z0-9)]+([а-яА-ЯёЁa-zA-Z ]+)» );
Matcher matcher = pattern.matcher(allpage.toString());
if (matcher.find())
<
matchtemper = matcher.group(1);
>
return matchtemper;
>
catch (Exception e)
<
>
return matchtemper;
>;
//—————————————————————-
public void RefreshTemper()
<
final TextView tTemper = (TextView) findViewById(R.id.temper);
String bashtemp = «» ;
bashtemp = GetTemper( «be.bashkirenergo.ru/weather/ufa» );
tTemper.setText(bashtemp.concat( «°» )); // отображение температуры
>;
>
После того как приложение написано, можно уже его отлаживать и тестировать.
Запуск и тестирование приложения
Вспоминаем про нашу виртуальную машину и запускаем привычной кнопкой или менюшкой Run → Run
Вот такую картину мы можем затем созерцать:
Теперь, если вы хотите поделиться приложением, то нужно собрать apk-файл. Для этого воспользуемся меню File → Export и в списке Android → Export Android application. Далее выберите проект, затем создайте хранилище ключей keystore и ключ key, для этого нужно будет заполнить несколько полей с всякого рода справочной информацией. Получившийся apk-файл можно распространять и даже выложить в Android Market, но для этого придется зарегистрироваться и уплатить $25, что в общем-то немного, особенно для стоящего проекта. Но регистрация в Маркете, пожалуй, тема отдельной статьи.
Заключение
В заключении хотелось бы сказать, что безусловно разработка приложений для Android приятна, достаточно проста и интересна. Конечно, мы рассмотрели лишь верхушку айсберга, но я надеюсь, что в умах тех из вас, кто раньше не пробовал делать ничего подобного «загорелась лампочка» и вполне возможно, что когда-то вашим приложением будут пользоваться миллионы.
Источники, ссылки
UPD: Устранение возможных ошибок
ERROR: Unable to open class file C:\workspace\Test\gen\com\example\test\R.java: No such file or directory
emulator: ERROR: no search paths found in this AVD’s configuration. Weird, the AVD’s config.ini file is malformed. Try re-creating it
— это следствие того, что у Вас кириллица в имени пользователя. Решается: идем в Компьютер → Свойства системы → Дополнительные параметры системы → Переменные среды. Создаем новую переменную с именем ANDROID_SDK_HOME и значением – путем, где находится папка AVD (например, C:\Android\). Создаем, далее ищем там же переменную Path, открываем и в поле значений через точку с запятой добавляем путь до папки tools Android SDK (например, C:\Android\tools). Сохраняем. Запускаем Eclipse, запускаем программу.
UPD 05.10.2011, во что превратилось данное приложение можно лицезреть на следующих скринах:
Это результат развития той самой болванки, которая выше дана в качестве примера.
Разработка и создание Android-приложений
Создание сайтов
Источник


