- Running Your Android Application on an Android Emulator
- To Start Your Android Emulator
- To Run Your Application on Your Android Emulator
- Running Your Android Application on an Android Emulator
- To Add GPU Emulation to the Default Emulator
- To Start Your Android Emulator
- To Run Your Application on Your Android Emulator
- Creating an Android Emulator
- Installing an Android System Image (Required)
- Creating an Android Emulator Using the Android Virtual Device Manager
- Creating an Android Emulator Using the Command Line
- Starting an Android Emulator
Running Your Android Application on an Android Emulator
After you create one or more Android emulators, you can run your RAD Studio mobile applications on your Android emulators. Before you run your application on your Android emulator, start your Android emulator as described below in To Start Your Android Emulator, so as to reduce startup time when you run your Android application from the IDE.
 Caution: Android emulators are extremely slow and do not support the same feature set as real devices.
We do not recommend that you attempt to use an Android emulator:
- If you have an Android device, use your Android device instead.
- You can also use Mobile Preview to do initial debugging of an Android app.
To Start Your Android Emulator
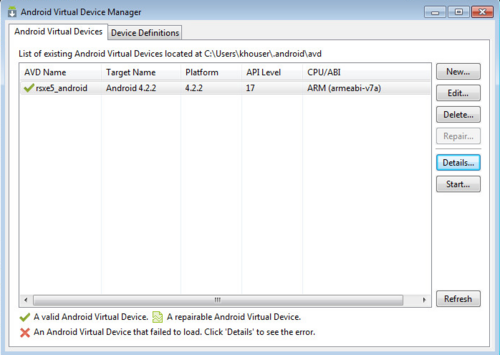

- Start the Android Virtual Device Manager: Select Start | All Programs | Embarcadero RAD Studio XE6 | Android SDKs | Android AVD Manager .
- In the Android Virtual Device Manager, select your Android emulator in the list and click Start.
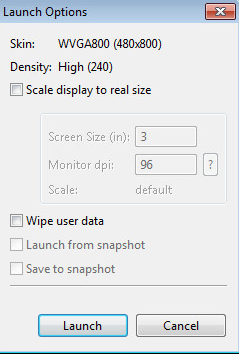
- On the Launch options dialog box, click Launch:

To Run Your Application on Your Android Emulator
- Open your Android application in RAD Studio.
- In the Project Manager, enable the emulator as the target platform. If necessary, expand the Target Platforms node and double-click the Android target platform. (The active target platform is displayed using a bold font.)
- Expand the Android node in the Project Manager.
- Expand the child Target node.
- Double-click the target Android emulator to activate it. (The active emulator is displayed using a bold font.) Note: If the emulator is not shown, right-click the Target node and select Refresh. If the emulator still is not displayed, see Using the Target Node.
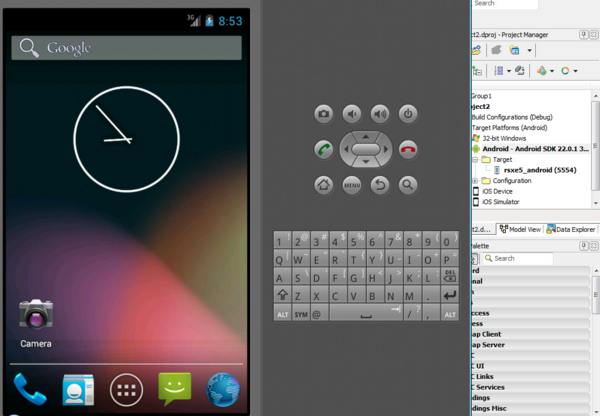
In the following image you can see an emulator named rsxe6_android running, and the target platform setting activated in the Project Manager:
- In the device selector in the FireMonkey Mobile Form Designer, select the device that matches the emulator you are using. For example, if your emulator uses the WQVGA400 device, select 3.3″ WQVGA Android Phone (240dp x 400 dp).
- Run your application:
- Run with debugging ( Run >Run or F9)
- Run without debugging ( Run >Run Without Debugging or SHIFT+CTRL+F9)
- Compile and deploy messages should appear in the IDE.
- If the emulator is not running, the IDE displays: «The selected emulator is not running. Do you want start it?» Click Yes. A «Launching emulator» message is displayed.
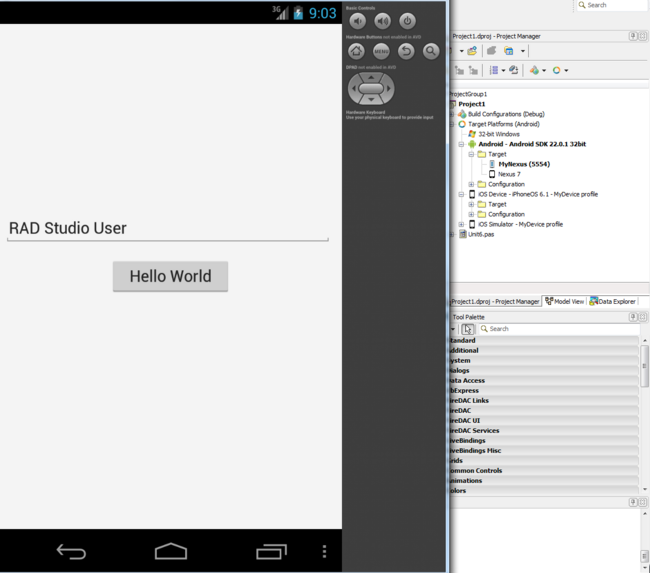
- Open your emulator screen and watch for the app to appear. In the following image you can see a custom Nexus 4 emulator running a simple Hello World! application:
RAD Studio builds your application for Android and runs your application on the selected Android emulator. If the active Android emulator is not running, RAD Studio shows a dialog box that gives you the choice to start your Android emulator. If your Android emulator screen is locked, unlock it to access your application.
Android emulators run much slower than real devices due to the ARM platform emulation on top of a non-ARM system; if performance prevents you from using an Android emulator side by side with RAD Studio, see Running and Debugging Your Android Application Remotely. For obvious reasons, emulators also lack some of the physical features that real devices provide, although you can emulate some features], such as geo location.
Источник
Running Your Android Application on an Android Emulator
RAD Studio provides a default Android emulator for your use. The emulator is named rsxe5_android.exe, and it is located in C:\Users\ \.android\avd\ . You can either use the default rsxe5_android emulator or create an Android emulator yourself.
Before you run your application on your Android emulator, have your Android emulator already open to save some time.


To Add GPU Emulation to the Default Emulator
The default emulator (rsxe5_android) does not have the Use Host GPU property set by default. You might find that the emulator runs faster if you enable GPU emulation, as follows:
- Open the Android Virtual Device Manager:
- Select Start > All Programs > Embarcadero RAD Studio > Android Tools.
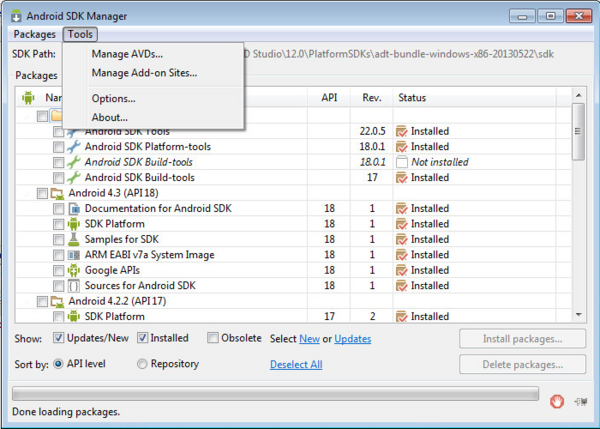
- In the SDK Manager, click the Tools menu and select Manage AVDs.
- Select the rsxe5_android emulator and click the Edit button. Note: If the rsxe5_android emulator is not present, you can create your own Android emulator. See Creating an Android Emulator.
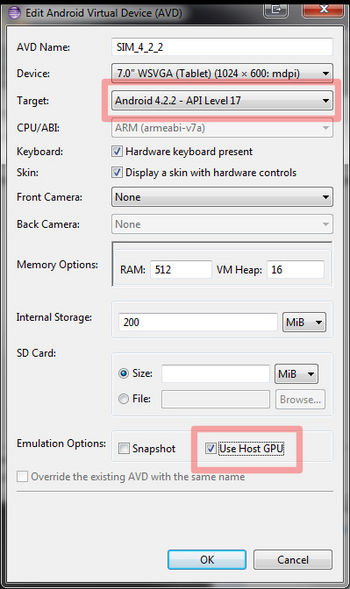
- On the Edit Android Virtual Device (AVD) dialog box, click New in the Hardware field.
- Add the GPU emulation property and set its value to yes:
- Click Edit AVD to save your changes.


To Start Your Android Emulator
- Start the Android Virtual Device Manager:
- Select Start > All Programs > Embarcadero RAD Studio > Android Tools .
- In the SDK Manager, click the Tools menu and select Manage AVDs.
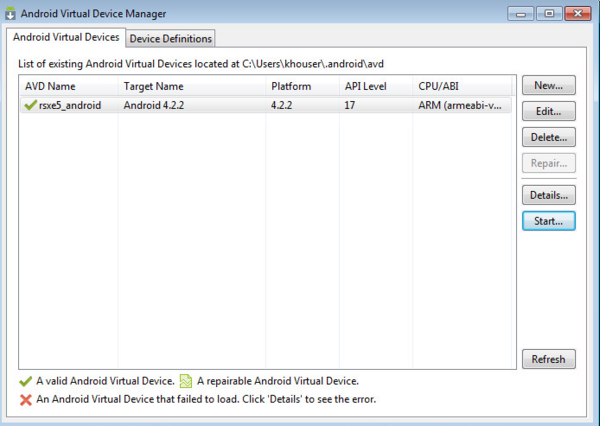
- In the Android Virtual Device Manager, select your Android emulator in the list and click Start.
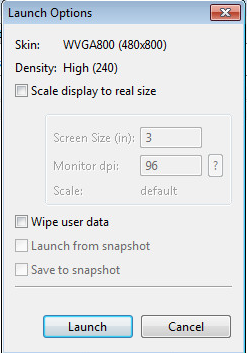
- On the Launch options dialog box, click Launch:

Note: If the rsxe5_android emulator is not present, you can create your own Android emulator. See Creating an Android Emulator.
To Run Your Application on Your Android Emulator
- Open your Android application in RAD Studio.
- In the Project Manager, enable the emulator as the target platform. If necessary, expand the Target Platforms node and double-click the Android target platform. (The active target platform is displayed using a bold font.)
- Expand the Android node in the Project Manager.
- Expand the child Target node.
- Double-click the target Android emulator to activate it. (The active emulator is displayed using a bold font.) Note: If the emulator is not shown, right-click the Target node and select Refresh. If the emulator still is not displayed, see Using the Target Node.
In the following image you can see the default rsxe5_android emulator running, and the target platform setting activated in the Project Manager:
- In the device selector in the FireMonkey Mobile Form Designer, select the device that matches the emulator you are using. For example:
- If you are using the default rsxe5_android emulator with its built-in skin, select WXGA800.
- If your emulator uses the WQVGA400 device, select 3.3″ WQVGA Android Phone (240dp x 400 dp)
- Run your application:
- Run with debugging ( Run >Run or F9 )
- Run without debugging ( Run >Run Without Debugging or Shift+Ctrl+F9 )
- Compile and deploy messages should appear in the IDE.
- If the emulator is not running, the IDE displays: «The selected emulator is not running. Do you want start it?» Click Yes. A «Launching emulator» message is displayed.
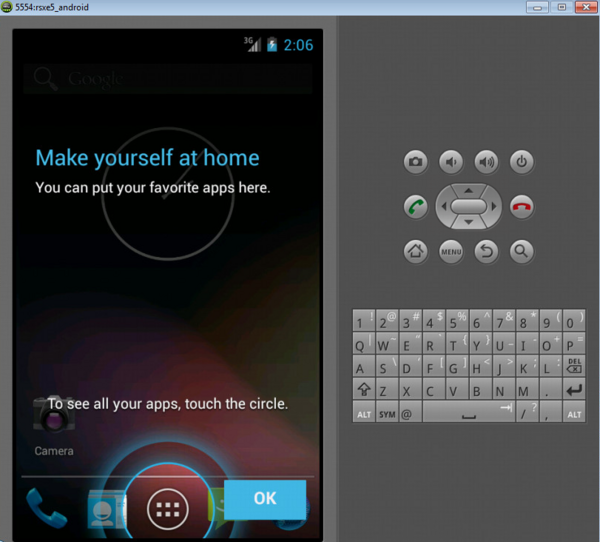
- Open your emulator screen and watch for the app to appear. In the following image you can see a custom Nexus 4 emulator running a simple Hello World! application:


RAD Studio builds your application for Android and runs your application on the selected Android emulator. If the active Android emulator is not running, RAD Studio shows a dialog box that gives you the choice to start your Android emulator. If your Android emulator screen is locked, unlock it to access your application.
Android emulators run much slower than real devices due to the ARM platform emulation on top of a non-ARM system; if performance prevents you from using an Android emulator side by side with RAD Studio, see Running and Debugging Your Android Application Remotely. For obvious reasons, emulators also lack some of the features that real devices provide, although you can emulate some of those features such as geo location.
Источник
Creating an Android Emulator
An Android emulator is an Android Virtual Device (AVD) that represents a specific Android device. You can use an Android emulator as a target platform to run and test your Android applications on your PC.
- Using Android emulators is optional.
- An Android emulator is installed by default during the RAD Studio installation.
- We recommend that you install this emulator during product installation.
- This emulator is used as the default target for an Android application, so you can easily create and run an Android application on your development system.
- If you create your own Android emulator, consider creating an emulator for each Android device you want to support.
- RAD Studio supports the following targets:
- Android emulators that are version 4.0 or newer
- Android devices that are ARM version 7 or newer
- You cannot use an Android emulator on a Virtual Machine (VM). Although an emulator might run on a VM, the emulator will not run an application.
- It is a well-known performance issue that Android emulators are extremely slow.
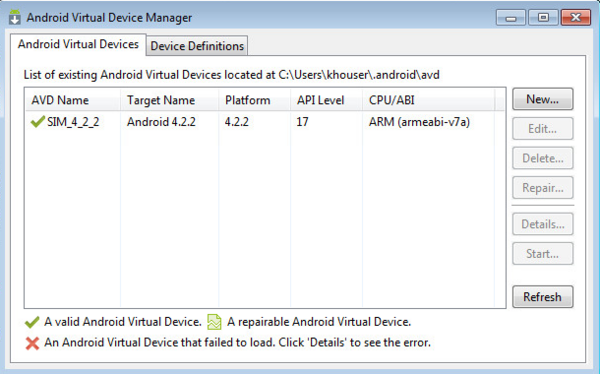
The installed Android emulator is named rsxe5_android, which uses the WVGA800 skin and Android 4.2.2.
Installing an Android System Image (Required)
Before you create an Android emulator, you need to install an Android system image that your emulators can use.
Note: If you installed the Android SDK and NDK during RAD Studio installation, a valid Android system image (such as Android 4.2.2 API 17) should already be shown as Installed in the Android SDK Manager. In this case, you do not need to install another Android system image.
Follow these steps:
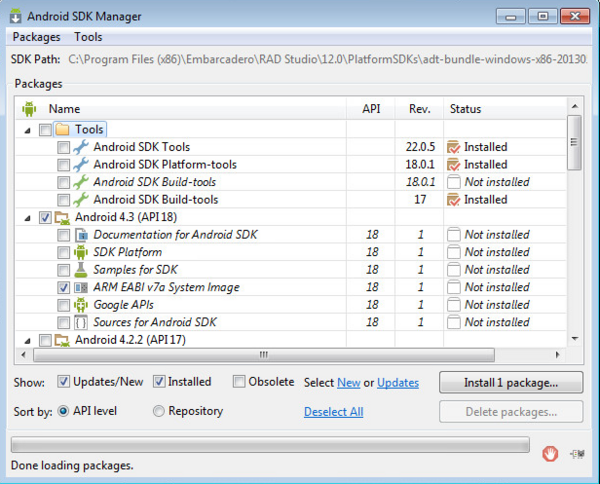
- Start the Android SDK Manager (select Start | All Programs | Embarcadero RAD Studio | Android Tools ).
- In the packages tree, locate and check the ARM EABI v7a System Image node within the first Android node in the list. For example: Android 4.2.2 (API 17) or Android 4.3 (API 18)
- Click Install 1 package. (Clear any checkboxes that were auto-selected.)
- In the Choose Packages to Install page, click Accept License, and then click Install to install the system image.
Creating an Android Emulator Using the Android Virtual Device Manager
To create an Android emulator on your system, follow these steps:
- Start the Android SDK Manager (select Start | All Programs | Embarcadero RAD Studio | Android Tools).
- In the Android SDK Manager, select Tools | Manage AVDs.
In the Android Virtual Device Manager, click the New button to create a new virtual device. 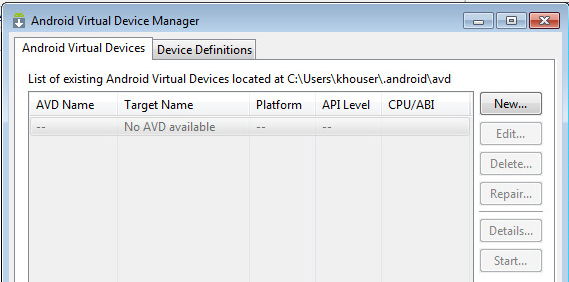
- In Target, select an Android SDK with an API level that is 17 or higher. The drop-down list contains your installed versions of the Android SDK.
- Under Emulation Options, check Use Host GPU.
- In Device, select the Android device to emulate.
Tip: Emulating an older Android device like the Nexus S might be faster than emulating a newer, larger device like the Nexus 10.
RAD Studio lists your Android emulators in the Project Manager, within the Target node of the Android target platform node. See Using the Target Node.
Creating an Android Emulator Using the Command Line
You can create an Android emulator in the command window by entering a command such as this:
For the skin, you might want to add this option:
Starting an Android Emulator
When the emulator is the current target platform, you do not have to start the emulator before running your Android app on the emulator. However, we recommend that you start your Android emulator separately, perhaps before you start RAD Studio. Emulators are notoriously slow to start and to run, so starting the emulator beforehand means that your app can get to the emulator more quickly.
The recommended way to start an Android emulator is by using the Android Virtual Device Manager, which can be started from the Android SDK Manager.
To start an Android emulator such as the default emulator installed in RAD Studio:
- Start the Android SDK Manager (select Start | All Programs | Embarcadero RAD Studio | Android Tools).
- In the Android SDK Manager, click the Tools menu and select Manage AVDs.
- In the Android Virtual Device Manager, select the emulator and click Start.
In the Project Manager, your emulator should appear in the Target node of the Android target platform: 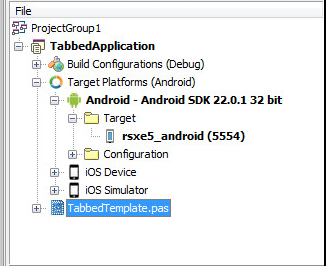
Tip: If the Project Manager does not show your running Android emulator as running, with the same icon as in the screenshot above, see Using the Target Node.
Your next step is to run an Android app on your emulator. In the Project Manager, ensure that the emulator’s name is in boldface and the port number is indicated in parentheses (such as (5554)), indicating that the emulator is running and is the current selected target platform.
Источник


