- RadioButton и RadioGroup
- Методы
- Программное добавление переключателя
- Добавление картинок к переключателю
- Пример с переключателями
- Слушатель OnCheckedChangeListener
- Метод clearCheck()
- Метод getCheckedRadioButtonId(): Узнать выбранный элемент
- Кот или муж?
- Собственные стили
- Собственный вид
- Radio Button in Android: Learn Basics and Customization
- Understanding Radio Group for Radio Buttons
- Using RadioButton with RadioGroup
- Handling RadioButton events
- RadioButton click event
- Clicking on RadioButton through code
- Styling radio button in Android
- Change radio button color
- Change radio button background
- Creating Custom Radio Groups & Radio Buttons in Android
- Introduction
- Step 1 — Creating a Custom Radio Button
- Design inspiration
- Creating a compound view
- Custom Radio Button XML File
- Implementing a custom Radio Button
- The RadioCheckable interface
- Handling click and touch events
- Step 2 — Creating a Custom Radio Group
- Listeners
- Step 3 — Using custom components
- Layout file example
RadioButton и RadioGroup
Познакомимся с компонентом RadioButton, который находится в разделе Buttons. Главная особенность элемента состоит в том, что он не используется в одиночестве. Всегда должно быть два и более переключателя и только один из них может быть выбранным. Это похоже на кнопки на старых радиоприёмниках, когда нажимая на одну из кнопок, вы заставляете отключиться другую нажатую кнопку.
Компоненты RadioButton (переключатель) используются в составе контейнера RadioGroup. Обратите внимание на два момента. Первое — в контейнер RadioGroup можно включать не только RadioButton, но и другие элементы, например, TextView. Второе — переключатели работают в своём контейнере, т.е. если у вас два контейнера RadioGroup, то переключатели из одного контейнера не влияют на поведение переключателей второго контейнера.
Методы
Основным методом для переключателя является toggle(), который инвертирует состояние переключателя. Также представляют интерес методы isChecked(), который возвращает состояние кнопки, и setChecked(), изменяющий состояние кнопки в зависимости от параметра.
Для уведомления о переходе положения переключателя в активное или неактивное состояние в результате определённых событий, нужно вызывать метод setOnCheckedChangeListener() с применением слушателя OnCheckedChangeListener.
Программное добавление переключателя
Получив ссылку на группу переключателей, можно добавить в неё ещё один переключатель (или другой элемент управления) через метод addView():
Добавление картинок к переключателю
Вы можете добавить изображение в левой, правой, верхней и нижней части переключателя, используя либо определённые атрибуты XML или программно.
Через атрибут drawableRight и ему подобных:
Программно через метод setCompoundDrawables(left, top, right, bottom):
В этом примере мы указали только одно значение для правого края, остальным присвоили значение null. Можно одновременно задействовать все стороны переключателя.
Пример с переключателями
Создадим новую форму с четырьмя кнопками-переключателями, с помощью которых будем заливать фон приложения выбранным цветом. Сначала подготовим строковые ресурсы.
Создадим простейшую разметку на основе LinearLayout. Заполним форму текстовым блоком определённого цвета и присвоим ему текст «Текущий цвет». В нижней части формы расположим четыре цветных текстовых блока, а под ними четыре переключателя, с помощью которых мы будем менять цвет основного текстового блока.
Обратите внимание, что элементы RadioButton помещаются в контейнер RadioGroup. Если теперь посмотреть на форму, то увидим одно большое серое поле. А снизу расположились в ряд четыре метки, а ещё ниже также в ряд расположились четыре переключателя. Причём последний серый переключатель имеет выбранный статус (android:checked=»true»).
Переходим к программной части. Добавляем слушатель для обработки щелчков на кнопках-переключателях.
Запустим приложение и посмотрим, что у нас получилось. Пощёлкаем по переключателям и убеждаемся, что всё работает.
Слушатель OnCheckedChangeListener
Показанный выше способ использует щелчок, так как переключатели можно рассматривать как кнопки. Но на самом деле у переключателей есть свой слушатель OnCheckedChangeListener. Я расположил в новом проекте RadioGroup с тремя RadioButton и написал простенький пример.
Этот способ намного удобней. Вам даже не нужно объявлять ссылки на переключатели и назначать им слушатели. Код получается более компактным.
Обратите внимание, что метод onCheckedChanged() принимает параметр RadioGroup, что позволяет применять один и тот же слушатель OnCheckedChangeListener() для нескольких групп переключателей. Вариант -1 сработает, когда группа переключателей будет сброшена в коде с помощью метода clearCheck().
Метод clearCheck()
Когда пользователь выберет любой из переключателей, то он уже не сможет снять с него отметку. Какой-нибудь из переключателей обязательно будет выбран в одном контейнере с ним. Единственный способ очистить все переключатели — программно вызвать метод clearCheck(), который относится к классу RadioGroup.
Метод getCheckedRadioButtonId(): Узнать выбранный элемент
У RadioGroup есть также метод getCheckedRadioButtonId(), который позволяет узнать идентификатор выбранного переключателя. Можем узнать выбранный переключатель через нажатие кнопки.
Также можно узнать индекс выбранного переключателя через метод indexOfChild():
Кот или муж?
Теперь, когда вы познакомились с новым элементом, то вам не составит труда написать программу для нелёгкого выбора.

Девушки, нужен ли вам такой муж? Если он не любит котиков, то будет ли любить вас? Возьмите лучше котёнка. Он клёвый.
Собственные стили
Если вы используете стандартный проект, то переключатели будут использовать цвета Material Design, в частности цвет colorAccent для кружочка с точкой.
В файле res/values/styles.xml добавим строки:
Свойство colorControlNormal отвечает за окружность в невыбранном состоянии, а colorControlActivated за точку и окружность в выбранном состоянии.
Присваиваем созданный стиль атрибуту android:theme:
Теперь цвета флажков изменились.
Собственный вид
Если вас не устраивает стандартный вид элементов RadioButton, то не составит никакого труда реализовать свои представления о дизайне.
В папке res/drawable создаём файл radiobutton_selector.xml:
Также необходимо подготовить два изображения для двух состояний — выбран и не выбран.
Осталось прописать селектор в элементе RadioButton при размещении на экране (атрибут android:button):
Готово! Можете запускать проект и проверять работу переключателей.
Источник
Radio Button in Android: Learn Basics and Customization
Here is a simple tutorial to understand Radio Button in Android. I have also included mostly used customization for Android.
Radio button is a type of View that allows user to select one option from a set. Normally the available options are the ones user must see to decide.
Here is a sample code for RadioButton , place it in your .xml layout file.
Before we move any further let us first understand the RadioGroup class in Android.
And later we will also look at how we can customize RadioButton . Customization will include changing the color of RadioButton.
Understanding Radio Group for Radio Buttons
RadioGroup in Android is a class that acts as a wrapper for RadioButton . If you are using radio buttons then you have more one value to deal with.
And if you use multiple radio button without RadioGroup. You will have a bunch of radio buttons that will allow multiple selections.
But we do not want that. We want our radio button to be checked one at a time. For this purpose we will use a RadioGroup .
Sample code for radio group is given below.
Now the above code might make no sense to you. Let us use it on a real layout.
Also, note the android:orientation=»horizontal» attribute I have for RadioGroup. We can use it because the class RadioGroup extends LinearLayout .
Using RadioButton with RadioGroup
Here is a sample code for you we will continue our further code based on this.
First let us create a simple layout:
Now let us map everything in our activity like below.
We will add interaction for the radio buttons below.
Handling RadioButton events
Now that we have multiple radio buttons in our Android application. Let us finally interact with them in this section.
We will breakup this section into two parts.
RadioButton click event
We obviously want to do something when a radio button is clicked. We can do exactly this by adding the code below in our activity like below.
Now let us look at how we can programatically click on any of the radio button.
Clicking on RadioButton through code
It’s really simple to click any of the radio button through code. All you have to dois know the id of the button.
For this example let us click on option_two . Which can be done like below.
Now that we have looked into handling click events. Let us look at customizing the radio button.
Styling radio button in Android
Let us look at how we can customize the radio button.
Change radio button color
Let us see how we can change the color of our radio button. And by colors of radio button, I mean the text color and the button color itself.
Let us see how we can change the text color. We use the attribute named android:textColor for this.
Also, to change the radio button’s color we use android:buttonTint . If you’re on AndroidX this should work for all API levels.
Now let us extract the code to our styles.xml or themes.xml file.
And use it in your radio buttons as
The above style is going to change the color to black. Let us look at more customization.
Change radio button background
We can also change background like in other views. Let us look at this sample drawable file.
You have to use it like any other drawable file in your andorid:background attribute.
That is all you have to know as a beginner. If you have any queries feel free to comment below.
Источник
Creating Custom Radio Groups & Radio Buttons in Android
Radio Group and Radio Button are two great components provided by the Android Framework, but unfortunately they often cannot satisfy all requirements. In this case there are several possible ways to get missing functionality, for example, use third-party libraries or create your own custom view components. In this tutorial I am going to explain the latter option. It is always a great idea to learn internals and understand what is going on under the hood.
Introduction
This tutorial is intended to explain how to create custom Radio Group and Radio Button components. There are lot of related topics addressed in this guide like Custom Views, Compound Views, View Groups. However, I won’t cover this topics in great details as far as there are lot of great tutorials out there. This tutorial supposes some basic knowledge of the Android Framework and the Java language. Furthermore you can find the link to the source code at the end of the article.
Step 1 — Creating a Custom Radio Button
First of all we need to find a design prototype to implement it in our custom Radio Button.
Design inspiration
I have found this great design prototype of the settings screen. Here you can see three radio buttons that are used as presets. This is a great choice from the UX perspective that lets a user easily choose from standard, in this case time, presets.
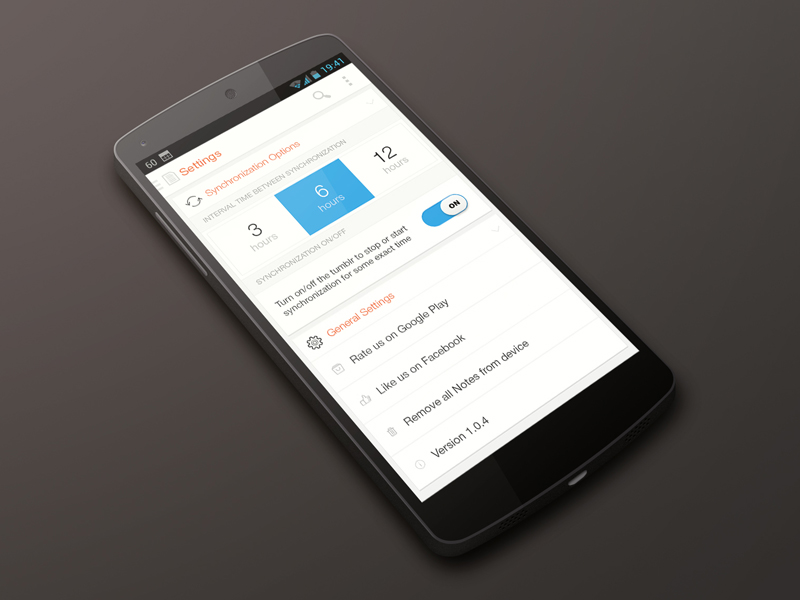
We are going to create a similar custom radio button, but in addition there will be an Edit Text view in order to enter custom values, however this is not related to the main purpose of the guide.
Creating a compound view
A compound view is a group of views or even view groups created for reusability and consistency. Furthermore such views could be enhanced programmatically as well.
Let’s start by creating the hierarchy of our compound radio button.
As you can see it is quite simple and contains only two Text View components.
Custom Radio Button XML File
To get started, create the /res/layout/custom_preset_button.xml XML file that will be used as the layout file for the compound view.
Please make sure you are using the tag. This tag helps to eliminate redundant view groups when a file with the tag is included into another layout or used as the layout file for a compound view.
Implementing a custom Radio Button
Next, we need to create a compound view class that will inflate the created layout file. Let’s call it PresetValueButton. We will extend the Relative Layout view group, because it is the most appropriate view group for this purpose. Here is the final implementation, let’s discuss the most interesting parts.
We have defined the following custom attributes:
- presetButtonValueText – Value text
- presetButtonUnitText – Unit text
- presetButtonValueTextColor – Value text color
- presetButtonUnitTextColor – Unit text color
- presetButtonPressedTextColor – Text color for both labels for the pressed state
The RadioCheckable interface
In order to define common properties and methods that a radio button must have to be a part of a radio group create the following RadioCheckable interface.
As you can see from the code above, our interface extends the Checkable interface defined in the Android Framework.
You may wonder what is the purpose of these two methods addOnCheckChangeListener and removeOnCheckChangeListener . Let’s see the implementation in the PresetValueButton class.
I’ve decided to use multiple listeners (add instead of set method), since the default implementation of the RadioButton class contains two listeners, one is available to a user and the second one is used just by the parent RadiouGroup class. Have a look at this snippet from the CompoundButton class.
Handling click and touch events
As you may have already noticed click and touch events are handled in the specific way.
This decision is the result of the peculiarity of handling click events and appearance of a button. When a user clicks on a radio button the text color should be set to presetButtonPressedTextColor and then reset to the normal state on the up action. Therefore this is handled manually, in addition if user has set its own touch handler it will be called after the switch statement.
Step 2 — Creating a Custom Radio Group
Now it is time to create a custom radio group. A lot of ideas and implementation details are taken from the default RadioGroup class. Our custom radio group class extends the LinearLayout view group as it is the most suitable container for this purpose.
Listeners
There are three listeners defined in the class:
- OnCheckedChangeListener: Listener that is set by a user in order to listen for check change events.
- PassThroughHierarchyChangeListener: This listener is used the internal purpose only. The radio group is notified when a child view is added or removed.
- RadioCheckable.OnCheckedChangeListener: This listener is assigned to a child radio button when it is added.
Let’s look closer at the PassThroughHierarchyChangeListener implementation.
As it has been just mentioned, on line 12 mChildOnCheckedChangeListener is added to a child view, hence the radio group will be notified about child views click/change events. On line 14 we are adding a child view to the hash map in order to cache child views, as a result we do not need to call the findViewById method whenever we need a child view.
It is worthwhile to mention that we defined the custom attribute for presetting id in the XML file, similarly to the default RadioGroup implementation. Therefore you can set a view id in the XML layout file to make this view checked by default.
Step 3 — Using custom components
Layout file example
Finally, let’s test our custom components. Create the following XML layout file.
Источник


