- How to install React Native on Mac
- Let’s see how to install and configure react-native development environment on Mac, and create react native project to check the environment is set well.
- Contents
- Outline
- Homebrew
- Nodejs
- Watchman
- React Native CLI
- Xcode
- Install Cocoapods
- Android Studio
- Android Studio Configuration
- Android Studio SDK Configuration
- Configure Android Studio Environment Variable
- Create & Check react-native Project
- Check on iOS
- Check on Android
- Completed
- How to Install, Setup and Use Android Emulator for Mac, Linux and Windows without installing Android Studio
- — And save yourself a lot of space!
- Step 1: Install Java Development Kit 8.
- Step 2: Install Android SDK.
- Important note for the next two steps:
- Step 3: Install platform and build tools required for React Native.
- Step 4: Create a new virtual device.
How to install React Native on Mac
Let’s see how to install and configure react-native development environment on Mac, and create react native project to check the environment is set well.
Contents
Outline
let’s see how to install and configure react-native development environment on Mac. If you want to know how to install react-native on Windows, see the blog post below.
you can use Expo CLI and React Native CLI to develop react-native app on Mac.
Expo CLI is the package includes many native features(geolocation, camera, etc) when you develop the app with react-native. At the first time, when you develop the react native with Expo CLI, you can feel easy and comfortable. However, this pacakge includes many native features those you don’t use, and that makes the app build size bigger. Also, if you want to integrate the native feature which Expo CLI doesn’t include, it’s hard to make it. Therefore, this blog post doesn’t recommend to use Expo CLI.
This blog post is about how to install and configure React Native CLI environment. Also, we’ll create react-native project by React Native CLI and check it works well.
We need to install Nodejs, Watchman, Xcode, etc to develop the app by react-native. let’s see how to install them one by one.
Homebrew
Homebrew is a package manager on Mac to install and manage packages. We can install packages simply on Mac via Homebrew.
First, execute the command below to check Homebrew is installed on Mac.
If Homebrew is installed, you can see Homebrew version like below.
If Homebrew version is not shown, you can install Homebrew via the command below.
After installing, execute the command below to check Homebrew is installed well.
If Homebrew is installed well, you can see Homebrew version like below.
Nodejs
react-native is Javascript, so we need to install Nodejs that is Javascript runtime.
execute Homebrew command below to install Nodejs.
After installing, execute the command below to check Nodejs is installed well.
If Nodejs is installed well, you can see Nodejs version on the screen.
When Nodejs is installed, basically, npm (Node Package Manager) is also installed. Execute the command below to check npm is installed well.
If npm is installed well, you can see npm version like below.
Watchman
Watchman is to watch specific folders or files, and if they is changed, Watchman can trigger some actions. In react-native, Watchman watches the source codes and if they are added or changed, Watchman rebuilds them.
Execute Homebrew command below to install Watchman.
After installing, execute the command below to check Watchman is installed well.
If Watchman is installed well, Watchman version would be shown up.
React Native CLI
Let’s install React Native CLI to develop the app by react-native. Execute npm command below to install React Native CLI globally.
After installing, execute the command below to check React Native CLI is installed well.
If React Native CLI is installed well, you can see React Native CLI version like below.
Xcode
We need Xcode to develop iOS app by react-native. Click the link below to install Xcode via App store.
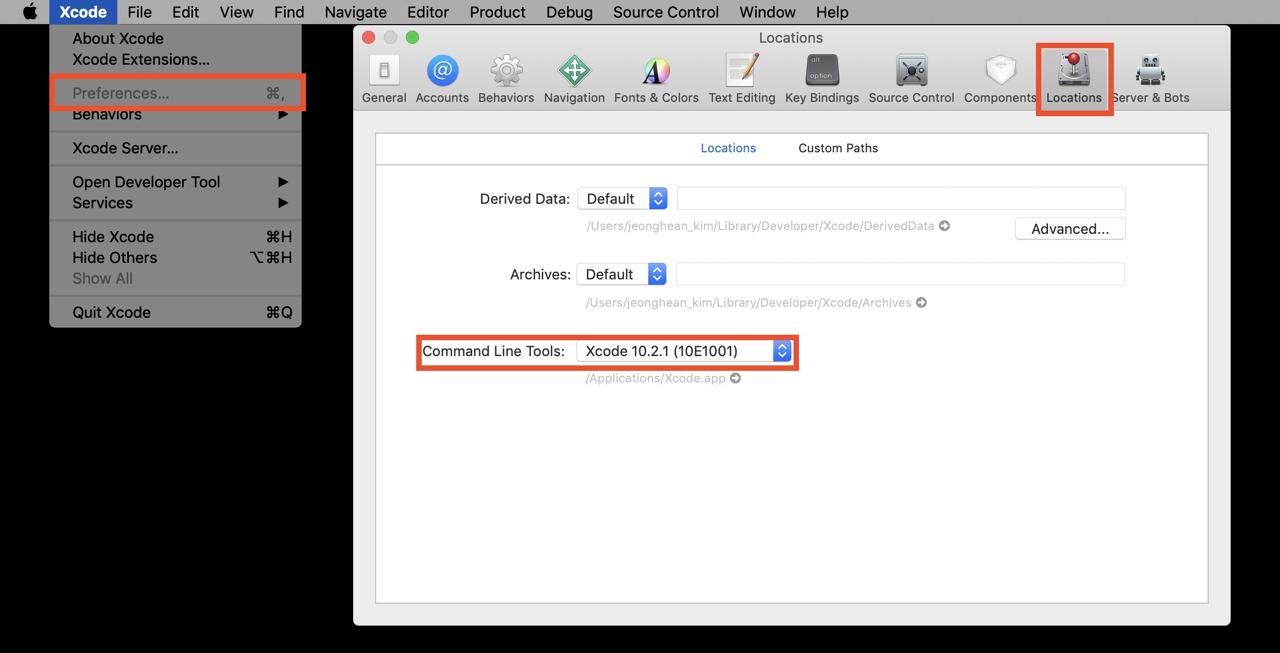
After Xcode is installed, we need to configure Command Line Tools. Execute Xcode and click Xcode > Preferences. > Locations on the top menu. When you click it, you can see Command Line Tools setting like below.
If the setting is not like above, click the dropdown menu and select last version of Command Line Tool.
Install Cocoapods
Cocoapods is the dependency manager on iOS development.
Cocoapods is necessary to develop an app by react-native. Execute the command below to install Cocoapods.
After installing, execute the command below to check Cocoapods is installed well.
If Cocoapods is installed well, you can see Cocoapods version like below.
We need to install JDK(Java Development Kit) to develop Android app with react-native. Execute the command below to install JDK.
After installing, Execute the command below to check Java is installed well.
If Java is installed well via installing JDK, you can see Java version like below.
When JDK is installed, Java compiler is alo installed. Execute the command below to check Java compiler is also installed well.
If Java compiler is installed well via installing JDK, Java compiler version is shown up like below.
Android Studio
We need to install Android Studio to develop Android app with react-native. Click the link below to go to Android Studio site and download the installation file.
After downloading, execute the installation file to execute Android Studio.
Android Studio Configuration
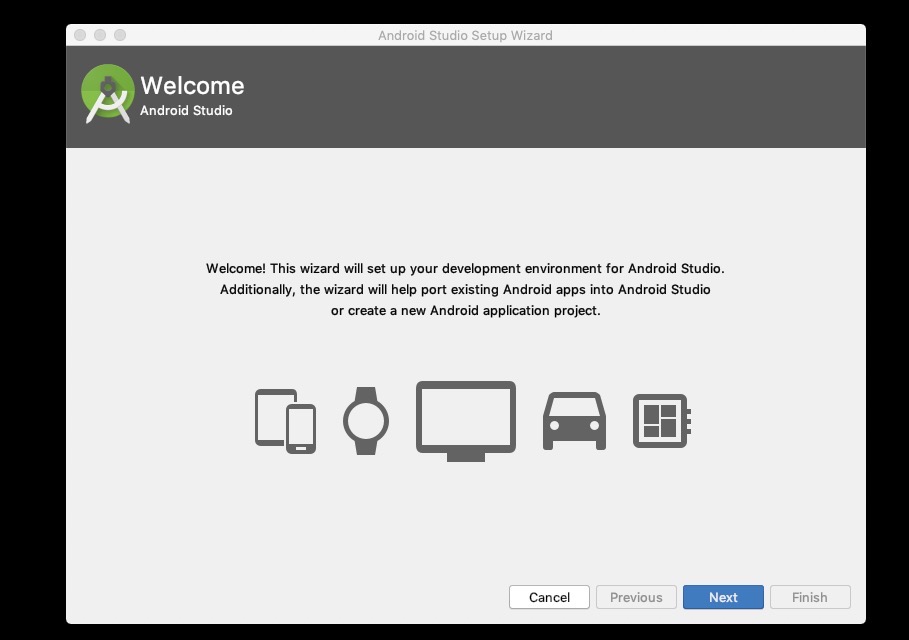
you can see the screen like below after executing Android Studio.
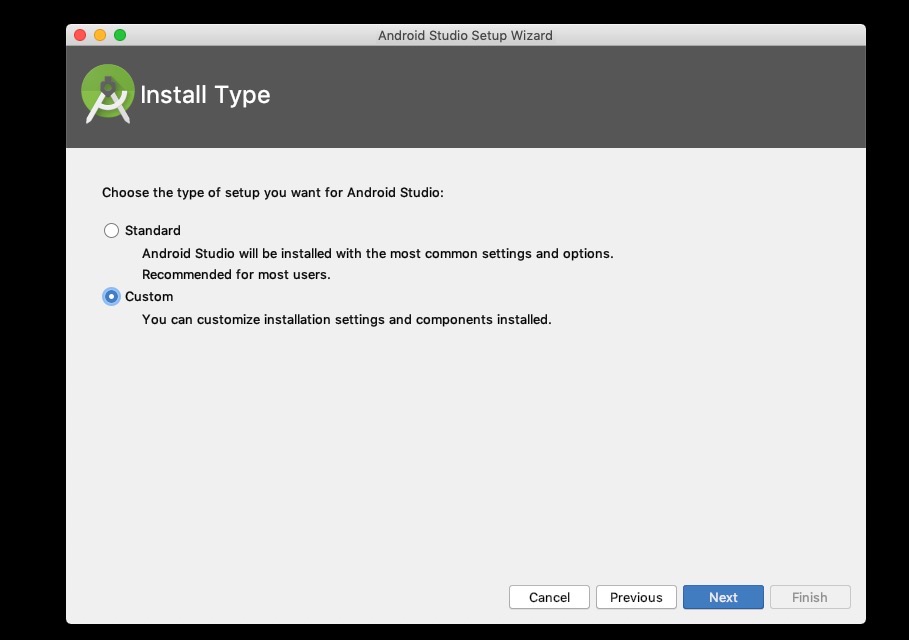
Click Next button to go to next screen. When you go to the next screen, you can see Install Type configuration screen. Select Custom option and click next button to go to next screen.
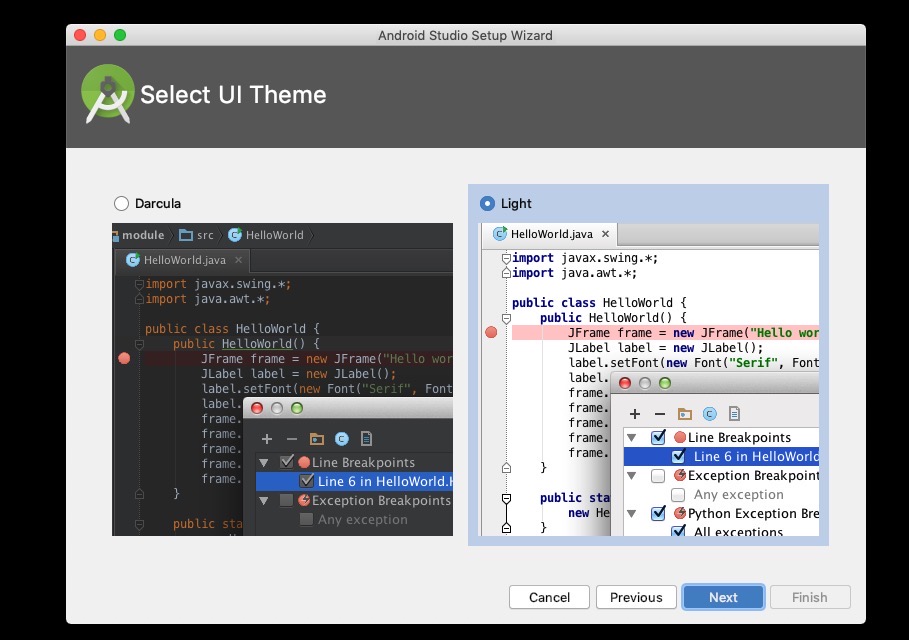
When you go to the next screen, you can see Select UI Theme screen like below. Select the theme which you like, and click Next button to go to the next screen.
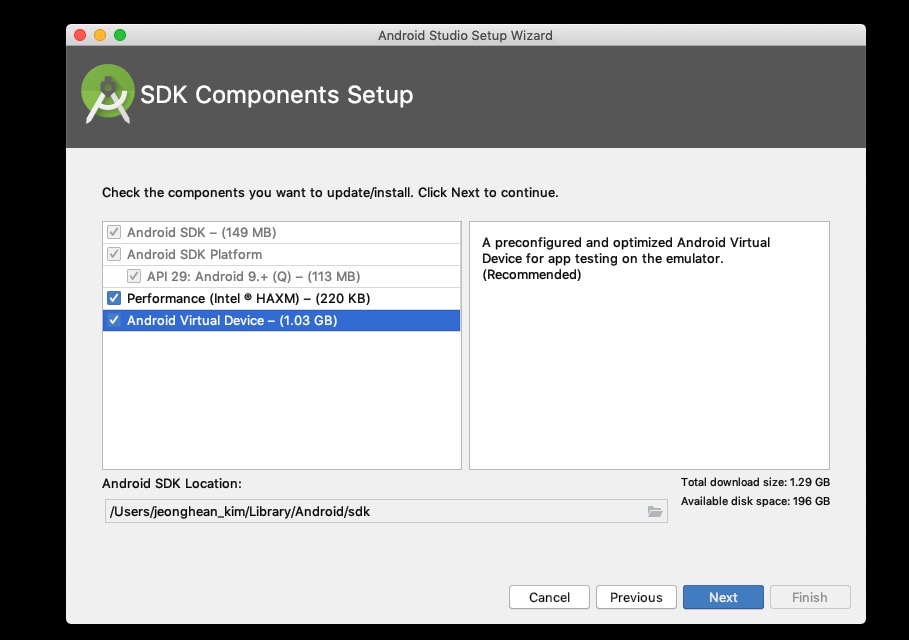
When you go to the next screen, you can see SDK Components Setup screen like below. Select Performance (Intel ® HAXM) option and Android Virtual Device option, and clic Next button.
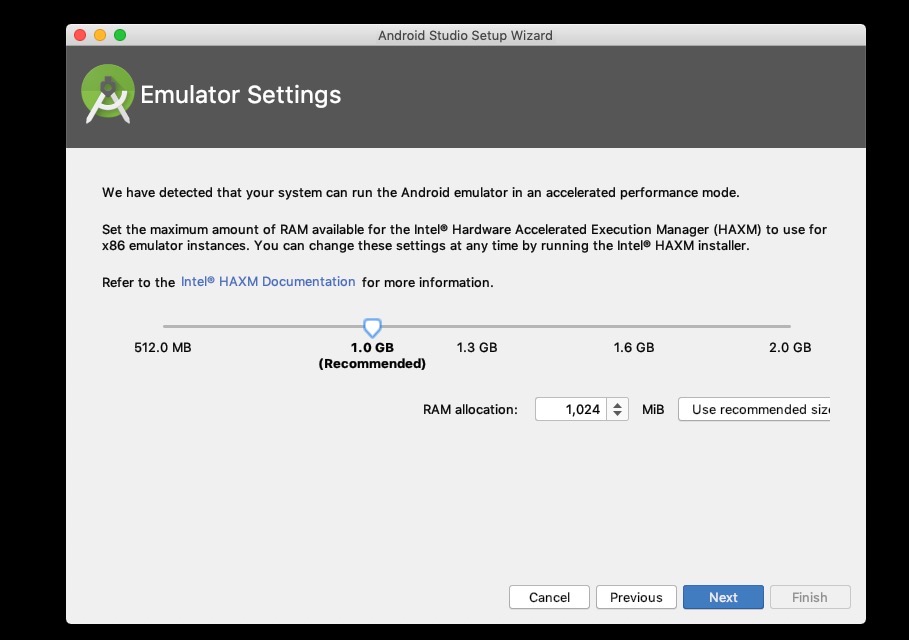
on the next screen, you can see Emulator Settings screen like below. Click Next button without any changing especially.
the next process is just normal program installation, so I don’t explain the detail. Just click Finish button to continue Android studio installation to complete it.
After Android studio installation, you can see Android studio is executed like below.
Android Studio SDK Configuration
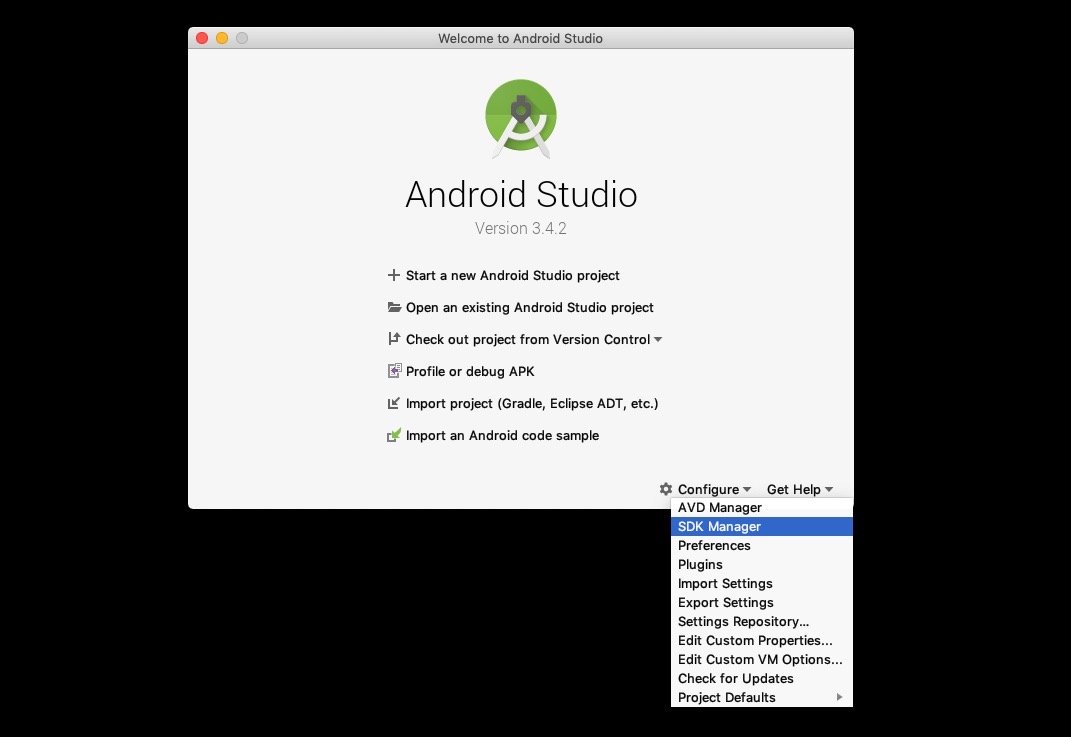
Click Configure > SDK Manger menu on the right botton to go to Android SDK configuration.
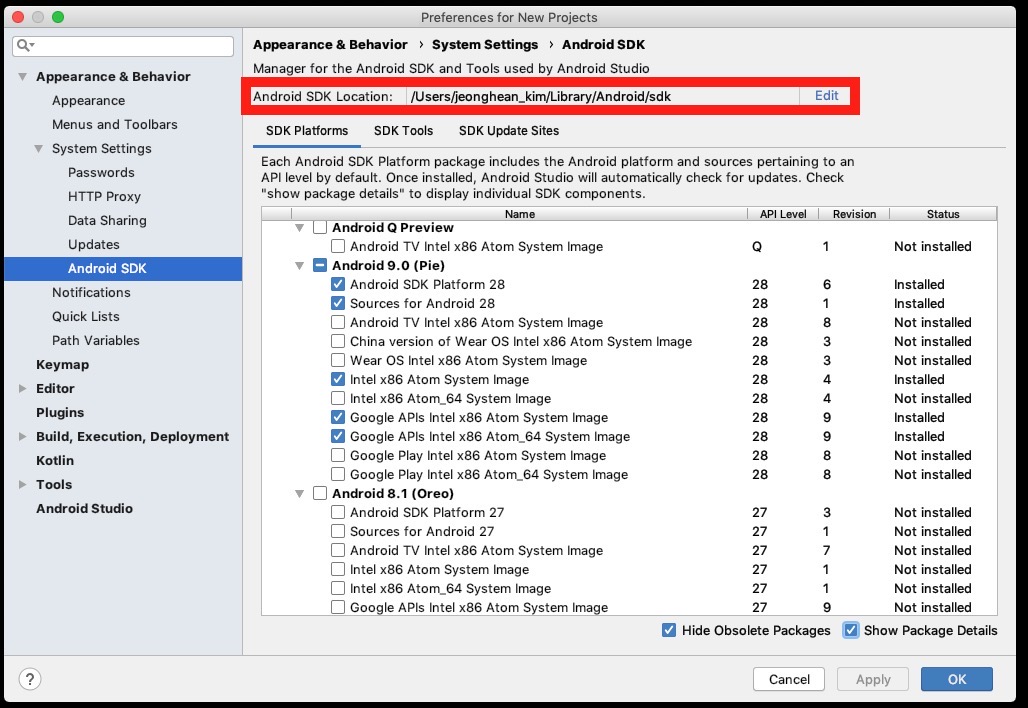
When the screen is shown up like below, select Show Pacakge Details option on the right bottom. find and select the options below on the list.
- Android SDK Platform 29
- Intel x86 Atom System Image
- Google APIs Intel x86 Atom System Image
- Google APIs Intel x86 Atom_64 System Image
If you select all options above, click OK button on the right bottom to install them.
Configure Android Studio Environment Variable
Android studio installation and configuration are done. Now, we need to set the environment variables. open
/.bash_profile file or
/.zshrc file and add the code below to them to add the environment variables.
If you use .bash_profile , execute the command below.
on the code above, you should modify Android SDK directory location to your location. If you don’t know where your Android SDK location, go to the Android Studio SDK configuration.
you can find your Android SDK directory location at Android SDK Location section on the top of the Android studio SDK configuration screen.
After configuration, re-start the terminal and execute the command below.
If the environment variables are configured well, you can see the result like below.
Create & Check react-native Project
Execute React Native CLI command below to create react-native project.
Check on iOS
After creating, execute the command below to execute the react-native app on iOS.
If you can’t execute well, execute ios/SampleApp.xcworkspace file and select the simulator on the top of Xcode screen, and click the arrow button to execute the simulator.
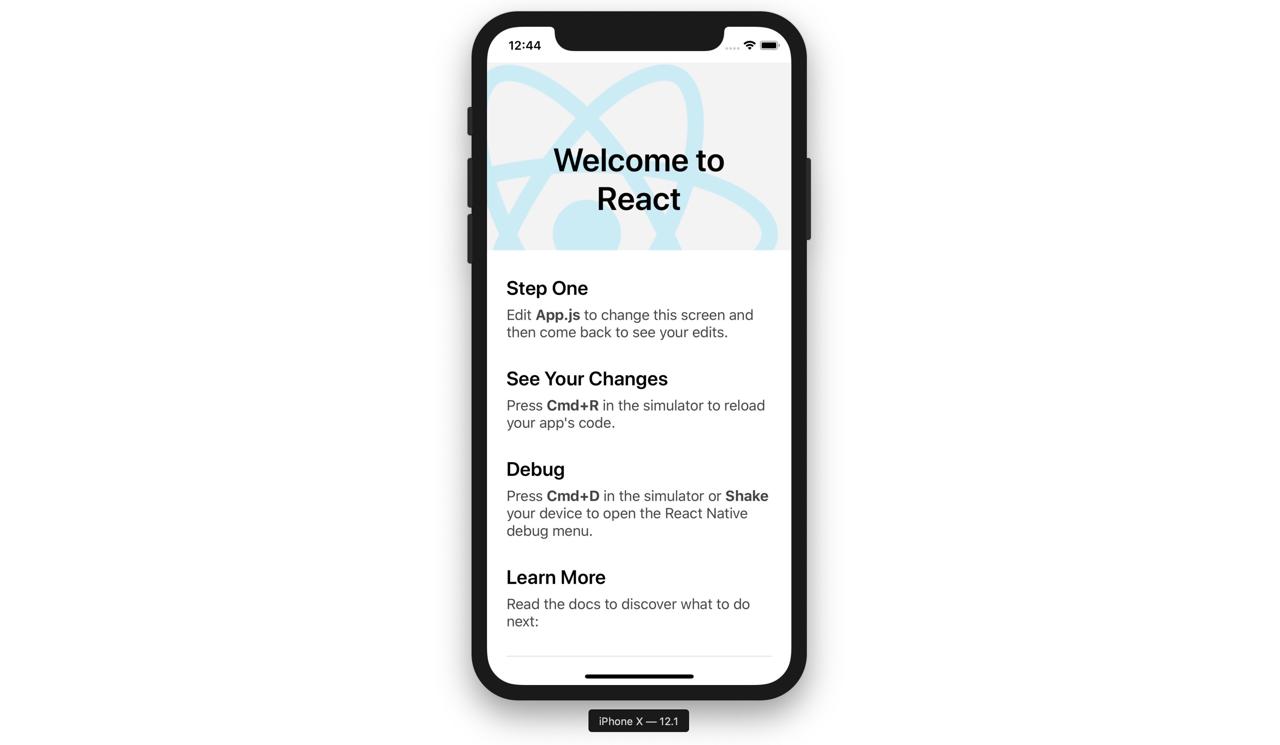
If the react-native app is executed well, you can see the screen like below.
Check on Android
In Android, execute the command below after connecting the device that the developer mode is activated via USB or executing Android studio emulator.
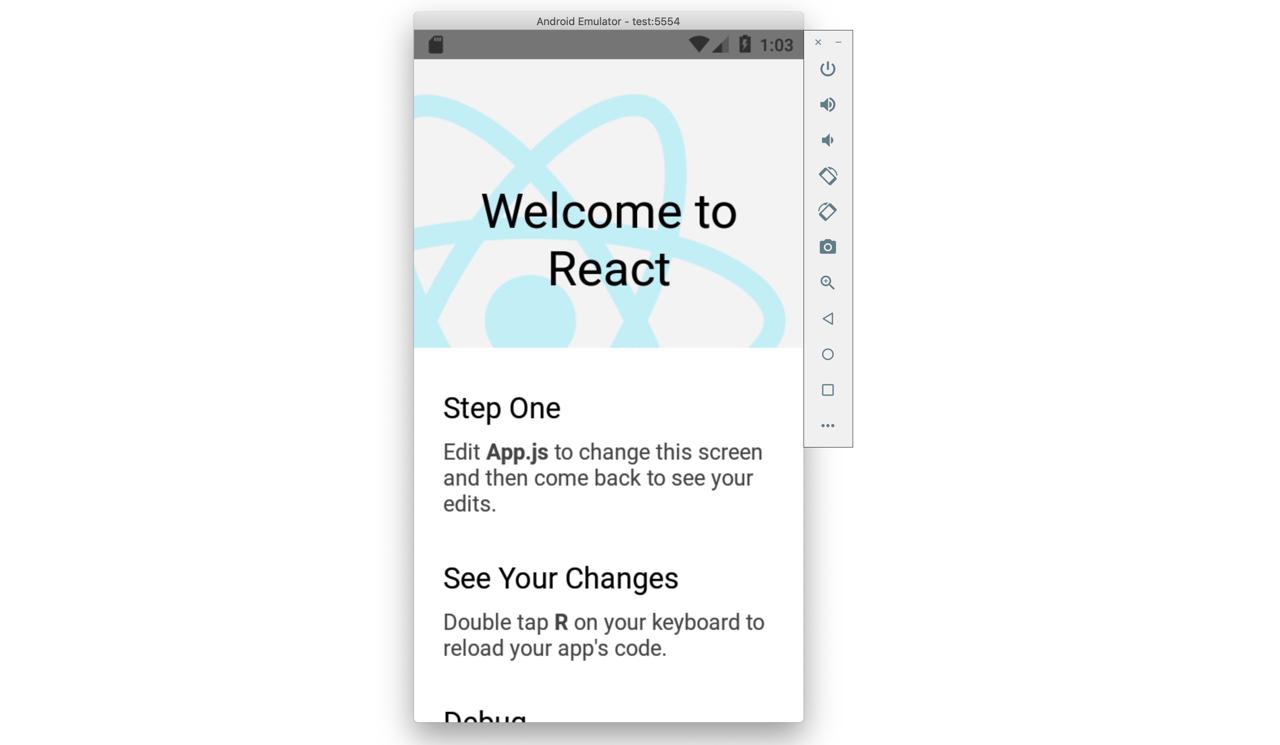
If you don’t have any problen, you can see the screen like below.
Completed
We’ve seen how to install and configure react-native to develop the app on Mac. Also, We’ve created the app by React Native CLI and executed it to check the environment is configured well.
Now, we are ready to develop the app with react-native. Let’s dive to the react-native development world!
Was my blog helpful? Please leave a comment at the bottom. it will be a great help to me!
Источник
How to Install, Setup and Use Android Emulator for Mac, Linux and Windows without installing Android Studio
Jan 12, 2019 · 5 min read
— And save yourself a lot of space!
So let me ask you first —
How many of you have installed Android Studio only to use the emulator for your native app? Oh, and don’t forget the way your system struggles when you try to run it!
And no, I’m not just talking about any average system — even my Macbook Pro with 8GB of RAM makes a lot of noise!
A lot of you might have also c ome across alternatives like Genymotion , Nox , BlueStacks and a lot others. Some are free, while a lot others with really nice features and performance are paid.
So most of us stick to the free ones or end up downloading Android Studio for the really good and easy to use emulator it provides.
But it gets worse when you already have Visual Studio Code , a few tabs on Google Chrome and your music player running!
Okay enough with the memes, let’s quickly set up Android Studio’s emulator in a better way this time — without actually installing Android Studio! ✊
Step 1: Install Java Development Kit 8.
First you’ll need to install JDK 8. Windows and linux users can directly visit the link and download it after accepting the license.
For Mac users, I recommend installing via Homebrew :
Windows and Linux users should make sure that they have set-up path to their Java installation.
Step 2: Install Android SDK.
Once we have installed and set-up Java in our system, we will need to install Android SDK.
Windows and linux users can download the command line tools here.
Mac users can install it by running:
Note for Mac users: If you run into an error like this while installing android SDK :
Then you simply need to run the below command and try installing android-sdk again :
After installing, make sure you have added android-sdk to your system path.
For Mac and Linux users, you need to add the following line to your .bashrc or .zshrc :
Important note for the next two steps:
Incase your system complains about not being able to find the command while trying to issue the next set of commands involving sdkmanager , avdmanager or emulator — you can navigate to the directory where it is present inside the android-sdk folder and run them as ./sdkmanager , ./avdmanager and ./emulator respectively.
For those of you who are feeling lazy to find it yourself :
sdkmanager and avdmanager will be located inside android-sdk/tools/bin whereas emulator can be found inside android-sdk/tools.
Now that we know this, let’s continue towards a better development experience!
Step 3: Install platform and build tools required for React Native.
Now we can go ahead and set-up platform and build tools to help us in creating and running our virtual device in android emulator.
To do this, open your terminal and run the following command :
Once we have downloaded the above packages, run the following command to list all the tools available :
This will fetch the complete list of the available packages on remote that you can download to your system. You can download packages from the list by running :
Note: sdk-path is the string in the leftmost column of the generated list. And it must be wrapped in quotes while running the above command. For example, let’s say we want to create a virtual device which requires Google APIs Intel x86 Atom System Image package, we can install the package by running :
You can download the packages that you need from the list and if you look closely, you’ll find android emulator package there too! But don’t worry I won’t make you go through the long list in your terminal, here’s the command you need to run in order to download the android emulator package :
That’s it! We’ve downloaded the android emulator and we’re ready to set-up our Android virtual device!
Step 4: Create a new virtual device.
Let’s create an android virtual device with the help of Google APIs Intel x86 Atom System Image we downloaded through the previous command, which was :
Now to create a virtual device, run the following command :
This will create a virtual device named myTestDevice using the Intel x86 Atom system image we downloaded .
To check if your device was created, you can run :
This will list all the virtual devices present in your system.
If you followed all the instructions properly, you can see your device listed as well and you must be able to start your virtual device by running :
And now your android emulator will start with the device you just created! But this time in a better way just like you always deserved — without wasting your precious storage space! 🎉
And don’t forget to leave a few claps if you liked this post or share it with someone who might need this! 😄
Don’t forget, you can leave upto 50 claps!! 👏👏
Happy Hacking! Cheers!
Do you have any queries or suggestions? Did you run into some problem while installing or setting up? Leave your comment on the post and I’d love to help you out!
Источник
