- How to Read QR Code using Zxing Library in Android?
- QR Code
- Step by Step Implementation
- Android Barcode Reader and Qr Code Scanner using Google Mobile Vision
- Advantage over legacy ZXING scanner
- How to use Barcode Reader Using Google Mobile Vision
- avaneeshkumarmaurya/Barcode-Reader
- Barcode-Reader — Barcode Reader Using Google Mobile Vision
- Adding Barcode Reader in Fragment
- Adding Scanner Overlay Scanning Indicator
- Additional Options
- Распознавание Barcode Android
- Создание нового проекта
- Интегрируем ZXing
- Сканируем
- Обработка результатов сканирования
- Scan Barcodes with ML Kit on Android
- Before you begin
- Input image guidelines
- 1. Configure the barcode scanner
- Kotlin
- 2. Prepare the input image
- Using a media.Image
- Kotlin
- Kotlin
- Kotlin
- Using a file URI
- Kotlin
- Using a ByteBuffer or ByteArray
- Kotlin
- Using a Bitmap
- Kotlin
- 3. Get an instance of BarcodeScanner
- Kotlin
- 4. Process the image
- Kotlin
- 5. Get information from barcodes
- Kotlin
- Tips to improve real-time performance
How to Read QR Code using Zxing Library in Android?
Zxing stands for Zebra Crossing, it is one of the most popular open-source API for integrating QR(Quick Response) Code processing. It is a barcode image processing library implemented in Java, with ports to other languages. It has support for the 1D product, 1D industrial, and 2D barcodes. Google uses ZXing by web search to obtain millions of barcodes on the web indexable. It also creates the foundation of Android’s Barcode Scanner app and is combined into Google Product and Book Search.
Note: To read QR code using CAMView Library you may refer to How to Read QR Code using CAMView Library in Android?
Attention reader! Don’t stop learning now. Get hold of all the important Java Foundation and Collections concepts with the Fundamentals of Java and Java Collections Course at a student-friendly price and become industry ready. To complete your preparation from learning a language to DS Algo and many more, please refer Complete Interview Preparation Course.
QR Code
It is an abbreviation for Quick Response Code. It is a combination of white and black squares and can be read easily with a QR Scanner. It generally uses four encoding modes
- Numeric
- Alphanumeric
- Byte/Binary
- Kanji
It is used for authentication and online payments. A sample GIF is given below to get an idea about what we are going to do in this article. Note that we are going to implement this project using the Java language.

Step by Step Implementation
In this project, we are creating a basic QR Scanner application which is used to scan a QR Code and display the result over the screen.
Step 1: Create a New Project
To create a new project in Android Studio please refer to How to Create/Start a New Project in Android Studio. Note that select Java as the programming language.
Note: Choose API 24 and onwards as Minimum SDK.
Step 2: Adding dependencies
Источник
Android Barcode Reader and Qr Code Scanner using Google Mobile Vision

Google’s Vision API has replaced the ZXING QR Scanner that we were using earlier. Apart from barcode scanning, it serves multiple purposes including face detection.
Advantage over legacy ZXING scanner
Google vision API is faster. It can scan calendars and business cards.
I am attaching a QR code with a calendar event.
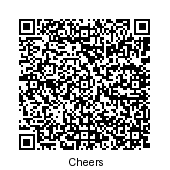
When we scan above QR code with vision API, we get the following:
Besides calendars, we can also scan contacts, driving licenses and more.
I have created a sample of the above mentioned facility.
How to use Barcode Reader Using Google Mobile Vision
avaneeshkumarmaurya/Barcode-Reader
Barcode-Reader — Barcode Reader Using Google Mobile Vision
1. Click the above link, download the project and import barcode-reader as module
2. Include the barcode reader dependency in app’s build.gradle
3. You can just launch the scanner activity by calling this method
and get the result into onActivityResult:
4. If you want to make your own activity, implement the activity from BarcodeReader.BarcodeReaderListener and override the necessary methods.
Adding Barcode Reader in Fragment
In fragment the barcode reader can be added easily but the scanner listener barcodeReader.setListener() has to be set manually.
Check the example fragment code in BarcodeFragment.java and MainActivity.java
Adding Scanner Overlay Scanning Indicator
The overlay animation indicator displays a horizontal line animating from top to bottom. This can be useful in showing cool animations to indicate scanning progress.
To use it, add the com.notbytes.barcode_reader.ScannerOverlay on top of barcode reader fragment using Relative or Frame layout.
Additional Options
XML attribute for Barcode Reader
auto_focus — boolean, turn on/off auto focus. Default is true
use_flash — boolean, turn on/off flash. Default is false
XML attribute for Scanner Overlay Indicator
square_width — Width of transparent square
square_height — Height of transparent square
line_color — Horizontal line color
line_speed — Horizontal line animation speed
You can play the beep sound when a barcode is scanned. This code is usually called in onScanned() callback.
You can change the default beep sound by passing the file name. Your beep file should be in the project’s assets folder.
The scanning can be paused by calling pauseScanning() method.
The scanning can be resumed by calling resumeScanning() method.
Источник
Распознавание Barcode Android
В данной статье мы будем использовать ZXing (Zebra Crossing), чтобы расшифровать штрихкод в нашем Android приложении.
Используя ZXing, нам не нужно думать о том, что у пользователя нет сканера barcode, так как классы, предоставляемые библиотекой позаботятся об этом. Интегрируя ZXing в наше приложение мы можем предоставить пользователю более простую возможность сканировать шрихкоды, также это позволит нам сфокусироваться на разработке основной части приложения.
Создание нового проекта
Шаг 1
В Eclipse создайте новый Android проект. Введите имя приложения, проекта и название пакета. 
Шаг 2
Откройте основной шаблон. Eclipse должен был создать стандартный шаблон. Внутри него замените существующий контент на кнопку
После кнопки добавим два текстовых поля, которые будут отображать результаты отсканированной информации.
Добавьте к кнопке текст. Откройте файл res/values/strings
Чтобы просканировать пользователь должен будет нажать на кнопку. Когда приложение получает результат распознавания, оно отобразит его в текстовых полях.
Интегрируем ZXing
Шаг 1
ZXing — библиотека с открытым исходным кодом, предоставляющая возможность распознавания штрихкодов на Android. Некоторые пользователи уже имеют установленное приложение ZXing, поэтому достаточно передать ему код и дождаться результатов. В данном приложении мы рассмотрим способ, вызывающий соответствующую функцию другого приложения. Если данное приложение отсутствует у пользователя, то будет выведено предложение скачать его.
В Eclipse добавим новый пакет в Ваш проект. Для этого кликнем правой кнопкой мыши по папке src и выберем «New»->«Package», а затем введем com.google.zxing.integration.android в качестве имени пакета.
Шаг 2
Eclipse предлагает несколько способов импортирования существующего кода в проект. В данной статье самым простым методом будет создание двух классов, содержащий код из ZXing. Кликните правой кнопкой мыши по Вашему проекту, выберете «New»->«Class» и введите «IntentIntegrator» в качестве названия класса. Остальные параметры Вы можете не изменять. Как только Вы создали класс, проделайте тоже самое, но назовите класс «IntentResult».
Скопируйте код из обоих классов библиотеки, а затем вставьте его в созданные классы.
Теперь Вы можете подключить файлы в основной класс
Вернемся на минутку и также подключим следующие файлы. Обратите внимание, что Eclipse мог уже их подключить за Вас
Изучите содержание двух классов. Изучив их Вы обнаружите, что они не считывают код. Эти два класса являются просто интерфейсами, предоставляющими доступ к функционалу сканирования.
Сканируем
Шаг 1
Давайте реализуем сканирование, когда пользователь нажимает на нашу кнопку. В главном файле приложения существует метод onCreate, который должен выглядеть примерно так
Перед данной функцией создайте следующие переменные, которые будут хранить нашу кнопку и два текстовых поля, созданных в шаблоне
После существующего кода в onCreate добавьте строки, которые будут инициализировать переменные
Теперь, добавим обработчик нажатия
Расширим класс, чтобы объявить интерфейс OnClickListener
Шаг 2
Теперь, мы можем реагировать на нажатие кнопки началом процесса сканирования. Добавим метод onClick
Проверяем, была ли нажата именно кнопка сканирования
Внутри блока с условием создадим экземпляр класса IntentIntegrator, который мы импортировали
Сейчас, давайте вызовем процедуру, которая начнет сканирование
В данный момент должно начаться распознавание, но только, если у пользователя установлено необходимое приложение. Если его нет, то будет предложено начать загрузку. Результат сканирования будет возвращен приложению.
Обработка результатов сканирования
Шаг 1
Сканер будет запущен, когда нажата кнопка. Затем будет возвращен результат сканирования в метод onActivityResult. Добавим его в наш код
Внутри функции постараемся обработать результат
Шаг 2
Как и любые другие данные, полученные от другого приложения, было бы не плохо проверить, что результат не пуст. Продолжим мы только, если у нас есть правильный результат
Если мы не получили результат сканирования (например, пользователь отменил сканирование), то мы просто выведем сообщение
Вернемся в блок с условием, давайте разберемся с тем, что нам вернула библиотека. Объект Intent Result имеет метод, обеспечивающий получение результата сканирования. Получим результат сканирования, как строку
Также, получим вид barcode
Шаг 3
Теперь, наше приложение имеет всю необходимую для отображения информацию. В нашей статье мы просто отобразим ее пользователю.
Запустите наше приложение на реальном устройстве вместо эмулятора, чтобы увидеть, как работает функционал распознавания штрихкодов. Попробуйте просканировать штрихкод с какой-нибудь книги или любого другого товара.
Результаты сканирования
Источник
Scan Barcodes with ML Kit on Android
You can use ML Kit to recognize and decode barcodes.
There are two ways to integrate barcode scanning: by bundling the model as part of your app, or by using an unbundled model that depends on Google Play Services. If you select the unbundled model, your app will be smaller, however the bundled model has performance advantages over the unbundled model. See the table below for details.
| Feature | Unbundled | Bundled |
|---|---|---|
| Implementation | Model is dynamically downloaded via Google Play Services. | Model is statically linked to your app at build time. |
| App size | About 600 KB size increase. | About 3.2 MB size increase. |
| Initialization time | Might have to wait for model to download before first use. | Model is available immediately. |
| Performance | V1 model. | V3 model is faster and more accurate. V3 model detects more correct results from bad-quality inputs and have more stable bounding boxes in streaming mode. Recall is improved by 17.1%. |
- Play around with the sample app to see an example usage of this API.
- See the Material Design showcase app for an end-to-end implementation of this API.
Before you begin
- In your project-level build.gradle file, make sure to include Google’s Maven repository in both your buildscript and allprojects sections.
- Add the dependencies for the ML Kit Android libraries to your module’s app-level gradle file, which is usually app/build.gradle . Choose one of the following dependencies based on your needs:
For bundling the model with your app:
For using the model in Google Play Services:
If you choose to use the model in Google Play Services, you can configure your app to automatically download the model to the device after your app is installed from the Play Store. To do so, add the following declaration to your app’s AndroidManifest.xml file:
If you don’t enable install-time model downloads, the model is downloaded the first time you run the scanner. Requests you make before the download has completed produce no results.
Input image guidelines
For ML Kit to accurately read barcodes, input images must contain barcodes that are represented by sufficient pixel data.
The specific pixel data requirements are dependent on both the type of barcode and the amount of data that’s encoded in it, since many barcodes support a variable size payload. In general, the smallest meaningful unit of the barcode should be at least 2 pixels wide, and for 2-dimensional codes, 2 pixels tall.
For example, EAN-13 barcodes are made up of bars and spaces that are 1, 2, 3, or 4 units wide, so an EAN-13 barcode image ideally has bars and spaces that are at least 2, 4, 6, and 8 pixels wide. Because an EAN-13 barcode is 95 units wide in total, the barcode should be at least 190 pixels wide.
Denser formats, such as PDF417, need greater pixel dimensions for ML Kit to reliably read them. For example, a PDF417 code can have up to 34 17-unit wide «words» in a single row, which would ideally be at least 1156 pixels wide.
Poor image focus can impact scanning accuracy. If your app isn’t getting acceptable results, ask the user to recapture the image.
For typical applications, it’s recommended to provide a higher resolution image, such as 1280×720 or 1920×1080, which makes barcodes scannable from a larger distance away from the camera.
However, in applications where latency is critical, you can improve performance by capturing images at a lower resolution, but requiring that the barcode make up the majority of the input image. Also see Tips to improve real-time performance.
1. Configure the barcode scanner
For example, to detect only Aztec code and QR codes, build a BarcodeScannerOptions object as in the following example:
Kotlin
The following formats are supported:
- Code 128 ( FORMAT_CODE_128 )
- Code 39 ( FORMAT_CODE_39 )
- Code 93 ( FORMAT_CODE_93 )
- Codabar ( FORMAT_CODABAR )
- EAN-13 ( FORMAT_EAN_13 )
- EAN-8 ( FORMAT_EAN_8 )
- ITF ( FORMAT_ITF )
- UPC-A ( FORMAT_UPC_A )
- UPC-E ( FORMAT_UPC_E )
- QR Code ( FORMAT_QR_CODE )
- PDF417 ( FORMAT_PDF417 )
- Aztec ( FORMAT_AZTEC )
- Data Matrix ( FORMAT_DATA_MATRIX )
Note: For a Data Matrix code to be recognized, the code must intersect the center point of the input image. Consequently, only one Data Matrix code can be recognized in an image.
2. Prepare the input image
You can create an InputImage object from different sources, each is explained below.
Using a media.Image
To create an InputImage object from a media.Image object, such as when you capture an image from a device’s camera, pass the media.Image object and the image’s rotation to InputImage.fromMediaImage() .
If you use the CameraX library, the OnImageCapturedListener and ImageAnalysis.Analyzer classes calculate the rotation value for you.
Kotlin
If you don’t use a camera library that gives you the image’s rotation degree, you can calculate it from the device’s rotation degree and the orientation of camera sensor in the device:
Kotlin
Then, pass the media.Image object and the rotation degree value to InputImage.fromMediaImage() :
Kotlin
Using a file URI
To create an InputImage object from a file URI, pass the app context and file URI to InputImage.fromFilePath() . This is useful when you use an ACTION_GET_CONTENT intent to prompt the user to select an image from their gallery app.
Kotlin
Using a ByteBuffer or ByteArray
To create an InputImage object from a ByteBuffer or a ByteArray , first calculate the image rotation degree as previously described for media.Image input. Then, create the InputImage object with the buffer or array, together with image’s height, width, color encoding format, and rotation degree:
Kotlin
Using a Bitmap
To create an InputImage object from a Bitmap object, make the following declaration:
Kotlin
The image is represented by a Bitmap object together with rotation degrees.
3. Get an instance of BarcodeScanner
Kotlin
4. Process the image
Kotlin
5. Get information from barcodes
Kotlin
Tips to improve real-time performance
If you want to scan barcodes in a real-time application, follow these guidelines to achieve the best framerates:
Don’t capture input at the camera’s native resolution. On some devices, capturing input at the native resolution produces extremely large (10+ megapixels) images, which results in very poor latency with no benefit to accuracy. Instead, only request the size from the camera that’s required for barcode detection, which is usually no more than 2 megapixels.
If scanning speed is important, you can further lower the image capture resolution. However, bear in mind the minimum barcode size requirements outlined above.
If you are trying to recognize barcodes from a sequence of streaming video frames, the recognizer might produce different results from frame to frame. You should wait until you get a consecutive series of the same value to be confident you are returning a good result.
The Checksum digit is not supported for ITF and CODE-39.
Except as otherwise noted, the content of this page is licensed under the Creative Commons Attribution 4.0 License, and code samples are licensed under the Apache 2.0 License. For details, see the Google Developers Site Policies. Java is a registered trademark of Oracle and/or its affiliates.
Источник


