- iOS 15.1/14/13.7 Restore iPhone using Finder on macOS Monterey/Big Sur/Catalina [Easy Way]: iPhone XR, iPhone XS Max/X/8/7/6S
- Steps for Update or Restore iPhone Using Finder on Mac
- Video Walkthrough Guide on Restore iOS/iPadOS and Restore Latest Backup
- Or Another Way is to Restore iOS using Clean install: [Skip This if you haven’t any problem in Restore File]
- Troubleshooting:
- jaysukh patel
- How to Restore IPSW with/without iTunes
- What is IPSW?
- How to Use IPSW File to Restore/Update iPhone with iTunes
- How to Perform IPSW Restore without iTunes?
- Wrap It Up
- The Best IPSW Restore Tool
- Q. Why You Need Manually Restore iPhone using IPSW File
- Option 1. How to Use iTunes to Restore IPSW File
- Step 1: Download an IPSW File
- Step 2: Use iTunes to restore IPSW file
- The Disadvantage of using iTunes to Restore IPSW File
- Option 2. The Best IPSW Restore Tool — iMyFone Fixppo
- Proven Ways to Restore Unsigned IPSW
- Is It Possible to Restore To Unsigned IPSW?
- What is Unsigned IPSW?
- Restore Unsigned IPSW Using SHSH2 Blobs
- Restore Unsigned IPSW by FutureRestore
- Bonus: How to Downgrade iOS with WooTechy iMaster
- Conclusion
iOS 15.1/14/13.7 Restore iPhone using Finder on macOS Monterey/Big Sur/Catalina [Easy Way]: iPhone XR, iPhone XS Max/X/8/7/6S
Last Updated on Jul 31, 2021
Find the Steps by Step Guide for Install iOS or Restore iPhone using Finder on mac Until now, We use iTunes, But No iTunes on Mac With the Release of macOS Catalina or later all macOS, So we must use Finder on Mac to Restore, Update, Backup [Manage Backups] for iPhone/iPad/iPod touch. Here in this article learn how to install New iOS copy or Restore iOS device Using Finder. This tutorial also covers iOS installation problem, Failed iOS 15 install, Stuck on Update iOS 15, iOS 15 Stuck on Apple Logo on your iPhone XS Max, iPhone Xs, iPhone XR, iPhone X, iPhone 8, iPhone 8 Plus, iPhone 7, iPhone 7 Plus, iPhone 6S/6S Plus, iPhone 6 and iPad.
we are happy to help you, submit this Form, if your solution is not covered in this article.
Now getting back to the title, you are looking for how to restore iPhone on mac Without iTunes, isn’t it? For that also macOS Catalina or later macOS is necessary. I guess you have installed the macOS on your Mac and now, see the restoring process of the iPhone in macOS.
Steps for Update or Restore iPhone Using Finder on Mac
Video Walkthrough Guide on Restore iOS/iPadOS and Restore Latest Backup
Step #1: Connect iPhone to Mac, using the original Lightning cable.
Step #2: Open the “Finder”.
Step #3: Now, on the left side panel, under Locations, select your iPhone. [Unlock the device with a passcode on iPhone/iPad to allow access on Mac]
Step #4: Click on “Pair” to proceed.
Step #5: On your iPhone, you will be asked to Trust the Computer, tap “Trust”.
Step #6: Type in the Passcode of the iPhone.
Step #7: Next, on Mac, click on “Get Started”.
Step #8: There you can see, Restore and Update, Press Option on Keyboard and click on “Restore iPhone”.
Update iPhone/iPad: Without Erase your Device, Update iOS to iOS 15 on your iPhone and iPad. Use Option Key from Keyboard + click on the Update iPhone button.
Or Another Way is to Restore iOS using Clean install: [Skip This if you haven’t any problem in Restore File]
Restore iPhone/iPad: This Option is for Factory Restore, Clean install New ipsw file of iOS 15 on your iPhone or iPad. Use Options Key From Keyboard + Click on the Restore iPhone button.
Step #9: When pop-up asks you to Browse the Downloaded ipsw file for iPhone, allow Mac to proceed.
After that, your iPhone will reboot and Show Lightning cable with the iTunes logo. So don’t interrupt the installation process by press any switch or close finder. Also, Wait for long.
- if your iPhone will go from finder during restart time, Wait it will back in your Finder’s Sidebar.
Keeps your iPhone connected until you see the iPhone Lock screen or Welcome screen.
Troubleshooting:
The iPhone Could not be updated. The Server returned an internal error. : Restart your Mac, Open Host file, and add # in the line of apple.com after that reboot your Mac and iPhone.
Also, Check you have a working internet connection on iPhone and Mac.
Also, check Apple Server status, Go google for that and find what is the status in your region.
NOTE: For now this is the only way left for us to install iOS 15 betas on iPhone. Hopefully, Apple will consider this lengthy procedure and look forward to resuming the over-the-air install button on Profile. So that we could easily install new updates on the iPhone.
Finally, you have restored iPhone to iOS 15 beta, congratulations for that! Also, in case if you don’t like iOS 13 beta and want to downgrade the iPhone from iOS 15 beta to iOS 14, then we have got you the way out.
Share your Problem with us we are happy to help you if you having issues on installing iOS 15 ipsw file on iPhone, iPad on MacOS Monterey/Catalina using Finder.
jaysukh patel
Jaysukh Patel is the founder of howtoisolve. Also self Professional Developer, Techno lover mainly for iPhone, iPad, iPod Touch and iOS, Jaysukh is one of responsible person in his family. Contact On: [email protected] [OR] [email protected]
Источник
How to Restore IPSW with/without iTunes
In our digital life, there are a lot of situations that we will need to install IPSW file on iPhone, iPad or iPod touch, like, update iOS system, restore unsigned ipsw without iTunes, downgrade iOS, repair iOS issues, restore device to factory reset and so forth. At the very beginning, we’d better figure out what the IPSW is.
What is IPSW?
IPSW file is the raw iOS software for iPhone, iPad, and iPod touch, which is normally used in iTunes to install iOS firmware. And iTunes utilizes the IPSW file format to store iOS firmware to restore any device to its original state. In the following, we will show you how to install iOS manually with IPSW.
How to Use IPSW File to Restore/Update iPhone with iTunes
Now follow the guide below to learn how to restore iPhone with IPSW:
- Step 1: Download the IPSW file you want from here.
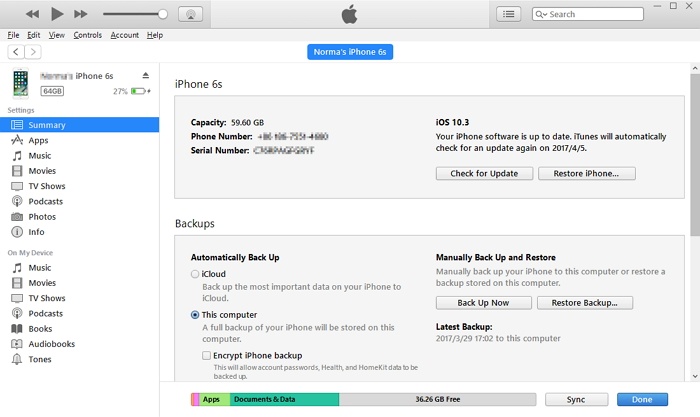
- Step 2: Open iTunes. Select your device by clicking the «device» icon. In the Summary panel hold the Option key and click Update or Restore if using a Mac, or hold the Shift key and click Update or Restore if using a Windwos PC.
Step 3: Now select your IPSW file. Browse for the download location, select the file, and click Choose. Your device will update as if the file had been downloaded through iTunes.
- 1. Unsigned IPSW files are not supported. No tools in the market supports to restore unsigned IPSW files.
- 2. Before updating or restoring iOS with IPSW, we highly recommend you backup your files beforehand because the data will be wiped out after restoring from IPSW files. You can use Apple’s backup methods to backup to iPhone or iCloud. Also, there are lots of free iPhone backup software that let you backup your files more flexibly.
How to Perform IPSW Restore without iTunes?
Have you met situations like, iTunes won’t let you restore iPhone from IPSW file, or your iPhone/ipad might got stuck when you are trying to restore or update them from IPSW, or see an error when using iTunes? You can try to restore iPhone from IPSW without iTunes by using iPhone restore tool — UltFone iOS System Repair, a profesional IPSW restore tool that empowers you to restore iPhone/iPad with the latest IPSW file and thus fix various iOS system issues like iPhone black screen of death, Apple logo loop, iPhone frozen, iPhone stuck in recovery mode, and more.
Download and install this iOS firmware restore tool free to your PC or Mac computer, and follow the steps to restore IPSW without iTunes.
Step 1 Launch this IPSW restore tool and connect your iPhone to computer. Click «Start» on the main interface to enter iOS system restore function.
Step 2 On the following screen, you can select the repair mode. I recommend you to use «Standard Repair» because it won’t cause losing data while restoring iPhone using IPSW file.
Step 3 By default, this program will display the latest signed IPSW file that matches your device. You can click «Download» button to start downloading the IPSW file online.
Step 4 After downloading. Hit «Start Standard Repair» to start installing the IPSW file to your iPhone and fixing the iOS problems.
Step 5 Once the repair is done, your iPhone/iPad will automatically reboot and everything will get back to normal.
Wrap It Up
Here in this article we introduces two methods to install IPSW file to iPhone/iPad. The method of using iTunes allows you to restore iPhone with IPSW file but will cause data loss and the operations are a bit complicated to beginners. So, it is recommended to free download this best IPSW restore tool to restore your iPSW files without iTunes. Enjoy!
Источник
The Best IPSW Restore Tool
home_icon Created with Sketch.
Home > iPhone Issues > The Best IPSW Restore Tool
![]()
February 6, 2019 (Updated: August 2, 2021)
1785 views , 5 min read
Things aren’t always happening as planned when upgrading your iDevice to a different iOS version. Well, you ought to do it another way around by restoring the iPhone using an iPSW file. For that purpose, perhaps you’re going to wonder about the best iPSW restore tool, right! In today’s write-up, we’re going to help you discover not just the best iPSW restore tool, but also going to equip you with the step by step procedure to restore iPhone using iPSW file, sounds good? Keep reading.

Q. Why You Need Manually Restore iPhone using IPSW File
Whether you failed to update or restore your device in a normal way, or you don’t like the latest iOS version (now it is iOS 15 beta 3/2/1) on your device, you can choose to restore iPhone using IPSW file. iPhone restoring is a common phenomenon for such scenarios, but it is not very easy to manually restore iPhone using IPSW file for most people. Here we will tell you how to do it and introduce the best tool to achieve the purpose.
Option 1. How to Use iTunes to Restore IPSW File
Step 1: Download an IPSW File
In order to download the IPSW file, you need to follow specific steps. Here are they –
- Browse https://ipsw.me/ and click on your product type. Here you tap on ‘iPhone’.
- Then, you got to select the iPhone model, so hit on your iPhone model on the list.
- Now, select an iOS version from the ‘Signed IPSW’ list. Once you tap it you will navigate to the ‘Download’ screen.
- Hit ‘Download’ here and wait while the iOS for your iPhone gets downloaded.
This can be used with a reliable IPSW restore tool to properly restore your iPhone.

Step 2: Use iTunes to restore IPSW file
Once you get hold of this IPSW file on your computer. You can use it to restore the iPhone with iTunes. Make sure that you have updated iTunes to the freshest version.
For your information, restoring iPhone using IPSW file with iTunes can be done this way –
- Launch iTunes and then connect your iPhone to the system.
- Tap on the ‘Device’ icon over iTunes.
- For Mac press the ‘Option’ key and tap ‘Update’ or ‘Restore’. If you have a Windows PC, hold ‘Shift’ and press ‘Update’ or ‘Restore’.
- Now, pick the recently downloaded IPSW file in the previous guide and hit ‘Choose’.
- Allow your iPhone to update the regular way.
Please note that unsigned IPSW files are not supported. No tools in the market support to restore unsigned IPSW files.
The Disadvantage of using iTunes to Restore IPSW File
- This is not the normal operation when using iTunes, so it could be many errors.
- The steps are complicated and not user-friendly for the people who know nothing about technology.
- It’s time-consuming.
Option 2. The Best IPSW Restore Tool — iMyFone Fixppo
When it comes to restoring iPhone using IPSW file, we recommend that you use iMyFone Fixppo.
- It is very easy to use. You just need to choose the version you like and with some clicks, you can restore the IPSW file to your device.
- You can enjoy a 100% success rate for performing this.
- It offers all the available IPSW files for all the iOS devices including the latest iPhone 12 and supports all iOS versions including iOS 15 beta 3/2/1.
- It applies different technology from iTunes, so it could bypass many iTunes errors.
Here is how to restore iPhone using IPSW file in iMyFone Fixppo:
Step 1:В Download, install and launch iMyFone Fixppo (iOS System Recovery). Hit the ‘Standard Mode’ tab (No Data Loss) or ‘Advanced Mode’ tab (Erase All Data) on the program interface and then connect your iPhone. Press the ‘Next’ button afterward.
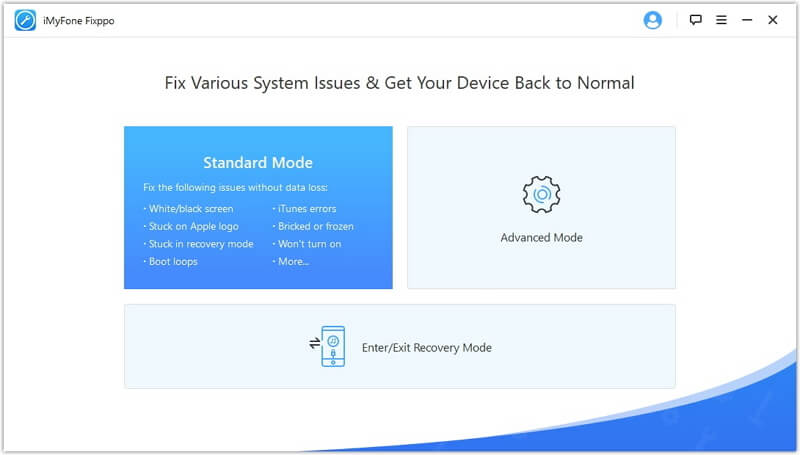
Note: In case, your iPhone is not detected by the program, you need to put the device into DFU or Recovery mode following the onscreen guide or use the feature Enter/Exit Recovery Mode.
Step 2:В Now, Fixppo will detect the available firmware versions for your iPhone. Choose the desired one under the ‘Firmware Version’ drop-down menu and hit the ‘Download’ button.
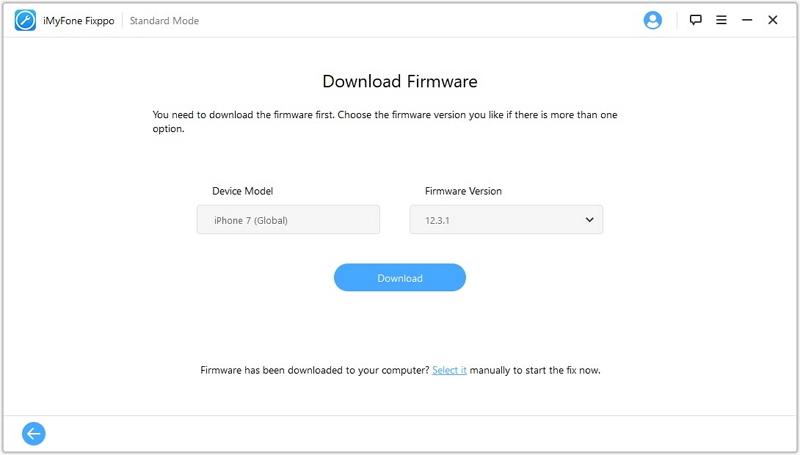
Step 3:В When the firmware has been downloaded properly, you can hit the ‘Start’ button. It will install the IPSW file on your device within 10 munites.
You can also check other users’ feedback before making your decision.
Источник
Proven Ways to Restore Unsigned IPSW

Apr 18, 2021 (Updated: Nov 15, 2021) • Filed to: Downgrade iOS
6K views, 7 min read
As Apple releases new iOS software versions, it also stops signing some older versions. This means sooner or later, your current iOS version will no longer be supported, and you may have to upgrade to a newer iPhone firmware version.
But every iOS update comes with its downsides. While the 14.4.2 version update fixes some performance issues introduced by earlier versions, the update also caused new problems like short battery lifespan, iPhone freezes, and charging issues.
One way to solve update-related issues on iOS is to move back to a known stable version, in other words, downgrade to unsigned iOS version. But what if Apple has stopped signing a version you intend to move back to? You might be wondering whether it’s possible to restore unsigned IPSW of that said version. Regardless of what you think, let’s find out.

Bonus: How to Downgrade iOS with WooTechy iMaster 
Is It Possible to Restore To Unsigned IPSW?
Yes, you can restore your iOS device to an unsigned IPSW firmware, but not in the traditional way. Usually, when you want to upgrade or downgrade to an iOS version using the IPSW restore file, you will do so through iTunes.
During the downgrade process, iTunes will make some verifications and checks with Apple servers to ensure you are restoring a signed IPSW file. Anyone trying to work with unsigned IPSWs firmware will only get you an error message.
To upgrade or downgrade to a previous iOS firmware that has stopped being signed by Apple, part of the requirements are a third-party restore app, the destination unsigned iOS IPSW file, and its SHSH blob file. You will learn more about these requirements in this blog. So keep reading.
What is Unsigned IPSW?
IPSW is the file extension of Apple’s iPhone mobile operating system. An unsigned IPSW means Apple has stopped supporting the iOS version. iOS users wouldn’t be able to use iTunes to restore to an unsigned firmware.
Apple periodically unsigns iOS version because of security issues and to encourage users to make use of additions newer updates have to offer.
Regardless of the reason and as we mentioned earlier, new versions of iOS software often cause unpleasant experiences to device performance and features. To resolve firmware update bugs and issues, reverting to a previous stable iOS version might be the solution.
Restore Unsigned IPSW Using SHSH2 Blobs
You learned earlier that it is possible to restore unsigned IPSWs with the help of SHSH2 Blobs. These blob files are the digital signatures that Apple places on each IPSW firmware file for each iOS device. When Apple stops signing a particular firmware, it removes the sign (signature) from the firmware so users won’t be able to upgrade or downgrade to it.
Note: You must have saved a blob (digital signature) file of the iOS version you want to restore while the version is still being signed by Apple. Once Apple stops signing an iOS firmware version, the signature is removed, and then, you can’t restore the firmware.
Online tools like TTS Saver can help with blob saving. You can start saving the digital signature of your current iOS firmware now for possible future use. For how to save and restore SHSH2 blob files, see the steps below. You’ll find this useful when restoring iOS.
Step 1: Connect your iPhone to your Mac or Windows computer using a data transfer cable.
Step 2: Open iTunes on your PC and navigate to the iPhone device information page by clicking the mobile icon at the top screen. Keep clicking on Serial Number until ECID appears. Copy the value next to it.
 How to Save SHSH2 Blob File Using TSS Saver
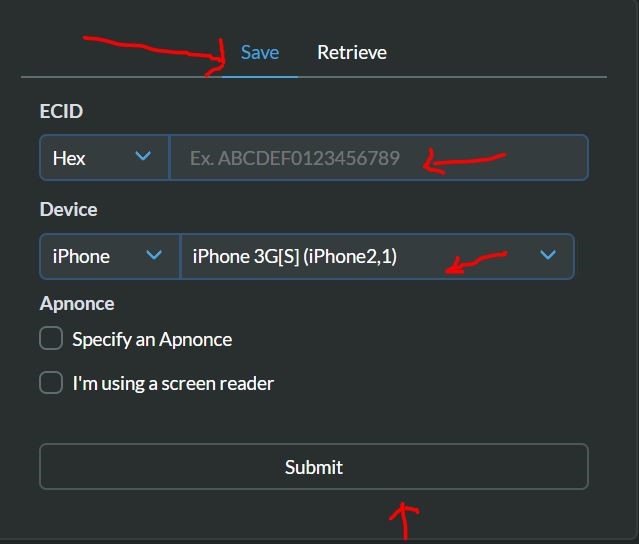
Step 3: Go to this website. Enter your ECID, choose your iPhone model and click «Submit«. The online tool will automatically save the blob of all available iOS firmware for your iPhone device and provide you with an option to download any of them.
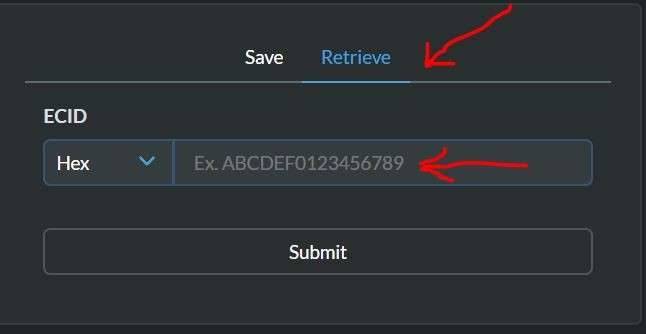
How to Retrieve a Blob File With TSS Saver
Step 4: Referring to the image below, insert your ECID value and click submit to see all blob files you’ve previously saved.
With your blob files ready, you’re only halfway through completing how to downgrade to unsigned iOS. That said, follow the instructions in the next section to discover how to use FutureRestore to complete unsigned iOS restore.
Restore Unsigned IPSW by FutureRestore
FutureRestore is a tool developed for iOs users who want to restore, upgrade, or downgrade to any iOS version that is no longer signed by Apple. But FutureRestore can’t do the job alone. It needs the help of other files — the destination unsigned iOS IPSW file you’re moving to and the blob file of that said destination iOS firmware.
To downgrade to unsigned IPSW file using FutureRestore, follow the steps below:
Requirements:
A more recent version of the Futurerestore.
The IPSW file of the unsigned iOS you’re restoring to.
The blob file of #2 (which you’ve learned how to save and retrieve in the previous section).
With all these requirements set, continue with the instructions below.
Step 1: Connect your iPhone to your PC, making sure your PC has an Internet connection.
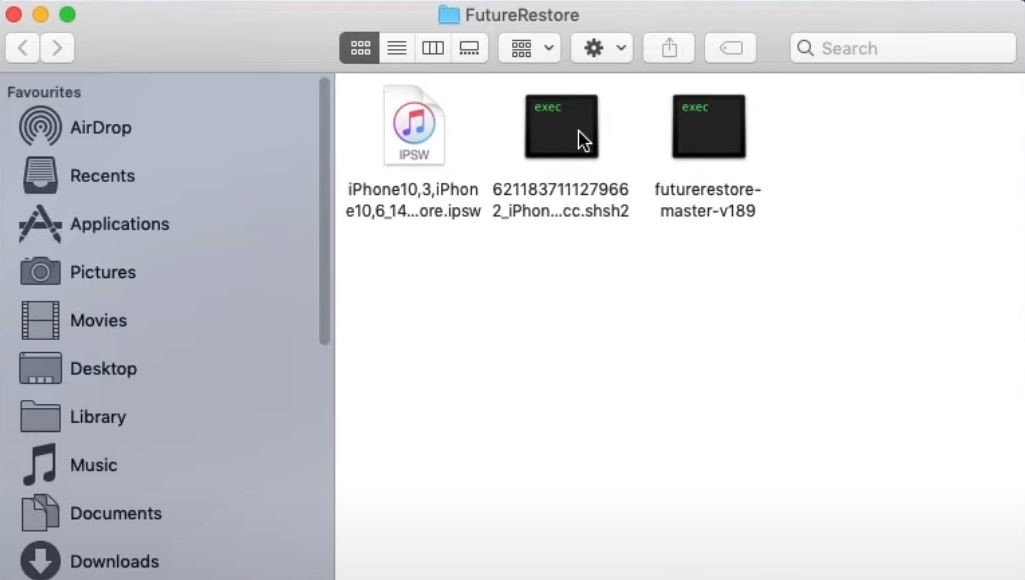
Step 2: Put all the 3 items listed in the requirements into one folder.
Step 3: Open up Terminal on your Mac computer or Command Prompt (for Windows users).
Step 4: Drag the unarchived FutureRestore file into Terminal and type -t.
Step 5: Next, drag the blob file into the Terminal interface and type —latest-sep —latest-no-baseband (if your iPhone is not sim-enabled) or —latest-sep —latest-baseband (if your iPhone uses sim).
Step 6: Drag the unsigned iOS firmware into the Terminal screen as well. After performing steps #4 through #6, your terminal or Command Prompt interface should look like the one in the image below.
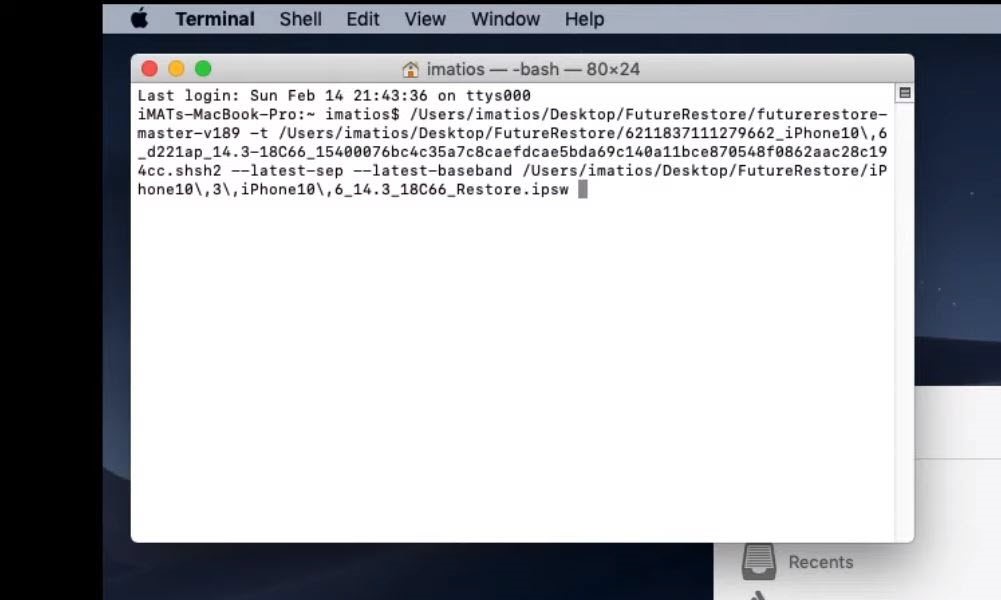
Step 7: Press enter and let the downgrade process begin and complete.
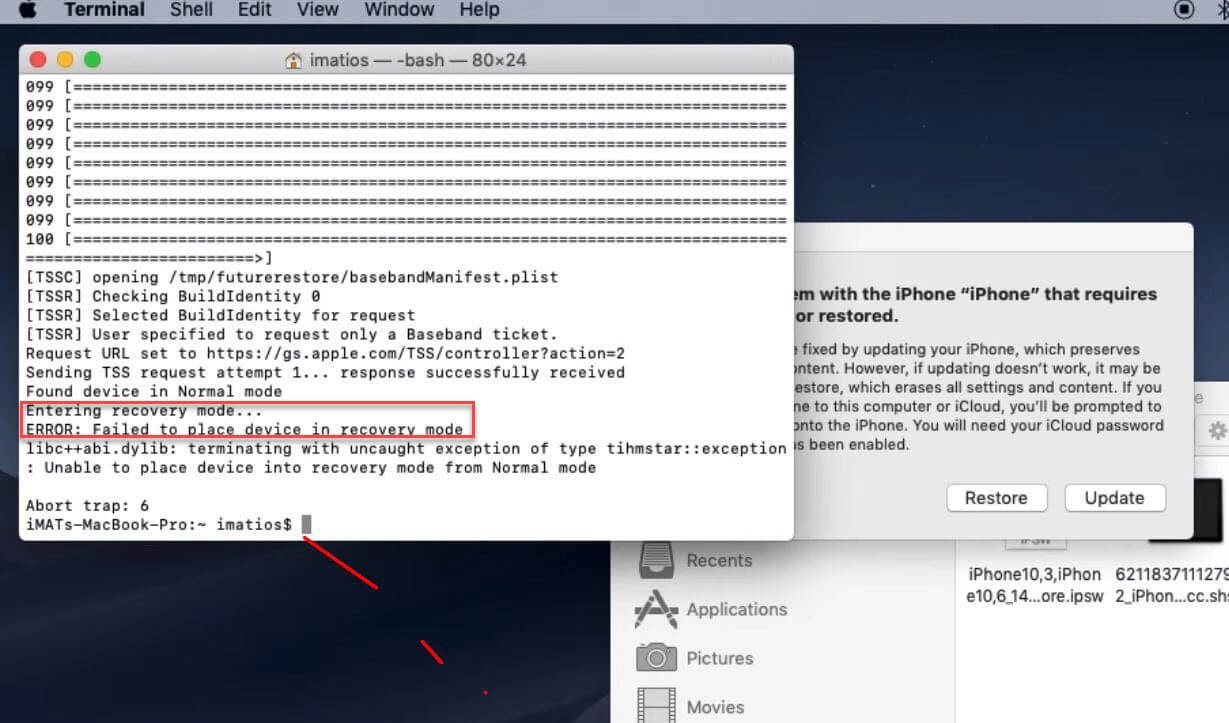
Step 8: If the log on the Terminal screen indicated that the process is stuck and failed at recovery mode, simply reenter the line of codes and try again.
Bonus: How to Downgrade iOS with WooTechy iMaster
Although you can use methods above to downgrade iOS, its still risky and terribly complicated. If you don’t want to deal with any technical process, you may turn to WooTechy iMaster, which offers a surprisingly easy solution to downgrade your iOS.

Great Features of WooTechy iMaster
User-friendly, without any technical knowedge required to downgrade iOS.
Easy to downgrade and upgrade, with no risk of losing data at all.
Free to back up and upgrade, during which you can check the compability.
Able to downgrade the newest iOS 15 to previous iOS 14.
Video tutorial for iOS downgrade:

Here are the steps to downgrade iOS with iMaster:
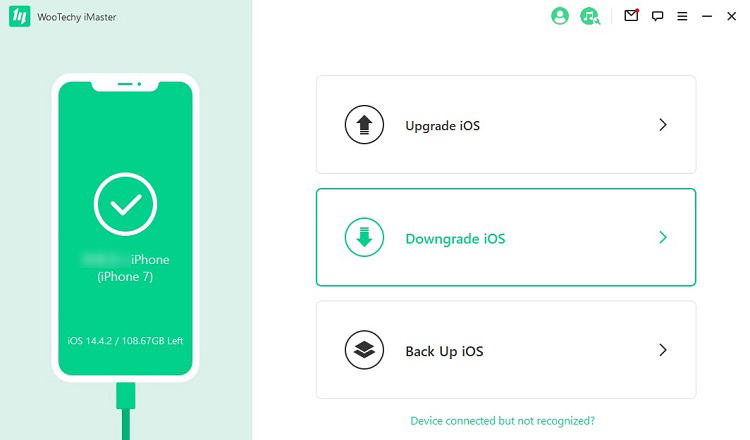
Step 1: Download and launch WooTechy iMaster. Conect your iOS device to your computer via USB, and select «Downgrade iOS» mode.
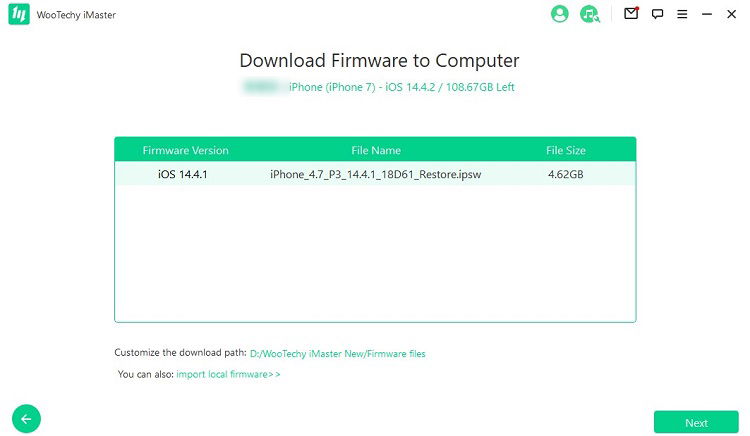
Step 2: The program will then prompt you to choose a firmware version you need. Note that you can customize the firmware download path here and import local firmware. Click «Next» to start downloading the firmware to computer.
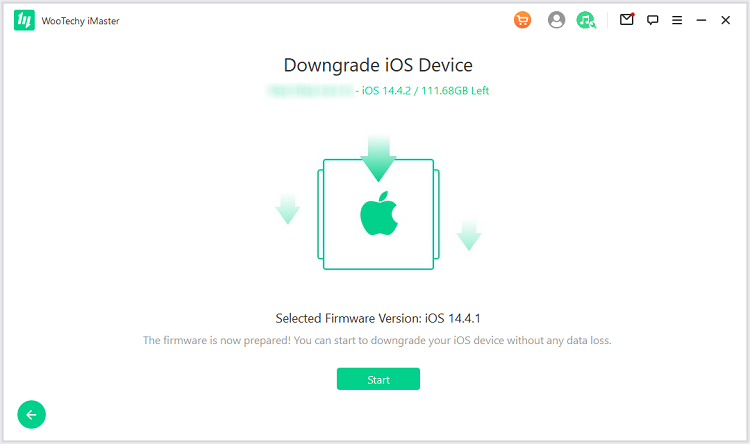
Step 3: Once the firmware is downloaded and verified, your device is then well-prepared for downgrade. Click «Start» to proceed.
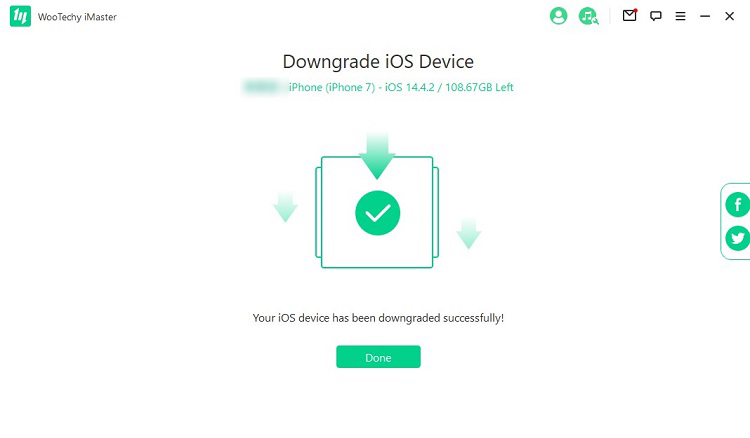
Step 4: You will see a prompt saying «downgraded successfully«. Just click «Done» to finish the downgrade process.
Conclusion
Apple periodically stops signing previous iOS versions when new versions are rolled out. This blog, however, has helped you see that you can still restore unsigned IPSW if you saved it with an online tool like TTS Saver. With your blob file and the unsigned firmware ready, you can make use of the FutureRestore tool to move back to your favorite, buggy-free iOS version.
In addition, as a professional software designed for the iOS downgrade and upgrade, WooTechy iMaster can help downgrade your iOS device even from the newest iOS 15 to iOS 14 in a few clicks. If you and found this post useful, share it with those who might be looking for a resource like this. And don’t hesitate to drop any questions or feedback you might have.
Источник


