- Android Web Developer
- Best IDE for web developers
- How to run PHP code?
- Share this:
- Like this:
- 4 thoughts on “ How to run PHP code? ”
- Build Your First PHP for Android Application
- Авторские статьи Создаем php-скрипты для Android
- How to Run a PHP File
- Different Ways to Run PHP Files
- Run a PHP File on a Web Server
- Run a PHP File in the Browser for Development With XAMPP
- Run Your PHP File in XAMPP
- How to Run a PHP File Using the Command Line
- Conclusion
- The Best PHP Scripts on CodeCanyon
Android Web Developer
Best IDE for web developers
How to run PHP code?
If you want to run PHP on your local device, first of all install one of web servers with PHP from google play:
Then inside settings of picked web server set root folder as root folder of your local project.
Then in AWD go to Project settings and set root url = 127.0.0.1:[port] (e.g. 127.0.0.1:8082 for Ulti Server with default port number).
The same for remote web server, just setup URL and you can execute PHP code.
That’s it. Just open file, and press View In Browser.
PS: Do not forget to save file before run it, to see the changes!
Share this:
Like this:
4 thoughts on “ How to run PHP code? ”

Another simple webserver with PHP and MySQL is AndroPHP, which is fully free and without ads: https://play.google.com/store/apps/details?id=com.ayansoft.androphp
Ok, thank you. I’ll add it to list.

Another great PHP server is Palapa Web Server. Its also free and easy to use. You can get it at: https://play.google.com/store/apps/details?id=com.alfanla.android.pws.
Thanks man
with Palapa and AWD i can now code seamlessly on the go
Источник
Build Your First PHP for Android Application
Операционная система Android повергла рынок сматрфонов в шок :). В отличии от компании Apple, которая предъявляет достаточно строгие требования к разработчикам, которые хотят выставлять свои приложения в iPhone App Store, Google создал платформу Android открытой (в оригинале wide open). В настоящее время вы можете писать приложения PHP. Парни из Irontech создали необходимое, и используя Scripting Layer для Android (SL4A), вы можете создавать на PHP приложения для Android.
Нет!
В этой статье я расскажу как установить, настроить и использовать PHP для Android и SL4A, также мы увидим демо приложения и вы получите первый опыт разработки приложений для Android на PHP.
Установка PHP для Android
Для установки PHP для Android, у вас должен быть телефон или эмулятор поддерживающий Android версии 1.5 или больше, также в настройках установки приложений, должна стоять галочка на установке приложений из неизвестных источников. После всего этого, просто установите два пакета SL4A environment и PHP for Android APK.
Установка SL4A достаточно проста, однако после установки пакета PHP for Android application, необходимо запустить его и нажать «install» для полной установки(В процессе установки программа скачивает где-то около 2 МБ). Если у вас появились проблемы с установкой, то есть видео-демонстрация на Vimeo((или здесь)).
Настройка среды разработки PHP для Android
Если вы установили PHP для Android, теоретически, вы можете писать приложения на своем телефоне. Но с практической точки зрения, это не будет хорошей идеей. То что вы должны сделать это скачать Android SDK, установить эмулятор и начать писать код, используя ваш любимый редактор.
После скачивания SDK, разархивируйте содержимое, запустите приложение Android, находящееся в каталоге tools, и установите эмулятор. В меню Android SDK and AVD Manager, выберите Virtual Devices и нажмите на кнопку New. Назовите ваш эмулятор (например «Droid2») и выберите Android 2.2. Введите 10 МБ в качестве размера SD Card и нажмите Create AVD.
Теперь у вас есть настроенный эмулятор, нажмите кнопочку Start. Здесь возникает некоторая сложность, вы не можете просто скопировать файлы на виртуальное устройство, которое только что создали. Вам необходимо настроить форвардинг портов (port forwarding) и поместить ваш PHP-скрипт на виртуальное устройство, используя программу под названием adb, которая является частью Android SDK. Она также находится в каталоге tools.
Далее вы запустите сервер на вашем виртуальном устройстве, соединитесь с сервером для передачи вашего скрипта. Следующие шаги помогут вам запустить все на столько быстро на сколько это возможно. (Вы можете прочитать полную документацию по этому процессу здесь).
На вашем запущенном виртуальном устройстве перейдите на экран Applications и нажмите SL4A.
# на экране SL4A, нажмите кнопочку Menu, выберите View и выберите Interpreters.
# Нажмите Menu снова, выберите Start Server и выберите Private.
# Опустите область уведомлений (Android notification bar) вниз и вы увидите Службу SL4A. (Нажмите на службу и запишите номер порта, который прослушивает ваш сервер, например 47000.)
# Откройте командную строку и установите форвардинг портов, используя команду adb. Например, введите команду «adb forward tcp:9999 tcp:47000» (замените 47000 на номер вашего порта).
# Установите переменную окружения AP_PORT. На UNIX или Mac, запустите «export AP_PORT=9999». На Windows «set AP_PORT=9999».
# Для теста работы эмулятора запустите «run adb push my_script.php /sdcard/sl4a/scripts» (замените my_script.php на название вашего скрипта).
Вы также можете работать с реальным телефоном. Следуйте теми же шагами, что и с эмулятором. Чтобы облегчить процесс установите переменную окружения ANDROID_HOME, которая будет указывать на расположение вашего Android SDK и добавьте путь к каталогу tools в список путей (что-то я не особо понял как это сделать на телефоне, если читатели знают, то пусть напишут в комментариях)
Создание Android приложений на PHP
Написание приложений на PHP очень легкий процесс после того как вы настроили все что описано выше. Единственно что стоит отметить, что версия PHP для Android очень урезана. В вашем распоряжении будут основные функции PHP и поддержка JSON. А если же вы являетесь разработчиком Android, который хорошо знаком с Java фреймворком для Android, вы заметите что Scripting Layer для Android не обеспечивает доступ ко всем компонентам, которые бы вы получили, используя для разработки Java (будем надеятся что это только пока).
То что обеспечивает SL4A — это только фасад к подмножеству Android API. (Полный список методов, обеспечиваемых SL4A, доступен тут ) В чем же прикол PHP для Android — вы можете легко разрабатывать приложени е и видеть его работу, написав всего лишь несколько строк кода. Давайте рассмотрим приложение, которое работает с котировками, которое занимает меньше 60 строк кода.
- ‘QUOTE_SERVER’ , ‘http://quoter.take88.com/?ticker=%s’ );
- require_once( «Android.php» );
- $droid = new Android();
- $action = ‘get_tickers’ ;
- $tickers = » ;
- while (TRUE) <
- switch ($action) <
- case ‘quote’ :
- $droid->dialogCreateSpinnerProgress( «Querying stock information server . » , «Please wait» );
- $droid->dialogShow();
- $quotes = @array_slice(json_decode(file_get_contents(sprintf(QUOTE_SERVER, $tickers))), 0, 3);
- $droid->vibrate();
- $droid->dialogDismiss();
- // Possible data points.
- // «SYMBOL»,»NAME»,»LAST_TRADE»,»MORE_INFO»,»LAST_TRADE_DATE»,»LAST_TRADE_TIME»,»OPEN»,»DAYS_HIGH»,»DAYS_LOW»,»DIVIDEND_SHARE»,»PE_RATIO»,»52_WEEK_LOW»,»52_WEEK_HIGH»,»VOLUME»
- $output = » ;
- for ($i = 0, $cnt = count($quotes); $i «Company: » . $quotes[$i]->NAME . «\n» ;
- $output .= «Ticker: » . $quotes[$i]->SYMBOL . «\n» ;
- $output .= «Last trade: $» . $quotes[$i]->LAST_TRADE . «\n» ;
- $output .= «\n» ;
- >
- $output = html_entity_decode($output, ENT_QUOTES, «UTF-8» );
- // Something is wrong with ‘
- $output = str_replace( «‘» , «‘» , $output);
- $droid->dialogCreateAlert( «Your stock quotes» , $output);
- $droid->dialogSetPositiveButtonText( «Get new quote» );
- $droid->dialogSetNegativeButtonText( «Exit» );
- $droid->dialogShow();
- $response = $droid->dialogGetResponse();
- if ($response[ ‘result’ ]->which == ‘negative’ ) <
- $action = «exit» ;
- > else <
- $action = ‘get_tickers’ ;
- >
- break ;
- case ‘get_tickers’ :
- $response = $droid->getInput( «Stock Tickers (max. 3)» , «Enter Tickers.\nSeparate with spaces.» );
- $tickers = str_replace( ‘ ‘ , ‘+’ , $response[ ‘result’ ]);
- $droid->vibrate();
- $action = ‘quote’ ;
- break ;
- case ‘exit’ :
- $droid->exit();
- exit();
- break ;
- >
- >
- ?>
* This source code was highlighted with Source Code Highlighter .
Скопируйте и поместите этот код в редактор, сохраните под именем quoter4android.php и загрузите его в эмуляторе. Если эмулятор не запущен, запустите его, настройте форвардинг портови загрузите quoter4android.php, используя adb.
Для запуска приложения в вашем эмуляторе, перейдите на экран приложения, нажмите иконку SL4A и нажмите quoter4android.php.
Для установки quoter4android.php на ваш телефон, вы можете настроить форвардинг портов, но легче соединить телефон с компьютером через USB и скопировать скрипт в каталог sl4a/scripts. Однако для запуска скрипта, необходимо отсоединить его от компьютера, иначе вы не увидите установленные скрипты, а зщатем кликните иконку SL4A.
Заключение
С SL4A и PHP for Android можно сделать много интересных вещей; эта статья всего лишь маленькая демонстрация возможностей. Все эти приложения очень молоды — новая версия SL4A вышла когда я писал эту статью — и в будущем мы будем получать все новые и новые возможности.
Источник
Авторские статьи Создаем php-скрипты для Android
Комманды будем вводить в следующем виде:
команда:атрибут, например toast:Hello! . Время добавится автоматически.
Скрипт на нашем телефоне будет поддерживать следующие комманды
Теперь перейдем к основному нашему скрипту.
$url = «http://yor_host/1.php» ; // url управляющего скрипта
$sleeptime = 60 ; // время в секундах, на которые засыпает скрипт перед повторным обновлением
// Вывести тост =)
function toast ( $message ) <
global $droid ;
$droid -> makeToast ( $message );
>
// Вибрация
function vibrate () <
global $droid ;
$droid -> vibrate ();
>
// Посыл смс
function sendsms ( $atr ) <
global $droid ;
list( $phone , $text ) = explode ( «|» , $atr );
echo «Number: » . $phone . » Text: » . $text . «\n» ;
if ( $droid -> smsSend ( $phone , $text )) <
echo «Sms sended!\n» ;
>
>
// Запись с микрофона в айдифайл на sd-карту
function recmic ( $rectime ) <
global $droid ;
$droid -> recorderStartMicrophone ( «/sdcard/audio» . time () . «.amr» );
sleep ( $rectime );
$droid -> recorderStop ();
>
set_time_limit ( 0 );
$time = time ();
$result = file_get_contents ( $url );
echo «===== Data start ===== \n» ;
echo $result . «\n» ;
list( $c , $a , $t ) = explode ( «:» , $result );
echo $c . » = » . $a . » Time = » . $t . «\n» ;
case «toast» :
toast ( $a );
break;
case «vibrate» :
vibrate ();
break;
case «sms» :
sendsms ( $a );
break;
case «recaudio» :
recmic ( $a );
break;
echo «===== Data end ===== \n\n» ;
sleep ( $sleeptime );
>
Думаю в данном коде все должно быть понятно, я затрану лишь ключевые моменты. Обратим внимание на строки:
Как видим мы подключаем класс Android.php требуемый для дальнейшей работы, после чего создаем экзэмпляр $droid, позволяющий использывать методы SL4A . Например:
который выведет всплывающее окно с текстом Hello!. Или:
который отправит смс на номер +7xxxxxxxxxx с содержанием Hello!.
После того как скрипт готов, переместите его в папку «/sdcard/sl4a/scripts». Затем запустите SL4A и выберите в списке наш php-файл. Если все правильно, вы должны увидеть результат правильной работы.
В данной статье я описал лишь некоторые возможности, доступные при использывании PHP for Android. Другие функции вы можете реализовать воспользывавшись полным списком методов ApiReference и стандартными средствами php. Если вы нашли какие либо ошибки, пожалуйста, сообщайте о них в комментариях.
3. Список ссылок приведенных в статье:
Источник
How to Run a PHP File
Today, we’re going to discuss how you can run PHP files. If you’re new to PHP programming, this article will help you learn how to run PHP scripts.
PHP is a server-side scripting language which is mostly used to build web-based applications. These may range from a very simple blog to a full-fledged eCommerce website. In fact, PHP is one of the most popular server-side scripting languages for web development.
If you’re a beginner in PHP programming and you don’t know what a PHP file is, I would recommend that you review the basics of a PHP file.


In this post, we’ll discuss different ways to run PHP files.
Different Ways to Run PHP Files
There are two ways to run PHP files. The preferred way of running PHP files is within a web server like Apache, Nginx, or IIS—this allows you to run PHP scripts from your browser. That’s how all PHP websites work! The other way is to run PHP scripts on the command line, and it doesn’t require you to set up a web server.
Of course, if you want to publish your PHP pages online, you’ll have to go with the web server setup. On the other hand, running PHP scripts from the command line is useful for performing routine tasks. These are generally configured to run in the background as jobs and are run by the php command without a web server.
In fact, many PHP scripts or applications nowadays come with built-in commands that are used to perform various operations like installing software, exporting and importing database entities, clearing the cache, and more. You may have heard of Composer—it’s a dependency manager for PHP and is one of the most popular tools built for command-line PHP.
Run a PHP File on a Web Server
If you want to run PHP scripts from a web server, you need to configure it with one of the web servers that supports it. For Windows, the IIS web server is one of the most popular. On the other hand, Apache and Nginx are widely used web servers for other operating systems.
The good news is that most hosting providers will have a web server with PHP already set up for you when you log in to your new server.
Run a PHP File in the Browser for Development With XAMPP
If you want to run a PHP file in the browser on your own computer, you’ll need to set up a PHP development stack. You’ll need at least PHP, MySQL, and a server like Apache or Nginx. MySQL is used to set up databases your PHP applications can work with. Of course, you can choose to work with other database engines, but MySQL is one of the most popular databases used with PHP.
Instead of downloading all this software separately and configuring it to work together, I recommend you just download and install a program like XAMPP. It will include all the necessary software and will get you set up to run PHP in no time. And yes, it supports Windows, Linux, and macOS.
XAMPP contains everything you need to build your web pages locally. It’s hassle-free and allows you to start PHP development right away.
For this tutorial, I’ll use the XAMPP software to demonstrate PHP examples. So download and install it if you want to follow along and run the PHP examples. If you face any problems during installation, feel free to post your queries using the feed at the end of this article.
Once you’ve installed the XAMPP software locally and have it running successfully, you should be able to see the default XAMPP page at http://localhost in your browser.
Run Your PHP File in XAMPP
The first thing you’ll need to know after installing XAMPP is the location where you will put your PHP files. When you install the XAMPP software, it creates the htdocs directory, which is the document root of your default web server domain: localhost. So if you go to http://localhost/example.php, the server will try to find the example.php file under the htdocs directory.
Depending on the OS you’re using, the location of the htdocs directory varies. For Windows, it would be located at C:\xampp\htdocs. On the other hand, it would be located at /opt/lampp/htdocs for Linux users. Once you’ve found the location of the htdocs directory, you can start creating PHP files right away and running them in your browser!
phpinfo() is a very useful function that gives you information about your server and PHP setup. Let’s create a phpinfo.php file under the htdocs directory with the following contents:
Now, go ahead and run it in your browser at http://localhost/phpinfo.php, and you should see output like this:


If you haven’t realized yet, let me tell you that you have just run your first PHP file on the web server! It may be a small one, but it’s a significant step towards learning PHP website development.
In fact, you could also create new directories under the htdocs directory to organize your PHP scripts. For example, you could create the datetime directory under htdocs for examples related to date and time. So if you create a today_date.php file under the htdocs/datetime directory, you could access it in the browser by going to http://localhost/datetime/today_date.php.
So in this way, you could create and run PHP scripts with a web server. In fact, this is what you are going to use most of the time in your day-to-day PHP development.
In the next section, we’ll see how you could run PHP scripts using the command line.
How to Run a PHP File Using the Command Line
When it comes to running PHP scripts on the command line, you should be aware of the location of the PHP executable file in your PHP installation.
For Windows users, you should be able to find the php.exe file under the directory where you have installed your PHP. On the other hand, if you’re a Linux or macOS user, you should be able to find it at /usr/bin/php. In fact, on Linux or macOS, you can just use the php shortcut from any directory. Once you know the location of your PHP executable file, you just need to provide the name of the PHP file which you want to execute from the command-line interface.
As a Windows user, though, you’ll need to type the full path to the PHP executable to run a PHP script. The PHP executable is usually available at C:\php7\php.exe, so you can use it to execute the PHP file as shown in the following command.
For Linux, you don’t need to type the whole path to the PHP executable.
As we discussed earlier, command-line PHP scripts are generally used for routine application-specific tasks, like:
- clearing or generating application caches
- exporting/importing system entities
- batch processing
- other general-purpose tasks
Generally, these kinds of tasks take a long time to execute and are not suited to running in a web environment since they cause timeout errors.
It’s important to note that when you’re running PHP scripts on the command line, you won’t have access to any $_SERVER variables, since these are only initiated if you’re running PHP on a web server. Thus, it’s not recommended to rely on these variables if you’re planning to run your scripts using the command line.
As a PHP programmer, it is important to understand how the command-line PHP interface works. In fact, a lot of PHP software and frameworks nowadays come with a built-in command-line tool which allows you to perform a wide range of utility tasks from the CLI itself.
Conclusion
Today, we discussed how you could run PHP files on your system. Specifically, we went into the details of how to execute PHP scripts in a browser along with a web server and how to run it with a command-line interface as well.
As a beginner, it’s important for you to understand the basic concepts in the first place. And I hope this article has helped you to move a step further in your PHP leaning. Don’t hesitate to ask if you have any queries by using the feed below.
The Best PHP Scripts on CodeCanyon
Explore thousands of the best and most useful PHP scripts ever created on CodeCanyon. With a low-cost, one-time payment, you can purchase one of these high-quality WordPress themes and improve your website experience for you and your visitors.


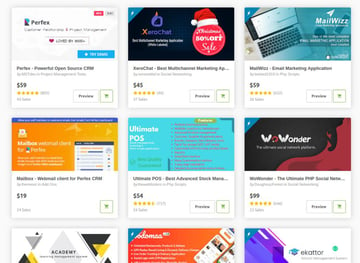
Here are a few of the best-selling and up-and-coming PHP scripts available on CodeCanyon for 2020.
Источник


