- Install Android on his Raspberry Pi
- Prerequisites to install Android
- Installing Android on the SD card
- Installing the Play Store
- Running Android on a Raspberry Pi
- The MagPi issue 112 out now
- Install Android on a Raspberry Pi 3 with emteria.OS
- Step 1: Register emteria.OS
- Step 2: Get the installer
- Step 3: Flash the SD
- Emteria.OS prices
- Running Android apps on Raspberry Pi
- Step 1: Start F-Droid
- Step 2: Find an app
- Step 3: Install!
- Three F-Droid apps to try out
- How to sideload Android apps on Raspberry Pi
- Step 1: Use an APK
- Step 2: Install Netflix on Raspberry Pi Android
- Step 3: Run the APK
- Install RTAndroid on a Raspberry Pi 3
- How to set up RT Android on a Raspberry Pi
- Subscribe and never miss an issue
Install Android on his Raspberry Pi
ⓘ This article may have been partially or fully translated using automatic tools. We apologize for any errors this may cause.
This article will explain how to install and configure Android 7.1.1 (with the Play Store) on your Raspberry Pi.
Above all, it is important to point out that this is only an experimental setup. No version of Android is officially compatible with the Raspberry Pi and therefore the version we will install is not optimized for our dear motherboard. It is therefore difficult today to use Android on a daily basis on its Raspberry Pi even if the installation we are going to present turns relatively well.
Prerequisites to install Android
After this short introduction, let’s take stock of everything we need to complete this installation.
- Of course, you need a Raspberry Pi 3
- A power supply
- A SD card at least 16GB and it is important that it has a good speed of reading / writing.
- You will also need a screen and an HDMI cable to display the beautiful Android interface. You can also use the official touch screen of the foundation that does not require the use of an HDMI cable
Then you will need to download the Android image and sh script that will install the Play Store.
ATTENTION, for the last part of the tutorial, you will have to use a machine with an unix OS (Linux or Mac OS) to be able to execute the sh script. If you do not have one, you can use a virtual machine. Here we indicate commands for a Debian like distro (such as Ubuntu, Linux Mint, Elementary Os, and a lot of others).
Installing Android on the SD card
Once downloaded, the installation of the Android image on the SD card is very simple, it’s the same manipulation as to create an SD card on raspbian. You can go back to the articles that we wrote about it for Windows or Linux. However in this tutorial, I will use a software released after the writing of these articles which is very easy to use and above all compatible for all OS, it is Etcher .

Just select the .img file from Android that you extracted from the zip archive downloaded in the introduction, Etcher automatically detects the SD card on which to install the operating system but it is possible to change it. Finally click on Flash to start the creation of the SD card. It can take long minutes.
When done, insert the SD card into your Raspberry Pi connected to a screen. Here you are now with a functional Android. However, as you can see, this one does not have a Play Store.
Installing the Play Store
To install the Play Store, you must first connect to the internet (wi-fi or Ethernet). For that, pull the options panel by clicking on top of screen and pull down, just like smarpthone.
Once done, we will need the IP address of the Raspberry Pi. To retrieve it, you have to go to the parameters, go down to the bottom of the various parameters and go to “About tablet” and then to “Status”. we can now see our IP address (198.168.xx).
Now that we have recovered this address, we will be able to return to our unix computer as indicated in the introduction while leaving the Raspberry Pi running Android. I remind those who are on Windows that they can use a virtual machine to perform these steps.
Open the downloaded gapps.sh file in the introduction. You will find the following lines
It is necessary to replace the IP address (ADB_ADDRESS) by that of your Raspberry Pi. In addition, if the other fields are empty, fill them in as above.
After that, in a terminal, run the command
This command will allow you to connect to your Raspberry Pi under android from your PC. Then install “LZip”
After these orders, we will be able to connect to our Raspberry Pi.
And finally, run the script to install the Play Store. Go through the terminal in the folder where the gapps.sh script is located, make the executable and run it.
Be carefull, the script is so looooooooong… Once it’s finished, the Raspberry Pi will restart. You will find yourself with a nice Android with the Play Store. However, some applications will have problems downloading them. Also as said in the introduction, this is an experimental setup and the GPU is not very well supported. It is therefore likely that Android is experiencing slowdowns. If you want a card that can run Android well, we recommend using an Odroid . We did not test on it but the returns are good.
Источник
Running Android on a Raspberry Pi
By Russell Barnes. Posted over 3 years ago.
How to install Google Android on your Raspberry Pi with emteria.OS. Discover how to get Android running and use Android apps on a Raspberry Pi computer.

The MagPi issue 112 out now
Discover 40 amazing projects to make and build with Raspberry Pi Zero 2 W. We are still reeling from the brilliance of Zero 2 W, and hope all our subscribers are enjoying their new free computer. This month, we will take a look at all the incredible things you can make with Raspberry Pi Zero computers.


Installing Google Android on a Raspberry Pi has never been easier. Discover how to install Android and run Android apps on your $35 Raspberry Pi computer.
The Raspberry Pi has been used in many different ways over the years by many different people, but installing Android or a Raspberry Pi has always presented a challenge.
Solutions have existed in the past, but have never worked like true Android. Recently that’s all changed. While limitations stopping Android working properly on Raspberry Pi were lifted some time ago, it’s taken until now for a build of full Android to be created by budding hackers to run on the Pi.
In this feature we’re going to look at emteria.OS, the first proper Android release running on a Raspberry Pi 3B+. After that there’s also some information on RTAndroid, an older solution that is still popular.
Install Android on a Raspberry Pi 3 with emteria.OS
Emteria.OS is a full build of Android available for Raspberry Pi. While you can get it for free and use it as an individual, it’s aimed more towards industry. Embedded Android devices are big business, and marrying the mobile OS with the Pi opens up a whole new world of Android in both maker projects and consumer products.
It’s been a long time coming, but finally there’s a proper way to install full Android on your Raspberry Pi thanks to emteria.OS. Based on RTAndroid (more information on RT Android is at the end of this article), this stable version is a bit more aimed towards business; however, more personal-use versions will be coming soon. Here’s how to set it up.
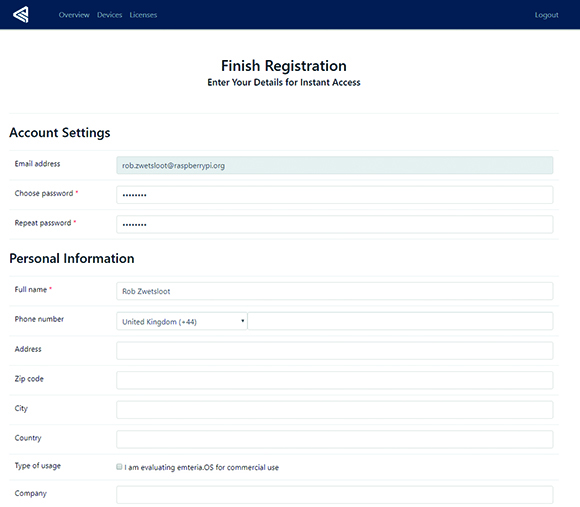
Step 1: Register emteria.OS
Register! You’ll need to first register an account on emteria.com – look for the Register option on the top right of the home page. Fill out the relevant details, confirm your email address, and then make sure you’re logged into your account on the emteria.OS website.
Step 2: Get the installer
From your emteria.com account you can download the installer for your system. This will burn the image for emteria.OS onto a microSD card to be used in a Raspberry Pi. On Windows you’ll have to install the installer using the setup wizard, while on macOS you’ll have to drag it into the Applications folder and run it using superuser in the Terminal.
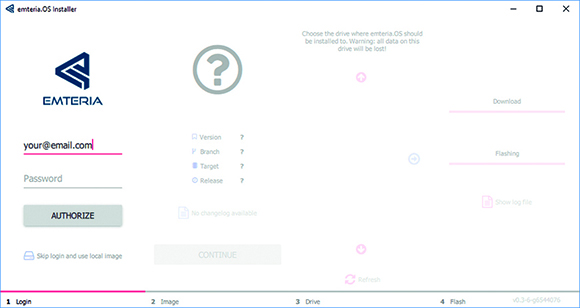
Step 3: Flash the SD
All you need to do now is open the installer, enter your emteria.OS username and password, and select the Raspberry Pi 3 as your device of choice for installing. Next, you’ll need to select your microSD card as the installation location and then just wait – the installer will download the image and then burn it to your microSD card.

Now you’re ready!
Emteria.OS prices
- Free to test During the initial setup of emteria.OS, you’ll be asked to activate your device with a licence – clicking Next allows you to continue on with emteria.OS and use it for free. There are some limitations, however: it only stays on for eight hours at a time, and has a watermark in the corner. Perfect for testing it out with a few projects, though!
- Purchasing a licence There are full licences for purchase on emteria.com, including a cheaper ‘personal’ option and one suited for business that includes bulk-buy discounts.
Running Android apps on Raspberry Pi
Now that you’ve got Android running on a Raspberry Pi, you’ll want to install some apps. This is easy thanks to F-Droid.
Here is how to install Android software onto your emteria.OS-powered Pi
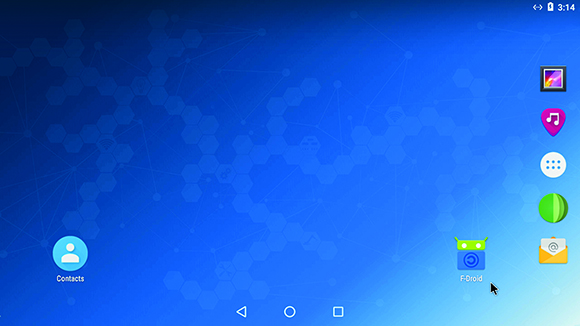
Step 1: Start F-Droid
Find F-Droid on your home screen on in the apps menu and start it up. It won’t launch straight away as it will first need to update all its repositories – something you’ll be familiar with from installing software on Raspbian using apt-get. This might also take a while so please be patient.

Step 2: Find an app
F-Droid works very similarly to the usual Play Store on normal Android devices. There are categories you can look for apps in, and you can also search for something you like. Some of your favourite apps on Android may even be available.

Step 3: Install!
Select the app you want, then hit the install button. It’s as easy as that – F-Droid even includes some info on the apps as well. F-Droid also lets you keep the apps up-to-date, although it’s a bit more manual than the Play Store equivalent.

Three F-Droid apps to try out
- NewPipe. Play YouTube videos on your device with this small, lightweight app that doesn’t require the original YouTube app to work
- Terminal Emulator. As emteria.OS is a bit more hackable than stock Android, you’ll be able to make good use of this terminal emulator to run more advanced commands.
- Face Slim. Missing out on some social media time? Face Slim allows you to use Facebook much like the standard app.
How to sideload Android apps on Raspberry Pi
Android apps can also be downloaded and installed manually on a Raspberry Pi, by a process known as «sideloading».
Step 1: Use an APK
Android apps work by downloading a specific file which is then used to install the software onto the device. These files are called APKs (Android Package Kit), as that’s the file name extension (.apk). If you have the APK file, you can install an app on Android without having to go through a separate store.
Step 2: Install Netflix on Raspberry Pi Android
F-Droid specialises in free and open-source Android apps, so you may not find everything you want on there, such as Netflix. As Netflix is more concerned about you being able to watch the shows you’re already paying for, the APK for the app is available from its website. Open the browser in emteria.OS and head to Netflix.

Step 3: Run the APK
Once the APK file has been downloaded, open it from the Downloads menu. You may need to enable installing from unknown sources if you’ve turned that option off in the emteria.OS settings – otherwise it will go about installing the Netflix APK for you. It will appear in your app menu as usual, although you’ll need to perform manual updates every now and then!
Install RTAndroid on a Raspberry Pi 3
Google’s Android operating system seems like a great fit for the Raspberry Pi. Both run on ARM hardware, Android is based on Linux and Google is keen to push for the next generation of coders.
But you don’t need to wait for Google to develop the official version of Android. It’s already possible to install, and run, Android apps on your Raspberry Pi with RTAndroid.
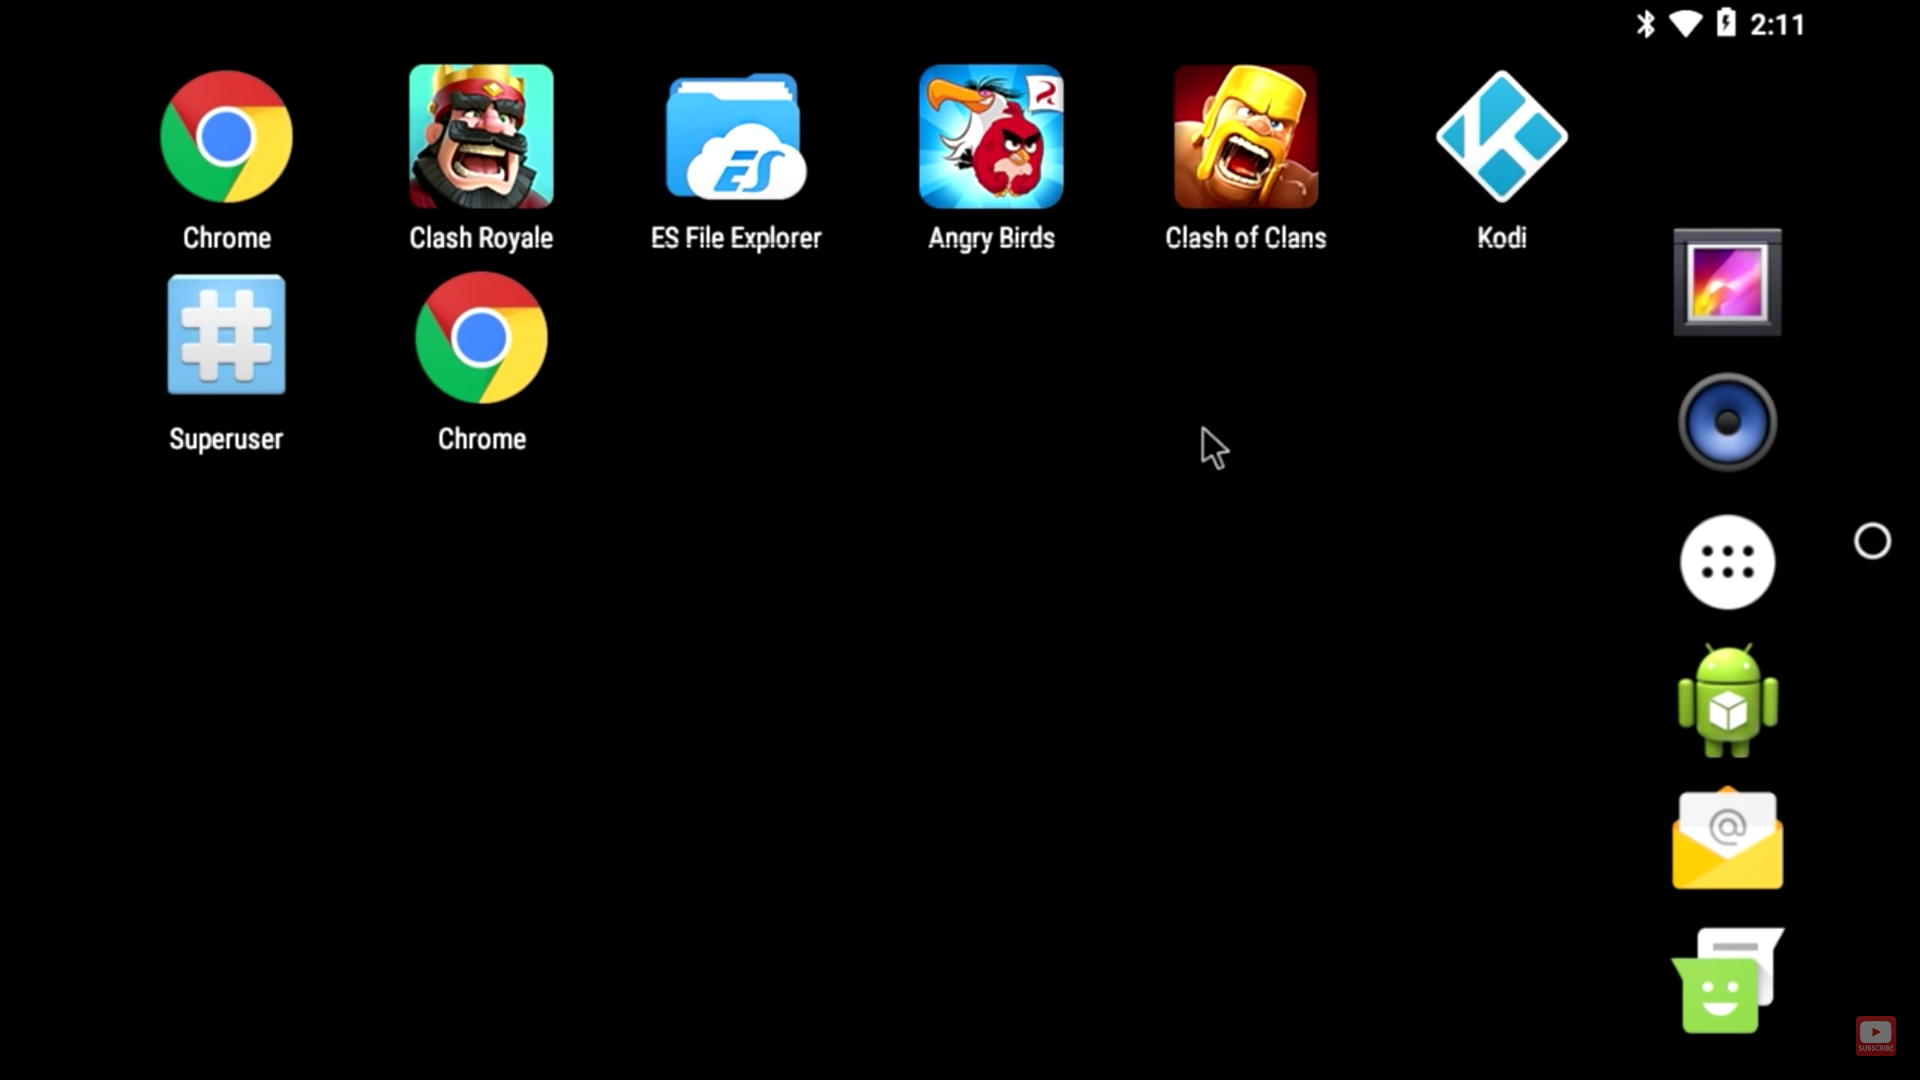
ETA Prime has a video showing how to install RTAndroid on a Raspberry Pi 3. They demonstrate installing the operating system, and using the Google Play store to download Android apps, including games. They even demonstrate Angry Birds in action.
There are a few limitations. You can’t use a touch screen, not even the official Raspberry Pi touch display. There are also some graphical hardware acceleration issues, although the demonstration of Angry Birds seems to run fine.
- Android Auto on Raspberry Pi: OpenAuto
- Get the Official Raspberry Pi Projects Book volume 3!
- The Raspberry Pi PC Challenge in The MagPi 59
How to set up RT Android on a Raspberry Pi
According to the makers: “RTAndroid is developed by the Embedded Software Laboratory at RWTH Aachen University and provides a reliable execution environment for applications with real-time requirements on common mobile devices. The platform benefits from Android’s high usability and its wide range of supported hardware.”
- Click here to view the RT Android website. You can find the installation under Downloads > Device Updates > Raspberry Pi 3.
There are detailed instructions on how to flash RTAndroid. The instructions request that you use Linux for the installation process, which you can run in a virtual environment on Mac or Windows.
The installation process seems is reasonably simple. Unzip the rtandroid download, and run the install script (pointing it to the mount point of your SD Card).
It’s unsurprising that RTAndroid works well on the Raspberry Pi 3, and we’re waiting to see if Google itself develops the operating system for the Raspberry Pi. This could offer more detailed support, including support for the Touch Screen.
In Google’s Android Open Source Project (AOSP) repository, a device tree for the Raspberry Pi 3 appeared back in May. It was created by Thomas Joseph Avila, but has remained empty since then.
Subscribe and never miss an issue
Get a a brand new Raspberry Pi Zero W, a case for it, and a selection of adapter cables with a twelve-month print subscription to The MagPi!

Russell runs Raspberry Pi Press, which includes The MagPi, Wireframe, and HackSpace magazine, and book projects. He’s a massive sci-fi bore.
Источник


