- Samsung PC Studio
- Samsung PC Studio 7.2.24.9
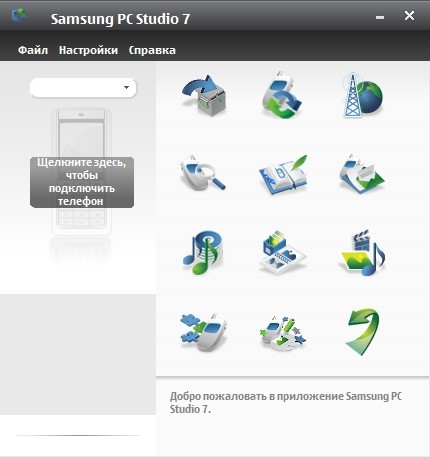
- Скриншот Samsung PC Studio
- Основные возможности Samsung PC Studio:
- Внимание:
- Samsung New PC Studio для Windows
- Получите максимальную отдачу от своего Samsung!
- Using a Galaxy Emulator Skin
- What You Need
- How To Use
- Tips on Using Emulators
- Emulator Limitations
- Getting Started
- 1. System Requirements
- 2. Downloading Samsung SDKs
- Downloading SDKs from Samsung Developers:
- 3. Getting started with Android Studio
- Creating an Android Studio project
- Adding a Samsung library to Android Studio
- Running the App
- Running a sample app
Samsung PC Studio


Samsung PC Studio – бесплатная утилита, способная управлять процессами и файлами Вашего телефона или смартфона при помощи персонального компьютера либо ноутбука.
Скачать Samsung PC Studio вы можете из медиатеки сторонних сайтов, потому что компания-разработчик Samsung трансформировала свои приоритеты относительно разработки ПО, и теперь Samsung PC Studio уже больше не актуален, так как на замену ему пришел и уже достаточно давно Samsung Kies.
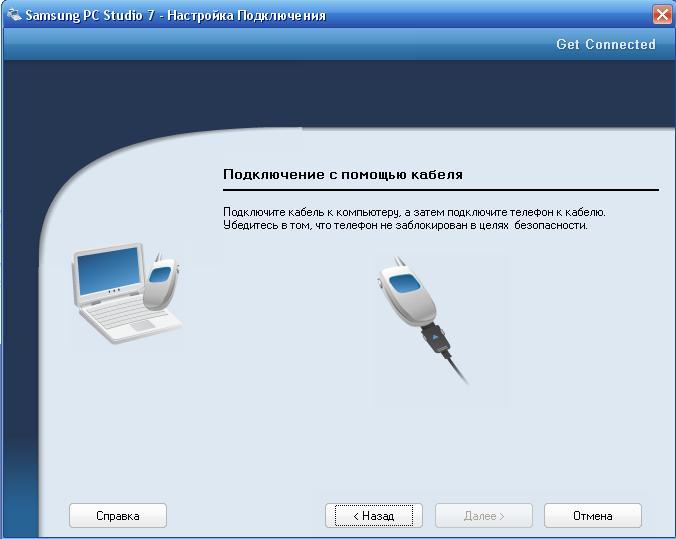
Изначально главной целью утилиты был перенос функций, отвечающих за работу телефонного аппарата, на компьютер. Система подключения смартфона к «железу» была реализована при помощи специального переходного провода, через infra-red порт или по беспроводной технологии «голубого зуба».
Что же предлагали нам создатели Samsung PC Studio для Windows?
Прежде всего, это подключение Вашего компьютера к мировой паутине через устройство связи (то есть трансформация последнего в полноценный модем) и синхронизация данных аппарата связи с ПК. Чем такие возможности могли быть удобны или, другими словами, в чем были преимущества использовать такой софт в сравнении с похожим софтом? Ответ очевиден: в 2008 году (когда утилита была запущена в массовое использование) Вы могли получить доступ к данным из глобальной сети без привязки к интернет-кафе или картам по оплате интернет. В то время это было революционным бонусом при использовании мобильного аппарата.
А что могло сравниться с безопасностью всех сохраненных данных, если телефон был, например, поврежден или утерян?
Что бы ни произошло с самим аппаратом, информация о всех контактах из телефонной книги, история смс-сообщений, все медиа-файлы были на ПК в неизменном виде в полнейшей сохранности. Эта функция, кстати, называется «резервное копирование» и в современных смартфонах происходит чаще всего по умолчанию автоматически в фоновом режиме, не причиняя пользователю никаких неудобств и не вызывая лишних вопросов.
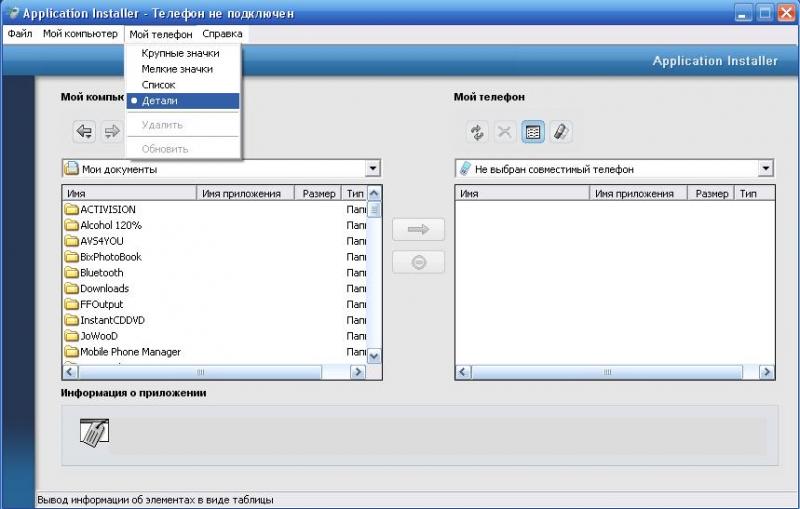
Скачайте Samsung PC Studio на компьютер для Windows 7 и 8, чтобы максимально просто подключить и управлять мобильным телефоном. Samsung PC Studio был способен к переносу файлов и их обработке (видео с телефона можно было смотреть через проигрыватель на ПК). О других возможностях программы можно говорить сколь угодно долго, но нельзя не затронуть очень нужную и важную возможность инсталляции приложений на телефон. Прототип интернет-магазина приложений.
Источник
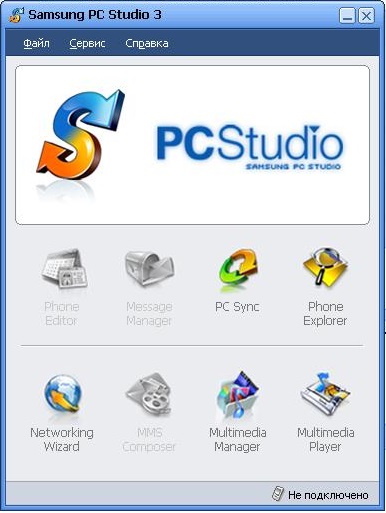
Samsung PC Studio 7.2.24.9
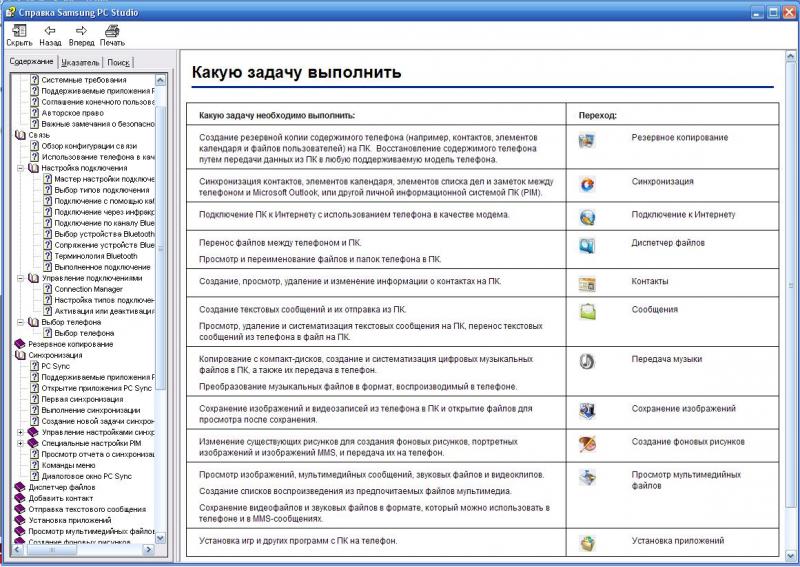
Скриншот Samsung PC Studio
Samsung PC Studio позволяет подключить ваш телефон к персональному компьютеру, а также предоставляет широкий диапазон приложений для управления телефоном с его помощью.
Основной задачей Samsung PC Studio является перенос и редактирование персональной информации и медиафайлов на телефоны SAMSUNG. Кроме этого, имеется мастер соединения, менеджер контактов, сообщений и файлов, а также поддержка синхронизации с компьютером (например, для резервного копирования файлов).
Основные возможности Samsung PC Studio:
— Бекап содержимого телефона (контактов, календаря, файлов) на ПК. Восстановление данных для любых из поддерживаемых моделей телефона.
— Синхронизация контактов, элементов календаря, элементов списка дел и заметок между телефоном и Microsoft Outlook.
— Подключение ПК к Интернету с использованием телефона в качестве модема.
— Перенос на ПК, просмотр и переименование файлов телефона.
— Создание, просмотр, удаление и изменение информации о контактах на ПК.
— Создание текстовых сообщений и их отправка из ПК. Просмотр, удаление и систематизация SMS, перенос сообщений из телефона в файл на компьютер.
— Копирование с компакт-дисков, создание и систематизация цифровых музыкальных файлов, а также их передача на телефон. Конвертация музыки в формат, воспроизводимый в телефоне.
— Сохранение изображений и видеозаписей из телефона на ПК и воспроизведение файлов после сохранения.
— Редактирование изображений для создания фоновых рисунков, портретных изображений и изображений MMS, и их загрузка на телефон.
— Установка игр и других программ с ПК на телефон.
Внимание:
Для использования некоторых функций Samsung PC Studio может понадобиться Microsoft DirectX 9.0 или выше.
Источник
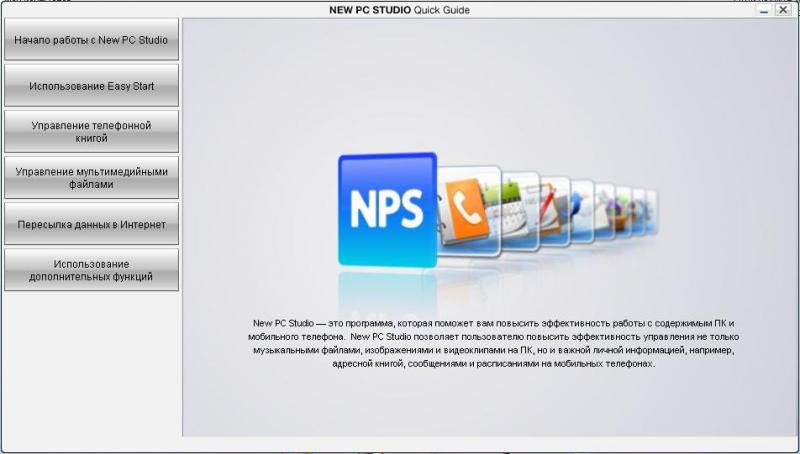
Samsung New PC Studio для Windows
Получите максимальную отдачу от своего Samsung!
Samsung New PC Studio — это инструмент, который соединяет все, что хранится на вашем телефоне с вашим компьютером, позволяет вам легко синхронизировать, архивировать и передавать файлы с одного устройства на другое.
Ваш телефон сохраняет важную информацию: календарь, фотографии, сообщения, видео, карты, новости, документы. Samsung New PC Studio является официальным инструментом для телефонов Samsung, который позволяет вам управлять и хранить копию всей вашей информации и файлов на вашем ПК.
Использование Samsung New PC Studio очень просто. Подключите телефон к компьютеру и просмотрите содержимое телефона непосредственно на ПК. Вы можете легко перемещать фотографии, музыку и видео с телефона на компьютер или наоборот. Просто перетащите их в конечный пункт назначения.
Вы также можете публиковать контент в Интернете с помощью онлайн-сервисов, таких как Flickr , YouTube или facebook , Медиа-менеджер медиаплеера Samsung New PC Studio сортирует музыку, видео или фотографию и включает в себя плеер / просмотрщик, который поможет вам выполнить задачу.
Программное обеспечение Samsung New PC Studio также обновляет календарь вашего телефона и синхронизирует ваши телефонные контакты, встречи и события, хранящиеся в Outlook. Образцовый взгляд Samsung New PC Studio и обилие справочного материала делают его приятным.
Если у вас есть сотовый телефон Samsung, вы не сможете жить без Samsung New PC Studio, установленной на вашем ПК.
Источник
Using a Galaxy Emulator Skin
What You Need
Android Studio and Android SDK
At least one platform installed in Android SDK > Platform
Downloaded Galaxy Emulator Skin
How To Use
Download your preferred Galaxy Emulator Skin.
Extract the downloaded skin and copy it in Android Studio > plugins > android > lib > device-art-resources.
Alternatively, you may store the downloaded file anywhere in your file directory. Just locate it later on when configuring the hardware profile.
Launch Android Studio and open AVD Manager by going to Tools > AVD Manager.

If you have an existing virtual device, click Edit button and simply select the downloaded Emulator Skin. Otherwise, click Create Virtual Device in AVD Manager.

In Virtual Device Configuration, click New Hardware Profile to create a profile for your new virtual device.

Fill in the specification of your virtual device.

Screen size and Resolution should match the Emulator Skin to be used.
In the Default Skin, select the downloaded Emulator Skin.

Or locate it by clicking the . button beside the Default Skin dropdown menu. Click OK then Finish.

The Hardware Profile for your virtual device has been created. Proceed by selecting its System Image.

Make sure that you have at least one system image downloaded before you can proceed.
Verify all configuration and check if the Emulator Skin is applied by clicking Show Advanced Settings.

Launch the newly created virtual device in the AVD Manager.

Afterwards, your virtual device with its Galaxy Emulator Skin will appear.

Tips on Using Emulators
By clicking the . (More) in the toolbar beside the emulator, you will see the Extended Controls window. Click Help to see the list of Keyboard shortcuts.
The buttons and other controls on the emulator work as they would on the actual device. For example, clicking on the home button will bring up the home screen.
Tweak the AVD hardware configuration to speed up your emulator. Increasing the memory or setting the screen to a smaller size gives a minor performance increase.
When starting an AVD, you may select a screen size suitable to your computer to enlarge or reduce the size of the emulator.
Emulator Limitations
The Galaxy Emulator Skin defines only the appearance and controls of an Android Virtual Device (AVD), which still runs on a stock Android OS. It does not include any One UI feature, since it only serves as skins for an AVD.
The emulator lacks support for the following features:
Placing or receiving actual phone calls. However, you can simulate phone calls (placed and received) through the emulator console.
Back camera/video capture. Front camera works if you have a webcam installed on your computer.
Источник
Getting Started
This guide teaches developers how to set up their workstations in order to use Samsung Mobile SDKs in their apps. It covers basic topics such as how to download and install the SDK.
This section covers:
- System Requirements.
- Downloading Samsung Mobile SDKs.
- Getting started with Android Studio.
1. System Requirements
To develop apps for Samsung mobile devices, you must first set up your Android development environment. If your development environment is already configured, you can skip this section.
- Verify that your development system meets the requirements specified by the Android System Requirements.
- Set up your Java environment:
To develop Android apps in Java, you need the following:
- Java Development Kit (JDK) — this provides the tools required to build a Java app.
- Java Runtime Environment (JRE) — this lets you run Java apps on your computer.
To set up these components: 1. Go to Java SE Downloads. 2. Click Java Download to display the download page for the latest version of JDK, which includes JRE. 3. Click the download package for your operating system: Windows, Mac OS X, or Linux. 4. Install the JDK package. For details about the installation, see the Java Platform Installation.
- Download Android Studio:
- Go to Android Studio.
- If the browser has detected your operating system, click Download Android Studio. Otherwise, click Download Options and select a different platform: Windows, Mac OS X, or Linux.
- Unzip and install the bundle. It includes essential components and the Studio IDE.
- Launch Android Studio.
- If you get a notice of Platform and Plugin Updates, click update to exit Studio and launch the SDK Manager. Then install the suggested packages.
2. Downloading Samsung SDKs
Downloading SDKs from Samsung Developers:
- Go to Mobile page
- Select the SDK you want to download
- Go to the Resources page for the SDK
- Click the download button
- Read the license agreement, select I agree to this SDK License Agreement and click Download
- Unzip the downloaded SDK to a folder of your choice. The SDKs typically provide the following folders
- Docs: Programming guides and API references
- Libs: Java and C libraries to use in your app
- Samples: Sample apps showing example source code
- Tools: Additional tools that may be needed to use the SDK
- Extras: Additional support resources
3. Getting started with Android Studio
This section describes how to create your first project in Android Studio and run an app.
Creating an Android Studio project
- Launch Android Studio.
- Create a new project by clicking File > New Project
- Fill out the fields:
- Application name: your app name
- Company domain: the qualifier for your app package name.
- Package name: this is the combination of the company domain and application name, which must be unique across all packages in the Android environment. Android generates this from the application name and company domain values.
- Project Location: the directory where your app is stored. You can use the default or specify another location, if desired.
- Click Next
- Select the type of device you want to target, for example, Phone and Tablet
- Select the Minimum SDK level you need to support the SDKs you’re using. In this example, select API 21. Click Next
- Use the default Empty Activity type and click Next. For more about activities, see Android Activities.
- Use the default Activity Name and Layout Name and click Finish For more about creating a project in Android Studio, see Creating Projects.
Adding a Samsung library to Android Studio
To use a Samsung SDK in your app, you add the library files that are bundled with the SDK to your Android Studio project.
- Open your project in Android Studio.
- Use a file browser to navigate to the folder containing the Samsung SDK
- Open the add-on SDK folder, then open:
- Docs > API Reference > index.html: to see what libraries and API methods are provided by the SDK
- Libs folder: to copy the libraries you want to use in your app
- In your Android Studio project, top-left drop-down menu, change the Android view to Project
- Right-click your app’s libs directory and select Paste
- In the Copy dialog, click OK to paste the copied files into your project
- The libraries now appear in your project under the libs folder
- Right-click the libraries and select Add As Library.
- Select the module to add the library to. If your app contains several modules, ensure that you add the library to the appropriate module. Click OK. Your project now includes the SDK you downloaded.
Running the App
Android Studio provides two ways to compile and test your app: — On an Android Virtual Device (AVD) — On a physical Samsung device To run your app:
- Plug your Samsung mobile device into your computer using a USB cable
- If you are using a Windows computer, go to Samsung Android USB Driver for Windows, then download and install the USB driver onto your computer
- Enable developer options on your device by going to Settings > About device > Software info and tapping Build number seven times. (Devices with Android 4.1 or older already have developer options displayed by default.)
- Turn on USB debugging by tapping Settings > Developer options > USB debugging
If My Knox is installed, USB debugging is grayed out; try using another device.
- In Android Studio, with your project open, click Run > Run ‘app’ (or press Shift + F10)
- Select the device you want run the app on, under either Connected Devices or Available Emulators
Running a sample app
The sample apps are in the Samples folder of the SDK you downloaded. To run a sample app:
- Open Android Studio
- In the top navigation menu, select File > Open
- Navigate to the sample app directory in the SDK you downloaded
- Click OK to import the file to your project
Источник


