- Saving Files
- This lesson teaches you to
- You should also read
- Choose Internal or External Storage
- Obtain Permissions for External Storage
- Save a File on Internal Storage
- Save a File on External Storage
- Query Free Space
- Delete a File
- How to save installed Android apps as APK files
- Save installed Android apps
- Closing Words
- Save all apps android
- Save all your Android’s innards
- Android and data backups: a tragic tale
- Titanium backup
- Super Backup
- MyPhoneExplorer
- Helium
- MyBackup
- Ultimate Backup Lite
- Conclusion
Saving Files
This lesson teaches you to
You should also read
Android uses a file system that’s similar to disk-based file systems on other platforms. This lesson describes how to work with the Android file system to read and write files with the File APIs.
A File object is suited to reading or writing large amounts of data in start-to-finish order without skipping around. For example, it’s good for image files or anything exchanged over a network.
This lesson shows how to perform basic file-related tasks in your app. The lesson assumes that you are familiar with the basics of the Linux file system and the standard file input/output APIs in java.io .
Choose Internal or External Storage
All Android devices have two file storage areas: «internal» and «external» storage. These names come from the early days of Android, when most devices offered built-in non-volatile memory (internal storage), plus a removable storage medium such as a micro SD card (external storage). Some devices divide the permanent storage space into «internal» and «external» partitions, so even without a removable storage medium, there are always two storage spaces and the API behavior is the same whether the external storage is removable or not. The following lists summarize the facts about each storage space.
- It’s always available.
- Files saved here are accessible by only your app by default.
- When the user uninstalls your app, the system removes all your app’s files from internal storage.
Internal storage is best when you want to be sure that neither the user nor other apps can access your files.
- It’s not always available, because the user can mount the external storage as USB storage and in some cases remove it from the device.
- It’s world-readable, so files saved here may be read outside of your control.
- When the user uninstalls your app, the system removes your app’s files from here only if you save them in the directory from getExternalFilesDir() .
External storage is the best place for files that don’t require access restrictions and for files that you want to share with other apps or allow the user to access with a computer.
Tip: Although apps are installed onto the internal storage by default, you can specify the android:installLocation attribute in your manifest so your app may be installed on external storage. Users appreciate this option when the APK size is very large and they have an external storage space that’s larger than the internal storage. For more information, see App Install Location.
Obtain Permissions for External Storage
To write to the external storage, you must request the WRITE_EXTERNAL_STORAGE permission in your manifest file:
Caution: Currently, all apps have the ability to read the external storage without a special permission. However, this will change in a future release. If your app needs to read the external storage (but not write to it), then you will need to declare the READ_EXTERNAL_STORAGE permission. To ensure that your app continues to work as expected, you should declare this permission now, before the change takes effect.
However, if your app uses the WRITE_EXTERNAL_STORAGE permission, then it implicitly has permission to read the external storage as well.
You don’t need any permissions to save files on the internal storage. Your application always has permission to read and write files in its internal storage directory.
Save a File on Internal Storage
When saving a file to internal storage, you can acquire the appropriate directory as a File by calling one of two methods:
getFilesDir() Returns a File representing an internal directory for your app. getCacheDir() Returns a File representing an internal directory for your app’s temporary cache files. Be sure to delete each file once it is no longer needed and implement a reasonable size limit for the amount of memory you use at any given time, such as 1MB. If the system begins running low on storage, it may delete your cache files without warning.
To create a new file in one of these directories, you can use the File() constructor, passing the File provided by one of the above methods that specifies your internal storage directory. For example:
Alternatively, you can call openFileOutput() to get a FileOutputStream that writes to a file in your internal directory. For example, here’s how to write some text to a file:
Or, if you need to cache some files, you should instead use createTempFile() . For example, the following method extracts the file name from a URL and creates a file with that name in your app’s internal cache directory:
Note: Your app’s internal storage directory is specified by your app’s package name in a special location of the Android file system. Technically, another app can read your internal files if you set the file mode to be readable. However, the other app would also need to know your app package name and file names. Other apps cannot browse your internal directories and do not have read or write access unless you explicitly set the files to be readable or writable. So as long as you use MODE_PRIVATE for your files on the internal storage, they are never accessible to other apps.
Save a File on External Storage
Because the external storage may be unavailable—such as when the user has mounted the storage to a PC or has removed the SD card that provides the external storage—you should always verify that the volume is available before accessing it. You can query the external storage state by calling getExternalStorageState() . If the returned state is equal to MEDIA_MOUNTED , then you can read and write your files. For example, the following methods are useful to determine the storage availability:
Although the external storage is modifiable by the user and other apps, there are two categories of files you might save here:
Public files Files that should be freely available to other apps and to the user. When the user uninstalls your app, these files should remain available to the user.
For example, photos captured by your app or other downloaded files.
Private files Files that rightfully belong to your app and should be deleted when the user uninstalls your app. Although these files are technically accessible by the user and other apps because they are on the external storage, they are files that realistically don’t provide value to the user outside your app. When the user uninstalls your app, the system deletes all files in your app’s external private directory.
For example, additional resources downloaded by your app or temporary media files.
If you want to save public files on the external storage, use the getExternalStoragePublicDirectory() method to get a File representing the appropriate directory on the external storage. The method takes an argument specifying the type of file you want to save so that they can be logically organized with other public files, such as DIRECTORY_MUSIC or DIRECTORY_PICTURES . For example:
If you want to save files that are private to your app, you can acquire the appropriate directory by calling getExternalFilesDir() and passing it a name indicating the type of directory you’d like. Each directory created this way is added to a parent directory that encapsulates all your app’s external storage files, which the system deletes when the user uninstalls your app.
For example, here’s a method you can use to create a directory for an individual photo album:
If none of the pre-defined sub-directory names suit your files, you can instead call getExternalFilesDir() and pass null . This returns the root directory for your app’s private directory on the external storage.
Remember that getExternalFilesDir() creates a directory inside a directory that is deleted when the user uninstalls your app. If the files you’re saving should remain available after the user uninstalls your app—such as when your app is a camera and the user will want to keep the photos—you should instead use getExternalStoragePublicDirectory() .
Regardless of whether you use getExternalStoragePublicDirectory() for files that are shared or getExternalFilesDir() for files that are private to your app, it’s important that you use directory names provided by API constants like DIRECTORY_PICTURES . These directory names ensure that the files are treated properly by the system. For instance, files saved in DIRECTORY_RINGTONES are categorized by the system media scanner as ringtones instead of music.
Query Free Space
If you know ahead of time how much data you’re saving, you can find out whether sufficient space is available without causing an IOException by calling getFreeSpace() or getTotalSpace() . These methods provide the current available space and the total space in the storage volume, respectively. This information is also useful to avoid filling the storage volume above a certain threshold.
However, the system does not guarantee that you can write as many bytes as are indicated by getFreeSpace() . If the number returned is a few MB more than the size of the data you want to save, or if the file system is less than 90% full, then it’s probably safe to proceed. Otherwise, you probably shouldn’t write to storage.
Note: You aren’t required to check the amount of available space before you save your file. You can instead try writing the file right away, then catch an IOException if one occurs. You may need to do this if you don’t know exactly how much space you need. For example, if you change the file’s encoding before you save it by converting a PNG image to JPEG, you won’t know the file’s size beforehand.
Delete a File
You should always delete files that you no longer need. The most straightforward way to delete a file is to have the opened file reference call delete() on itself.
If the file is saved on internal storage, you can also ask the Context to locate and delete a file by calling deleteFile() :
Note: When the user uninstalls your app, the Android system deletes the following:
- All files you saved on internal storage
- All files you saved on external storage using getExternalFilesDir() .
However, you should manually delete all cached files created with getCacheDir() on a regular basis and also regularly delete other files you no longer need.
Источник
How to save installed Android apps as APK files
APK Extractor is a free application for Google’s Android operating system that you may use to save installed Android apps as APK files on the device.
The installation of Android applications is pretty straightforward, especially so if you install them from Google Play or another application store.
It may happen that you want to save an Android APK installation file to your device for safekeeping or backup purposes. There are several potential reasons for that: making sure that you save a particular version of an application or wanting to move the installation file to other Android devices or even your PC or computer.
Tip: Check out APKUpdater, it keeps your sideloaded Android apps up to date
Save installed Android apps
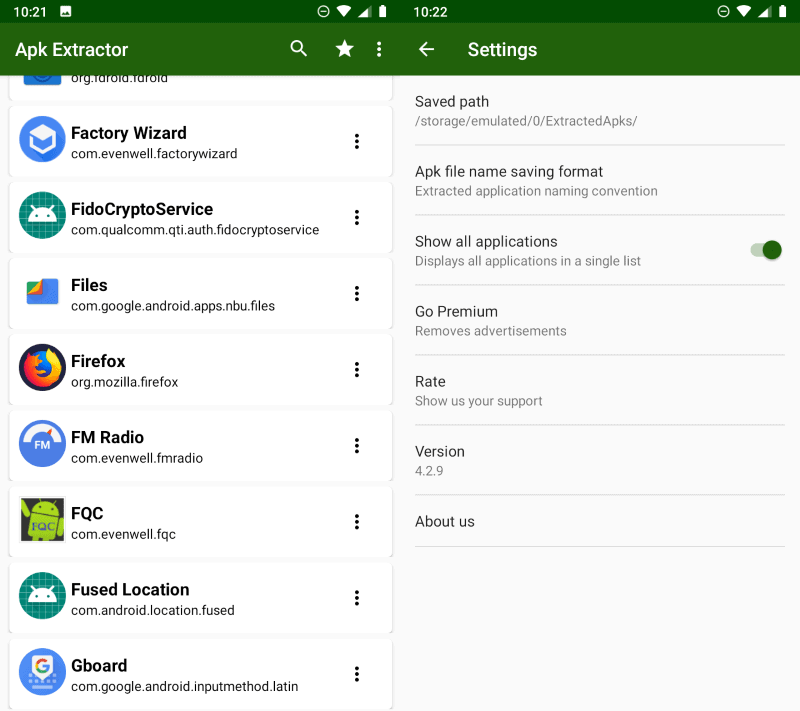
APK Extractor is available as a free and paid version. The free version comes with advertisement, the paid version removes it and is available for €1.04 currently (what is with that price?).
The application uses two different ad formats: a single unit at the top of the application list, and overlay ads that tend to get in the way.
The application displays all installed applications and (most?) system applications in a long list on start. You may use the built in search to find a specific Android application quickly.
An option in the settings divides the applications into user-installed apps and system apps. You may switch between the two categories using the menu at the top.
Saving works by tapping on the application in the interface. APK Extractor saves the Android application to the local device; the save path is highlighted when you save Android apps. You may change the save location in the settings if you prefer a different location for extracted Android applications.
A long-tap on any application enables the selection mode. Use it to select multiple applications for saving in one go. There is also a handy select all option to save all applications automatically but you need to make sure that there is enough storage space on the device for that.
The menu that is displayed next to each application displays the installed version and options to look up information or share it. Info opens the App Info page on the Android device that reveals required permissions, data usage, and other information.
Share saves the application to the device and opens the share options afterward making it easy to share the file using messaging applications or to online storage services.
Closing Words
APK Extractor is a useful application for Android that lets you backup Android applications locally. The process is straightforward and not complicated at all.
Inexperienced users may have difficulties accessing the saved Android apps on their devices, but that is not the fault of this application. It is easy enough to open the files manager to access the path the APK files are stored in or transfer them to another device.
The overlay advertisement is annoying but since you may not use the app regularly, it is not that much of a negative.
Now You: Do you backup or save your apps?
Источник
Save all apps android
Your browser is ancient!
Save all your Android’s innards

A selection of backup apps exist for this reason. There are free and paid backup apps, some requiring root privileges, and they all have their own strengths and weaknesses. These are the best backup apps. As disaster can strike without warning, backing up your messages, images, data, contacts and everything else that is important to you needs to be made easy.
Android and data backups: a tragic tale
Android has lacked a flawless backup solution for years. Only with root access is it possible to create a complete backup, making an iPhone-style switch a complicated affair. Enviously we look on iOS users who can upgrade their iPhone and, after a single login, see all their old data and settings magically restored.
The following backup solutions each deliver this comfort in part, but often root privileges are required for the app to get access to relevant parts of the file system. What this means and how it works is explained in this article:
Titanium backup
Assuming you have root access, no other backup app comes close to Titanium Backup. This exhaustive app can save almost anything: apps, application data, messages, system settings, widgets, backgrounds, you name it.
Its recovery services don’t only work on stock devices, either, but also across most hardware, Android versions and custom ROMs. Anyone who likes an experimental Android experience and has flashed their device will appreciate Titanium Backup.
| PROS | CONS |
|---|---|
| Extensive backup options | Confusing interface |
| Access to system apps | How to use it barely explained |
| Almost total control offered through fine-tuning | |
| App management | |
| Removal of bloatware and old data |
 Left shows the overview screen, right the main menu in Titanium Backup. / © ANDROIDPIT
Titanium Backup ★ root 
Super Backup
Super Backup can not only backup messages and contacts but also applications, call logs, bookmarks and your calendar. Superuser privileges are only required for backing up settings and app data. You can set it up to automatically send a copy of any backups you create to your Gmail address, and it now supports the same with Google Drive.
You can’t backup all media formats with Super Backup Pro, but for those files it supports, the operation is self-explanatory and simple to carry out. The Pro version is devoid of advertising.
| PROS | CONS |
|---|---|
| Easy to create backups | No automated backups through alternative cloud storage solutions |
| Ability to send backups automatically to Gmail | Can’t backup media |
| No root access needed |

Clear and simple: Super Backup. / © ANDROIDPIT
Super Backup : SMS & Contacts
MyPhoneExplorer
For those who are reluctant to let their data stray too far, MyPhoneExplorer allows you to create a complete backup locally on your computer. Simply connect to your PC over WLAN, Bluetooth or a USB cable through the Windows program and you’re ready to go. The tool focuses not only on backing up data, but it also provides additional functions such as sending SMS messages via PC and app management (start, uninstall).
| PROS | CONS |
|---|---|
| All data available offline | Requires Windows |
| Backs up all file types |

If you’re attached to your backups, MyPhoneExplorer transfers everything to your PC. / © FJ Softwaredevelopment
MyPhoneExplorer Client
Helium
Helium (formerly Carbon) comes from the makers of ClockworkMod and is one of the few backup apps that convinces not only with its functionality but also with its attractive design. Even without root privileges, it is possible to use Helium to backup not only your apps but also messages, Wi-Fi passwords, and application data. Backups of media files such as photos, music and videos are not possible with Helium.
The paid version provides a backup schedule, cloud connectivity and the removal of all ads.
| PROS | CONS |
|---|---|
| Simple solution | Limited range of backup options |
| Doesn’t require root access | Some apps take a while to backup |
| Full cloud connectivity | |
| Automated backups possible |

Backups and restorations don’t require much explaining in Helium. / © ANDROIDPIT
Helium – App Sync and Backup
MyBackup
The target group of MyBackup is the newbies. A simple interface and deliberately limited backup options make the application very approachable. It also includes root-requiring options to backup application settings, data and APKs.
Regular users can create backups of their programs, messages, system settings, APNs and contacts and call lists. Cloud storage is only available from the manufacturer itself, and it’s limited to 100 MB. If you want more space, you will need to pay for it.
| PROS | CONS |
|---|---|
| No need to regist | Only one cloud storage option |
| Offers local backups | Selection of media made difficult |
| Simple interface | |
| No root access required |
 My Backup Pro: only if you sign up do you gain access to cloud storage. / © ANDROIDPIT
My Backup
Ultimate Backup Lite
Ultimate Backup Lite offers a mix of features for devices with and without root privileges. Thanks to an introduction and clearly arranged UI, it’s easy to navigate from the off. Various file formats and areas of the smartphone can be backed up, with SMS being the most recent thing to see inclusion.
You can upload your backups to Dropbox, Google Drive and Box. For superusers, you can also freeze an app’s state and restore it later.
| PROS | CONS |
|---|---|
| Great design | No support for media files |
| Comprehensive information on programs | |
| Root functionality excellent |
 Ultimate Backup Pro provides more detailed information than the other apps. / © ANDROIDPIT
Ultimate Backup
Conclusion
Thanks to the automated backup of photos through Dropbox or Google+, as well as music through other cloud storage solutions, there is hardly any need for full backups of smartphones or tablets. One of the most important uses of backup apps, however, is for backing up application data and settings, so you can transfer these over to a new device with ease.
In this regard, Helium is the best solution for unrooted devices, but superusers still stand to benefit from the extended options it provides. For the smartphone hobbyist, Titanium Backup represents the Swiss army knife of backup apps, being simply littered with options.
Источник


