- Полный список
- inJustDecodeBounds
- inSampleSize
- inBitmap
- inPreferredConfig
- inDensity
- inTargetDensity, inScaled
- inScreenDensity
- inPurgeable
- inInputShareable
- inDither
- inMutable
- inPreferQualityOverSpeed
- inPremultiplied
- inTempStorage
- mCancel
- Как сохранить Bitmap в файл
- Convert Bitmap to File in Android – JAVA & Kotlin
- Method to Convert Bitmap to File in Java
- Method to Convert Bitmap to File in Kotlin
- Required Imports
- Permission Required to Access External Storage
- Explanation
- Convert File to Bitmap in Android
- Convert File to Bitmap in Java
- Convert File to Bitmap in Kotlin
- vxhviet / saveToExternalStorage.md
- This comment has been minimized.
- ayush-sriv commented Aug 20, 2018
- This comment has been minimized.
- AbelWeldaregay commented Feb 19, 2019
- This comment has been minimized.
- Appiah commented Feb 26, 2019 •
- Android Save Bitmap to Gallery – Download and Save Image from URL
- File Storage in Android
- Android Save Bitmap to Gallery
- Creating an Image Downloader Application
- Adding Permissions
Полный список
— разбираемся с BitmapFactory.Options
— сохраняем Bitmap в файл
На первом уроке про Bitmap мы обсудили, что для чтения картинки из файла (ресурсов,потока,…) в Bitmap используются decode* методы BitmapFactory. И при чтении мы можем использовать объект BitmapFactory.Options, который позволяет нам задать некоторые параметры. Какие-то из этих параметров весьма специфичны и крайне редко используются, но есть и те, которые могут быть полезны в повседневной работе.
Разберемся, зачем нужны эти параметры, и рассмотрим некоторые из них на примерах.
inJustDecodeBounds
Если включить (true) этот параметр, то система не будет создавать Bitmap, а только вернет информацию о изображение в следующих полях:
outWidth – ширина
outHeight – высота
outMimeType – mimetype
Project name: P1591_BitmapOptions
Build Target: Android 4.4
Application name: BitmapOptions
Package name: ru.startandroid.develop.p1591bitmapoptions
Create Activity: MainActivity
В DrawView указываем inJustDecodeBounds = true, читаем стандартную Android-иконку и выводим в лог информацию о ней.
Запускаем, смотрим лог:
bitmap = null, width = 48, height = 48, mimetype = image/png
У вас ширина и высота могут быть другие, т.к. при чтении картинок из папок res/drawable-*dpi учитывается density устройства.
Bitmap равен null, т.к. система только вернула нам инфу, а Bitmap не создавала, а следовательно и память не занимала.
inSampleSize
Позволяет указать коэффициент уменьшения размера изображения при чтении. Он должен быть кратным 2. Если зададите другое число, то оно будет изменено на ближайшее число меньшее вашего и кратное 2.
Перепишем класс DrawView:
Используем inSampleSize = 2 и в лог выводим размеры, получившегося Bitmap:
width = 24, height = 24
Как и заказывали, картинка при чтении в Bitmap стала в два раза меньше.
Параметры inJustDecodeBounds и inSampleSize можно использовать для чтения больших изображений. Т.е. если вы сразу решите считать большое изображение в Bitmap, вы можете занять, тем самым, слишком много памяти или вообще получить OutOfMemory. Поэтому следует сначала получить данные о размерах картинки, а затем с коэффициентом сжатия считать ее в Bitmap примерно нужного размера. Этот алгоритм мы еще подробно разберем на одном из следующих уроков.
inBitmap
Если передать в этот параметр Bitmap-объект, то он и будет использован для получения результата вместо создания нового Bitmap-объекта.
Тут есть несколько особенностей с версиями Android.
— в Android 4.4 (API 19) передаваемый Bitmap должен быть не меньше по размеру (в байтах), чем читаемое изображение.
— для более ранних версий, передаваемый в inBitmap объект должен быть того же размера (ширина/высота), что и читаемое изображение. Также, в Options необходимо добавлять inSampleSize = 1.
Создаем новый Bitmap-объект tempBitmap и передаем его в inBitmap параметр.
bitmap = android.graphics.Bitmap@5281a428 (48,48), tempBitmap = android.graphics.Bitmap@5281a428
Видно, что bitmap и tempBitmap указывают на один объект. Т.е. decode-метод не создавал новый Bitmap, а прочел изображение в tempBitmap и вернул его, как результат. Размер Bitmap стал 48х48. Хотя изначально мы создавали его размером 300х300.
Если систему что-то не устроит, она может вернуть null или сгенерировать IllegalArgumentException.
Еще раз проговорю, что этот пример сработал на Android 4.4, но на более ранних версиях есть нюансы, которые я чуть выше расписал.
inPreferredConfig
Указание желаемой конфигурации Bitmap.Config.
inDensity
Задает density-значение для Bitmap, аналогично методу setDensity. Для задания значения используйте константы DENSITY* класса DisplayMetrics.
inTargetDensity, inScaled
Если inTargetDensity отличен от inDensity, и inScaled = true (по умолчанию), то размер изображения будет скорректирован от inDensity к inTargetDensity.
inScreenDensity
К сожалению, мне не удалось понять, зачем он нужен. Если есть мысли, пишите на форуме.
inPurgeable
Позволяет системе временно удалить содержимое созданного Bitmap из памяти в случае нехватки таковой. Когда изображение снова понадобится (например при выводе на экран), оно будет восстановлено из источника. Т.е. жертвуем производительностью в пользу памяти.
inInputShareable
Если true, то Bitmap хранит ссылку на источник, иначе – данные источника. Но даже если true, то вполне может быть, что по усмотрению системы будут храниться данные, а не ссылка. Этот параметр актуален только при включенном inPurgeable.
inDither
Попытка сгладить цвета, если текущей цветовой палитры не достаточно для отображения оригинальных цветов изображения
inMutable
Если true, то мы получим mutable Bitmap
inPreferQualityOverSpeed
Включение более качественного декодирования в ущерб скорости
inPremultiplied
Доступен с API Level 19. Дает возможность выключить premultiplied-режим. Если режим включен (по умолчанию), то RGB компоненты в пикселах сразу рассчитаны с учетом альфа-компонента (для лучшей производительности). Канва принимает Bitmap только в таком режиме. В хелпе сказано, что выключение режима может понадобиться для специфических задач: RenderScript и OpenGL.
inTempStorage
Здесь можем указать свой временный массив, который будет использован в процессе декодирования
mCancel
По этой метке можно определить был ли процесс декодирования отменен методом requestCancelDecode
Как сохранить Bitmap в файл
Метод compress позволяет сохранить Bitmap в разных форматах в исходящий поток. На вход принимает:
— формат (JPG, PNG, WEBP)
— качество сжатия, от 0 (наихудшее) до 100 (наилучшее)
— поток
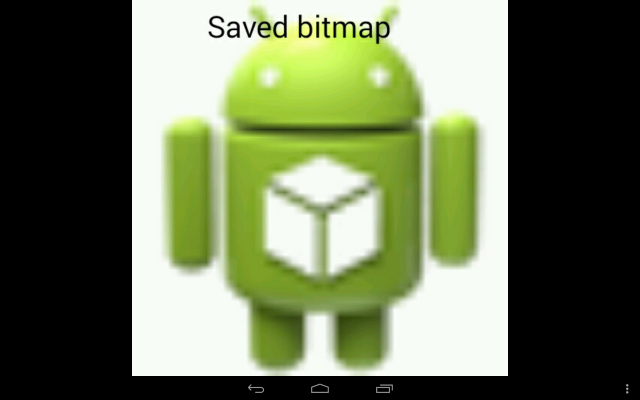
Рассмотрим пример, в котором создадим Bitmap, нарисуем на нем что-нибудь и сохраним на SD.
В bmpIcon читаем стандартную иконку, затем меняем размер на 500х500. Создаем новый bitmap, заполняем его белым, рисуем в нем bmpIcon и пишем текст.
Далее создаем объект File, который указывает на файл savedBitmap.png в стандартной папке Pictures. Для этого файла создаем поток FileOutputStream, который передаем в метод compress. Также в методе указываем формат JPEG и качество = 100.

После запуска приложения идем в папку Pictures, там должен быть файл savedBitmap.png.

На следующем уроке:
— читаем и отображаем большие изображения
Присоединяйтесь к нам в Telegram:
— в канале StartAndroid публикуются ссылки на новые статьи с сайта startandroid.ru и интересные материалы с хабра, medium.com и т.п.
— в чатах решаем возникающие вопросы и проблемы по различным темам: Android, Kotlin, RxJava, Dagger, Тестирование
— ну и если просто хочется поговорить с коллегами по разработке, то есть чат Флудильня
— новый чат Performance для обсуждения проблем производительности и для ваших пожеланий по содержанию курса по этой теме
Источник
Convert Bitmap to File in Android – JAVA & Kotlin
It’s a common requirement in Android Apps to save images as files in external storage and get a File reference from that saved location. Usually, we have images in the form of Bitmap in Android. In the following article, we will discuss how to Convert Bitmap to File in Android in both Java & Kotlin.
Method to Convert Bitmap to File in Java
Method to Convert Bitmap to File in Kotlin
Required Imports
Permission Required to Access External Storage
Most importantly, to save files in external storage we need to add external storage permission in the AndroidManifest file. For that add the following uses-permission tags in your Android Manifest file above the application tag.
These READ_EXTERNAL_STORAGE & WRITE_EXTERNAL_STORAGE permissions are dangerous permissions which means that to support Android 6.0 (API level 23) or higher, we need to handle it on runtime. For that, I have already written a detailed article to Handle Runtime Permissions in Android.
Explanation
The above methods take 2 parameters. The first parameter is the Bitmap object that you want to save in the file. The second parameter is the fileName by which you want to save the file in your external storage. This method compresses your Bitmap into PNG format and saves it in the External Storage. You can also change its compress format to JPEG. This method will return you the file object that you can use for future reference and retrieving the image again from the file. For that purpose, you can use the following code.
Convert File to Bitmap in Android
Converting File into bitmap just requires one line of code.
Convert File to Bitmap in Java
Convert File to Bitmap in Kotlin
If you have any question feel free to ask in the following comments section.
Источник
vxhviet / saveToExternalStorage.md
Question: How do I save Bitmap to extrenal storage in Android?
Answer:
Use this function to save your bitmap in SD card:
and add this in manifest
EDIT: By using this line you can able to see saved images in the gallery view. [UNTESTED]
This comment has been minimized.
Copy link Quote reply
ayush-sriv commented Aug 20, 2018
This comment has been minimized.
Copy link Quote reply
AbelWeldaregay commented Feb 19, 2019
How would you read it back in order to display it in an imageview?
This comment has been minimized.
Copy link Quote reply
Appiah commented Feb 26, 2019 •
public static Bitmap getBitmapThumbnail(Context context, Uri uri, double THUMBNAIL_SIZE) throws FileNotFoundException, IOException <
InputStream input = context.getContentResolver().openInputStream(uri);
thumbnail_size_in_double = 50.00;
bitmap = getBitmapThumbnail(context, «the_path_where_the/image/is_located_as_a/an/Uri», thumbnail_size_in_double);
imageView.setImageBitmap(bitmap);
//Please do test for yourself too very well before usage, it worked perfectly for me
You can’t perform that action at this time.
You signed in with another tab or window. Reload to refresh your session. You signed out in another tab or window. Reload to refresh your session.
Источник
Android Save Bitmap to Gallery – Download and Save Image from URL
Things are changing very fast in tech world. And if you want to be an Android Developer, then be ready to keep upgrading yourself. Actually this learning curve is the best thing that I like about this industry (My personal opinion). So, here is a new about about “Android Save Bitmap to Gallery”.
Saving file to internal storage, is required many times in our projects. We have done this thing many times before, but the method for saving file to internal storage has been changed completely for devices running with OS >= android10.
Basically your old way of saving files will not work with new versions of android, starting with android10. You can still go the old way, but it is a temporary solution. In this post we are going to talk about all these things.
File Storage in Android
Now, we have two kinds of storage to store files.
- App-specific storage: The files for your application only. Files store here cannot be accessed outside your application. And you do not need any permission to access this storage.
- Shared Storage: The files that can be shared with other apps as well. For example Media Files (Images, Videos, Audios), Documents and other files.
To know more details about File Storage in Android, you can go through this official guide.
In this post we will be saving a Bitmap to Shared Storage as an Image File.
To demonstrate saving file to internal storage in android10, I will be creating an app that will fetch an Image from the Given URL and then it will save it to external storage.
Android Save Bitmap to Gallery
Let’s first start with the main function, that we need to save a Bitmap instance to gallery as an Image File.
Let’s understand the above function.
- We have the bitmap instance that we want to save to our gallery in the function parameter.
- Then I’ve generated a file name using System . currentTimeMillis () , you apply your own logic here if you want a different file name. I used it just to generate a unique name quickly.
- Now we have created an OutputStream instance.
- The main thing here is we need to write two logics, because method of android 10 and above won’t work for lower versions; and that is why I have written a check here to identify if the device is > = VERSION_CODES . Q .
- Inside the if block, first I’ve got the ContentResolver from the Context .
- Inside ContentResolver , we have created ContentValues and inside ContentValues we have added the Image File informations.
- Now we have got the Uri after inserting the content values using the insert () function.
- After getting the Uri , we have opened output stream using openOutputStream () function.
- I am not explaining the else part, as it is the old way, that we already know.
- Finally using the output stream we are writing the Bitmap to stream using compress () function. And that’s it.
Now let’s build a complete application that will save image from an URL to the external storage.
Creating an Image Downloader Application
Again we will start by creating a new Android Studio project. I have created a project named ImageDownloader. And now we will start by adding all the required dependencies first.
Adding Permissions
For this app we require Internet and Storage permission. So define these permision in your AndroidManifest . xml file.
Источник


