- SDK Manager
- Recommended Packages
- Adding New Sites
- Troubleshooting
- Download
- Terms and Conditions
- 1. Introduction
- 2. Accepting this License Agreement
- 3. SDK License from Google
- 4. Use of the SDK by You
- 5. Your Developer Credentials
- 6. Privacy and Information
- 7. Third Party Applications
- 8. Using Android APIs
- 9. Terminating this License Agreement
- 10. DISCLAIMER OF WARRANTIES
- 11. LIMITATION OF LIABILITY
- 12. Indemnification
- 13. Changes to the License Agreement
- 14. General Legal Terms
- Android Studio
- Intelligent code editor
- Code templates and GitHub integration
- Multi-screen app development
- Virtual devices for all shapes and sizes
- Android builds evolved, with Gradle
- More about Android Studio
- System Requirements
- Windows
- Mac OS X
- Linux
- Разработка под Android: устанавливаем SDK
- Содержание
- Подготовка к установке
- Установка с помощью Android Studio
- Установка отдельного пакета
- Запуск и возможности
- Зачем же нужен Android SDK?
SDK Manager
The Android SDK separates tools, platforms, and other components into packages you can download using the SDK Manager. For example, when the SDK Tools are updated or a new version of the Android platform is released, you can use the SDK Manager to quickly download them to your environment.
You can launch the SDK Manager in one of the following ways:
- From Eclipse (with ADT), select Window >Android SDK Manager.
- From Android Studio, select Tools >Android >SDK Manager.
- On Windows, double-click the SDK Manager.exe file at the root of the Android SDK directory.
- On Mac or Linux, open a terminal and navigate to the tools/ directory in the location where the Android SDK is installed, then execute android sdk .
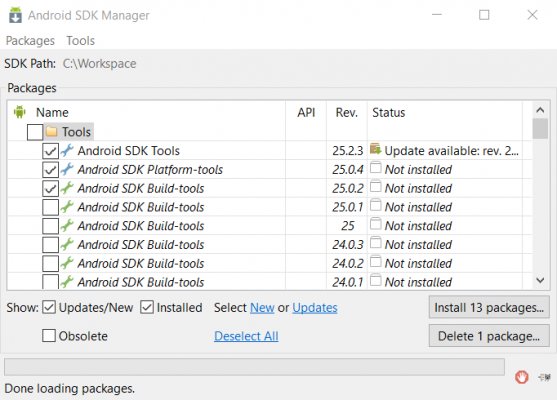
You can select which packages you want to download by toggling the checkboxes on the left, then click Install to install the selected packages.

Figure 1. The Android SDK Manager shows the SDK packages that are available, already installed, or for which an update is available.
There are several different packages available for the Android SDK. The table below describes most of the available packages and where they’re located in your SDK directory once you download them.
Recommended Packages
Here’s an outline of the packages required and those we recommend you use:
SDK Tools Required. Your new SDK installation already has the latest version. Make sure you keep this up to date. SDK Platform-tools Required. You must install this package when you install the SDK for the first time. SDK Platform Required.You must download at least one platform into your environment so you’re able to compile your application. In order to provide the best user experience on the latest devices, we recommend that you use the latest platform version as your build target. You’ll still be able to run your app on older versions, but you must build against the latest version in order to use new features when running on devices with the latest version of Android.
To get started, download the latest Android version, plus the lowest version you plan to support (we recommend Android 2.2 for your lowest version).
System Image Recommended. Although you might have one or more Android-powered devices on which to test your app, it’s unlikely you have a device for every version of Android your app supports. It’s a good practice to download system images for all versions of Android your app supports and test your app running on them with the Android emulator. Android Support Recommended. Includes a static library that allows you to use some of the latest Android APIs (such as fragments, plus others not included in the framework at all) on devices running a platform version as old as Android 1.6. All of the activity templates available when creating a new project with the ADT Plugin require this. For more information, read Support Library. SDK Samples Recommended. The samples give you source code that you can use to learn about Android, load as a project and run, or reuse in your own app. Note that multiple samples packages are available — one for each Android platform version. When you are choosing a samples package to download, select the one whose API Level matches the API Level of the Android platform that you plan to use.
Tip: For easy access to the SDK tools from a command line, add the location of the SDK’s tools/ and platform-tools to your PATH environment variable.
The above list is not comprehensive and you can add new sites to download additional packages from third-parties.
In some cases, an SDK package may require a specific minimum revision of another package or SDK tool. The development tools will notify you with warnings if there is dependency that you need to address. The Android SDK Manager also enforces dependencies by requiring that you download any packages that are needed by those you have selected.
Adding New Sites
By default, Available Packages displays packages available from the Android Repository and Third party Add-ons. You can add other sites that host their own Android SDK add-ons, then download the SDK add-ons from those sites.
For example, a mobile carrier or device manufacturer might offer additional API libraries that are supported by their own Android-powered devices. In order to develop using their libraries, you must install their Android SDK add-on, if it’s not already available under Third party Add-ons.
If a carrier or device manufacturer has hosted an SDK add-on repository file on their web site, follow these steps to add their site to the Android SDK Manager:
- Select Available Packages in the left panel.
- Click Add Add-on Site and enter the URL of the repository.xml file. Click OK.
Any SDK packages available from the site will now be listed under a new item named User Add-ons.
Troubleshooting
Problems connecting to the SDK repository
If you are using the Android SDK Manager to download packages and are encountering connection problems, try connecting over http, rather than https. To switch the protocol used by the Android SDK Manager, follow these steps:
Источник
Download
Before installing Android Studio or the standalone SDK tools, you must agree to the following terms and conditions.
Terms and Conditions
1. Introduction
2. Accepting this License Agreement
3. SDK License from Google
4. Use of the SDK by You
5. Your Developer Credentials
6. Privacy and Information
7. Third Party Applications
8. Using Android APIs
9. Terminating this License Agreement
10. DISCLAIMER OF WARRANTIES
11. LIMITATION OF LIABILITY
12. Indemnification
13. Changes to the License Agreement
14. General Legal Terms
You’re just a few steps away from building apps for Android!
In a moment, you’ll be redirected to Installing the Android SDK.
I have read and agree with the above terms and conditions

Android Studio
The official Android IDE
- Android Studio IDE
- Android SDK tools
- Android 5.0 (Lollipop) Platform
- Android 5.0 emulator system image with Google APIs
Download Android Studio
To get Android Studio or stand-alone SDK tools, visit developer.android.com/sdk/
Intelligent code editor

At the core of Android Studio is an intelligent code editor capable of advanced code completion, refactoring, and code analysis.
The powerful code editor helps you be a more productive Android app developer.
Code templates and GitHub integration

New project wizards make it easier than ever to start a new project.
Start projects using template code for patterns such as navigation drawer and view pagers, and even import Google code samples from GitHub.
Multi-screen app development

Build apps for Android phones, tablets, Android Wear, Android TV, Android Auto and Google Glass.
With the new Android Project View and module support in Android Studio, it’s easier to manage app projects and resources.
Virtual devices for all shapes and sizes

Android Studio comes pre-configured with an optimized emulator image.
The updated and streamlined Virtual Device Manager provides pre-defined device profiles for common Android devices.
Android builds evolved, with Gradle

Create multiple APKs for your Android app with different features using the same project.
Manage app dependencies with Maven.
Build APKs from Android Studio or the command line.
More about Android Studio
For more details about features available in Android Studio, read the overview at Android Studio.
If you have been using Eclipse with ADT, be aware that Android Studio is now the official IDE for Android, so you should migrate to Android Studio to receive all the latest IDE updates. For help moving projects, see Migrating to Android Studio.
System Requirements
Windows
- Microsoft® Windows® 8/7/Vista/2003 (32 or 64-bit)
- 2 GB RAM minimum, 4 GB RAM recommended
- 400 MB hard disk space
- At least 1 GB for Android SDK, emulator system images, and caches
- 1280 x 800 minimum screen resolution
- Java Development Kit (JDK) 7
- Optional for accelerated emulator: Intel® processor with support for Intel® VT-x, Intel® EM64T (Intel® 64), and Execute Disable (XD) Bit functionality
Mac OS X
- Mac® OS X® 10.8.5 or higher, up to 10.9 (Mavericks)
- 2 GB RAM minimum, 4 GB RAM recommended
- 400 MB hard disk space
- At least 1 GB for Android SDK, emulator system images, and caches
- 1280 x 800 minimum screen resolution
- Java Runtime Environment (JRE) 6
- Java Development Kit (JDK) 7
- Optional for accelerated emulator: Intel® processor with support for Intel® VT-x, Intel® EM64T (Intel® 64), and Execute Disable (XD) Bit functionality
On Mac OS, run Android Studio with Java Runtime Environment (JRE) 6 for optimized font rendering. You can then configure your project to use Java Development Kit (JDK) 6 or JDK 7.
Linux
- GNOME or KDE desktop
- GNU C Library (glibc) 2.15 or later
- 2 GB RAM minimum, 4 GB RAM recommended
- 400 MB hard disk space
- At least 1 GB for Android SDK, emulator system images, and caches
- 1280 x 800 minimum screen resolution
- Oracle® Java Development Kit (JDK) 7
Tested on Ubuntu® 14.04, Trusty Tahr (64-bit distribution capable of running 32-bit applications).
Источник
Разработка под Android: устанавливаем SDK
Такая популярная операционная система как Android не может обойтись без мощных и простых средств разработки. И именно здесь Android SDK (Software Development Kit или Набор средств для разработки ПО) показывает себя с лучшей стороны. Сегодня мы установим SDK и посмотрим, что он умеет. Это будет цикл статей о разработке приложений и игр для Android
Содержание
Подготовка к установке
Android SDK поддерживает большинство современных операционных систем под архитектурой x86 и x86_64, в том числе Windows, многие дистрибутивы Linux и Mac OS X. Также на ПК должен быть установлен Java Development Kit (Java 7 или Java 8), который обязательно потребуется для многих возможностей SDK, ведь Android неразрывно связан с Java.
Стоит заметить, что для встроенного эмулятора Android необходимо хорошее «железо» на PC, как, в принципе, и для других современных средств разработки.
Установка с помощью Android Studio
Уже долгое время существует Android Studio — официальная IDE (Integrated Development Enviroment) для разработки под Android. Туда уже включено всё необходимое и устанавливается в один клик. Достаточно лишь установить IDE, и вы также сможете использовать все возможности SDK, интегрированные внутри среды разработки.
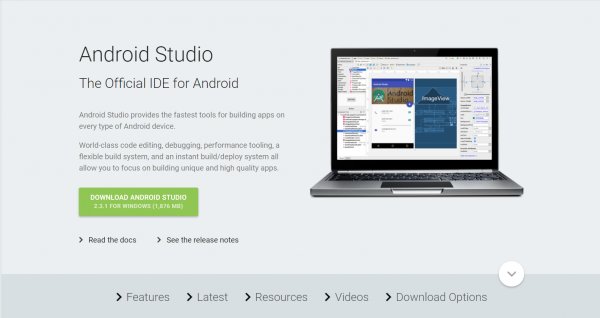
Скачать Android Studio можно с официального сайта. Там же можно найти много полезных гайдов по работе с Android SDK, но, к сожалению, доступны они исключительно на английском языке.
Установка отдельного пакета
Если вы не рассчитываете использовать такой мощный инструмент как Android Studio или у вас уже есть установленная Intellij IDEA, на основе которой и работает эта среда разработки, то вы можете установить Android SDK отдельно. Однако никаких других преимуществ этот метод установки не даст и рекомендуется воспользоваться предыдущим способом.
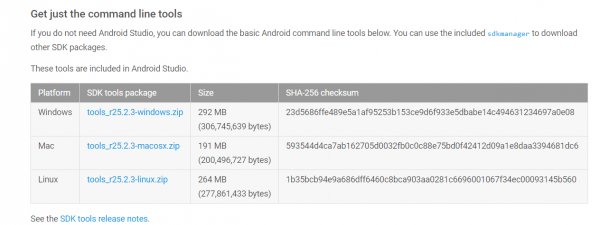
Для загрузки отдельного пакета инструментов для разработки без IDE необходимо воспользоваться сайтом Android Developer. Игнорируя все возможные упоминания об Android Studio, спускаемся в самый низ страницы и находим раздел «Get just command line tools» — можно также воспользоваться поиском по странице. После скачивания подходящего пакета для вашей операционной системы, достаточно распаковать в любое удобное для вас хранилище — рекомендуется также указать местоположение SDK в Intellij IDEA (Project Structure > SDK).
Запуск и возможности
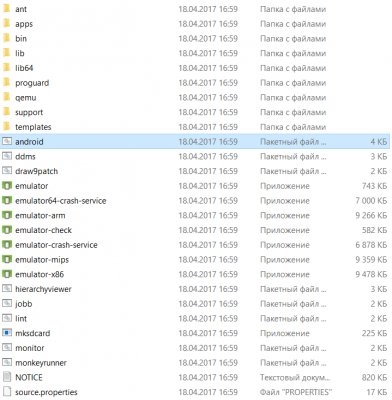
Для получения доступа ко всему функционалу Android SDK достаточно запустить пакетный файл android, если вы работаете под Windows, или же в терминале выполнить команду «android» в папке «tools/» вашего SDK для запуска на Linux и MacOS X. Вам будет предложено установить инструменты для разных версий API, чем больше инструментов установлено — тем лучше. Загрузка пакетов может занять много времени в зависимости от вашей системы и скорости интернет-соединения.
Перейдём к описанию основных инструментов:
- Platform-tools включает в себя основные инструменты взаимодействия с Android, такие как ADB, fastboot и systrace. Android Debugging Bridge поможет отследить ошибки в работе приложений на смартфоне, а также выполнять некоторые действия по работе с APK; fastboot, знакомый всем любителям прошивки своих Android-девайсов, работает в паре с ADB и помогает наладить работу устройства ещё до загрузки ОС, а systrace способен анализировать скорость работы процессов в операционной системе;
- Build-tools работают вместе с Platform-tools, но могут быть обновлены отдельно. Сюда входят такие утилиты как ProGuard для защиты ваших APK-файлов, JOBB для работы с расширениями в формате *.obb, и Zipalign, необходимый для оптимизации ваших готовых приложений;
- Кроме того, в SDK предусмотрен продвинутый эмулятор ОС Android, в котором вы сможете протестировать любые приложения и опробовать функции свежих версий Android. Однако для качественной эмуляции необходимо хорошее железо на ПК, также рекомендуется использовать эмуляцию работы x86.
Зачем же нужен Android SDK?
Android SDK — универсальный набор инструментов, который пригодится каждому пользователю смартфона или планшета, работающего под операционной системой Android. Обычный юзер может получить доступ к необходимым логам, восстановить устройство из нерабочего состояния и получить доступ к полноценному эмулятору, тогда как для разработчика это тот самый необходимый минимум, чтобы начать создавать игры и программы для Android.
Источник


