- Создание удобного OpenFileDialog для Android
- Select all files android
- About
- Manage all files on a storage device
- Request All files access
- Operations that MANAGE_EXTERNAL_STORAGE allows
- Invoke another app’s storage management activity
- Enable MANAGE_EXTERNAL_STORAGE for testing
- Google Play notice
- How To Download and See All Your Android Files
- How to see your Android files
- Access ‘My Files’ From the App Drawer
- Access Files From the Settings
- Using a Computer
- How Android Orders Files
- Device Storage
- SD Card
- Upload and Download Android Files
- Third party file managers
Создание удобного OpenFileDialog для Android
Наверное, как и многие разработчики под Android, столкнулся на днях с необходимостью реализовать в своем приложении выбор файла пользователем. Так как изначально в Android такого функционала нет, обратился к великому и ужасному. Это показалось мне странным, но из вороха вопросов на stackoverflow и небольшого числа отечественных форумов можно выделить всего три основных источника:
- Android File Dialog – почти все ссылки из stackoverflow ведут сюда. В принципе, неплохое решение, но реализовано через отдельную activity, а хотелось чего-то в духе OpenFileDialog’а из .Net.
- В данной статье речь идет вообще об отдельном файл-менеджере, и почерпнуть какие-то идеи из неё не удалось.
- Идея же отсюда очень понравилась, однако, как мне показалось реализовать все это можно несколько красивее.
В результате, начав реализовывать своё решение, я столкнулся с некоторыми трудностями решать которые показалось очень интересно. А посему, решил описать в данной статье не просто готовое решение, а все шаги, которые к нему привели. Желающие пройти их вместе –
Итак, приступим! В любой привычной среде (я использую IntelliJ IDEA) создадим новое приложение. На главной activity расположим одну единственную кнопку и напишем к ней, пока пустой, обработчик нажатия:
Создадим новый класс с конструктором:
а в обработчике кнопки вызовем диалог:
Кнопки показались, теперь надо бы и сами файлы найти. Начнем поиск с корня sdcard, для чего определим поле:
и реализуем следующий метод:
(так как главное требование к классу – работать сразу у любого разработчика, без подключения дополнительных библиотек, — то никаких google-collections использовать не будем, и с массивами приходится работать по старинке), а в конструкторе к вызову setNegativeButton добавим .setItems(getFiles(currentPath), null).

Что же, неплохо, однако файлы не отсортированы. Реализуем для этого дела Adapter как внутренний класс, заменим setItems на setAdapter и немного перепишем getFiles:
Еще лучше, но нам надо по клику на папке идти внутрь. Можно достучаться до встроенного listview, но я просто подменил его собственным (это потом пригодится). Плюс, изменения adapter’а внутри обработчика listview вызывало exception, и список файлов пришлось вынести в отдельное поле:
Отлично, вот только нажав на папку Android мы получаем список всего из одного каталога data, и наше окно тут же уменьшается в размере.
Возможно это нормально, но мне это не понравилось, и я стал искать возможности размер сохранить. Единственный найденный мною вариант – это установка setMinimumHeight. Установка этого свойства для listview вызвала дополнительные проблемы, но они решились оберткой его в LinearLayout:
Результат, все равно получился немного не таким, каким хотелось бы: при старте диалог развернут на весь экран, а после перехода в каталог Android – уменьшается до 750px. Да еще и экраны разных устройств имеют разную высоту. Решим сразу обе этих проблемы, установив setMinimumHeight в максимально возможную для текущего экрана:
Не нужно пугаться того, что мы устанавливаем в setMinimumHeight полный размер экрана, сама система уменьшит значение до максимально допустимого.
Теперь появляется проблема понимания пользователя, в каком каталоге он сейчас находится, и возврата вверх. Давайте разберемся с первой. Вроде все легко — установить значение title в currentPath и менять его при изменении последнего. Добавим в конструктор и в метод RebuildFiles вызов setTitle(currentPath).
А нет – заголовок не изменился. Почему не срабатывает setTitle после показа диалога, документация молчит. Однако мы может это исправить, создав свой заголовок и подменив им стандартный:
И снова не все ладно: если пройти достаточно далеко, то строка в заголовок влезать не будет
Решение с установкой setMaximumWidth не верно, так как пользователь будет видеть только начало длинного пути. Не знаю, насколько верно мое решение, но я сделал так:
Решим теперь проблему с возвратом. Это достаточно легко, учитывая, что у нас есть LinearLayout. Добавим в него еще один TextView и немного отрефракторим код:
Возможность возвращаться на шаг вверх, может привести пользователя в каталоги, к которым ему доступ запрещен, поэтому изменим функцию RebuildFiles:
(cообщение пока не очень информативное, но вскоре мы добавим разработчику возможность исправить это).
Ни один OpenFileDialog не обходится без фильтра. Добавим и его:
Обратите внимание — фильтр принимает регулярное выражение. Казалось бы – все хорошо, но первая выборка файлов сработает в конструкторе, до присвоения фильтра. Перенесем её в переопределенный метод show:
Осталось совсем чуть-чуть: вернуть выбранный файл. Опять же, я так и не понял зачем нужно устанавливать CHOICE_MODE_SINGLE, а потом все равно писать лишний код для подсветки выбранного элемента, когда он (код) и так будет работать без CHOICE_MODE_SINGLE, а потому обойдемся без него:
Источник
Select all files android

FilePicker ![]()
![]()
![]()
Android Library to select files/directories from Device Storage
And Don’t Forget To Follow Me On Instagram
Library available at JitPack.io

Latest version of this library is migrated to androidx

- Easy to Implement.
- No permissions required.
- Files, Directory Selection.
- Single or Multiple File selection.
Add it in your root build.gradle at the end of repositories:
Step 2. Add the dependency
If you are targeting Android 10 or higher. Set this to your manifest
Start by creating an instance of DialogProperties .
Now ‘DialogProperties’ has certain parameters.
Assign values to each Dialog Property using DialogConfig class.
Next create an instance of FilePickerDialog , and pass Context and DialogProperties references as parameters. Optional: You can change the title of dialog. Default is current directory name. Set the positive button string. Default is Select. Set the negative button string. Defalut is Cancel.
Next, Attach DialogSelectionListener to FilePickerDialog as below,
An array of paths is returned whenever user press the select button`.
Use dialog.show() method to show dialog.
Marshmallow and above requests for the permission on runtime. You should override onRequestPermissionsResult in Activity/AppCompatActivity class and show the dialog only if permissions have been granted.
- defaultValue , error_dir , root_dir , offset_dir must have valid directory/file paths.
- defaultValue paths should end with ‘:’.
- defaultValue can have multiple paths, there should be a ‘:’ between two paths.
- extensions must not have ‘.’.
- extensions should end with ‘:’ , also have ‘:’ between two extensions. eg. /sdcard:/mnt:
About
Android Library to select files/directories from Device Storage.
Источник
Manage all files on a storage device
The majority of apps that require shared storage access can follow the best practices for sharing media files and sharing non-media files. However, some apps have a core use case that requires broad access of files on a device, but cannot do so efficiently using the privacy-friendly storage best practices. Android provides a special app access called All files access for these situations.
For example, an anti-virus app’s primary use case might require regular scanning of many files across different directories. If this scanning requires repeated user interactions to select directories using the system file picker, it may provide a poor user experience. Other use cases—such as file manager apps, backup and restore apps, and document management apps—may require similar considerations.
Request All files access
An app can request All files access from the user by doing the following:
- Declare the MANAGE_EXTERNAL_STORAGE permission in the manifest.
- Use the ACTION_MANAGE_ALL_FILES_ACCESS_PERMISSION intent action to direct users to a system settings page where they can enable the following option for your app: Allow access to manage all files.
To determine whether your app has been granted the MANAGE_EXTERNAL_STORAGE permission, call Environment.isExternalStorageManager() .
Operations that MANAGE_EXTERNAL_STORAGE allows
The MANAGE_EXTERNAL_STORAGE permission grants the following:
Read and write access to all files within shared storage.
Access to the contents of the MediaStore.Files table.
Access to the root directory of both the USB on-the-go (OTG) drive and the SD card.
Write access to all internal storage directories, except for /Android/data/ , /sdcard/Android , and most subdirectories of /sdcard/Android . This write access includes direct file path access.
Apps that are granted this permission still cannot access the app-specific directories that belong to other apps because these directories appear as subdirectories of Android/data/ on a storage volume.
When an app has the MANAGE_EXTERNAL_STORAGE permission, it can access these additional files and directories using either the MediaStore API or direct file paths. When you use the Storage Access Framework, however, you can only access a file or directory if you could do so without having the MANAGE_EXTERNAL_STORAGE permission.
Invoke another app’s storage management activity
On Android 12 (API level 31) and higher, apps that have both the MANAGE_EXTERNAL_STORAGE permission and the QUERY_ALL_PACKAGES permission—such as file management apps—can use the getManageSpaceActivityIntent() to send users to another app’s custom space management activity.
The getManageSpaceActivityIntent() method takes in a package name and a request code, and it returns one of the following:
- A PendingIntent , if the app with the specified package name has defined a custom «manage space» activity. The file management app that called the getManageSpaceActivityIntent() method can then invoke the returned intent to send users to the custom activity.
- null , if the app with the specified package name doesn’t define a «manage space» activity.
Enable MANAGE_EXTERNAL_STORAGE for testing
To explore how the MANAGE_EXTERNAL_STORAGE permission affects your app, you can enable the permission for testing purposes. To do so, run the following command on the machine that’s connected to your test device:
Google Play notice
This section provides a notice for developers who publish apps on Google Play.
To limit broad access to shared storage, the Google Play store has updated its policy to evaluate apps that target Android 11 (API level 30) or higher and request «All files access» through the MANAGE_EXTERNAL_STORAGE permission. This policy takes effect in May 2021.
When your app targets Android 11 or higher, and it declares the MANAGE_EXTERNAL_STORAGE permission, Android Studio shows the lint warning that appears in figure 1. This warning reminds you that «the Google Play store has a policy that limits usage of» the permission.
 Figure 1. Lint warning in Android Studio that reminds you about the Google Play policy regarding the MANAGE_EXTERNAL_STORAGE permission.
You should request the MANAGE_EXTERNAL_STORAGE permission only when your app cannot effectively make use of the more privacy-friendly APIs, such as Storage Access Framework or the Media Store API. Additionally, the app’s usage of the permission must fall within permitted uses, and must be directly tied to the core functionality of the app. If your app includes a use case that’s similar to the following examples, it’s likely to be allowed to request the MANAGE_EXTERNAL_STORAGE permission:
- File managers
- Backup and restore apps
- Anti-virus apps
- Document management apps
- On-device file search
- Disk and file encryption
- Device-to-device data migration
Content and code samples on this page are subject to the licenses described in the Content License. Java is a registered trademark of Oracle and/or its affiliates.
Источник
How To Download and See All Your Android Files
One of the many cool aspects of Android is the fact that you can access all aspects of the operating system. Unlike iOS, you can see all system files and have access to every file and folder on the device. If you’re new to the operating system and want to know how to upload, download and see all your Android files, this tutorial is for you.

Android has its own file manager but there are also third-party file managers to make life easier. Since the native file manager is a part of every Android device, we’ll use that in our examples.

How to see your Android files
The easiest way to see your Android files is to access device storage on the handset. There are two ways that you can do this: From the app drawer or from the Settings.
Access ‘My Files’ From the App Drawer
If you believe the best path is the one of least resistance, this is the method for you. Accessing all of the files on your Android device is really simple:
- Open your devices’ App drawer – Depending on the version of Android software you’re running you can click on the home screen icon that has several dots or you can swipe up on the screen.

- Use the search bar to quickly locate the ‘File Manager’ app.
- Or, locate it among your other apps and tap on it.
- Select the folders to access the files you’d like to view.


Access Files From the Settings
This method isn’t exactly the fastest way to get your files, but it does let you see various file types quickly.
- Navigate to Settings, Storage & USB, and Internal storage – Because the Settings vary depending on your manufacturer, use the search bar within ‘Settings’ and type ‘Storage’ to find it quickly.
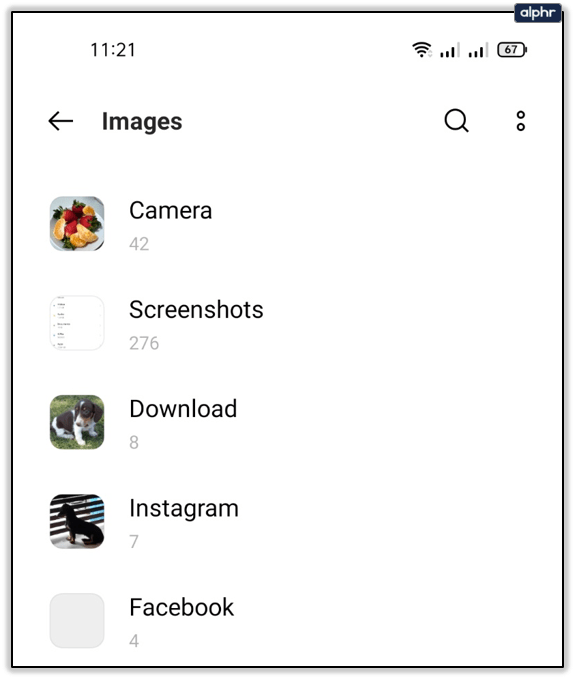
- Select any one of the options that appear. For the purposes of this article, we’ll select ‘Images.’
- Browse the folders selecting the one you’d like to view.


Using a Computer
You can also view files while your phone is connected to your computer. This works on both Mac and Windows computers.
- Plug your Android phone into your computer with a USB cable.
- Set it for File Transfer if the cable doesn’t default to it. Wait for Windows to detect it.
- Open the phone in Windows Explorer and browser as you would any other hard drive.


Windows treats Android devices as external storage so you can drag, drop, add, move and delete files and folders as you see fit. The only limitation is that Android can only manipulate one file or folder at a time.
How Android Orders Files
While you can see and manipulate Android files in Explorer, the file system is not the same as in Windows. Device Storage is the internal memory of your device. Portable or SD Card is external storage, the SD card attached to your handset, if you have one installed.
The SD card can be configured to store images, videos, games and other data. Not all apps can be loaded onto an SD card so if something isn’t there check Device Storage.
Device Storage
Android core files will always be stored within Device Storage. Many apps, games and programs will also be stored there too. Within Device Storage you will see folders created by the Android OS.
DCIM is the camera and is where your images will be stored. By default this will be on Device Storage but can be configured to store on SD Card. Download should speak for itself, as should Movies, Music, Pictures and all the other folders.
SD Card
If your device has an SD card it will appear beside Device Storage both on the phone and in Windows Explorer. You can browse and explore it in exactly the same way. In Windows 10 it may display as Card, External Storage, or SD Card depending on the card type and your phone.
You explore the SD Card the same as any Windows File. If you see a DCIM folder, it means your phone is configured to save images to the card instead of internal storage. The same for Music, Movies, Playlists, and other files. As mentioned, not all apps and files can be saved into external storage so you may not see everything you’re expecting.

Upload and Download Android Files
Now you know how to see your Android files, you should be able to move, add and change them too. Uploading and downloading Android files is just a matter of dragging and dropping them in Windows or selecting the menu option on your phone.
On an Android device:
- Navigate to Settings, Storage & USB, and Internal storage.
- Select the file or folder you want to move by pressing down on the icon and holding it until it says selected.
- Select ‘Move’ or ‘Copy’ from the bottom of the screen.
- Select the destination and confirm the move or copy.


Third party file managers
The Android file manager is quite capable but isn’t the easiest to use or to navigate. If you don’t like it much you can download and install third-party file managers from the Google Play Store. Search File Manager and choose an app you like the look of and that has good reviews. Download and install and then use as default. Most installation wizards take you through replacing the stock file manager so you will be in good hands.
Do you use a third party file manager for Android? Which do you use? Tell us about your experience below!
Источник


