- Flutter — Visual Studio Code Shortcuts for Fast and Efficient Development
- Keyboard Shortcut List
- Code Assist or Code Completion
- Quick Fix or the Magic Wand
- Quick Fix Options
- 1. Extract Local variable
- 2. Extract Method
- 3. Extract Widget
- 4. StatelessWidget to StatefulWidget
- 5. Add padding
- 6. Center widget
- 7. Wrap with Column, Container, Row, StreamBuilder, new Widget
- Flutter Specific Shortcuts — Create Stateful or Stateless Widgets
- Hierarchy
- Shortcuts while Coding
- Mouse Click Selection
- View Source Code
- Cut or Copy and paste a line
- Горячие клавиши Android Studio, которые могут увеличить вашу производительность на 100%
- Перевод
- 1. Поисковые горячие клавиши
- 2. Навигационные горячие клавиши
- Активные шаблоны
- Quick and Simple Text Selection
- David Bankier
- vscode-quick-select
- Installation
- Manual Install
- Usage
- String resources
- String
- Kotlin
- String array
- Kotlin
- Quantity strings (plurals)
- Kotlin
- Format and style
- Handle special characters
- Formatting strings
- Kotlin
- Styling with HTML markup
- Kotlin
- Kotlin
- Styling with spannables
- Kotlin
- Kotlin
- Kotlin
- Styling with annotations
- Example — adding a custom typeface
- Kotlin
- Annotation spans and text parceling
- Kotlin
- Kotlin
Flutter — Visual Studio Code Shortcuts for Fast and Efficient Development


It is a well known fact that keyboard shortcuts can help us a lot while developing, especially when you have a lot of code to go through and you have to find the opening and closing brackets or insert a new widget or remove one. Time is precious and I find these shortcuts help me a lot in coding in flutter. I became a fan of VS Code mainly because it’s so light weight and opens much faster than other IDEs I have worked with and have a ton of features and customizations along with extensions which can do wonders (This is just my personal opinion).
If you use Android Studio and IntelliJ in Windows, I would recommend you to read this great article or if you use mac you can check out this article.
First of all I hope you have Dart and Flutter Extensions enabled, if not you can get them from here : Dart and Flutter.
Now let’s jump into the shortcuts and see what all wonders we can do.
Keyboard Shortcut List
Firstly, I will provide you the shortcut to get all the shortcuts.
I won’t be able to explain all the default shortcuts in this article since the list is huge. You can find the list of default keyboard shortcuts and also search for shortcuts by using CTRL+K+S as seen below:
Or you can also use Ctrl+Shift+P to Show Command Palette with the recently used commands or also to search commands.
Or you can take a printout of all the default VS Code keyboard shortcuts from here. You can get the official dart custom shortcut list from here and flutter vs code extension documentation.
Code Assist or Code Completion
While coding, this is one of the important tools especially for beginners or if you get stuck somewhere and want to check for options, you can use Ctrl+Space to get a list of curated code completion options.
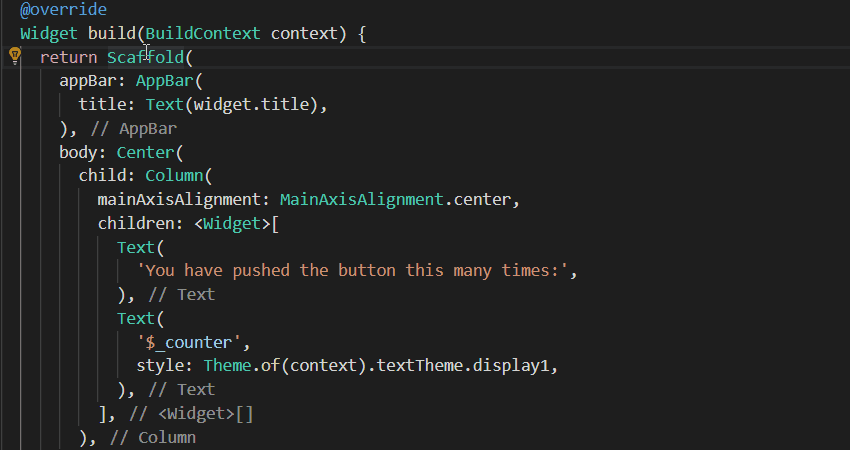
Quick Fix or the Magic Wand
For faster development in flutter you can use the quick fix tool with is Ctrl+. , it helps in fixing the code with some additional requirements without messing with your code or your widget structure and giving you less headache of manually correcting everything. Let’s see some of the examples
Quick Fix Options
As you can see below, when on any widget you can click Ctrl+. to find the quick fix options.
Let’s explore the menu items one by one :
1. Extract Local variable
You can extract an existing widget and make it a local variable and magically the widget will be replaced by the variable, wherever it is used.

2. Extract Method
What if you have got a lot of code and you want to split it to different methods. It would even given you a generated name for whatever code you want to split.
But I would advice against splitting widgets to methods, instead you should create a new class as it has a lot of impact on performance, you could refer this article to know in depth why widgets should not be split into methods. You can do this easily using the next menu.
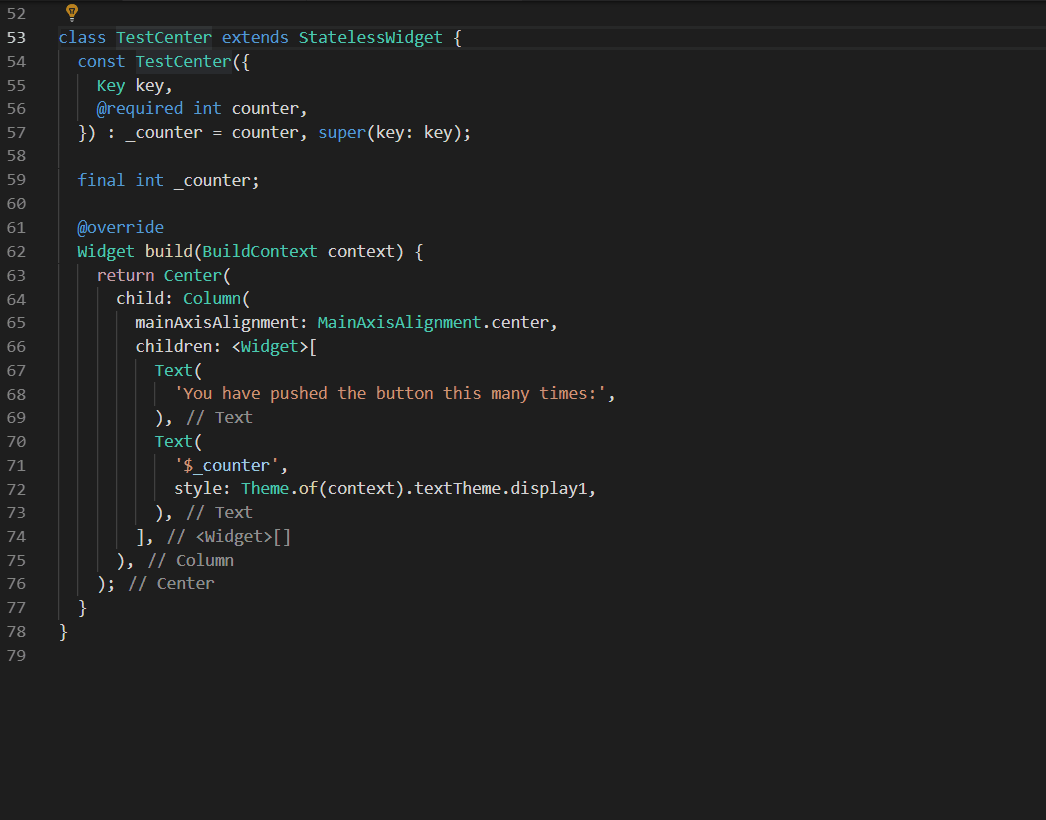
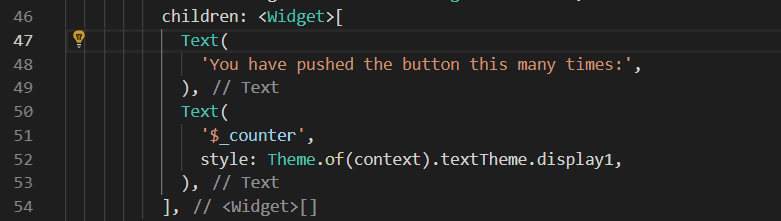
3. Extract Widget
This can come a lot in handy if you want to split your widgets into smaller widgets. Hope by now you know about the importance of splitting widgets to smaller widgets and it’s impact on performance 😉.
Just click on any widget and then click Ctrl+. and click Extract Widget option and give a name for the new widget and click Enter and that’s it.
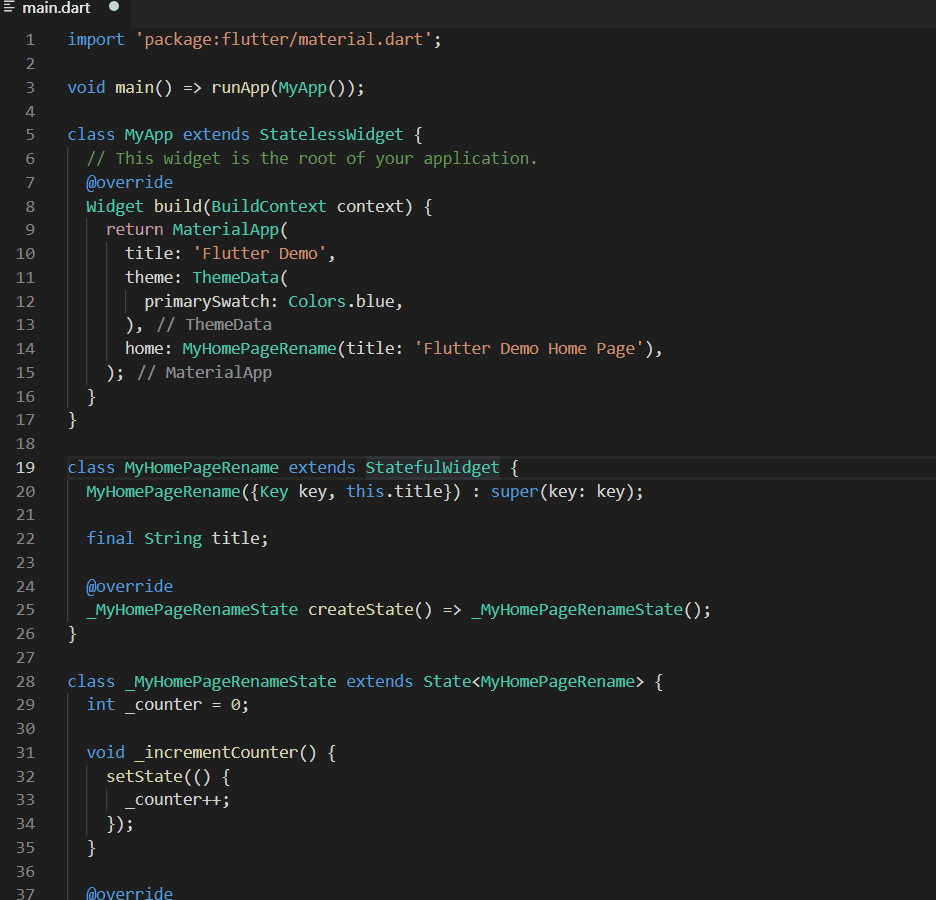
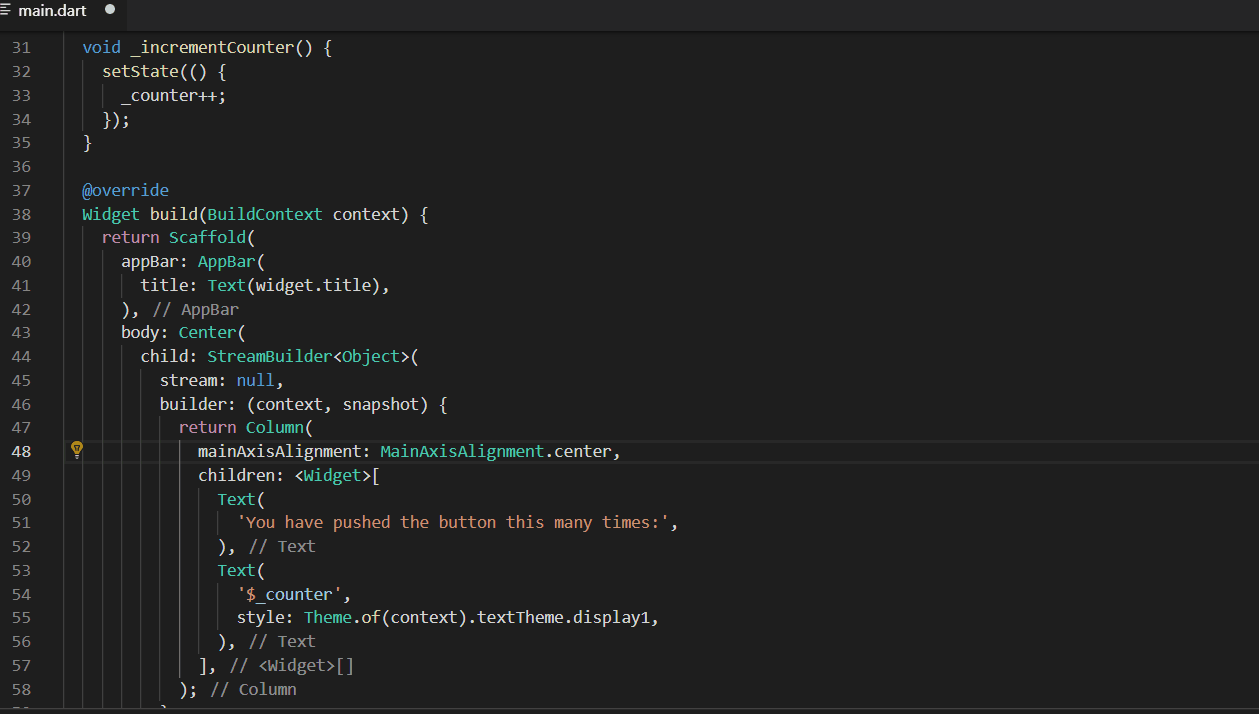
4. StatelessWidget to StatefulWidget
Now let’s say, you wanted a StatefulWidget , but this process only gives you a StatelessWidget , but there is a cool way to convert the StatelessWidget to StatefulWidget , may be by this time you would have guessed it…
Yes, you just have to click the StatelessWidget and click Ctrl+. and then “Ta Da” as if it’s magic you will get an option Convert to StatefulWidget click on that and that’s it 😍
5. Add padding
Adding padding to an existing widget is much more easier with the quick assist tool, just select Add padding and you will get padding around your widget without messing up your widget structure.
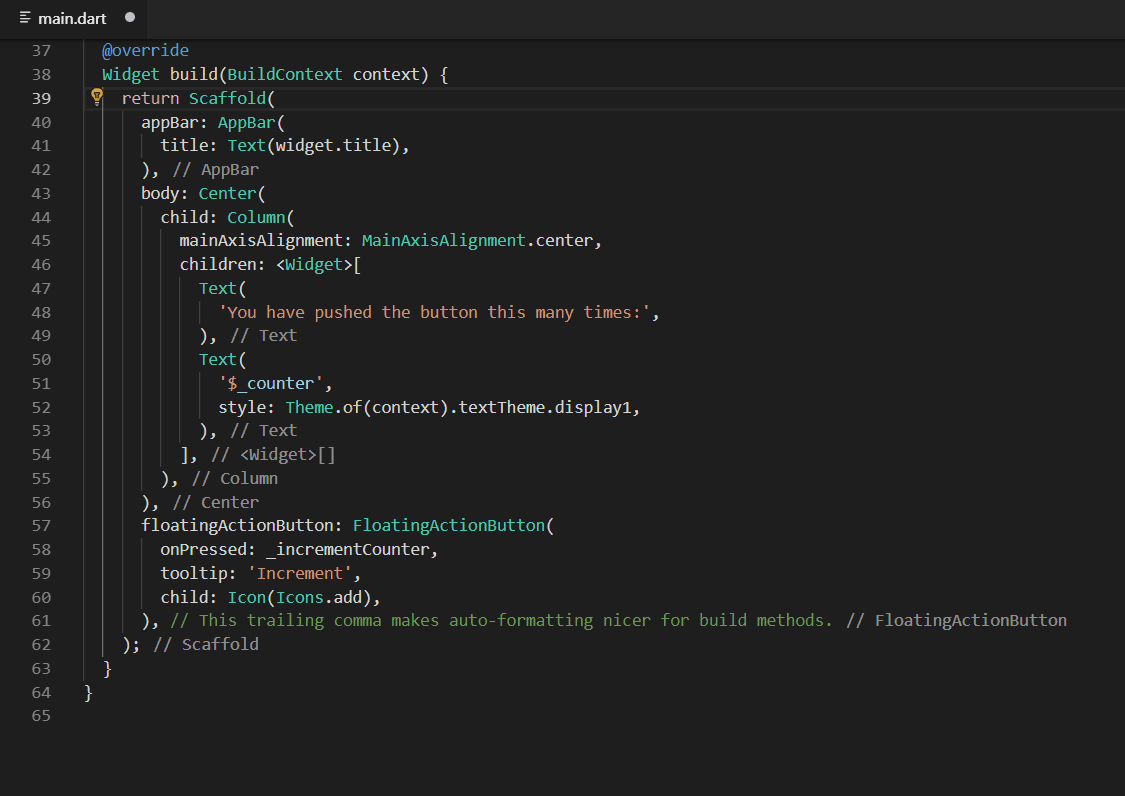
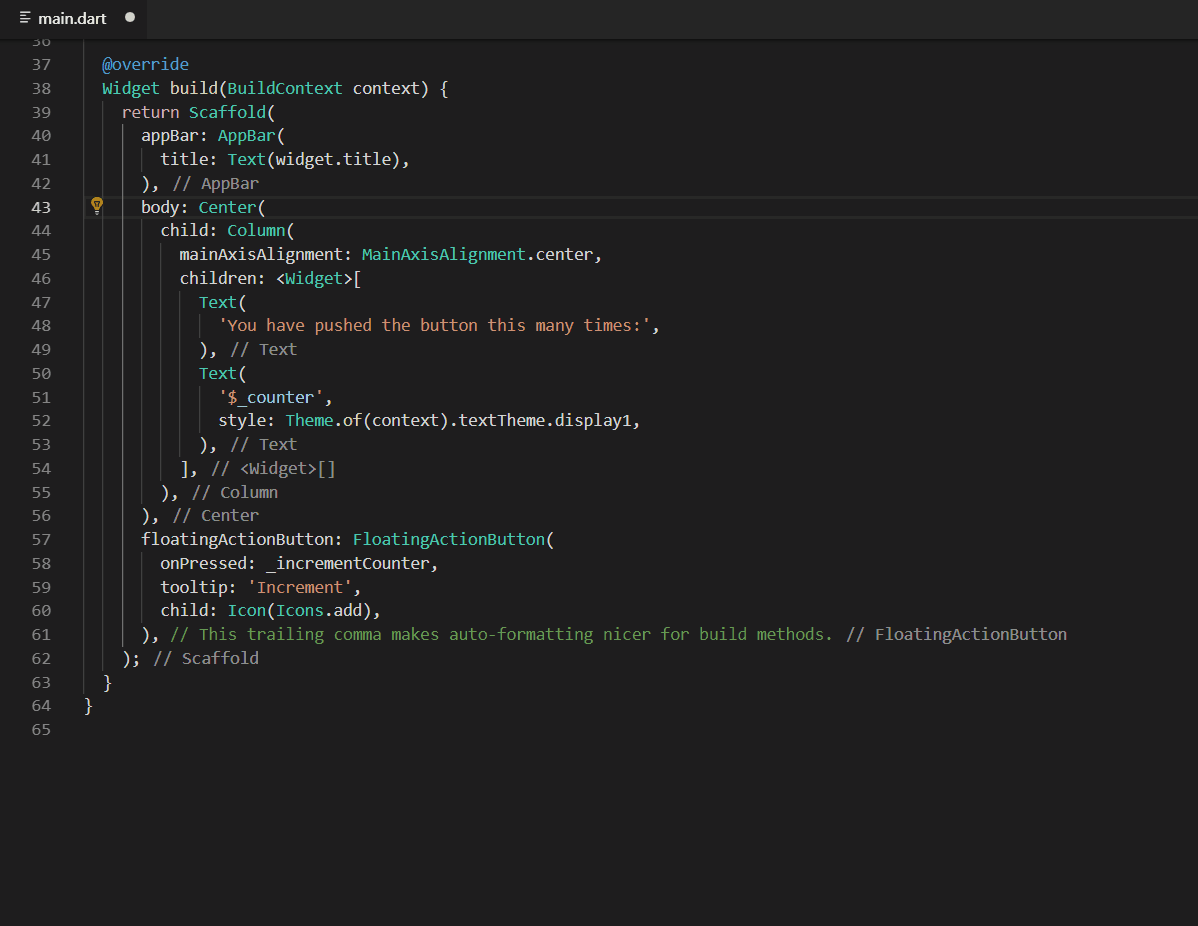
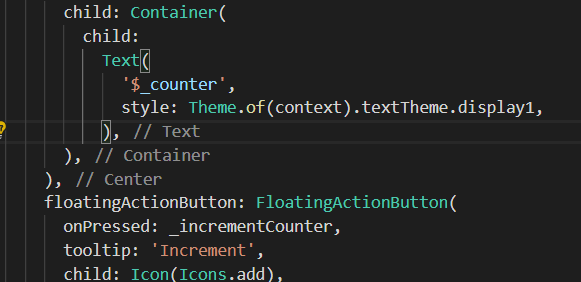
6. Center widget
This is used to wrap it with a center widget, thus centers your widget.
7. Wrap with Column, Container, Row, StreamBuilder, new Widget
You can use this same technique to wrap your required widget with a Column or Container or Row or StreamBuilder or any other widget or even custom widgets, to make that as your parent widget of the required widget.

But, unlike the same tool in android studio, you cannot select multiple widgets to come under a column, as of now that feature is not available.

You can also wrap with any other widget or a custom widget

Flutter Specific Shortcuts — Create Stateful or Stateless Widgets
There are some flutter specific shortcuts as well, which will provide some boilerplate code to work upon, which you can call by typing prefixes, in case the menu doesn’t popup you can type Ctrl+space after typing the prefix.
- Prefix stless : Create a new subclass of StatelessWidget .


Hierarchy
Inorder to see the class hierarchy press F4 on any widget and in a few seconds you will be able to see the widget hierarchy.
Shortcuts while Coding
Mouse Click Selection
This is very common and is used usually in any editor, you can select any word by double clicking the left mouse button over that word and you can select the whole line by clicking the left mouse button 3 times consecutively.
View Source Code
You can easily see behind the curtains of any widget and know it’s working or even find out the reason behind your errors or find the required parameters by going to the widget source code and reading about it, flutter provides a detailed documentation in the form of comments in the source code and can help you solve issue faster, in order to do that, it’s very easy, you just have to press ctrl and then left mouse click any widget to go into its source file, or you can use F12 while cursor is on the widget.
Cut or Copy and paste a line
You can cut a line by using Ctrl+x or copy the line using Ctrl+c when the cursor is at any point on the line and then you can use Ctrl+v to paste the same.
Источник
Горячие клавиши Android Studio, которые могут увеличить вашу производительность на 100%
Перевод заметки Шикара Ша с medium.com
Об авторе оригинала: Шикар Ша, Android-разработчик, сертифицированный Google (Shikhar Shah, Google Certified Android Developer).
От переводчика:
Если вы найдёте какие-то неточности в переводе терминов или их искажение, а также искажение смысла статьи-оригинала, то пишите об этом в комментариях или напрямую мне в личные сообщения.
За помощь в устранении синтаксических и пунктационных ошибок спасибо ЗаЕцу 😉
Перевод
Давайте перейдём сразу к делу. Вы здесь не для того, чтобы узнать историю моей жизни. Начнём.

Есть некоторое количество комбинаций горячих клавиш, с которыми я столкнулся, войдя в корпоративный мир. Я выделяю их в две группы.
1. Поисковые горячие клавиши
Не помните, где использовали определённое слово? Используйте эти горячие клавиши, чтобы решить вашу проблему.
i) Ctrl + Shift + F: Когда вы используете эту комбинацию, открывается поисковое окно, где вы можете найти слово, класс или любой другой объект. AS (Android Studio) просмотрит весь проект на предмет нахождения его в проекте.
ii) Shift + Shift: Устали использовать навигационную панель слева? Тогда вы можете добраться до желаемого файла из этого окна, которое открывается с помощью двойного нажатия на Shift. Просто введите начало названия или полное имя желаемого файла и AS в окне выдаст списком результаты поиска. Вы также можете открывать конкретные окна настроек с помощью этой комбинации клавиш.
2. Навигационные горячие клавиши
i) Ctrl + Клик: Доберитесь до файла разметки или Java-файла, кликнув по нему, удерживая клавишу Ctrl.
ii) Alt + вверх/вниз: Спокойно перемещайтесь по заголовкам классов и принадлежащих им методов с помощью этой комбинации.
iii) Alt + вправо/влево: Используйте стрелки вправо/влево в связке с клавишей Alt, чтобы перемещаться по открытым файлам проектов, таким как файл разметки или файл класса.
Активные шаблоны
i) «Toast» + Tab: Набор слова “Toast” и последующее нажатие на клавишу Tab сгенерирует готовый Toast-шаблон.
Существует множество встроенных шаблонов, которые помогут вам в работе, такие как
ii) loge + Tab
iii) logd + Tab
iv) logr + Tab
и многие другие. Прелесть этой фичи заключается в том, что вы можете добавлять свои активные шаблоны в настройки. Просто используйте двойной Shift и зайдите в раздел активных шаблонов (Live Templates), где вы можете добавить свой собственный шаблон.
И самая важная и спасительная комбинация это
которая автоматически полностью дублирует строку, на которой расположен курсор в текущий момент.
На этом всё, ребята.
ПОСЛЕДНИЙ:
Хотите, чтобы ваш код был чистым? Просто используйте
Ctrl + Shift + L
и ваш код в выбранных в текущий момент файлах будет должным образом отформатирован.
Источник
Quick and Simple Text Selection
David Bankier
vscode-quick-select
Yes I know about the ⌃⇧⌘← and ⌃⇧⌘→ expand/shrink selection. Having come from VIM I think these are still missing.
It now supports multilines automatic selection, matching correctly.
NEW: you can also now toggle single/double quotes
See the examples below.
Installation
Press F1 and narrow down the list commands by typing extension . Pick Extensions: Install Extension . Select the Quick and Simple Text Selection extension from the list
Manual Install
Mac & Linux
Windows
All Platforms
Usage
Here some examples — and it supports multiple selections.
In the examples below use CTRL instead of ⌘ for Windows.


NEW: You can also use this following shortcut to select either single, double quotes or backticks
NEW: You can also use this following shortcut to toggle quotes, e.g. «word» to ‘word’
NOTE: the extensions can be configured to exclude backticks from selection or switching

⌘k ( and ⌘k [ and ⌘k <
Using the following performs and outer selection:
⌘k ) and ⌘k ] and ⌘k >
Or if you have already made in inner selection, use the same key combination again to expand to an outer selection.
Источник
String resources
A string resource provides text strings for your application with optional text styling and formatting. There are three types of resources that can provide your application with strings:
String XML resource that provides a single string. String Array XML resource that provides an array of strings. Quantity Strings (Plurals) XML resource that carries different strings for pluralization.
All strings are capable of applying some styling markup and formatting arguments. For information about styling and formatting strings, see the section about Formatting and Styling.
String
A single string that can be referenced from the application or from other resource files (such as an XML layout).
Note: A string is a simple resource that is referenced using the value provided in the name attribute (not the name of the XML file). So, you can combine string resources with other simple resources in the one XML file, under one element.
file location: res/values/filename.xml
The filename is arbitrary. The element’s name is used as the resource ID. compiled resource datatype: Resource pointer to a String . resource reference: In Java: R.string.string_name
In XML: @string/string_name syntax: elements: Required. This must be the root node.
A string, which can include styling tags. Beware that you must escape apostrophes and quotation marks. For more information about how to properly style and format your strings see Formatting and Styling, below.
name String. A name for the string. This name is used as the resource ID. example: XML file saved at res/values/strings.xml :
This layout XML applies a string to a View:
This application code retrieves a string:
Kotlin
You can use either getString(int) or getText(int) to retrieve a string. getText(int) retains any rich text styling applied to the string.
String array
An array of strings that can be referenced from the application.
Note: A string array is a simple resource that is referenced using the value provided in the name attribute (not the name of the XML file). As such, you can combine string array resources with other simple resources in the one XML file, under one element.
file location: res/values/filename.xml
The filename is arbitrary. The element’s name is used as the resource ID. compiled resource datatype: Resource pointer to an array of String s. resource reference: In Java: R.array.string_array_name
In XML: @[package:]array/string_array_name syntax: elements: Required. This must be the root node.
Defines an array of strings. Contains one or more elements.
name String. A name for the array. This name is used as the resource ID to reference the array. A string, which can include styling tags. The value can be a reference to another string resource. Must be a child of a element. Beware that you must escape apostrophes and quotation marks. See Formatting and Styling, below, for information about to properly style and format your strings.
example: XML file saved at res/values/strings.xml :
This application code retrieves a string array:
Kotlin
Quantity strings (plurals)
Different languages have different rules for grammatical agreement with quantity. In English, for example, the quantity 1 is a special case. We write «1 book», but for any other quantity we’d write «n books». This distinction between singular and plural is very common, but other languages make finer distinctions. The full set supported by Android is zero , one , two , few , many , and other .
The rules for deciding which case to use for a given language and quantity can be very complex, so Android provides you with methods such as getQuantityString() to select the appropriate resource for you.
Although historically called «quantity strings» (and still called that in API), quantity strings should only be used for plurals. It would be a mistake to use quantity strings to implement something like Gmail’s «Inbox» versus «Inbox (12)» when there are unread messages, for example. It might seem convenient to use quantity strings instead of an if statement, but it’s important to note that some languages (such as Chinese) don’t make these grammatical distinctions at all, so you’ll always get the other string.
The selection of which string to use is made solely based on grammatical necessity. In English, a string for zero is ignored even if the quantity is 0, because 0 isn’t grammatically different from 2, or any other number except 1 («zero books», «one book», «two books», and so on). Conversely, in Korean only the other string is ever used.
Don’t be misled either by the fact that, say, two sounds like it could only apply to the quantity 2: a language may require that 2, 12, 102 (and so on) are all treated like one another but differently to other quantities. Rely on your translator to know what distinctions their language actually insists upon.
It’s often possible to avoid quantity strings by using quantity-neutral formulations such as «Books: 1». This makes your life and your translators’ lives easier, if it’s an acceptable style for your application.
Note: A plurals collection is a simple resource that is referenced using the value provided in the name attribute (not the name of the XML file). As such, you can combine plurals resources with other simple resources in the one XML file, under one element.
file location: res/values/filename.xml
The filename is arbitrary. The
element’s name is used as the resource ID. resource reference: In Java: R.plurals.plural_name syntax: elements: Required. This must be the root node.
A collection of strings, of which, one string is provided depending on the amount of something. Contains one or more elements.
name String. A name for the pair of strings. This name is used as the resource ID. A plural or singular string. The value can be a reference to another string resource. Must be a child of a
element. Beware that you must escape apostrophes and quotation marks. See Formatting and Styling, below, for information about to properly style and format your strings.
quantity Keyword. A value indicating when this string should be used. Valid values, with non-exhaustive examples in parentheses:
| Value | Description |
|---|---|
| zero | When the language requires special treatment of the number 0 (as in Arabic). |
| one | When the language requires special treatment of numbers like one (as with the number 1 in English and most other languages; in Russian, any number ending in 1 but not ending in 11 is in this class). |
| two | When the language requires special treatment of numbers like two (as with 2 in Welsh, or 102 in Slovenian). |
| few | When the language requires special treatment of «small» numbers (as with 2, 3, and 4 in Czech; or numbers ending 2, 3, or 4 but not 12, 13, or 14 in Polish). |
| many | When the language requires special treatment of «large» numbers (as with numbers ending 11-99 in Maltese). |
| other | When the language does not require special treatment of the given quantity (as with all numbers in Chinese, or 42 in English). |
example: XML file saved at res/values/strings.xml :
XML file saved at res/values-pl/strings.xml :
Kotlin
When using the getQuantityString() method, you need to pass the count twice if your string includes string formatting with a number. For example, for the string %d songs found , the first count parameter selects the appropriate plural string and the second count parameter is inserted into the %d placeholder. If your plural strings do not include string formatting, you don’t need to pass the third parameter to getQuantityString .
Format and style
Here are a few important things you should know about how to properly format and style your string resources.
Handle special characters
When a string contains characters that have special usage in XML, you must escape the characters according to the standard XML/HTML escaping rules. If you need to escape a character that has special meaning in Android you should use a preceding backslash.
By default Android will collapse sequences of whitespace characters into a single space. You can avoid this by enclosing the relevant part of your string in double quotes. In this case all whitespace characters (including new lines) will get preserved within the quoted region. Double quotes will allow you to use regular single unescaped quotes as well.
| Character | Escaped form(s) |
|---|---|
| @ | \@ |
| ? | \? |
| New line | \n |
| Tab | \t |
| U+XXXX Unicode character | \uXXXX |
| Single quote ( ‘ ) | |
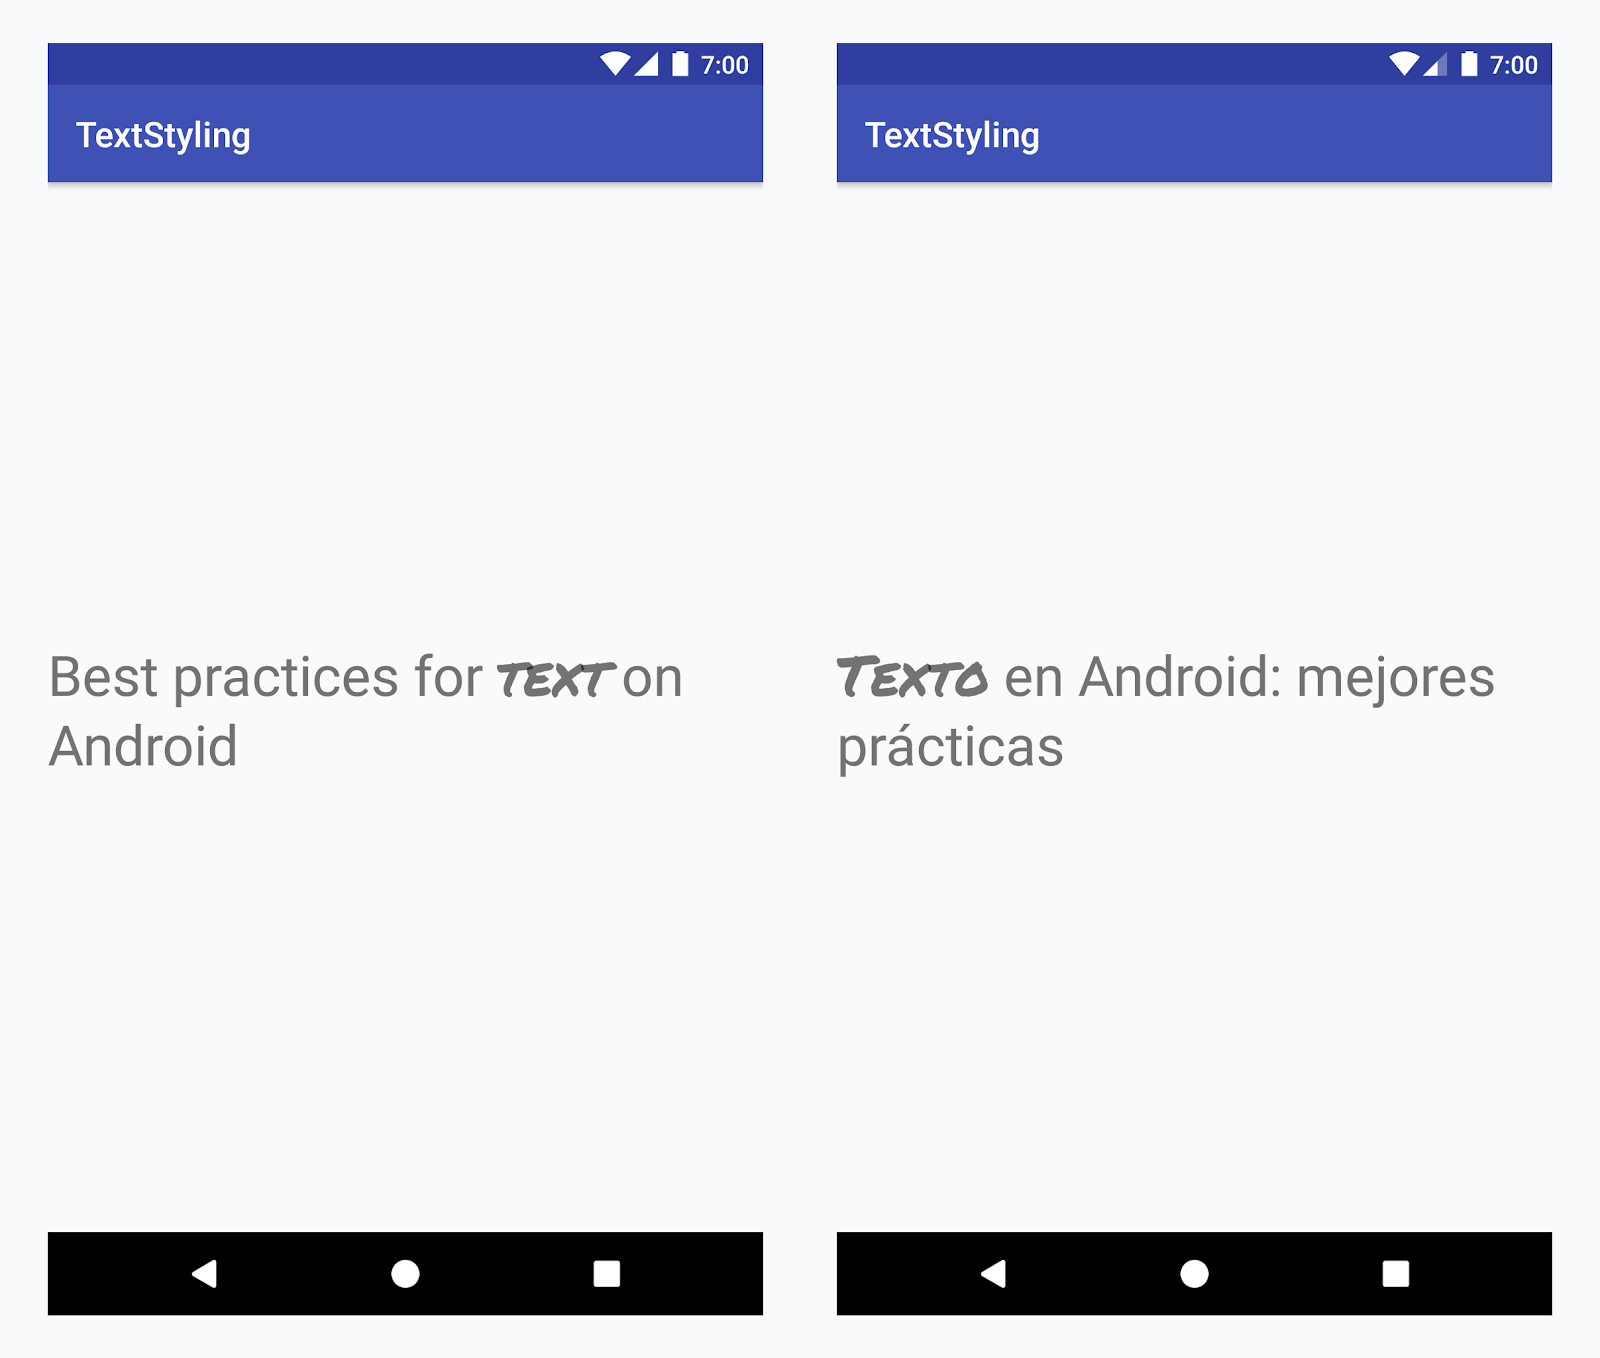
| Double quote ( » ) | \» Note that surrounding the string with single quotes does not work. Whitespace collapsing and Android escaping happens after your resource file gets parsed as XML. This means that (space, punctuation space, Unicode Em space) all collapse to a single space ( » » ), because they are all Unicode spaces after the file is parsed as an XML. To preserve those spaces as they are, you can either quote them ( » » ) or use Android escaping ( \u0032 \u8200 \u8195 ). Note: From XML parser’s perspective, there is no difference between «Test this» and «Test this» whatsoever. Both forms will not show any quotes but trigger Android whitespace-preserving quoting (that will have no practical effect in this case). Formatting stringsIf you need to format your strings, then you can do so by putting your format arguments in the string resource, as demonstrated by the following example resource. In this example, the format string has two arguments: %1$s is a string and %2$d is a decimal number. Then, format the string by calling getString(int, Object. ) . For example: KotlinStyling with HTML markupYou can add styling to your strings with HTML markup. For example: The following HTML elements are supported:
If you aren’t applying formatting, you can set TextView text directly by calling setText(java.lang.CharSequence) . In some cases, however, you may want to create a styled text resource that is also used as a format string. Normally, this doesn’t work because the format(String, Object. ) and getString(int, Object. ) methods strip all the style information from the string. The work-around to this is to write the HTML tags with escaped entities, which are then recovered with fromHtml(String) , after the formatting takes place. For example:
In this formatted string, a element is added. Notice that the opening bracket is HTML-escaped, using the notation. Then format the string as usual, but also call fromHtml(String) to convert the HTML text into styled text: KotlinBecause the fromHtml(String) method formats all HTML entities, be sure to escape any possible HTML characters in the strings you use with the formatted text, using htmlEncode(String) . For instance, if you are formatting a string that contains characters such as » fromHtml(String) , the characters come out the way they were originally written. For example: KotlinStyling with spannablesA Spannable is a text object that you can style with typeface properties such as color and font weight. You use SpannableStringBuilder to build your text and then apply styles defined in the android.text.style package to the text. You can use the following helper methods to set up much of the work of creating spannable text: KotlinThe following bold , italic , and color methods wrap the helper methods above and demonstrate specific examples of applying styles defined in the android.text.style package. You can create similar methods to do other types of text styling. KotlinHere’s an example of how to chain these methods together to apply various styles to individual words within a phrase: KotlinThe core-ktx Kotlin module also contains extension functions that make working with spans even easier. You can check out the android.text package documentation on GitHub to learn more. For more information on working with spans, see the following links: Styling with annotations
Example — adding a custom typefaceLoad the string resource and find the annotations with the font key. Then create a custom span and replace the existing span. KotlinIf you’re using the same text multiple times, you should construct the SpannableString object once and reuse it as needed to avoid potential performance and memory issues. For more examples of annotation usage, see Styling internationalized text in Android Annotation spans and text parcelingBecause Annotation spans are also ParcelableSpans , the key-value pairs are parceled and unparceled. As long as the receiver of the parcel knows how to interpret the annotations, you can use Annotation spans to apply custom styling to the parceled text. To keep your custom styling when you pass the text to an Intent Bundle, you first need to add Annotation spans to your text. You can do this in the XML resources via the tag, as shown in the example above, or in code by creating a new Annotation and setting it as a span, as shown below: KotlinRetrieve the text from the Bundle as a SpannableString and then parse the annotations attached, as shown in the example above. KotlinFor more information on text styling, see the following links: Content and code samples on this page are subject to the licenses described in the Content License. Java is a registered trademark of Oracle and/or its affiliates. Источник  Когда к мобильному устройству присоединены наушники  ОС Google Android развивается, и по всему видимому |