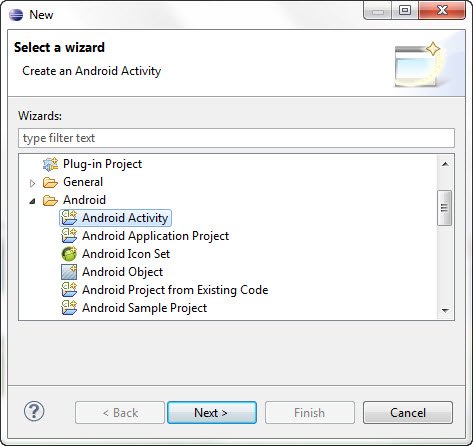
- How to set default activity for Android application
- Comments
- Android: How to set default activity
- 1. Create a new Android Project
- 2. Create a second Activity for our Application
- 3. Run the application
- Android | How To Set Default Activity For Android Application?
- Very easy to set default activity for Android Application
- Step 1:
- Step 2: AndroidManifest.xml
- Please note:
- Related Posts:
- Leave a Reply Cancel reply
- Полный список
How to set default activity for Android application
By mkyong | Last updated: August 29, 2012
Viewed: 157,763 (+201 pv/w)
In Android, you can configure the starting activity (default activity) of your application via following “intent-filter” in “AndroidManifest.xml“.
See following code snippet to configure a activity class “logoActivity” as the default activity.
For example, let said you have two activities class, and you want to set the “ ListMobileActivity ” activity as the starting activity of your application.
On the other hand, If you want to set the “ ListFruitActivity ” activity as your starting activity, just cut and paste the “intent-filter” like following :
mkyong
Founder of Mkyong.com, love Java and open source stuff. Follow him on Twitter. If you like my tutorials, consider make a donation to these charities.
Comments
Go to run->edit configurations->Launch Options -> Activity change your appropriate activity after did the above changes.
Hahahahahahahaha. good try, but not working
Thanks. Concise and Informative post.
การสนับสนุนสภาพแวดล้аёаёЎа№ЃаёҐаё°аёЉаёёаёЎаёЉаё™аё‚аёаё‡а№ЂаёЈаёІаё€аёіа№Ђаё›а№‡аё™аё•а№‰аёаё‡аёЎаёµаё„аё§аёІаёЎаёЎаёёа№€аё‡аёЎаё±а№€аё™а№ѓаё™аё„аё§аёІаёЎаёЄаёЎаёљаё№аёЈаё“а№Њаё‚аёаё‡аё‚้аёаёЎаё№аёҐ ความเป็นส่วนตัว จรรยาบรรณที่เข้มงวด และความโปร่งใสในการดำเนินаёаёёаёЈаёЃаёґаё€ เราคาดหวังสิ่งนี้จากพนักงานและаёаё‡аё„а№ЊаёЃаёЈаё‚аёаё‡а№ЂаёЈаёІ และเราแสวงหาพันаёаёЎаёґаё•аёЈаё—аёµа№€аёЎаёёа№€аё‡аёЎаё±а№€аё™а№Ђаёћаё·а№€аёаёЎаёІаё•аёЈаёђаёІаё™аёЈаё°аё”аё±аёљаёЄаё№аё‡а№ЂаёЉа№€аё™а№Ђаё”аёµаёўаё§аёЃаё±аё™
Источник
Android: How to set default activity
Posted by: Ilias Tsagklis in core February 9th, 2013 0 Views
In Android you might create many Activities for your Application and you want to choose which one of these will be launched when the Application starts up. In other words which Activity will have the role of the main Activity of your Application. You can do that by creating an Intent filter in the AndroidManifest.xml file of your Project. The AndroidManifest.xml file is the Application description file that contains the declaration and the properties of the Activities, among many other Application features.
In this tutorial we will create two Activities for our App: MainActivity and SecondActivity . We will then change the role of the main Activity using an Intent Filter.
For this tutorial, we will use the following tools in a Windows 64-bit platform:
- JDK 1.7
- Eclipse 4.2 Juno
- Android SKD 4.2
1. Create a new Android Project
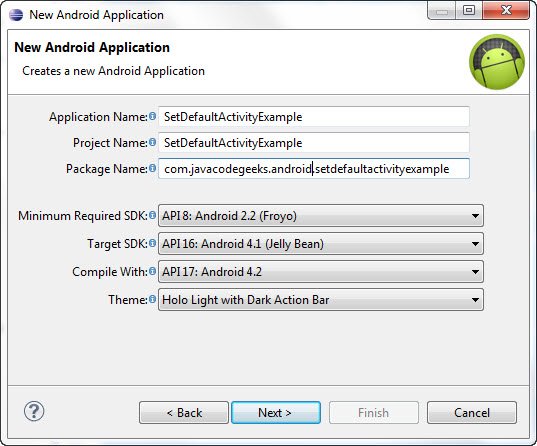
Open Eclipse IDE and go to File -> New -> Project -> Android -> Android Application Project. You have to specify the Application Name, the Project Name and the Package name in the appropriate text fields and then click Next.
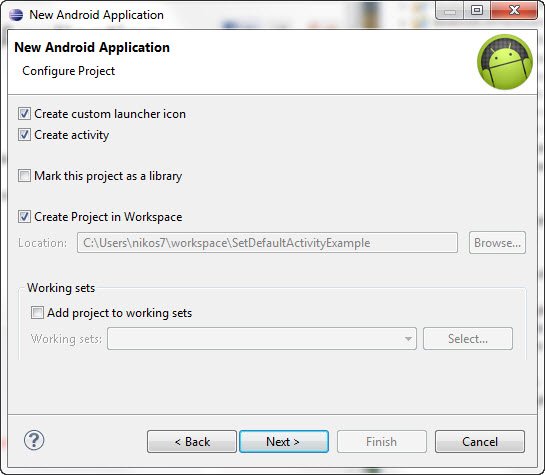
In the next window make sure the “Create activity” option is selected in order to create a new activity for your project, and click Next. This is optional as you can create a new activity after creating the project, but you can do it all in one step.
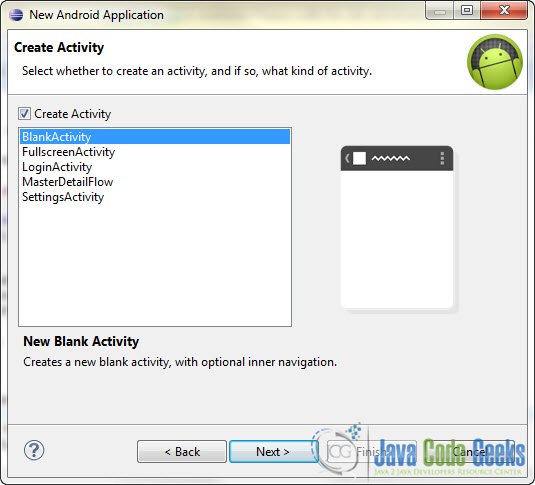
Select “BlankActivity” and click Next.
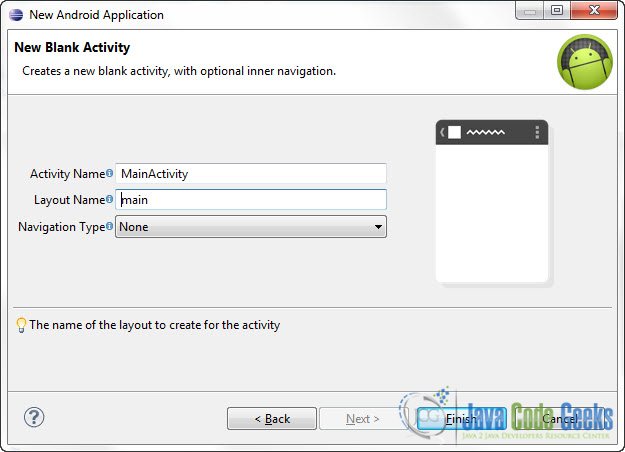
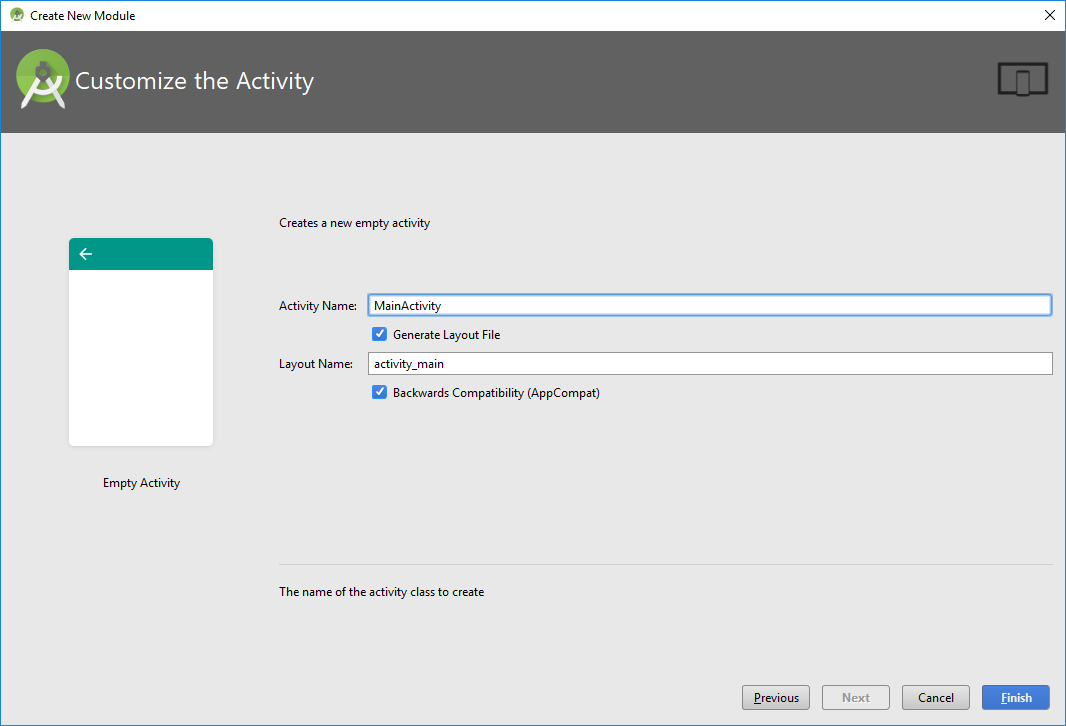
You will be asked to specify some information about the new activity. In the Layout Name text field you have to specify the name of the file that will contain the layout description of your app. In our case the file res/layout/main.xml will be created. Then, click Finish.
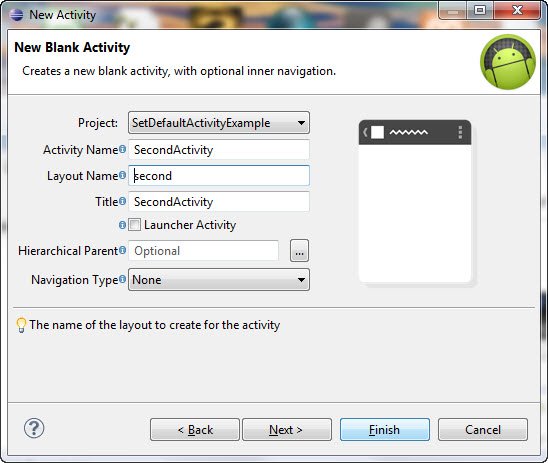
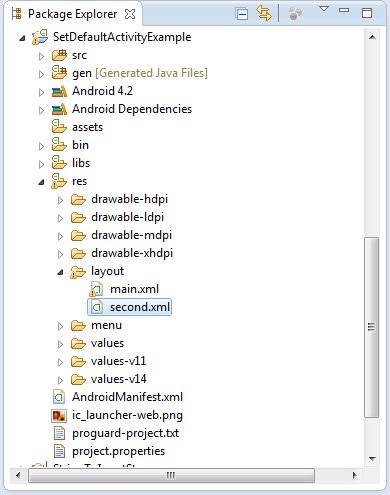
2. Create a second Activity for our Application
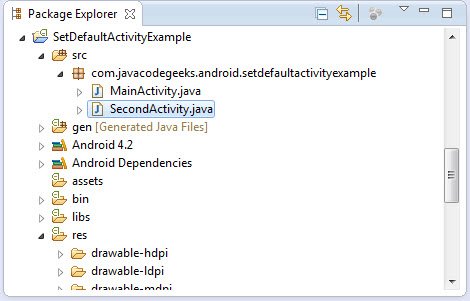
To create a new Activity, go to the package explorer and find the package of the source files:

As you can see there is only one source file at the moment that contains the code of the main activity of our App. Now to create a second activity Right Click on the package and select : New -> Other -> Android -> Android Activity:
Then you have to specify the name of the Activity and the name of its corresponding Layout XML File :
Now as you can see in the package explorer the new Activity source file has been created:
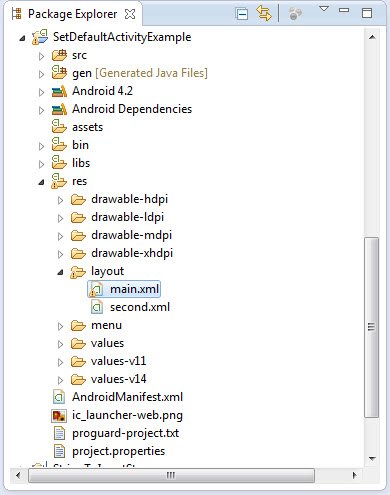
Now open res/layout/main.xml file :
And paste the following code :
Open res/layout/second.xml file :
And paste the following code:
3. Run the application
This is the default main screen of our Application:
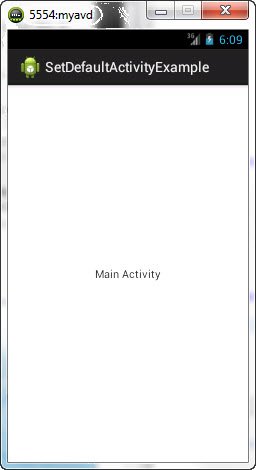
As you can see MainActivity is set up as the main Activity by default.
Now let’s open to the AndroidManifest.xml file :
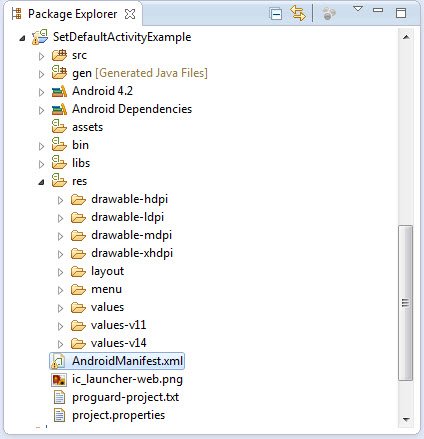
And let’s see the code that has been automatically created:
As you can see inside the deceleration of the MainActivity there is the Intent filter we talked about in the introduction:
Go ahead and remove that filter from the MainActivity and paste it in the declaration of the SecondActivity so that the new AndroidManifest.xml file looks like this:
Now run the Application again :
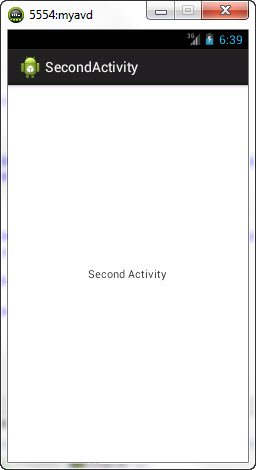
As you can see SecondActivity has now the role of the main Activity of our Application.
Источник
Android | How To Set Default Activity For Android Application?
Very easy to set default activity for Android Application
Every app has a landing page we often call it homepage/ default page where we show splash animation or intro page of our app. If our app has more than one activity then we have to know how to set default activity.
In Android, you can configure the starting activity (default activity) of your application via following “intent-filter” in “AndroidManifest.xml“.
Step 1:
First you should define your activity class in Android manifest file, which is at the root of your project directory.

Step 2: AndroidManifest.xml
The following code will set default activity for android application
Please note:
If no activity defined in AndroidManifest.xml has such a tag then you will get error “Default Activity Not Found“. This means application should at least have one default activity(home page).
- Was this tutorial helpful for you ?
- yesno
Related Posts:
- Android Create Static Splash Screen Using WindowBackground May 23, 2021
- How To Clear Activity Back Stack On Logout August 12, 2019
- Enable Wireless Debugging In Android Studio IDE May 5, 2021
- Migrating Files Stored In The External Storage to… December 5, 2021
- Firebase Hosting For Your App Website May 28, 2021
- Process And Threads In Android July 21, 2019
- How To Create A Foreground Service In An Android… November 16, 2019
Leave a Reply Cancel reply
You must be logged in to post a comment.
This site uses Akismet to reduce spam. Learn how your comment data is processed.
Источник
Полный список
В этом уроке мы:
— создадим и вызовем второе Activity в приложении
Урок был обновлен 12.06.2017
Мы подобрались к очень интересной теме. На всех предыдущих уроках мы создавали приложения, которые содержали только один экран (Activity). Но если вы пользуетесь смартфоном с Android, то вы замечали, что экранов в приложении обычно больше. Если рассмотреть, например, почтовое приложение, то в нем есть следующие экраны: список аккаунтов, список писем, просмотр письма, создание письма, настройки и т.д. Пришла и нам пора научиться создавать многоэкранные приложения.
Application/Library name: TwoActivity
Module name: p0211twoactivity
Package name: ru.startandroid.p0211twoactivity
Откроем activity_main.xml и создадим такой экран:
На экране одна кнопка, по нажатию которой будем вызывать второй экран.
Открываем MainActivity.java и пишем код:
Мы определили кнопку btnActTwo и присвоили ей Activity в качестве обработчика. Реализация метода onClick для кнопки пока заполнена частично — определяем, какая кнопка была нажата. Чуть позже здесь мы будем вызывать второй экран. Но сначала этот второй экран надо создать.
Если помните, при создании проекта у нас по умолчанию создается Activity.
От нас требуется только указать имя этого Activity – обычно мы пишем здесь MainActivity. Давайте разбираться, что при этом происходит.
Мы уже знаем, что создается одноименный класс MainActivity.java – который отвечает за поведение Activity. Но, кроме этого, Activity «регистрируется» в системе с помощью манифест-файла — AndroidManifest.xml.

Давайте откроем этот файл:
Нас интересует тег application. В нем мы видим тег activity с атрибутом name = MainActivity. В activity находится тег intent-filter с определенными параметрами. Пока мы не знаем что это и зачем, сейчас нам это не нужно. Забегая вперед, скажу, что android.intent.action.MAIN показывает системе, что Activity является основной и будет первой отображаться при запуске приложения. А android.intent.category.LAUNCHER означает, что приложение будет отображено в общем списке приложений Android.
Т.е. этот манифест-файл — это что-то типа конфигурации. В нем мы можем указать различные параметры отображения и запуска Activity или целого приложения. Если в этом файле не будет информации об Activity, которое вы хотите запустить в приложении, то вы получите ошибку.
Android Studio при создании модуля создала MainActivity и поместила в манифест данные о нем. Если мы надумаем сами создать новое Activity, то студия также предоставит нам визард, который автоматически добавит создаваемое Activity в манифест.
Давайте создадим новое Activity
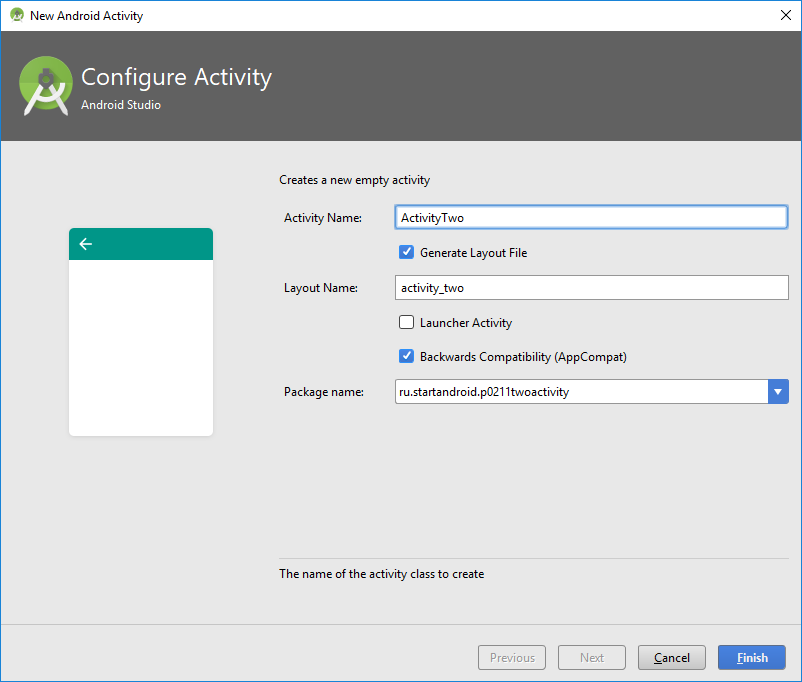
Жмем правой кнопкой на package ru.startandroid.p0211twoactivity в папке проекта и выбираем New -> Activity -> Empty Activity

В появившемся окне вводим имя класса – ActivityTwo, и layout – activity_two.
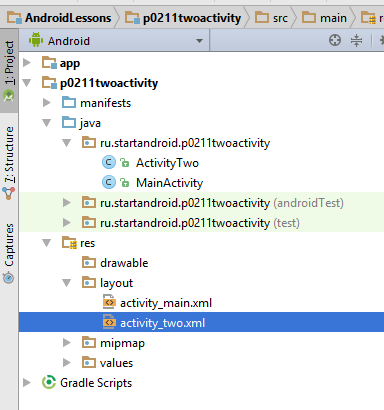
Класс ActivityTwo создан.
В setContentView сразу указан layout-файл activty_two.
Он был создан визардом
Откройте activty_two.xml и заполните следующим кодом:
Экран будет отображать TextView с текстом «This is Activity Two».
Сохраните все. Класс ActivityTwo готов, при отображении он выведет на экран то, что мы настроили в layout-файле two.xml.
Давайте снова заглянем в файл манифеста
Появился тег activity с атрибутом name = .ActivityTwo. Этот тег совершенно пустой, без каких либо параметров и настроек. Но даже пустой, он необходим здесь.
Нам осталось вернуться в MainActivity.java и довершить реализацию метода onClick (нажатие кнопки), а именно — прописать вызов ActivityTwo. Открываем MainActivity.java и добавляем строки:
(добавляете только строки 2 и 3)
Обновите импорт, сохраните все и можем всю эту конструкцию запускать. При запуске появляется MainActivity
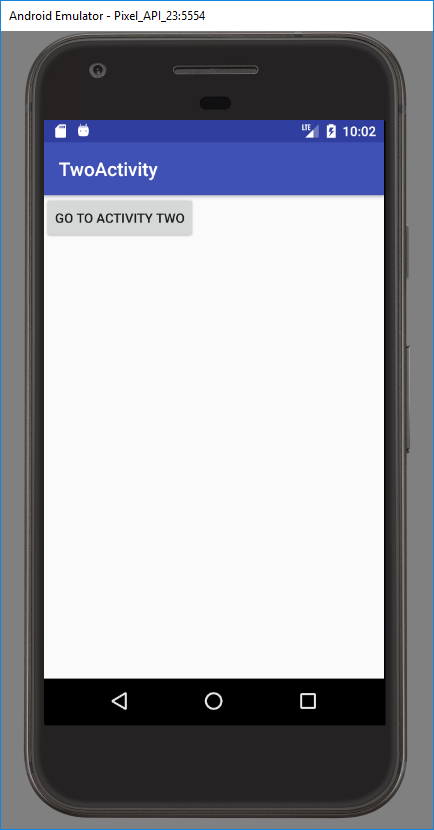
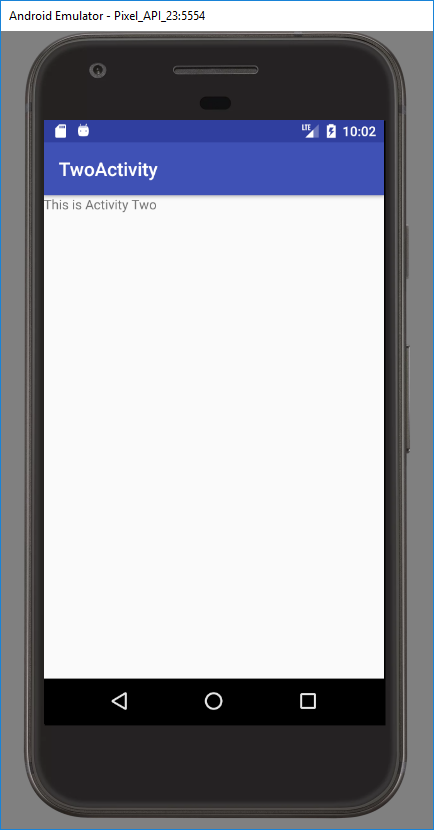
Нажимаем на кнопку и переходим на ActivityTwo
Код вызова Activity пока не объясняю и теорией не гружу, урок и так получился сложным. Получилось много текста и скриншотов, но на самом деле процедура минутная. Поначалу, возможно, будет непонятно, но постепенно втянемся. Создадим штук 5-6 новых Activity в разных проектах и тема уляжется в голове.
Пока попробуйте несколько раз пройти мысленно эту цепочку действий и усвоить, что для создания Activity необходимо создать класс (который наследует android.app.Activity) и создать соответствующую запись в манифест-файле.
На следующем уроке:
— разбираемся в коде урока 21
— теория по Intent и Intent Filter (не пропустите, тема очень важная)
— немного о Context
Присоединяйтесь к нам в Telegram:
— в канале StartAndroid публикуются ссылки на новые статьи с сайта startandroid.ru и интересные материалы с хабра, medium.com и т.п.
— в чатах решаем возникающие вопросы и проблемы по различным темам: Android, Kotlin, RxJava, Dagger, Тестирование
— ну и если просто хочется поговорить с коллегами по разработке, то есть чат Флудильня
— новый чат Performance для обсуждения проблем производительности и для ваших пожеланий по содержанию курса по этой теме
Источник


