Android — Location Based Services
Android location APIs make it easy for you to build location-aware applications, without needing to focus on the details of the underlying location technology.
This becomes possible with the help of Google Play services, which facilitates adding location awareness to your app with automated location tracking, geofencing, and activity recognition.
This tutorial shows you how to use Location Services in your APP to get the current location, get periodic location updates, look up addresses etc.
The Location Object
The Location object represents a geographic location which can consist of a latitude, longitude, time stamp, and other information such as bearing, altitude and velocity. There are following important methods which you can use with Location object to get location specific information −
| Sr.No. | Method & Description | ||||||||||||||||||||||||
|---|---|---|---|---|---|---|---|---|---|---|---|---|---|---|---|---|---|---|---|---|---|---|---|---|---|
| 1 |
| Sr.No. | Callback Methods & Description | |||||||||||||||||||||
|---|---|---|---|---|---|---|---|---|---|---|---|---|---|---|---|---|---|---|---|---|---|---|
| 1 |
| Sr.No. | Callback Method & Description | ||||||||||||||||||
|---|---|---|---|---|---|---|---|---|---|---|---|---|---|---|---|---|---|---|---|
| 1 |
| Sr.No. | Method & Description | |||||||||||||||
|---|---|---|---|---|---|---|---|---|---|---|---|---|---|---|---|---|
| 1 |
| Step | Description |
|---|---|
| 1 | You will use Android studio IDE to create an Android application and name it as Tutorialspoint under a package com.example.tutorialspoint7.myapplication. |
| 2 | add src/GPSTracker.java file and add required code. |
| 3 | Modify src/MainActivity.java file and add required code as shown below to take care of getting current location and its equivalent address. |
| 4 | Modify layout XML file res/layout/activity_main.xml to add all GUI components which include three buttons and two text views to show location/address. |
| 5 | Modify res/values/strings.xml to define required constant values |
| 6 | Modify AndroidManifest.xml as shown below |
| 7 | Run the application to launch Android emulator and verify the result of the changes done in the application. |
Following is the content of the modified main activity file MainActivity.java.
Following is the content of the modified main activity file GPSTracker.java.
Following will be the content of res/layout/activity_main.xml file −
Following will be the content of res/values/strings.xml to define two new constants −
Following is the default content of AndroidManifest.xml −
Let’s try to run your Tutorialspoint application. I assume that, you have connected your actual Android Mobile device with your computer. To run the app from Android Studio, open one of your project’s activity files and click Run  icon from the toolbar. Before starting your application, Android studio installer will display following window to select an option where you want to run your Android application.
Now to see location select Get Location Button which will display location information as follows −
Источник
Полный список
— получаем данные о местоположении
Android устройства могут предоставить нам данные по нашему текущему местоположению. Это, конечно, очень удобно и вовсю используется для, например, пользования картой, получения актуальной для вашей местности информации (прогноз погоды), всевозможных чекинов и пр.
Реализация этого всего вполне проста. Мы вешаем слушателя на провайдера и получаем данные. На данный момент есть два провайдера: GPS и Network.
GPS – тут все понятно, это данные с GPS-спутников.
Network – это координаты, которые можно получить через сотовую связь или WiFi. Для этого провайдера нужен инет.
Напишем простое приложение, которое будет запрашивать и отображать координаты.
Project name: P1381_Location
Build Target: Android 2.3.3
Application name: Location
Package name: ru.startandroid.develop.p1381location
Create Activity: MainActivity
В strings.xml добавим строки:
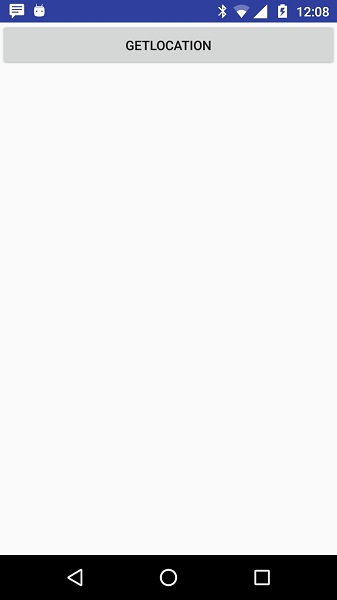
Несколько TextView, в которые мы будем выводить данные, и кнопка для открытия настроек местоположения.
В onCreate определяем TextView-компоненты и получаем LocationManager, через который и будем работать.
В onResume вешаем слушателя с помощью метода requestLocationUpdates. На вход передаем:
— тип провайдера: GPS_PROVIDER или NETWORK_PROVIDER
— минимальное время (в миллисекундах) между получением данных. Я укажу здесь 10 секунд, мне этого вполне хватит. Если хотите получать координаты без задержек – передавайте 0. Но учитывайте, что это только минимальное время. Реальное ожидание может быть дольше.
— минимальное расстояние (в метрах). Т.е. если ваше местоположение изменилось на указанное кол-во метров, то вам придут новые координаты.
— слушатель, объект locationListener, который рассмотрим ниже
Также здесь обновляем на экране инфу о включенности провайдеров.
В onPause отключаем слушателя методом removeUpdates.
locationListener – слушатель, реализует интерфейс LocationListener с методами:
onLocationChanged – новые данные о местоположении, объект Location. Здесь мы вызываем свой метод showLocation, который на экране отобразит данные о местоположении.
onProviderDisabled – указанный провайдер был отключен юзером. В этом методе вызываем свой метод checkEnabled, который на экране обновит текущие статусы провайдеров.
onProviderEnabled – указанный провайдер был включен юзером. Тут также вызываем checkEnabled. Далее методом getLastKnownLocation (он может вернуть null) запрашиваем последнее доступное местоположение от включенного провайдера и отображаем его. Оно может быть вполне актуальным, если вы до этого использовали какое-либо приложение с определением местоположения.
onStatusChanged – изменился статус указанного провайдера. В поле status могут быть значения OUT_OF_SERVICE (данные будут недоступны долгое время), TEMPORARILY_UNAVAILABLE (данные временно недоступны), AVAILABLE (все ок, данные доступны). В этом методе мы просто выводим новый статус на экран.
Провайдеры включаются и отключаются в настройках системы. Тем самым, просто определяется доступен ли провайдер для получения от него координат. Чуть позже увидим, как можно отправить юзера в эти настройки. Программное включение/выключение провайдеров через стандартные методы недоступно.
Далее идут свои методы.
showLocation на вход берет Location, определяет его провайдера методом getProvider и отображает координаты в соответствующем текстовом поле.
formatLocation на вход берет Location, читает из него данные и форматирует из них строку. Какие данные он берет: getLatitude – широта, getLongitude – долгота, getTime – время определения.
checkEnabled определяет включены или выключены провайдеры методом isProviderEnabled и отображает эту инфу на экране.
Метод onClickLocationSettings срабатывает по нажатию кнопки Location settings и открывает настройки, чтобы пользователь мог включить или выключить провайдер. Для этого используется Intent с action = ACTION_LOCATION_SOURCE_SETTINGS.
Осталось в манифесте прописать разрешение на определение координат — ACCESS_FINE_LOCATION, которое позволит нам использовать и Network и GPS. Также существует разрешение ACCESS_COARSE_LOCATION, но оно дает доступ только к Network-провайдеру.
С кодом все, давайте смотреть, что получилось. Все сохраняем и запускаем приложение.
У меня на планшете сейчас выключен GPS, выключен WiFi, вставлена симка и выключен мобильный интернет.
Запускаю приложение и вижу такую картину:
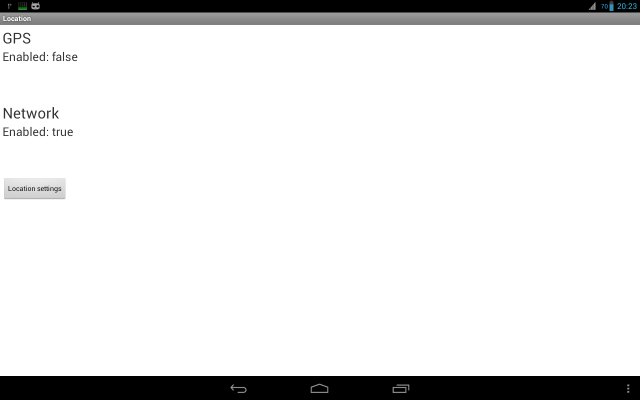
GPS выключен, Network включен. Но инета нет, поэтому Network мне ничего не дает. Надо включить либо мобильный инет, либо WiFi.
Я включаю WiFi. Проходит секунд 15-20 и инфа с Network пошла

Видим широту, долготу и время.
Напомню, что мы ставили минимальную скорость обновления – 10 сек. Но у меня провайдер Network выдает данные не чаще, чем раз в минуту.
Теперь давайте включим GPS. Для этого мы специально повесили кнопку Location settings, которую надо будет нажать пользователю, чтобы перейти в настройки. Жмем кнопку.
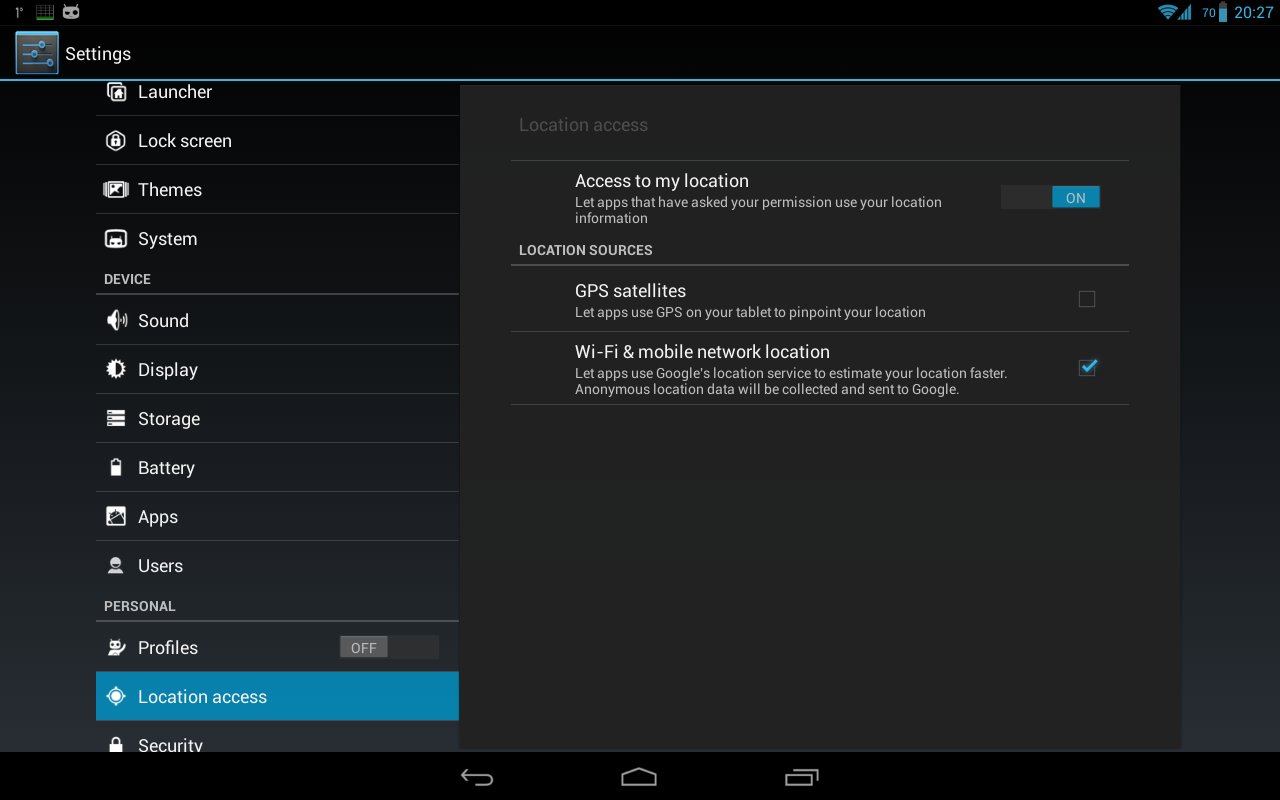
Видим, что GPS выключен, а Network включен. Наше приложение показывало все верно.
Разумеется, GPS можно включать и выключать через быстрые настройки системы (справа сверху). Но не все пользователи об этом знают. А тут мы их точно направим.
Включаем GPS и жмем Назад, чтобы вернуться в приложение.

GPS теперь показывает что он включен, ждем координаты. Для этого имеет смысл подойти к окну, больше вероятности, что поймаем сигнал.
В итоге сигнал пойман и получен результат.
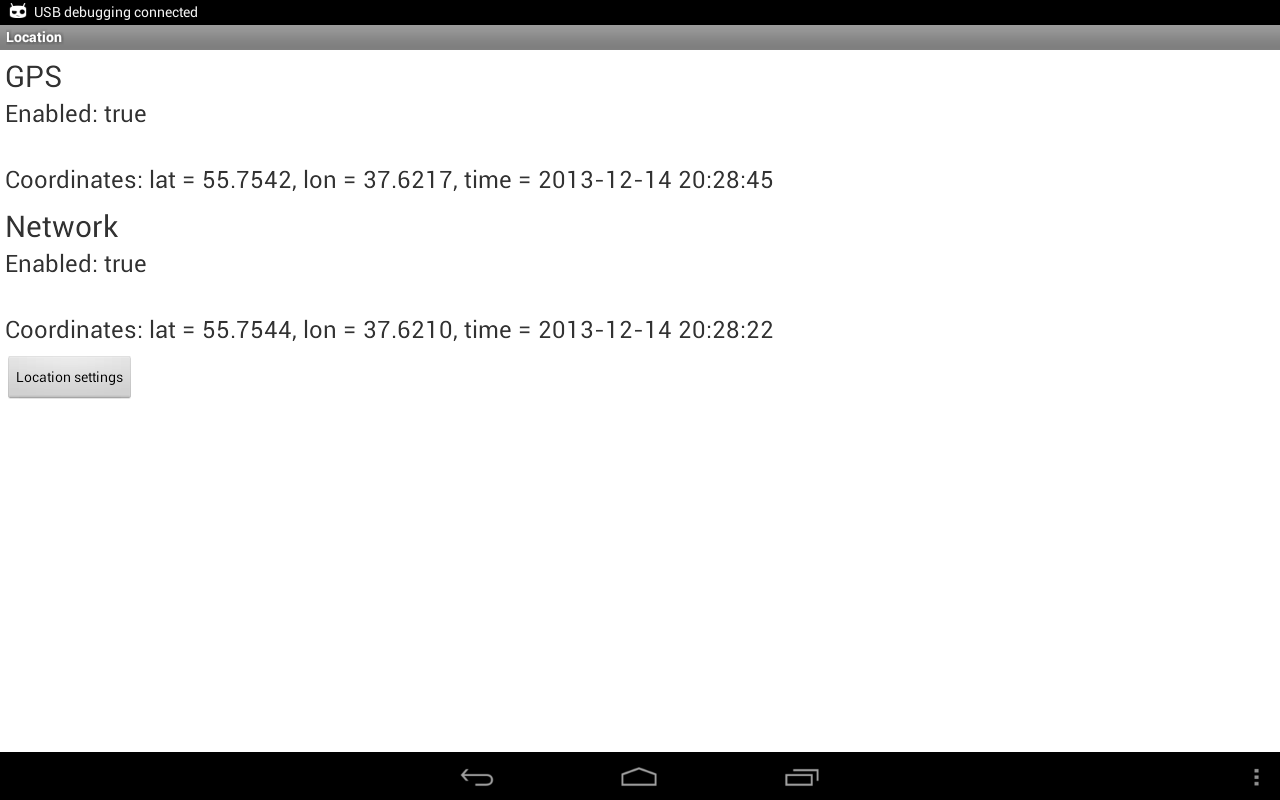
У GPS через какое-то время включился статус 2 (AVAILABLE).
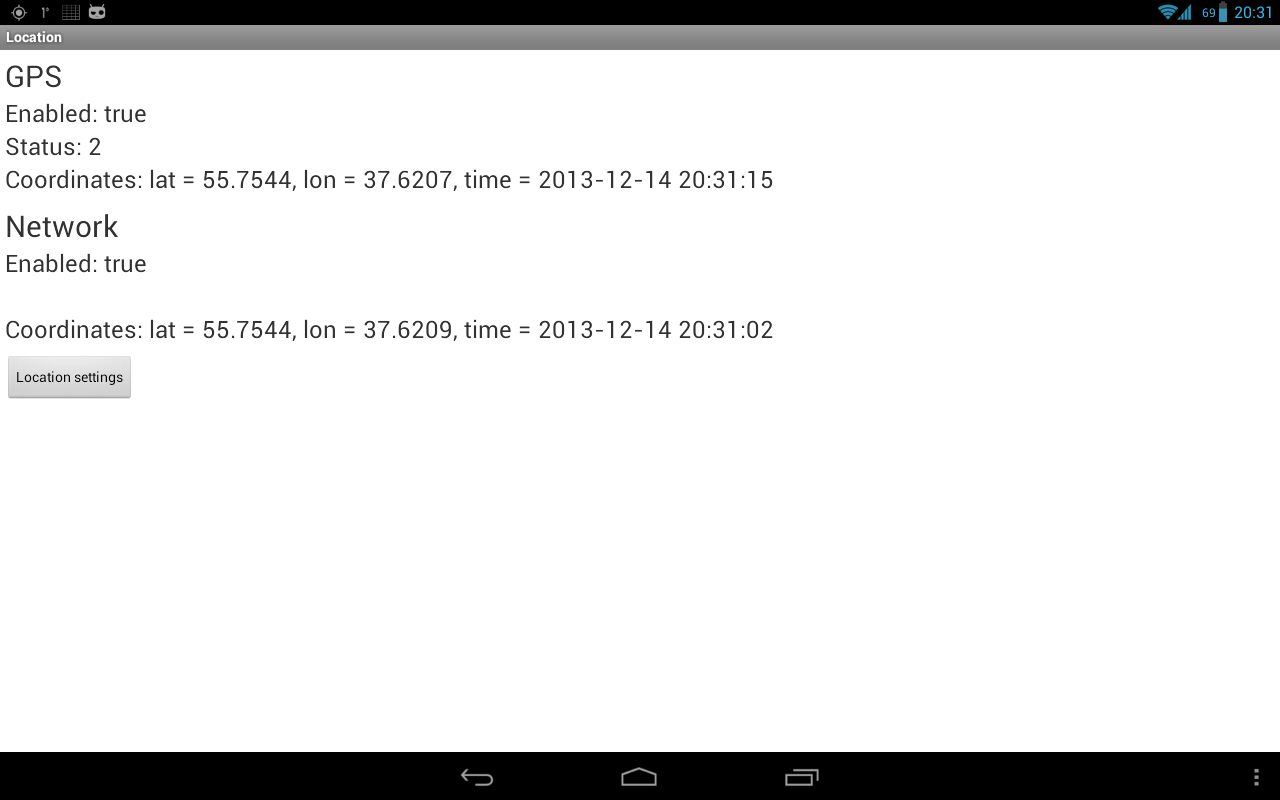
А у Network тишина со статусом. Не знаю, нормально это или нет.
Если с GPS сигналом все ок, то каждые 10 сек вы будете получать инфу о вашем местоположении. Если убрать планшет от окна, получим плохой сигнал: данные могут приходить реже и статус у меня иногда меняется на 1 (TEMPORARILY_UNAVAILABLE).
Прочее
Есть еще третий тип провайдера — PASSIVE_PROVIDER. Сам по себе этот провайдер никакие данные не вернет. Но повесив на него слушателя, вы сможете получать данные о местоположении, когда кто-то еще в системе пытается определить местоположение через обычные провайдеры. Система будет дублировать результаты и вам.
Метод getAllProviders вернет вам список всех доступных провайдеров. Метод getProviders(boolean enabledOnly) вернет либо все, либо только включенные.
Объект Location кроме координат, времени и провайдера имеет еще несколько атрибутов, которые могут прийти и пустыми:
getAccuracy – точность показания в метрах
getAltitude – высота над уровнем моря в метрах
getSpeed – скорость движения в м/с
getBearing – насколько я понял, это угол, на который текущая траектория движения отклоняется от траектории на север. Он же азимут.
Местоположение можно протестировать и через AVD эмулятор. Для этого надо в Eclipse открыть DDMS (Window > Open Perspective > DDMS) и выбрать вкладку Emulator Control. Внизу будет вкладка Manual, на которой есть поля для ввода координат и кнопка отправки.
На следующем уроке:
— создаем приложение с картой
— настраиваем карту и обрабатываем ее события
— программно меняем положение камеры
Присоединяйтесь к нам в Telegram:
— в канале StartAndroid публикуются ссылки на новые статьи с сайта startandroid.ru и интересные материалы с хабра, medium.com и т.п.
— в чатах решаем возникающие вопросы и проблемы по различным темам: Android, Kotlin, RxJava, Dagger, Тестирование
— ну и если просто хочется поговорить с коллегами по разработке, то есть чат Флудильня
— новый чат Performance для обсуждения проблем производительности и для ваших пожеланий по содержанию курса по этой теме
Источник


