- Set up your iPhone, iPad, or iPod touch
- If you’re switching to a new device
- If you’re setting up your first iOS device
- Turn on your device
- If you have another device, use Quick Start
- Activate your device
- Set up Face ID or Touch ID and create a passcode
- Restore or transfer your information and data
- Sign in with your Apple ID
- Turn on automatic updates and set up other features
- Set up Siri and other services
- Set up Screen Time and more display options
- Finish up
- What to do before you sell, give away, or trade in your iPhone, iPad, or iPod touch
- If you still have your iPhone, iPad, or iPod touch
- Transfer information to your new device
- Remove your personal information from your old device
- If you no longer have your iPhone, iPad, or iPod touch
- If you’re trading in an Android device to Apple
- Learn more
- Samsung Galaxy Buds 4+
- Next level of listening
- Samsung Electronics Co., Ltd.
- iPhone Screenshots
- Description
- What’s New
- Ratings and Reviews
- Nice one Samsung
- Developer Response ,
- Connectivity issue
- NO Sense
- Developer Response ,
- App Privacy
- Data Not Linked to You
- Information
Set up your iPhone, iPad, or iPod touch
Learn how to set up your iPhone, iPad, or iPod touch.
If you’re switching to a new device
If you want to transfer your information from another device to your new iPhone, iPad, or iPod touch, follow these steps:
Make sure that you back up your previous iOS device so that you can transfer the content to the new device.

If you’re setting up your first iOS device
If you already set up your new device but want to start over, learn how to erase your iPhone, iPad, or iPod touch.
Otherwise, follow these steps:
Turn on your device
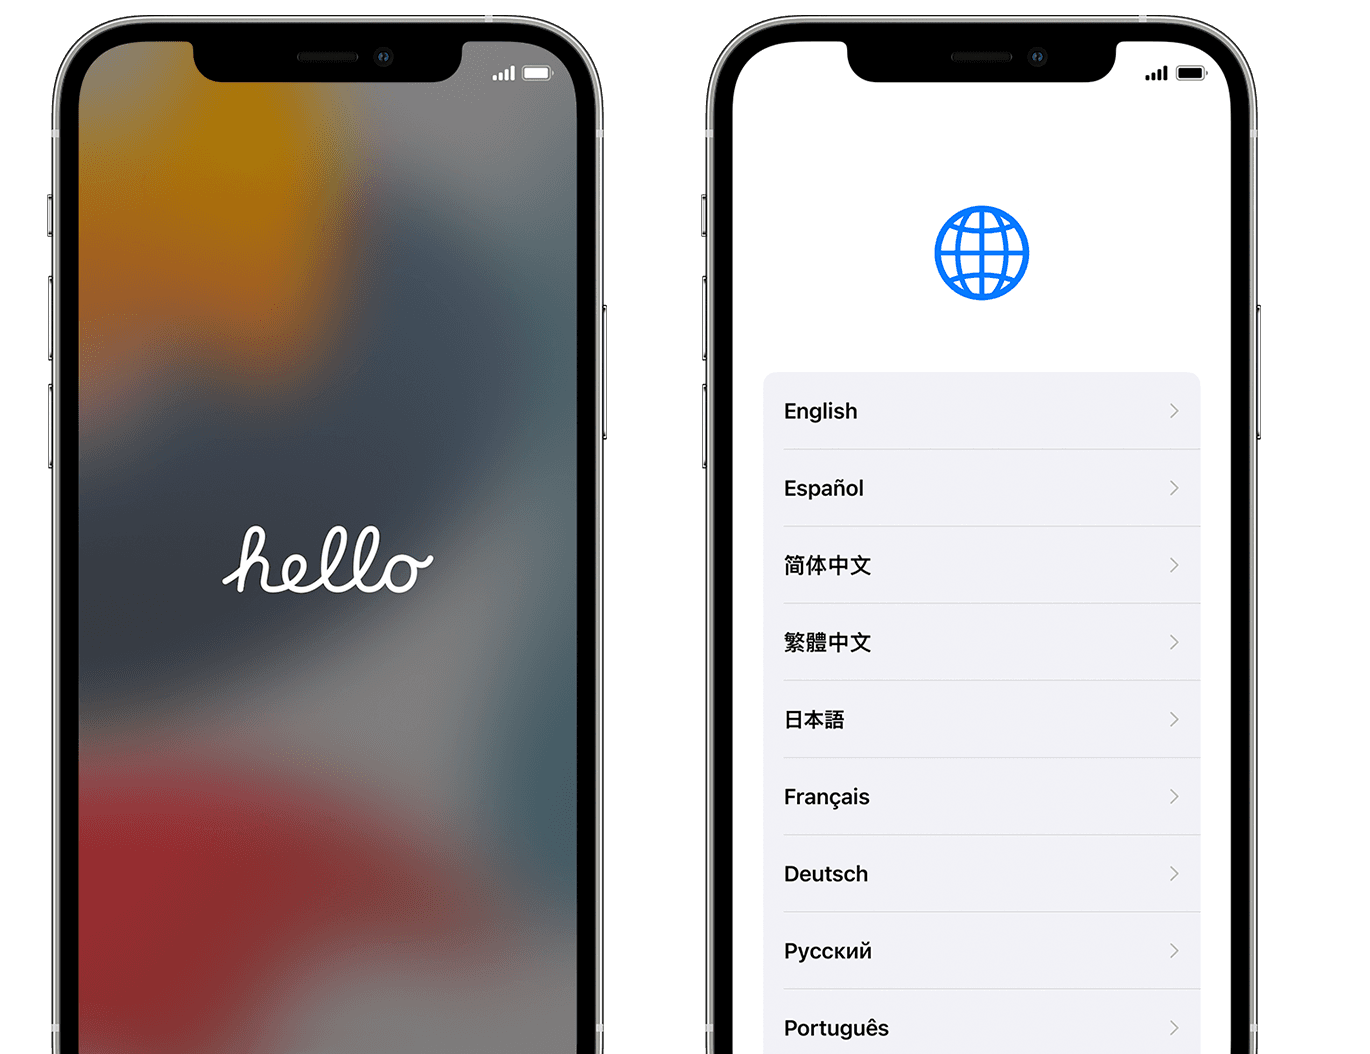
Press and hold the device’s power button until you see the Apple logo. You’ll then see «Hello» in many languages. Follow the steps to get started. If you’re blind or have low vision, you can turn on VoiceOver or Zoom from the Hello screen.
When asked, choose your language. Then tap your country or region. This affects how information looks on your device, including date, time, contacts, and more. At this point, you can tap the blue accessibility button to set up Accessibility Options that can optimize your setup experience and the use of your new device.
If you have another device, use Quick Start
If you have another device, you can use it to automatically set up your new device with Quick Start. Bring the two devices close together, and then follow the instructions.
If you don’t have another device, tap «Set Up Manually» to continue.

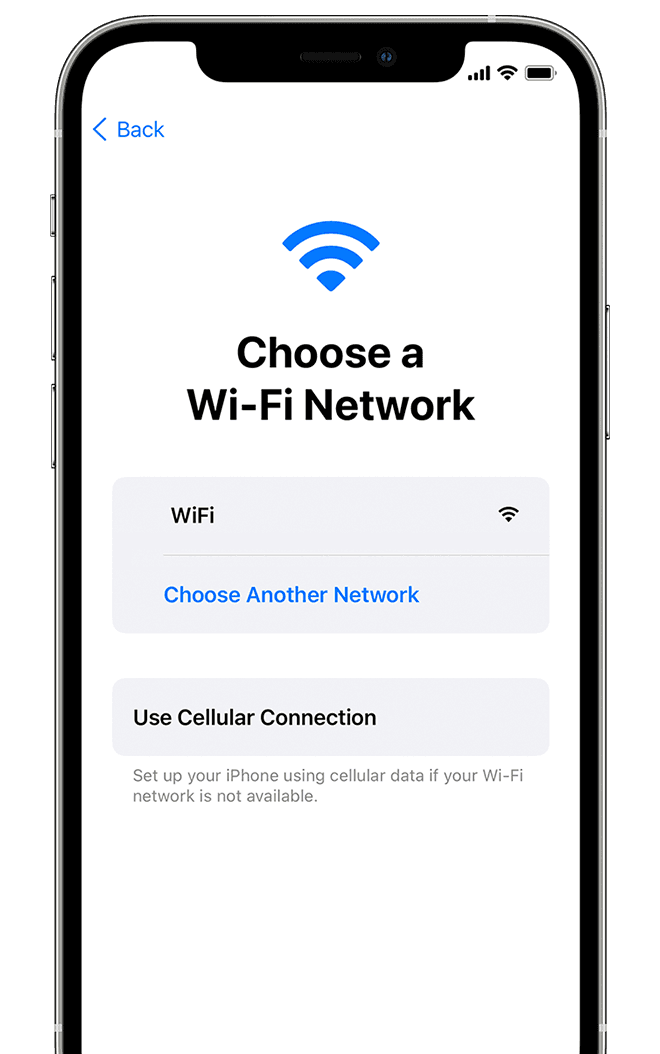
Activate your device
You need to connect to a Wi-Fi network, a cellular network, or iTunes to activate and continue setting up your device.
Tap the Wi-Fi network that you want to use or select a different option. If you’re setting up an iPhone or iPad (Wi-Fi + Cellular), you might need to insert your iPhone SIM card or iPad SIM card first.
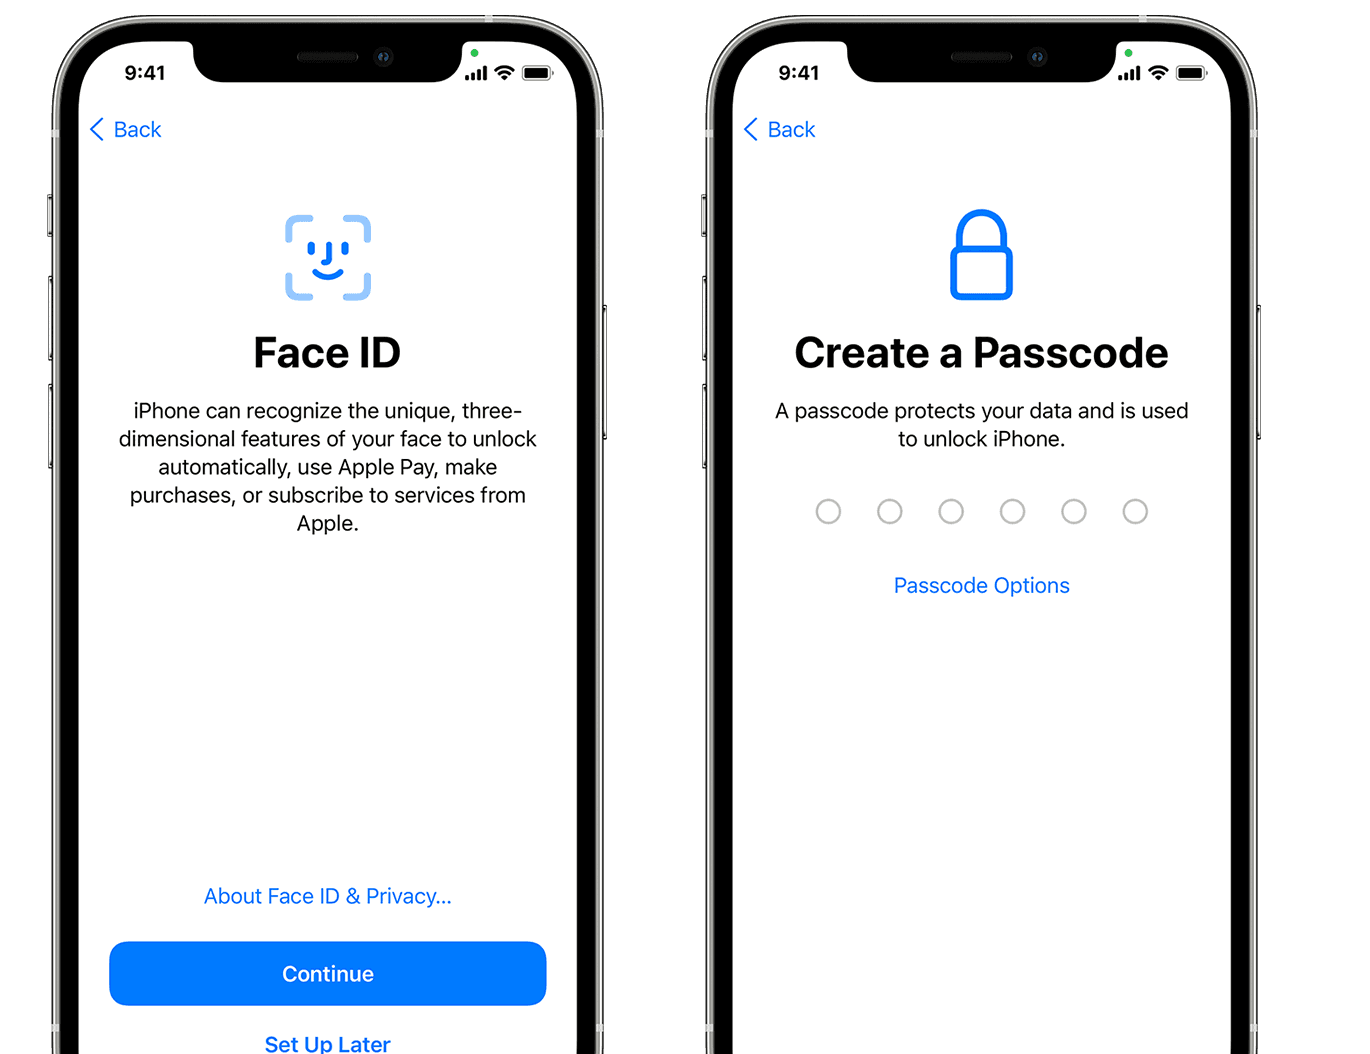
Set up Face ID or Touch ID and create a passcode
On some devices, you can set up Face ID or Touch ID. With these features, you can use face recognition or your fingerprint to unlock your device and make purchases. Tap Continue and follow the instructions, or tap «Set Up Later in Settings.»
Next, set a six-digit passcode to help protect your data. You need a passcode to use features like Face ID, Touch ID, and Apple Pay. If you’d like a four-digit passcode, custom passcode, or no passcode, tap «Passcode Options.»
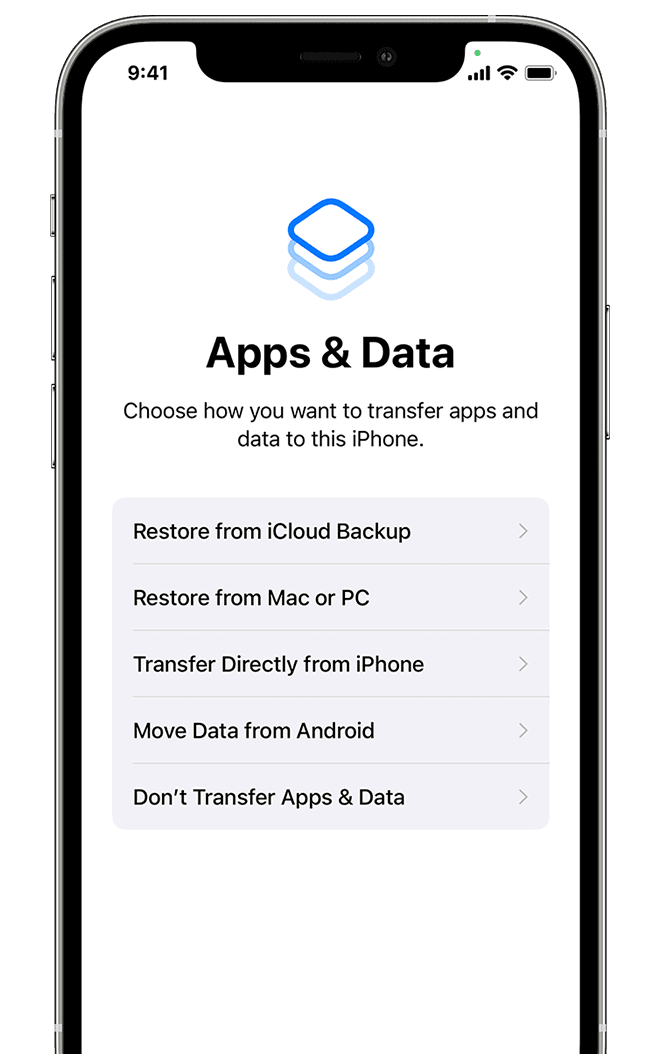
Restore or transfer your information and data
If you have an iCloud backup or a backup made from your computer or an Android device, you can restore or transfer your data from your old device to your new device.
If you don’t have a backup or another device, select Don’t Transfer Apps & Data.
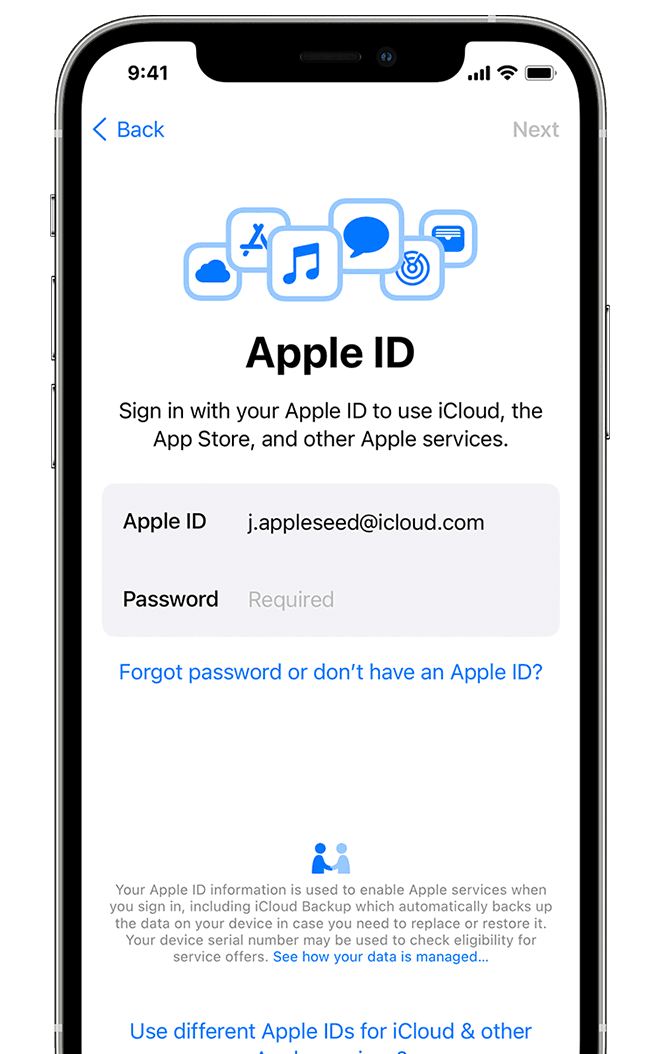
Sign in with your Apple ID
Enter your Apple ID and password, or tap «Forgot password or don’t have an Apple ID?» From there, you can recover your Apple ID or password, create an Apple ID, or set it up later. If you use more than one Apple ID, tap «Use different Apple IDs for iCloud and iTunes?»
When you sign in with your Apple ID, you might be prompted for a verification code from your previous device.
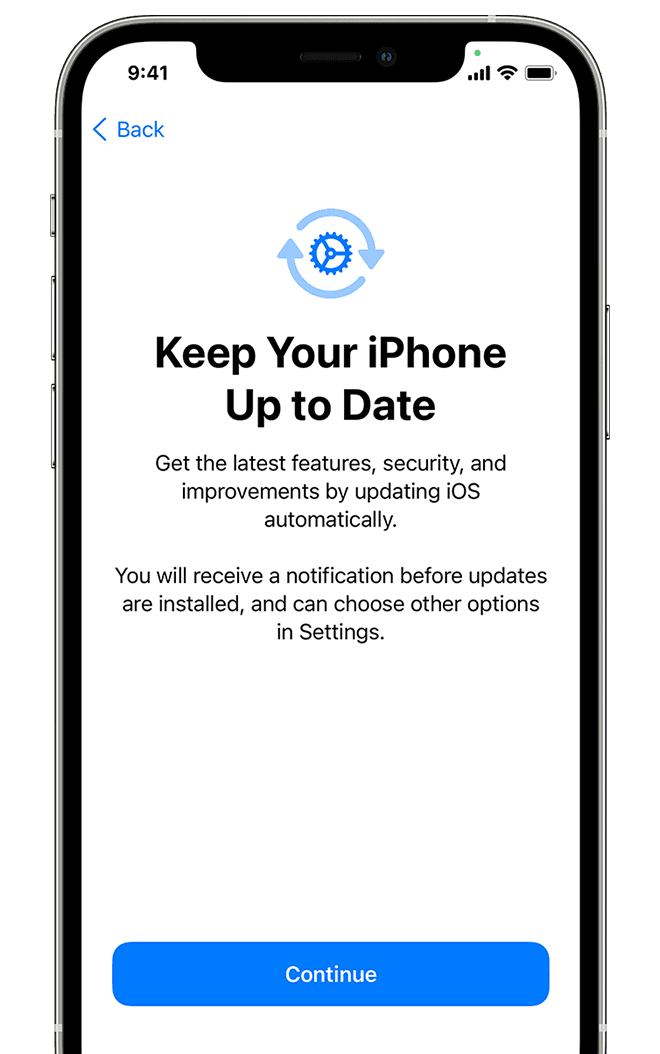
Turn on automatic updates and set up other features
On the next screens, you can decide whether to share information with app developers and allow iOS to update automatically.
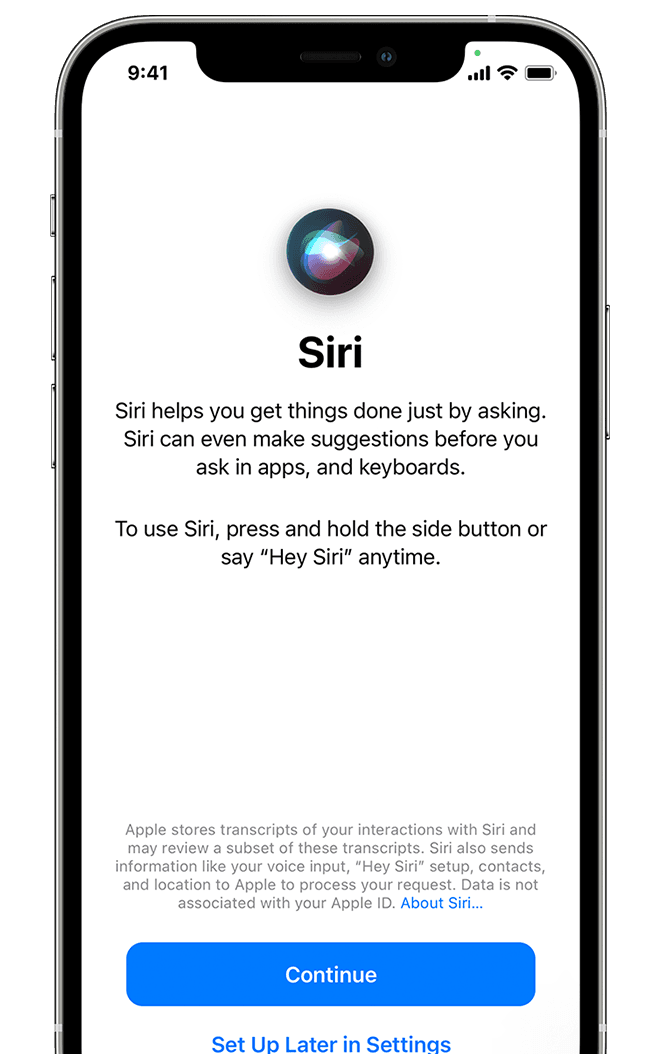
Set up Siri and other services
Next, you’ll be asked to set up or enable services and features, like Siri. On some devices, you’ll be asked to speak a few phrases so that Siri can get to know your voice.
If you signed in with your Apple ID, follow the steps to set up Apple Pay and iCloud Keychain.
Set up Screen Time and more display options
Screen Time gives you insight into how much time you and your kids spend on your devices. It also lets you set time limits for daily app use. After you set up Screen Time, you can turn on True Tone if your device supports it, and use Display Zoom to adjust the size of icons and text on your Home screen.
If you have an iPhone X or later, learn more about using gestures to navigate your device. If you have an iPhone with a Home button, you can adjust the click for your Home button.

Finish up
Tap «Get Started» to begin using your device. Make a safe copy of your data by backing up, and learn about more features in the user guide for your iPhone, iPad, or iPod touch.
Information about products not manufactured by Apple, or independent websites not controlled or tested by Apple, is provided without recommendation or endorsement. Apple assumes no responsibility with regard to the selection, performance, or use of third-party websites or products. Apple makes no representations regarding third-party website accuracy or reliability. Contact the vendor for additional information.
Источник
What to do before you sell, give away, or trade in your iPhone, iPad, or iPod touch
Use these steps to transfer information to your new device, then remove your personal information from your old device.
Before you sell, give away, or trade in your device, you should first transfer information to your new device, then remove your personal information from your old device.
You shouldn’t manually delete your contacts, calendars, reminders, documents, photos, or any other iCloud information while you’re signed in to iCloud with your Apple ID. This would delete your content from the iCloud servers and any of your devices signed in to iCloud.
If you still have your iPhone, iPad, or iPod touch
Follow these steps to transfer information to your new device, then remove your personal information from your old device.
Transfer information to your new device
If you have a new iPhone, iPad, or iPod touch, you can use Quick Start to automatically transfer information from your old device to your new device if you’re using iOS 11 or later. Use iCloud, iTunes, or the Finder to transfer information to your new device if you’re using iOS 10 or earlier.
If your phone number will change with your new device, add additional trusted phone numbers to your account to ensure you don’t lose access. If you no longer have access to your old phone number, you can generate a two-factor authentication code on your old device if needed.
Remove your personal information from your old device
- If you paired an Apple Watch with your iPhone, unpair your Apple Watch.
- Back up your device.
- Sign out of iCloud and the iTunes & App Store.
- If you’re using iOS 10.3 or later, tap Settings > [your name]. Scroll down and tap Sign Out. Enter your Apple ID password and tap Turn Off.
- If you’re using iOS 10.2 or earlier, tap Settings > iCloud > Sign Out. Tap Sign Out again, then tap Delete from My [device] and enter your Apple ID password. Then go to Settings > iTunes & App Store > Apple ID > Sign Out.
- If you’re switching to a non-Apple phone, deregister iMessage.
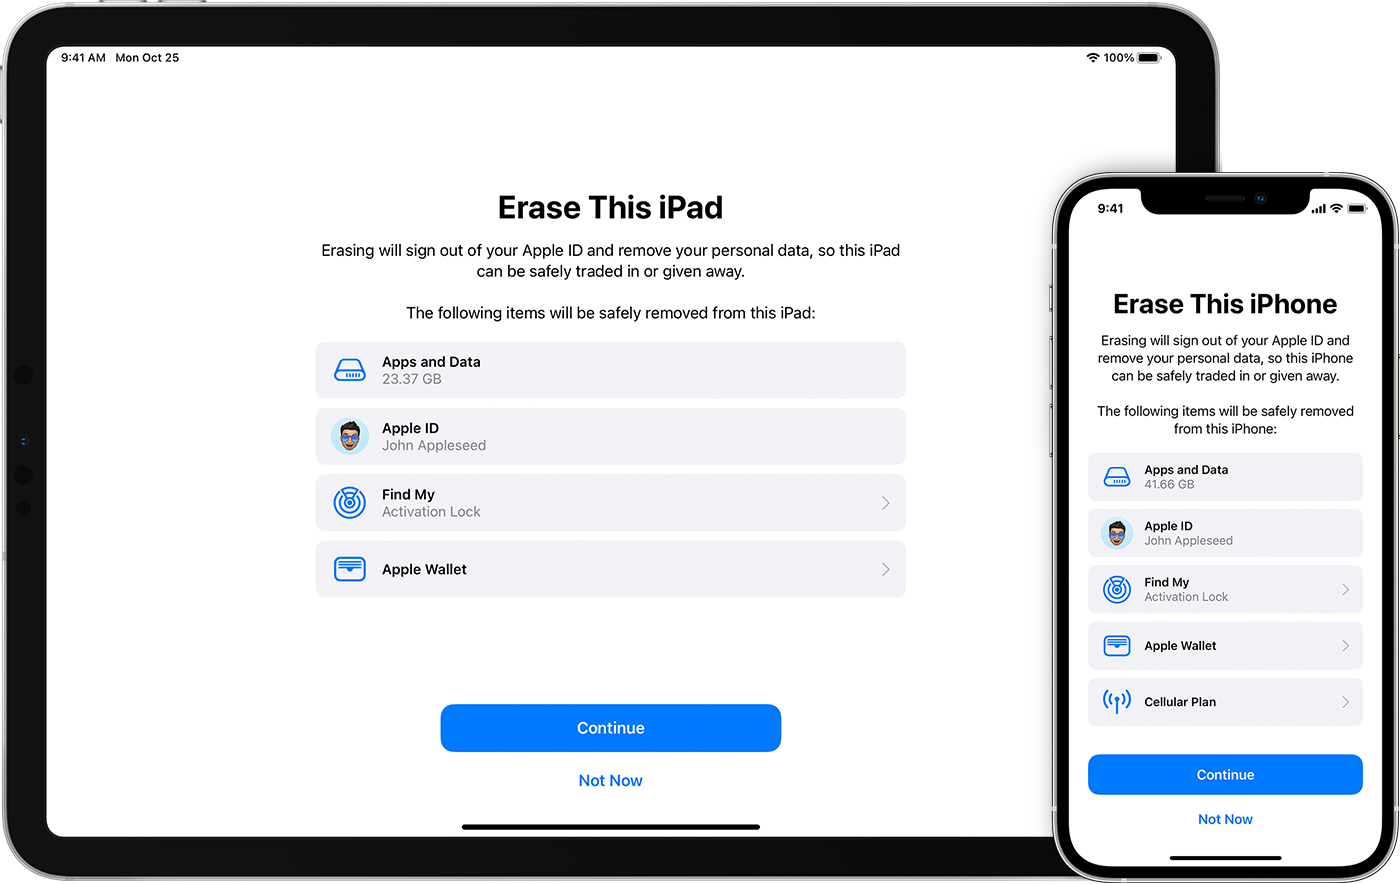
- Go back to Settings and tap General > Transfer or Reset [device] > Erase All Content and Settings. If you turned on Find My [device], you might need to enter your Apple ID and password. If your device uses eSIM, choose the option to erase your device and the eSIM profile when asked.
- If asked for your device passcode or Restrictions passcode, enter it. Then tap Erase [device].
- Contact your carrier for help transferring service to a new owner. If you aren’t using a SIM card with your device, you can contact them to get help transferring service to the new owner.
- Remove your old device from your list of trusted devices.
When you erase your iPhone, iPad, or iPod touch, Find My [device] and Activation Lock are turned off.
If you no longer have your iPhone, iPad, or iPod touch
If the steps above weren’t completed and you no longer have your device, use these steps:
- Ask the new owner to erase all content and settings using the above steps.
- If you’re using iCloud and Find My [device] on the device, sign in to iCloud.com/find or the Find My app on another device, select the device, and click Erase. After the device has been erased, click Remove from Account.
- If you can’t follow either of the above steps, change your Apple ID password. This won’t remove personal information that’s stored on your old device, but it prevents the new owner from deleting your information from iCloud.
- If you’re switching to a non-Apple phone, deregister iMessage.
- If you’re using Apple Pay, you can remove your credit or debit cards at iCloud.com. Choose Account Settings to see which devices are using Apple Pay, then click the device. Next to Apple Pay, click Remove.
- Remove your old device from your list of trusted devices.
If you’re trading in an Android device to Apple
Before you send in an Android device to Apple as a trade-in, be sure to do the following:
- Back up your data.
- Erase the device.
- Remove any SIM cards, memory cards, cases, and screen protectors.
Contact your device’s manufacturer if you need help.
Learn more
- Make a backup of your iPhone, iPad, or iPod touch or restore from a backup.
- Remove all of your cards from Apple Pay.
- Get help if your iPhone, iPad, or iPod touch is lost or stolen.
- Learn about Activation Lock.
- No matter the model or condition, we can turn your device into something good for you and good for the planet. Learn how to trade in or recycle your iPhone, iPad, or iPod touch with Apple Trade In.
When you tap Erase All Content and Settings, it completely erases your device, including any credit or debit cards you added for Apple Pay and any photos, contacts, music, or apps. It will also turn off iCloud, iMessage, FaceTime, Game Center, and other services. Your content won’t be deleted from iCloud when you erase your device.
Источник
Samsung Galaxy Buds 4+
Next level of listening
Samsung Electronics Co., Ltd.
-
- #160 in Utilities
-
- 2.0 • 3.2K Ratings
-
- Free
iPhone Screenshots
![]()
![]()
![]()
![]()
![]()
![]()
![]()
![]()
Description
*This application is for Galaxy Buds+ and Galaxy Buds Live. Support for Galaxy Buds (SM-R170) is not available.
Open the charging case.
On your mobile device, tap Settings -> Bluetooth and then connect earbuds and mobile devices.
Launch the Samsung Galaxy Buds app, and the follow the on-screen instructions to complete the connection.
* The Samsung Galaxy Buds application connects Samsung Galaxy Buds+ and Samsung Galaxy Buds Live to your iPhone.
* Use the Samsung Galaxy Buds application to set up and manage the following features.
— Connect to and disconnect from a mobile device
— Earbuds & Charging Case battery status
— Ambient Sound (Samsung Galaxy Buds+ only)
— Active Noise Cancelling (Samsung Galaxy Buds Live only)
— Equalizer Setting
— Touchpad Setting
— Advanced Feature
— Find my Earbuds
— Earbuds Software Update
* Compatibility:
— iPhone 7 or later models with the iOS 10 and higher version
— The Galaxy Buds application is not compatible with Galaxy Buds (SM-R170)
* Settings and features provided by the Galaxy Buds application are only available when Galaxy Buds+ or Galaxy Buds Live is connected to your mobile device. Features will not work properly without a proper connection between your earbuds and your mobile device.
* If you have any questions, please contact to the web page below.
(http://www.samsung.com/support/)
※ User Agreement
Following User Agreements are required for the app service.
Even if you don’t agree the agreements you can use basic service but can’t use disagree services.
[Required User Agreements]
— Bluetooth: Required for communication with Buds+ or Buds Live
What’s New
— Improved application stability
Ratings and Reviews
Nice one Samsung
So I have all my music on my iPod touch right and I try to use the app and it keeps on insisting that it is not compatible with the iPod touch. To their credit it is a 6th gen iPod with some bad specs which doesn’t make any sense to why it wouldn’t be compatible but alright. So I try it out on my iPad where I get most of my work done and nothing. Still not compatible. There is absolutely no excuse for this it is running the latest version of iPad OS and has great specs. I think Samsung believes that everyone has their music on an iPhone, which is true for most people but some people just like to have a device for only music listening like the iPod, or the people trying to work during a pandemic like this one with an iPad. There is no excuse for this non compatibility and if there is a technical issue as to why this is the case please tell me Samsung. Thank you.
**Edit**
I am using a iPad Air 2 which according to Samsung’s reply to this review is not supported. I am using the Buds+. They still work with the device but not having the app is an inconvenience. I am still confused as to why the compatibility is only for these devices, my idea is that Samsung develops for each individual device which I have never seen before. I have to give them some props to trying to make this in the first place instead of only having Bluetooth or worse yet having it locked to one device. I am still curious if this is a technical issue or a software issue with the compatibility.
Developer Response ,
Hello again! Thanks for clarifying your iPad model and we are really sorry for the inconvenience. The minimum requirement for a Galaxy Buds App to work in iOS is satisfied by iPad Air 3rd Generation or later models with iOS 10 and later versions. The Galaxy Buds App is not compatible with older models. We would love to support all our users but this is unfortunately a hardware compatibility limitation which cannot be addressed by a software update.
Connectivity issue
I’ll start out by saying I honestly really enjoy the buds+. They sound awesome, plus the ambient mic mode and numerous other features are really nice. The issue I have is if I pair the buds+ through the app, my buds+ have no sound coming through them. My phone just sends the audio through the phone speakers like nothing is connected. If I just pair the buds+ through the Bluetooth connection menu in my settings for my IPhone X, they will function normally. If I pair them through my Bluetooth menu though I cannot pair them through the app, which prevents me from being able to use all the cool features. My phone and buds+ are both on the latest updates. I have also deleted the app and reinstalled it, just to make sure there wasn’t just some bad file I downloaded. Or possibly just a glitch in my download. I have had zero issues with other headphone companies and their software for their headphones. This is a sad deal for me, because I really want to be able to use these headphones to their fullest
exten. These are by far the most comfortable and best sounding truly wireless headphones I have had.
NO Sense
How do you make an app that is not compatible to its original product version!! When will this app be compatible or when will there be an app that is compatible? I was sooo excited when I purchased the original galaxy buds from Samsung since I had done all my research and compared them to a few others including Apple AirPods, and Samsung ultimately won for its look and comfort for me and also it stated on the website that they were compatible to iOS came to find out they are not. I called Samsung to complain but of course nothing could be done I accepted the fact that I can only use my buds as Bluetooth with my iPhone 11 max pro but was told to periodically check for an app in the App Store since it might become available soon. Today I was told by a colleague that a new version of the galaxy buds was available with the app for iPhones I was excited when I heard the news that I quickly downloaded the app thinking that of course it’s compatible to the original buds how could they not right. Not reading the fine print “not compatible with SM-R170” VERY DISAPPOINTED! NOT HAPPY AT ALL!! Not sure if I will be buying Samsung products anymore since it’s very hard to have them pair or be compatible with other devices. Please make it compatible. It’s ridiculous it’s not!
Developer Response ,
Dear user, we apologize for any confusion; this application has been developed for Galaxy Buds+. Your Galaxy Buds from last year will not be supported due to compatibility limitations. Let us explain:
Buds+ has been built with a new chip which enhances connectivity and provides better memory. Due to the implementation of the new chip, Galaxy Buds+ are compatible with iOS devices.
Sadly, this compatibility limitation cannot be addressed with a software update. We’re really sorry for the inconvenience it may cause and we really appreciate your understanding.
App Privacy
The developer, Samsung Electronics Co., Ltd. , indicated that the app’s privacy practices may include handling of data as described below. For more information, see the developer’s privacy policy.
Data Not Linked to You
The following data may be collected but it is not linked to your identity:
Privacy practices may vary, for example, based on the features you use or your age. Learn More
Information
English, Albanian, Arabic, Croatian, Czech, Danish, Dutch, Estonian, Finnish, French, German, Greek, Hebrew, Hindi, Hungarian, Icelandic, Indonesian, Irish, Italian, Japanese, Korean, Latvian, Lithuanian, Macedonian, Malay, Norwegian Bokmål, Polish, Portuguese, Romanian, Russian, Serbian, Simplified Chinese, Slovak, Slovenian, Spanish, Swedish, Thai, Traditional Chinese, Turkish, Ukrainian, Vietnamese
Источник


