- What Is Setup Wizard On Android Phone?
- How to Install Setup Wizard on Android
- Features of Setup Wizard
- How to Run Android Setup Wizard
- How to Skip the Google Setup Wizard
- Setup Wizard: как удалить вирус за 5 минут?
- Что это за ПО?
- Как отличить вирус от стандартной программы
- Удаляем вредоносное ПО
- Как защититься от вируса?
- How to fix Android Setup Wizard Keeps Stopping or Setup Wizard not working
- Android Setup Wizard Keeps Stopping or Setup Wizard not working or Setup Wizard Keeps Crashing
- What is the Android Setup Wizard or What is the Setup Wizard on Android phone?
- How to Skip Android Setup Wizard: Fix Android Setup Wizard keeps stopping or Android Setup Wizard keeps crashing.
- Method one to fix Android setup wizard keeps stopping by clearing app’s data.
- The second method to fix the Android setup wizard not working is a little complex. You have to Factory reset your device but it’s not guaranteed that it will fix the problem.
- Custom ROM setup wizard keeps stopping or setup wizard keeps stopping in custom ROM after first boot in Android 11 or Android 10 ( can’t install GAPPS )
- Here is a video guide in case you don’t understand the process.
What Is Setup Wizard On Android Phone?

Have you ever wondered how you can set up a Wizard on your android phone? Or you do not know what setup Wizard on an android phone is? Then this article will take you step- by –step on how to setup Wizard on android phone.
A setup wizard is a tool that is installed in the android phone to help the user to manage applications. The setup wizard performs various functions. The primary purpose of the setup wizard that has a premium license is to allow the user to restore previous applications on a new phone. The setup wizard also enables the user to install a custom ROM.
How to Install Setup Wizard on Android
Apart from enabling the user to restore previous applications on a new phone and to install a custom ROM, android setup wizard also provides multiple profiles for users with various Android devices.
Features of Setup Wizard
The characteristic feature of the setup wizard is that it assists the user to initialize an android phone. The Wizard can internalize the already installed apps and categorize them in a wizard way. The setup wizard has a feature that provides multiple profiles for different devices for premium users.
The setup wizard is useful in the installation of the commonly used apps in android phone. The wizard searches for apps categorically and gives a back-up of currently installed apps. The back-up feature is for the premium users. Get comprehensive features of Android setup wizard.
How to Run Android Setup Wizard
Follow the following steps to run the android setup wizard:
1. The first step to run the android setup Wizard is to select the default language. This is done by tapping on the icon ‘’Changing the Default Language.’’ By tapping, the user can manually choose the new default language.
2. The Android setup allows you to change the hearing, vision, or dexterity issues. Changing of the font is optional and is done by tapping Settings-> Accessibility. By tapping this icon, the user can review or modify the Accessibility settings like font size.
3. After you have set the default language and display font size, the user can now move to the next step. On the opening screen, select Start and then Next on the Accessibility screen to move to the next level.
4. Ensure that your network is stable. If the system you are using is stable, select the network’s name and enter your network password. Tap Connect->Next to proceed.
5. You are required to read the End User License Agreement (EULA) carefully. Tick on the ‘’I Understand’ box after you have read.
6. You need to read the Consent to get the Diagnostic and Usage Data information. It is optional; therefore, you can choose Yes or No Thanks. Then choose Next.
7. To access the Android services and apps, the user requires a Google/ Gmail account.
Select Yes and enter the account information if you already have a Google / Gmail account.
Tap on ‘Get an Account’ to create a Google/ Gmail account if you don’t have one.
8. Tap the checkboxes to set Google location preferences. Select Next.
9. You will see a message ‘This phone belongs to…’ Enter your name to personalize your phone. Tap on the right arrow icon to continue.
10. For the Samsung user, some Samsung apps require a free Samsung account.
Tap Sign In to register now if you already have a Samsung account. You will be required to enter your email address and Samsung password.
Select Create Account if you do not have a Samsung account to create one.
11. There is an option of editing the name that will be used to identify the phone.
12. You can also enable Easy mode for a simpler user interface for your Android phone.
13. Tap on Finish to dismiss the Wizard.
Some versions of the Android phones may display additional options, and dialogue boxes as Wizard configure the phone to initial use. Just follow the prompts, and you are good to go.
How to Skip the Google Setup Wizard
The Google setup wizard is part of the Android Operating System, and usually, it cannot be skipped. However, you can skip the Google setup wizard using the Honeywell provisioner. Skipping of Google setup wizard only applies to Android phones with mobility hardware of; 75e Android, CT50 Android, CT60 Android, CN51 Android, CN75, CK75, EDA50, and Android 4.x, Android 6.x, Android 7.x Operating systems. Follow these steps to skip the Google setup wizard:
1. For mobility, use EZConfig on a PC and open the applicable DeviceConfig.xml initially retrieved from the device.
2. Set the required parameters at 0. These parameters include ‘Other Settings’>’GoogleStartupWizard.’
3. Print the configuration barcode. You can also download the code from File 1.
4. The Google Setup Wizard will appear after a factory reset of the device.
To activate the settings, scan the setup barcodes and save Deviceconfig.xml in IPSM/ Honeywell/persist.
6. The device will show the ‘desktop.’
7. As the Deviceconfig.xml is stored in IPSM/ Honeywell/ persist, a factory rest (without the option ‘Erase IPSM’ ticked) will skip the Google Setup Wizard again.
Note: After the Factory Reset during the normal setup, the wizard screens will have to be answered one-by-one as shown below:
1. Language screen> Press ‘Start.’
2. Wi-Fi screen>Press ‘Skip’> ‘Skip Anyway’
3. Google & Location screen> Press ‘Right Arrow’>’Right arrow’
4. Date & Time screen >Press ‘Right Arrow’
5. ‘This device belongs to’ screen> Press ‘Right Arrow’>’Right Arrow.’
6. Google Services screen> Press ‘Right Arrow’> ‘Finish’
Источник
Setup Wizard: как удалить вирус за 5 минут?

Опасные вирусы попадают на компьютеры через уязвимости в операционной системе. Но время от времени мы добровольно скачиваем и устанавливаем вирусные программы на компьютер. Если программный установщик постоянно предлагает вам установить новые утилиты, это повод серьезно задуматься. Возможно вмести с этими обновлениями вы запускаете вредные вирусы.
Что это за ПО?
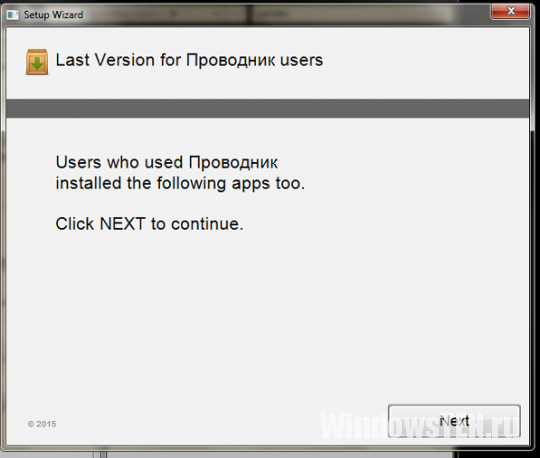
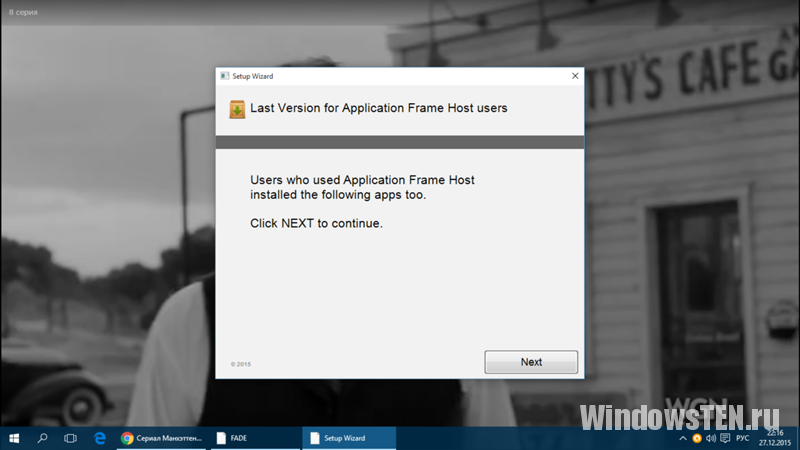
Изначально, Setup Wizard не представляет собой ничего опасного. Это стандартный установщик программ Windows, который активно используется производителями программного обеспечения для распаковки приложений. Тем не менее, у установщика есть слабая сторона. Он, как и другие утилиты, уязвим для хакеров. Окно зараженного Setup Wizard постоянно всплывает на рабочем столе, предлагая якобы «Установить обновления». На деле, соглашаясь с установкой, вы открываете двери вирусным атакам.
Как отличить вирус от стандартной программы
Внешне модифицированный программный продукт не отличается от стандартного. Поэтому перед тем, как удалить вирус Setup Wizard, нужно убедиться, что это действительно вредное ПО. Как понять, что перед нами именно вирус? Обратите внимание на следующее:
- Подозрительная активность установщика. Стандартная программа никогда не запускается самостоятельно. Она открывается только при вашем участии. Вирусный установщик может запускаться сам в любое время.
- Не актуальные обновления. Вирус бьет наугад и предлагает «Обновить» наиболее популярные программы, которые могут быть не установлены на вашем ПК.
Удаляем вредоносное ПО
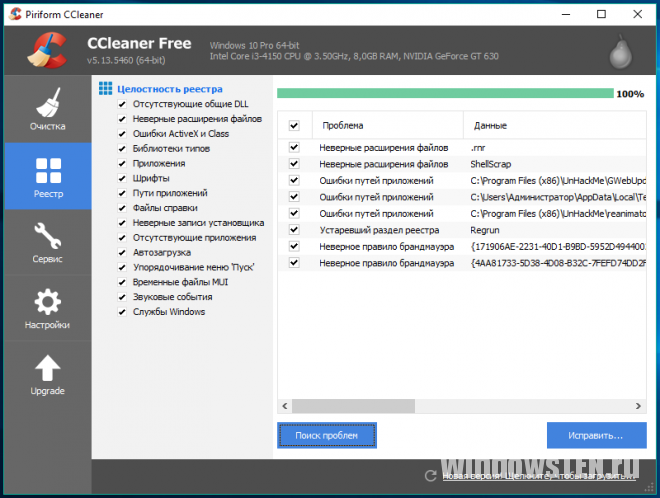
Перед тем, как удалить Setup Wizard с компьютера, нужно очистить содержимое папки Temp. Сделать это можно при помощи CCleaner, или самостоятельно.
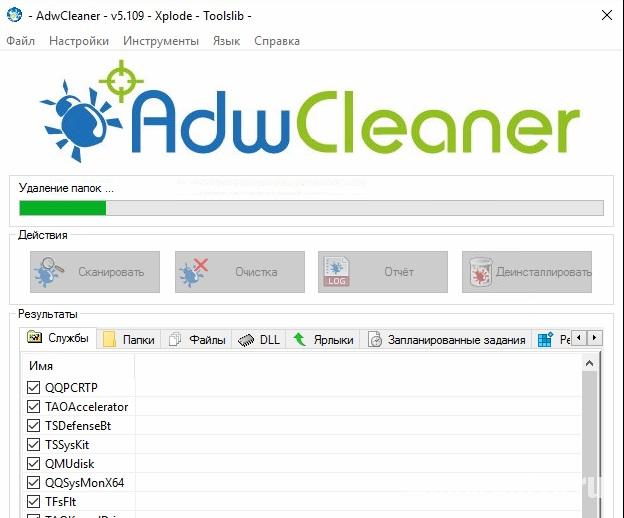
Для полной деинсталляции понадобятся 2 программы: AdwCleaner и UnHackMe.
Первая программа нужна для очистки вредоносного содержимого браузеров. Вторая – для избавления системы от вирусных файлов.
- Жмем «Сканирование».
- После того, как утилита найдет вредные файлы, нажимаем «Очистка».
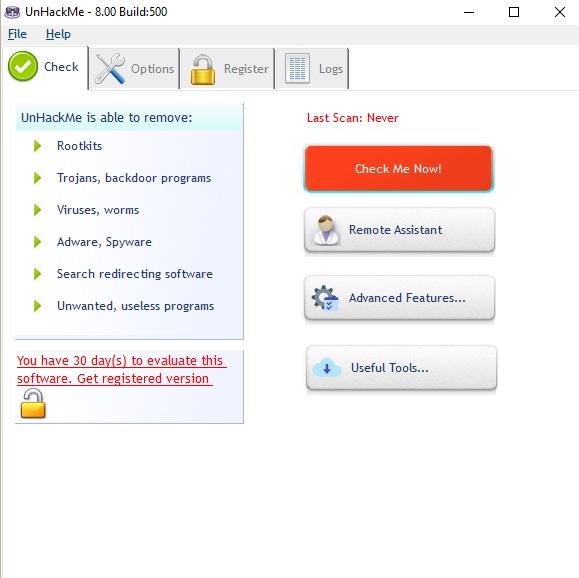
UnHackMe – условно бесплатная программа. 30 дней ею можно пользоваться без оплаты, и только затем потребуется покупать. Нам она нужна всего для одного цикла сканирования, поэтому условно-бесплатный характер настораживать не должен. Скачиваем, запускаем, проводим сканирование.
После удаления вредных программ, нужно перезагрузить компьютер и запустить CCleaner. В этой программе запускаем максимально глубокую очистку.
Теперь нужно проверить ярлыки. Программа может менять путь к сайтам, и при клике на стандартный браузер мы получим переход на вирусный сайт. Чтобы этого не произошло: кликаем по ярлыку браузера правой кнопкой мыши, открываем вкладку «Ярлык», смотрим на путь к рабочей папке.
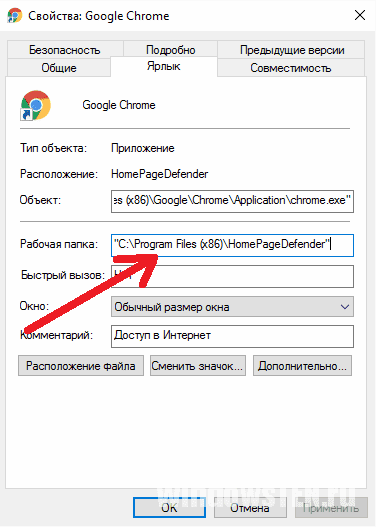
В этом случае, вирус подменил ярлыки, и при клике на привычный значок Chrome, запуститься не браузер, а его подмененная версия с рекламой. Проще всего – удалить эту иконку, а вместо нее поместить ярлык из папки Chrome.
Как защититься от вируса?
Проблема вируса в том, что привычные антивирусные программы не всегда распознают в нем опасность. Ведь основа этого вируса – стандартный установщик для Windows. К тому же, техника мошенников в том, что все действия по внедрению вредных программ на компьютере вы делаете самостоятельно, соглашаясь с условиями установки.
Единственный, и максимально верный способ уберечь себя в будущем – внимательно читать условия установки, и не запускать неизвестных программ.
Вы можете написать нам, если на каком то этапе инструкции у вас возникла сложность. Укажите что уже проделали и с чем возник вопрос, чтобы мы смогли помочь.
Источник
How to fix Android Setup Wizard Keeps Stopping or Setup Wizard not working
Android Setup Wizard Keeps Stopping or Setup Wizard not working or Setup Wizard Keeps Crashing
Android setup wizard keeps stopping in your phone that’s why you are here right? Maybe you are getting this error because you have successfully installed custom ROM and GAPPS and even after booting and successfully making it to the home screen or you are stuck with Android setup wizard keeps stopping and you are not able to to move forward and you are stuck in here. The cause happens due to Google Security features embedded into Google Apps.
So this issue can be solved easily and is quite simple to do. But I will not be responsible if anything happens to your phone or your phone goes into bootloop or gets bricked. So do at your own risk. But I am positive that this thing won’t happen. So let’s start with what is Android setup wizard?
What is the Android Setup Wizard or What is the Setup Wizard on Android phone?
Android setup wizard or setup wizard is a system tool that is used to set up the phone for the first time. When you first buy your phone and boot it for the first time then the setup wizard occurs.
The setup wizard includes language, country, default mobile data connection, default message, Wi-Fi settings, wallpaper settings, screen lock settings, backup settings, etc.
Android setup wizard is not necessary on the first boot and it can be set up later on. But people forget to set up the phone so that’s why it appears on the first boot. But it can be irritating and problematic if the Android setup wizard itself gets unresponsive and the setup wizard keeps crashing.
The Android setup wizard won’t let you move further ahead until the Android setup wizard activation is complete. If the Android setup wizard activation is incomplete then you will have to bypass the Android setup wizard. Now let’s look at how to fix the setup wizard.
How to Skip Android Setup Wizard: Fix Android Setup Wizard keeps stopping or Android Setup Wizard keeps crashing.
Setup wizard keeps stopping Android can be fixed by clearing the Setup Wizard’s data or factory resetting. This method will work if you have a working Android operating system but the setup wizard is unresponsive or the setup wizard is crashing. To fix this issue follow the steps below.
Method one to fix Android setup wizard keeps stopping by clearing app’s data.
Step 1: Go to system settings
Step 2: Then go to Apps and Notification or Apps and Features or All Apps.
![]()
Step 3: Choose ” See all apps ” or if you have 3 dots on the right or left corner, click on it and choose all apps.
Step 4: Check for three dots on the left or right corner and select ” Show system apps “
![]()
![]()
Step 5: Search for ” Android Setup ” and click on it.
Step 6: Now select and click ” Force Stop ” and then click on ” Storage option ” or ” Storage and Cache “
 force stop
- force stop app
- storage and cache
Step 7: click on ” Clear Cache ” and ” Clear Data ” and click on ok whenever it asks to confirm the action.
- clear data or clear storage
- clear app data
The second method to fix the Android setup wizard not working is a little complex. You have to Factory reset your device but it’s not guaranteed that it will fix the problem.
Step 1: Backup everything from your device. ( Internal, Messages, Calls, Contacts, Photos, Videos, etc. )
Step 2: Go to system settings
Step 3: Then go to ” System and Language ” or ” System “
Step 4: Choose ” Reset options ” or ” Factory and reset “
Step 5: Click on ” Erase all data ” or ” Factory Reset Device ” and it will start factory resetting and it will automatically boot the device. ( Do at your own risk )
- erase all data in factory reset
- factory reset option in android
Custom ROM setup wizard keeps stopping or setup wizard keeps stopping in custom ROM after first boot in Android 11 or Android 10 ( can’t install GAPPS )
With the Android 11 release, users are unable to flash Vanilla custom ROM variant with GAPPS because the setup wizard keeps stopping in custom ROM after the first boot. That is why they can’t move forward because Android setup wizard activation is incomplete. The Vanilla variant of custom ROM is great for extra customizability but because of this problem users are unable to install GAPPS.
Here is a video guide in case you don’t understand the process.
So here is the fix to custom ROM setup wizard keeps stopping. Follow the steps below to successfully fix this problem.
Step 1: Boot into custom recovery
Step 2: Go to wipe section and clean Dalvik, Cache, Data, and System
Step 3: Now go to Zip Flash or Files and choose a ROM to install
Step 4: After choosing ROM File, add another Zip and choose GAPPS file
Step 5: Swipe to confirm flash
Step 6: After flashing ROM and the GAPPS file, go to the wipe section and Format data.
Step 7: To format data, choose format section and type yes, and then hit enter, after this, the format data process will start
Step 8: Reboot your smartphone
Step 9: After rebooting the smartphone, you should see the Android setup wizard keep stopping or the Android setup wizard keeps crashing.
Step 10: Now, press and hold your power button and reboot into recovery.
Step 11: Now go to the Mount section in TWRP or go to the menu in Orange Fox and then go to Mount and Mount System partition.
- orange fox menu
Step 12: After Mounting System go to Files or File manager then go to this location. (root)/System_root/system/priv-app/(AndroidSetupWizard)
Step 13: Now after going to this location, delete the Android setup wizard folder by pressing and holding on to the folder then choose ” delete ” and then ” swipe to confirm ” to successfully delete the folder.
Step 14: Now go back and Reboot your smartphone and you should directly land on the home screen.
This is the method to successfully Boot Vanilla Custom ROM with GAPPS. This method was tested on Redmi Note 9 Pro or Redmi Note 9S (globally), but this method should work on all phones with Android 11 ROMs. I hope you also get the same result as me.
Источник


