- Shared Element Transitions — Part 4: RecyclerView
- Common Code
- Animal Gallery Item Layout
- Animal Gallery Adapter
- Animal Item
- RecyclerView to Activity
- RecyclerView to Fragment
- Bonus: RecyclerView to ViewPager
- Navigation Component | Shared Element Transition with Recyclerview
- PreRequistic
- Transition Name
- transition.xml
- popular_item_layout.xml
- DashboardFragment.kt
- PopularMovieAdapter.kt
- DetailFragment.kt
- The animation is ready now, Run your app.
- Transitions in Android Navigation Component
- Implementation
- Example
- Link to the sample:
- serbelga/android_navigation_shared_elements
- Contribute to serbelga/android_navigation_shared_elements development by creating an account on GitHub.
- Transitions in lists with RecyclerView and Android Navigation Component
Shared Element Transitions — Part 4: RecyclerView
In part 3 of the series we looked at how to implement Shared Element Transitions when using Picasso or Glide.
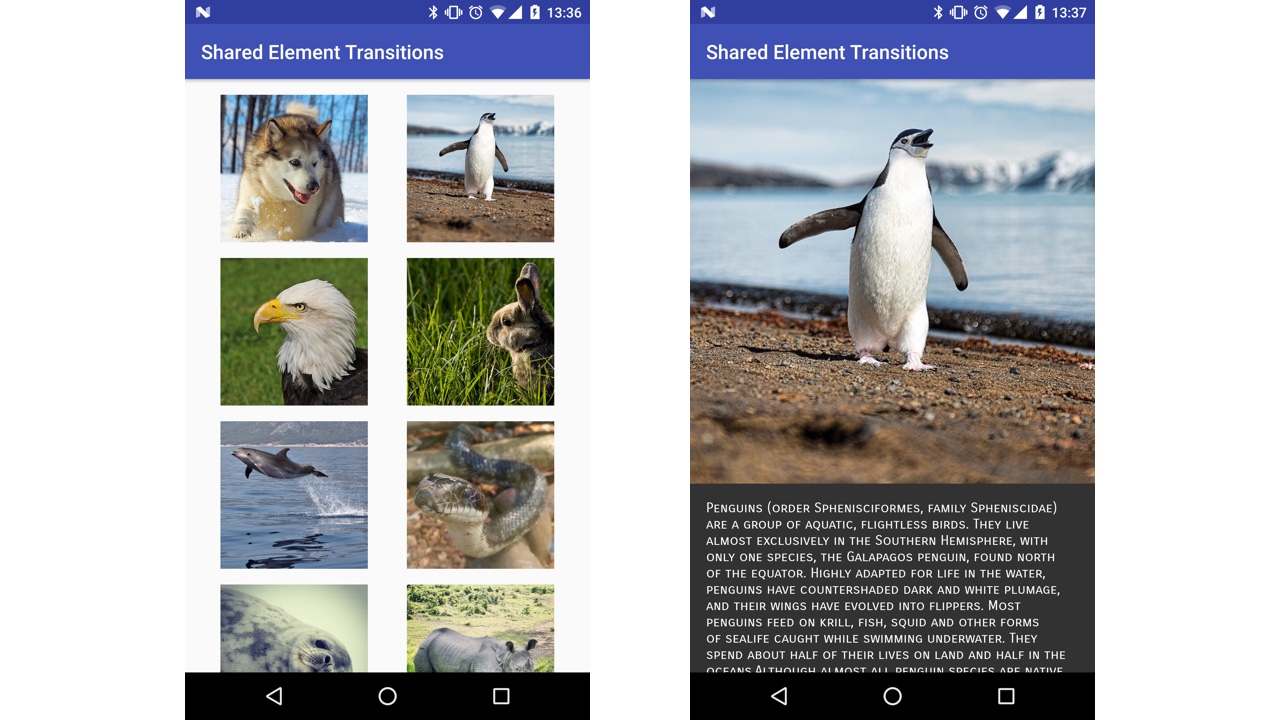
In part 4 we’re going to look at implementing them with RecyclerView , a popular use case with apps that have Shared Element Transitions. An example of this is Google Play Music, which i mentioned in part 1, but there are plenty more out there. Pocket Casts is another good example:
We’re going to make something similar, going from a gallery of Animals to a detail page telling us a bit more info. Here’s our two screens:
I’m going to show three examples. Two using Activity and Fragment to go from a RecyclerView to a simple detail view. Finally one going from a RecyclerView to a ViewPager .
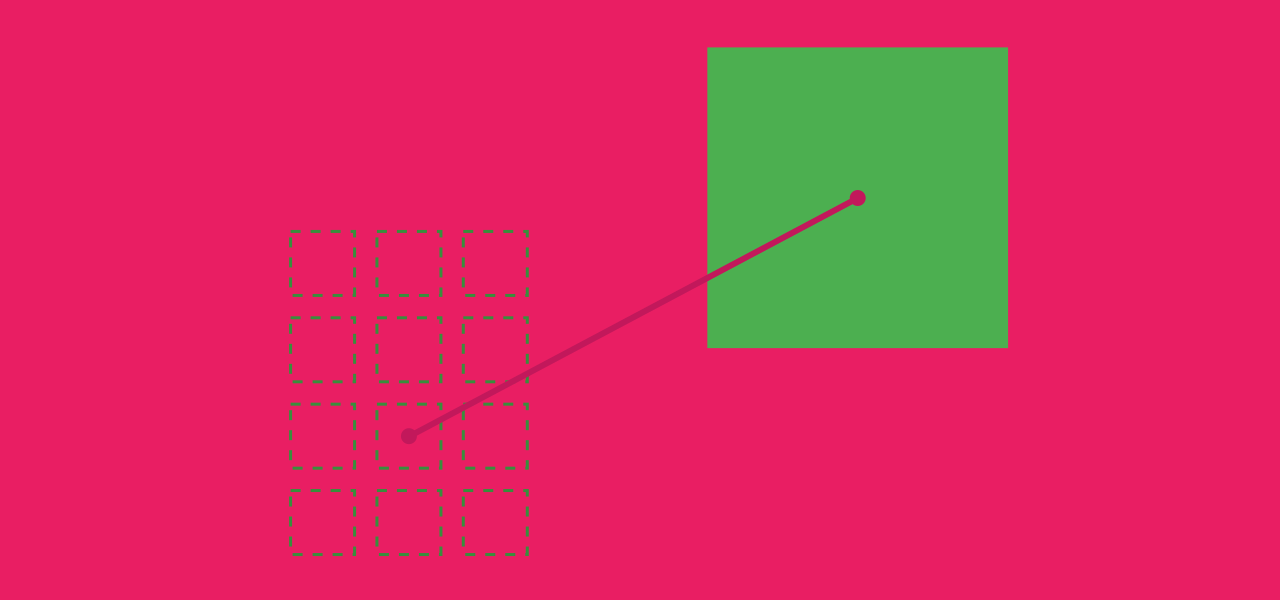
There’s one key point that I want to get across, in case you decide to skip to other parts of the post. That is that Shared Element Transitions need a UNIQUE transition name. This is easy to forget but is key when doing them with RecyclerView . Enough chuff, let’s get on with it!
Common Code
First of all lets look at some common code to all the examples. Let’s start with the layout for the gallery items.
Animal Gallery Item Layout
Nothing fancy, but the key thing to note is there is NO transitionName attribute set on the ImageView .
Animal Gallery Adapter
Here we have our AnimalGalleryAdapter . This will be used throughout all the examples to show the gallery images.
On line 6 in the constructor we ask for an AnimalItemClickListener which will handle calling back to the relevant Activity or Fragment to launch the animal detail screen.
The onBindViewHolder method is where we set the transitionName . As previously mentioned, this has to be unique in the view hierarchy, so we construct one with an arbitrary string and append the position of the item onto the end. use the Animal’s name as we know this will be unique. It’s best if you can use some unique identifier derived from your model. If we set the transitionName in XML then all ImageView in the gallery would have the same one, which means when we came back to the gallery the framework would have no idea where to move the image to. Which results in some weird image movement and clashing! Line 21 we set the transitionName on the ImageView using ViewCompat . Line 23 we set the dynamic transitionName on the ImageView .
We fire onAnimalItemClick on line 26 when an image is tapped. We give it the position, the AnimalItem that was clicked, and finally the ImageView . and finally transitionName . The transitionName isn’t entirely necessary as we set it on the ImageView , but it help keeps the code cleaner as calling getTransitionName on an ImageView is only available 21+. We can use ViewCompat to call getTransitionName on the ImageView as we have done in previous examples.
Animal Item
Our AnimalItem is pretty simple. We need the image URL to tell Picasso (can easily be swapped for Glide) what image to load in our detail Activity or Fragment . It’s also Parcelable so we can pass on through by adding to the extras Bundle of the Intent .
RecyclerView to Activity
This is probably the most simple to implement. In our RecyclerViewActivity we just need to handle the onAnimalItemClick and launch the AnimalDetailActivity .
Line 8 and 9 we put our AnimalItem and transitionName in the Bundle to be passed through to the AnimalDetailActivity . Line 11-14 we do what we did in part 1 and create ActivityOptions using the ImageView passed through from the AnimalGalleryAdapter . and the transitionName . We add the ActivityOptions when we call startActivity on line 16.
Now we need to setup the AnimalDetailActivity .
We need to stop the AnimalDetailActivity loading before Picasso has finished loading the image from the image url. So line 7 we call supportPostponeEnterTransition to tell it to wait. Line 19 we get the transitionName from the extras and set it on the ImageView of the AnimalDetailActivity . This is key, as we DON’T set the transitionName in the layout XML of the AnimalDetailActivity . This is because we don’t know it until someone has actually clicked an Animal from the gallery. So we have to set it dynamically. It’s not necessary though, and if you wanted you could set this on the ImageView via the layout if you like, but you’d need to set it when creating the ActivityOptionsCompat in RecyclerViewActivity . Line 23-36 we use Picasso to load the image and in the onSuccess and onError methods of the callback we tell the AnimalDetailActivity that it can now launch by calling supportStartPostponedEnterTransition . This was talked about in detail in part 3. With that everything should work!
RecyclerView to Fragment
There’s not too much difference between using a Fragment compared with the above code for the Activity example. So I’m just going to touch on the key differences. Here’s our RecyclerViewFragment which gets loaded from the Activity that holds the Fragments.
In the onAnimalItemClick method we create our FragmentTransaction . On line 10 we add the ImageView and dynamic transitionName that has been passed through from the AnimalGalleryAdapter . We use it to get the transitionName . Just like the Activity example, we need to pass through our AnimalItem and transitionName which we do when creating our Fragment on line 7.
Again, just like the Activity example we have to tell the Fragment to wait to load until we tell it so by calling postponeEnterTransition() on line 7. Line 9 we call setSharedElementTransition() otherwise we won’t get one and we just inflate the transition move from the Android resources to tell it what type of Transition we want.
Line 25 we set the transitionName on the ImageView . as it’s dynamic. Like the Actvivity example, this isn’t necessary and we could just set a transitionName via XML and then use it here. We load the image using Picasso (28-41) and make sure we call startPostponedEnterTransition() in the image load callback’s onSuccess() and OnError() methods so that the Fragment actually loads.
So as you can see, apart from the Fragment specific calls, the Activity and Fragment examples are both pretty much the same. I won’t post a video as it’s identical to the one above for the Activity !
Bonus: RecyclerView to ViewPager
I was asked about this scenario last week and so I’ve decided to throw it in as well. There’s just one caveat to this example. As you’ll likely know the nature of a ViewPager is that you can swipe to change pages. This proves an issue with a Shared Element Transition’s return transition. You might have moved in the ViewPager and no longer have the View you did the Shared Element Transition with in the first place. If you do there’s also the chance you’ll be on an adjacent page, so when you press back the first image transitions back rather than the one that you are on. Take a look at the video to see what I mean.
There’s hardly any difference in code to the above Fragment example apart from using a ViewPager and this little snippet:
On line 12 we call setSharedElementReturnTransition() and set it to null so that it doesn’t perform a return Shared Element Transition. This way, when the back buttons pressed, there’ll be no odd return transition. If you know a way round this I’d be keen to hear, I have a few ideas myself but I ran out of time this week to try them! Note I’m calling this on the Fragment that’s going to be created, NOT the one that’s loading it. It’ll look something like this:
And that’s it for this week. In part 5 I’ll be focusing on gotchas. We’ll use some of the previous examples and get them into a state when we no longer have that nasty white flash! If you haven’t seen it go back and look at some of the videos above. You’ll never unsee it again! We’ll also look at stopping the images overlapping the navigation and status bars.
The source code for this can be found here under the package recycler_view .
Update (5/03/17): I’ve made some minor adjustments to this post since first releasing. There’s nothing better than having 1000’s of eyes on your work for reviewing!
Источник
Navigation Component | Shared Element Transition with Recyclerview

Jan 25, 2020 · 3 min read
I have seen many people asking about the shared animation transition with Recyclerview in the Navigation component. In this article, we’re going to Animate transition between destination with Recyclerview.
PreRequistic
Knowledge of Kotlin.
Should know how to define an adapter for recycler view.
Have worked with Navigation architecture.
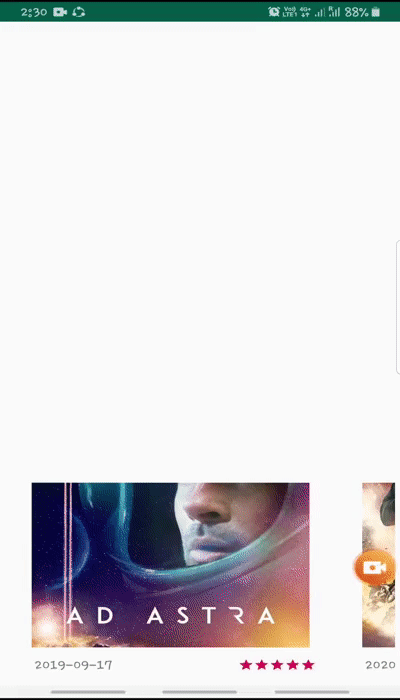
Our end product is very simple. Here I’m using TMDB API for getting popular movie data and loading it in recycler view. When you click on any item the app will show a detailed screen. The item from the recycler view will animate into place on Detail Screen.
Transition Name
To an i mate a chosen element from the list, we need to specify a unique identifier for it in tranistionName attribute of a view . This is very basic and many people forget defining UNIQUE transition name but this is the key when doing with Recyclerview.
transition.xml
Here, the Data Binding library is going to help us a lot. I have just passed the PopularItem model to the layout and with the help of binders, we set everything we need.
popular_item_layout.xml
DashboardFragment.kt
Hold on, I’ll discuss the parameter one by one.
item — Adapter has the list of popular movies. Here item is on which click is performed.
posterView — It’s an Imageview on which we will load the poster of a movie using the Coil library.
releaseDateView — It’s a TextView on which we will set the release date of movie.
ratingView — sets the rating of a movie.
Now, you might have a question about why we need all these parameters. The reason is we will pass the transitionName in method addSharedElements of FragmentNavigator.
PopularMovieAdapter.kt
Now moving on the next screen that is DetailFragment which will receive PopularMovie model as a paramater which we are passing here DashBoardFragmentDirections.actionDashBoardFragmentToDetailFragment(item)
DetailFragment.kt
In onViewCreated method of DetailFragment.
Don’t Ignore mBinding .executePendingBindings(). It’s very important if you forget you won’t be able to see animation as a transition name is going to be not the same as what we have defined in the recycler view item layout.
SharedElementEnterTransition is equally important. If you remove this line you won’t be seeing an animation.
The animation is ready now, Run your app.
OOPS!! When returning to the previous screen there is no animation.
The fragment has been recreated and the item we want to transition is loaded into the list and it takes time to load.
To make it work properly, we need to postpone the transition until views are ready.
To do so, we call a postponeEnterTransition() in our fragment onViewCreated() and once everything is setup we start the transition by calling startPostponedEnterTransition() .
Источник
Transitions in Android Navigation Component

Mar 12, 2019 · 4 min read
Update 8th December 2019: I’ve update this post to show how to implement the transition in lists using RecyclerView and the Navigation component.
The Navigation Component helps you implement common, but complex navigation requirements in your app, enabling you to more easily provide consistent and predictable experiences for your users.
This component also provides support for displaying transitions and share elements in the transitions between fragments.
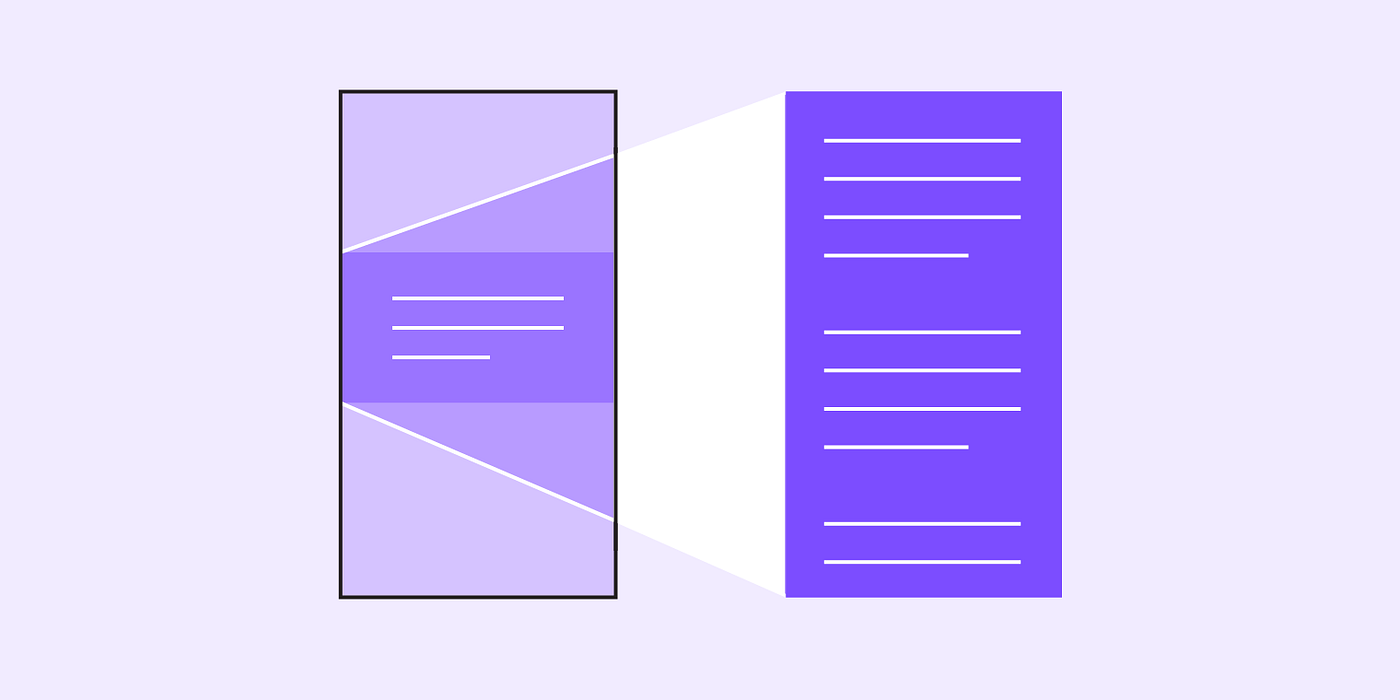
Transitions occur when users move b etween fragments, such as from a list screen to a detail screen. The use of motion is a good choice to guide users between two screens in your app. They help users orient themselves by expressing your app’s hierarchy, using movement to indicate how elements are related to one another.
For example, when an element expands to fill the entire screen, the expansion expresses that the new window is a child element or specifies the details. The screen from which it expanded is its parent element.

Navigation Component allows users to implement transitions between fragments and supports adding shared element transitions between destinations.
Shared element transitions are supplied programmatically rather than through your navigation XML file, as they require referencing the View instances that you wish to include in the shared element transition.
Implementation
For this example I’ve implemented a simple transition between a fragment that contains an element and the detail fragment for this element.
I’ve included the following dependency:
This library needs that your project migrate to AndroidX. I’ve used the Android KTX version of this library. If you don’t want to use AndroidX, you can implement android.arch.navigation:navigation-fragment-ktx:1.0.0 instead.
The first step is create the fragments and define the relationship between them. I’ve created two fragments: ParentFragment and DetailFragment. The two fragments are linked and the navigation graph presents the following aspect.

The first fragment has a MaterialCard with an image which will be passed to the next fragment.
The ImageView component has an attribute called transitionName, which has to be the same in the two layouts.
Now, we are going to implement the navigate action. The variable extras contains the Extras parameter of the navigate() call. I’m adding the sharedElement imageView, whose transitionName is “imageView”. Then I call the navigate function.
Then, I override the function onCreate on the DetailFragment class for display the animation.
We could use the Glide library for load images from a URL. The only thing that we have to do is load the image in the two fragments from the same URL.
The URL can be passed between fragments using a Bundle Object and pass it in the navigate call or as a destination argument in the navigation graph.
Example
I’ve implemented the next transition using these concepts and the Glide library.
Link to the sample:
serbelga/android_navigation_shared_elements
Contribute to serbelga/android_navigation_shared_elements development by creating an account on GitHub.
Transitions in lists with RecyclerView and Android Navigation Component
A common use case is to use Shared Elements in a RecyclerView to show the transition between a list item and its details. This can be also implemented with the Android Navigation Component.
Instead of setting the ImageView transition name in the XML of our item list layout, we will programmatically set this in the adapter class. I’ve decided to use the image URI as the transition name, but you can use another value if you prefer.
Then, in the parent class we will listen to the click event on the list item and execute the navigate to the detail view. When we click on an item, we need to know which ImageView has been clicked and its transition name to set it in the extras object.
Also, we need to pass the image URI to use it in the detail view to load the image into the ImageView. Android Navigation offers Safe Args to pass data between fragments. To enable Safe Args include the following classpath in the project build.gradle
And this line into the app module build.gradle
In the Navigation editor, click on the destination that receives the argument, the DetailFragment. In the Attributes panel, click on Add (+) in the Argument section. In the Add Argument window, enter the name of the argument, the String type, if it is voidable and a default value.
Safe Args will generate classes to pass and access to data. In the parent fragment pass the image URI as parameter.
Then in the detail fragment obtain this value by calling getArguments() or if we use the -ktx dependencies, we can also use the property delegate by navArgs() to access the arguments.
Once we have the image URI, load into the ImageView and set the sharedElementEnterTransition.
Источник


