- How to share albums in Photos on your iPhone, iPad, and Mac
- Before you begin
- Turn on Shared Albums
- Use Shared Albums on your iPhone, iPad, and iPod touch
- Create a new shared album
- Delete a shared album
- Invite more people
- Remove a subscriber
- Add photos and videos
- Delete from a Shared Album
- Save photos and videos from a shared album
- Use Shared Albums on your Mac
- Create a new Shared Album
- Delete a shared album
- Invite more people
- Remove a subscriber
- Add photos and videos
- Delete from a shared album
- Save photos and videos from a shared album
- File types that you can use in Shared Albums
- Shared Album storage limits
- Photo Transfer WiFi 4+
- Send Photos and Videos
- KeepSolid Inc.
- Screenshots
- Description
- GoShare: Unlimited photo share 4+
- Event image sharing solution
- Ngo Phi
- Designed for iPhone
- iPhone Screenshots
- Description
- App Privacy
- Data Linked to You
- Data Not Linked to You
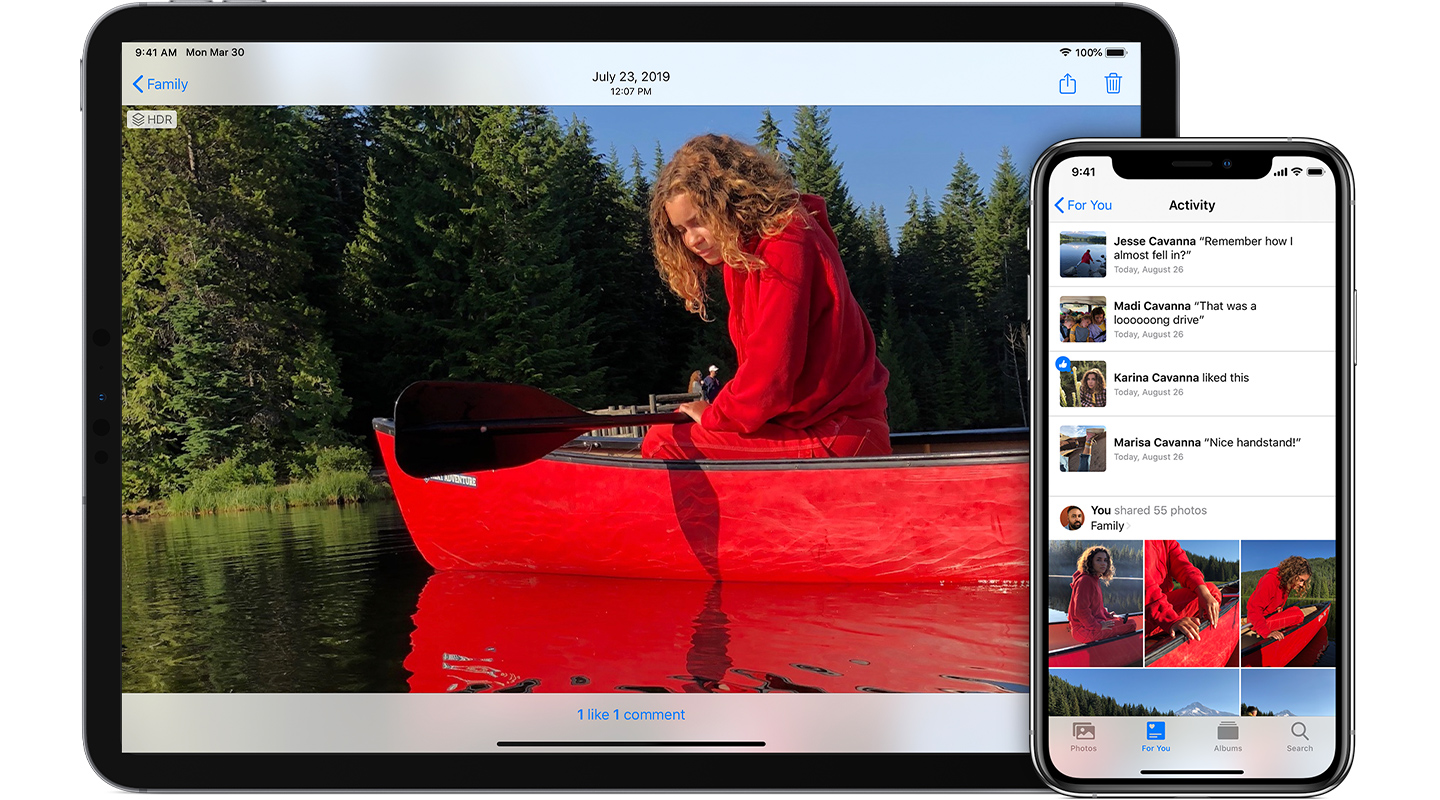
How to share albums in Photos on your iPhone, iPad, and Mac
Shared Albums let you share photos and videos with just the people you choose — and they can add their own photos, videos, and comments.
Use Shared Albums on your iOS or iPadOS device
Use Shared Albums on your Mac
Before you begin
- Update your iPhone, iPad, or iPod touch to the latest iOS or iPadOS, your Mac to the latest macOS, and your Apple TV 4K or Apple TV HD to the latest tvOS. If you have a Windows PC, update to Windows 7 or later and download iCloud for Windows.
- Set up iCloud on all of your devices.
- Make sure that you’re signed in to iCloud with the same Apple ID on all of your devices that you want to use with Shared Albums.
Turn on Shared Albums
- On your iPhone, iPad, or iPod touch, go to Settings > [your name] > iCloud > Photos, then turn on Shared Albums.
- On your Mac, open the Photos app. From the menu bar at the top of the screen, choose Photos > Preferences. Click the iCloud tab, then select Shared Albums.
- On your Apple TV, go to Settings > Users and Accounts > iCloud and turn on Shared Albums.
- On your Windows PC, open iCloud for Windows and select Photos. Click the Options button to verify that Shared Albums is on, then click Apply. Learn more about sharing albums with iCloud for Windows.
If you’re using earlier versions of iOS, iCloud for Windows, iPhoto, or Aperture, you can still create and see Shared Albums. In earlier versions of iOS, macOS, tvOS, and iCloud for Windows, Shared Albums was called iCloud Photo Sharing.

Use Shared Albums on your iPhone, iPad, and iPod touch
Create a new shared album
- Go to the Albums tab and tap the Add button .
- Tap New Shared Album.
- Give the shared album a name, then tap Next.
- Choose people to invite from your contacts, or type an email address or iMessage phone number.
- Tap Create.
Delete a shared album
- Open the shared album.
- Go to the People tab.
- Tap Delete Shared Album.
If you’re looking at your list of shared albums, you can also tap Edit, then tap the Delete button to delete a shared album.
When you delete a shared album, it’s automatically removed from all of your devices and the devices of your subscribers. If Public Website was enabled, the shared album is removed from the web too. Deleting a shared ablum permanently deletes all of its photos. Before continuing, make sure that you save any photos that you want to keep.
Invite more people
- In Albums, select a shared album that you created.
- Go to the People tab.
- Tap Invite People.
- Enter the names of people that you want to share this album with.
- Tap Add.
You can even share albums with friends and family who don’t use iCloud. Just open a shared album that you created, go to the People tab, and turn on Public Website. Your photos publish to a website that anyone can see in an up-to-date web browser.
Remove a subscriber
- Open the shared album.
- Go to the People tab.
- Select the subscriber that you want to remove.
- Tap Remove Subscriber at the bottom of the screen.
As the creator of a shared album, you control who can access it. You can remove subscribers or delete the album at any time.
Add photos and videos
- In the Photos tab or from within an album, tap Select and then select the photos and videos that you want to share.
- Tap the Share button , then tap Add to Shared Album .
- Choose the album where you want to share your photos. Then tap Post.
If you have a shared album open, you can also tap the Add button to select photos and videos to add.
When you add new photos, the people that you share the album with are notified automatically. Make sure that Subscribers Can Post is turned on so that they can add photos and videos too. Just go to the shared album’s People tab.
Delete from a Shared Album
- Open the shared album.
- Tap the photo or video.
- Tap the Trash button .
- Tap Delete Photo.
If you’re the owner of a shared album, you can delete any photos, videos, or comments from anyone. Subscribers can delete anything that they personally added. Anything you delete is automatically deleted from the album on all your devices and the devices of subscribers.
Any photos that you saved or downloaded from a shared album to your Photos library stay in your library even if the shared album is deleted or the person who created it stops sharing it.
Save photos and videos from a shared album
When you share photos and videos with someone, they can save shared items to their own library.
- Tap the photo or video.
- Tap the Share button .
- Tap Save Image or Save Video.
Use Shared Albums on your Mac
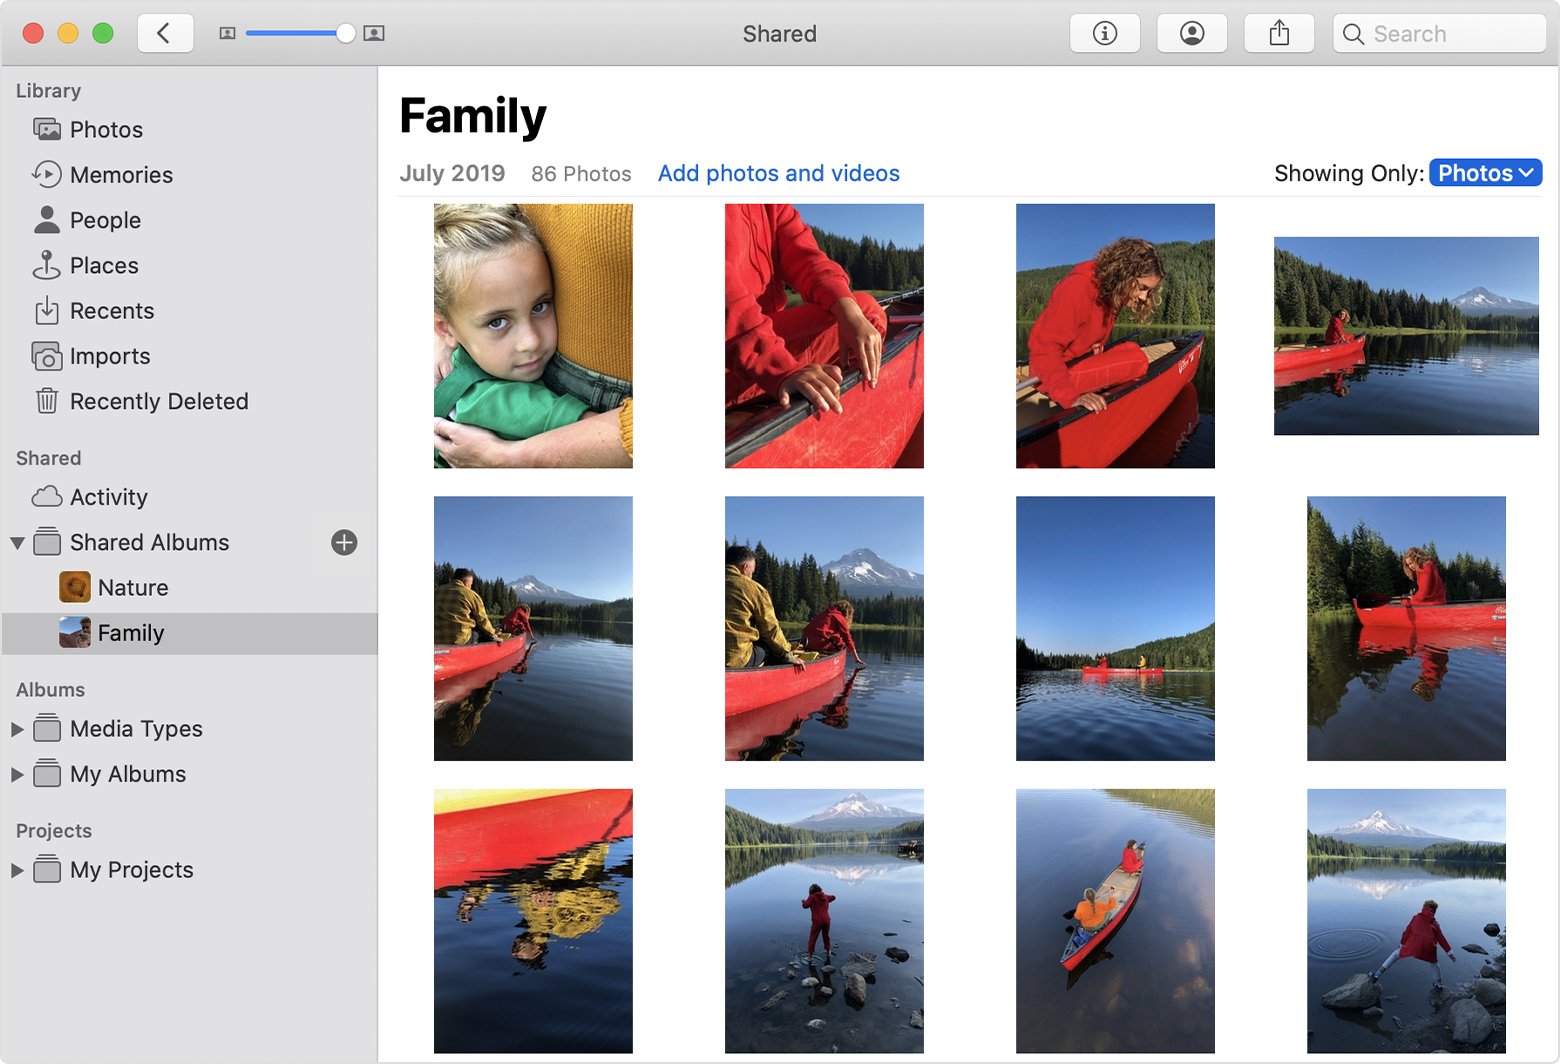
Create a new Shared Album
- In the sidebar, click the Add button next to Shared Albums.
- Type the email addresses of people you want to share the album with. Click the Add button to select contacts from iCloud.
- Click Create.
Delete a shared album
- Open the shared album.
- Click the People button in the toolbar.
- Click Delete Shared Album.
When you delete a shared album, it’s automatically removed from all of your devices and the devices of your subscribers. If Public Website was enabled, the shared album is removed from the web too. Deleting a shared ablum permanently deletes all of its photos. Before continuing, make sure that you save any photos that you want to keep.
Invite more people
- Select a shared album that you created under Shared in the sidebar.
- Click the People button in the toolbar.
- In the Invite People field, type the email addresses of people that you want to share this album with. Click the Add button to choose people to invite from your contacts.
You can even share albums with friends and family who don’t use iCloud. Just open a shared album that you created, click the People button in the toolbar, and turn on Public Website. Your photos publish to a website that anyone can see in an up-to-date web browser.
Remove a subscriber
- Open the shared album.
- Click the People button in the toolbar.
- Select the subscriber that you want to remove.
- Click Remove Subscriber.
As the creator of a shared album, you control who can access it. You can remove subscribers or delete the album at any time.
Add photos and videos
- Select the photos and videos that you want to share.
- Click the Share button in the toolbar, then select Shared Albums.
- Choose the album where you want to share your photos.
If you have a shared album open, you can also click “Add photos and videos” to select photos and videos to add. You can also simply drag photos from your library directly into the shared album in the sidebar.
When you add new photos, the people that you share the album with are notified automatically. Open the shared album, click the People button in the toolbar, and make sure that Subscribers Can Post is turned on so that they can add photos and videos too.
Delete from a shared album
- Open the shared album.
- Select the photo or video.
- Control-click, then click Delete Photo. Click Delete.
If you have a shared album open, you can also select a photo and press the Delete key to delete it from the shared album.
If you’re the owner of a shared album, you can delete any photos, videos, or comments from anyone. Subscribers can delete anything that they personally added. Anything you delete is automatically deleted from the album on all your devices and the devices of subscribers.
Any photos that you saved or downloaded from a shared album to your Photos library stay in your library even if the shared album is deleted or the person who created it stops sharing it.
Save photos and videos from a shared album
When you share photos and videos with someone, they can save the shared items to their own library.
- Select the photo and video that you want to save.
- Control-click, then click Import.
File types that you can use in Shared Albums
Shared Albums support these image formats:
Shared Albums also support special formats that you capture with your iPhone, like slo-mo, time-lapse, Live Photos, and Memory videos. When shared, photos are reduced to 2048 pixels on the long edge, except panoramic photos, which can be up to 5400 pixels wide. You can share GIFs that are 100MB or smaller.
Shared Albums support these video file types and formats:
Videos can be up to fifteen minutes in length and are delivered at up to 720p resolution.
* You can’t upload RAW photos to Shared Albums on your Windows PC.
Shared Albums upload a copy of your data. Downloaded content may not contain the same information as the original.
Shared Album storage limits
A shared album can hold up to 5000 photos and videos. If you reach your Shared Album limit, you need to delete some photos or videos before adding new ones. The photos and videos you share (and the comments or likes associated with those photos) stay in iCloud until you or the contributor delete them manually, or until you delete the shared album completely.
The photos and videos in your Shared Albums are kept in iCloud, but they don’t count against your iCloud storage limit.
Information about products not manufactured by Apple, or independent websites not controlled or tested by Apple, is provided without recommendation or endorsement. Apple assumes no responsibility with regard to the selection, performance, or use of third-party websites or products. Apple makes no representations regarding third-party website accuracy or reliability. Contact the vendor for additional information.
Источник
Photo Transfer WiFi 4+
Send Photos and Videos
KeepSolid Inc.
Screenshots
![]()
![]()
![]()
![]()
![]()
Description
•••Transfer Camera Roll content wirelessly and without hassle. Save your photos and HD videos to iDevices or any device or computer connected to the same local network•••
•••Ranked among the TOP 10 Photo&Video apps in 55 countries•••
macOS version: https://itunes.apple.com/app/id1181929525
Photo Transfer WiFi app is the best tool to transfer photos from iPhone to iPad or Mac.
Features
— Send photos and videos from iPhone or iPod Touch to other iPhone with a simple drag and drop
— Transfer media from your PC or Mac to iPhone or iPod Touch
— Download photos and videos to your Computer from iPhone, iPod Touch, iPad and iPad Mini
— Copy photos and videos from Computer to iPad or iPad Mini
— Import HD videos to iPad or iPad Mini from iPhone
— Exchange photos and videos between iPads over your local WiFi network
— Make your pictures accessible from your iPhone or iPod Touch to other users on the same WiFi network
— Share your media files on iPad or iPad Mini
— Backup your Camera Roll content to Dropbox
— Download and share photos and videos from your Dropbox folders
— Browse photos and videos shared on iDevices from any PC or Mac
— Download shared media to your Computer
— Receive photos and videos to iPhone or iPod Touch from iPad
— Preview shared photos and videos in any browser
— Use browser to download shared photos and videos from iDevices
— Send photos and videos from any browser to your iPhone or iPad
— Use 3D Touch for quick preview of your photos and videos
Transfer your media
— Single and multiple photos and videos
— Albums
— Photos in full resolution
— HD Videos
Supports
— Safari, Mozilla Firefox, Chrome, Internet Explorer, Opera and other browsers
Other benefits
— Easily transfer media from one iDevice to another with drag and drop
— Backup all your photos and videos to your computer
— Manage access to your media
— Your media is transferred over your local WiFi network without the need for any external server.
Universal app — install the app on many devices:
— iPhone
— iPod Touch
— iPad
— iPad Mini
— iPad Pro
Источник
GoShare: Unlimited photo share 4+
Event image sharing solution
Ngo Phi
Designed for iPhone
iPhone Screenshots
![]()
![]()
![]()
Description
Collect photos for a memorial
Collect photos for a wedding
Collect photos for a college project
Collect photos for an event
…and many more
Simple — Easy to Use — Unlimited
Remember it forever. Upload photos from your phone’s camera and your files. Perfect for event, online classwork, and everything in between. Everyone can upload their photos to one shared space.
————
With CREATOR plan, you can share, upload photo without any limitation.
Account will be charged for renewal within 24-hours prior to the end of the current period, and identify the cost of the renewal. Subscriptions may be managed by the user and auto-renewal may be turned off by going to the user’s Account Settings after purchase. Any unused portion of a free trial period, if offered, will be forfeited when the user purchases a subscription to that publication, where applicable
Terms: http://goshare-project.web.app/term.html
Policy: https://goshare-project.web.app/policy.html
App Privacy
The developer, Ngo Phi , indicated that the app’s privacy practices may include handling of data as described below. For more information, see the developer’s privacy policy.
Data Linked to You
The following data may be collected and linked to your identity:
Data Not Linked to You
The following data may be collected but it is not linked to your identity:
Privacy practices may vary based on, for example, the features you use or your age. Learn More
Источник


